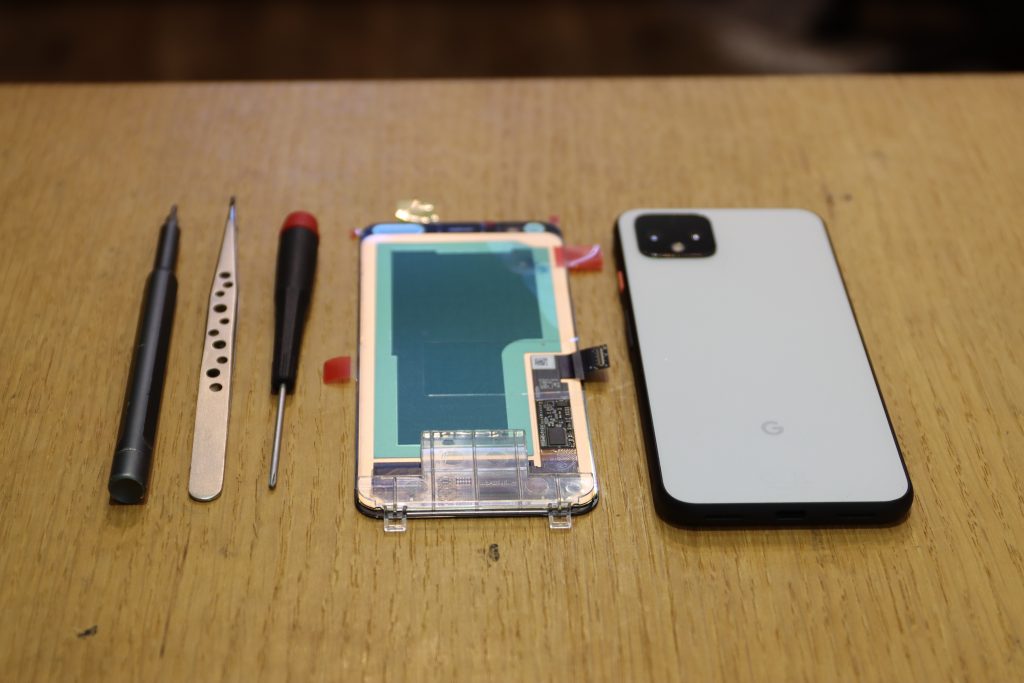
DIY Google Pixel 4 Left Grip Sensor Replacement Guide
Duration: 45 minutes
Steps: 29 Steps
This repair guide comes to you from the awesome folks at Salvation Repair, and while we think it’s pretty great, it hasn’t received a thumbs up from Google.
For your own safety, make sure to drain your battery to below 25% before diving into the disassembly of your phone.
Heads up: this process will likely take out the Pixel 4’s grip sensors, so be prepared for that!
Caution:
Warning:
Alright, let’s get this Pixel 4 fixed up! This guide will help you replace that left grip sensor and flex cable. We’ll be taking out the battery and motherboard, so let’s make sure that battery is discharged below 25% for safety. Heads up, the grip sensors are pretty stubborn and might come apart. It’s a good idea to grab some replacement parts before we get started. Oh, and Google wants to remind you that working with the laser assembly might expose you to some invisible infrared rays. You can check out their safety warnings here. Also, don’t reuse a battery if it’s been damaged, it’s not safe. Time for a fresh one! If you need help, you can always schedule a repair. Let’s do this!
Step 1


– Time to get started! Insert a SIM eject tool, a trusty paper clip, or a specialized bit into the tiny hole on the SIM card tray, located on the left edge of your phone.
– Give it a firm press to eject the tray – you got this!
– Now, carefully remove the SIM card tray and you’re one step closer to getting your phone back in action. If you need help, you can always schedule a repair
Step 2

You might want to consider using a hair dryer, heat gun, or hot plate for this job! Just a friendly reminder: keep the heat in check to avoid any stress on your phone—both the display and internal battery are not fans of excessive warmth. Stay cool while you work!
– Get your iOpener nice and toasty and press it against the bottom edge of the back panel for about a minute. Let’s get this party started!
Tools Used

Step 3


If your back glass is looking a bit worse for wear with some serious cracks, don’t fret! Slapping on a layer of clear packing tape might just do the trick to help that suction cup stick. If you’re feeling adventurous, you can also try using some super strong tape instead of the suction cup. And if you’re really in a bind, a little superglue on the suction cup can help it cling to the broken panel. Remember, if you need help, you can always schedule a repair.
– Get that suction cup nice and snug on the heated edge of the back panel. Press down to create suction as close to the edge as possible. We’re talking about a bond, folks! A suction bond!
Step 4


Don’t worry if this part feels a little tricky. It might be a bit tougher on older phones. If you’re struggling, just give those edges a little more heat and try again. You got this! And remember, if you need a helping hand, you can always schedule a repair.
– Give that suction cup a good, steady pull to create a little gap between the back panel and the frame.
– Slip the tip of an opening pick into the gap you just created.
Step 5


– Gently glide the opening pick along the bottom edge, heading towards the left corner to cut through that sticky adhesive.
– With the pick still in place, move it from the bottom left corner all the way to the bottom right corner to fully sever the adhesive on the bottom side.
– Keep that pick snugly in the bottom right corner to stop the adhesive from re-sticking.
Step 6

– Get ready to unlock your phone’s full potential – start by heating up an iOpener and applying it to the left edge of your phone for about a minute. If you need help, you can always schedule a repair
Tools Used
Step 7


– Now it’s time to get underneath that back panel – insert a second opening pick right above the charge port and get ready to make some progress!
– Gently slide that opening pick down to the bottom left corner of your phone, you’re doing great! If you need help, you can always schedule a repair
Step 8


The adhesive can be pretty stubborn, so try moving the pick in and out with a gentle sawing motion to help it slice through more easily. If you’re having trouble, don’t worry – it’s all part of the process. If you need help, you can always schedule a repair
– Gently slide the opening pick around the bottom left corner and across the left edge of the phone to cut through that sticky adhesive like a pro.
– Pause when you get to the top left corner, close to the camera, and leave that pick nestled in place.
Step 9

– Grab your iOpener, give it a little love, and place it on the right edge of your phone for a whole minute. Let the magic happen!
Tools Used
Step 10


– Keep that first pair of opening picks snug in their spots, then slide in a third pick on the lower right side. You’re doing great!
– Gently glide that opening pick towards the top of the phone, cutting through the adhesive on the right side like a pro.
– When you hit the top right corner, just chill and leave the pick in place. You’re almost there!
Step 11


– Alright, let’s get this party started! Slide your opening pick around the top right corner and across the top of the phone. Think of it like a tiny pizza cutter for your phone’s adhesive. You got this!
Step 12


– Alright, now that you’ve sliced around the phone’s edge, gently lift the right side of the back cover. Think of it like opening a book!
– Don’t yank it off just yet, though, because it’s still attached. Take it slow and steady, friend!
Step 13


– Keep on swinging that back panel open until it’s resting on the left side of your phone. Just be careful not to put any pressure on that ribbon cable, okay? It’s a delicate little thing.
– Now’s a great time to check and make sure everything is working as it should! Turn your phone on and see if everything is working as it should. But remember, once you’re done testing, power it down completely before you continue.
Step 14

Keep track of all those screws, buddy. We don’t want any missing parts! Put each one back where it belongs, just like you found it. It’s like a screw puzzle, but a little less exciting. 😉
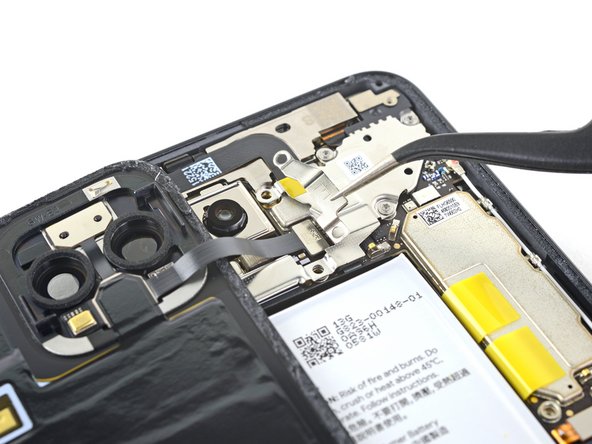
– Let’s get started by removing the five T3 Torx screws that hold the battery connector shield in place:
– You’ll need to take out four 4.0 mm screws
– And one 2.1 mm screw – don’t worry, it’s an easy step! If you need help, you can always schedule a repair


Step 16


Heads up! When you’re using that spudger around the battery, be super careful not to poke a hole in it. You don’t want a battery explosion on your hands (or your device). If you’re feeling nervous, you can always schedule a repair with us. We’ll be happy to help!
– Phew, this might look tricky, but don’t sweat! Using the pointed end of a trusty spudger, gently pop the battery connector straight up from the motherboard – it’s like a little game of Send the Connector Away! 👊💨 When you’re ready to bring it back, align that baby just right (you’ve got this!), then press down on either side until it clicks into place. Remember, the middle’s a no-go zone to avoid any pin-bending mishaps. Top job, champ!
Tools Used


Step 18

– Let’s get started! Use a T3 Torx driver to remove the two 4mm screws that hold the back panel connector cover in place. If you need help, you can always schedule a repair
Step 19

– Time to get started! Use a pair of tweezers to carefully remove the cover from the back panel connector. If you need help, you can always schedule a repair
Tools Used


Step 22


If those adhesive pull tabs are feeling a bit stubborn, grab a plastic dropper or syringe and load it up with some high-concentration (>90%) isopropyl alcohol. A few drops under the left edge of the battery will do the trick! Let it sit for a minute to give the adhesive a chance to loosen up.
Be prepared; this might require a bit of muscle!
Just a heads up, these adhesive pull tabs can be a bit fragile and may snap during the process. So, take it slow and steady.
– Get a grip on that yellow pull tab and give it a steady tug – you got this!
– Keep pulling up on the adhesive strip with some consistent force. If you’re using a spudger, give it a little spin every now and then to keep things under control. Remember, we’re in this together!
– Repeat this process for each of the three pull tabs. Don’t worry if they snap in half – it’s all part of the journey. If you need help, you can always schedule a repair
Tools Used
Step 23


Keep that opening pick away from the grip sensor cable and all areas below it! Getting too close can lead to some unwanted damage to the charge port flex cable hiding under the battery. You’re doing great—just be careful and take your time! If you need help, you can always schedule a repair.
Even if you pulled off all three adhesive tabs, you might still want to use an opening pick to get that battery out. Just think of it as a little extra help for your device! And remember, if you need help, you can always schedule a repair.
– If those battery tabs snapped off during removal, don’t fret! Slide an opening pick along the upper right edge of the battery to loosen that stubborn adhesive.
Step 24


Hey, that battery looks kinda beat up! If it’s dented or damaged, it’s time to say goodbye and get a fresh one. Safety first, right? No worries, we’ve got you covered. If you need help, you can always schedule a repair.
Alright, let’s make sure that phone is nice and dry before we put the battery back in. If there’s any alcohol solution left, gently wipe it away with a lint-free cloth. Or, if you’re feeling patient, just let it air dry. No worries, it’ll be ready in a jiffy! If you’re ever feeling lost, you can always schedule a repair.
– Let’s get this battery out! Gently lift it up and away from the phone. If it’s feeling a little sticky, you can peel it away from any leftover adhesive tabs.
– Time to install the new battery! If you’re using stretch release adhesive, give it a little love and apply it onto the battery. Otherwise, stick with some double-sided tape, or pre-cut