DIY Google Pixel 4 XL Soli Sensor Replacement Guide
Duration: 45 minutes
Steps: 48 Steps
Salvation Repair brings you this step-by-step guide, and while we’re pretty handy, we want to give a shoutout to the original authors – it’s not officially endorsed by Google, though!
Heads up:
This repair guide comes courtesy of the awesome team at Salvation Repair, though it’s not officially backed by Google. Curious about our repair guides? Dive in here. In this guide, we’ll walk you through the steps to remove or swap out the Soli radar module, the magic behind Google’s nifty “Motion Sense” feature on your Google Pixel 4 XL. Just a heads up: Google does caution that taking apart the front laser assembly might expose you to some sneaky invisible infrared laser emissions. For more details, check out their safety warnings here. If you need help, you can always schedule a repair.
Step 1
– Grab your trusty SIM eject tool, a bit, or even a straightened paper clip and gently insert it into the tiny hole on the SIM card tray located on the left edge of your phone.
– Give it a firm push to pop that tray right out!
– Now, carefully take out the SIM card tray and you’re all set!
Step 2
Feel free to use a hair dryer, heat gun, or hot plate for some extra warmth, but watch out! Overheating can be a real party pooper for your phone’s display and internal battery. Keep it cool and happy!
– Grab your trusty iOpener and give it a warm hug against the bottom edge of the back panel for a solid minute. You’ve got this!
Tools Used
Step 3
If your back glass is looking a bit worse for wear with some serious cracks, don’t sweat it! Slap on a piece of clear packing tape to help that suction cup stick better. Prefer something tougher? Go ahead and use some super strong tape instead of the suction cup. If you’re feeling bold and nothing else works, you could always get creative and superglue the suction cup to that broken panel. Just remember, if you need help, you can always schedule a repair.
– Now it’s time to get a grip on that back panel. Apply a suction cup to the heated edge, pressing down firmly to create suction – try to get it as close to the edge as possible. If you need help, you can always schedule a repair
Step 4
Depending on how long you’ve had your phone, this might be a bit tricky. If you’re finding it tough, just warm up that edge a bit more and give it another go!
– Give that suction cup a solid pull upwards! You want to create a nice little gap between the back panel and the frame.
– Now, take the tip of your opening pick and slide it right into that gap you just made.
Step 5
– Gently glide that opening pick across the bottom, heading towards the left corner to neatly cut through the adhesive.
– Keeping the pick in place, slide it from the bottom left corner all the way to the bottom right corner to fully sever the adhesive on the bottom side.
– Once you reach the bottom right corner, leave the pick inserted there to stop the adhesive from sticking back together.
Step 6
– Grab your trusty iOpener and give it a warm hug on the left edge of the phone for a solid minute. You’ve got this!
Tools Used
Step 7
– Gently slide a second opening pick under the back panel right above the charging port.
– Now, glide that opening pick over to the bottom left corner of your phone.
Step 8
That adhesive can be a real sticky situation! Don’t worry, though! Just gently push your pick back and forth like you’re sawing through butter. It’ll help separate those layers like a champ. If you need help, you can always schedule a repair
– Gently work the opening pick around the bottom left corner and along the left side of the phone – you’re making progress by loosening the adhesive.
– When you reach the top left corner near the camera, stop and leave the pick in place. If you need help, you can always schedule a repair
Step 10
– Now that you’ve got two opening picks in place, it’s time to bring in the third pick to help with the lower part of the righthand side.
– Gently slide the opening pick upwards towards the top of the phone, carefully cutting through the adhesive on the right side.
– Keep going until you reach the top right corner, then stop and leave the pick inserted – you’re making great progress! If you need help, you can always schedule a repair
Step 11
– Now, let’s get that last bit of adhesive! Slide your trusty opening pick around the top right corner and across the top side of your phone, just like you’re slicing through a piece of cake (but way more satisfying).
Step 12
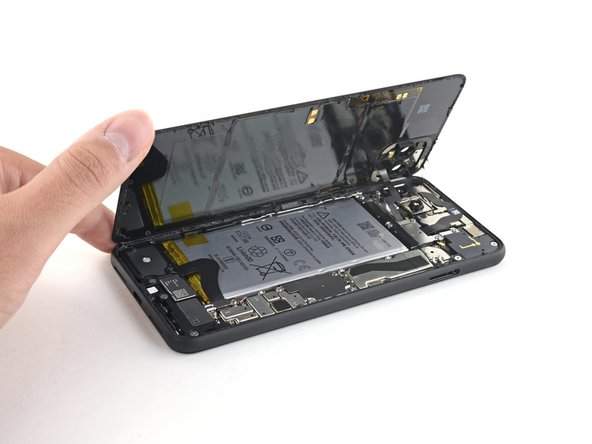
– After you’ve made your way around the edge of the phone, gently lift the right side of the back cover, just like flipping open a book.
– Hold on a sec! Don’t yank the panel off just yet; it’s still hanging on to the phone.
Step 13
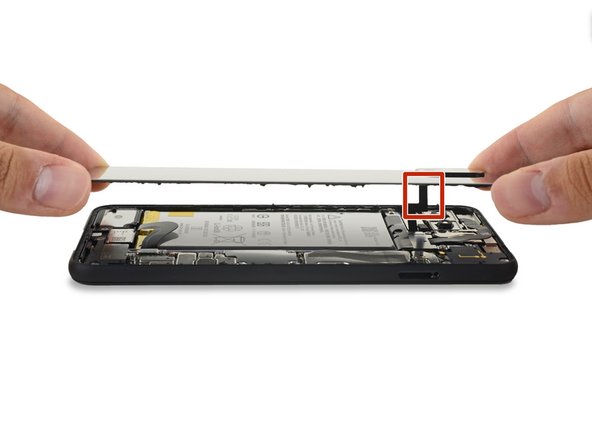
– Gently swing the back panel open until it can comfortably rest on the left edge of the phone. Just be mindful not to put any strain on that delicate ribbon cable attached inside.
– Now’s a great time to power up your phone and check that everything’s working smoothly before you seal it back up. Just remember to turn it off completely before diving back into the repair!
Step 14
As you tackle this repair, keep an eye on each screw and make sure it finds its way back to its original home.
– Alright, let’s loosen up those screws holding the battery connector shield in place! You’ll see four of them, and here’s the breakdown:
– One 1.8 mm screw, looking pretty small.
– One 4.1 mm screw, a little bigger.
– One 4.4 mm shouldered screw, that’s the one with the little bump on the head.
– And finally, one 4.0 mm shouldered screw, just like the last one but a touch shorter. Don’t worry, we’ve got you covered! If you need any help, you can always schedule a repair.
Step 16
When using the spudger near the battery, take extra care not to puncture it. If you need help, you can always schedule a repair.
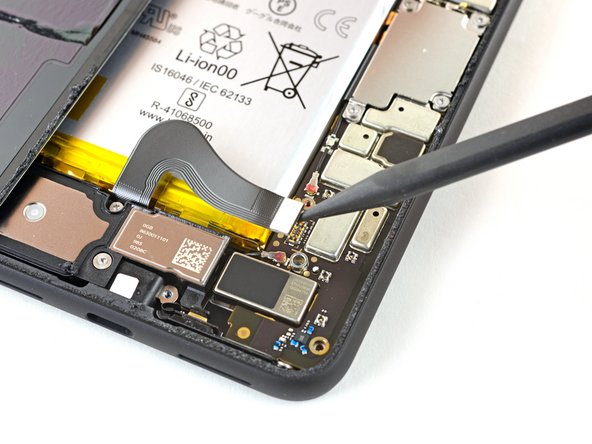
– Grab your trusty spudger and gently lift the battery connector straight up from the motherboard to disconnect it. No need to rush, take it nice and easy!
– When it’s time to reconnect, align the connectors just right and press down on one side until you hear that satisfying click. Then do the same for the other side—just avoid pressing down in the middle. If things get a little wobbly and misaligned, you might bend those precious pins, and we don’t want that! If you need help, you can always schedule a repair.
Tools Used
Step 18
– Alright, grab that T3 Torx driver and loosen those two 4.1 mm screws holding down the back panel connector cover. You got this!
Step 23
– Let’s get those screws out! Start by removing the three T3 Torx screws that are holding down the rear-facing camera connector cover:
– One 2.7 mm screw
– One 4.1 mm screw
– One 4.2 mm screw
Step 24
– Time to get up close and personal with your device’s rear-facing camera! Use a trusty pair of tweezers to carefully remove the connector cover – it’s like a little puzzle piece waiting to be freed. If you need help, you can always schedule a repair
Tools Used
Step 25
– Let’s get started by taking off the three T3 Torx screws that are holding down the front-facing camera connector cover:
– One 4.1 mm screw
– One 4.0 mm shouldered screw
– One 4.1 mm shouldered screw
Step 27
– Grab your trusty spudger and gently lift the camera and sensor connectors right up from the motherboard. You’ve got this!
Tools Used
Step 28
This cable has a bit of a sticky friendship with the phone, secured by some light adhesive.
– Time to disconnect that additional sensor connector. Let’s get it done! If you need help, you can always schedule a repair
Step 29
– Check out these groovy steps to remove the front camera and sensor assembly:
– Unscrew these lil’ fellas:
– The last step is removing this teeny-tiny screw:
Step 30
– Time to get up close and personal with your device’s front camera and sensor assembly – use a trusty pair of tweezers to carefully remove it. If you need help, you can always schedule a repair
Tools Used
Step 31
– Grab your trusty T3 Torx driver and let’s get to work! Carefully unscrew those four 3.5 mm screws holding the display connector cover in place. You’ve got this!
Step 33
– Grab your trusty spudger and gently pry apart the display connector from the motherboard. You’re doing great!
Tools Used
Step 34
– Grab your trusty T3 Torx driver and unscrew that 2.7 mm screw holding the motherboard snugly to the frame. You’ve got this!
Step 35
– Grab your trusty spudger and gently use the pointed end to wiggle that side buttons connector free from the motherboard. You’ve got this!
– Next up, let’s disconnect those two rear-facing camera connectors from the motherboard. Just a little tug, and they’ll be ready to roll!
Tools Used
Step 36
– Let’s get started by disconnecting the earpiece speaker connector from the motherboard. If you need help, you can always schedule a repair
Step 37
– Let’s get started by disconnecting the two grip sensor connectors from the motherboard – easy peasy!
– Next, carefully disconnect the charge port connector from the motherboard. If you need help, you can always schedule a repair
Step 38
– Grab your trusty spudger and gently nudge the top antenna connector away from the motherboard. It should pop right off without a fuss!
– Next up, let’s disconnect the bottom antenna connector. Just give it a little tug, and you’re all set!
Tools Used
Step 39
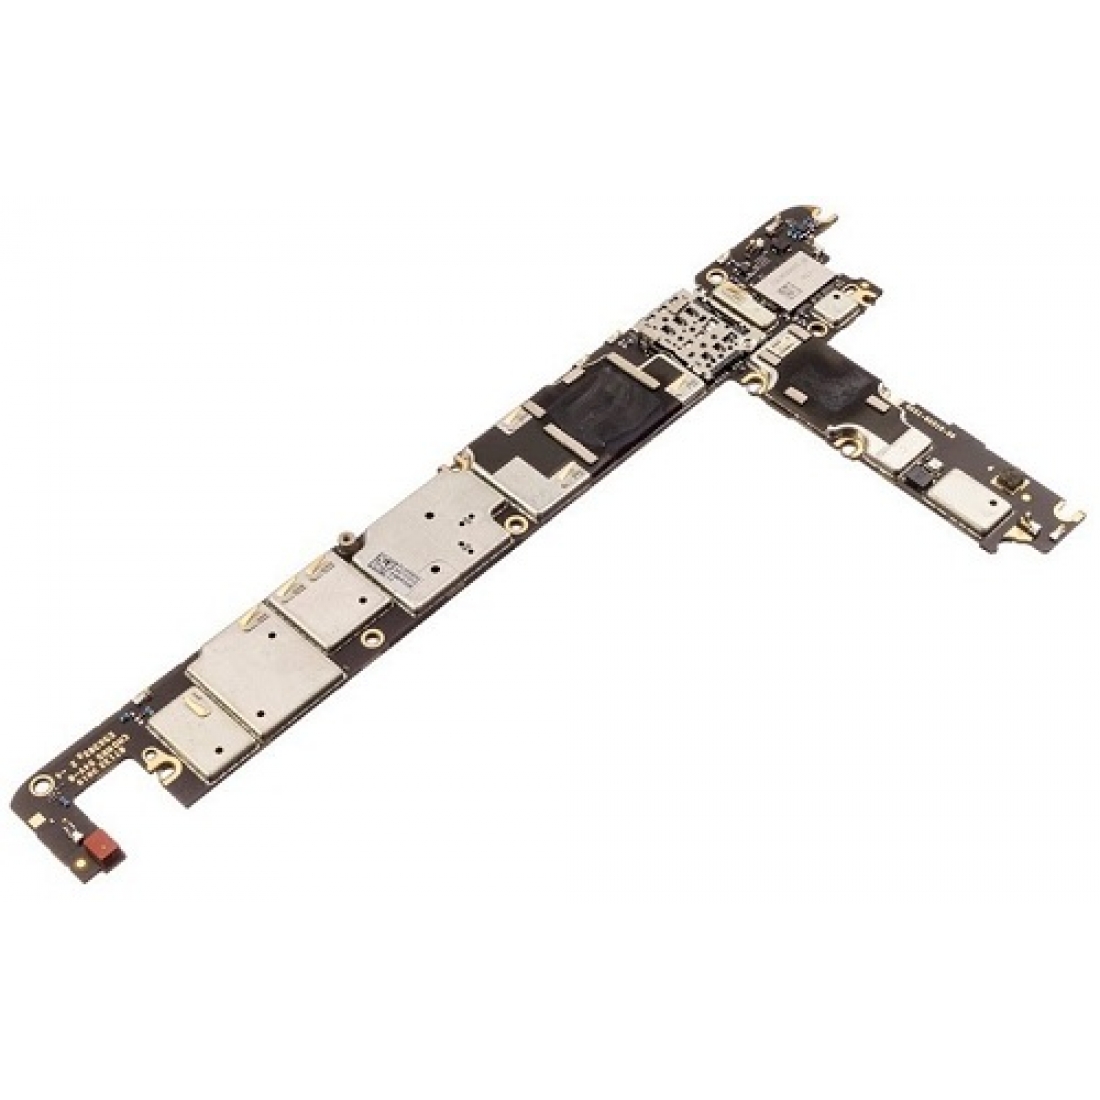
– Time to get this motherboard out – use a spudger to carefully pivot the top end up and out of the phone’s frame. If you need help, you can always schedule a repair
Tools Used
Step 40
Alright, cool beans, the camera connectors are chillin’ around the motherboard. The camera module is just hangin’ out, so it might wanna go for a ride with the motherboard. Just keep an eye out and be prepared for a little adventure! 😉
– Now, gently lift that motherboard out, like you’re carefully extracting a delicious cookie from a cookie jar! Just be careful not to get those little ribbon cable connectors tangled up.
– Time to give that motherboard a proper send-off! Go ahead and remove it completely.
– Now, when you’re putting that motherboard back in its home, make sure those little ribbon cable connectors are happy and not getting trapped under anything. They’re kind of like little party animals and need to be free to roam!
Step 42
– Let’s loosen things up! Use a T3 Torx driver to take out that tiny 2 mm screw holding the earpiece module board in place. It’s just a quick twist and you’ll be ready for the next step! If you need help, you can always schedule a repair.
Step 43
Be careful not to completely remove this board – it’s still hooked up to the earpiece speaker, so let’s leave it connected for now. If you need help, you can always schedule a repair
– Grab your trusty spudger and gently nudge the board to the side, moving it away from the top of your phone. You’ve got this!
Tools Used
Step 44
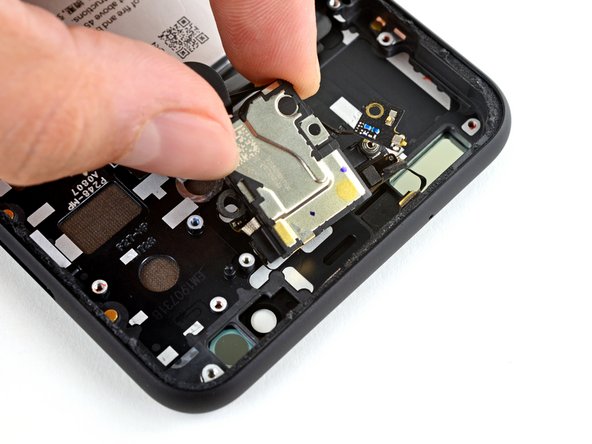
Don’t worry, that earpiece module is just chillin’ with some light adhesive. You can gently lift it up without too much effort. You got this! 😎 If you need help, you can always schedule a repair
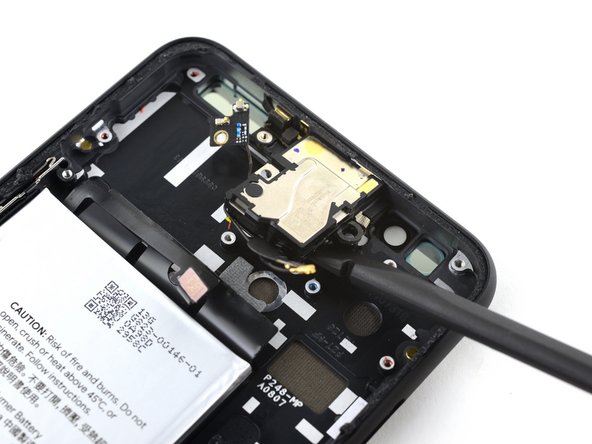
– Take your trusty spudger and gently slide the flat end underneath the earpiece module, carefully prying it away from the phone’s midframe. You’ve got this!
Tools Used
Step 45
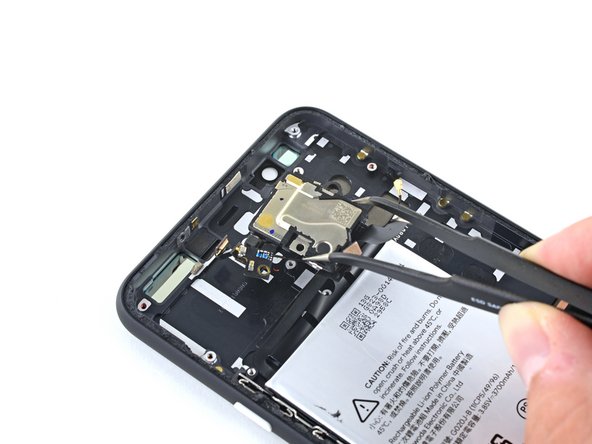
Don’t fully yank out that earpiece speaker just yet—the mic’s still hanging on to the phone’s frame. If you need help, you can always schedule a repair.
– Gently pry the earpiece speaker away from the phone’s top frame – it’s stuck on with some light adhesive, so take your time and be careful not to damage anything. If you need help, you can always schedule a repair
Step 46
– Grab your spudger (the pointed end, of course) and gently peel the microphone away from the sticky situation it’s in with the top frame. Just like peeling a sticker off your laptop, but way cooler!
– Make sure that microphone is totally free from the frame before moving on to the next step. You’ve got this!
Tools Used
Step 47
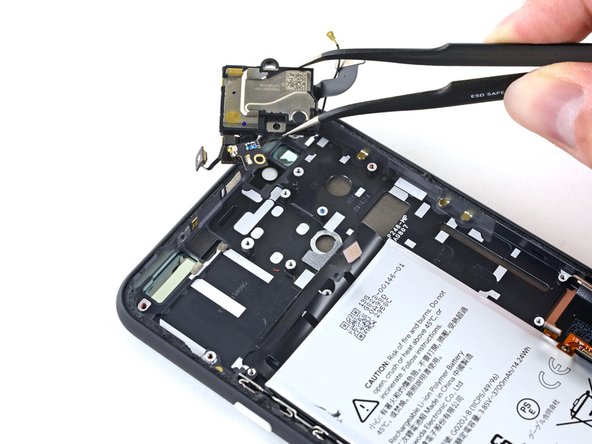
– Grab your trusty tweezers and gently lift off the earpiece speaker and Soli motion sensor assembly. It’s like a tiny dance, but with less music and more tech!
Tools Used
Step 48
– Time to get a little delicate! Use a pair of tweezers to carefully peel away and remove the Soli motion sensor cable, which is held in place with some light adhesive. If you need help, you can always schedule a repair
Tools Used


