DIY Google Pixel 4a 5G Camera Replacement Guide
Duration: 45 minutes
Steps: 42 Steps
Hey there! This handy guide was created by the Salvation Repair team, not Google. We’re here to help you fix it! Learn more about our repair guides here.
Heads up! The Pixel 4a 5G screen is a bit delicate. Be careful, but don’t worry, we’ll guide you through it!
Ready to give your Google Pixel 4a 5G a new set of eyes? We’ve got you covered with this super easy step-by-step guide to replace the rear-facing camera. Just a heads-up: the screen on this phone is a little sensitive, so be extra careful during the opening steps, especially if you’re reusing the screen. If you need any help, you can always schedule a repair.
Step 1


– Grab a SIM eject tool, a bit, or a straightened paper clip and slide it into the SIM tray hole.
– Give a gentle push straight into the hole to pop out the SIM card tray.
– Carefully take out the SIM card tray and set it aside.
Step 2


Get ready to carefully lift that screen off your phone! Make sure to check out the notes below before diving in. They’re your best friends on this journey!
– Hey there, let’s get this phone back in tip-top shape! First things first, we need to get acquainted with a few key spots on your phone’s screen:
– Screen Seam: This is where the screen meets the rest of the phone. It’s the prime spot for our opening tool.
– Frame Seam: This is where the plastic frame meets the back cover. It’s secured by screws, so no prying here!
– Screen Flex Cable: We’re going to be extra careful with this one, so don’t go poking around too deep. It’s sensitive and we want to keep it safe.
– Adhesive Perimeter: This is the narrow line of adhesive holding the screen in place. Don’t get carried away with the prying, or you might end up with a cracked screen. If you need help, you can always schedule a repair.
Step 3
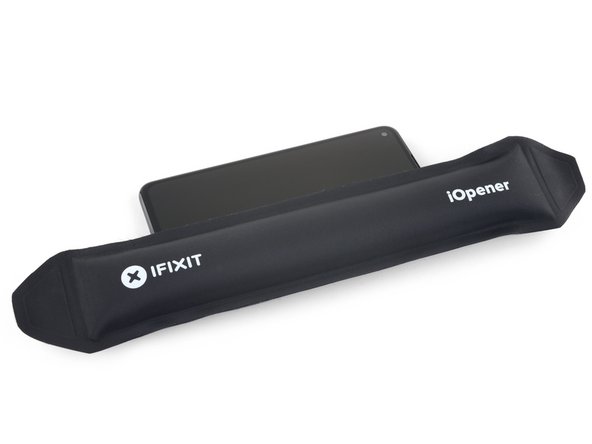
When using heat to loosen things up, remember that a hair dryer, heat gun, or hot plate can be super helpful – just be gentle and don’t overdo it. Your phone’s display and internal battery are sensitive to heat, so keep an eye on the temperature. If you need help, you can always schedule a repair
– Warm up your iOpener and cozy it up to the right edge of the screen for a cool minute to loosen that sticky adhesive.
Tools Used

Step 4


If your display is cracked to the point of needing a little TLC, slapping a layer of clear packing tape on it might just give that suction cup something to stick to. Or, if you’re feeling adventurous, you can use some super strong tape instead of the suction cup. And hey, if push comes to shove, a little superglue on that suction cup can help it stay put on the broken screen. Remember, if you need help, you can always schedule a repair.
– Grab a suction cup and place it as close to the right edge of the screen as you can get.
– Give that suction cup a solid lift with a steady pull.
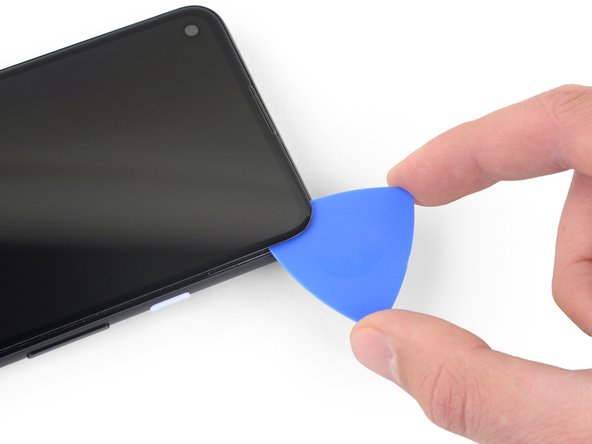
– Slide the tip of an opening pick into the screen seam, but keep it no more than 1 mm in.
Step 5


Hold your horses if the pick feels like it’s hitting a bump! It might just be nudging against the edge of the OLED panel. Give it a little angle and give it another go!
Here’s how to slide your pick in without putting a dent in that OLED panel. Make sure you do this before getting into the fun of slicing the adhesive!
– Ok, tech warriors! For this next leap, grab your pick tool and get ready to be a hero. Gently nudge it 1 mm into the gap, then pivot it upwards until it’s at quite the steep angle. Go ahead, you’ve got this! If you need help, you can always schedule a repair.
Step 6


Be careful not to insert the pick more than 1/4 inch (6 mm) into your device, or you might accidentally damage the screen’s flex cable. If you need help, you can always schedule a repair
– Let’s slide that pick along the right side of the screen, gently cutting through that adhesive. We don’t want that adhesive sealing back up, so leave the pick chillin’ in the bottom-right corner, holding the fort. If you need help, you can always schedule a repair
Step 7


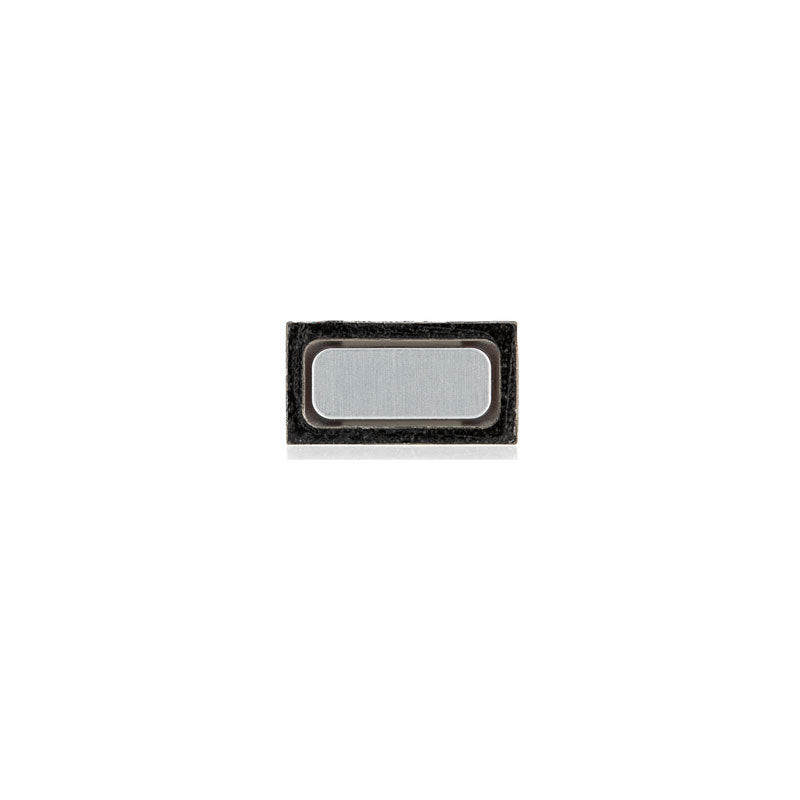
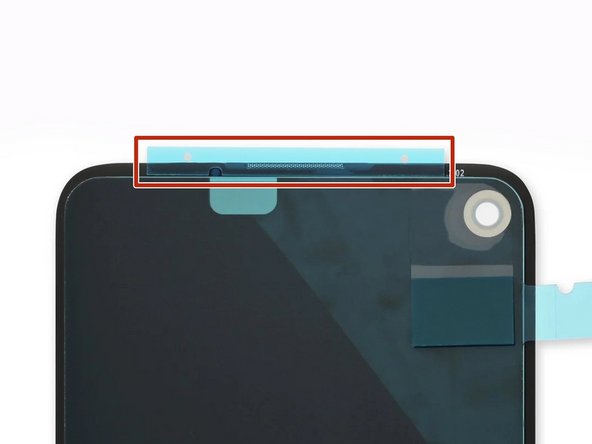
Hey there! There’s a nifty mesh covering the earpiece speaker at the top edge of the screen. If you don’t have a replacement mesh handy, just be careful not to damage or misplace this little guy.
– Pop another opening pick into the right edge of your phone at a sweet angle where a gap has already opened up. This will help keep that OLED panel safe and sound!
– Gently slide the opening pick around the top of the phone to slice through the adhesive like a pro.
– Keep that pick in place along the top edge to stop the adhesive from trying to seal back up. You got this!
Step 8


If you’re having a tough time slicing that screen, just warm up the tricky spot for about a minute, then give it another go!
– Now it’s time to get a little more aggressive – insert another opening pick into the top edge of your phone at an angle, making sure to target a gap that’s already formed to avoid damaging that fancy OLED panel.
– Use your trusty pick to carefully slice around the top-left corner, being mindful of the camera window – we don’t want any accidents!
– Leave the pick in place along the left edge to keep the adhesive from re-sealing, and take a deep breath – you’re making great progress! If you need help, you can always schedule a repair
Step 9


Be careful now – you’re getting close to the screen flex cable and digitizer, so make sure to slice with precision! If you need help, you can always schedule a repair
If the screen is being stubborn, give it a little love with some heat! Just apply heat for a minute to the tough spot, and then try again.
– Gently glide the opening pick along the left edge of your phone to slice through that pesky adhesive. You’ve got this!
Step 10


Hey there, be careful around the screen flex cable and digitizer, ok?
If the screen is a bit stubborn, try applying some heat to the tricky area for a minute and then give it another go. It’ll loosen up in no time!
– Now, gently work the opening pick around the bottom-left corner and across the bottom of the display. This will help you cut through the remaining adhesive, and you’ll be one step closer to fixing your device. If you need help, you can always schedule a repair
Step 11


Hold off on removing the screen for now. Let’s take it one step at a time to ensure everything goes smoothly. If you need help, you can always schedule a repair
– Once you’ve carefully cut around the perimeter of the phone, give the screen’s right edge a gentle lift – think of it like opening a book!
– Now, use an opening pick to delicately cut through any stubborn adhesive left behind.
Step 12


Hey, be super careful not to put any pressure on that little ribbon cable. We don’t want to give it a bad day, do we?
– Just lift it from the top, swing that screen up and over until you can lay it down on its glass side.
Step 13


– Time to get those nimble fingers working! Gently peel off the tape covering the screen connector. Use your fingernail or a pair of tweezers. Don’t worry, if the tape’s still lookin’ good, you can stick it back on when you’re all done. If not, you can grab a piece of Kapton tape to replace it. Piece of cake, right?
Tools Used

Step 14


Heads up! The plastic cover might take a little flight when you’re taking it off. Don’t worry, it’ll land safely. 😉
– Time to get started! Insert the tip of a spudger into the plastic cover’s opening, where the screen flex cable is secured.
– Gently pry the plastic cover straight up – it should pop out of place with a bit of effort.
– Now, remove the plastic cover and you’re one step closer to fixing your device. If you need help, you can always schedule a repair
Tools Used

Step 15


– Use the tip of a spudger to gently pry up and disconnect the screen flex cable.
– To reconnect press connectors like this one, carefully align it and press down on one side until it clicks into place, then do the same on the other side. Don’t press down on the middle. If the connector is misaligned, the pins can bend and get damaged. If you need help, you can always schedule a repair.
Tools Used
Step 16


Once you power up your device after putting it back together, the screen will embark on a calibration adventure. Please resist the urge to poke the screen during this time; it could lead to some touchy issues down the road.
Refer to the third photo to get your adhesives in the right spot – it’s a great reference point to ensure everything is lined up correctly. If you need help, you can always schedule a repair
– First things first, take off that screen!
– Ready to put on a shiny new screen? Here’s how:
– Check if your new screen comes with the speaker mesh and top edge adhesive already on it.
– If it does, you can skip the top edge adhesive step and keep moving!
– But if it doesn’t, peel off the larger clear liner from the top edge adhesive and stick it to the screen (not on the frame). Just make sure that big cutout aligns perfectly with the speaker mesh.
Step 17

During this repair, keep an eagle eye on each screw and make sure it finds its way back to its original spot.
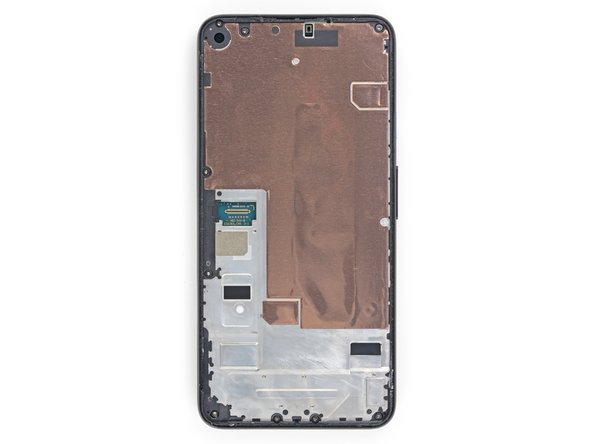
– Let’s get those screws out! Grab your trusty T3 Torx screwdriver and unscrew the nine 4.4 mm-long screws holding the back cover to the midframe. It’s like giving your device a little hug, but with tools! If you need help, you can always schedule a repair
Step 18


– Let’s get this party started! Slide an opening pick into the seam between the midframe and the back cover. Just above the SIM card slot, you’ll find the perfect spot.
– Now, let’s give those pesky clips a little wiggle room. Slide the opening pick along the right edge of your phone to loosen them up.
Step 19


– Keep gliding that opening pick along the top, left, and bottom edges of your phone. You’ll want to keep at it until all those sneaky plastic tabs holding the back cover to the midframe pop free. You’re doing great! If you need help, you can always schedule a repair.
Step 20


Hold up, buddy! Don’t try removing the back cover. It’s still rockin’ those two ribbon cables, keepin’ everything connected and in check. If you need help, you can always schedule a repair.
– Flip your phone over, back cover facing up. Ready to get this show on the road?
– Now, with a gentle touch, swing that back cover up. Like opening a door to a brand new adventure.
– Rest the back cover against something handy, like a box or a can. We got this!
Step 21


– Let’s get started by using a T3 Torx screwdriver to remove the seven screws that hold the motherboard bracket in place:
– You’ll find four 4.0 mm-long screws
– And three 2.1 mm-long screws. If you need help, you can always schedule a repair
Tools Used


Step 23


– Let’s give that battery a little break! Use the tip of a spudger to gently disconnect the battery cable from the motherboard. If you need help, you can always schedule a repair
Tools Used
Step 24

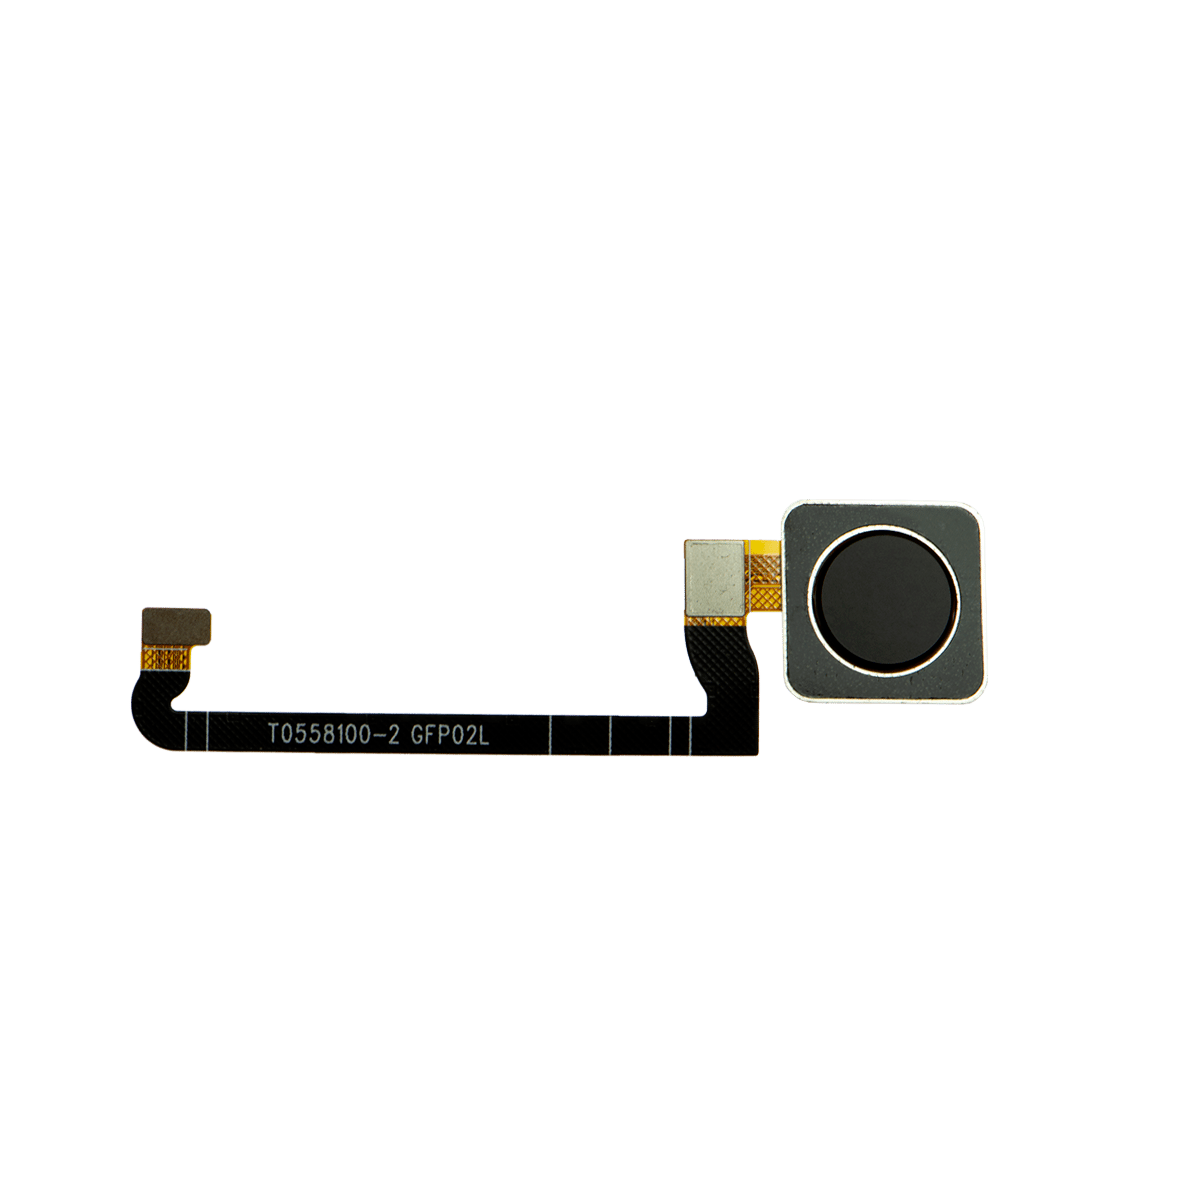
– Grab your trusty spudger and gently nudge it under the fingerprint sensor cable to pop it up and disconnect it. You’re doing great!
Tools Used


Step 27


Heads up! This copper foil is delicate, so be careful not to poke a hole in it.
– Alright, time to get this party started! Grab your fingers or a pair of tweezers and carefully peel back that tape covering the copper foil. It’s like revealing a secret treasure, but instead of gold, it’s a phone repair! If you need help, you can always schedule a repair
Tools Used
Step 28


– Time to give that front-facing camera some freedom! Use the flat end of a spudger to gently disconnect it from the motherboard.
– Now, carefully lift out the front-facing camera. You’re doing great!
Tools Used
Step 29

– Grab your trusty T3 Torx screwdriver and give those two 4.2 mm screws holding the loudspeaker assembly in place a little twist! They’ll come right out.
Step 30

Be gentle when handling the loudspeaker, and try not to puncture those delicate white membranes on either side – you’ll want to keep it in good shape if you plan to reuse it. If you need help, you can always schedule a repair
– Time to get started! Carefully slide the tip of a spudger under the loudspeaker assembly to loosen it.
– Now, gently flip the loudspeaker assembly over so it rests lightly on top of the battery. If you need help, you can always schedule a repair
Tools Used
Step 31
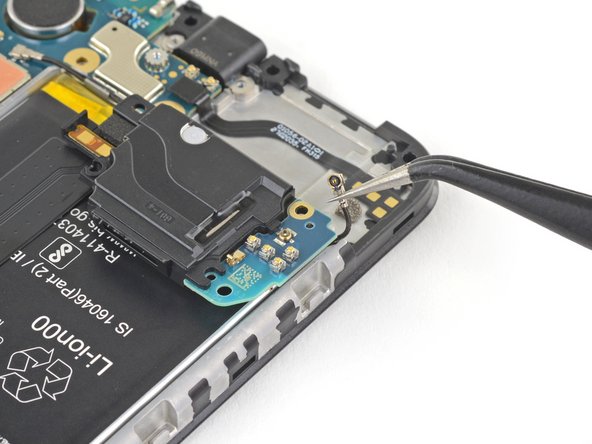

Grab the metal connector of the antenna cable using your tweezers—not the plastic cable. If you’re unsure, you can always schedule a repair.
– Time to get up close and personal with those tiny components! Use a trusty pair of tweezers to carefully disconnect the antenna cable from the loudspeaker assembly. If you need help, you can always schedule a repair
Tools Used
Step 32

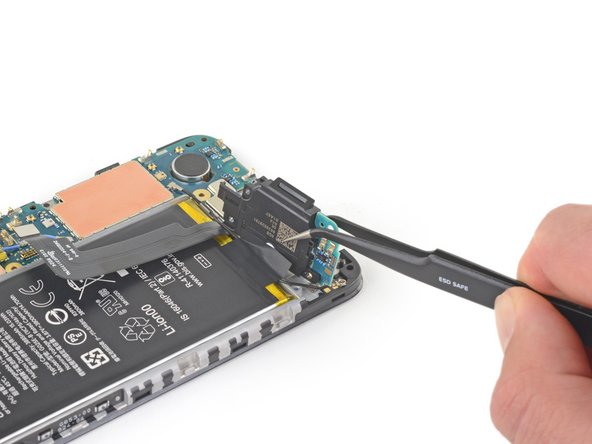

Watch out for those delicate white membranes flanking the loudspeaker! If you plan to give it a second life, keep them intact.
– Time to give that loudspeaker assembly some air! Gently lift it up, peeling it away from the tape holding it down.
– Now it’s time to give that speaker a proper send-off! Remove the loudspeaker assembly completely.

Step 34

– Gently pry open the loudspeaker cable from the motherboard using the tip of a spudger. You’ve got this!
Tools Used
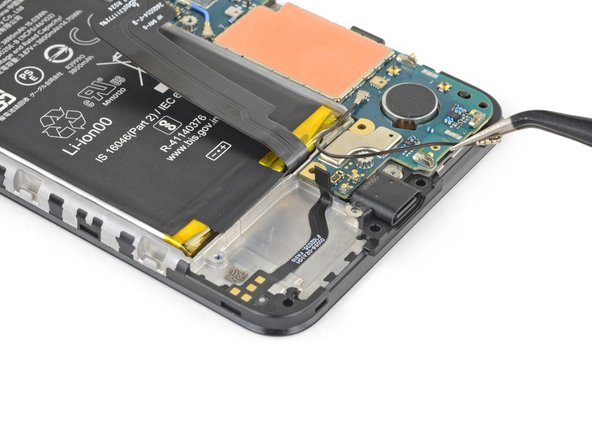
Step 35

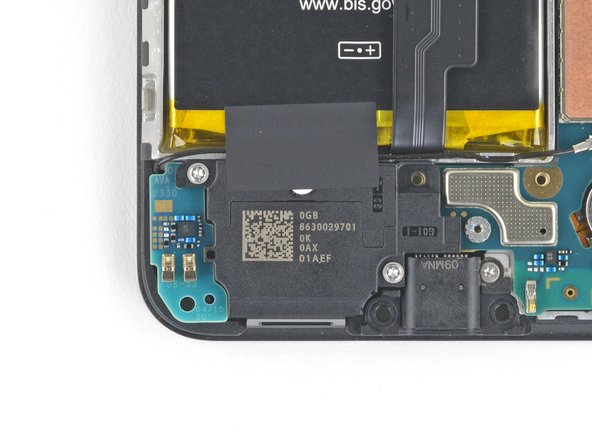
– Grab your trusty spudger and gently pry the headphone jack cable loose from the motherboard. It’s like giving it a little high-five, but with less enthusiasm (and more precision).
Tools Used
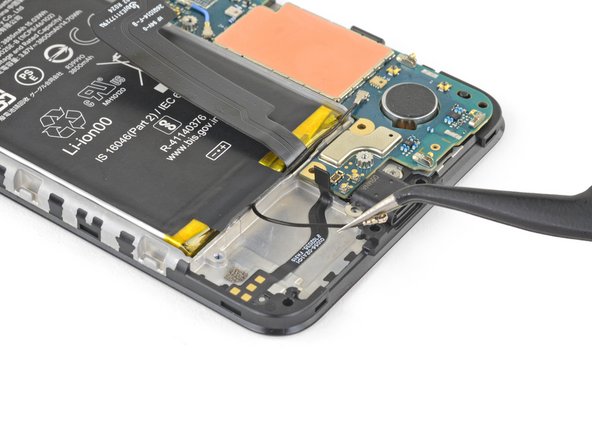
Step 36
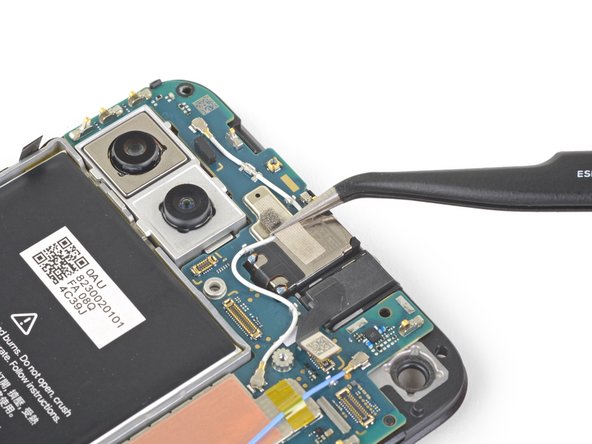

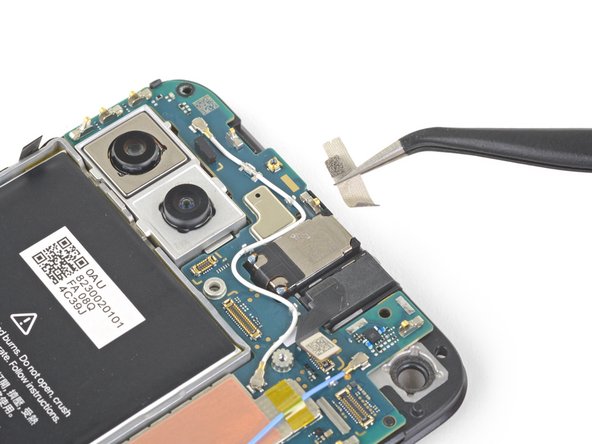
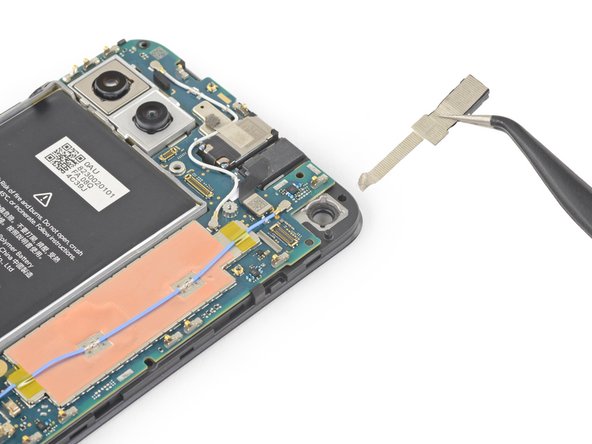
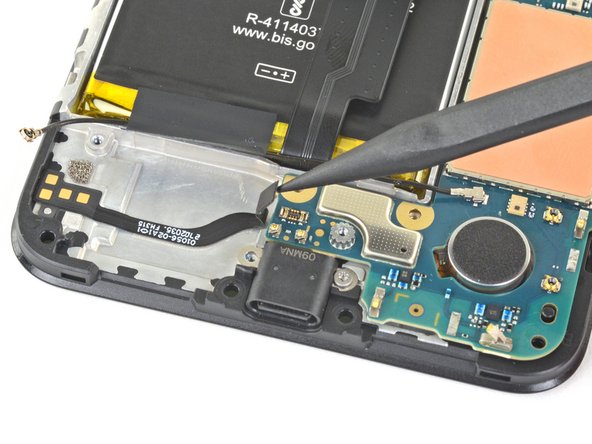
– Grab your tweezers and peel off that tape from the earpiece speaker to reveal the antenna flex cable.
Tools Used
Step 37

– Alright, let’s get that charging port out! Grab your trusty T3 Torx screwdriver and give those two 2.1 mm screws a little spin. They’re holding that charging port in place, so once they’re out, you’ll be able to get to the good stuff.
Tools Used
Step 38

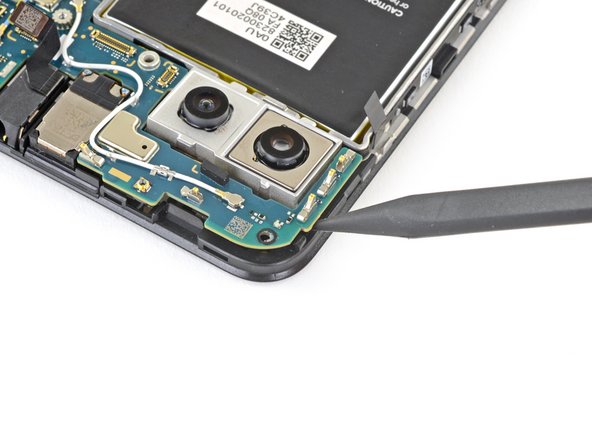
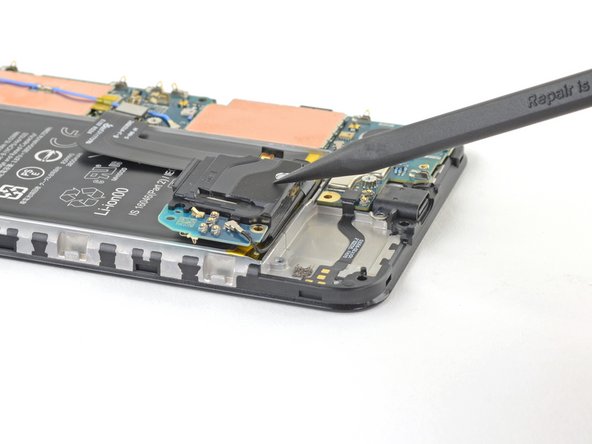
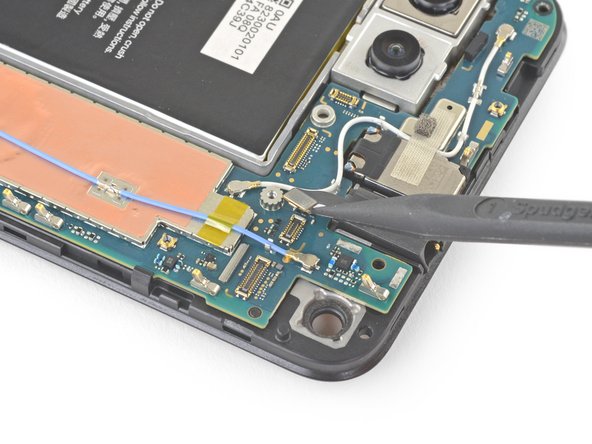
The motherboard is attached to the midframe using plastic clips, so let’s take a look at how to carefully release them. If you need help, you can always schedule a repair
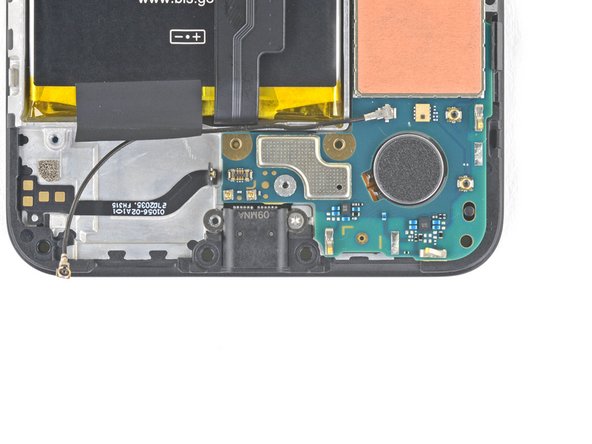
– Gently slide the spudger’s tip into the little gap between the motherboard and the midframe, right by the front-facing cameras, and give it a little nudge to pop it free from the first clip.
Tools Used
Step 39

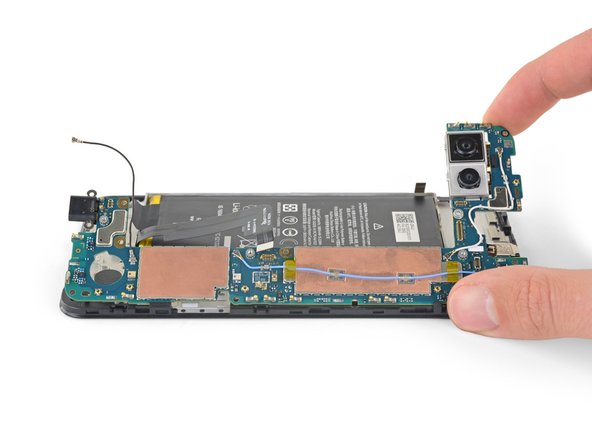
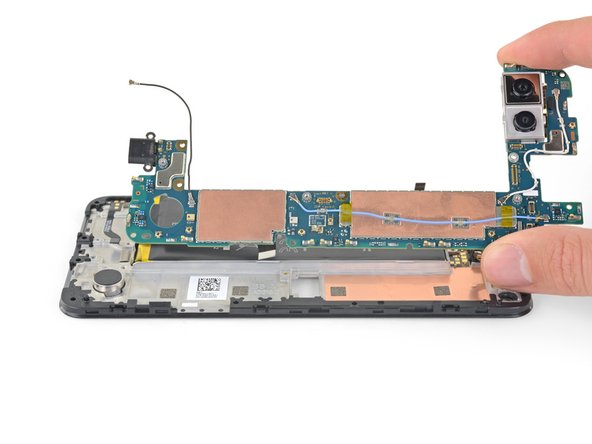
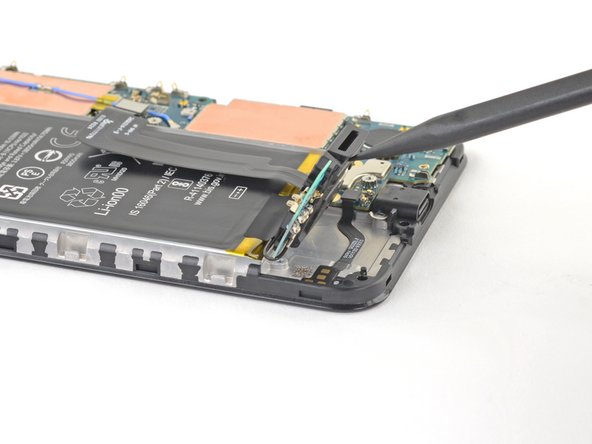
This will release all the rest of the clips. You got this!
– Carefully grasp the motherboard with your fingers and gently open it, just like you’re opening a book.
– Now, lift the motherboard straight out to remove it. If you need help, you can always schedule a repair
Step 40
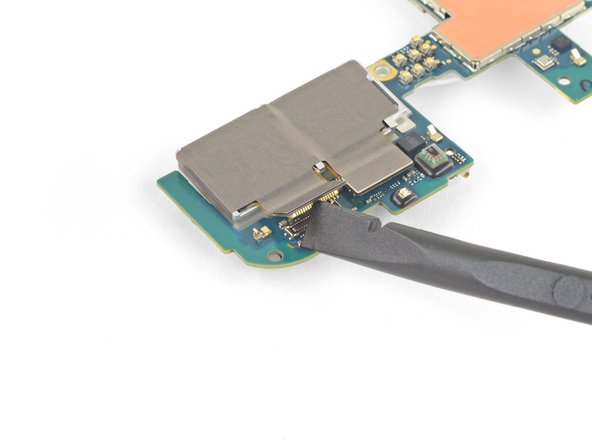

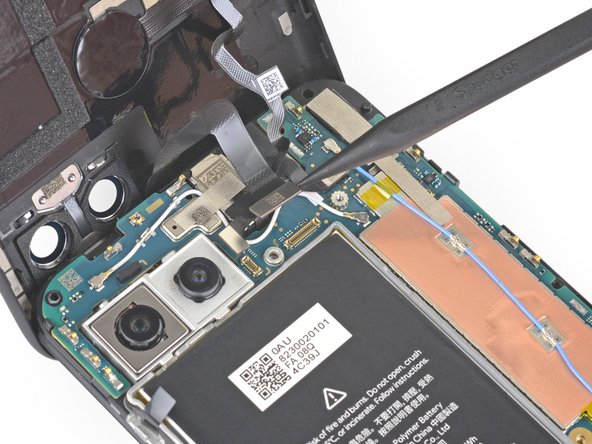
– Gently pry the left camera away from the motherboard using the flat end of a spudger. You’ve got this!
Tools Used
Step 41
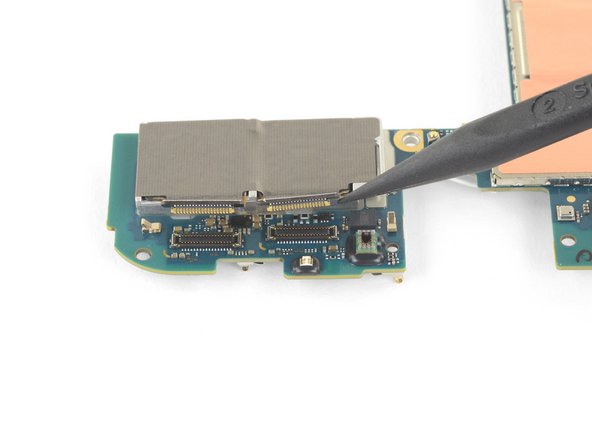

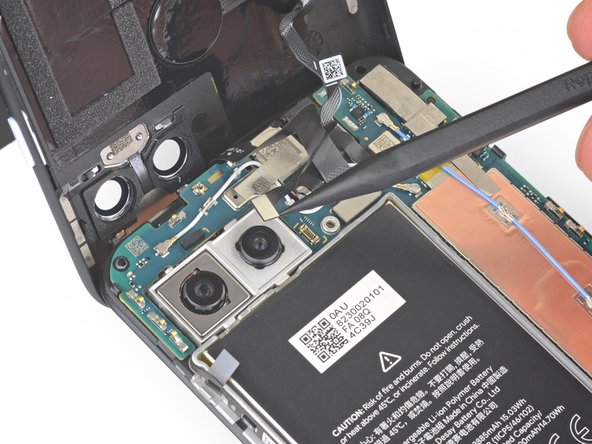
Be careful not to accidentally damage those tiny capacitors on the motherboard – we want your repair to go smoothly! If you need help, you can always schedule a repair
– C’mon, let’s get this right camera disconnected! Unleash your inner technomage and grab that spidger tip. Time to work some tech magic! Ready, set, go!
Step 42

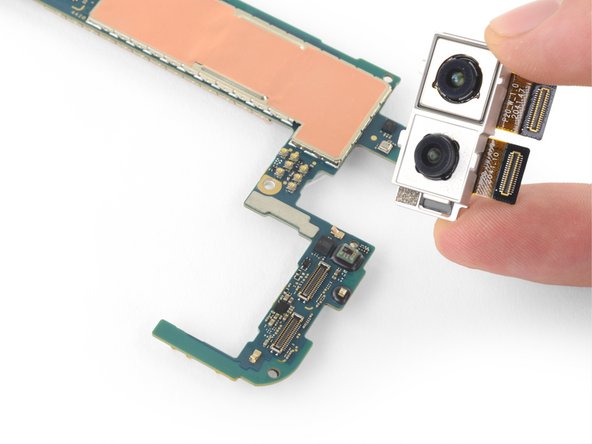
– Say goodbye to the front-facing camera assembly! It’s time for a little removal action.
– Before you bring in the new camera module, check for any pesky plastic spacers and toss them aside!
– Don’t forget to give the lens surface a nice, gentle clean to make sure it’s as clear as day before you pop in the new camera assembly.