
DIY Google Pixel 6 Front Camera Replacement Guide
Duration: 45 minutes
Steps: 23 Steps
This repair guide has been put together by the awesome folks at Salvation Repair, though Google hasn’t given it a thumbs up. Curious about our repair guides? Check them out here!
Safety first! Make sure your battery is below 25% before diving into disassembly. Your future self will thank you!
Get ready to give your Google Pixel 6 a brand new front or selfie camera assembly. Before you start, make sure to discharge your battery to below 25% to avoid any potential thermal issues. If your battery is swollen, take the necessary precautions to stay safe. Also, keep in mind that the Pixel 6 has class 1 lasers, so be careful when disassembling to avoid exposure to invisible infrared laser emissions. When you’re reassembling, remember that you’ll need some replacement adhesive to get everything stuck back together again. And don’t worry if you’re not feeling confident – if you need help, you can always schedule a repair. Our guide is here to walk you through it, step by step. Just remember, reapplying that adhesive just right will be key to retaining your device’s water resistance, but either way, the IP rating will be a thing of the past. So, let’s get started and get that camera working like new.

Step 2


Up next, we’re diving into the world of the Anti-Clamp! This nifty little tool is your best friend for making the opening process a breeze. If you don’t have an Anti-Clamp handy, no worries—just hop down three steps for an alternative method!
Is your screen sporting a crack? No need to fret! Simply lay down a strip of clear packing tape to give that suction cup a fighting chance to stick.
Looking for the full scoop on how to work that Anti-Clamp like a pro? Be sure to check out our comprehensive guide!
If you feel like your phone’s surface is a hotspot—slippery and uncooperative—don’t sweat it! A bit of tape can transform that slick surface into a more grippy one for the Anti-Clamp.
– Grab the blue handle and give it a little tug backwards—that’s how you unleash the Anti-Clamp’s awesome arms!
– Slide those arms over either the left or right side of your phone, like you’re giving it a big hug.
– Now, get those suction cups ready! Place one on the front and one on the back, near the bottom edge of your phone.
– Time to get sticky! Squeeze those cups together to give your phone a good suction.
Step 3


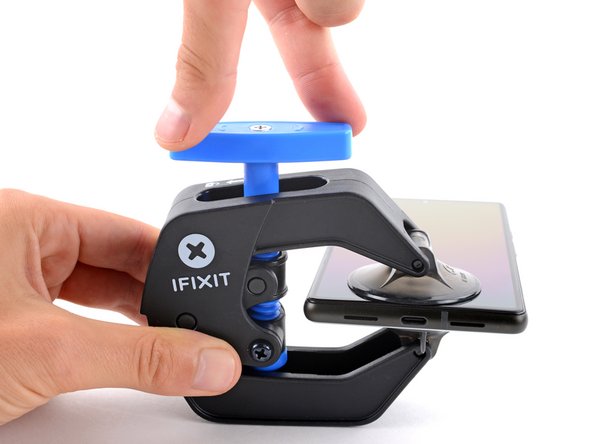
– Give that blue handle a little tug forward to lock the arms in place.
– Now, spin that handle clockwise a full 360 degrees, or until those cups get a little stretchy.
– Keep those suction cups in line with each other, like a well-rehearsed dance team. If they start to slip out of formation, gently loosen them and get them back in sync.
Step 4


Take it easy and don’t twist more than half a turn at once. Give it a moment—wait a full minute between turns. Let the Anti-Clamp and a little patience do their magic for you!
For an extra boost, try using a hair dryer or heat gun – just be careful not to overheat, as this can harm your device’s display or battery. Take your time and proceed with caution.
If the Anti-Clamp isn’t creating enough space, don’t worry! Simply apply a bit more heat to the area and give the handle a gentle clockwise turn – about half a turn should do the trick. If you need help, you can always schedule a repair
– Warm up an iOpener and thread it through the Anti-Clamp’s arms.
– Fold the iOpener so it snuggles up to the bottom edge of the phone.
– Give it a minute to let the adhesive release and open up a gap.
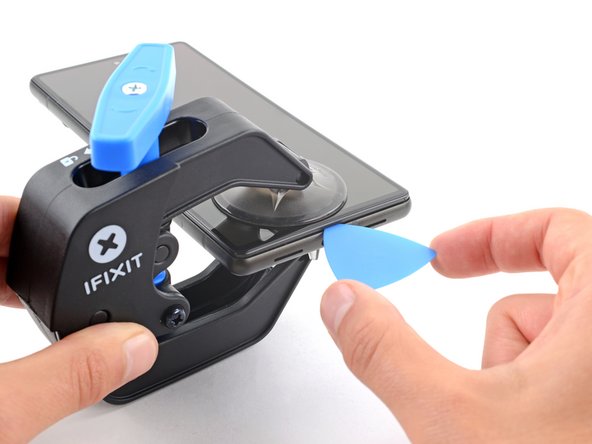
– Slide an opening pick under the screen frame when the Anti-Clamp creates a wide enough gap.
– You can skip the next two steps.


Step 5

You can also use a hair dryer, heat gun, or hot plate to warm things up, but be careful not to get too hot! If you’re not sure about using these, you can always schedule a repair with us. We’re happy to help!
– Get that iOpener nice and toasty, and place it on the screen to help loosen the sticky stuff underneath. Let it hang out there for at least three minutes for the best results!
Step 6


Alright, let’s be careful here! Make sure you’re inserting your opening pick in the right spot to avoid separating the screen from its safety frame instead of the whole phone assembly. We wouldn’t want to make things more complicated than they need to be, right? If you need help, you can always schedule a repair.
If your screen is badly cracked, don’t worry – we’ve got you covered. Try slapping a layer of clear packing tape over it to help the suction handle stick. If that doesn’t work, you can use some seriously strong tape as a substitute. And if all else fails, a tiny bit of superglue can be used to attach the suction handle to the screen. If you need help, you can always schedule a repair
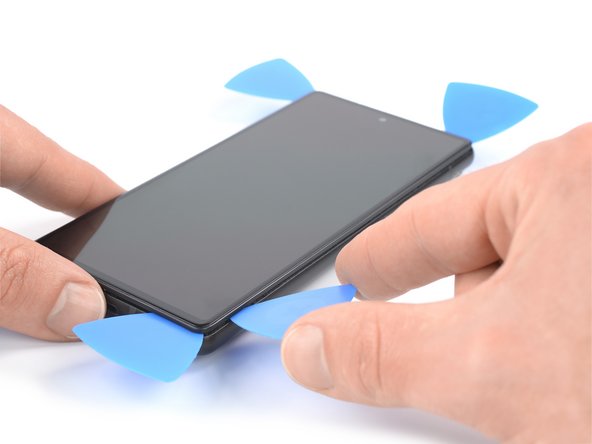
– Alright, time to warm things up! Gently heat the screen until it’s cozy to the touch.
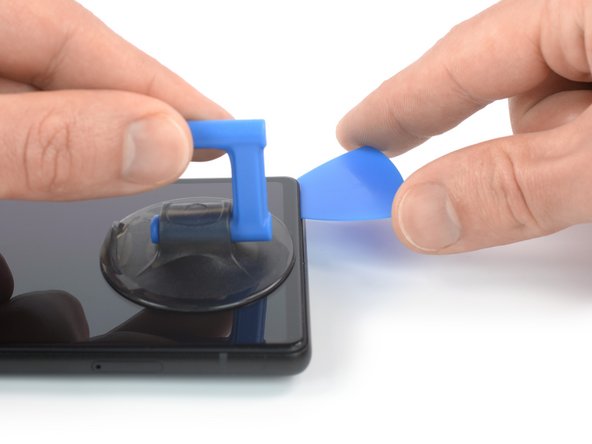
– Now, grab your trusty suction handle and attach it to the bottom edge of the screen. We’re about to lift this bad boy off!
– Carefully lift the screen, including its trusty frame, using the suction handle. You’ll see a little gap appear – that’s our opening!
– Slide that handy opening pick into the gap between the screen frame and the phone. We’re going to slice through that adhesive like a hot knife through butter!
– Hold the opening pick in place. We don’t want that sticky adhesive sealing itself back up, do we? If you need help, you can always schedule a repair.
Tools Used

Step 7


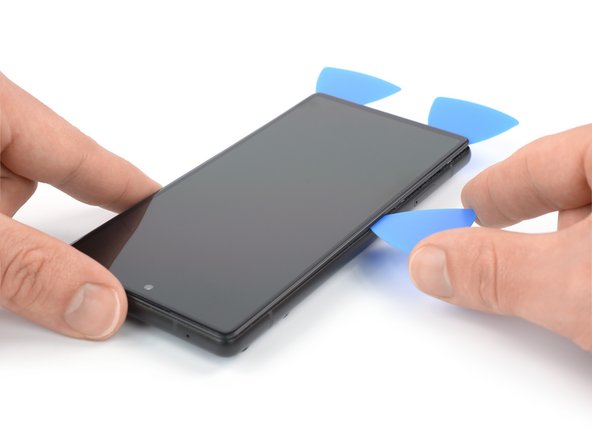
– Now it’s time to bring in some extra help – insert a second opening pick at the bottom edge of your device and gently slide it to the bottom left corner to cut through the adhesive.
– Don’t remove the opening pick just yet, leave it in place to keep the adhesive from sealing back up. If you need help, you can always schedule a repair
Step 8


– Alright, cool cats and kittens, your Google Pixel 6 screen is held in place by some sticky stuff AND tiny little plastic clips. Don’t get too excited, though! If you’re using our awesome opening pick and it gets stuck, you’ve gone too far underneath the screen. Keep your pick in the shallow end – just slide the tip (about 3-4 millimeters) under the screen to slice through that adhesive.
– Now, slide another one of those trusty opening picks underneath the bottom left corner of the screen.
– Next, slide the pick along the left side of the screen – smooth sailing, baby! Keep on slicing that adhesive.
– Leave the opening pick in the top left corner so that the adhesive doesn’t get all sneaky and stick back together. We wouldn’t want that, right?
Step 9


Be careful when slicing near the front facing camera – just insert the tip of the opening pick (about 2-3 mm) to avoid any damage or smudges. If you need help, you can always schedule a repair
If the adhesive gets tough to slice through, it’s probably chilled out. Give it a 1-2 minute warm-up with your iOpener or heat gun. If you need help, you can always schedule a repair.
– Let’s get this party started! Insert a fourth opening pick at the top left corner of the screen.
– Now, slide the opening pick along the top edge of the phone like you’re slicing through a delicious cake. This will cut the adhesive holding the screen in place.
– Leave the opening pick chilling in the top right corner to keep the adhesive from sticking back together. We’re almost there!
Step 10

– Grab your fifth opening pick and gently slide it along the right edge of the phone. This will help you cut through the last bits of adhesive holding things together.
Step 11


Be gentle with that display cable during the next steps, we don’t want any accidental damage! If you need help, you can always schedule a repair
– Alright, let’s open this thing up! Carefully swing the right side of the screen open towards the left side of the phone like you’re flipping through a magazine. You’ll know you’re doing it right if it feels smooth and easy. If you get stuck, you can always schedule a repair.


Step 13
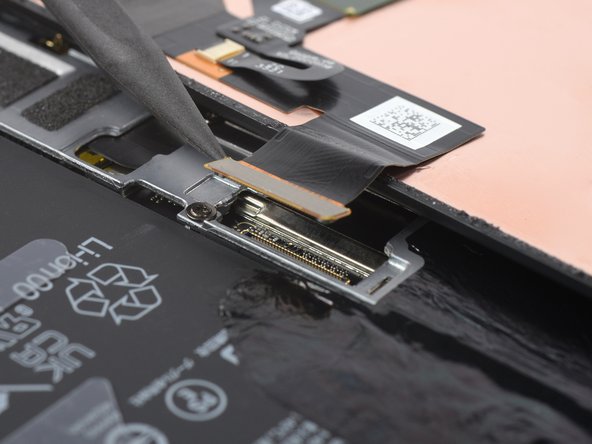

– Time to disconnect that display flex cable! Use your spudger to gently pry the connector straight up from its socket. If you need help, you can always schedule a repair
Tools Used

Step 14

– First things first, let’s get that screen off! Time to get hands-on.
– Now, as you’re putting everything back together:
– If you’ve swapped out the screen, take a peek at the front-facing camera hole and make sure to pull off any leftover protective liners. We want that camera shining!
– Here’s a pro tip: Test your device before you seal the deal! Hook up the screen, power it on, and check if everything’s working like a charm. Once you’re done testing, be sure to turn off your phone and disconnect the screen before wrapping things up.
– If you’re going the custom adhesive route, check out our guide just for that.
– Using a pre-cut adhesive card? We’ve got a special guide that’ll walk you through it.
– Installing a new screen? Don’t forget to follow our guide to calibrate that fingerprint sensor so it’s as good as new!
Step 15

Hey, don’t go roasting that battery! It’s a little sensitive to heat and could get grumpy if you overdo it. Keep it cool, we want it to stay happy and healthy!
Step 16


Be careful not to poke or bend the battery with your tool. If you do, the battery might leak some yucky stuff or get really hot! If you’re not sure what you’re doing, you can always schedule a repair.
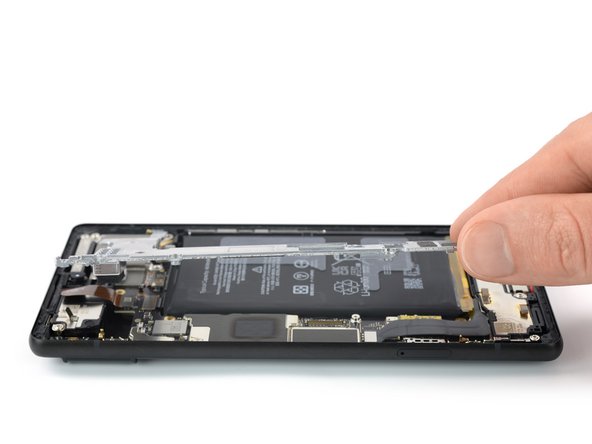
– Using a pair of blunt-nose tweezers or a clean fingernail, gently lift the black graphite film from the top edge of the battery and the motherboard shield. You got this!
– Carefully remove the graphite film. Keep going, you’re doing great!
Tools Used
Step 17


If the graphite film is giving you a hard time and isn’t peeling off, it’s probably just a bit too cool. Give your iOpener or heat gun another go on the rear glass for a quick 1-2 minute warm-up to get things back on track.
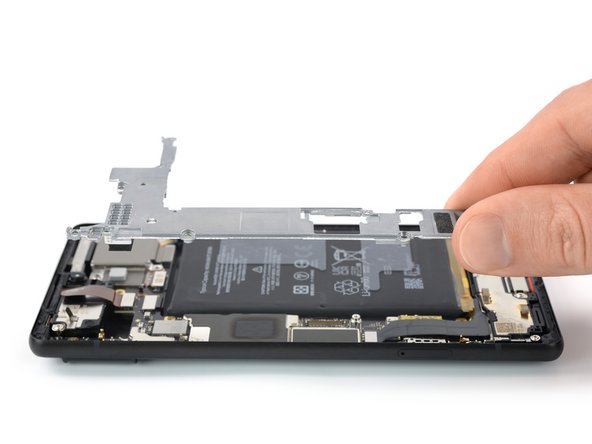
– Time to get those nimble fingers working! Use a pair of blunt nose tweezers or a clean fingernail to gently peel the black graphite film off the left edge of the battery and the motherboard shield. If you need help, you can always schedule a repair
Step 18


Okay, cool beans, let’s take a peek at that graphite film at the bottom edge of the battery. We’ll only need to remove this little guy if we’re swapping out the battery or the loudspeaker. No biggie, right?
We’ll also need to remove a bit of foam that’s chilling between the display and the speaker. Make sure to pop it back in place after you’ve replaced the graphite film. It’s all about keeping things snug!
– Grab a pair of blunt nose tweezers or your trusty clean fingernail and gently lift that black graphite film off the bottom edge of the battery and the loudspeaker assembly. You’ve got this!
– Say goodbye to the graphite film!
Tools Used
Step 19

Alright, slickster! Keep track of each little screw during this repair, make sure it goes back where it came from. You got this!
– Grab that trusty Torx T3 screwdriver and let’s get to work on freeing the motherboard cover! You’ll need to tackle these screws:
– Eight delightful 4.8 mm-long screws just waiting to be removed
– One sneaky 2.4 mm-long screw that wants to hang out with the rest

Step 21

– Time to get started! Use a spudger to carefully disconnect the battery cable by gently prying the connector straight up from its socket. If you need help, you can always schedule a repair
Tools Used
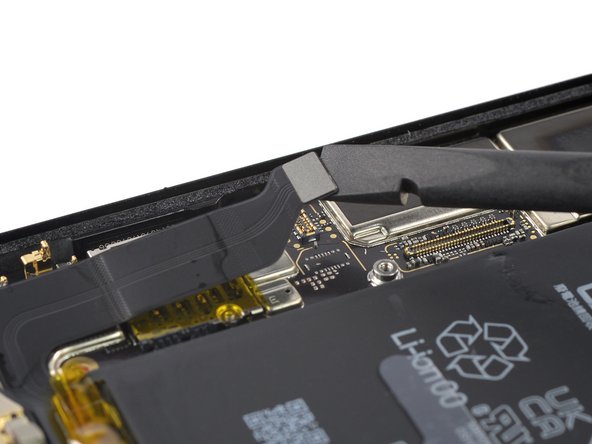
Step 22

– Time to give that front camera cable the heave-ho! Gently pry up the connector using your trusty spudger. Just lift it straight up from its socket and you’re golden. If you need help, you can always schedule a repair
Tools Used
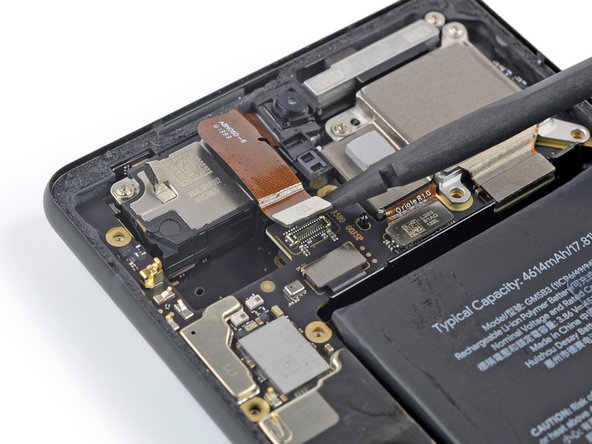
Step 23
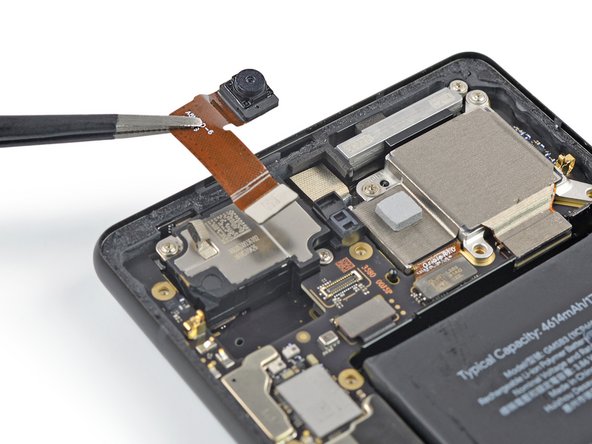

– Gently use your fingers or a trusty pair of tweezers to lift the front camera out of its cozy little nook and set it free.
Tools Used
