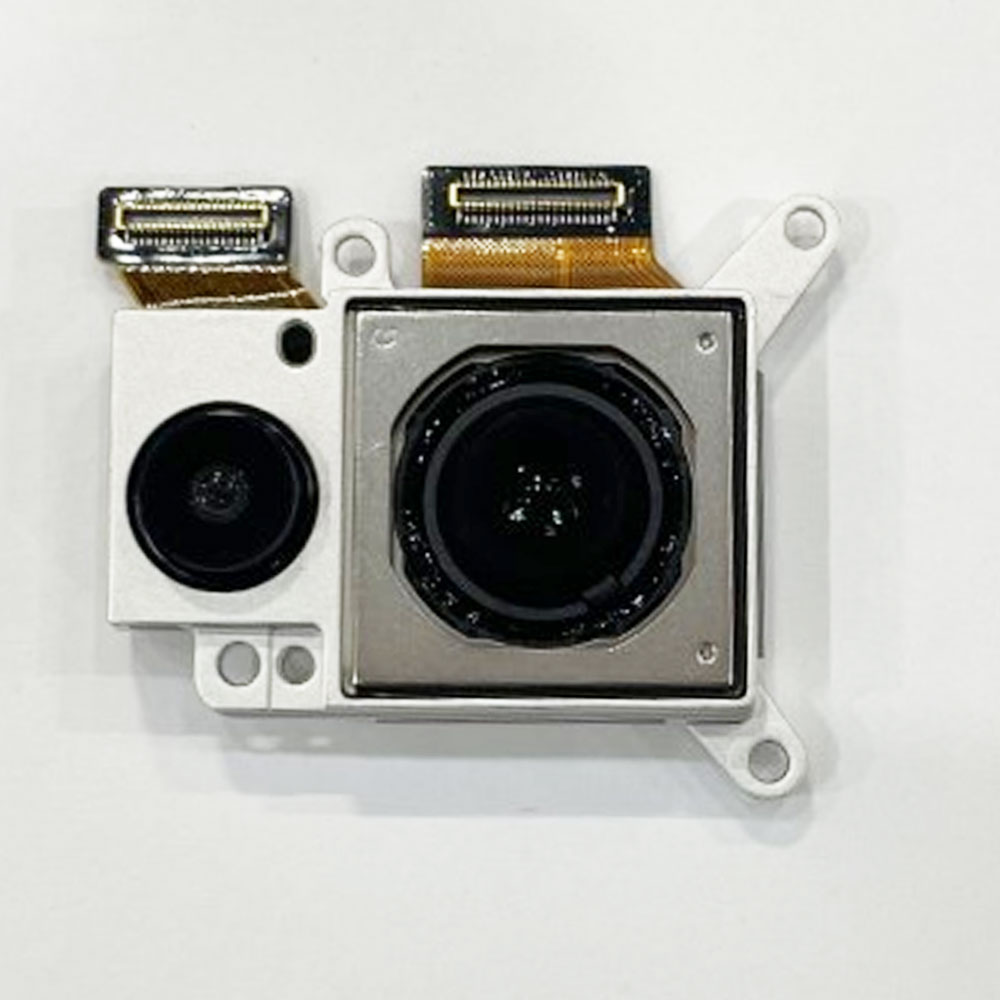
DIY Google Pixel 6 Rear Camera Replacement Guide
Duration: 45 minutes
Steps: 24 Steps
A heads up from the team at Salvation Repair: we created this guide to help you fix your device, but it’s not officially endorsed by Google. Want to know more about our repair guides? Click here to learn more.
Safety first! Before you start taking your phone apart, make sure the battery is at 25% or less. If you need help or have questions, you can always schedule a repair.
Get ready to give your Google Pixel 6 some TLC. This step-by-step guide from Salvation Repair will walk you through removing or replacing the rear camera assembly. Before you start, make sure to discharge your battery to below 25% to avoid any potential thermal issues. If your battery is swollen, take the necessary precautions. Also, keep in mind that the Pixel 6 has class 1 lasers, so be careful when disassembling to avoid exposure to invisible infrared laser emissions. When you’re reassembling, you’ll need some replacement adhesive to get everything stuck back together again. Don’t worry if you’re not feeling confident – if you need help, you can always schedule a repair. Let’s get started and get your phone camera up and running in no time.
Step 1
Before you start, make sure your battery is below 25% charged. We want to avoid any accidents, like a damaged battery catching fire. If you need help, you can always schedule a repair
– Switch off your phone completely and disconnect all cables.
Step 2
Alright, let’s get this party started with our Anti-Clamp! It’s a cool tool we came up with to make this part a breeze. But, if you’re not feelin’ the Anti-Clamp vibes, skip down a few steps for another way to do things.
Hey, if your screen’s lookin’ a little rough, no worries! Just slap some clear tape on it to give our suction cup a better grip.
Want to learn all the ins and outs of the Anti-Clamp? Check out this link for a full guide.
If your phone’s surface is a little slippery for the Anti-Clamp, just stick some tape on it for a better grip. It’s like giving your phone a little helping hand! Need a hand with this? You can always schedule a repair.
– Pull the blue handle back to release the Anti-Clamp’s arms.
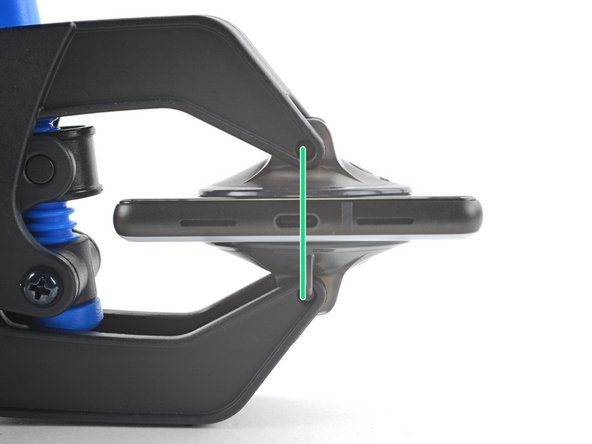
– Slide those arms over either side of your phone.
– Place the suction cups at the bottom edge of the phone—one on the front, one on the back.
– Press the cups together for strong suction.
Step 3
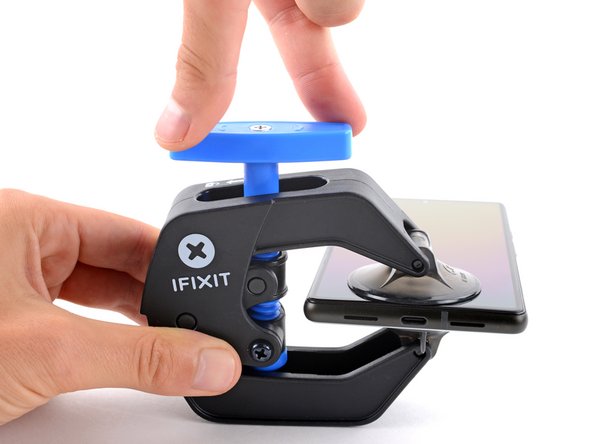
– Give that blue handle a little tug forward to click the arms into locking mode, just like a well-deserved high-five.
– Now, twist the handle in a glorious clockwise circle – 360 degrees, baby! Keep going until those suction cups start showing off and stretching.
– Be a buddy to those suction cups and ensure they’re buddying up nicely. If they start to drift apart like old friends, just loosen them up a bit and guide them back into alignment with the arms.
Step 4
Take it easy, champ! Just a half turn at a time, and wait a minute between each one. Let the Anti-Clamp do its thing, and give it some time to work its magic. You got this!
Feeling a bit chilly? Grab a hair dryer or heat gun to warm things up—just remember, too much heat could put your display or internal battery in a bit of a pickle, so use with caution!
If the Anti-Clamp isn’t pulling its weight and a gap remains, don’t hesitate to apply some extra heat to that spot and give the handle a gentle half turn clockwise. You’ve got this!
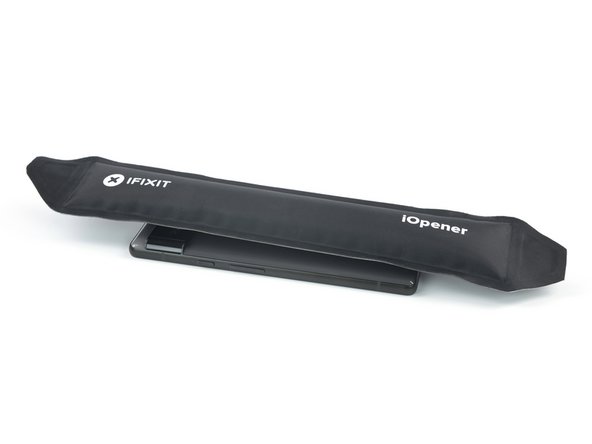
– Heat up your iOpener and slip it between the arms of the Anti-Clamp.
– Fold that iOpener up so it’s resting nicely on the bottom edge of your phone.
– Give it a minute to let the adhesive chill out and create a little opening.
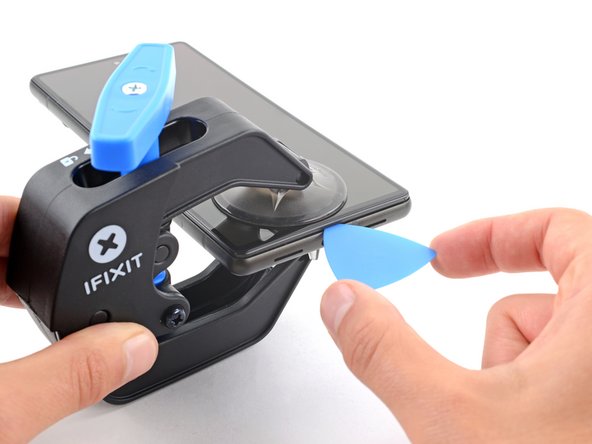
– Slide an opening pick under the screen frame when the Anti-Clamp gives you enough space.
– Skip the next two steps. You’re doing great!
Step 5
You can also use a hair dryer, heat gun, or hot plate, but be careful not to melt your device. Just remember to keep things cool, and if you need help, you can always schedule a repair.
Step 6
Hey, make sure you’re placing that opening pick in the sweet spot! You don’t want to be separating the screen from its safety frame instead of the phone assembly, right? Just a friendly tip to keep things smooth.
If your screen is super cracked, covering it with some clear packing tape might help the suction handle stick. Or, you can try using some really strong tape instead of the suction handle. If all else fails, you can try carefully attaching the suction handle to the screen with superglue. If you need help, you can always schedule a repair.
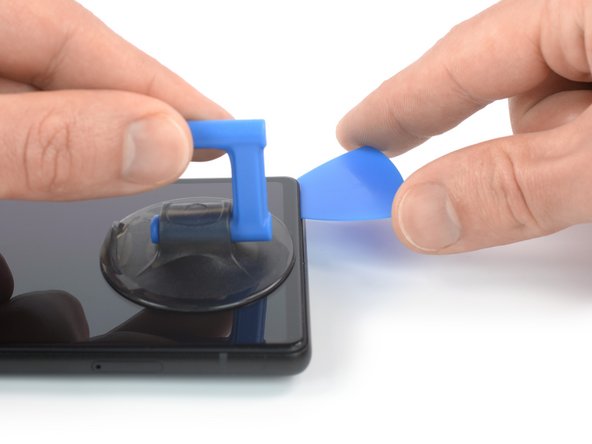
– Let’s get this screen warm! Apply a suction handle to the bottom edge of the screen. It’s like giving it a warm hug.
– Now, lift the screen gently, including its safety frame, with the suction handle. Just a little bit to create a gap.
– Take an opening pick and slide it into the gap between the screen frame and the phone assembly. It’s like a tiny, helpful friend.
– Slide the opening pick to the bottom right corner of the screen to slice the adhesive. You’ve got this!
– Leave the opening pick in place to prevent the adhesive from resealing. Don’t worry, we’ll get that screen off in no time. If you need help, you can always schedule a repair
Tools Used
Step 7
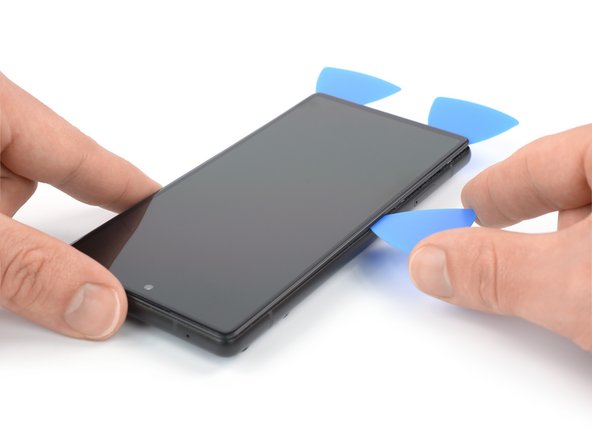
– Now it’s time to bring in some extra help – insert a second opening pick at the bottom edge of your device and gently slide it to the bottom left corner to cut through the adhesive.
– Don’t remove the opening pick just yet, leave it in place to keep the adhesive from sealing back up. If you need help, you can always schedule a repair
Step 8
– Alright, let’s get this screen off. The Google Pixel 6 screen is held in place by both glue and some tiny plastic clips. If your opening pick gets stuck during the screen removal, it just means you went a little too deep. Just use the tip of the pick (about 3-4mm) to slice through the adhesive.
– Now, grab your trusty opening pick and slide it underneath the bottom left corner of the screen.
– Slide that pick along the left edge of the screen, carefully slicing through the adhesive. It’s like butter!
– Leave that opening pick in the top left corner. This will help prevent the adhesive from sealing back up.
Step 9
Hey there! To keep your front-facing camera looking its best, slice very carefully and only use a tiny bit of your opening pick, about 2-3 mm. Don’t worry, you’ve got this! If you’re feeling unsure, you know, schedule a repair – we’re here to help!
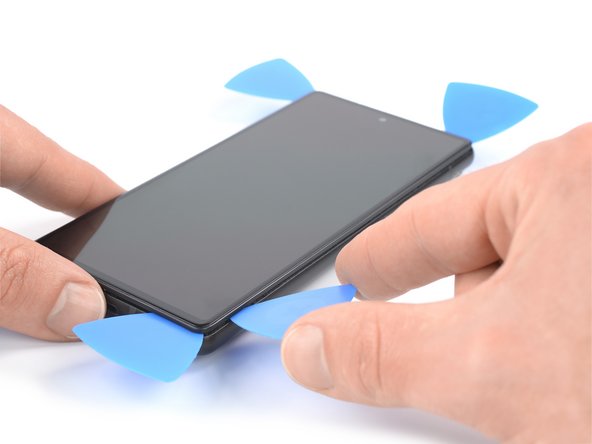
– Pop in a fourth opening pick at the top left corner of your screen, like a pro!
– Gently glide that opening pick along the top edge of your device to smoothly slice through the adhesive.
– Keep the opening pick wedged in the top right corner to stop that pesky adhesive from sealing back up.
Step 10
Hold your horses! Don’t go yanking the display off just yet; it’s still linked up to the phone assembly.
– Alright, let’s keep going! Grab your fifth opening pick and slide it along the right side of your phone. You’ll want to gently slice through any remaining adhesive holding the back cover in place. No worries if it’s a bit tough, we’re almost there! If you need help, you can always schedule a repair.
Step 13
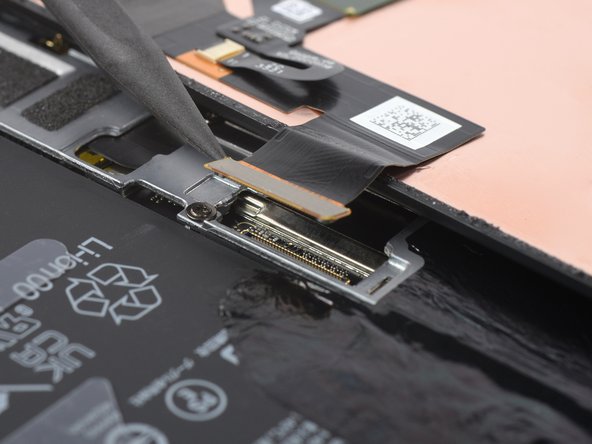
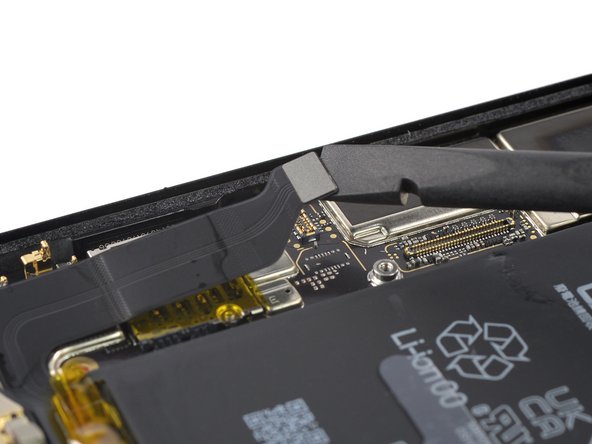
– Grab your trusty spudger and gently lift the display flex cable by prying the connector straight up from its socket. You’ve got this!
Tools Used
Step 14
Don’t forget to put the display cable bracket back in place.
– Time to ditch that old screen! Remove it to make way for the new one.
– Reassembly alert: pay attention to the details to get everything just right.
– If you’re rocking a brand new screen, take a peek at the front-facing camera hole and remove any leftover protective liners.
– Now’s the perfect time to test your phone before sealing it up. Connect your screen, power it on, and make sure everything is working as it should. Then, power it off and disconnect the screen before moving forward.
– Using custom-cut adhesives? No problem! Follow this guide for a seamless application process.
– Pre-cut adhesive card, here you come! Follow this guide to get it just right.
– New screen, who dis? If you’re installing a fresh screen, be sure to follow this guide to calibrate that fingerprint sensor. And remember, if you need help, you can always schedule a repair with Salvation Repair.
Step 15
Be careful not to apply heat directly to the battery, as it’s super sensitive to heat damage and could potentially cause a thermal event. If you’re not sure about this step, don’t worry – you can always schedule a repair and let the pros handle it.
Step 16
– Grab a pair of blunt nose tweezers or your trusty clean fingernail, and gently peel away the black graphite film from the top edge of the battery and the motherboard shield. Take your time; it’s like unwrapping a present!
– Once you’ve got that film off, go ahead and remove the graphite film completely.
Tools Used
Step 17
Having a tough time peeling off that graphite film? It’s likely because it’s had a bit of a chill! Give your iOpener or heat gun a little workout on the rear glass for about 1-2 minutes to warm things up and get back to peeling.
– Grab a pair of blunt nose tweezers or your trusty clean fingernail, and gently peel back the black graphite film from the left side of the battery and the motherboard shield. You’re almost there!
Step 18
When it’s time to swap out the battery or the loudspeaker, just gently peel away the graphite film from the bottom edge. It’s a quick little task!
Don’t forget to remove the foam piece connecting the display to the speaker. After your new graphite film is in place, pop that foam back on to keep everything snug.
– Grab your favorite blunt nose tweezers or a clean fingernail (we’re not judging!) and gently peel that black graphite film off the bottom edge of the battery and loudspeaker assembly. It’s like giving those components a little spa day.
– Time to say goodbye to that graphite film!
Tools Used
Step 19
As you dive into this repair adventure, make sure to keep a close eye on each screw. They have their own special spot, and you’ll want to return them to their rightful homes when you’re done.
– Grab your trusty Torx T3 screwdriver and let’s get those screws out to set the motherboard free:
– Remove eight screws, each one measuring 4.8 mm long.
– And don’t forget to take out that one little 2.4 mm-long screw!
Step 20
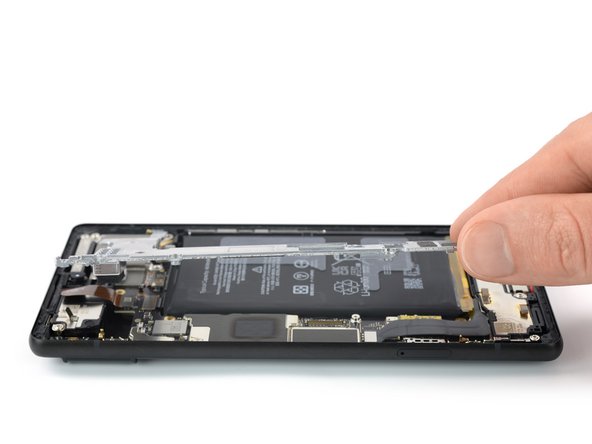
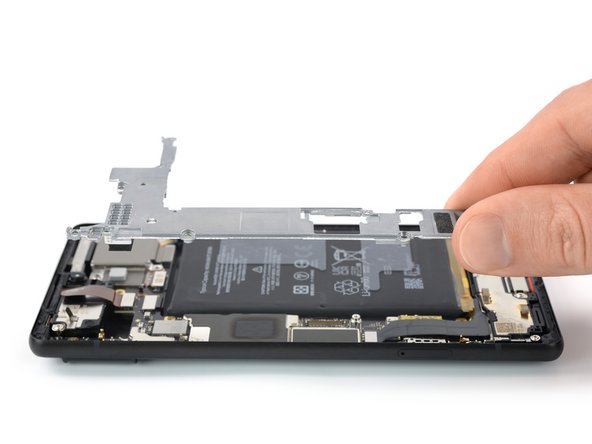
– Let’s pop that motherboard cover off! Carefully lift it up and set it aside. You got this!
Step 22
– Let’s get this camera assembly out! Use a Torx T3 screwdriver to remove the two 4.8mm-long screws holding it in place. You got this!
Step 23
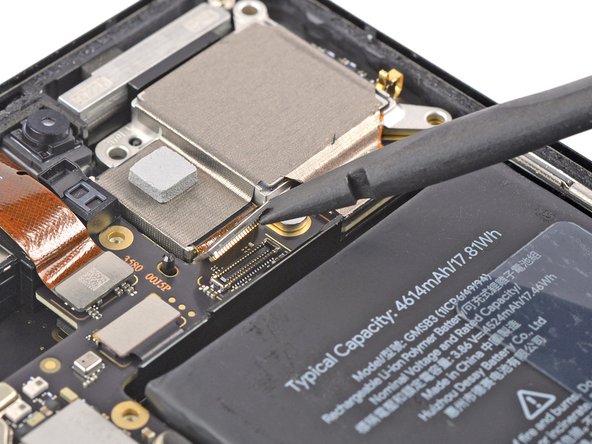
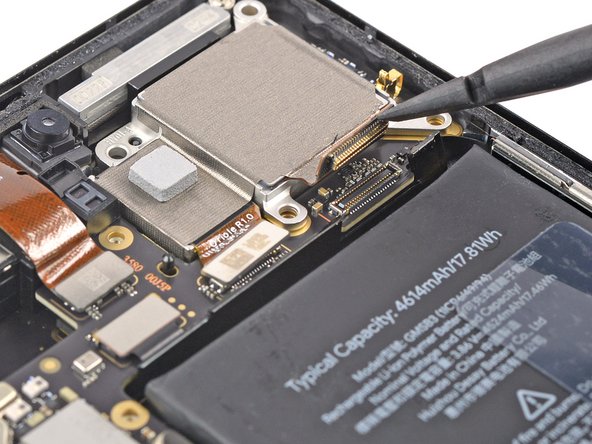
– Time to free those camera cables! Use a spudger to gently pry the connectors straight up from their sockets. Don’t worry, it’s a smooth move. If you need help, you can always schedule a repair
Tools Used
Step 24
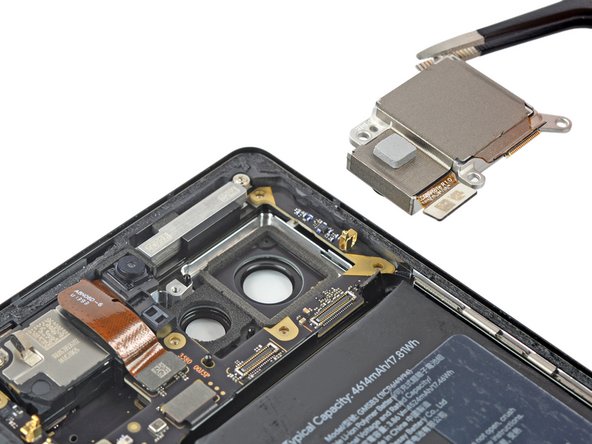
– Grab your camera assembly with your fingers or some tweezers and gently lift it out of its cozy little home. You’re free, camera!
– Take a moment to compare your shiny new camera part with the old one. You might need to move a few things over, like that cute little gray cushion. Don’t worry, it’s easy!
– If your new camera module has a plastic spacer, give it the boot before you install it. It’s not needed anymore.
– Before you pop in your new camera, give the lens a quick wipe-down. No dust bunnies allowed! Now you’re ready to rock and roll.
Tools Used
