DIY Google Pixel 7 Front Camera Replacement Guide
Duration: 45 minutes
Steps: 28 Steps
This repair guide comes straight from the awesome folks at Salvation Repair, and while Google hasn’t given it a thumbs up, we’re here to help you through it! Curious about our other guides? Check them out here.
For your safety, make sure to drain that battery to below 25% before diving into disassembly. Safety first, fun second!
Hey there, techie! This repair guide will walk you through replacing the front camera on your Google Pixel 7, like a boss! We’ve got your back with some friendly advice and a few tips along the way. First things first, keep your phone safe by letting the battery power drop below 25% before you start taking things apart. It’s all about being smart and minimizing any potential risks. Remember, a swollen battery calls for extra caution, so be careful! Just a heads-up: the Pixel 7 has lasers inside, so keep those eyes protected while you’re working on it. Don’t worry, you’ll be fine if you take it slow and steady. We’re in this together! And hey, if you need a little help getting things done, you can always schedule a repair with us. Now, let’s get those camera lenses snapping! Just a quick note: To keep your phone water-resistant, make sure you reapply the adhesive properly. If you need a hand with that, we’re here for you. And don’t forget, you’ll need some fresh adhesive for this repair. Let’s do this!


Step 2


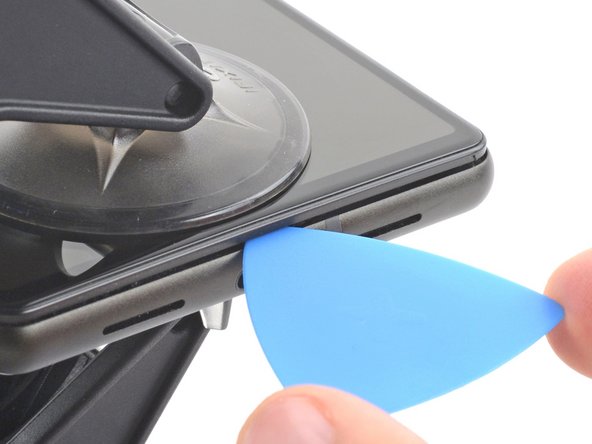
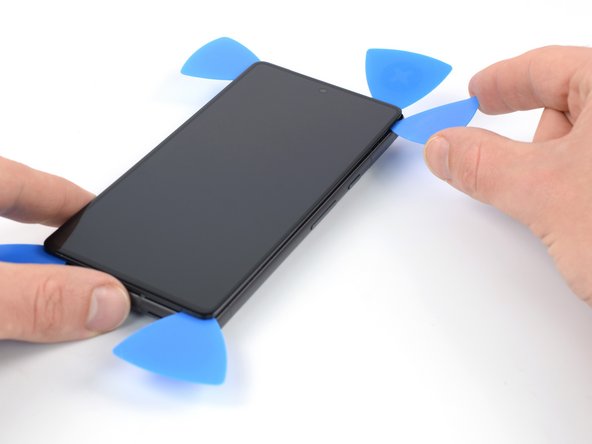
Be careful when inserting the pick – stop at about 3.5 mm to avoid damaging the internal components and interfering with the plastic clips. If you need help, you can always schedule a repair
The Google Pixel 7’s screen is securely fastened by a combination of plastic clips and adhesive, making it a bit of a challenge to remove – but don’t worry, we’ve got you covered. If you need help, you can always schedule a repair
– During the screen removal process, aim to place your opening picks carefully under the safety frame to prevent any separation from the screen. Keep an eye out for the plastic clips surrounding the screen – if your pick gets stuck, you’ve gone too deep! If you need help, you can always schedule a repair.
Step 3


The next three steps showcase the Anti-Clamp, our handy tool that makes the opening process a breeze. If you aren’t using the Anti-Clamp, just skip down three steps for another method.
If your screen is cracked, pop on some clear packing tape to help the suction cup stick.
Need the full scoop on using the Anti-Clamp? Check out this guide.
If your phone’s surface is too slick for the Anti-Clamp, use tape to give it some extra grip.
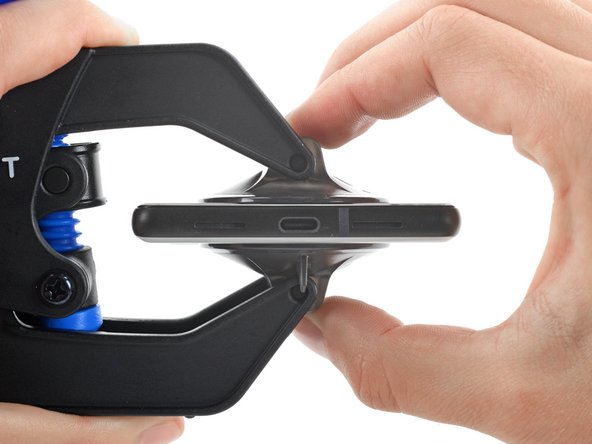
– Grab the blue handle and pull it back to release those Anti-Clamp arms.
– Gently slide those arms over the left or right edge of your phone.
– Set the suction cups close to the bottom edge of your phone—one on the front and one on the back side.
– Squeeze the cups to create some suction magic.
Step 4

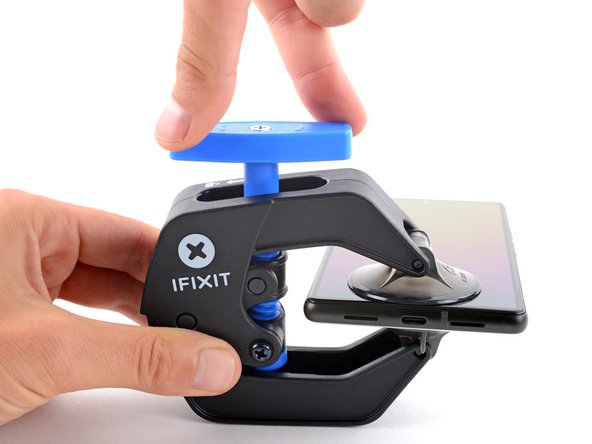

– Let’s get this show on the road! Pull the blue handle forward to lock the arms in place.
– Now, give that handle a spin! Turn it clockwise 360 degrees, or until the cups start to stretch.
– Keep those suction cups lined up like best friends! If they start to drift apart, loosen them up a little and give ’em a good realignment.
Step 5
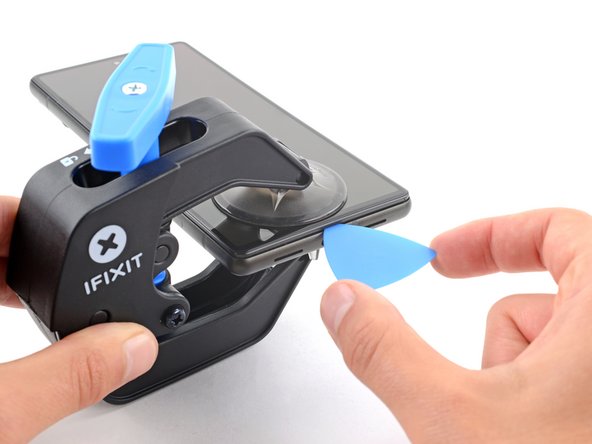

Take it easy and don’t twist more than a half turn at a time. Give it a minute to breathe between each turn. Let the Anti-Clamp and some patience do their magic for you.
Feel free to use a hair dryer or heat gun, but be careful! Too much heat can mess up your display or the internal battery, so take it easy.
If the Anti-Clamp isn’t making a good gap, just apply a bit more heat and give that handle a half turn clockwise for some extra magic.
– Warm up your iOpener and gently slide it through the arms of the Anti-Clamp.
– Bend the iOpener so it rests on the bottom edge of your phone.
– Give it a minute to let that adhesive chill out and create a little opening for you.
– Once the Anti-Clamp has opened up enough space, slide an opening pick under the screen frame.
– Feel free to skip the next two steps!


Step 6

When it’s time to heat things up, a hair dryer, heat gun, or hot plate can be your new best friend. Just remember, it’s all about finding that sweet spot – the edge should feel slightly too hot to touch, but not smoldering. If you’re unsure, don’t worry, you can always schedule a repair and let the pros at Salvation Repair guide you through it.
Step 7


If your screen is looking like a jigsaw puzzle, try sticking a layer of clear packing tape on it. This can help the suction cup stick better. If you’re feeling adventurous, you can also use some super-strong tape instead of the suction cup. And if things get really tricky, a little superglue on the suction cup might just do the trick for that broken display!
Depending on how long you’ve had your phone, getting that screen ready for repair might be a bit tricky. If you’re struggling, don’t hesitate to add a bit more heat to the bottom edge and give it another shot!
– When the screen feels warm, pop a suction handle on the bottom edge.
– Use the suction handle to lift the screen and its safety frame, making a tiny gap between the screen and the phone assembly.
– Slide an opening pick into that gap.
Tools Used

Step 8


– The screen cable is located just shy of the halfway mark along the left edge of your phone. Handle this area with care to keep that cable safe and sound.
– You’ll find a bunch of spring contacts hugging the edges of the phone. Tread lightly around these spots to prevent any bending mishaps!
Step 9


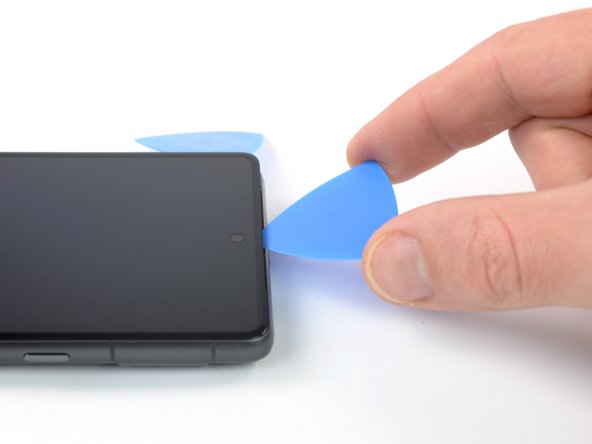
– Gently guide the opening pick down to the bottom right corner of the screen to carefully cut through that pesky adhesive.
– Keep that opening pick in place to stop the adhesive from sticking back together like it never wanted to part ways!
Step 10


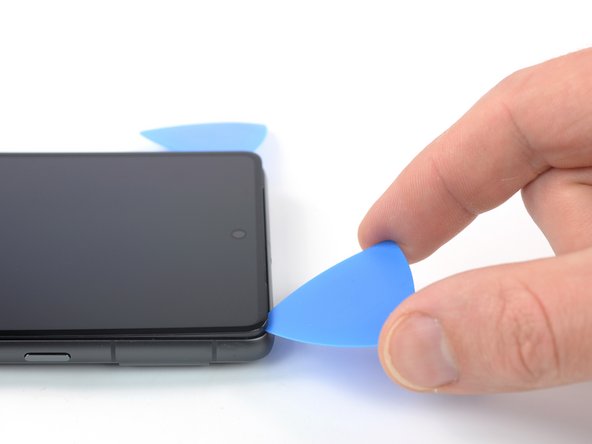
– Slip in a second opening pick at the bottom edge and gently glide it over to the bottom left corner of the screen to slice through that pesky adhesive.
– Keep that opening pick right where it is to stop the adhesive from playing hide and seek.
Step 11


– Slide a third opening pick right under the bottom left corner of your screen. We’re getting in there!
– Gently glide the opening pick along the left edge to cut through that sticky adhesive and free those pesky plastic clips.
– Keep the opening pick nestled in the top left corner to stop that adhesive from sticking back together. We’re on a roll!
Step 12

When you’re working near the front camera, just nudge the tip of the opening pick (~2.5 mm) to avoid damaging or smudging the camera.
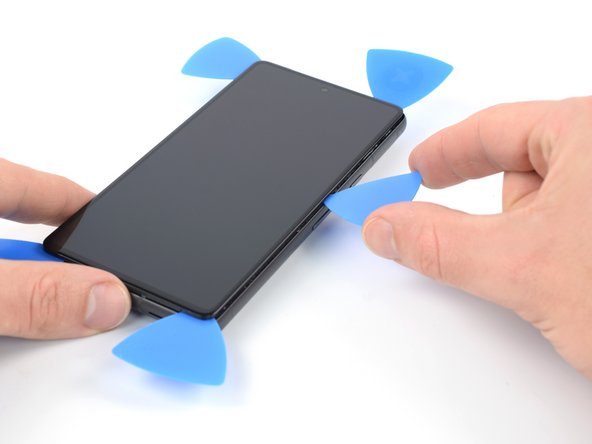
– Now it’s time to add a fourth opening pick – slide it into the top left corner of the screen and get ready to make some progress!
– Gently slide the opening pick along the top edge of the phone to carefully slice through the adhesive. You’re doing great!
– Leave that opening pick right where it is, in the top right corner, to keep the adhesive from resealing. You’re one step closer to a fully functional device! If you need help, you can always schedule a repair
Step 13

Be careful not to completely remove the display just yet – it’s still connected to the phone assembly by a flex cable, so let’s take it one step at a time. If you need help, you can always schedule a repair
– Slide in a fifth opening pick along the right edge of your phone to cut through that stubborn adhesive and pop those right plastic clips loose. You’re almost there!
Step 14


Be careful when you’re moving the screen around! You don’t want to go too far, or you might stretch out the flex cable. It’s a delicate little thing. If you need help, you can always schedule a repair.
Step 15


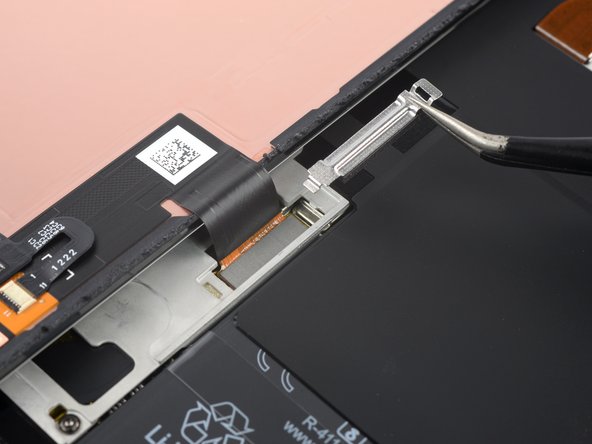
The display cable bracket is a bit stubborn, so be prepared to use some elbow grease to release it. If you need help, you can always schedule a repair
– Slide one arm of those trusty tweezers into the gap at the top of the display cable bracket.
– Gently push the bracket inwards and lift it up to set it free.
Tools Used


Step 17


– Time to get started! Use a spudger to carefully disconnect the display flex cable by gently prying the connector straight up from its socket.
– Re-attaching press connectors like this one is a breeze. Just carefully align and press down on one side until it clicks into place, then repeat on the other side. Remember, don’t press down on the middle – you want to avoid bending those pins and causing any permanent damage. If you need help, you can always schedule a repair
Tools Used

Step 18

Alright, cool beans! Once you’ve put everything back together, your screen’s gonna go through a little dance. Just don’t touch it while it’s doing its thing, or you might end up with a touch screen that’s all messed up! But hey, don’t worry, we got you covered. If you need help, you can always schedule a repair.
– Let’s get started by carefully separating the screen from the phone.
– When it’s time to put everything back together:
– Double-check that all screws are tightened and there are no loose parts – we want your device to be good as new.
– Reconnect the screen and test your phone to make sure it’s working properly. Then, power it back down and finish reassembling.
– Apply new adhesive where needed, but first clean the area with isopropyl alcohol (>90%) to ensure a strong bond.
– If you’re using custom-cut adhesives for your device, be sure to follow the guide for the best results.
– Using a pre-cut adhesive card? Follow this guide for a seamless repair experience. And if you need help, you can always schedule a repair


Step 20
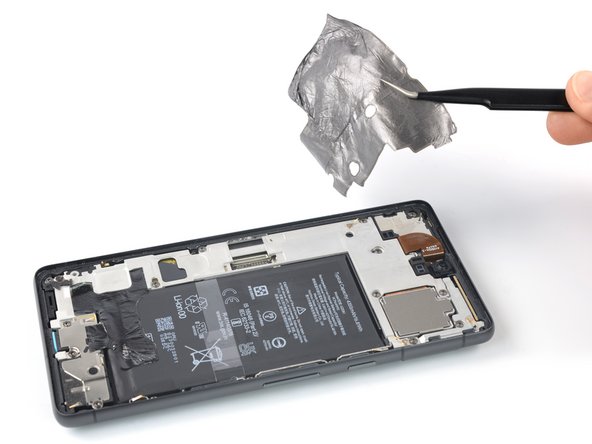

If the foil is giving you a tough time, warm up that iOpener and press it to the foil for a couple of minutes to help break its grip.
– Get ready to use your tweezers and carefully peel the upper graphite foil away from the battery and midframe. You’re doing great so far! If you need help, you can always schedule a repair.
Step 21


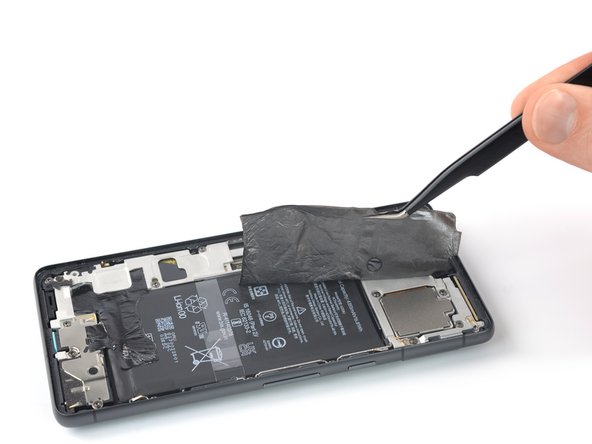
Having trouble peeling off the foil? Just heat up that iOpener and slap it on the foil for two minutes to make it easier to remove. If you need help, you can always schedule a repair
– Time to get up close and personal with your device’s internals. Use a trusty pair of tweezers to carefully pry the lower graphite foil away from the battery and midframe. If you need help, you can always schedule a repair
Step 22
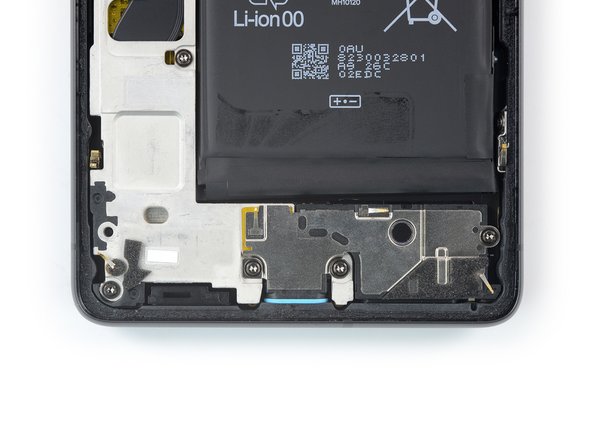

– Let’s get started by removing the three 5.1 mm-long screws that hold the loudspeaker in place – just grab your trusty Torx T3 screwdriver and you’re all set. If you need help, you can always schedule a repair
Step 23

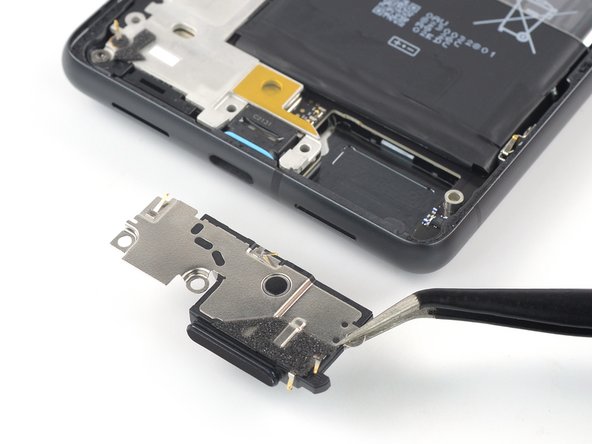
– Grab your tweezers and carefully lift the loudspeaker out of its snug little nook and remove it. If you need help, you can always schedule a repair
Tools Used
Step 24

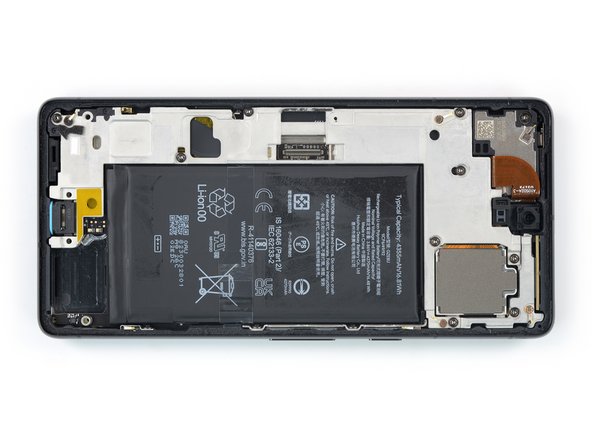
– Let’s get started! Use a Torx T3 screwdriver to remove the nine 5.1 mm-long screws that hold the midframe in place. If you need help, you can always schedule a repair
Step 25

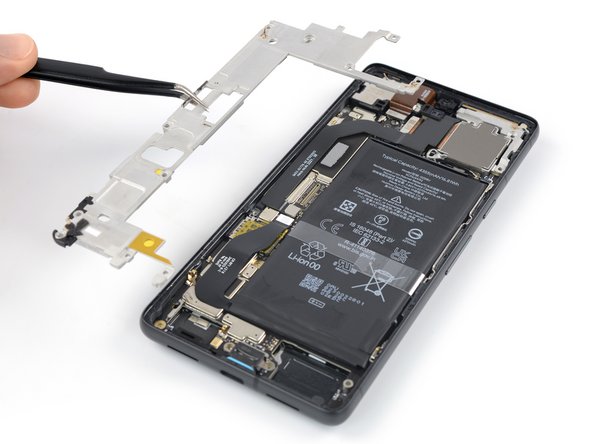

– Grab a trusty pair of tweezers and gently lift the midframe out of its cozy spot.
– As you put things back together, take a moment to inspect the thermal pad. If it’s looking worse for wear, go ahead and swap it out! Clean the area with some high-concentration (greater than 90%) isopropyl alcohol using a microfiber or lint-free cloth, then lay down a fresh thermal pad.
Tools Used


Step 27
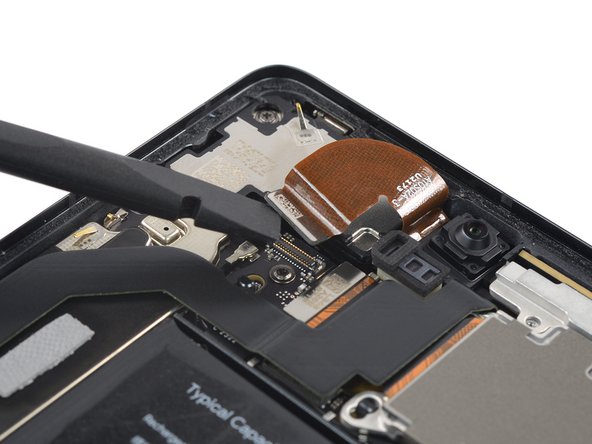

– Time to get started! Use a spudger to carefully disconnect the front facing camera cable by gently prying the connector straight up from its socket. If you need help, you can always schedule a repair
Tools Used
Step 28
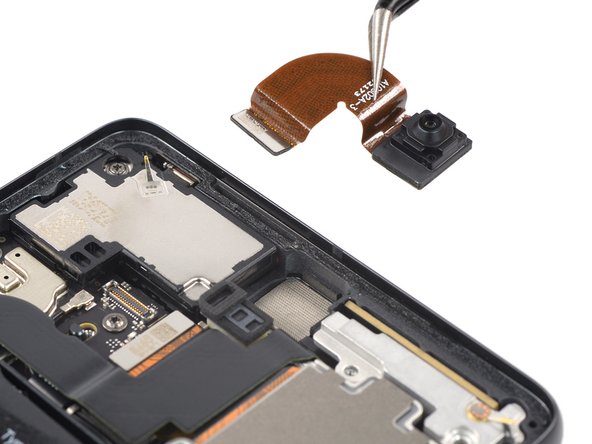

– Time to get up close and personal with that front-facing camera! Use a trusty pair of tweezers to carefully lift it out of its cozy little recess, and then you can remove it. If you need help, you can always schedule a repair
Tools Used