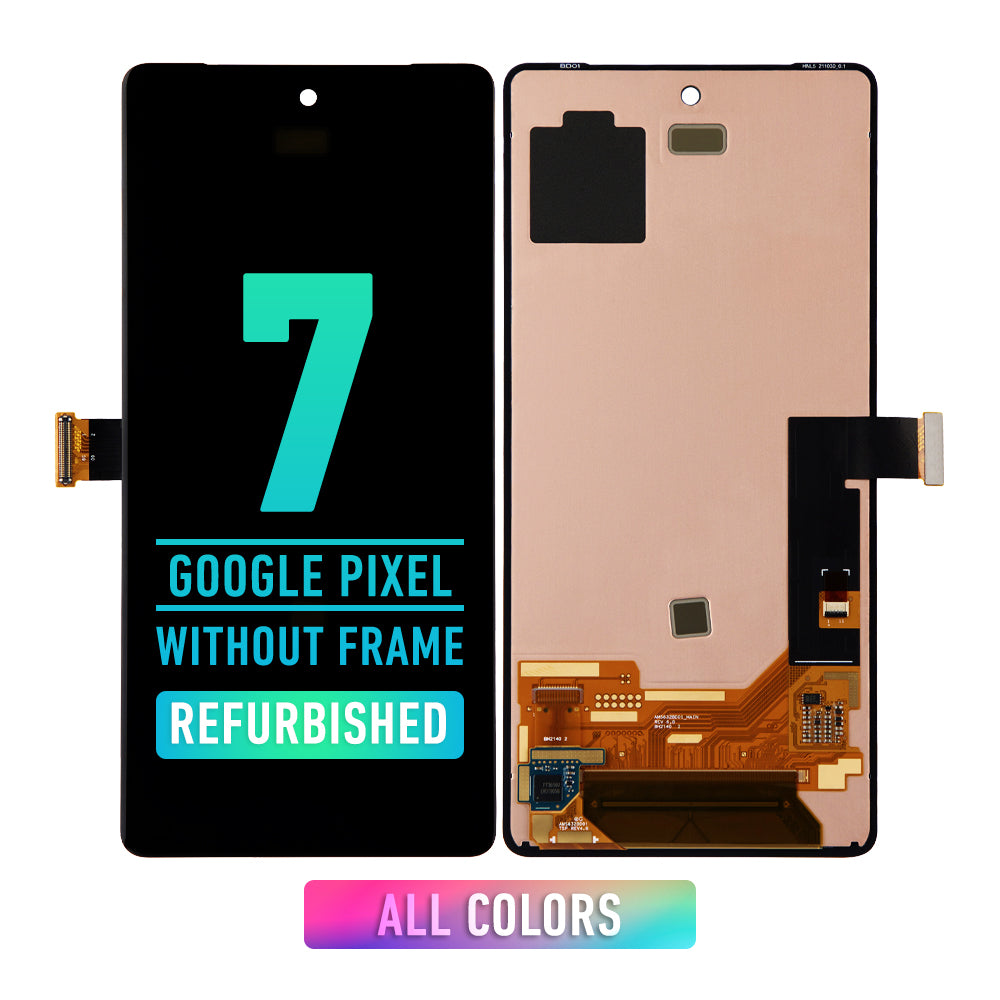
DIY Google Pixel 7 Rear Cameras Replacement Guide
Duration: 45 minutes
Steps: 36 Steps
Hey there! Just a heads up: this guide was put together by the talented team at Salvation Repair and hasn’t received Google’s stamp of approval. Want to dive deeper? Check out our amazing repair guides here.
Safety first! Make sure to drain your battery below 25% before you start taking your phone apart. Your future self will thank you!
GQML3
Get ready to breathe new life into your Google Pixel 7 by replacing one or both of its rear cameras. Before you start, make sure to discharge your battery to below 25% to minimize the risk of a fire in case it gets damaged during the repair. If your battery is swollen, be sure to take the necessary precautions. Also, keep in mind that the Pixel 7 contains class 1 lasers, so be careful when disassembling to avoid exposure to invisible infrared laser emissions. This guide is based on the GQML3 model with a 5G mmWave antenna, but you can still follow along if you have a non-mmWave model – just skip the mmWave antenna steps. To maintain water resistance after the repair, you’ll need to reapply the adhesive carefully, but note that your device’s IP rating will be lost. Don’t worry if you’re not feeling confident – if you need help, you can always schedule a repair. Let’s get started with this step-by-step guide.
Step 1


– First things first, give your phone a little break. Power it down completely and unplug any cables. No need to stress, this is just the beginning!
Step 2


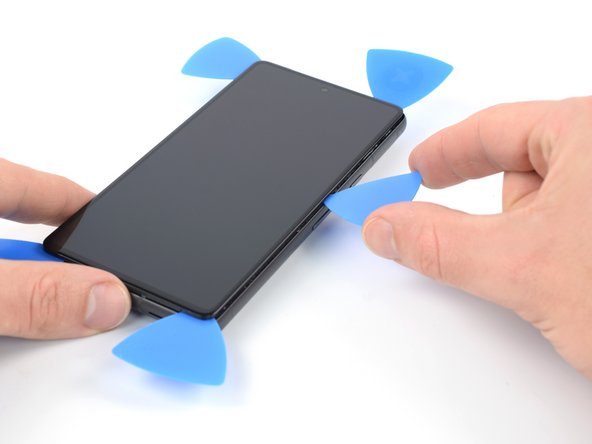
Slide the pick in no more than 3.5mm to keep the internals safe and avoid messing with the plastic clips. If you need help, you can always schedule a repair
– As you embark on the removal journey, remember to gently slide your opening picks beneath the safety frame to keep it snug against the screen.
– You’ll encounter a few plastic clips hugging the screen. If your opening pick feels like it’s hitting a wall during the removal process, just know you’ve gone a bit too deep under the screen.
Step 3


Up next, we’ve got a little gadget called the Anti-Clamp to help you tackle that opening procedure with ease! If you’ve got your own method, feel free to jump ahead three steps for an alternate approach.
Dealing with a cracked screen? No worries! Just toss a layer of clear packing tape over it. This will help the suction cup stick like it’s meant to.
Curious about how to get the best out of the Anti-Clamp? Check out our handy guide for all the details!
If your phone feels a bit slippery and the Anti-Clamp can’t get a grip, try using some tape to give it the traction it needs. You’ve got this!
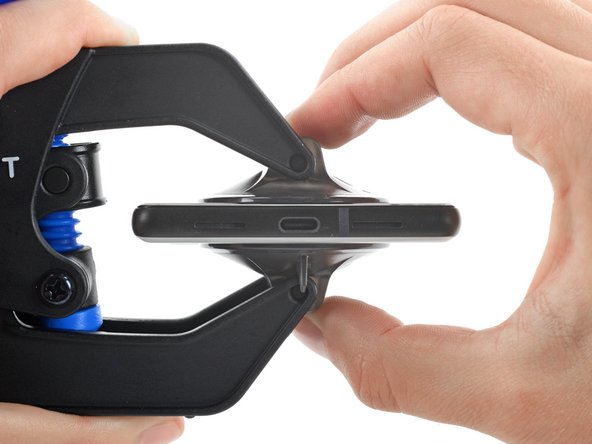
– First, let’s get started by pulling the blue handle backwards – this will unlock the Anti-Clamp’s arms and get you moving.
– Next, slide the arms over either the left or right edge of your phone, getting into position for the next step.
– Now, carefully place the suction cups near the bottom edge of the phone, one on the front and one on the back – this is where the magic happens.
– Finally, squeeze the cups together to apply suction – if you need help or it’s not going as planned, you can always schedule a repair
Step 4

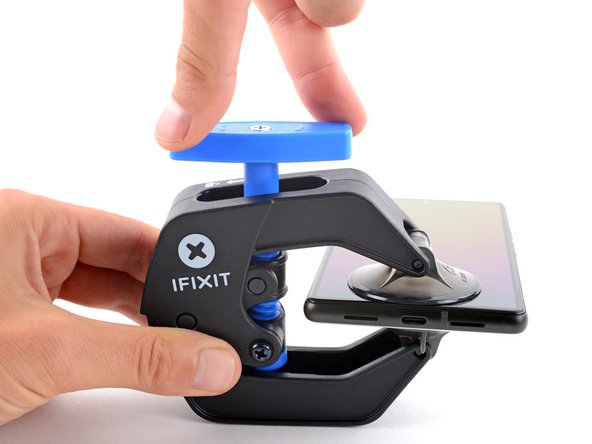

– Get started by pulling that blue handle forward – this will lock the arms in place.
– Next, turn the handle clockwise until it’s made a full 360 degrees or the cups start to stretch. Easy does it!
– Now, keep an eye on those suction cups and make sure they stay aligned. If they start to slip out of place, just loosen them a bit and realign the arms. You got this! If you need help, you can always schedule a repair
Step 5

Take it easy with that tool! Just a half turn at a time, and then chill for a minute before the next round. Let the Anti-Clamp and a little bit of patience do the heavy lifting for you.
You can use a hair dryer or heat gun—but remember, extreme heat can mess up your display and/or internal battery. So, proceed with caution!
If the Anti-Clamp doesn’t create enough of a gap, apply some more heat to the area and give the handle a clockwise twist—just half a turn.
– Warm up that iOpener and slide it through the arms of the Anti-Clamp like a pro.
– Bend the iOpener so it rests comfortably on the bottom edge of your phone.
– Take a breather for a minute to let the adhesive relax and create a little gap for you.
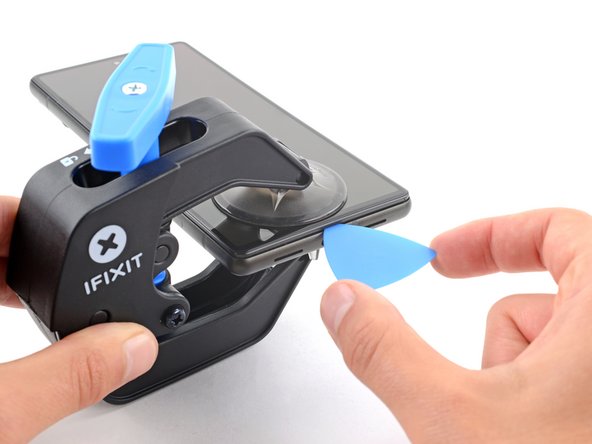
– Once the Anti-Clamp has made a nice enough gap, gently slide an opening pick under the screen frame.
– Feel free to skip the next two steps and keep moving forward!


Step 6

You can use a hair dryer, heat gun, or a hot plate, just be sure not to give your device too much of a toasty treatment. Aim for the edge to be warm but not burning—just enough to kickstart the repair party!
Step 7


If your screen is totally shattered, it might be a little tricky to get the suction cup to stick. Don’t worry, you can always cover it with some clear packing tape for extra grip. Or, if you’re feeling extra confident, try some super strong tape instead of the suction cup. If all else fails, you can always try a little superglue to hold the suction cup in place. Just make sure it’s a good bond, because we don’t want your screen taking a tumble!
Okay, now we’re getting into the nitty-gritty. Depending on how old your phone is, this step might take a little more muscle. If you’re struggling, don’t be afraid to apply a little more heat to the bottom edge and give it another go. We believe in you! And if things are just getting too complicated, you can always schedule a repair.
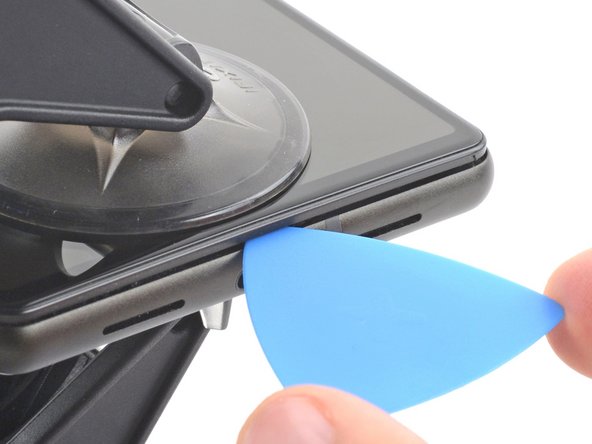
– When the screen feels nice and toasty, stick a suction handle to the bottom edge of the screen.
– Use the suction handle to gently lift the screen along with its safety frame, creating a small gap between the screen and the phone assembly.
– Slide an opening pick into that gap.
Tools Used

Step 8


– The screen cable is located just shy of halfway up the left edge of the phone. Handle with care here to avoid any accidental cable tears!
– You’ll find a bunch of spring contacts around the phone’s perimeter. Tread lightly in these spots to keep those contacts from bending!
Step 9


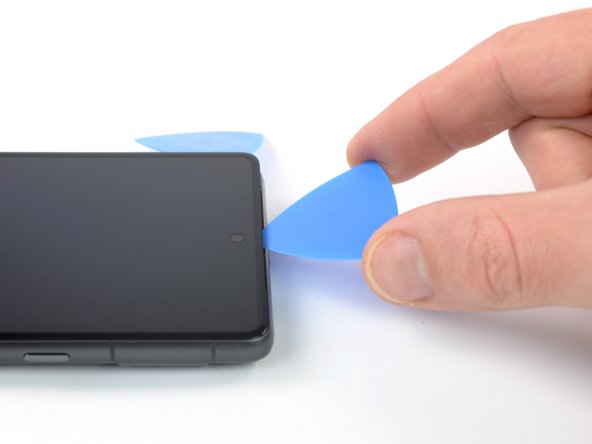
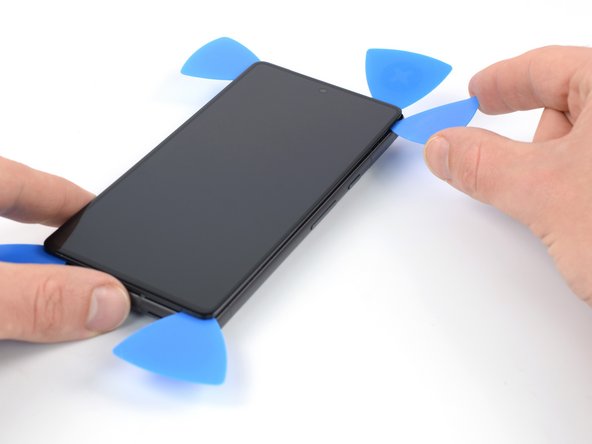
– Take that opening pick and glide it to the bottom right corner of the screen to cut through the adhesive.
– Keep the opening pick right there to stop the adhesive from sticking back together.
Step 10


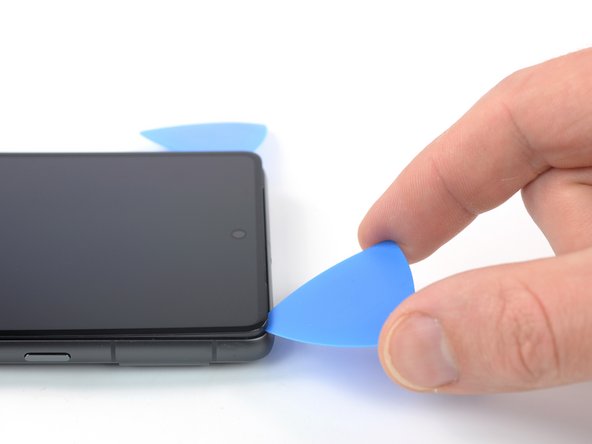
– Slide a second opening pick into the bottom edge and gently glide it toward the bottom left corner of the screen to cut through that sticky adhesive.
– Keep the opening pick in position to make sure the adhesive doesn’t decide to seal back up again.
Step 11


– Slide a third opening pick into the bottom left corner of your screen to get the party started!
– Gently glide that pick along the left edge to break free the adhesive and help those plastic clips say goodbye.
– Keep that pick in the top left corner like a trusty sidekick to stop the adhesive from trying to seal itself back up.
Step 12

When slicing near the front-facing camera, just slip the tip of the opening pick (~2.5 mm) to avoid smudging or damaging the camera. If you need help, you can always schedule a repair.
– Pop in a fourth opening pick at the top left corner of the screen.
– Gently glide that pick along the top edge of the phone to slice through the adhesive like a pro.
– Keep the opening pick snug in the top right corner to stop that pesky adhesive from sticking back together.
Step 13

Hold up! Don’t go pulling the display completely off just yet. There’s still a flex cable holding it to the phone, so let’s be careful and not yank it too hard. 😉 If you need help, you can always schedule a repair.
– Now, let’s get that right side freed up! Take your fifth opening pick and slide it along the right edge. This will help cut through any remaining glue and release those stubborn plastic clips. Don’t worry, it’s just like butter! If you need help, you can always schedule a repair
Step 14


Hey, be careful with that screen! Don’t twist it or pull it too far away from the frame. You don’t want to put a strain on that flex cable, right? If you need help, you can always schedule a repair.
Step 15


The display cable bracket is secured snugly, so don’t be shy about giving it a little extra oomph to pop it free!
– Gently slide one arm of your trusty tweezers into the gap at the top of the display cable bracket.
– Give it a little push inward and then lift it up to set it free.
Tools Used

Step 16
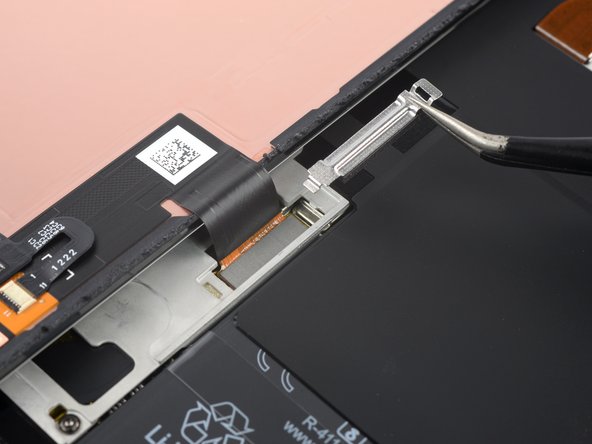

– Time to get a little handy! Use a pair of tweezers to carefully remove the display cable bracket. Gently pull it from underneath the midframe, moving it in the direction of the cameras. If you need help, you can always schedule a repair
Tools Used
Step 17


– Grab a spudger and lift that display flex cable connector straight up from its socket.
– To re-attach press connectors like this one, align it carefully and press down on one side until it clicks, then do the same on the other side. Avoid pressing down in the middle. Misalignment can bend the pins, causing permanent damage. If you need help, you can always schedule a repair
Tools Used

Step 18

After you’ve put everything back together, your screen will go through a quick calibration process when you boot up. Just let it do its thing – don’t touch the screen until it’s finished, or you might end up with some wonky touch settings. If you need help, you can always schedule a repair
– Let’s get started by carefully separating the screen from the phone.
– When it’s time to put everything back together, remember to double-check that all screws are tightened and there are no loose parts.
– Reconnect the screen and give your phone a test run to make sure it’s working smoothly. Then, power it back down and finish up the reassembly.
– If needed, apply fresh adhesive after cleaning the area with isopropyl alcohol (>90%). This will ensure a strong bond.
– If you’re using custom-cut adhesives for your device, be sure to follow the specific instructions for that process.
– And if you’re using a pre-cut adhesive card, follow the guide for that method. If you need help or have questions, you can always schedule a repair with Salvation Repair.
Step 19


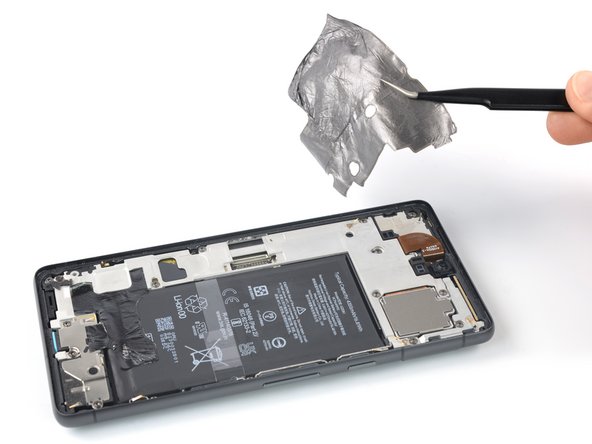
Be careful not to poke or bend the battery with your tools as you work—doing so could lead to leaks of hazardous materials or even a fire. Stay safe and keep it cool!
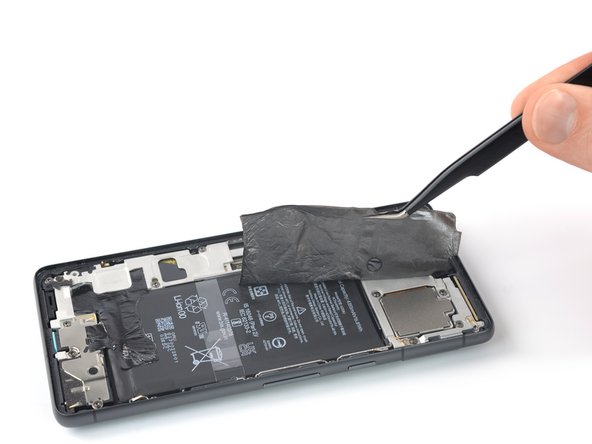
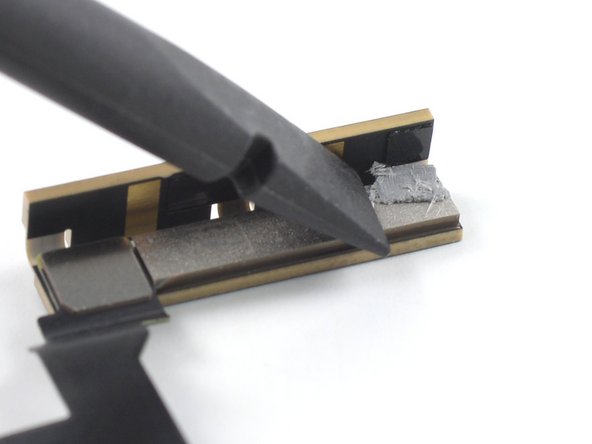
– Grab a trusty pair of tweezers and gently lift that black silicone pad right off the battery and midframe. You’ve got this!
Tools Used
Step 20

Don’t sweat it if the foil is giving you a tough time! Just heat up that iOpener for a couple of minutes and hold it against the foil. The heat will loosen up the adhesive so you can peel it off like a boss! If you’re really stuck, you can always schedule a repair.
Step 21


If you’re having a hard time peeling off the foil, don’t worry! Just apply a heated iOpener to the foil for a couple of minutes to loosen things up. The foil should come right off then! If you need help, you can always schedule a repair.
– Time to get a little delicate! Use a pair of tweezers to carefully pry the lower graphite foil off the battery and midframe. Remember to take your time and be gentle. If you need help, you can always schedule a repair
Step 22
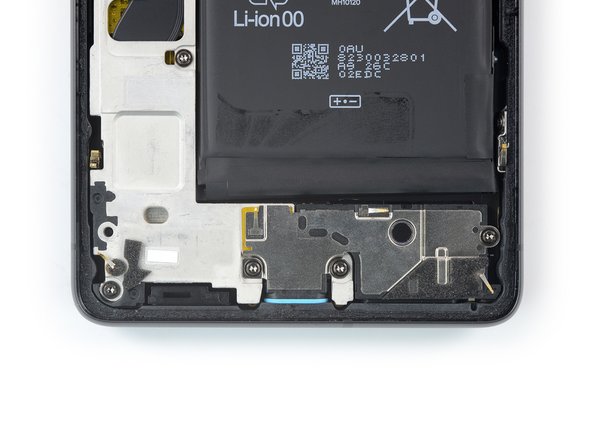

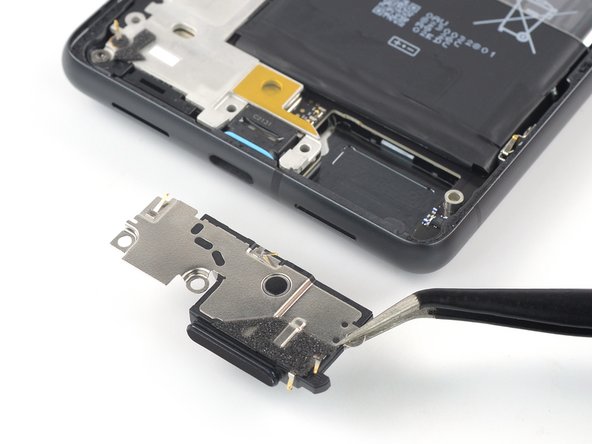
– Grab your trusty Torx T3 screwdriver and let’s get to work! Begin by unscrewing those three screws that are each 5.1 mm long, securing the loudspeaker in place. You’re doing great!

Step 24

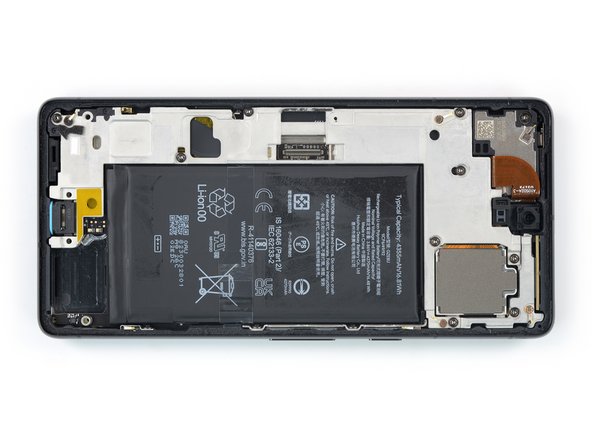
– Let’s get started by using a Torx T3 screwdriver to remove the nine 5.1 mm-long screws that hold the midframe in place. If you need help, you can always schedule a repair
Step 25

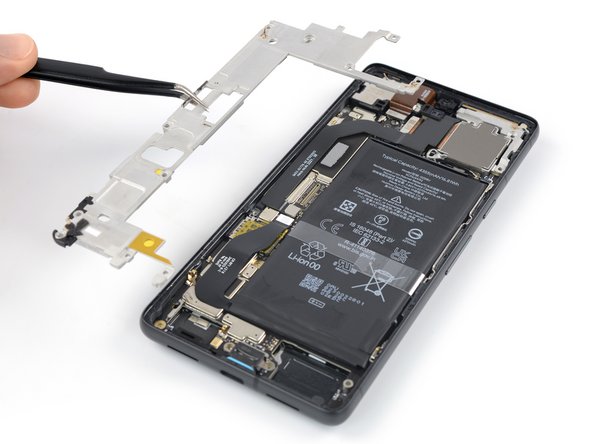

– Grab your trusty tweezers and gently lift away the midframe—it’s time to get up close and personal!
– As you put everything back together, take a moment to inspect the thermal pad. If it’s looking a bit worse for wear, don’t fret! Simply remove the old pad, give the area a good scrub with some high-concentration (over 90%) isopropyl alcohol and a microfiber or lint-free cloth, and then pop on a shiny new thermal pad.
Tools Used


Step 27

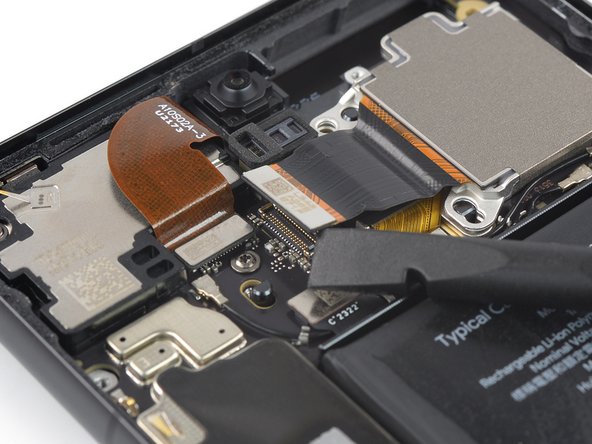
Get ready for some action! The following six steps will guide you on how to gracefully detach the mmWave antenna. Let’s do this!
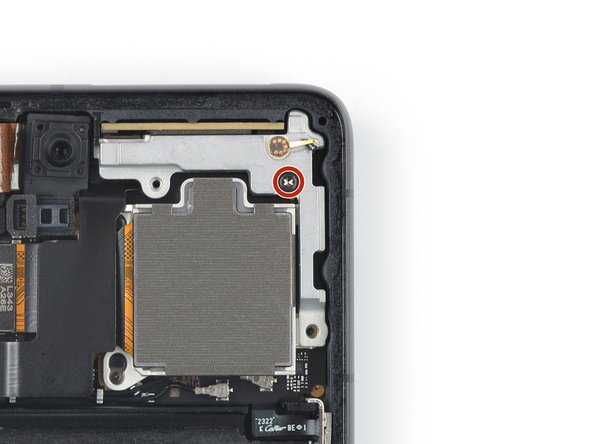
– Grab your trusty Torx T3 screwdriver and gently unscrew the 5.1 mm-long screw that’s holding on to the mmWave antenna bracket. You’re doing great!


Step 31
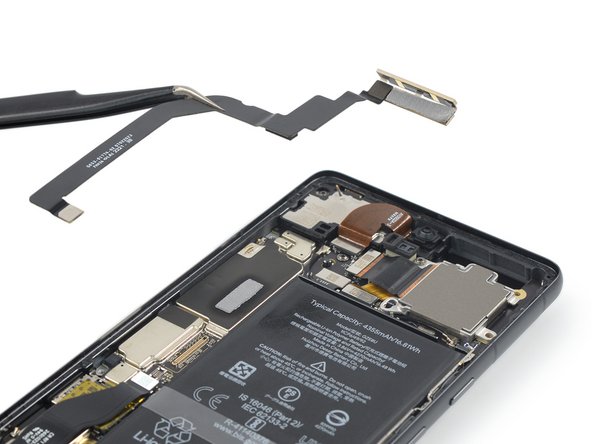

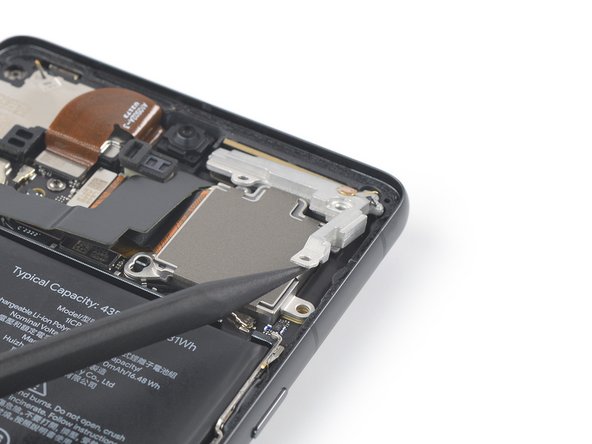
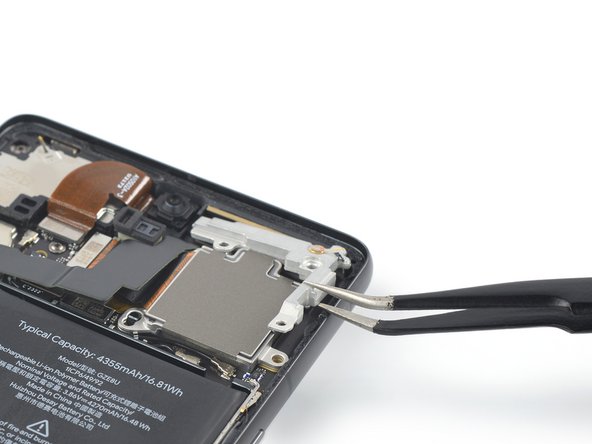
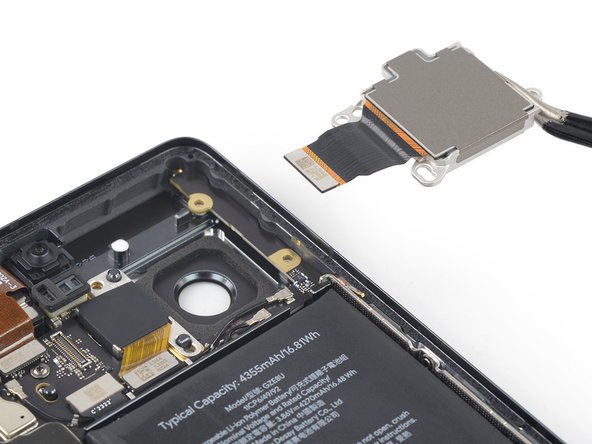
– Grab a trusty pair of tweezers and gently lift the mmWave antenna (along with its cable) out of its cozy little spot.
– Carefully detach the mmWave antenna assembly from the device.
– When putting everything back together, take a moment to check on the thermal pad’s condition. If it looks a bit worse for wear, go ahead and remove it. Clean the area with some high-concentration (over 90%) isopropyl alcohol and a soft microfiber or lint-free cloth. Then, lay down a fresh thermal pad to keep things running smoothly.
Tools Used
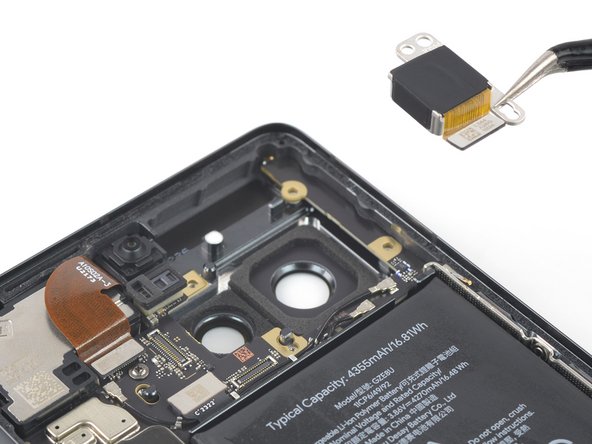
Step 32
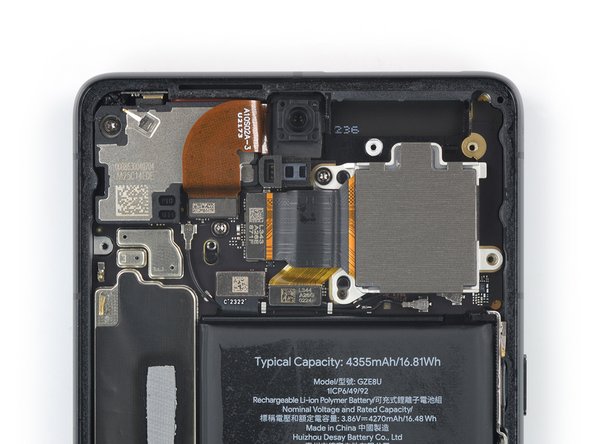

– Grab your trusty Torx T3 screwdriver and gently unscrew the 5.1 mm-long screw that’s holding those rear cameras in place. You’ve got this!


Step 35

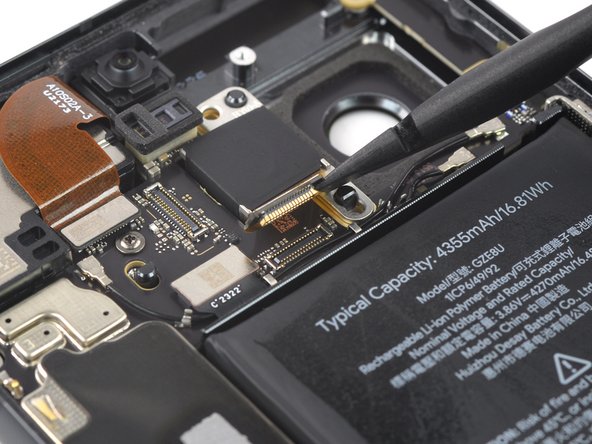
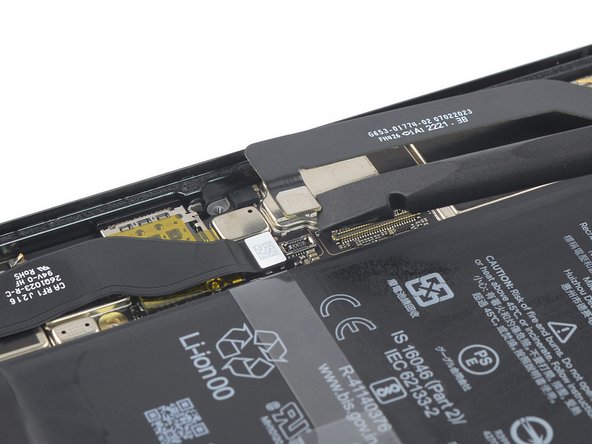
– Time to get started! Use a spudger to carefully disconnect the ultra wide-angle camera cable by gently prying the connector straight up from its socket. If you need help, you can always schedule a repair
Tools Used