DIY Google Pixel 7a Battery Replacement Guide: Step-by-Step
Duration: 45 minutes
Steps: 44 Steps
This guide is crafted by the talented folks at Salvation Repair, and it’s not officially backed by anyone else. Want to dive deeper into our repair wisdom? Check out our other guides!
Hey there! This rad repair guide is all yours to rock. Thanks to the awesome crew at Salvation Repair for leading the way. Time to pop that battery outta your Google Pixel 7a and give it a fresh start. Just remember – this one might be a bit of a tech tart and could be ready for a makeover if your phone’s showing its age by acting like a drained puddle. So, let’s get to it and make your Pixel feel like new again. If you need help, no worries – we got you covered. Just swing by schedule a repair and our friendly fixers will have you sorted in no time!


Step 2

Keep the heat to a cozy level—just enough to warm it up! Going overboard with the heat could spell trouble for the screen, back cover, or battery. Let’s keep it cool while we fix it!
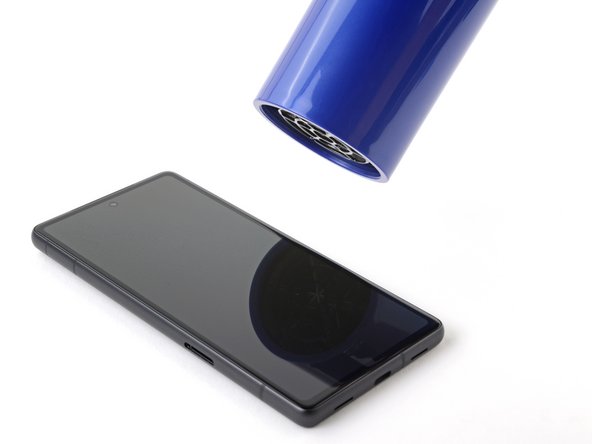
If you’re feeling a bit chilly about that rear cover, grab a hair dryer, heat gun, or hot plate to give it a warm hug. Just be careful not to go overboard – we want it cozy, not toasty!
– Let’s get cookin’ with our heated iOpener buddy! Gently place it on the bottom edge of that rear cover for about three minutes, and let the warmth do its magic! Ready to rock and roll?
Tools Used


Step 3


In the next three steps, we’ll introduce you to the Anti-Clamp, a nifty little tool we’ve crafted to make opening your device a breeze. If you’re not using the Anti-Clamp, feel free to skip ahead three steps for a different approach.
For detailed instructions on how to use the Anti-Clamp, check out this guide.
– Give the blue handle a gentle pull backward to set those Anti-Clamp arms free.
– Gently slide the arms down to the bottom edge of your phone, ensuring one suction cup catches the rear cover while the other finds its spot on the screen.
– Now, give those cups a little squeeze to lock in that suction magic!
Step 4


– Give that blue handle a gentle tug forward to secure those arms in place.
– Now, twist the handle to the right for a full 360-degree spin, or until you see those suction cups start to stretch out.
– As those cups stretch, keep an eye on their alignment. If they start to slip, no worries! Just take off the Anti-Clamp and use some tape to help them stick.
Step 5

Alright, so the heat from our trusty iOpener should be enough to get that rear cover nice and loose. But, just in case it cools down while you’re setting up the Anti-Clamp, give it a little reheat. No worries, it’s all part of the process!
If the adhesive is feeling stubborn, just twist the handle clockwise one quarter turn and give it a minute. And if things start to cool down, a quick blast with a hair dryer or heat gun will get things back on track. Keep on keepin’ on!
– Grab a sturdy object and slide it under your phone, making sure it sits nice and level between the arms of the Anti-Clamp.
– Give it a minute, or until you see that adhesive loosen up, so a little gap appears along the bottom edge of your phone.
– Now, take an opening pick and gently slide it into that gap between the rear cover and the frame. You’re doing great!
– Finally, pull those suction cups off your phone using their handy pull-tabs and set the Anti-Clamp aside for a moment.
Tools Used
Step 6


If you’ve already popped in an opening pick with the Anti-Clamp, feel free to breeze past this step.
– First up, grab a suction handle and stick it right in the center of the bottom edge of that rear cover—let’s get pulling!
– Now, give that suction handle a strong, steady pull. Keep it consistent until you see a little gap forming between the rear cover and the frame. You’re doing great!
– Time to introduce the opening pick! Slide the tip right into that gap you’ve just created.
– Once you’ve made your move with the pick, feel free to let go of the suction handle. You’re on a roll!
Tools Used


Step 8


From this point forward, be sure to keep your opening picks at an angle, with the blade facing upwards, and continue to slice through until the rear cover is completely removed.
– Tilt that opening pick up high so its tip is looking away from the frame like it’s on a mission.
– Gently glide your pick down to the bottom left corner of the rear cover, like a smooth operator.
– Keep that pick right where it is to stop the adhesive from getting all clingy again.
Step 9


– Slide your trusty second opening pick into the bottom left corner.
– Gently glide the pick all the way to the bottom right corner of the rear cover to break that stubborn edge adhesive loose.
– Keep that pick in its cozy spot to stop that adhesive from making friends again.
Step 10

If you’re feeling a bit fancy, grab a hair dryer, heat gun, or hot plate to gently warm up that rear cover. Just be sure not to turn your phone into a sauna – we want it warm, not toasty!
– Time to get this repair started! Apply a heated iOpener to the right edge of the rear cover for about two minutes, and let the heat do its magic.
Tools Used
Step 11


Hey there! Just a friendly reminder: keep your pick no deeper than 5 mm along the right edge to give that wireless charging coil some love and avoid any accidental damage.
To get a better visual, measure 5 mm from the tip of your pick and mark it with a permanent marker – it’s an easy way to keep track of your progress!
– Pop a third opening pick right into the bottom right corner of that rear cover.
– Gently glide your pick up the right edge of the rear cover to break free the adhesive. Stop when you hit the camera bar!
– Keep that pick snugly in place to stop the adhesive from rejoining the party.
Step 12

To loosen things up, try warming the rear cover with a hair dryer, heat gun, or hot plate. Just be careful not to overheat your phone – we want to fix it, not fry it! If you’re feeling stuck, remember that Salvation Repair is here to help.
– Time to get this repair started! Apply a heated iOpener to the left edge of the rear cover for about two minutes, and let the heat do its magic.
Tools Used
Step 13


Be careful not to push your pick deeper than 3 mm along the left edge! We want to keep that wireless charging coil and rear cover foam pad safe and sound. You’ve got this!
For a visual reference, you can mark your pick with a permanent marker at 3 mm from the tip.
– Pop in a fourth opening pick at the bottom left corner of the rear cover like a pro!
– Gently slide that pick up the left edge of the rear cover to break free the adhesive. Stop right when you hit the camera bar.
– Keep this pick snug in place to stop the adhesive from playing tricks and resealing.
Step 14

If you’re feeling a bit crafty, grab a hair dryer, heat gun, or hot plate to give that rear cover a gentle warm-up. Just keep an eye on it—nobody wants a phone that’s too hot to handle!
– Let’s get this party started! Warm up the top edge of the rear cover with a heated iOpener for two minutes.
Tools Used
Step 15


You’ll notice a sturdy strip of adhesive hanging out by the antenna housing. No worries, we got this!
If the pick isn’t sliding in, try wiggling it into the tiny gap near the camera bar from the last pick. You’ve got this!
– Now it’s time to add a fifth opening pick to the top left corner of the rear cover. Carefully insert it between 8mm and 10mm deep – that’s about halfway between the tip of the pick and the logo. You’re making great progress!
– Next, gently slide your pick halfway across the top edge. This will help loosen the antenna bracket adhesive. Stop when you reach the middle of the top edge – you’re doing fantastic!
Step 16


Keep your pick to a maximum of 3 mm deep – we want to be gentle with that antenna housing graphite tape!
– Pull your pick back out to about 3mm.
– Scoot your pick over to the top right corner to slice through the remaining top edge adhesive.
Step 17


Keep your picks angled upwards and away from the frame during this step for a smooth sailing repair experience!
– Gently slide the top edge pick so its flat side nestles under the rear cover.
– Carefully position the picks on either side of the camera bar, ensuring their flat edges are tucked beneath it.
Step 18


Take it easy! Avoid bending that rear cover like it’s a pretzel. Just give it a little nudge to break the adhesive seal around the camera bar. If that sticky stuff is putting up a fight, gently wiggle the rear cover from side to side to help loosen it up.
A generous strip of adhesive is holding that rear cover in place just below the camera bar. Don’t worry, you’re getting closer to revealing the inner workings!
– Slide those opening picks right under the camera bar and gently nudge the top edge of the rear cover away from the frame.
– Keep prying back and forth until the camera bar starts to loosen up. You’ve got this!
Step 19


– Gently slide the opening picks along the long edges of the rear cover, starting from the camera bar, to carefully break any adhesive that might have stuck it back together.
Step 20


– First things first, let’s pop off that rear cover!
– As you start putting everything back together:
– Why not give your phone a little test run before sealing it up? Power it on and make sure it’s working like a champ. Once you’ve checked everything, power it back down to continue the reassembly.
– Now, follow this guide to add some fresh adhesive and get that rear cover back in place!
Step 21


Just warm up the flash until it’s cozy to the touch! Remember, the battery and nearby components are a bit sensitive to heat, so keep it chill.
If you’re feeling a bit chilly about that flash, grab a hair dryer or heat gun and give it a gentle warm-up. You’ll have it cozy in no time!
– Warm up that iOpener and give the flash unit a cozy minute of heat to loosen up the adhesive that’s holding it tight against the logic board cover. You’re doing great!
Tools Used
Step 22


Handle with care – the flash cable is super fragile, so be gentle to avoid any slips or tears!
– Gently slide your pick beneath the right edge of the flash to gently break the adhesive that’s holding it to the cover. You’re doing great!
Step 23


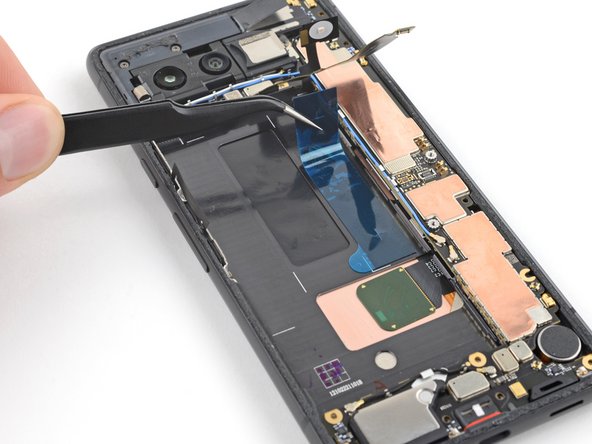
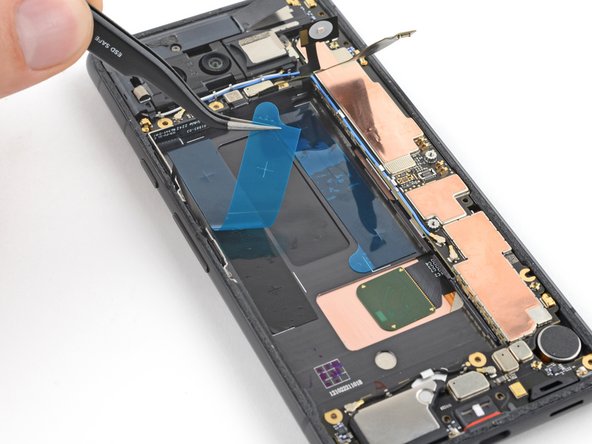
– If that copper tape took a little trip with the flash, don’t worry! Just use some tweezers or your fingers to gently remove any black foam residue hanging out on the logic board cover.
Tools Used

Step 24


Hey there, be super careful when using your tool around the battery. You don’t wanna give it a little bump, right?
Alright, if that copper tape stuck to the logic board cover, and you’ve got a new one ready to go, let’s ditch that old tape.
– Let’s get this repair started! Apply some heat to the underside of the flash with a heated iOpener for about a minute.
– Now it’s time to get a little delicate – hold the neck of the flash cable steady and use your trusty tweezers to carefully peel and remove the copper tape from the flash unit.
Step 25


While the Pixel 7a uses Torx Plus screws, your standard Torx drivers might still do the trick. Try using the T2 bit to remove 1IP Torx Plus screws and the T3 Torx bit for 3IP Torx Plus screws. Just remember to apply some steady, downward pressure to avoid stripping those screws. If you need help, you can always schedule a repair
– Grab your trusty 3IP Torx Plus driver and get ready to tackle those thirteen 4.3 mm screws holding the logic board cover in place. You’ve got this!
– Now, switch it up with a 1IP Torx Plus driver to take out the 1.5 mm screw that’s keeping the right edge of the cover snug. Easy peasy!
Step 26


– Slide an opening pick into the bottom right corner of the logic board cover and the frame. You’re doing great!
– Gently pry upwards to pop the clip that’s holding the cover in place. Keep it up!
Step 27


– Time to give that logic board cover a little lift! Gently raise the top edge and slide that flash unit right through its opening. It’s like a little dance, really.
– Now, when you’re putting everything back together, just remember to do the flash unit shuffle again – thread it through its opening as you carefully lower the logic board back into place. Easy peasy!
Step 28


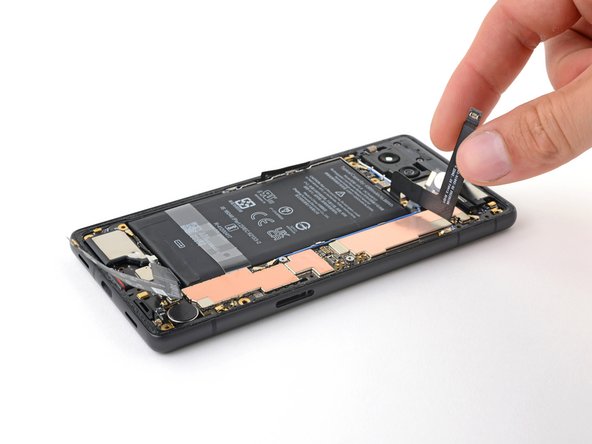
– Alright, time to give that wireless charging assembly the boot! Gently remove it, and we’ll be cruising right along.
Step 29

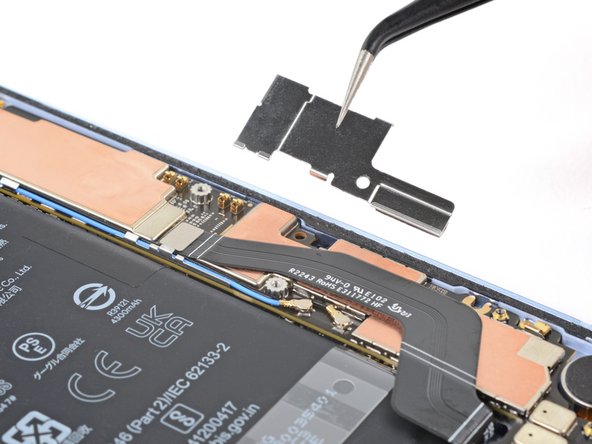
– Grab your trusty 1IP Torx Plus driver and unscrew that 1.5 mm screw holding the connector cover in place. You’ve got this!
– With a gentle touch, use tweezers or your fingers to lift off the cover. Easy peasy!
– When it’s time to put everything back together, remember to tuck the upper left corner of the cover under the hook on the logic board before securing it with its screw. You’re almost there!
Tools Used
Step 30

The Verizon model (G0DZQ) Pixel 7a comes with a special cable and connector for the 5G mmWave antenna. Don’t worry, aside from that, the rest of this guide works for all phone types. You’ve got this!
Step 31


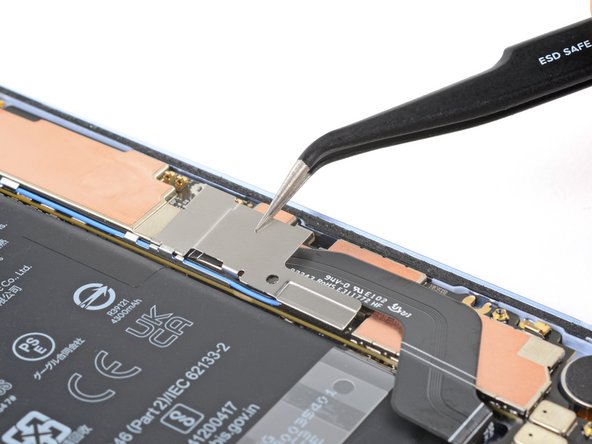
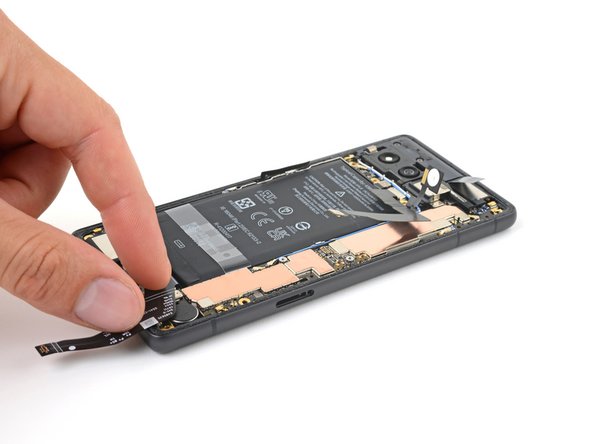
To reconnect a press connector, simply line it up with the socket and give a gentle push on one side until you hear that satisfying click! Then, do the same on the other side. It may take a couple of tries to get it just right, but don’t worry, you’ve got this!
– Let’s get this party started! First, find your battery press connector’s tiny friend – that’s the spudger. Once you’ve got it, gently slide the flat end under the top edge of the battery press connector. Now, it’s time for the connector and the spudger to go their separate ways! Pry them straight up like you’re in a sticky situation (but you’re hands-free, and that’s the magic of repair!). Keep up the great work, you’re doing an awesome job!
Tools Used


Step 35

Hey, be cool with that heat! Don’t get too friendly with the screen. It’s a little sensitive to heat. Keep the heat moving around, ya know? Don’t just hang out in one spot.
– First, let’s talk about the battery – it’s held in place by two strips of adhesive that secure the upper half. You’ll find the battery jacket just below these strips.
– Now, flip your phone over and get ready to warm things up. Use a hair dryer, heat gun, or hot plate to evenly heat the screen until the entire frame is warm to the touch. This will help loosen things up and make the repair process smoother.
Tools Used
Step 36

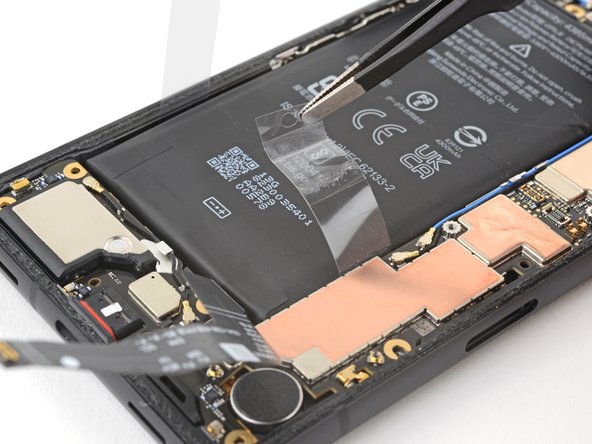
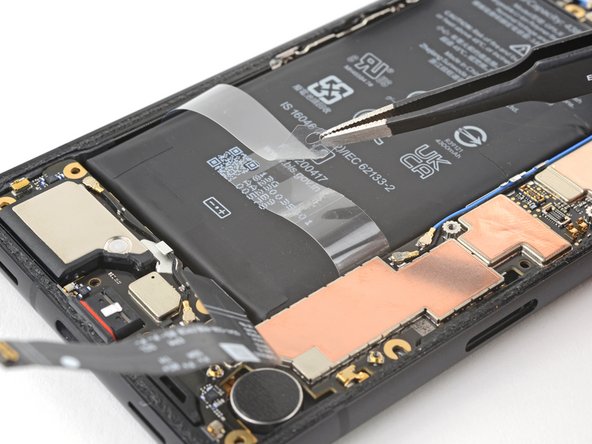
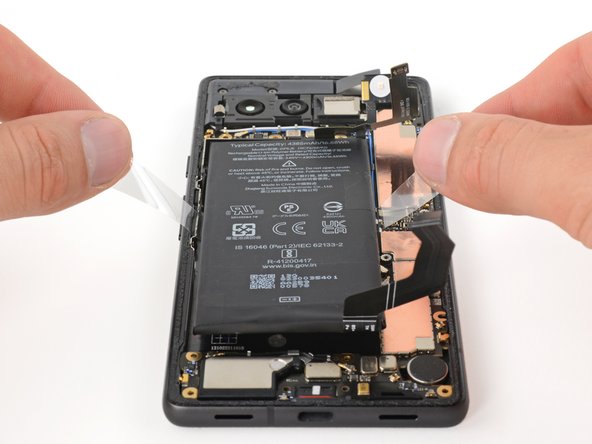
You might find yourself doing a little dance with those sawing motions before the adhesive finally decides to budge. If the jacket tears, no worries! Just hop down two steps for a different approach.
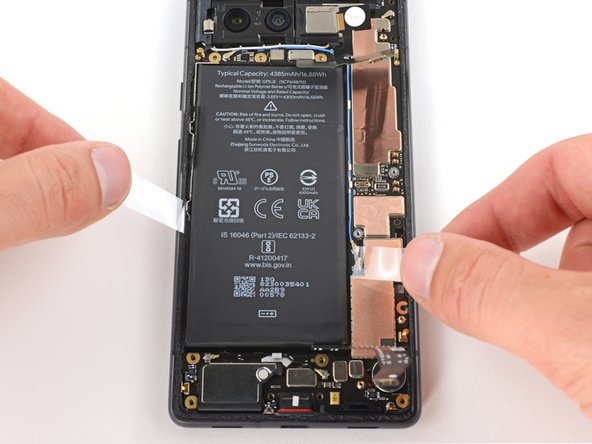
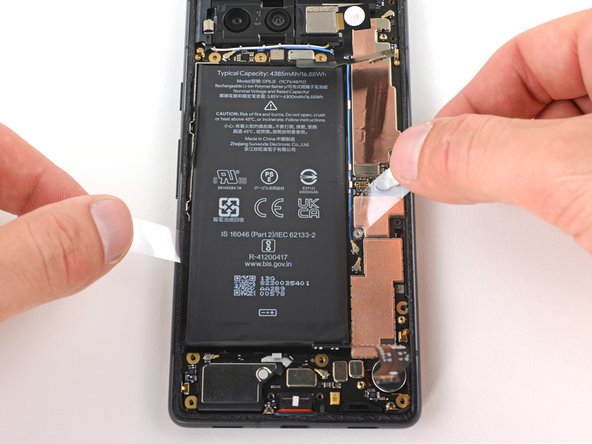
– Alrighty, let’s get into those battery jacket cutting vibes, folks! Gently grip both sides of that battery jacket, just like it’s a fun sideways dance. Now, super slowly and gently, slide each end of the jacket towards the very top of that battery, imagine you’re painting a masterpiece with slight sawing motions. Be patient, and stop when the jacket reaches the halfway point. And hey, if you need a little extra hand, you can always schedule a repair!
Step 37

If your battery is still being stubborn, try applying a little more heat. If you’re ready to give up and move on, feel free to skip to the next step for an alternative method. No judgment here!
Step 38

Okay, so the jacket trick didn’t work? No worries! Let’s try a different approach. We’ve got three more steps to get that battery out.
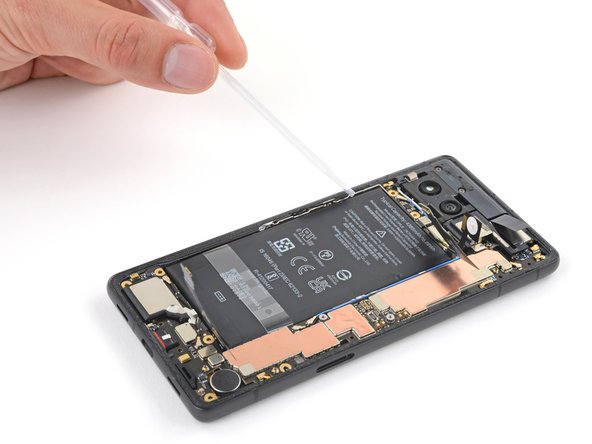
– Grab a pipette or syringe and fill it up with some powerful isopropyl alcohol (we’re talking over 90% here!).
– Now, let’s get to work! Apply a couple of drops of that isopropyl alcohol right between the left edge of the battery and the frame.
– Give it a minute to work its magic and soften that adhesive!
Step 39


– Gently slide the side button tab to the left, away from the battery. You’re doing great!
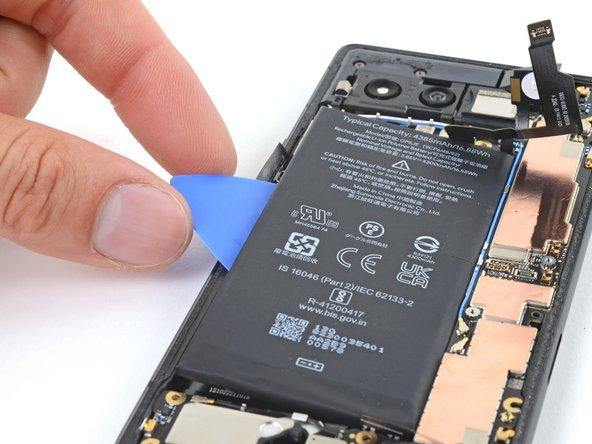
– Now, take the flat end of your trusty opening pick and carefully wedge it between the left edge of the battery and the frame. Keep it steady!
Step 40

Handle the battery with care—nobody wants a squished or poked battery! A battery in distress can be a safety concern, so let’s keep it happy and intact.
If after a minute you’re still not feeling that adhesive loosen up, just add a couple more drops of isopropyl alcohol and give it another go!
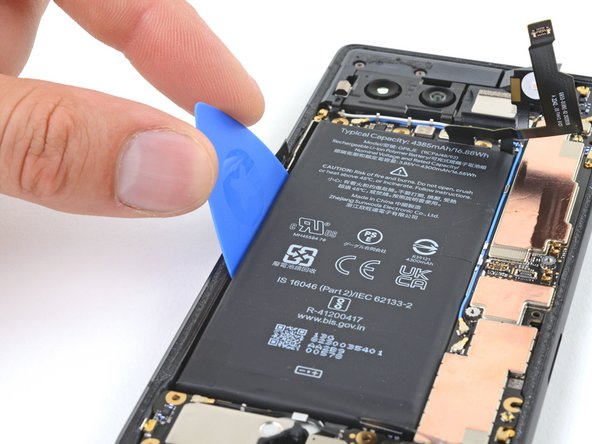
– Gently bend that opening pick away from the battery, giving it a solid push for about a minute to get things started.
– Once you see that adhesive starting to loosen up, slide your pick further under the battery and keep prying it upward like a pro!

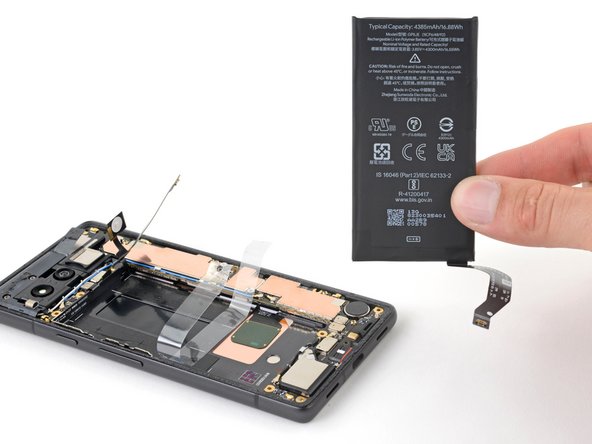
Step 42

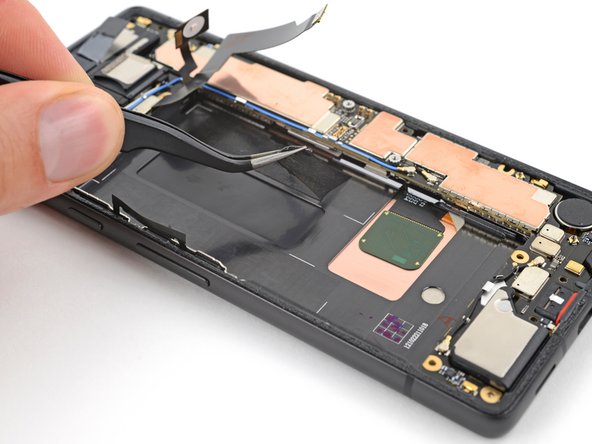

– Grab that trusty spudger and gently scrape the edge of the old adhesive, rolling it into a nice little ball that you can easily grab with your tweezers.
– Now, with either your tweezers or your fingers, peel away the old adhesive from the frame like a pro!
– If you spot any leftover residue, just dab a few drops of super-concentrated isopropyl alcohol (over 90%) onto the frame and give it a good wipe with a lint-free or microfiber cloth.
Step 43

– Ready to stick some adhesive? Let’s do this! Peel those two strips of battery adhesive off their big ol’ liners.
– Time to get sticky! Position the short strip of adhesive on the right side of the battery recess. Use those white lines on the frame as your guide.
– Now for the long strip. Get it stuck on the left side of the recess. You’ve got this!


