DIY Google Pixel 9 Autofocus Replacement Guide: Step-by-Step
Duration: 45 minutes
Steps: 21 Steps
This repair guide comes straight from the brilliant minds at Salvation Repair. While it’s not officially backed by any tech giants, it’s packed with tips to help you on your repair journey! Dive in and enjoy the adventure of bringing your device back to life! If you need help, you can always schedule a repair.
Get ready to dive into some fun! This guide will help you swap out the LDAF (laser detect auto focus) sensor and tethered flash cable as a single unit in your Google Pixel 9. Make sure you have some replacement back glass and adhesive for the autofocus sensor handy. Just a heads-up: any repair might affect your phone’s water resistance. How well you seal that rear cover adhesive will determine if your phone stays splash-proof. If you need help, you can always schedule a repair.
Step 1


– Let’s give your phone a little break! Unplug all those cables.
– Time for a power nap! Make sure your phone is completely off.
Oh no! Those scratches on your Pixel screen are glowing up the place? Not to worry, fam! Before we get started on this repair mission, it’s a good idea to let that battery tank run as low as 25% or less. You don’t want any unexpected juice surges causing a wild lithium-ion battery party during your repair sesh! If you’re feeling totally stuck, just remember, we’ve got your back. No shame in the repair assistance game. Just click schedule a repair and we’ll help you out!
Simultaneously press the power button and the volume up button to reveal the shutdown menu.
Step 2

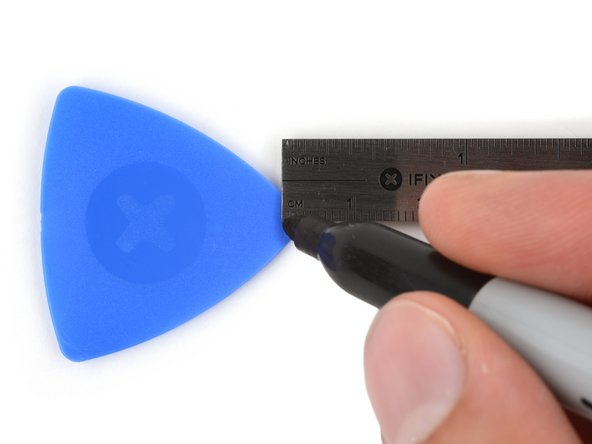

No need to get all fuzzy about this – just insert your tool less than 3 mm to keep our superhero gizmos safe and sound!
If your screen or back glass is a bit on the cracked side, don’t worry if a suction cup doesn’t stick like it should—it’s just a dramatic pause in your repair journey!
For a smoother experience, grab a permanent marker and measure out 3 mm from the tip of your opening pick. Mark it like it’s a treasure map!
– The adhesive is doing its job by holding the back glass snugly to the frame.
– Grab some packing tape and lay it down in overlapping strips over the glass. This will keep you safe and make taking things apart a breeze! Just make sure there’s a nice, flat spot near the bottom edge that’s big enough for your suction cup to stick.
Step 3
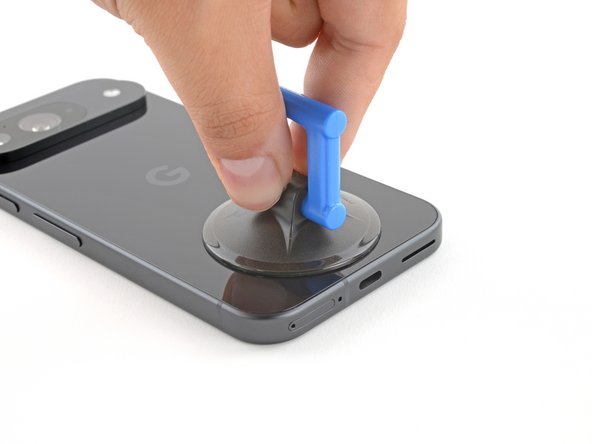

– Stick a suction handle right at the bottom edge of the back glass, as close to the edge as you can get it.
– Press down firmly to attach the suction cup.
Tools Used

Step 4
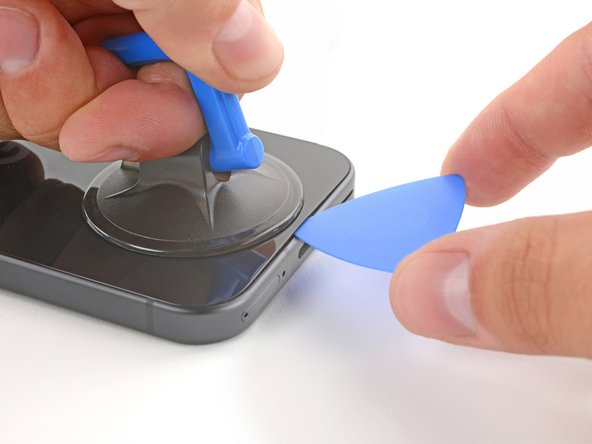

– Alright, techies! Get ready for some fun. Give that back glass a gentle tug with some major muscle power and create a lil’ space for our hero – the opening pick. So, pop that pick right in there and show it the way to go!
Tools Used
Step 5
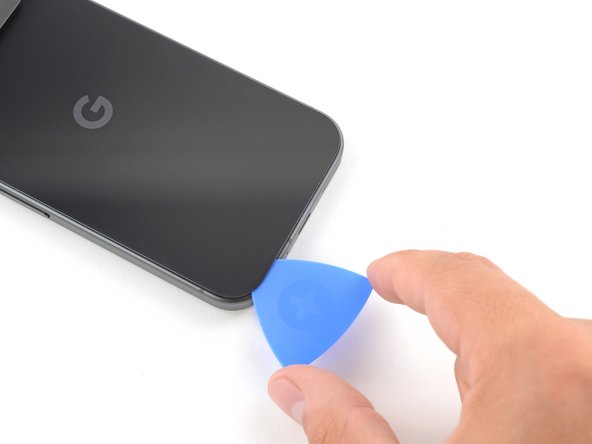

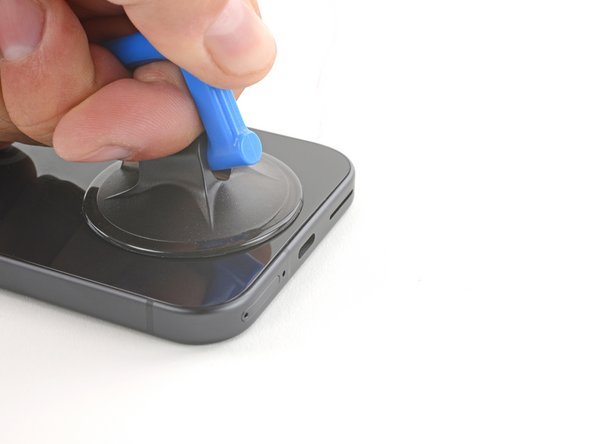
Hey there, champ! Just a friendly reminder to be gentle when inserting that opening pick. Don’t go digging too deep – keep it under 3mm, alright? You got this!
– Wiggle that opening pick back and forth along the bottom edge to loosen the adhesive holding it in place. You got this!
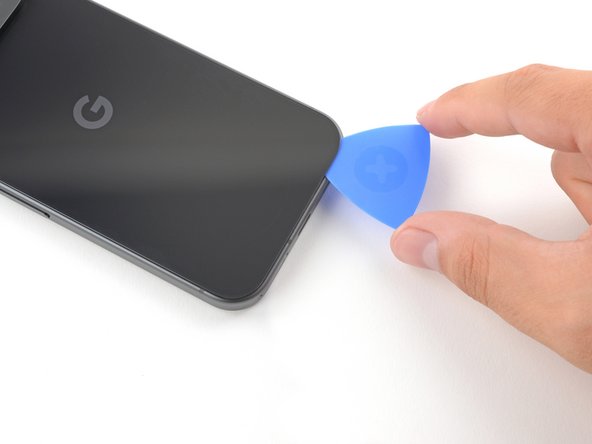
Step 6


– Alright, grab that opening pick and slide it around the edge of the phone. Think of it like a little dance around the phone, helping it to break free from the glue holding it together. You got this!
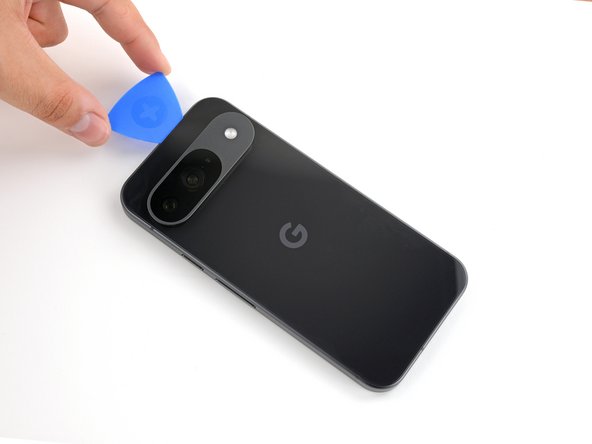
Step 7
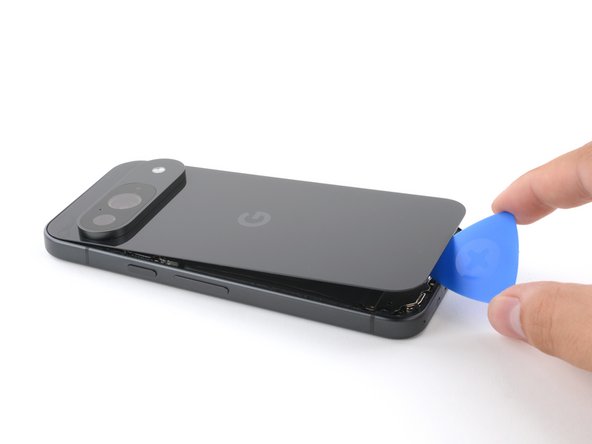


– Now that you’ve got most of the adhesive out of the way, give that opening pick a gentle twist at the bottom edge. This will help lift the back glass just enough so you can get a good grip with your fingers.
– Keep using the opening pick to tackle any stubborn bits of adhesive that are still holding the back glass in place.
Step 8

– Time to say goodbye to that back glass! Carefully remove it.
– As you get ready to put everything back together:
– Why not give your phone a little test run before sealing it up? Power it on and make sure everything’s working like a charm. Just remember to power it down again before continuing the reassembly.
– Follow along with this guide to apply fresh adhesive and reattach your back glass. You’ve got this!
Step 9

As you dive into this repair, be sure to keep a close eye on every screw—it’s like a little treasure hunt! Make sure each one returns to its original home.
The Pixel 9 may favor Torx Plus screws, but don’t sweat it—standard Torx bits are your trusty sidekicks here too. Just remember to apply steady, downward pressure to keep things from getting stripped!
– Let’s give this screw a twirl! Grab your 3IP Torx Plus driver and gently remove the single 5.4 mm‑long screw holding down the upper board cover. Unleash your inner tool master while you work!


Step 11

– Grab your trusty 3IP Torx driver and let’s tackle those five screws holding down the midframe and wireless charging coil:
– You’ll find four screws measuring 5.4 mm in length, ready to be unscrewed.
– And don’t forget the one little 2.2 mm-long screw, just waiting for its turn!

Step 13

– Gently take off the midframe, then carefully lift out the wireless charging coil and the NFC assembly. You’re doing great!


Step 15

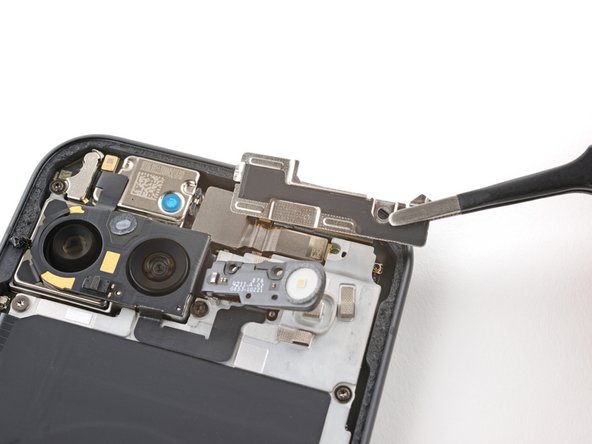
– Grab your trusty 3IP Torx Plus driver and say goodbye to that 5.4 mm-long screw holding down the antenna board cover. You’re almost there!

Step 17

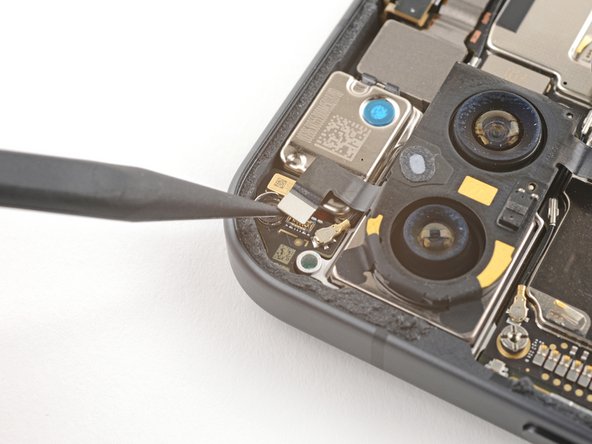
– Gently wiggle the spudger’s tip under the autofocus connector and lift it up to disconnect it from the motherboard.
Tools Used
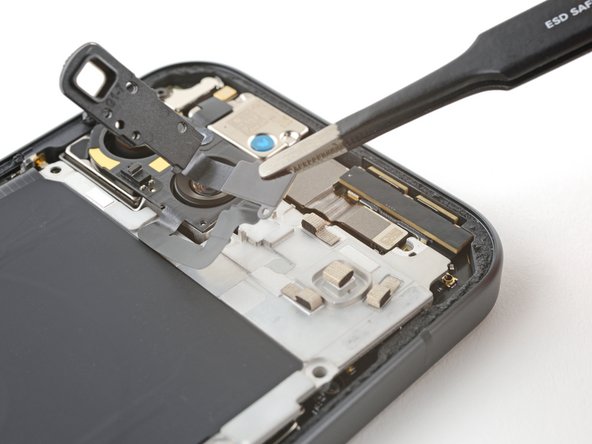
Step 18
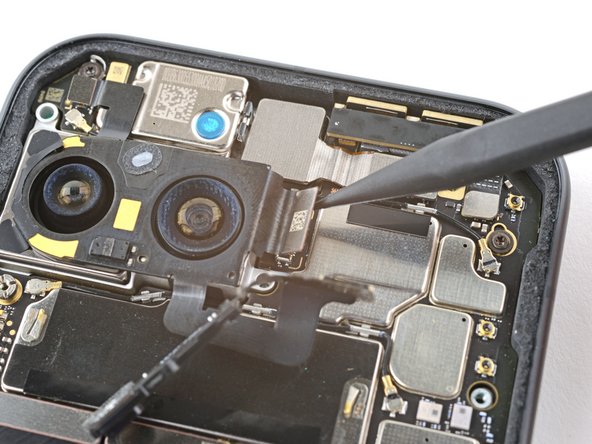

– Now, using the tip of your trusty spudger, gently pry up and disconnect the flash connector from the motherboard. It’s like giving it a little hug goodbye!
Tools Used
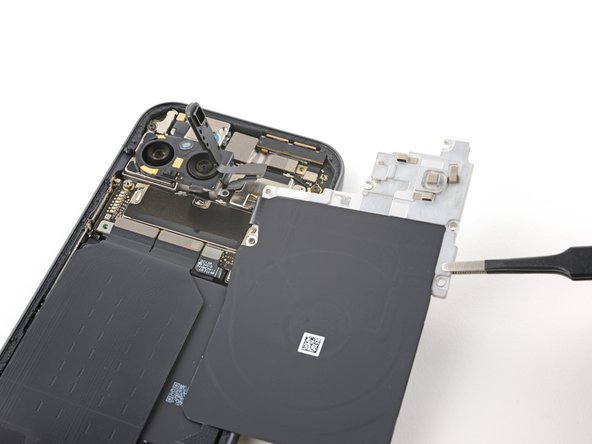
Step 19

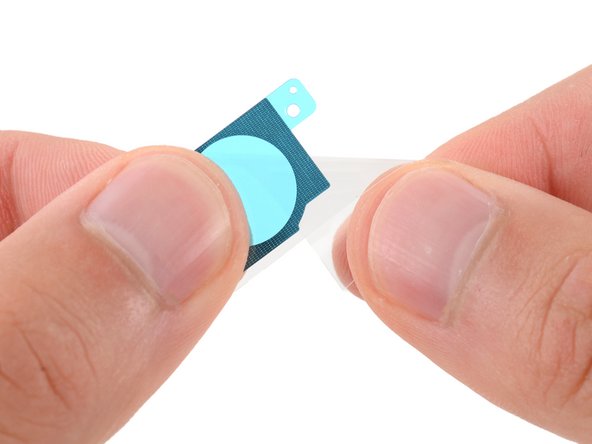
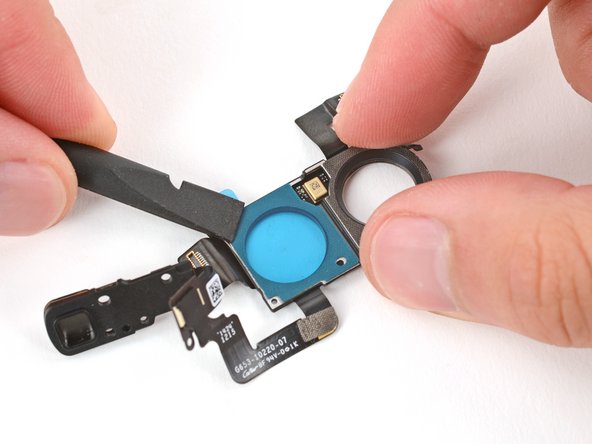
– Warm up an iOpener and place it on the LDAF and flash module for about a minute. This will help loosen the adhesive that’s holding it to the rear camera module, making your repair journey much smoother.
Step 20
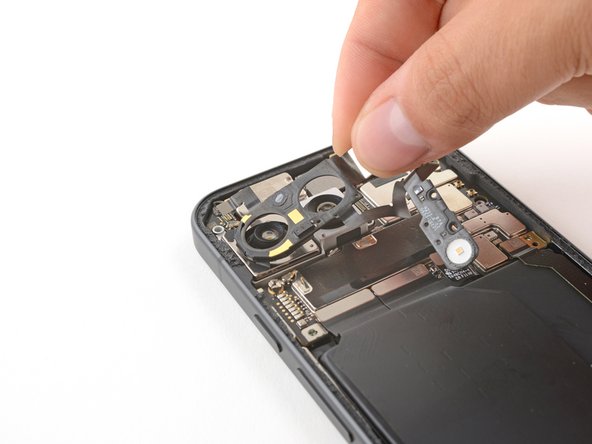
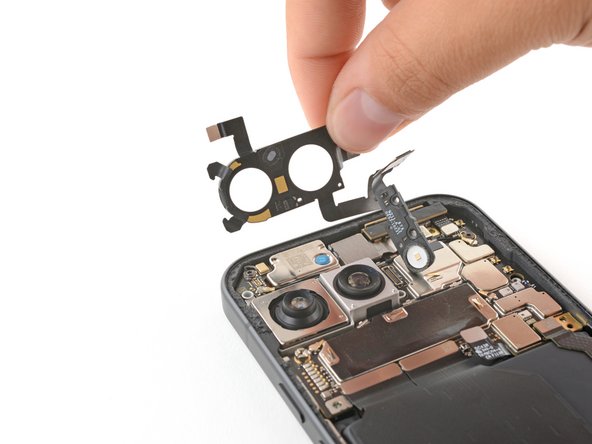

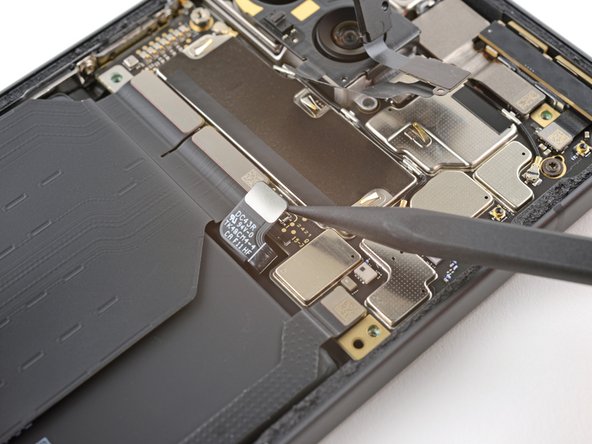
Handle the rear camera lenses with care! If your fingers accidentally find their way to them, just give them a gentle wipe with a clean microfiber cloth.
– Hey there! Time to tackle this LDAF and flash module removal together, you got this! First things first, gently lift and disconnect that nifty little duo. Once that’s done, let’s give a warm welcome to their return in right proper orientation, shall we?
Step 21

– Ready to put your device back together? Just follow these steps in reverse, and you’ll be good to go!
– Need to check if everything’s working? Give the built-in Pixel Diagnostic tool a whirl by clicking here.
– Time to do your part for the planet! Drop off your e-waste at an R2 or e-Stewards certified recycler.
– Things didn’t quite go as planned? No worries! Try some basic troubleshooting or pop into our Pixel 9 Answers Community for a hand.
– Decided to hit the brakes? No problem—just cancel this guide and take it easy.
–
Success!

