DIY Google Pixel 9 Front Camera Replacement Guide
Duration: 45 minutes
Steps: 18 Steps
Hey there! This guide is brought to you by the talented folks at Salvation Repair, and it hasn’t received any official thumbs up from outside parties. If you’re curious about more of our handy repair guides, just click here!
Welcome to your go-to guide for swapping out the front camera on your Pixel 9! If your selfies are coming out fuzzy, have those pesky spots, or the camera just isn’t cooperating, it sounds like it’s time for a new front camera. Grab some replacement back glass and front camera adhesives, and let’s get to work! Just a heads up: any repair can impact your phone’s water resistance. Maintaining that water resistance after the fix will depend on how well you secure that rear cover adhesive. Need a hand? Check out schedule a repair.
Step 1


Hey, before you get started, let’s give your Pixel’s battery a little rest. Let it drop below 25% before you dive in. A full battery can be a bit sassy if it’s accidentally damaged, so it’s best to play it safe!
Simultaneously press the power button and the volume up button to pull up the shutdown menu. Let’s do this!
– Disconnect every cable from your phone.
– Turn off your phone completely.
Step 2

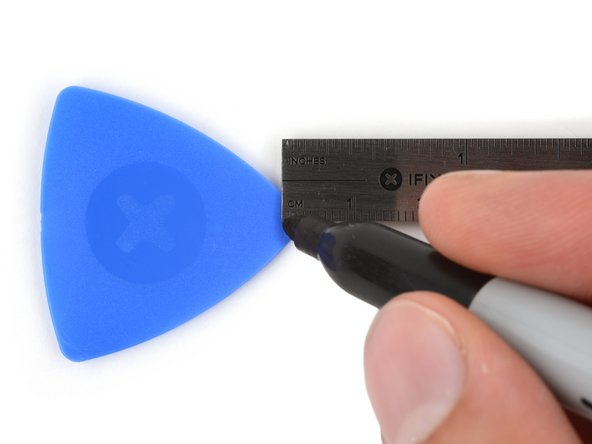

When you’re peeling away that pesky adhesive, keep your tool no deeper than 3 mm under the back glass. We want to keep those internal components happy and unscathed!
Hey, if your screen or back glass is super cracked, a suction cup might not stick perfectly.
To help things out, measure and mark 3mm from the tip of your opening pick with a permanent marker.
– It’s time to give that back glass some love! Stick some tape around the edge to keep it secure and make removing it a breeze. Think of it as giving your phone a hug. Just make sure there’s a clear spot near the bottom edge for our suction cup buddy.
Step 3
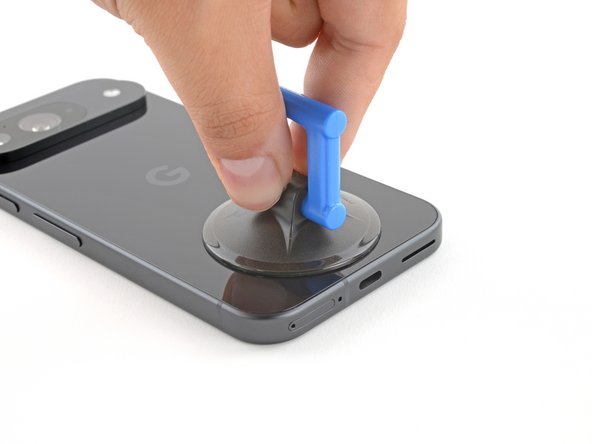

– Grab your suction handle and place it right at the bottom edge of the back glass, get it as close to the edge as you can!
– Now, push down gently to get that suction cup nice and secure.
Tools Used

Step 4
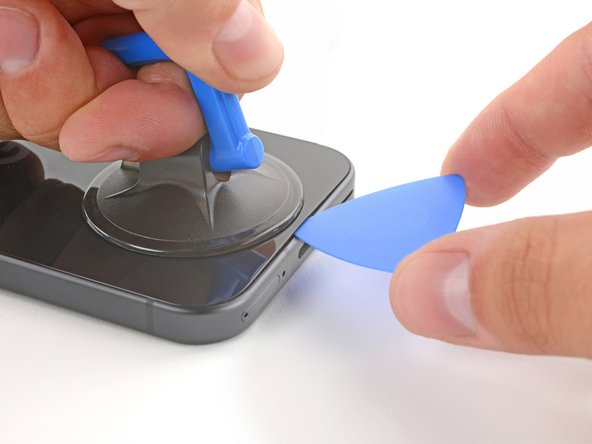

– Give that suction handle a confident pull! Use a bit of muscle to pop that back glass just enough to sneak in some air.
– Slide the opening pick’s tip into the tiny gap you created. You’re doing great!
Tools Used
Step 5
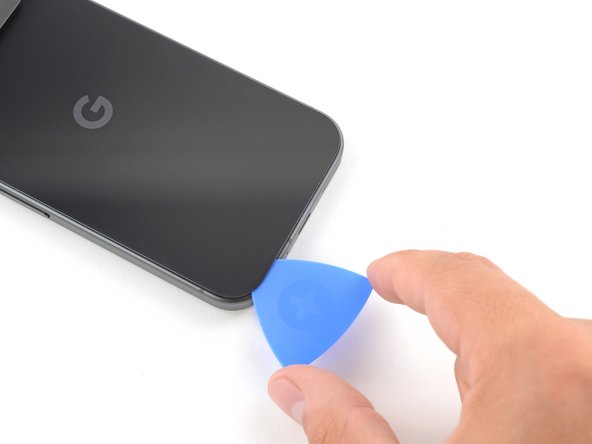

Hey! Don’t go crazy with that opening pick. Keep it chill, and make sure you’re not going deeper than 3 mm!
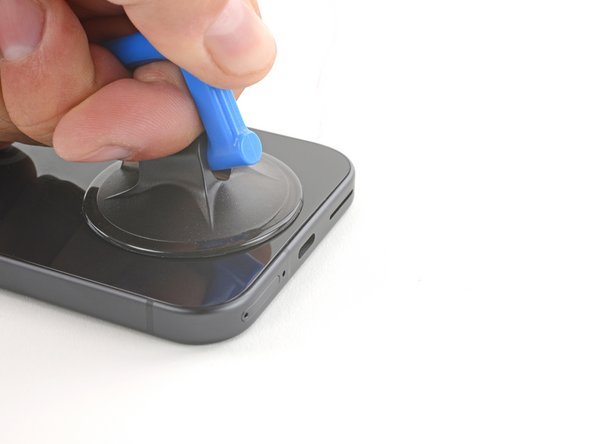
– Gently slide the opening pick back and forth along the bottom edge to break free the adhesive that’s holding it down.
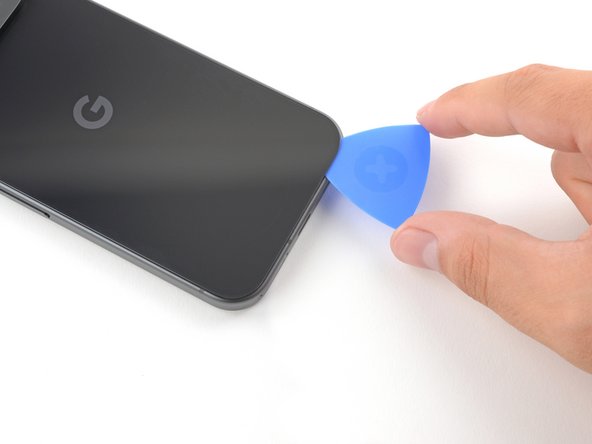
Step 6


– Now, slide that opening pick around the edge of your phone, like you’re cutting a birthday cake. You’re gonna slice through the rest of that sticky stuff holding the back on. You got this!
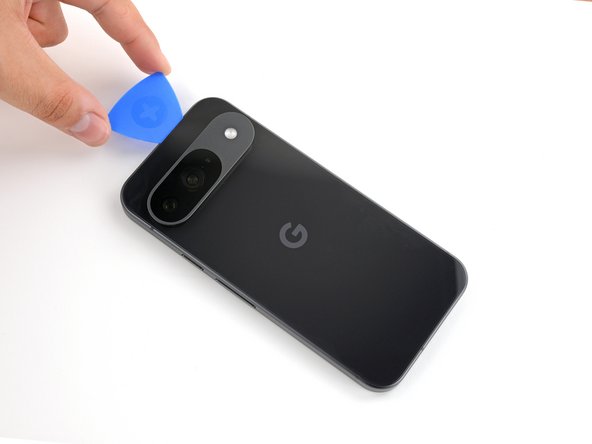
Step 7


– Now that most of the adhesive is out of the way, give that opening pick a gentle twist at the bottom edge to start lifting the back glass. Keep going until you can grab it with your fingers!
– Use the opening pick to tackle any stubborn bits of adhesive still holding onto the back glass. You’ve got this!
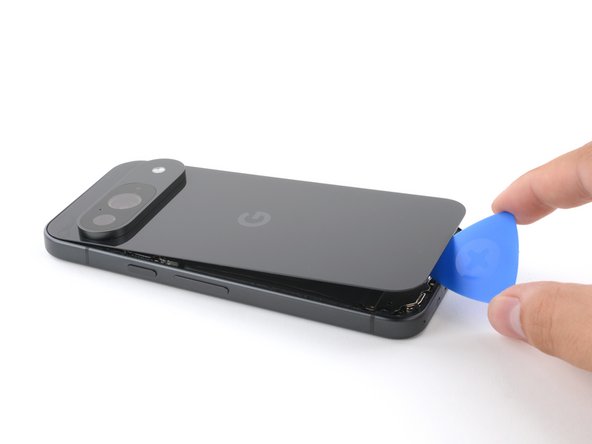
Step 8

– Time to get that back glass off! Let’s do it right.
– As you start putting everything back together:
– Here’s a little tip: Now’s a perfect moment to power on your phone and make sure it’s all good before we seal things up. Give it a quick check! Once satisfied, turn it off to continue the reassembly.
– Next up, follow this guide to apply the new adhesive and get that back glass back in place!
Step 9

Hey, remember those tiny little screws? They’re like tiny little friends, and they want to go back home. So, keep track of them all – you know, just like you would with a friend. And make sure you put them back in the exact same spot they came from. No mix-ups, right?
While the Pixel 9 uses those Torx Plus screws, your trusty standard Torx bits will work just fine. Just make sure to keep the pressure steady – you want to make sure those screws go in nice and smooth!
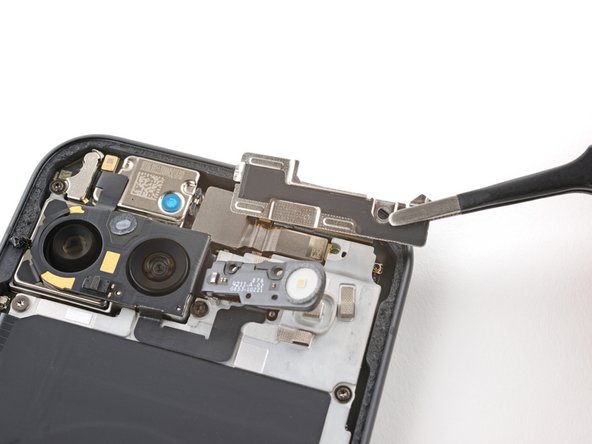
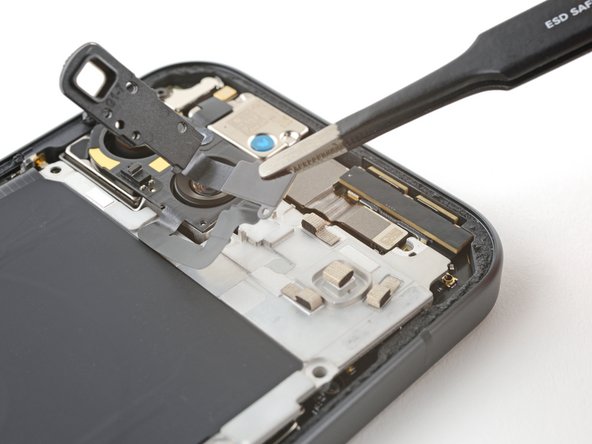
– Grab your trusty 3IP Torx Plus driver and get ready to tackle that lone 5.4 mm screw holding down the upper board cover. Let’s make this repair happen!


Step 11

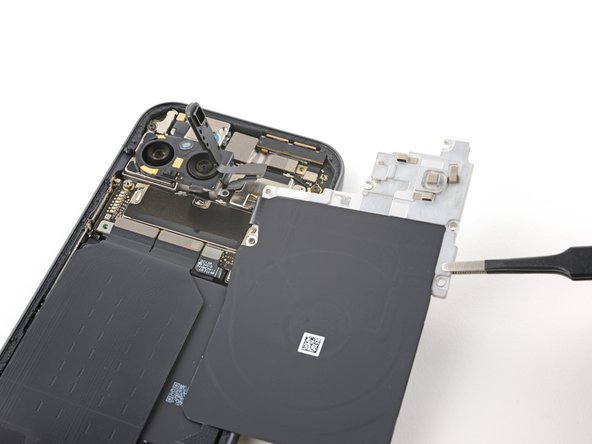
– Grab your trusty 3IP Torx driver and set to work removing the five screws that are holding the midframe and wireless charging coil in place:
– You’ll need to extract four screws that are each 5.4 mm long.
– And don’t forget about that one little 2.2 mm long screw!


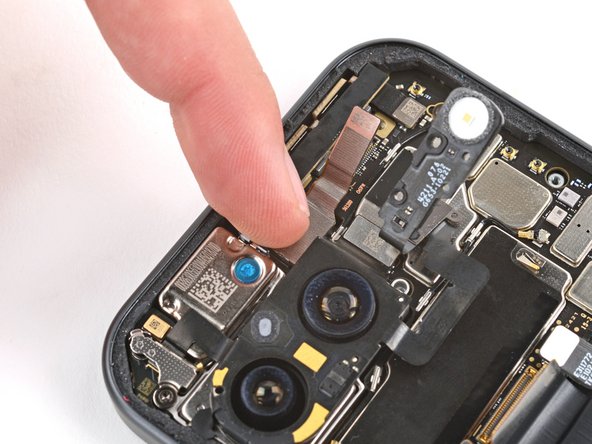
Step 15
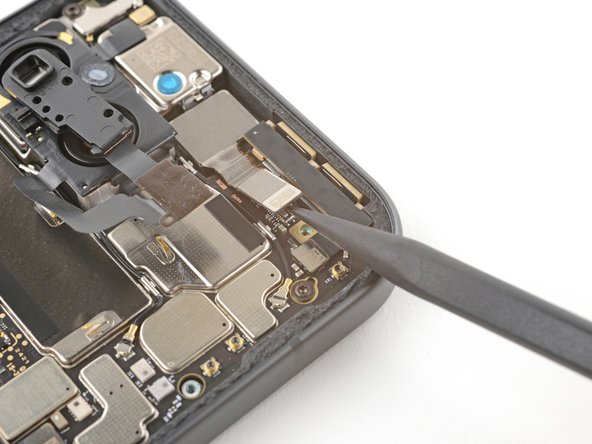

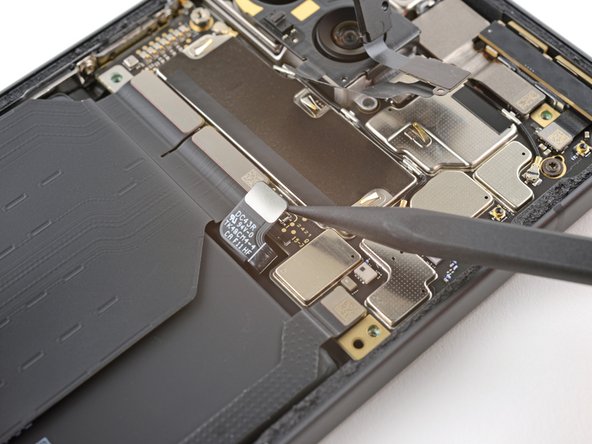
– Grab your spudger and use the tip to gently pry up the connector for the front camera. You’ve got this!
Tools Used
Step 16

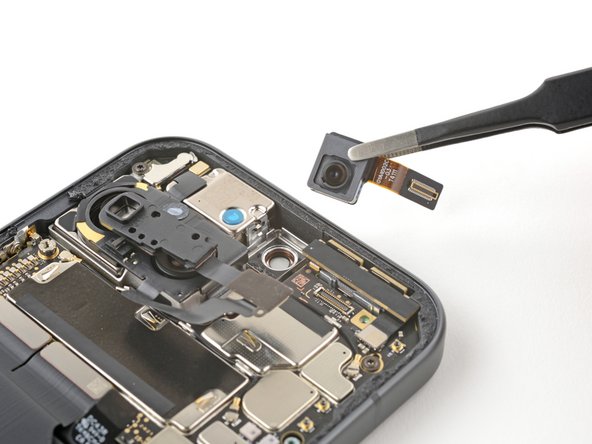
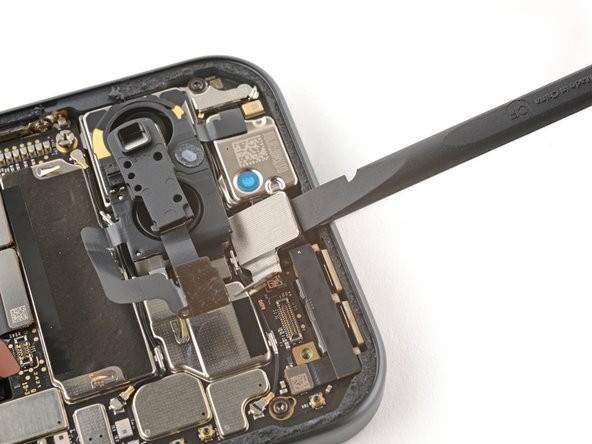
– Let’s get that front camera out! Carefully slide the flat end of a spudger between the top edge of the front camera and the frame.
– Now, gently pivot the spudger down against the frame. This will help pop the front camera up and out of its little home.
– There you go! You’ve successfully removed the front camera. If you need help, you can always schedule a repair
Tools Used
Step 17
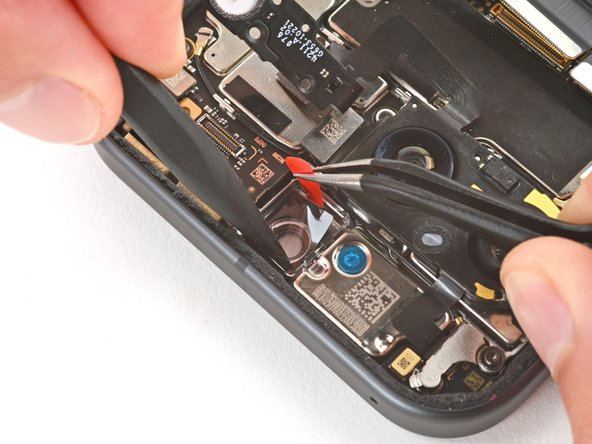


– Grab your trusty tweezers and gently yank that old front-facing camera adhesive off the frame. Bye-bye, sticky stuff!
– Peel away the larger clear liner from the front-facing camera adhesive. Let’s keep things clear!
– Now it’s time to finesse the new adhesive into the front-facing camera recess with those tweezers. You’ve got this!
– Take a spudger and give the adhesive a little gentle nudge to secure it nicely to the frame. Make it snug!
– Finally, don’t forget to remove the last liner from the adhesive. We’re almost there!
Step 18

– Alright, champ, you’re ready to put your device back together! Just follow these instructions backwards, starting with this step.
– Want to make sure everything’s working like a charm? Click here to run a quick diagnostic test.
– Ready to send your old parts to their new home? Find an R2 or e-Stewards certified recycler and give them a proper send-off.
– Things not going as planned? Don’t fret! Check out some basic troubleshooting tips or ask the Salvation Repair community for help!
– If you need help, you can always schedule a repair
–
Success!

