DIY Google Pixel 9 Pro Battery Replacement Guide
Duration: 45 minutes
Steps: 48 Steps
Hey there, awesome DIY-er! Remember, this repair guide is all about empowering you to tackle your tech troubles with confidence! Don’t sweat the clamp and phone securing steps if you haven’t got those tools. Just find a helpful pal to lend a hand and get your fix on! If you need help, you can always schedule a repair.
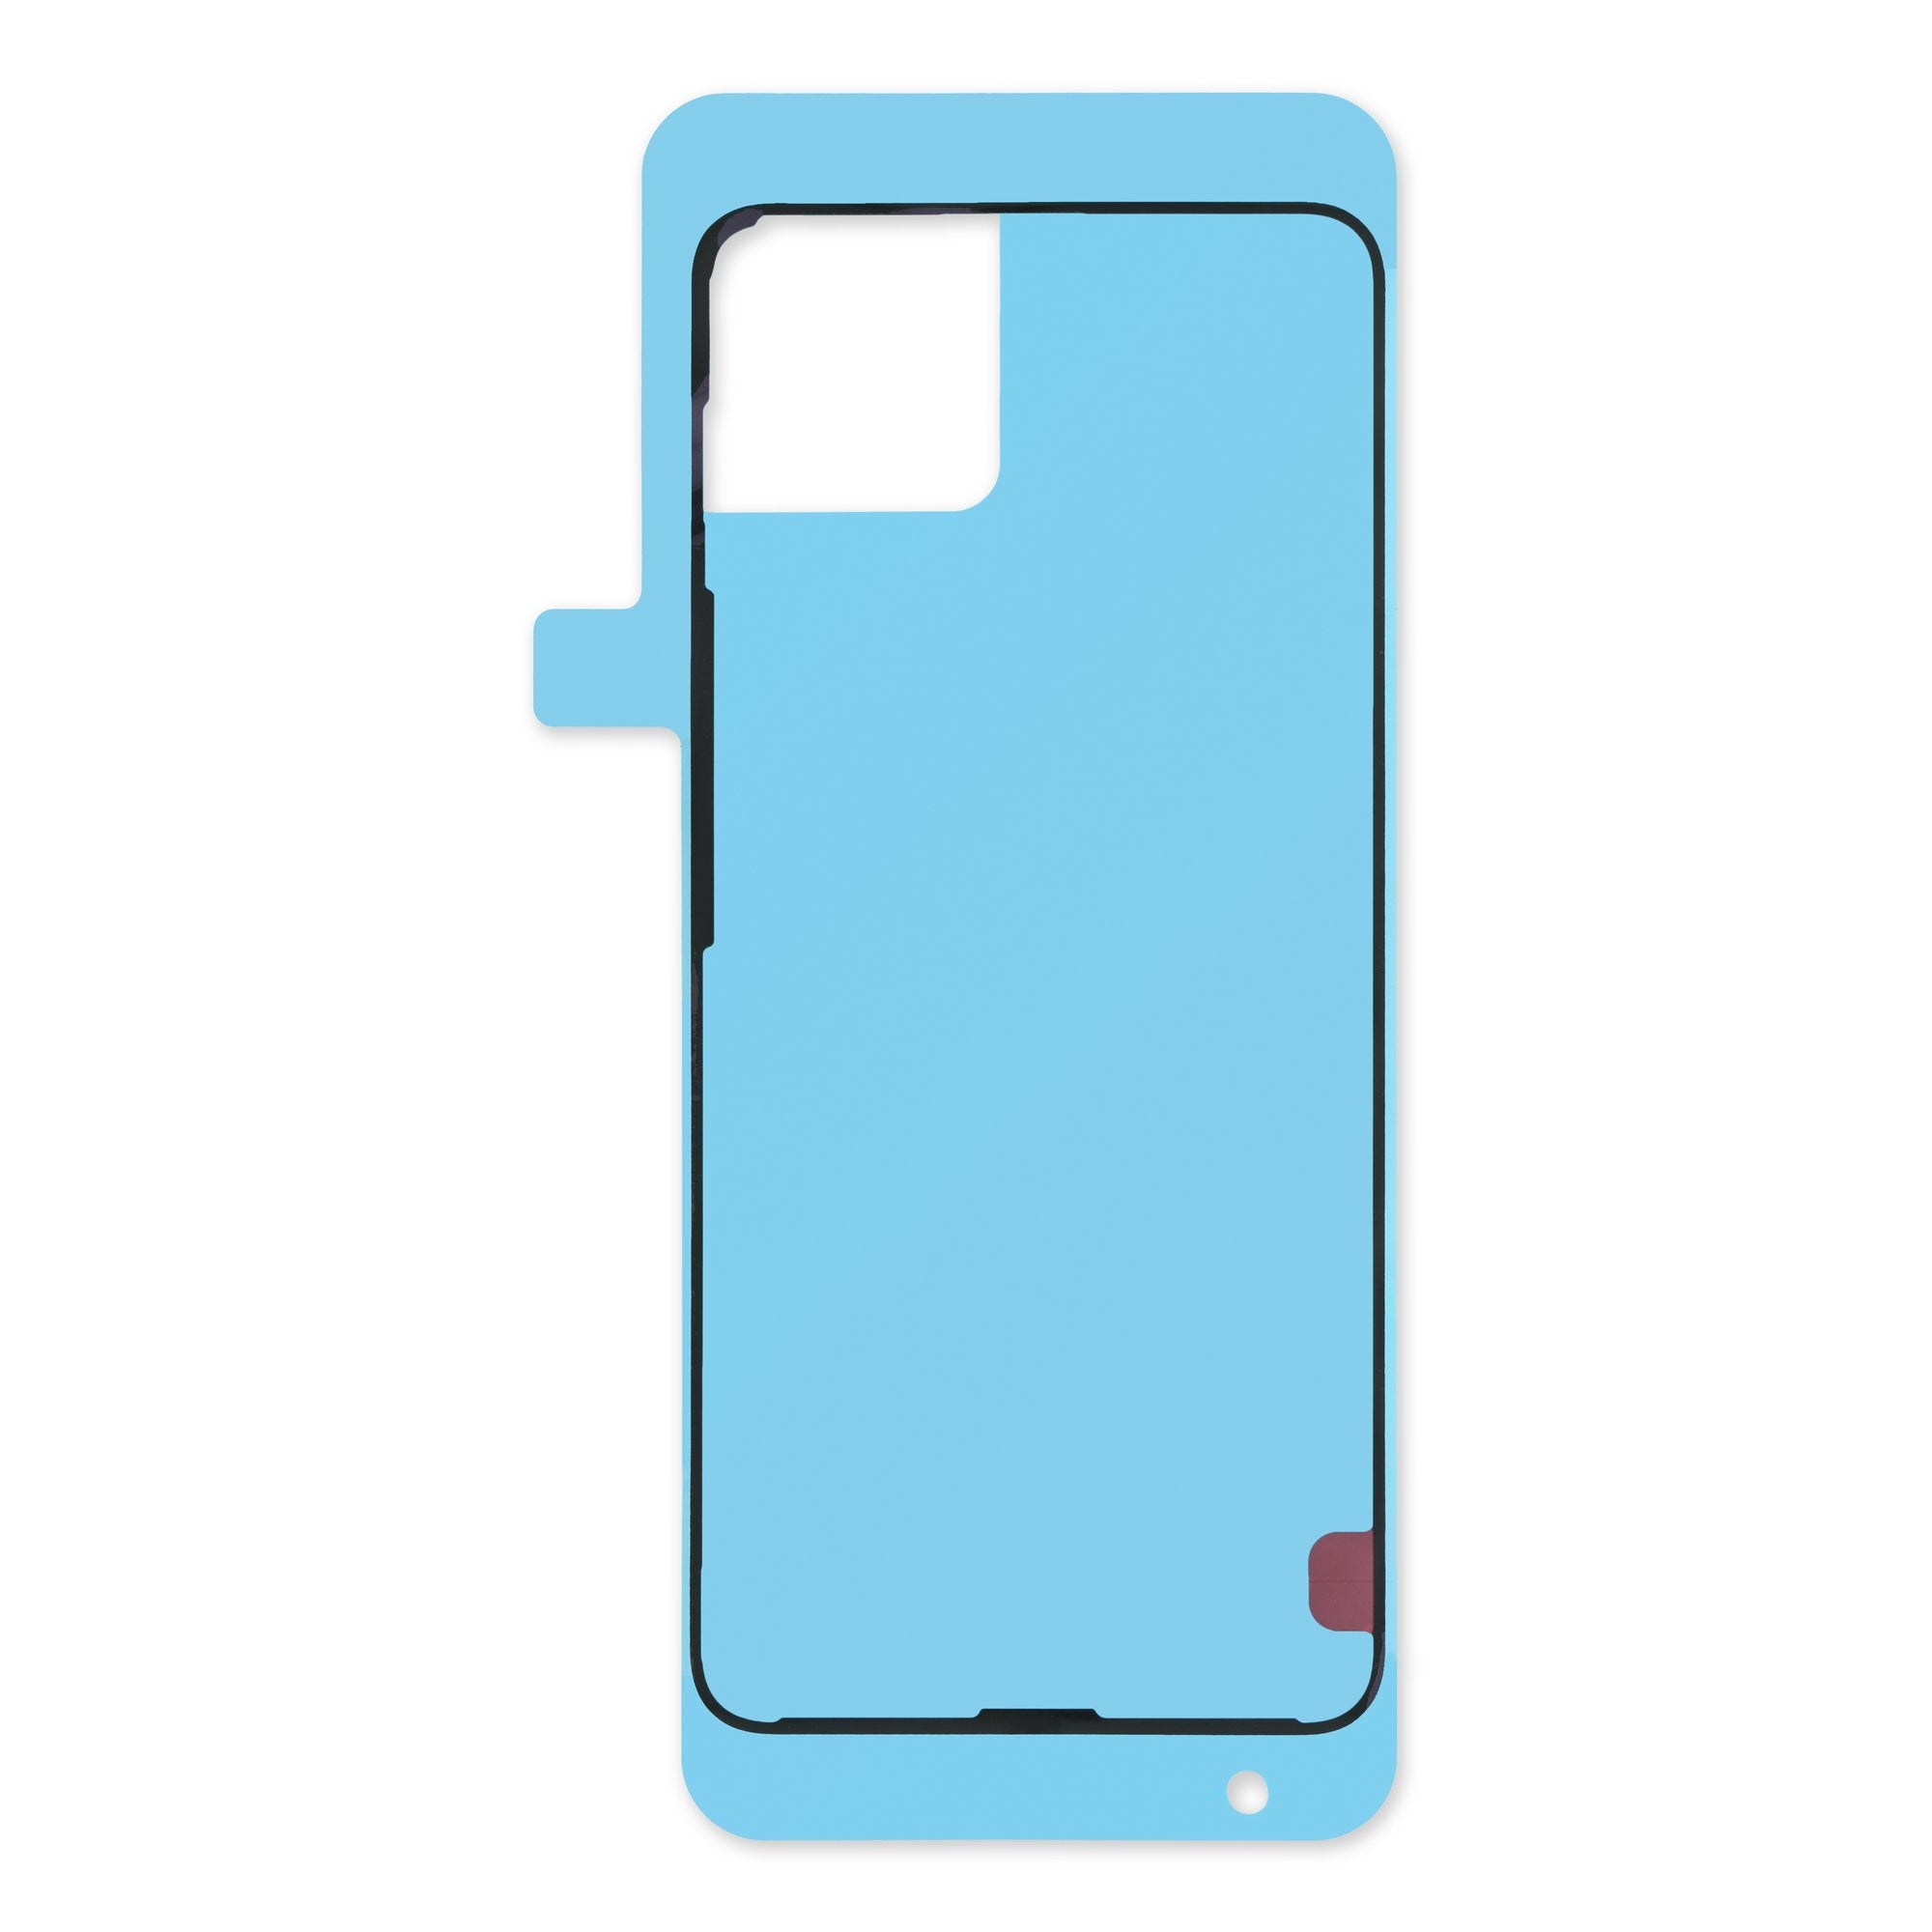
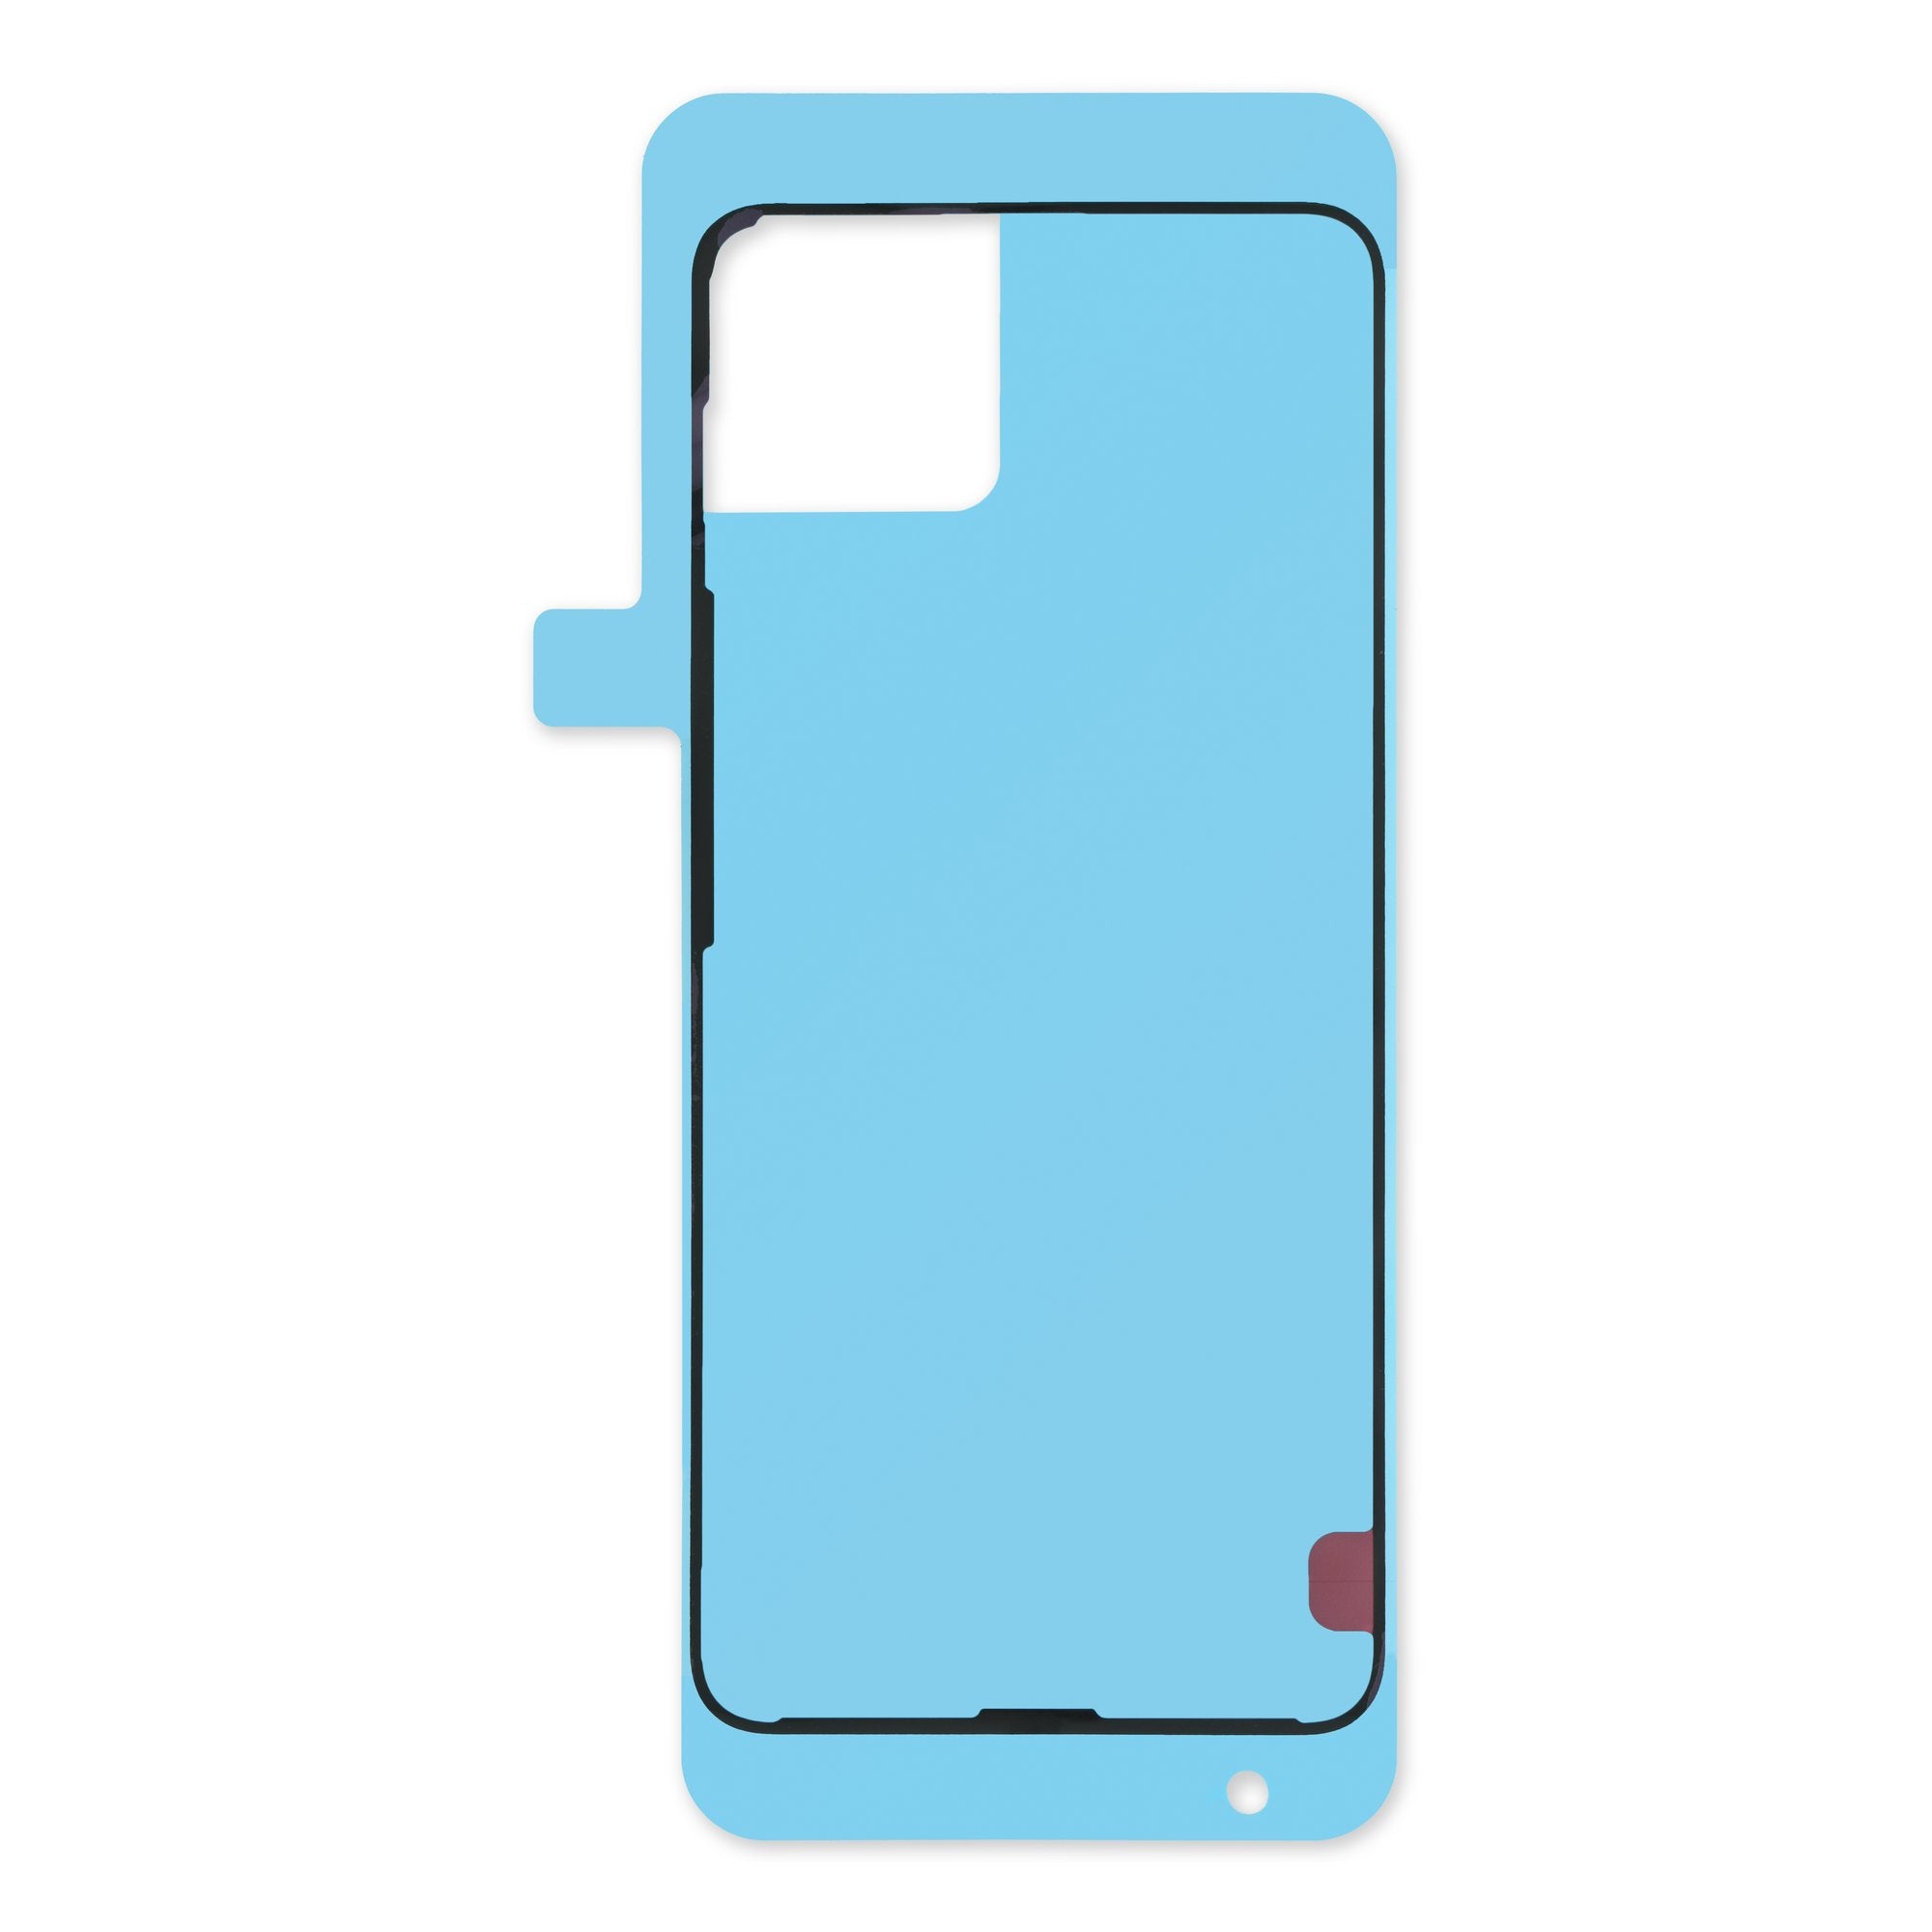
Welcome to our repair guide, crafted with care by the team at Salvation Repair! Ready to tackle that battery swap on your Pixel 9 Pro? Remember, lithium-ion batteries don’t last forever, and if your phone’s acting more like a paperweight than a communication device, it might just be time for a replacement! If you notice that battery looking a bit swollen, handle it with care. For this process, you’ll need to secure your phone to your workspace—clamps are your best friend here, but if you’re flying solo, grab a buddy to help out. Don’t forget, you’ll need some replacement rear cover adhesive to seal everything back up. And just a heads-up: any repair can mess with your device’s water resistance, so make sure to reapply that adhesive properly. If things get tricky, don’t hesitate to schedule a repair with us!
Step 1
– First things first, give your phone a little break from all the wires. Unplug everything! It’s time for a power nap.
Step 2
Avoid going more than 3mm deep when prying up the back cover to keep those internal goodies safe and sound!
Grab your opening pick and measure out a cool 3 mm from the tip—then make your mark with a permanent marker! If you’ve got a coin handy, you can also stick it to the pick at that same 3 mm spot for a clever little guide.
Step 3
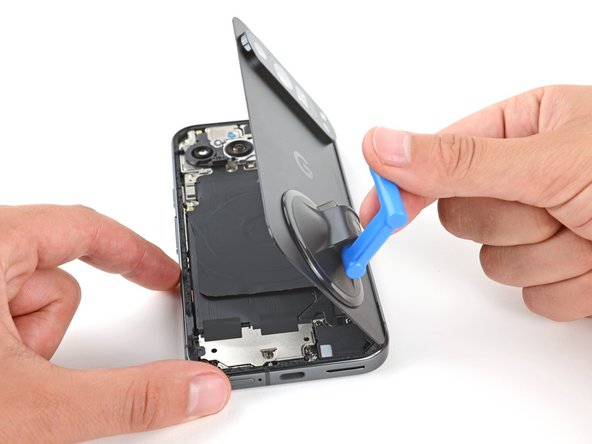
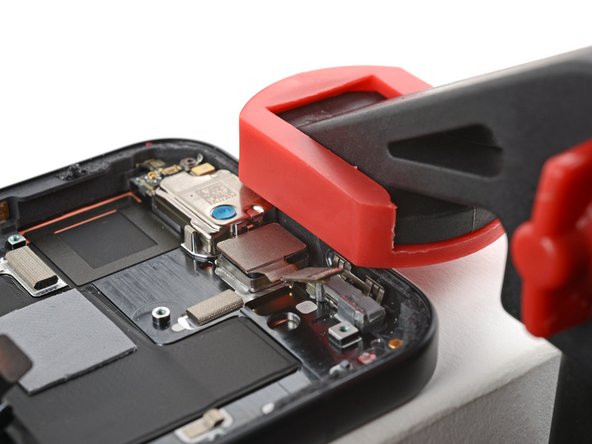
– Grab a suction handle and stick it to the bottom edge of the rear cover, getting as close to the edge as you can. You’ve got this!
Tools Used
Step 4
– Give that suction handle a solid tug—don’t be shy! We’re just creating a tiny opening under the rear cover.
– Now, slide the tip of your trusty opening pick into that snug little gap you just made.
Tools Used
Step 5
Hey, remember to chill out with the opening pick. Don’t push it deeper than 3mm.
– Slide your opening tool along the bottom edge to separate the adhesive holding it in place. It’s like a little dance between your tool and the phone!
Step 6
– Gently slide your trusty opening pick up the left edge and glide it along the top edge to break that stubborn adhesive free!
Step 7
– Now, slide your pick down the right edge of the device. This will help you separate the remaining adhesive. You’ve almost got it! You’re doing great!
Step 8
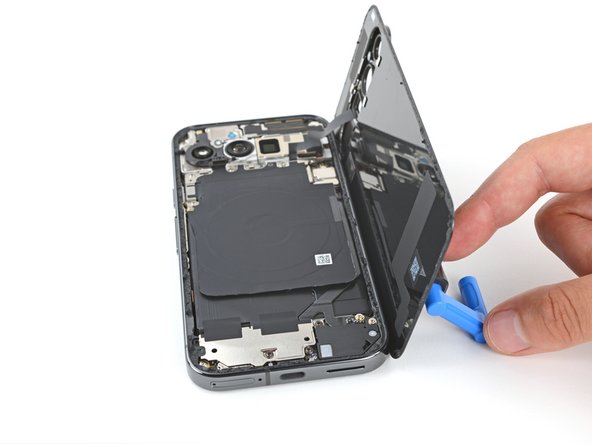
Hold your horses on yanking off that rear cover just yet! There’s a sneaky ribbon cable hanging out on the right edge that’s still connected to the phone.
If you’re running into some sticky situations, take a peek around the edges for any leftover adhesive. Grab your trusty opening pick and gently work your way around to free things up.
– Grab that suction handle and gently lift the left edge of the rear cover, swinging it over to the right like you’re opening a whimsical book.
– Now, use the suction handle to prop up the rear cover, giving you the perfect view of the ribbon cable nestled in the top right corner.
Tools Used
Step 9
Keep track of all those tiny screws, like a boss! Make sure they go back where they belong, or your phone might be a little confused.
Your Pixel 9 Pro is a little picky about its screws. It likes those Torx Plus ones, but don’t worry, regular Torx bits will do the trick too. Just be sure to keep the pressure even so you don’t mess things up.
This little guy doesn’t like magnets, so you might need to use tweezers to get him out. No big deal!
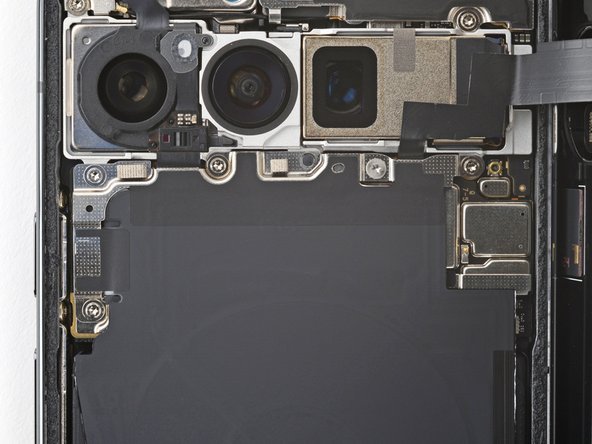
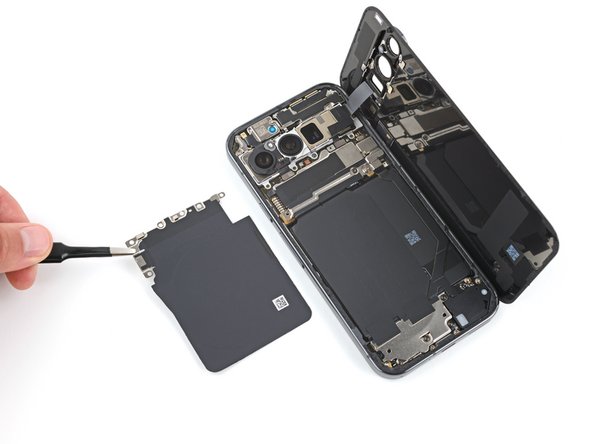
– Grab your trusty Torx Plus 3IP screwdriver and let’s tackle those five screws holding the wireless charging assembly in place:
– Four screws that are 5.4 mm long, just waiting to be removed!
– One little screw that’s 1.5 mm long, ready to join the party!
Step 10
Whoa there, partner! Tread lightly and watch those top left springs under the charging assembly. They might be tiny, but they’re powerful little fellas!
– Gently grab those tweezers or your trusty fingers and carefully lift out the wireless charging assembly. You’ve got this!
Step 11
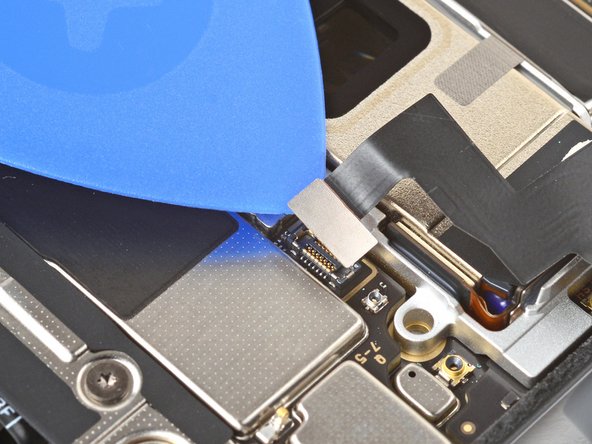
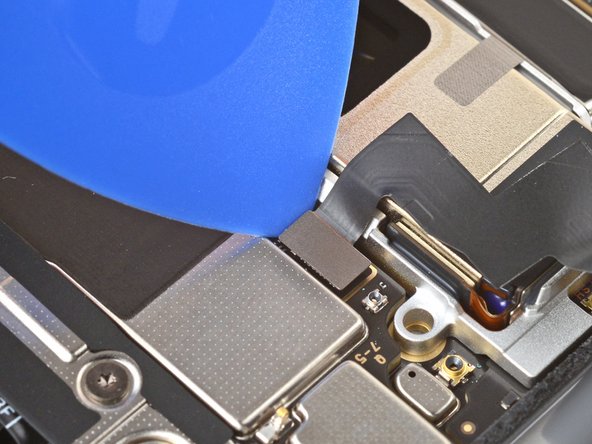
– Slip the tip of an opening pick under the left edge of the rear cover press connector and gently pry it straight up to disconnect.
Step 12
– Let’s get that rear cover off! It’s time to say goodbye to the back of your device.
– Once you’re done, be sure to follow these instructions for getting your rear cover back on like new. If you’re feeling unsure about any of this, you can always schedule a repair.
Step 13
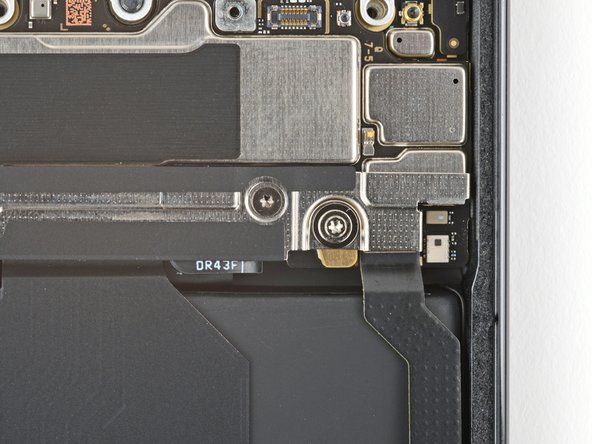
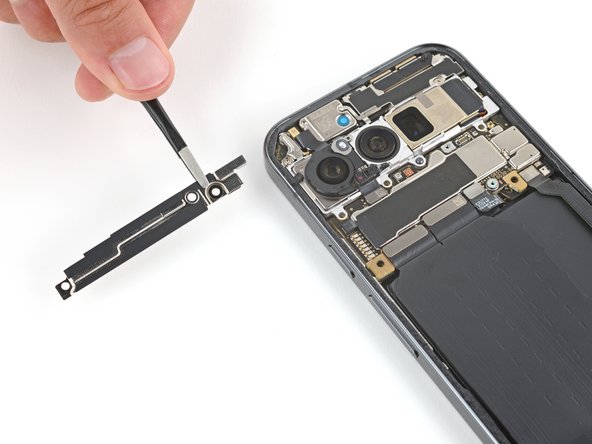
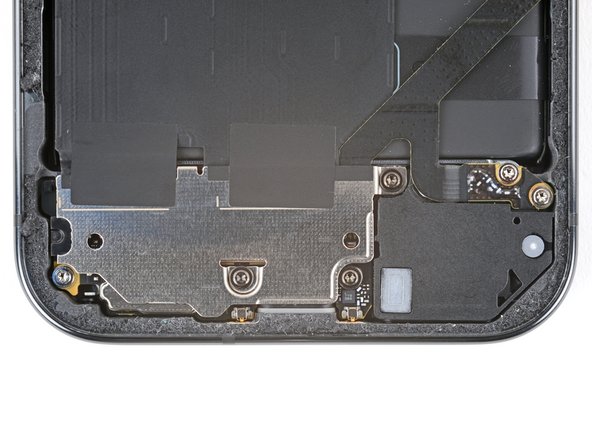
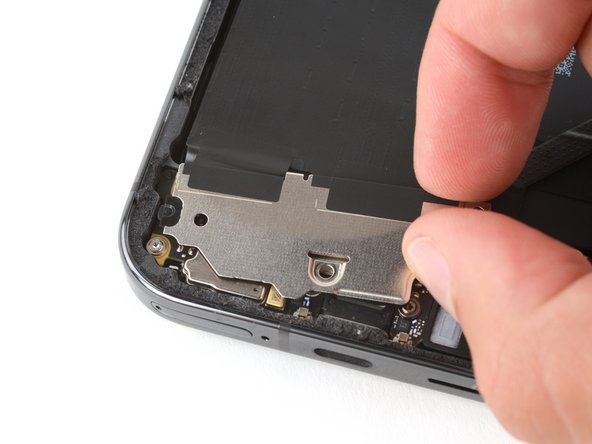
– Let’s rock with our groove-thing as we get down to business. Peel back the armor plating of your transformer castle using a slick Torx Plus 3IP magic wand to release the captive screws – one with a 2.3-mm swag stroll and its counterpart sashaying with a 5.4-mm skip: totally tubular, right?
Step 14
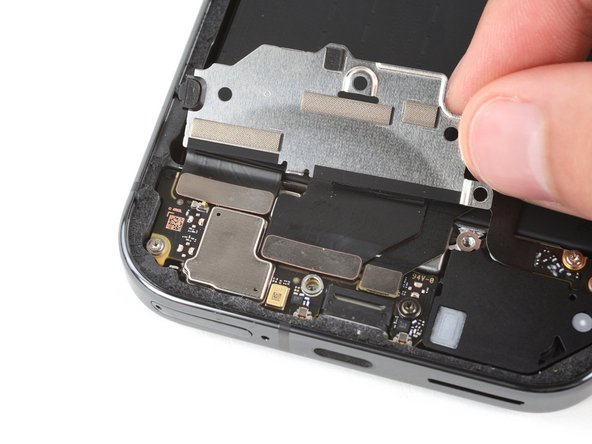
– Grab those tweezers or use your fingers to gently pop off the cable cover. You’ve got this!
Step 16
– Grab your trusty Torx Plus 3IP screwdriver and gently remove the 5.4 mm-long screw that’s holding the mmWave antenna cover in place. You’ve got this!
Step 18
– Carefully tug the right edge of the cover towards the bottom of the phone and lift it off.
– When putting things back together, slip the two tabs on the top corners into their slots in the frame and press the cover down to snap it in place.
Step 19
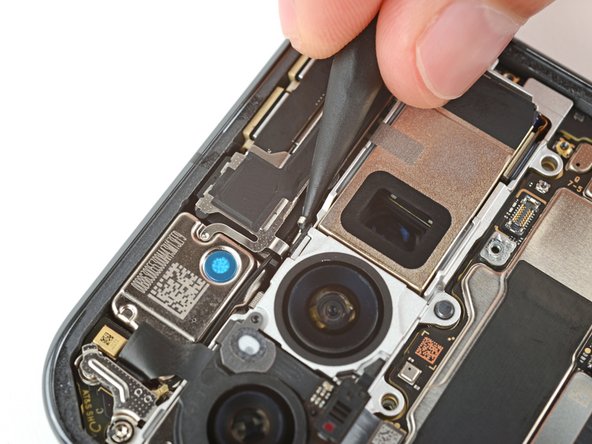
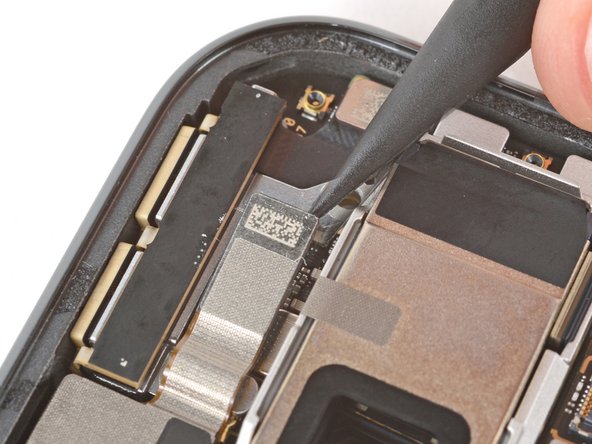
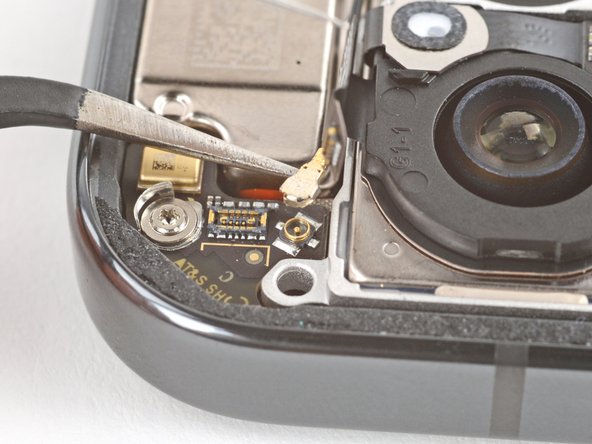
– Gently use the tip of a spudger to lift and disconnect the mmWave antenna press connector from the top right corner of the logic board. You’re doing great!
Tools Used
Step 21
Handle with extra care not to touch the cameras during this step. If you happen to do, give them a nice wipe with a clean microfiber or lint‑free cloth.
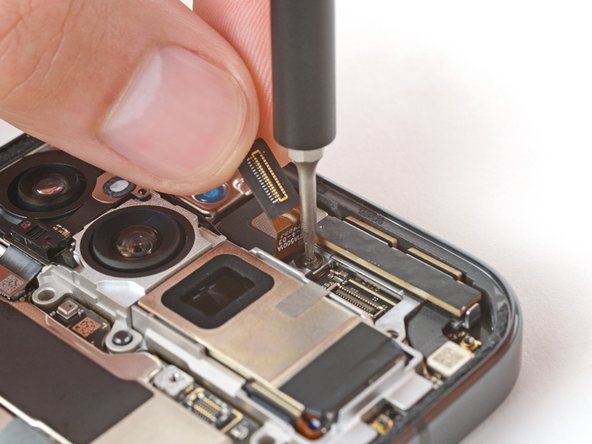
– Gently move the front-facing camera cable aside so you can easily reach the mmWave antenna screw.
– Grab your trusty Torx Plus 3IP screwdriver and remove that 4.3 mm-long screw holding the mmWave antenna in place.
Step 22
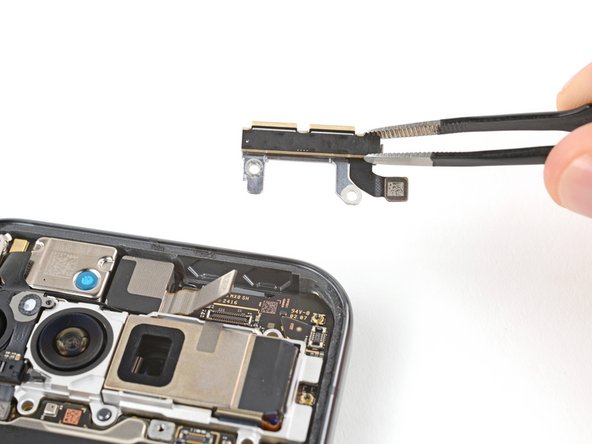
– Grab your trusty tweezers or just use your fingers to gently lift out the mmWave antenna. It’s a delicate dance, but you’ve got this!
– When you’re putting everything back together, remember to tuck the mmWave antenna snugly under the front-facing camera cable. It’s like giving it a cozy blanket!
Step 23
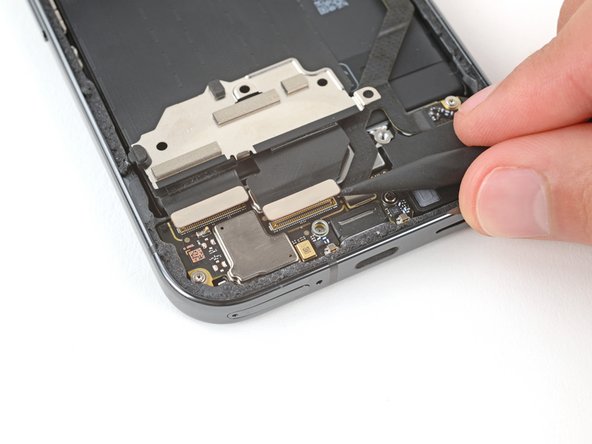
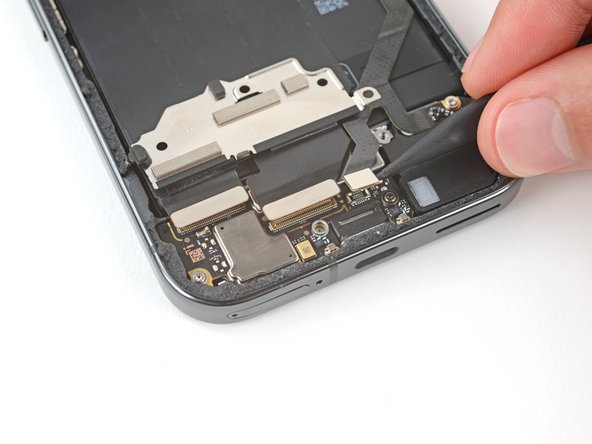
– Grab the flat end of your trusty spudger and gently lift up to disconnect the press connector hanging out near the bottom left corner of the logic board. You’ve got this!
– Now, switch to the pointy end of your spudger and give a little nudge to the press connector just to the right of the last one you tackled. Easy peasy!
Tools Used
Step 24
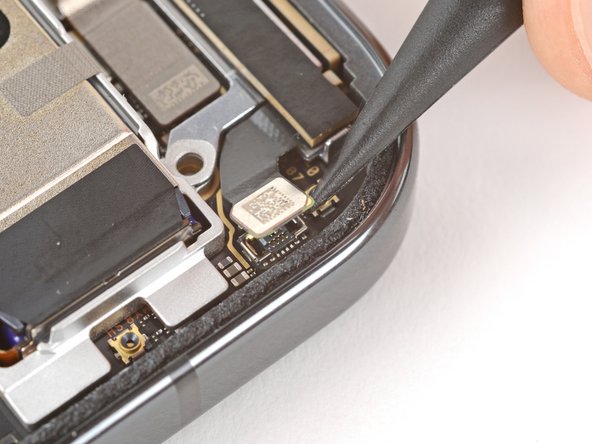
Handle with care! Those tiny, surface-mounted components just to the right of the connector are a bit delicate. Let’s keep them safe and sound!
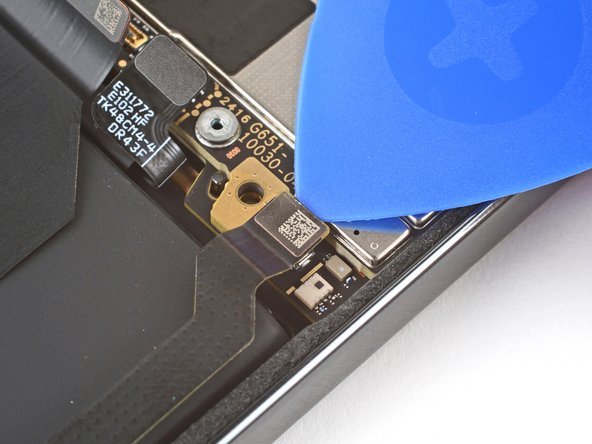
– Gently wiggle the tip of your opening pick underneath the top edge of that press connector, nestled up near the bottom right corner of the logic board.
– Give it a little nudge to pop that press connector loose and disconnect it.
Step 25
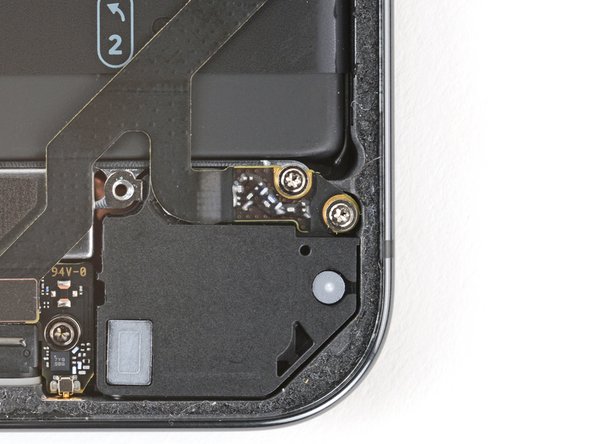
– Ready to rock? Grab your Torx Plus 3IP screwdriver and let’s pop out those two 4.3mm screws holding down the charging board cover. You’re doing great!
Step 26
– Let’s get that charging board cover unclipped! Gently pull the right edge towards the top of your phone, and watch the left side of the cover come free.
– Now, it’s time to give that cover a little flip! Turn it away from the charging board so you can see those press connectors.
Step 27
Please take extra care to avoid harming those tiny, delicate components on the charging board! They’ve got a tough job, and we want them to keep working perfectly.
– Now, it’s time to get a little fancy with your spudger! Carefully use the pointy end to gently pry up and disconnect those three connectors hanging out on the top side of the charging board. You got this!
Tools Used
Step 28
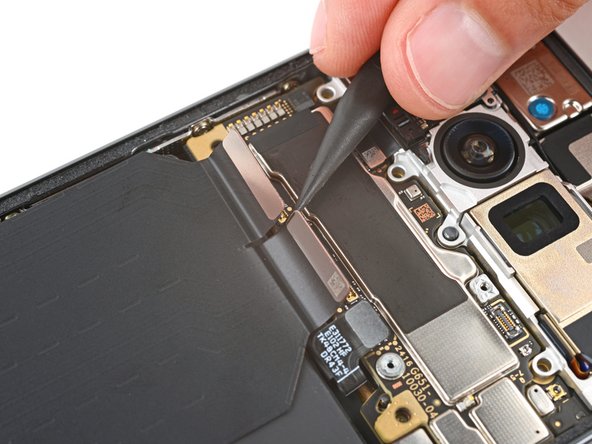
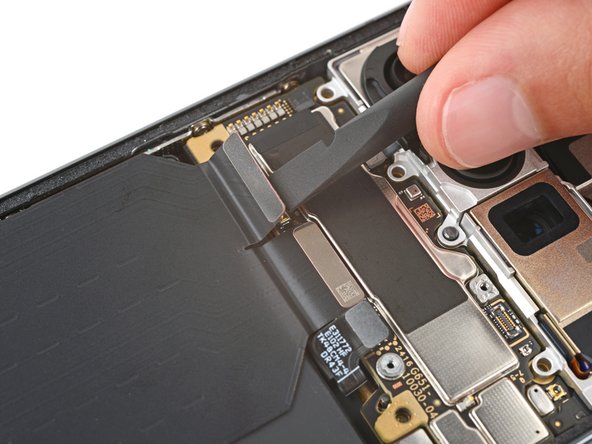
– Give that left interconnect cable a gentle tug with your fingers and pop it out with ease!
Step 29
– Grab your trusty Torx Plus 3IP screwdriver and go ahead and take out those two 2.5 mm-long screws that are holding down the bottom of the right interconnect cable. You’ve got this!
Step 30
– Gently pry off the right interconnect cable using your fingers. You’re doing great!
Step 31
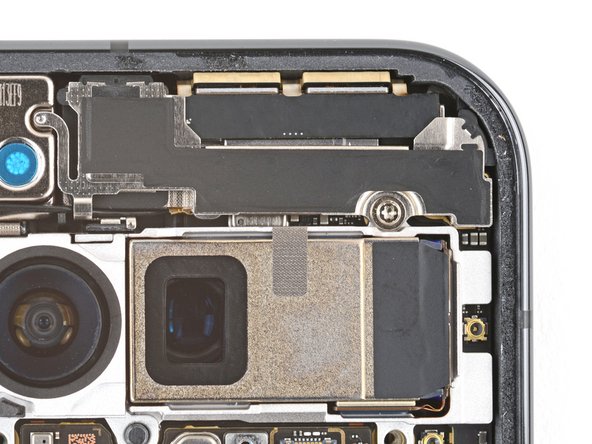
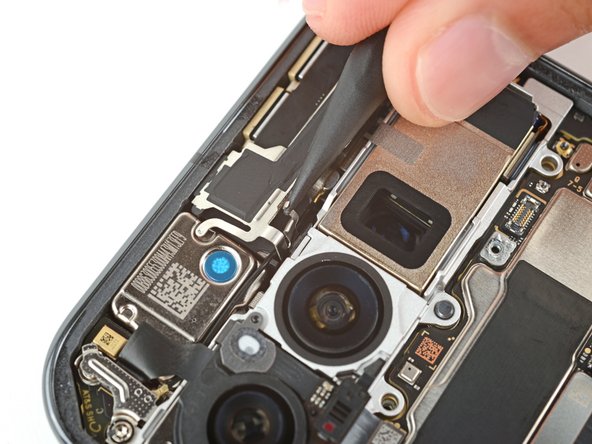
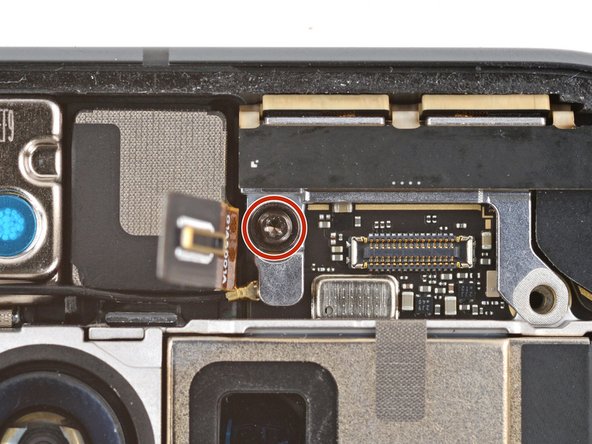
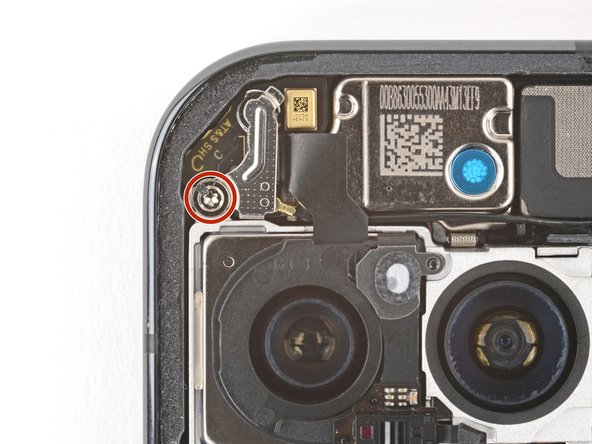
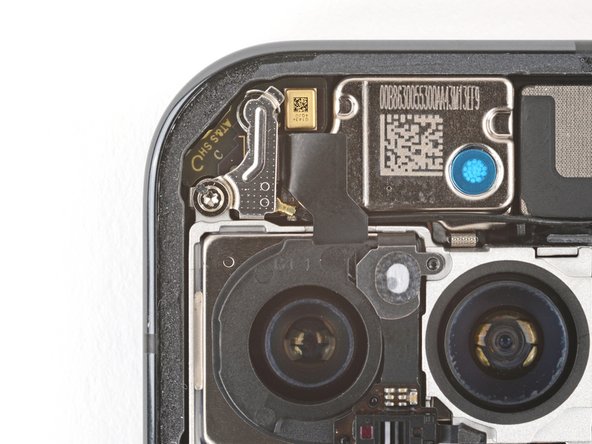
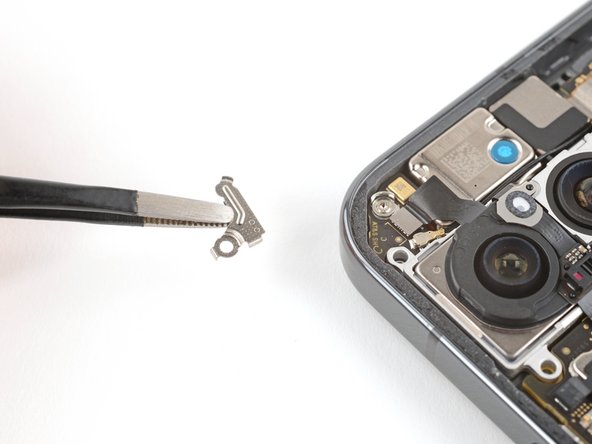
– Grab your trusty Torx Plus 3IP screwdriver and gently unscrew the 5.4 mm-long screw that’s holding the antenna cover in place at the top left corner. You’re doing great!
Step 33
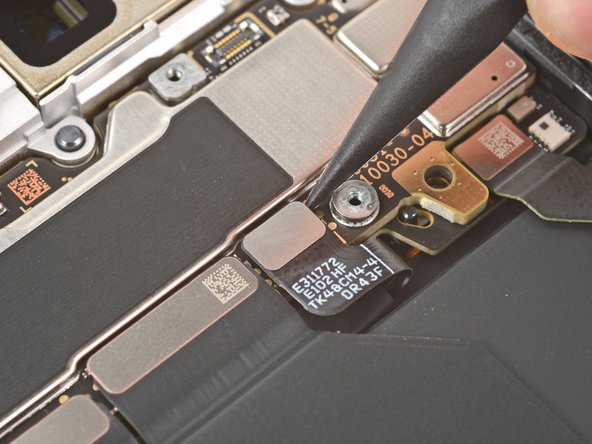
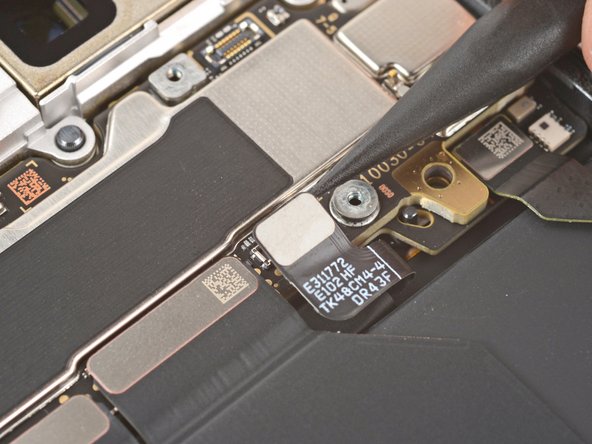
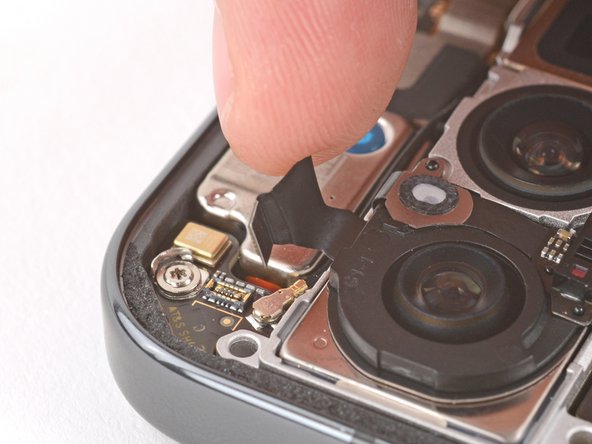
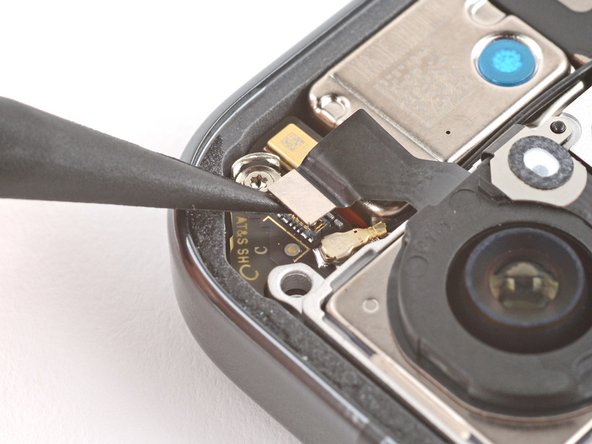
– Grab that trusty spudger and gently slide the tip underneath the autofocus sensor press connector in the top left corner. Give it a little nudge to disconnect—easy peasy!
– Now, with the connector free, carefully slide the cable aside. This will clear the way for you to access the hidden metal antenna connector waiting beneath.
Tools Used
Step 34
– Gently slide one arm of your angled tweezers underneath the metal neck of the antenna connector and lift it straight up to disconnect. Easy peasy!
– To reconnect, simply hold the connector right over its socket and give it a gentle press down with your finger or a spudger. It should ‘snap’ right back in! If it’s being a bit stubborn, just adjust the head and give it another shot. You’ve got this!
Tools Used
Step 35
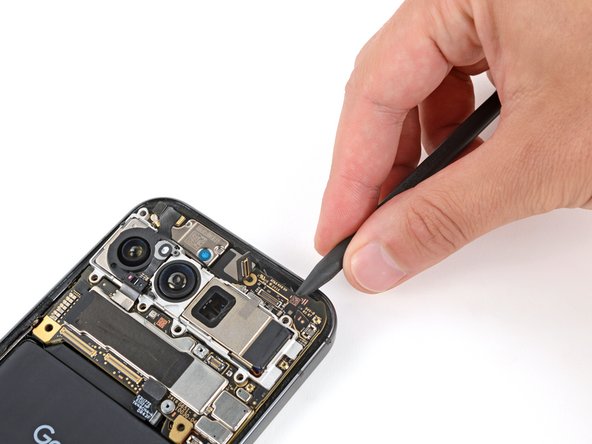
– Grab your trusty spudger and gently lift the top edge of the logic board until you can get a good grip with your fingers.
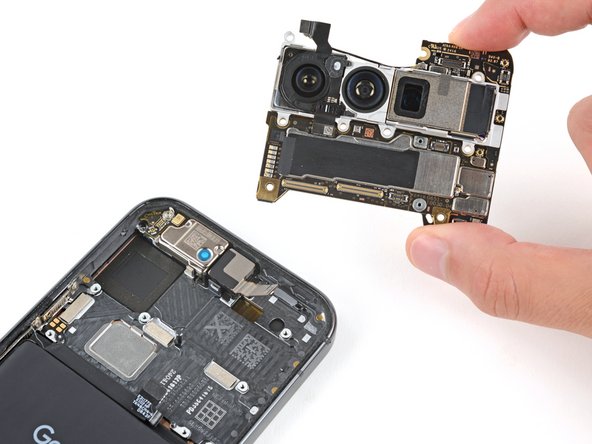
– Now, take hold of the right side of the logic board and carefully remove it, making sure not to tangle with the front-facing camera and battery cables.
– When you’re putting everything back together, keep the front-facing camera cable out of the way and gently lower the logic board into its cozy spot.
Tools Used
Step 36
– While putting things back together:
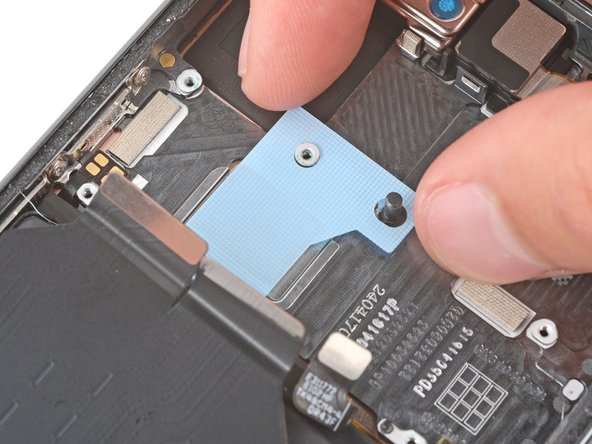
– Give the logic board thermal pad a quick once-over—it’ll either be on the bottom of the logic board or on the frame.
– If it looks good, move on to the next step.
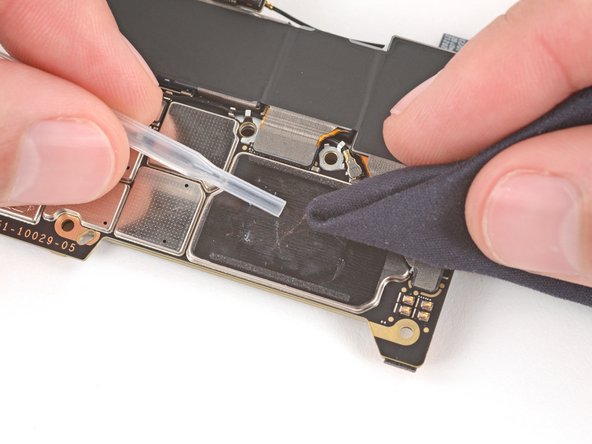
– If it’s seen better days, use the flat end of a spudger to gently scrape and remove it.
– Grab some isopropyl alcohol (90% or higher) and a microfiber cloth to clean off all thermal pad residue from the frame and the bottom of the logic board.
– Apply a fresh thermal pad to its spot on the frame.
Tools Used
Step 37
Hey there! If you don’t have finger stalls, no worries! You can use rubber gloves instead. No biggie!
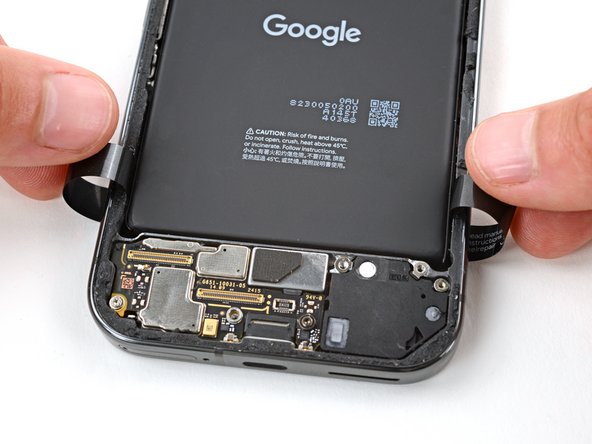
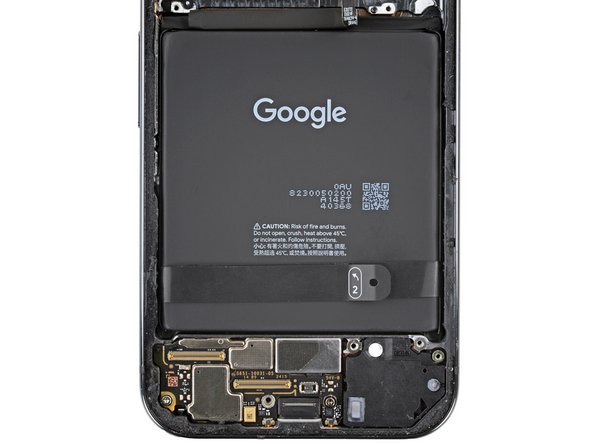
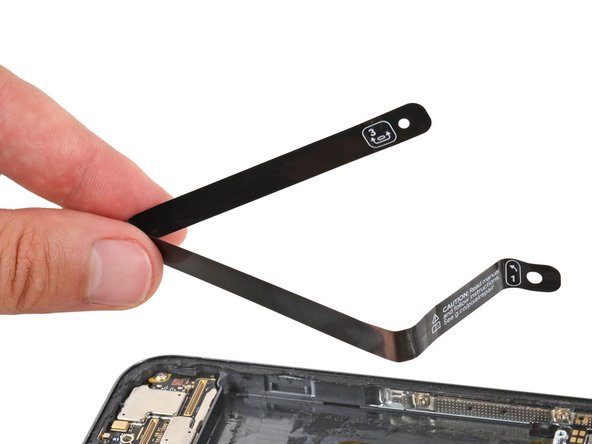
– Gently use your fingertips to lift the plastic tabs located at the bottom edge of the battery.
– Once you’ve got those tabs up, feel free to tuck them under the phone or tape them back so they stay out of the way while we heat things up in the next step.
– Slip on some finger stalls to ensure you have a solid grip on those battery pull tabs in the upcoming steps!
Tools Used
Step 38
Before you dive into the battery removal extravaganza, take a moment to check out the next three steps. The pull tabs work best right after you’ve warmed up that battery, so it’s super important to know the game plan before you kick things off!
Or, if you’re feeling fancy, you can use a heat mat set to 70°C (158°F) with your phone screen-side down for 10 minutes. This will give your phone a little spa treatment, and help loosen things up for the next step. If you need help, you can always schedule a repair
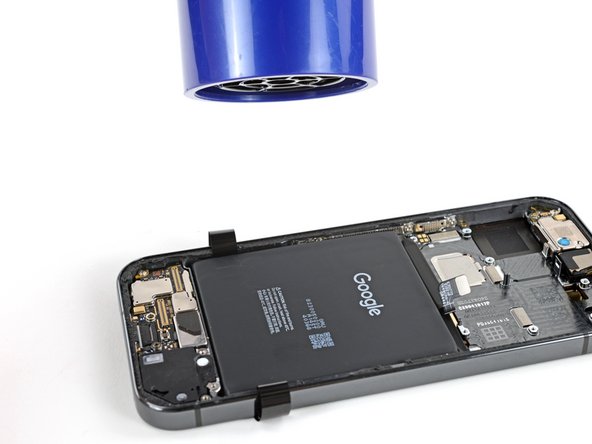
– The battery is held tight by some seriously strong adhesive. But no worries! A little heat will do the trick to break that bond and help you out. Let’s warm things up a bit!
– Grab your trusty hair dryer and set it to High heat and Low speed. Hold it about three inches away from the battery and give it a good blast for three minutes. Make sure to spread the heat evenly over the entire surface of the battery. You got this!
Tools Used
Step 39
Before you secure your phone, take a quick peek underneath. You want to make sure it’s all clear down there! When you do secure it, stick to the raised lip of the frame. And remember, gentle hands are the way to go—no poking those delicate internal parts!
Grab some clamps with soft plastic or rubber pads, or just be super careful to keep your device safe from any scrapes.
Two hands? No problem! Get that phone held steady on your workspace. We’re going to do this thing.
And remember, static electricity is no friend of our delicate electronics. Keep those ESD precautions in mind!
– Gently pull those tabs out from underneath your phone so they’re ready for action!
– Grab some F-Clamps or C-Clamps to keep your phone steady on your work surface. You’ll want at least two—one to hug the top and another for the bottom.
– No clamps? No problem! Just get a buddy to hold the phone nice and tight while you work your magic.
Step 40
Don’t even think about using a bent or broken battery—it’s a fire waiting to happen! Swap it out for a fresh one instead.
If the battery isn’t budging after a solid minute of applying pressure, give it another round of heat and take another shot! You’ve got this!
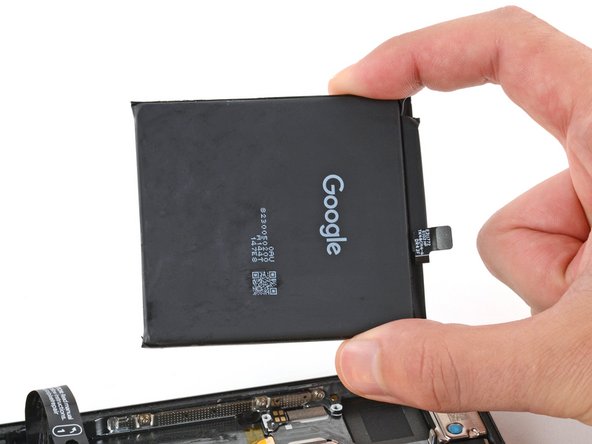
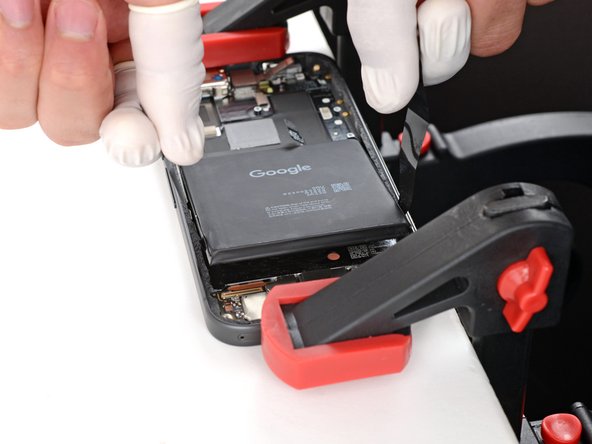
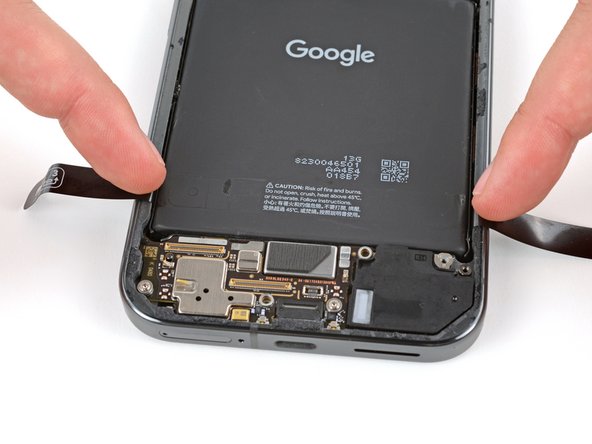
– Gently tug straight up on those battery pull tabs, and keep a steady, even pressure until the battery pops free from the frame.
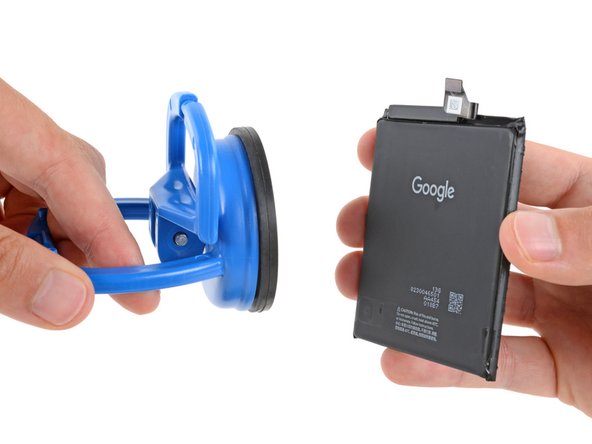
– Now, go ahead and take out that battery.
– If you’ve successfully freed the battery, high five! Feel free to skip ahead seven steps for reassembly guidance.
– If the pull tab decided to put on a magic show and disappeared, don’t panic! Just move on to the next step for an alternative method to remove the battery.
Step 43
A heavy-duty suction cup is your best bet for battery removal. But if you have a smaller suction handle, that’ll do too. Just stick it to the bottom edge of the battery and skip down a couple of steps.
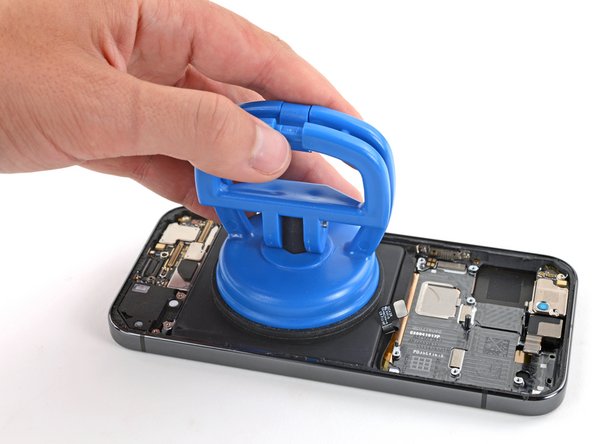
– Give that big suction cup handle a friendly tug to lift it up and away!
– Now, use your fingers to gently fold those pesky plastic battery tabs completely out of the battery’s way.
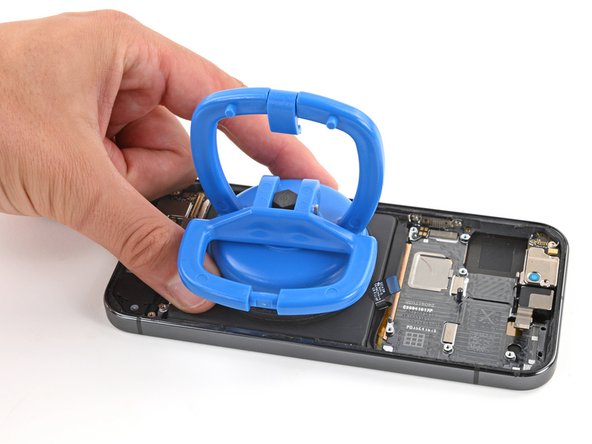
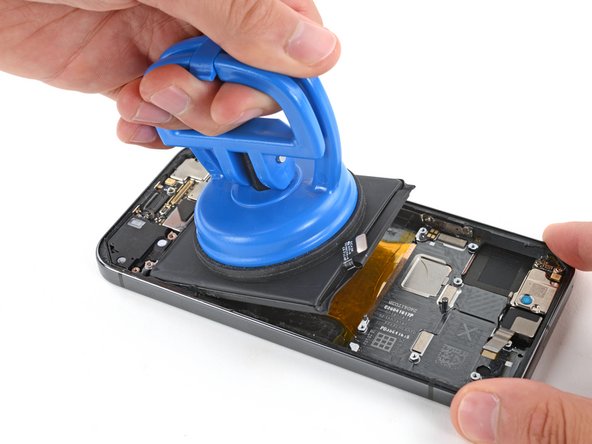
– Time to put that suction cup right in the heart of the battery!
Tools Used
Step 44
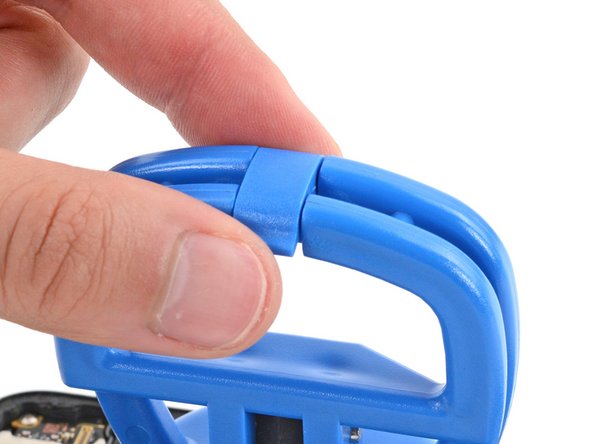
– With a gentle touch, press down on the suction cup and give the handle a little pull to secure it in place.
– Now, take that plastic clip perched on top of the suction cup, flip it over the handle, and snap it into place to keep everything snug.
Step 45
– Use one hand to hold your phone down tight on your work surface – it’s going to be your best friend during this process!
– With your other hand, grab that suction cup and give it a strong, steady tug towards the bottom of your phone. This will help lift the top edge of the battery. Remember, keep that pressure on – it gives the adhesive a little time to loosen up!
Step 46
Don’t even think about reusing a bent or damaged battery—it’s a serious fire risk. Swap it out for a fresh new one!
– Let’s get this battery out of its little hiding spot!
– Time to say goodbye to the suction cup. It’s done its job!
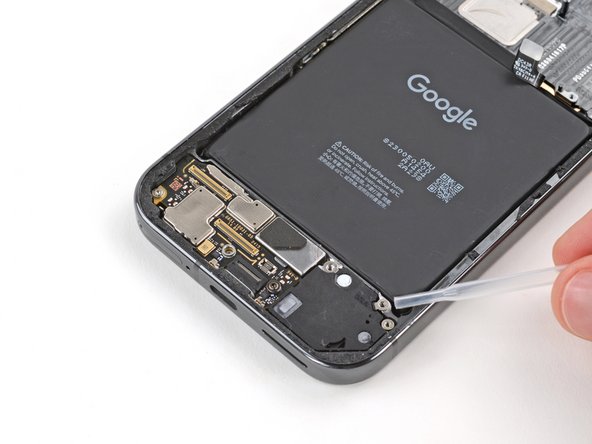
– If the pull tab is still hangin’ around, give it a gentle nudge and send it on its way.
Step 47
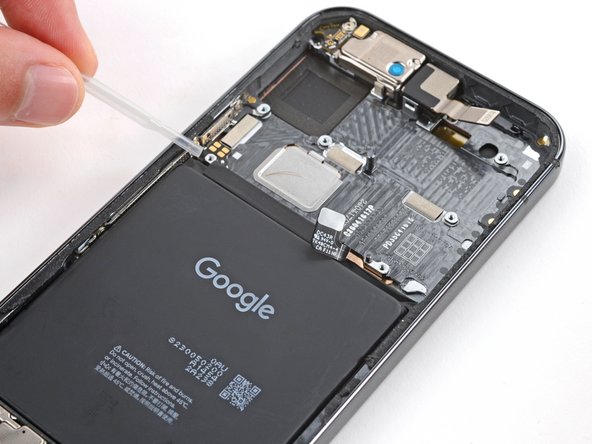
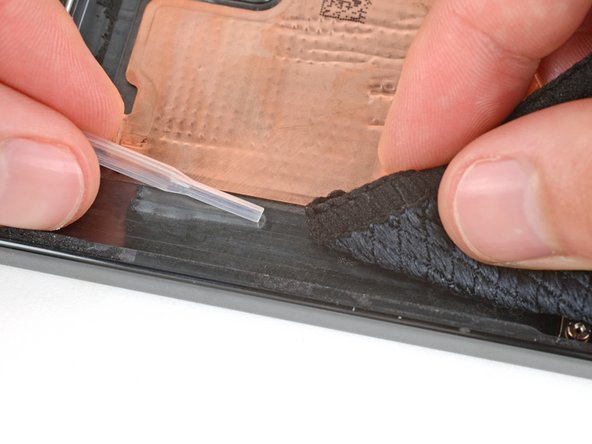
– Grab your trusty spudger and gently scrape away all that old battery adhesive clinging to the frame. It’s like giving your device a little spa treatment!
– Once you’ve banished all the sticky residue, take some isopropyl alcohol (90% or higher) and a microfiber cloth to give everything a nice clean swipe. You’ll want it sparkling!
– Let the frame dry completely before you pop in that shiny new replacement battery. Patience is key, my friend!
Tools Used
Step 48
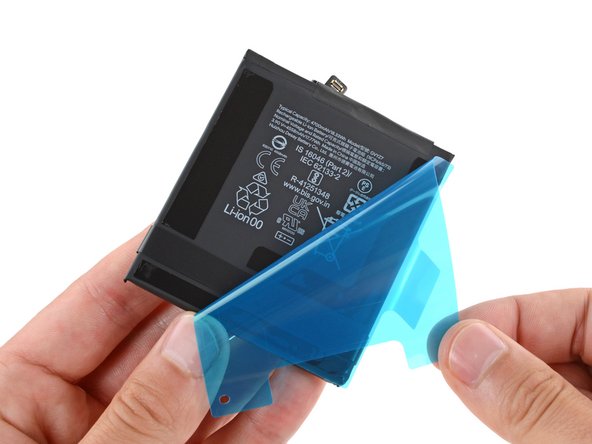
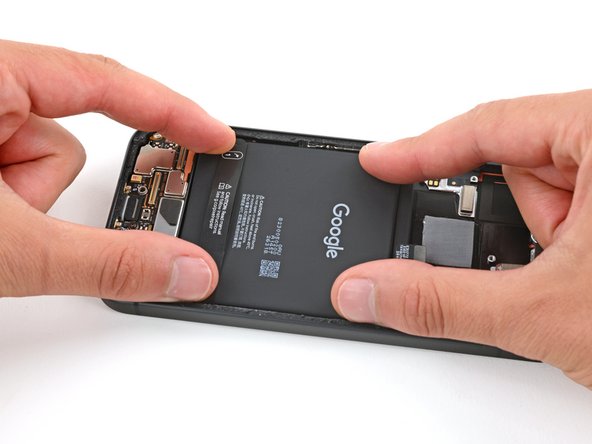
– Now that you’ve got that done, it’s time to put everything back together. Follow the steps in reverse order, starting with this one.
– Feeling like a tech wizard? Run a quick diagnostic test to make sure everything’s working like a dream.
– Want to get the most out of your new battery? Calibrate it after you’ve finished the guide.
– Time to say goodbye to your old electronics? Take your e-waste to a certified recycler.
– Didn’t go as smoothly as you hoped? Try some basic troubleshooting, or if you’re stuck, you can always schedule a repair.
– Well, looks like you decided to call it quits. No worries, maybe you’ll give it another shot another time.
–
Success!


