DIY Guide: Basic LED Flashlight Soldering Skills Tutorial
Duration: 45 minutes
Steps: 27 Steps
Hey there! Just a friendly reminder to take your time and double-check everything as you go. If you hit a snag or need a hand, don’t hesitate to schedule a repair. You’ve got this!
Get ready to light up your life with the Basic LED Flashlight DIY Soldering Kit! This guide will walk you through the fundamentals of soldering those through-hole components to bring your flashlight to life. If this is your first soldering adventure or you’re curious to learn more, feel free to check out our handy guide on soldering and desoldering connections. And remember, if you need help, you can always schedule a repair!
Step 1


– When you’re tackling this project indoors, make sure to set up your fume extractor right by your side. Arrange your tools in a bright spot, away from anything that could catch fire.
Step 2

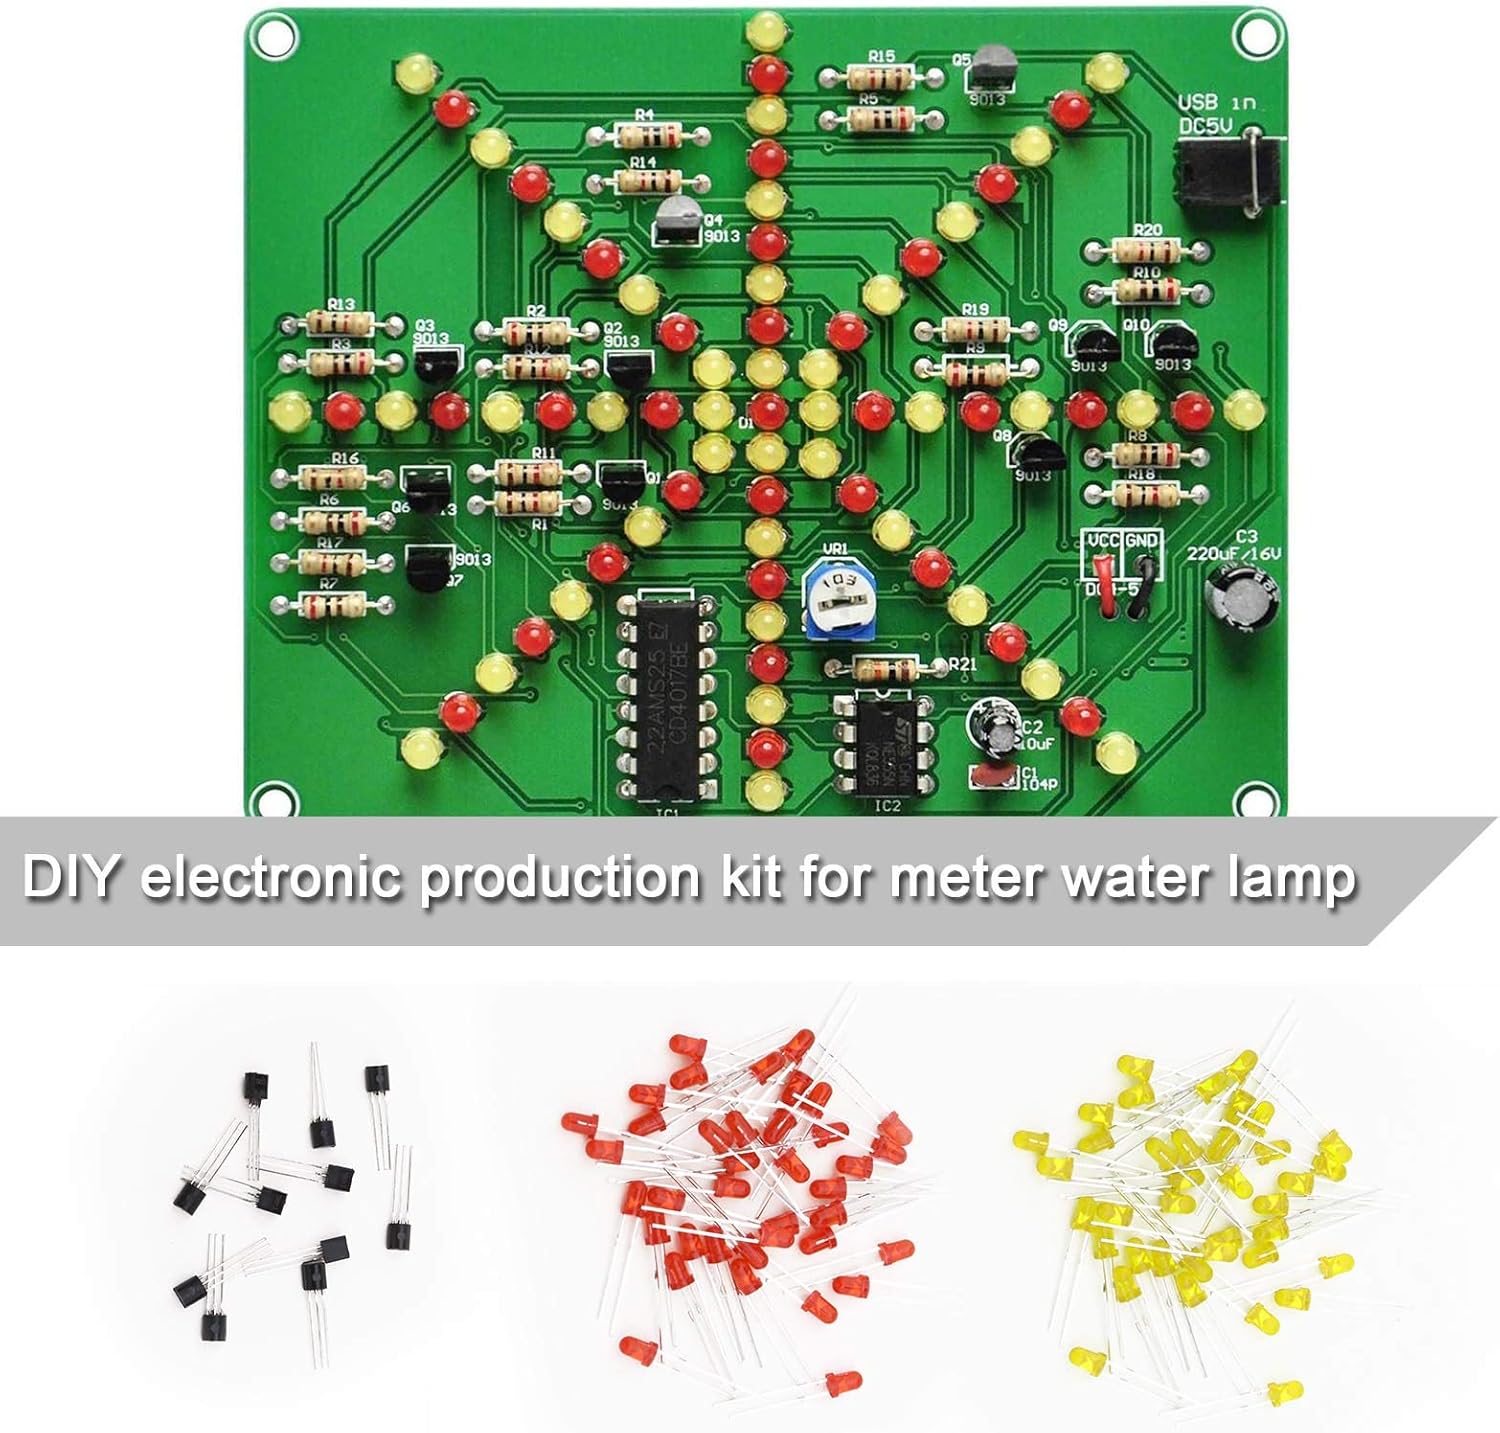
– Your flashlight kit is packed with these awesome components:
Step 3


– Gently use your fingers to pop off the two protective covers from the resistor leads. Just be careful not to bend those leads while you’re at it!
Step 4


– Gently grip the resistor body with one finger and bend the leads over the edge of that finger at a right angle, creating a U-shape. You’re doing great!
Step 5


The resistor is designed to be symmetrical, so feel free to pop it in any way you like!
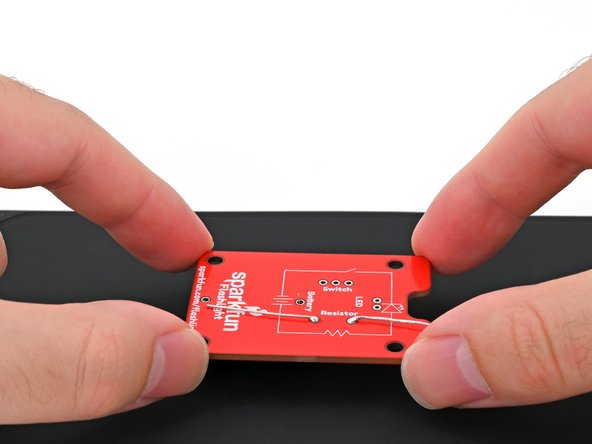
– Grab the circuit board and make sure the front side, which has the cheerful message ‘Let Your Light Shine’ at the top, is facing you.
– Now, it’s time to pop those resistor leads through their designated holes on the front of the circuit board!
Step 6


– Press the resistor snugly against the front of the circuit board.
– Turn the board over.
– Gently bend the resistor leads so they’re lined up parallel to the circuit board. This will keep the resistor steady while you get it soldered in place.
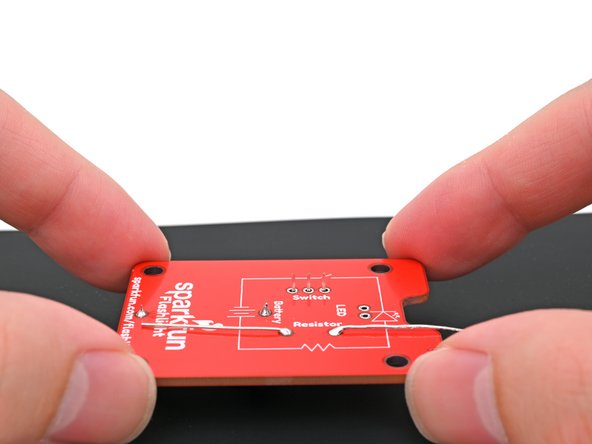
Step 7

– Grab those helping hands and steady the board with the leads pointing up! You’ve got this!
Tools Used

Step 8


If you’re just getting the hang of using a soldering iron, don’t sweat it! Take some time to practice the cleaning and melting process a few times. It’ll help you understand how molten solder behaves and how much the tip can hold. Remember to clean that tip before moving on!
– Grab those safety glasses and put them on! Safety first, folks!
– Fire up that soldering iron! If yours has a temperature control feature, you’re in luck!
– Time to clean up that soldering iron tip! If you’re using a cellulose sponge, give it a little splash of distilled water until it’s damp, then swiftly wipe the tip across it. If brass wool is your tool of choice, give the tip a few friendly stabs into the wire.
– Now, let’s get a little glob of solder melting on the tip of your iron. This nifty trick is known as ‘tinning the tip,’ and it’s going to make heat transfer a breeze!
Step 9


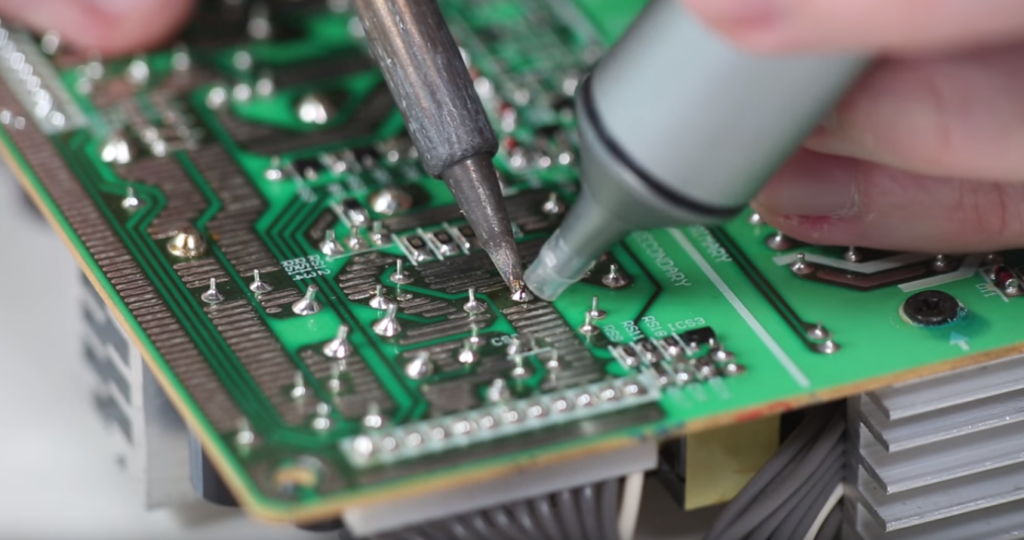
In this step, we’re going to warm up the solder pad and the resistor’s lead so they can easily melt the solder wire. Let’s get that heat going!
– Gently press the tip of your soldering iron against the circuit board’s solder pad and the resistor’s lead for a few seconds to get them nice and toasty. Make sure to angle the tip for the best contact—it’s all about that sweet spot!
– Now, let the solder wire flow into that warm zone until you see a little concave pool of solder forming around the lead, kind of like a mini volcano. Cool, right?
– First, pull away the solder wire, then carefully lift the soldering iron off the pad. You’re doing great!
– Repeat this fun little dance for the second resistor lead, and you’re on your way to a successful repair!
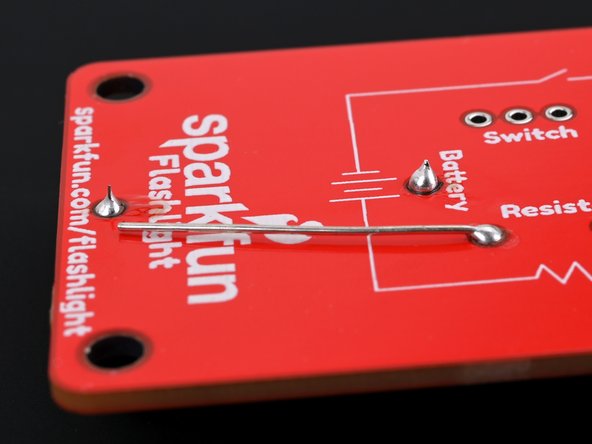
Step 10

Awesome job—you’ve successfully soldered that resistor onto the board!
If the solder isn’t hugging the entire lead, just give it another heat and add a little more solder to make it cozy.
Take a look and see if any solder has made an unexpected friend with another joint. If that’s the case, gently warm up the area with your iron to break them apart. If they’re being stubborn, go ahead and desolder it and give it another shot.
Just like learning to ride a bike, practice is key! If your first solder joint doesn’t look like it came out of a magazine, don’t sweat it! It takes a few tries to nail down the technique and timing.


Step 12


Remember, the battery connector has its own unique style—it’s not symmetrical! Make sure to align it just right using its outline on the board. You’ve got this!
– Gently position the battery connector onto its designated spot on the front of the circuit board. Ensure that the leads fit snugly through their respective holes in the board.
Step 13

– Gently press the battery connector snugly against the front of the circuit board.
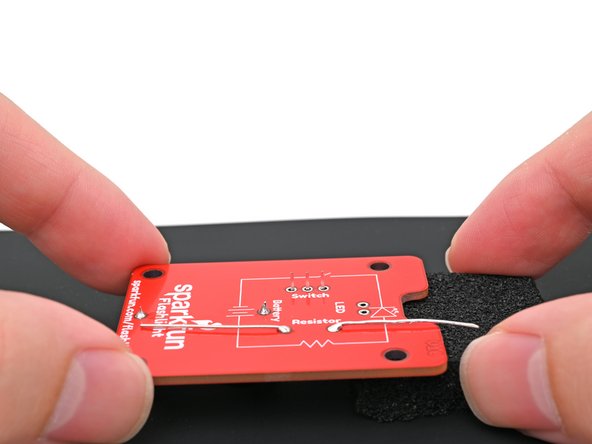
– Carefully flip the board over and place it down so the battery connector is resting comfortably on your work mat or surface.
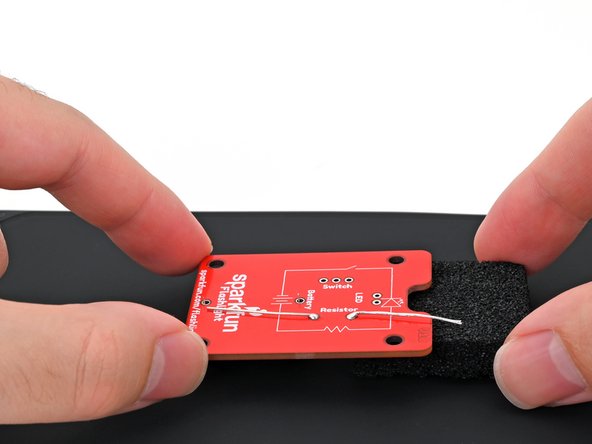
– Slide a foam block under the top edge of the board (the side with the notch) to keep it steady while you work your soldering magic.
Step 14


– Gently press the tip of your soldering iron against the circuit board’s solder pad and the battery connector’s lead for a few seconds to warm them up. Make sure to angle the tip for the best contact with both surfaces.
– Now, let the solder wire flow into the heated area until you see a lovely little concave pool of solder forming around the lead, like a mini volcano of goodness!
– Once you’ve got that pool just right, pull the solder wire away first, and then carefully lift the soldering iron from the pad.
– Don’t forget to repeat this whole process for the other battery connector lead. You’re doing great!
Step 15

– Give that battery connector a good once-over! Make sure it’s sitting nice and flat against the board, and check that those solder joints are snug and secure. You’ve got this!
Step 16


The switch is designed to be inserted in any direction, so feel free to pop it in however you like!
– Position the switch on its designated outline on the front of the circuit board. Ensure that all three leads pass through their respective holes in the board.
Step 17

– Press that switch snugly against the front of the circuit board—it’s like giving it a little hug!
– Turn the board over and gently set it down so the switch is comfortably resting on your work mat or surface.
– Pop that foam block under the board to keep everything nice and steady while you work your soldering magic.
Step 18


Keep that switch snug against the board and make sure the leads are all lined up like a well-rehearsed dance crew while you solder. If things start to look a bit wobbly, just desolder those leads and give it another go!
– Attach the three switch leads to the board with a little solder magic.
Step 19
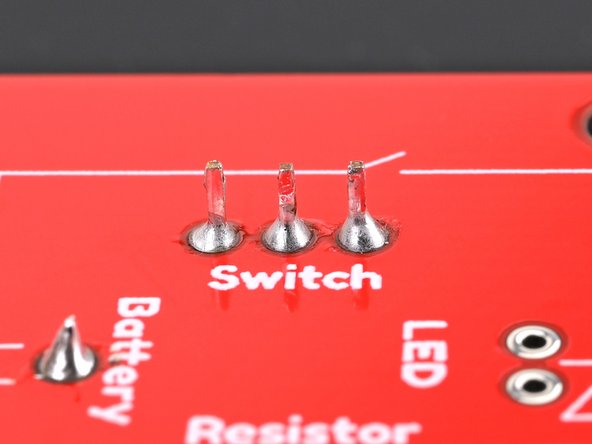

– Give that switch a good once-over! Make sure it’s sitting nice and flat against the board, and check that those solder joints are snug as a bug in a rug. You’ve got this!
Step 20


Make sure the LED is aligned just right – it’s got its own unique style, and we want it to shine perfectly!
– Let’s get those LED leads ready! Carefully insert them halfway into the front of the board—remember, the longer leg goes in the ‘Long Leg’ hole, and the shorter leg fits into the ‘Short Leg’ hole. You’ve got this!
– Now, gently push the LED towards the board, bending those leads a little so the lens snuggles perfectly into the notch between the words ‘Let Your’ and ‘Light Shine’ on the top/front of the circuit board. Keep going, you’re doing great!
Step 21


– Time to flip the board over and get started!
– Now, gently bend those LED leads so they’re nice and parallel to the circuit board. This will help keep the LED steady while you work your magic soldering it to the board.
Step 22


– Get those helping hands ready to hold the board steady with the leads pointing up, just like a little flag waving in the breeze!
– Now, let’s get to soldering! Attach the two leads of the LED to the board and watch the magic happen.
Tools Used
Step 23

Take a moment to check if any solder has accidentally connected with a neighboring joint. If you spot a bridge, gently heat the solder between the joints with your iron and separate them. If that pesky bridge refuses to budge, don’t fret—just desolder it and give it another shot!
Step 24
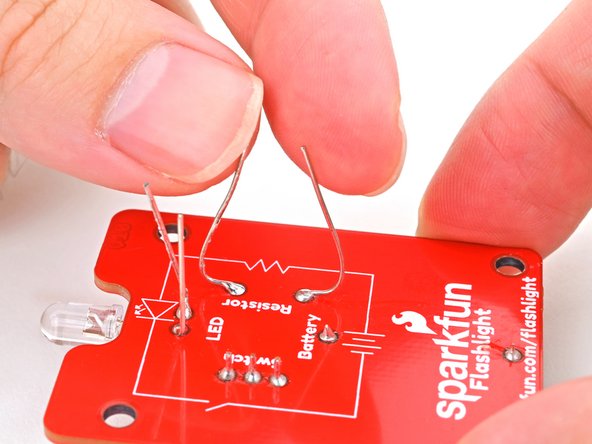

– Gently bend those resistor and LED leads upwards so they’re standing tall and proud, making a perfect right angle with the board!
Step 25


Now’s the perfect moment to tidy up any leftover solder gunk. Grab some isopropyl alcohol, dab it on those solder joints, and give them a gentle wipe with a lint-free cloth to soak up all that flux and alcohol residue. You’re doing great!
– Grab your trusty flush cutters and snip those leads down so they’re nice and flush with the solder joint on the back of the board. No need for them to be poking up like they’re trying to wave at you!


Step 27
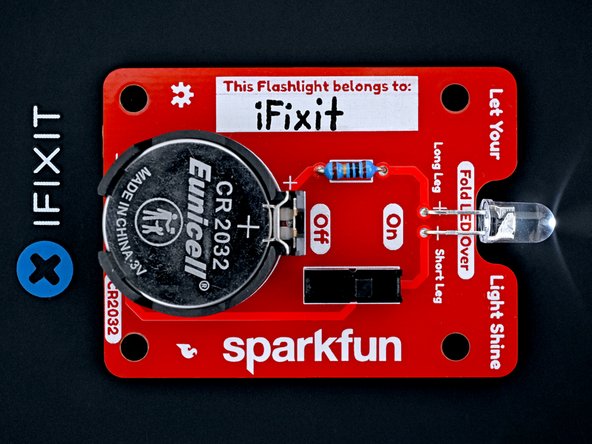

Awesome! Your flashlight is now ready to shine bright!
– Got your switch in the ‘off’ position? Time to flip it and light up that flashlight! Let’s get this show on the road.
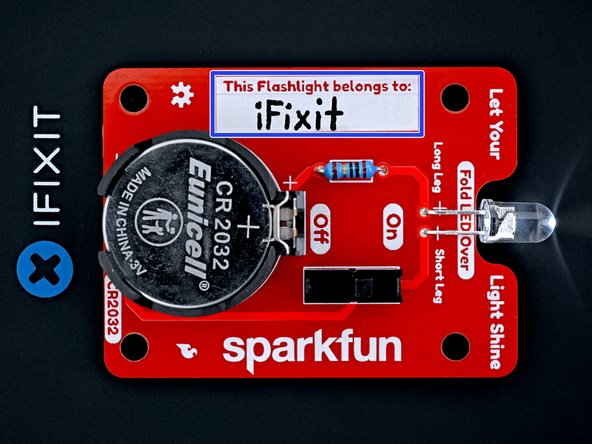
– Feel free to add your name in the name tag field if you want to give a personal touch!