DIY Guide for iPhone 6 Plus Replacing the Battery
Duration: 30 min.
Steps: 12 Steps
Ready to tackle that pesky battery issue on your iPhone 6 Plus? In this guide, we’ll walk you through the steps to swap out that faulty battery all by yourself! This fix is perfect if your iPhone is crashing during those intense gaming sessions, refusing to charge, or just not turning on at all. Let’s get your device back to its energetic self!
Step 1
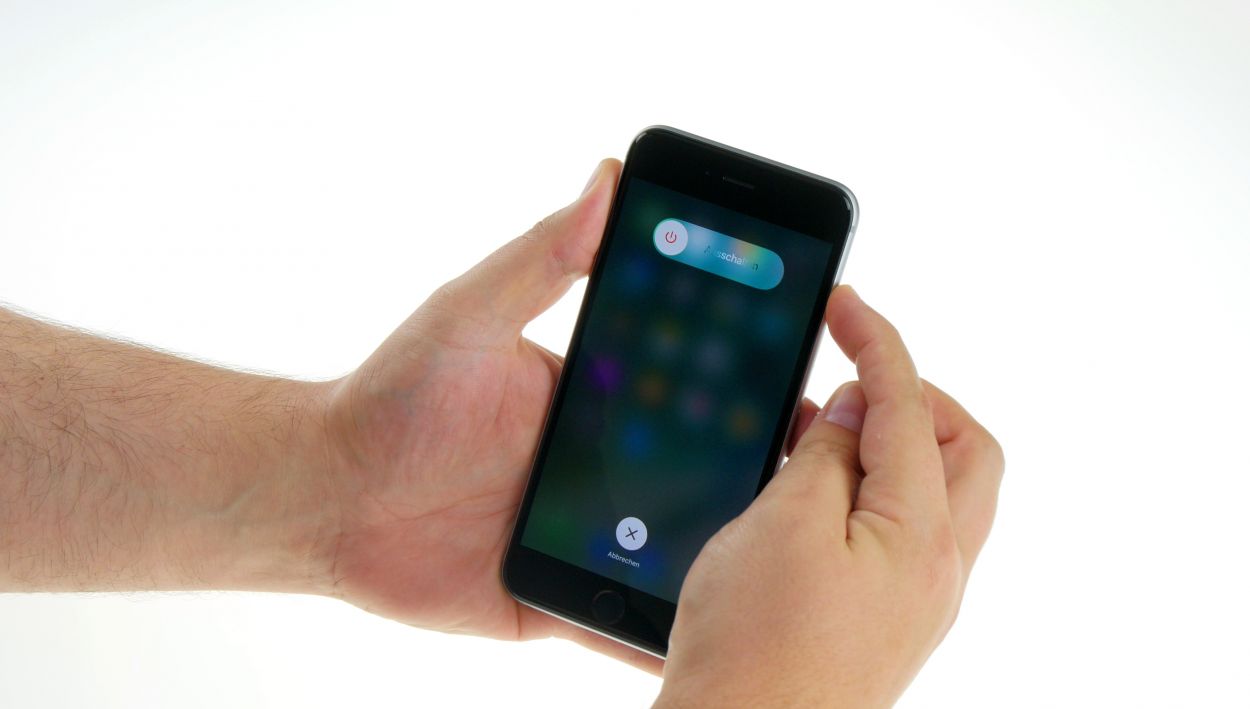
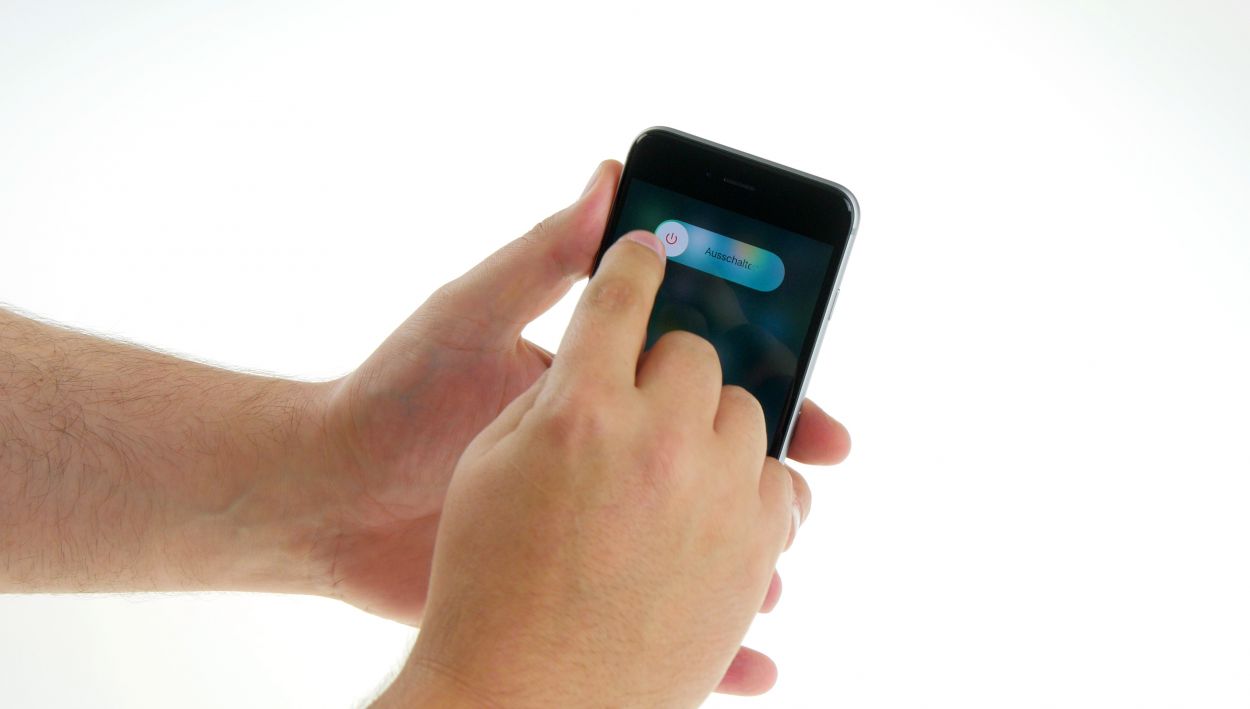
– Alright, champ! First things first: Power down your iPhone completely. Hold that standby button for about three seconds until the power-off slider pops up. Avoid any mid-repair surprises!
– Swipe that slider from left to right. Your iPhone will shut down – it might take up to ten seconds. Don’t worry, it’s just taking a little breather before we get started!
Step 2
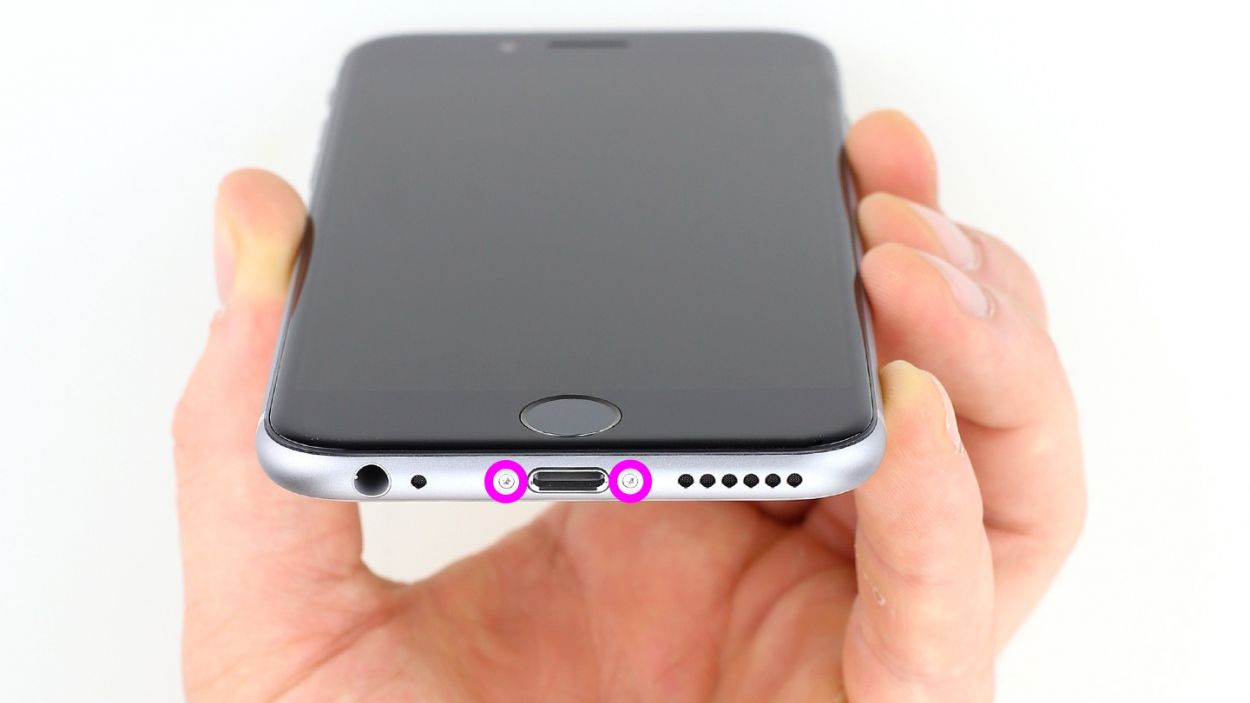
– Grab your pentalobe screwdriver – it’s showtime!
– Those two pentalobe screws at the bottom? Yep, unscrew ’em! They’re hanging out next to the Lightning connector. Keep those little guys safe in a container. (That’s 2 x 3.8 mm pentalobe screws, FYI)
Step 3


– Alright, let’s make sure your iPhone 6 Plus is comfortably settled on a soft, clean surface to avoid any unwanted scratches on its back.
– To get that front panel lifted, you’ll need a suction cup and a hard plastic pick. If the screen’s looking a bit worse for wear, a layer of packing tape can help hold it together while you work!
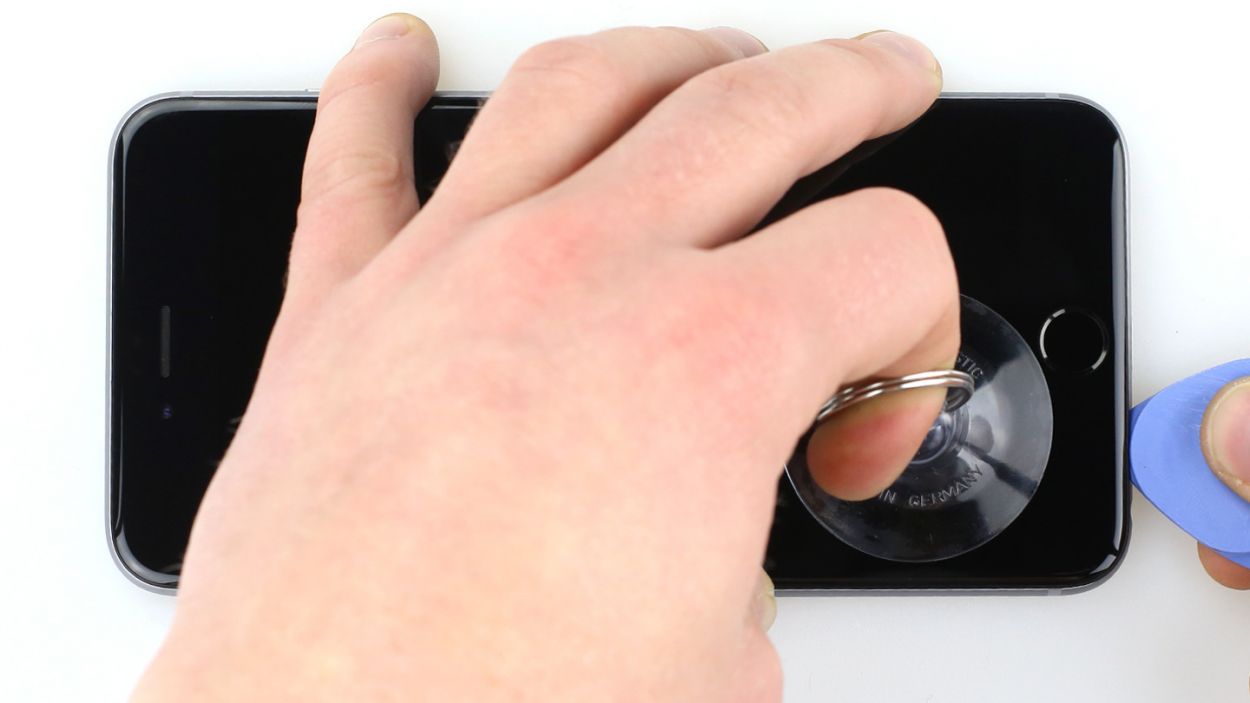
– Place the suction cup right over the Home button, or just beside it if that’s not possible (check out figure 1 for guidance!). Use the suction cup to lift the screen while gently inserting your hard plastic pick between the aluminum frame and the display frame. Press down on the aluminum frame to help lift. You might need to give this a few tries—it’s all part of the dance!
– Once you’ve managed to lift the screen just a few millimeters, carefully move around the edges until it’s loosened up on both sides (see figure 3).
Step 4

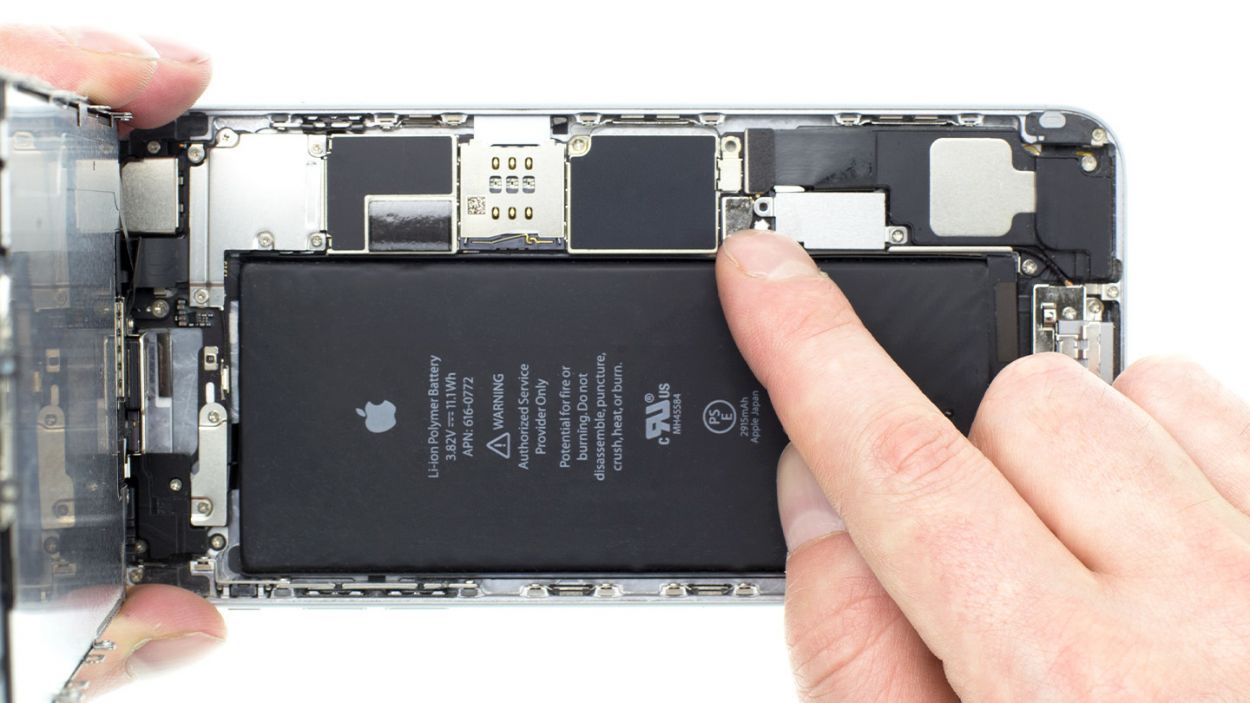
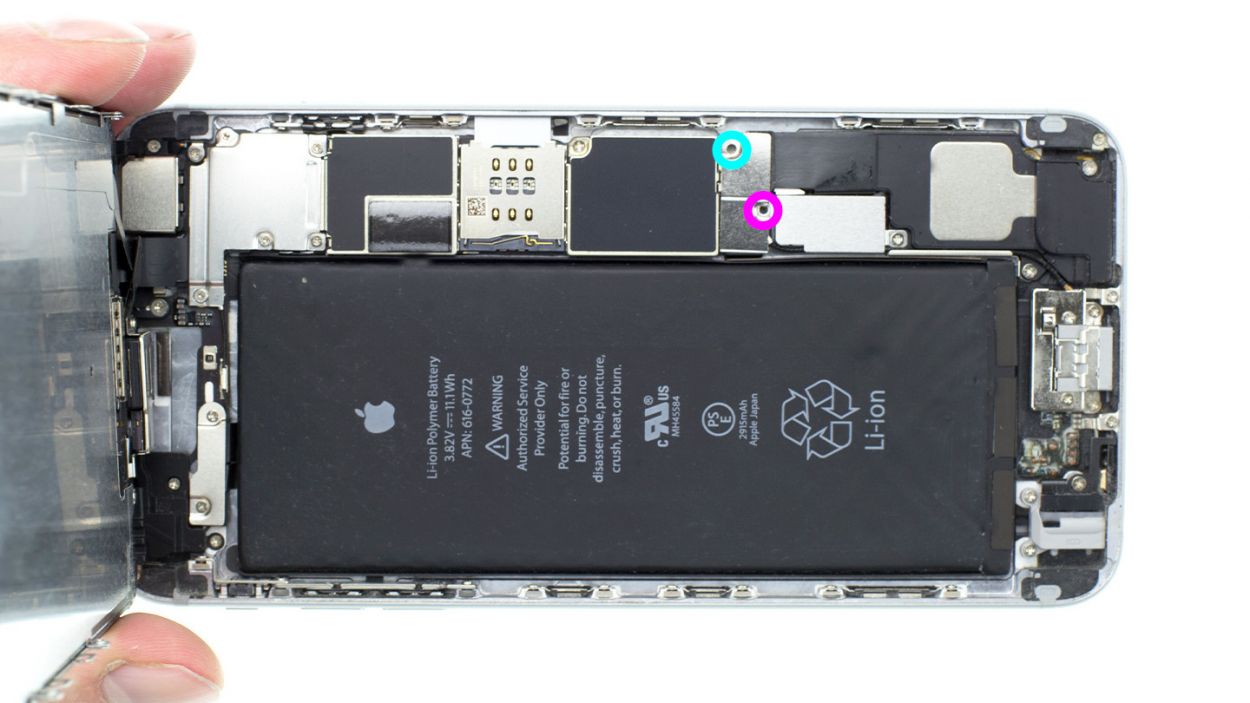
– Grab your trusty Phillips screwdriver and get ready to tackle those Phillips screws on the battery connector (check out figure 1 for a visual!). Once you’ve got those out, gently lift the cover (figure 2 is your friend here). And hey, don’t forget to keep all those little parts together in one container! You’ll need 1 x 3.2 mm Phillips screw and 1 x 2.3 mm Phillips screw.
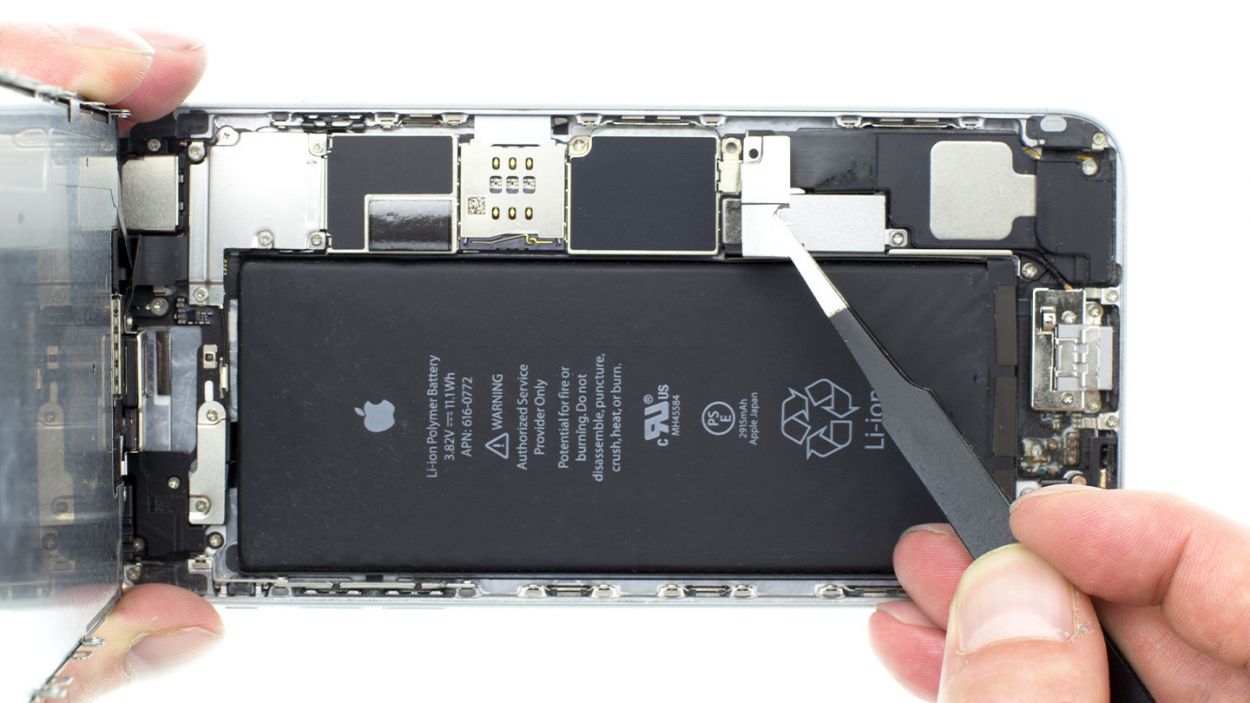
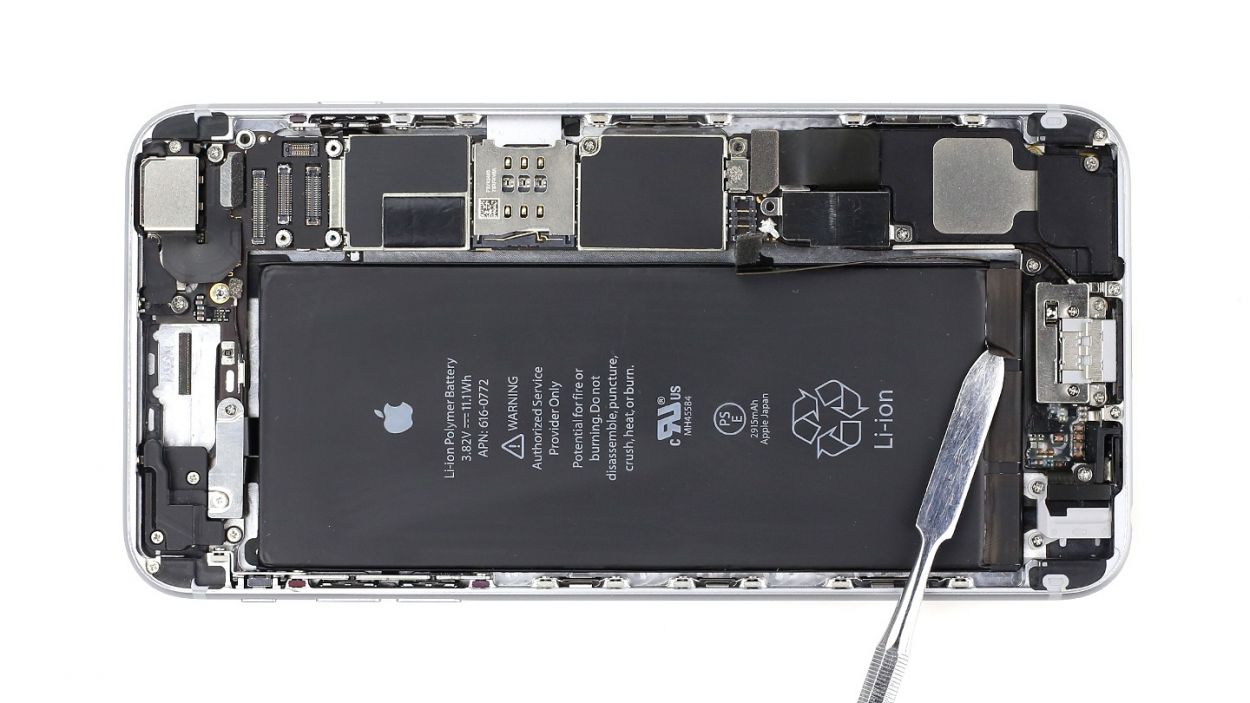
– Now, let’s carefully lift that battery connector! Just slide the pointed tip of your ESD spudger right under the connector (figure 3 will show you how). No spudger? No problem! Your fingernail can do the trick too.
Step 5

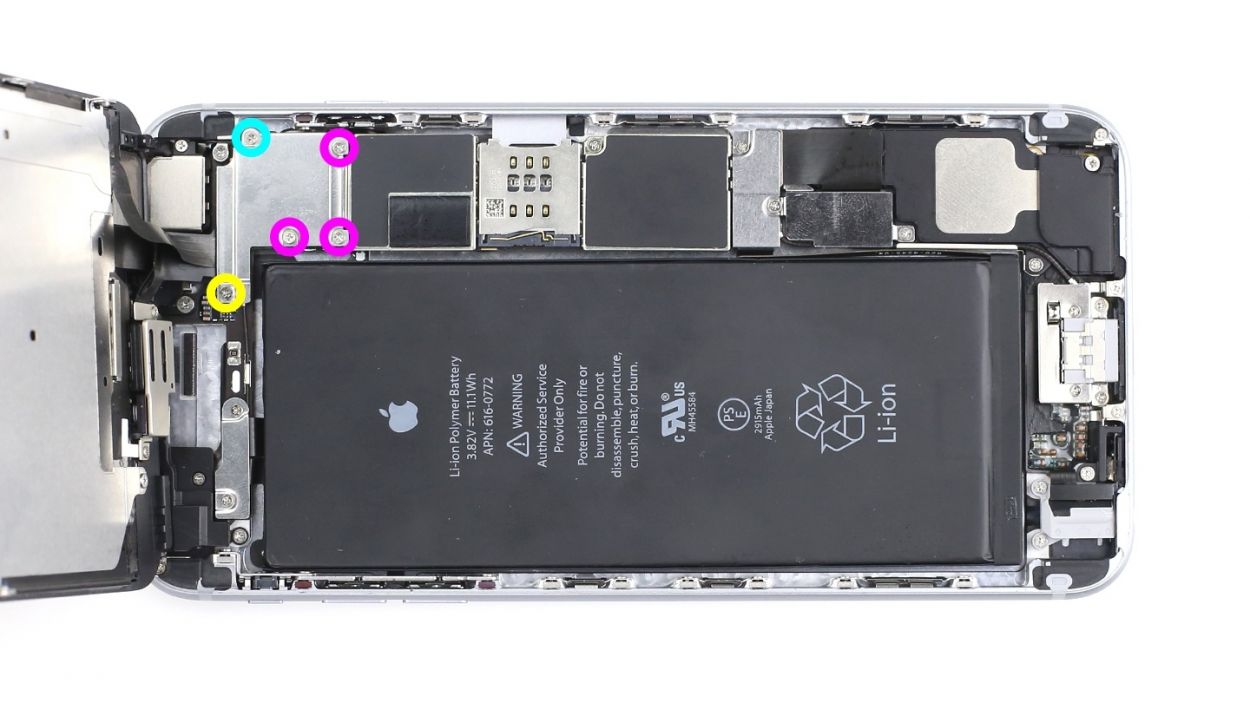
– Alright, let’s kick things off by removing those five Phillips screws from the shiny silver cover (check out figure 1 for a visual!). Make sure to keep those screws together in a container so they don’t wander off. Once you’ve got them out, gently lift the cover off. You’ll need 1 x 1.6 mm Phillips screw, 3 x 1.2 mm Phillips screws, and 1 x 2.9 mm Phillips screw.
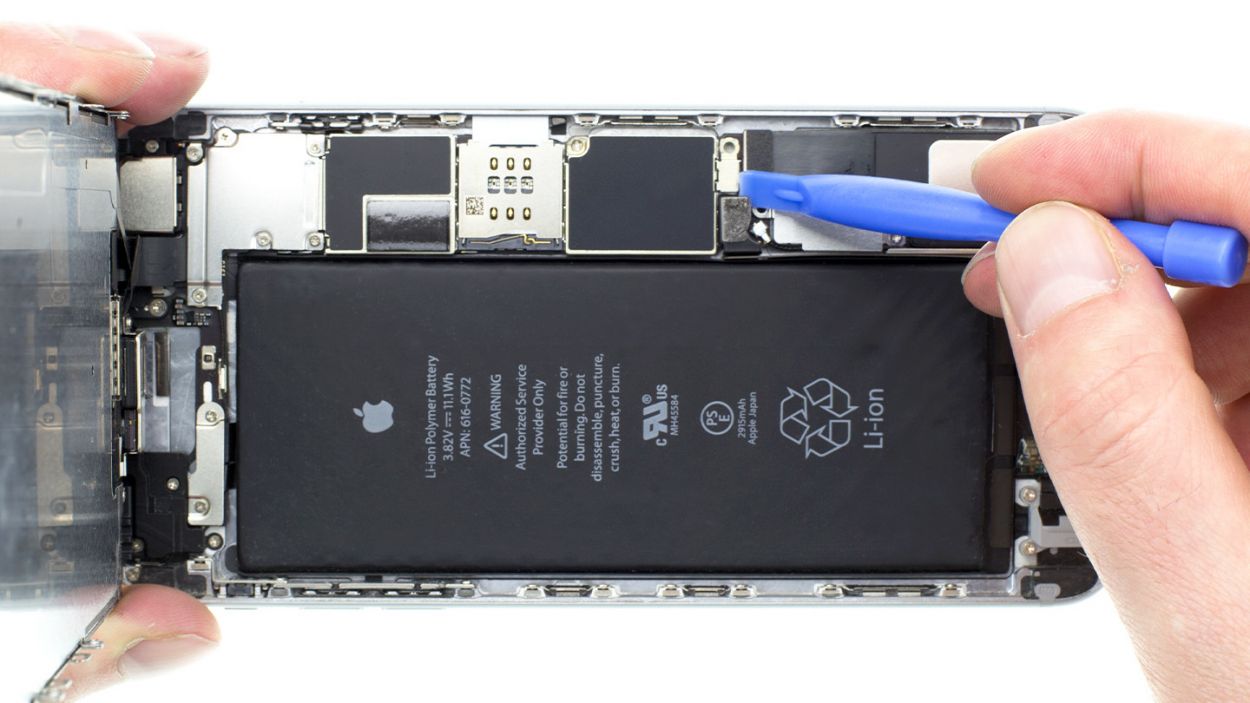
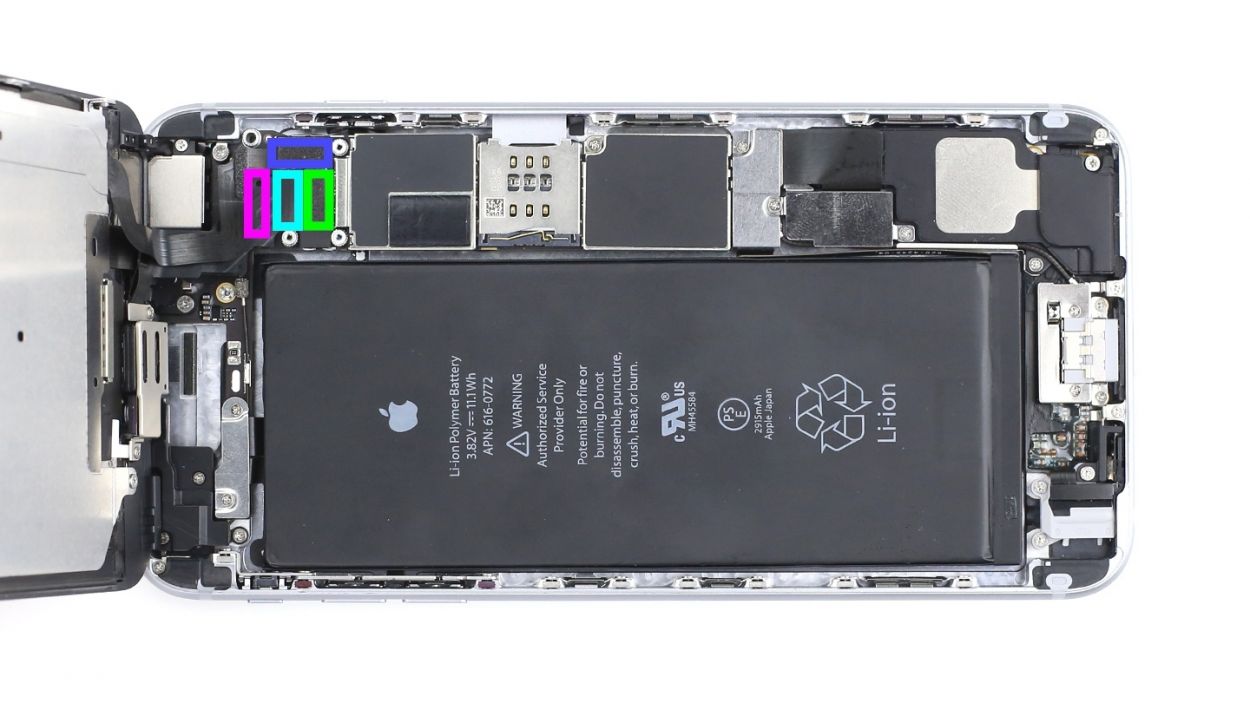
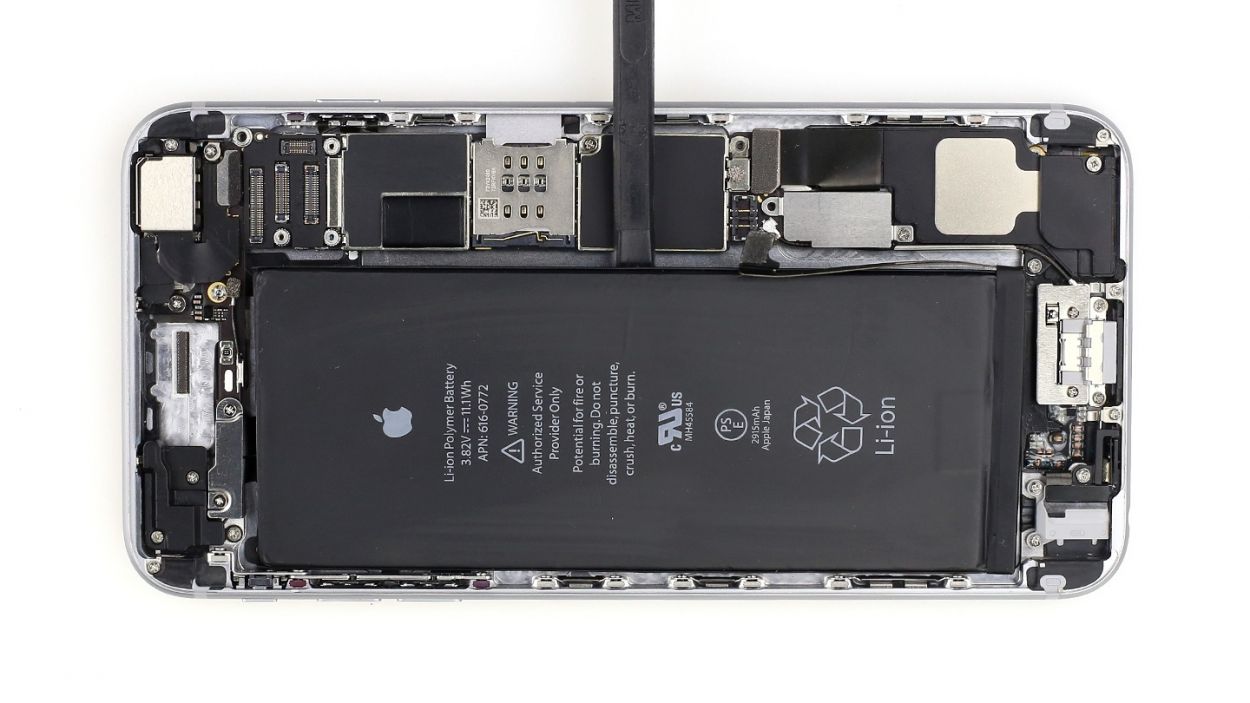
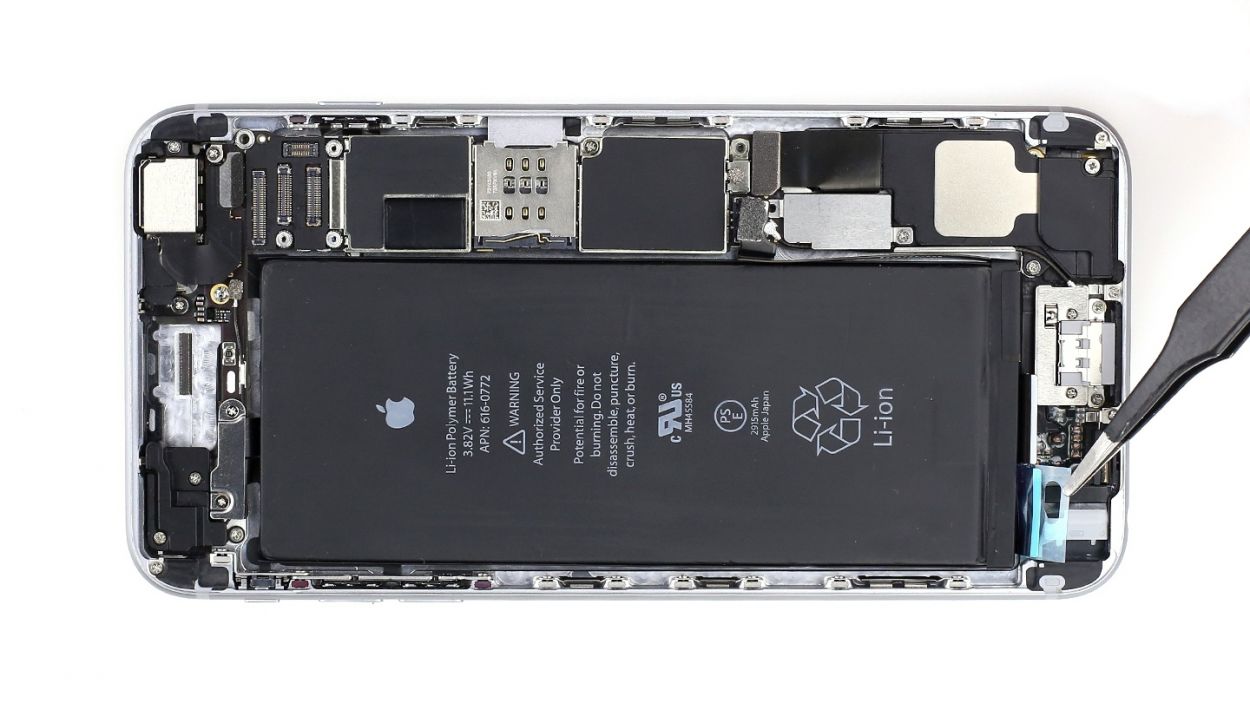
– Now, it’s time to disconnect the four overlapping connectors (see figure 2) in the order listed below. Take your time with this step—be careful! Use the pointed tip of your spudger just a tad below the contact and lift it up gently. You’re disconnecting the Front camera/sensor/earpiece/ambient microphone, Touch ID cable, LCD, and Touchscreen. You’ve got this!
Step 6
– The battery is held in place by three sticky strips. Grab your trusty laboratory spatula and gently pry off the three black ends of those adhesive strips from the battery (check out figure 1 for a visual!).
– Now, take your time and slowly peel off those adhesive strips. Keep them as flat as possible while you’re at it, right at the level of the iPhone. (Figures 2 and 3 will guide you!).
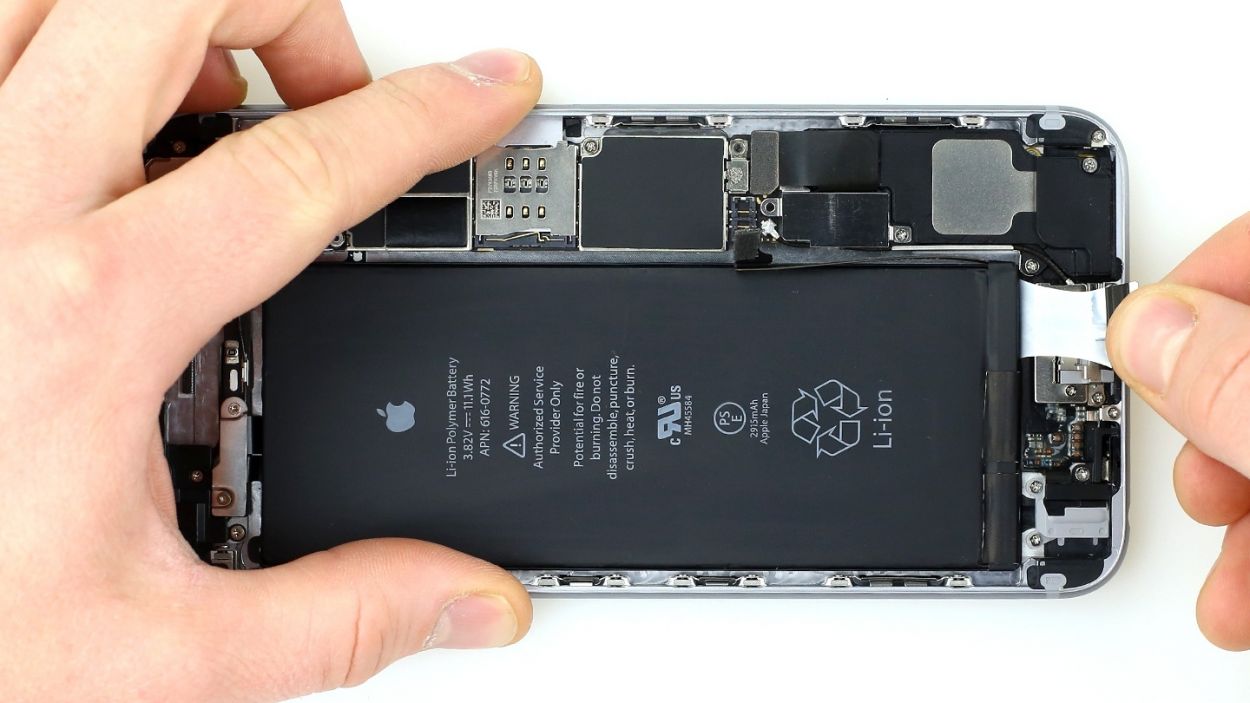
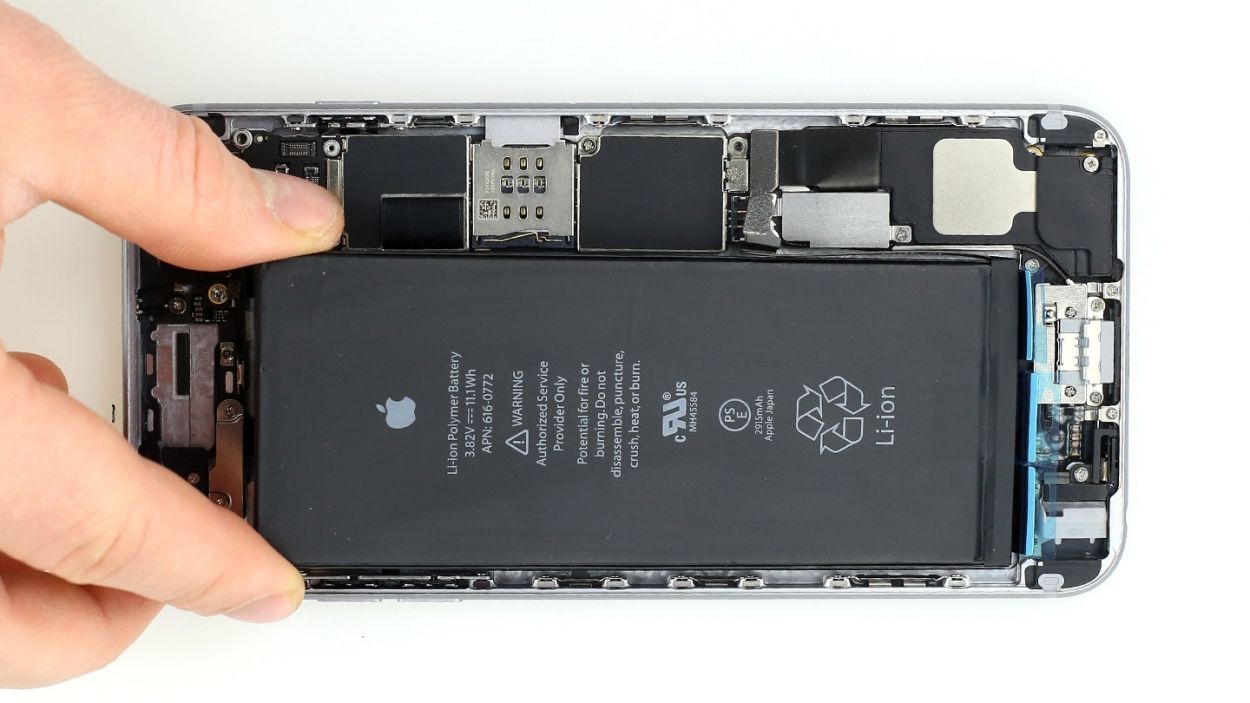
– And just like that, you can lift out the battery!
Step 7

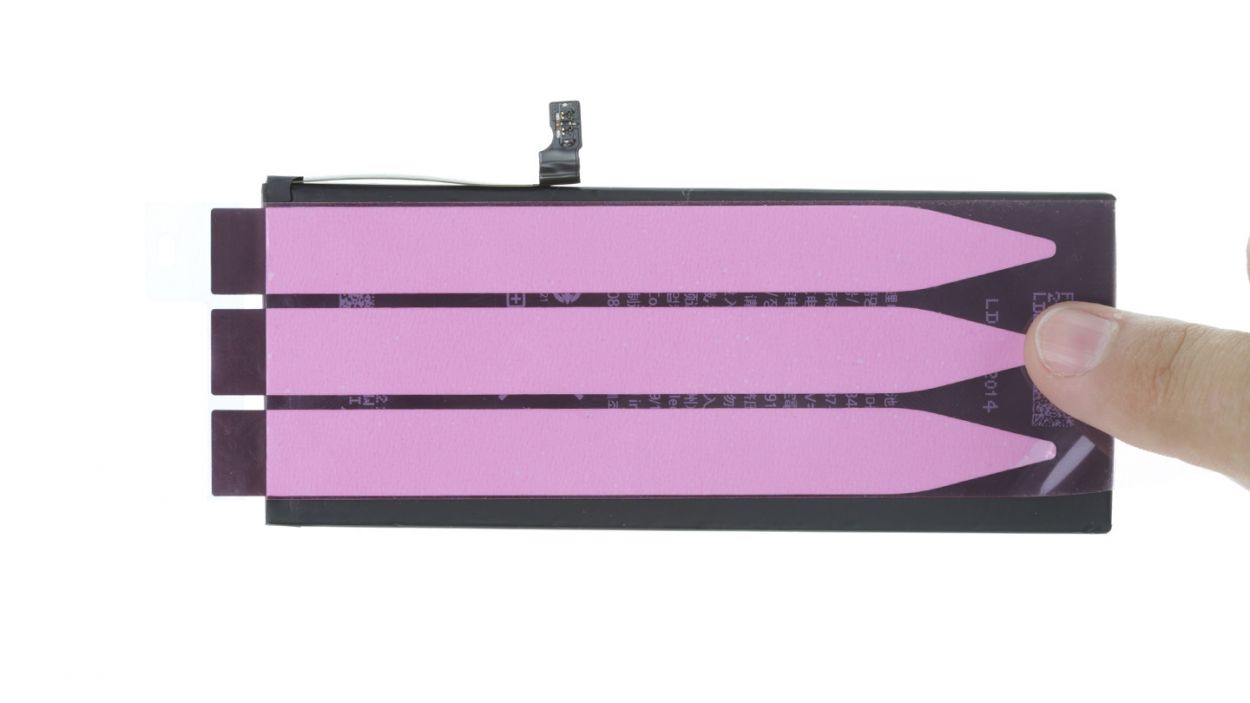
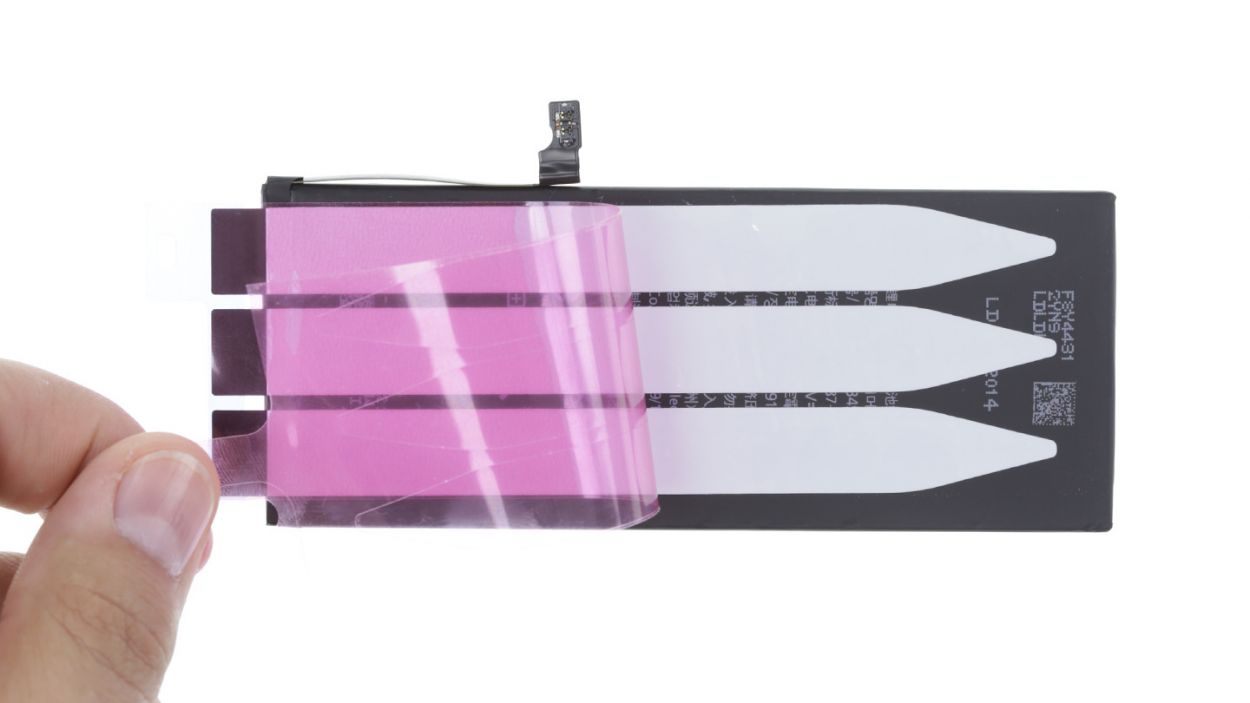

– Attach new adhesive strips to the battery and pull off the film (see figures 1 to 3). Otherwise, the battery will have too much room and move around.
– Now put the battery back in the iPhone and connect the connector (see figure 4). Pull the film off of the tabs and stick them securely to the battery (see figure 5).
– Put on the silver cover and screw it in place (see figure 6).1 x 3.2 mm Phillips screw1 x 2.3 mm Phillips screw
Step 8

If those connectors are feeling a bit shy and don’t connect just right, you might see some funky stripes on your display or find that parts of the touchscreen are playing hard to get. Let’s make sure they’re snug as a bug!
– Reattach the connectors (see figure 1). Connecting the LCD connector generally takes a few tries. Be very careful to avoid bending the connector.Front camera/sensor/earpiece/ambient microphoneTouch ID cableLCDTouchscreen
– Start your iPhone as soon as the connectors are securely attached. Check the function of the LCD, touchscreen, proximity sensor, front camera and earpiece.If the connectors aren’t connected properly, stripes will appear on the display or parts of the touchscreen won’t work.
– Now attach the cover and screw it in place (see figure 2).1 x 1.6 mm Phillips screw3 x 1.2 mm Phillips screw1 x 2.9 mm Phillips screw
Step 9

– Attach new adhesive strips below the battery. Otherwise, the battery will have too much room and move around
– Now put the battery back in the iPhone and connect the connector (see figure 1).
– Put on the silver cover and screw it in place (see figure 2).1 x 3.2 mm Phillips screw1 x 2.3 mm Phillips screw
Step 11

– Now, let’s get those two pentalobe screws back in at the bottom of the enclosure—it’s super easy! Just a quick twist and you’re all set. Remember, that’s 2 x 3.8 mm pentalobe screws you’re dealing with here!
Step 12

When the battery is removed from the device, the iPhone loses the time and sets itself to 1:00 a.m. on 1/1/1970. You could have trouble connecting to the cellular network if the time isn’t set.
– Hey there! First up, let’s get your iPhone in sync with iTunes or hop onto a WLAN network and chill for a bit until the time gets sorted out.
– Next, pop out that SIM tray with the SIM card and then slide it back in like a pro.
– Now, flip on airplane mode for a moment and then switch it off again. Easy peasy!