DIY Guide for Replacing iPhone 11 Pro Screen
Duration: 60 min.
Steps: 15 Steps
Welcome to your DIY adventure! In this clear and concise photo guide, we’ll walk you through replacing that broken display step by step. Need tools? Check out our online store for the perfect iPhone toolkit and a top-notch screen for your iPhone 11 Pro. Wishing you the best of luck with your display swap! If our instructions help you out, we’d really appreciate a thumbs up! Let’s get started!
Step 1
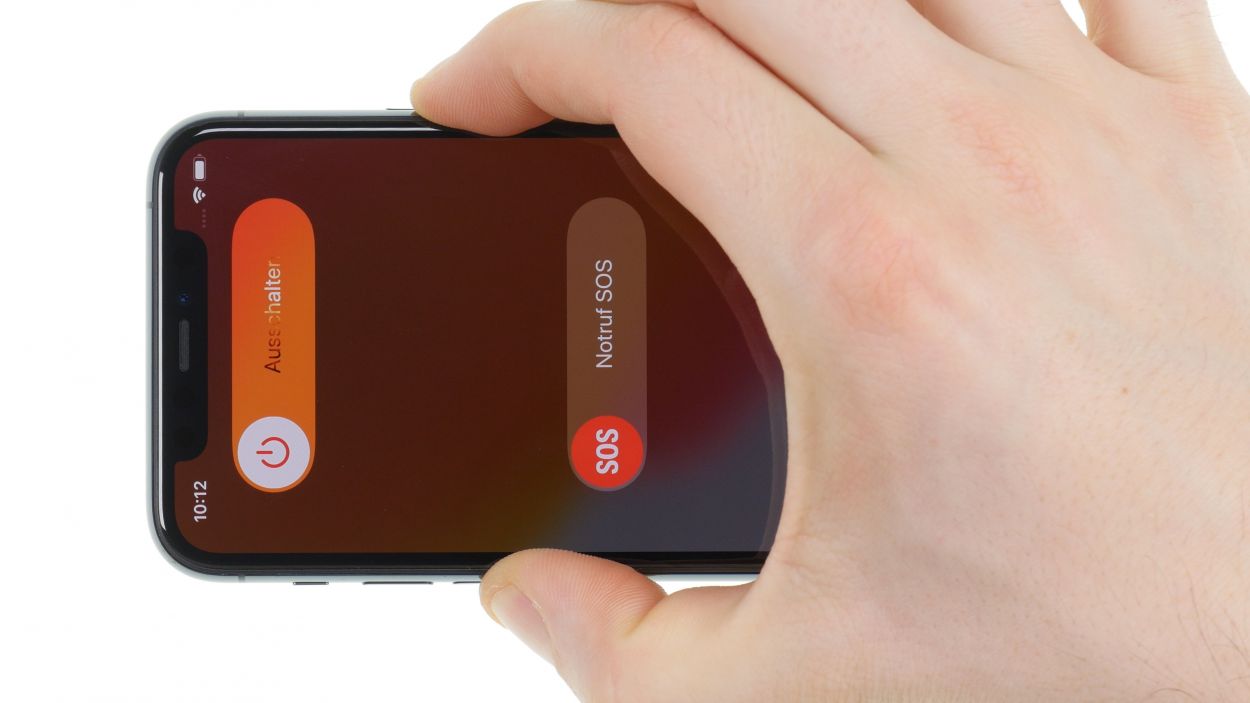
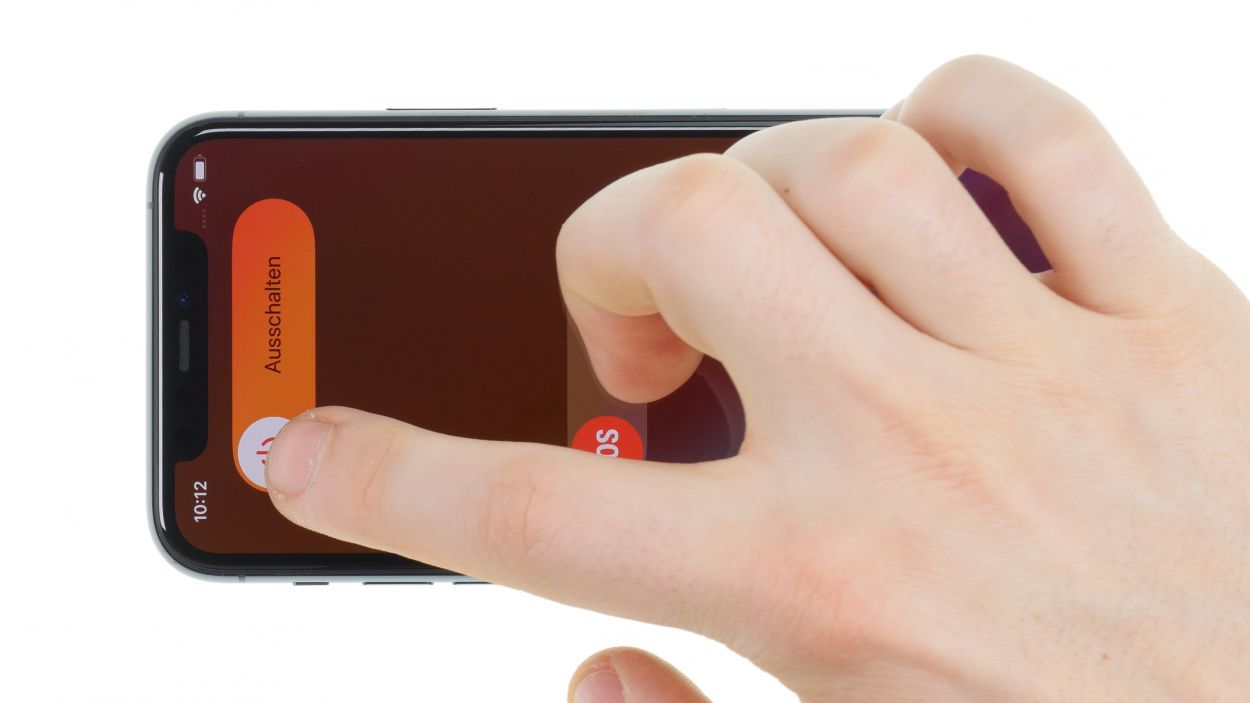
– Give that sleep/wake button and volume button a friendly squeeze together for a few seconds to power down your device.
– Slide the ‘Switch off’ slider from left to right like a pro!
– In just a few moments, your smartphone will be completely powered down. Easy peasy!
Step 2

– Grab your trusty Pentalobe screwdriver and unscrew those two Pentalobe screws like a pro!
– Once you’ve got them out, toss them into your screw storage so they don’t wander off on their own adventure.
2 × 6.7 mm Pentalobe
Hey there! To keep all those tiny screws and parts from disappearing into the great unknown, we suggest using a handy screw storage solution. Got an old sewing box lying around? Perfect! We also love our magnetic pad, which lets you organize the parts just like they were in your phone. This way, you can steer clear of losing screws or mixing them up, which could cause a hiccup in your repair journey.
Step 3


Just a friendly reminder: your screen should be warm to the touch but not hot enough to roast marshmallows! Keep it comfy so you can work without any finger burns.
– First, let’s give your iPhone a cozy spot on a soft, clean surface to keep that case scratch-free!
– Next, warm up the edge of the display with your heat gun, gliding it smoothly over the surface.
Tools Used
- heat gun to heat parts that are glued on so they’re easier to remove.
In most cases, you can also use a hairdryer.” rel=”noopener”>Heat gun
Step 4


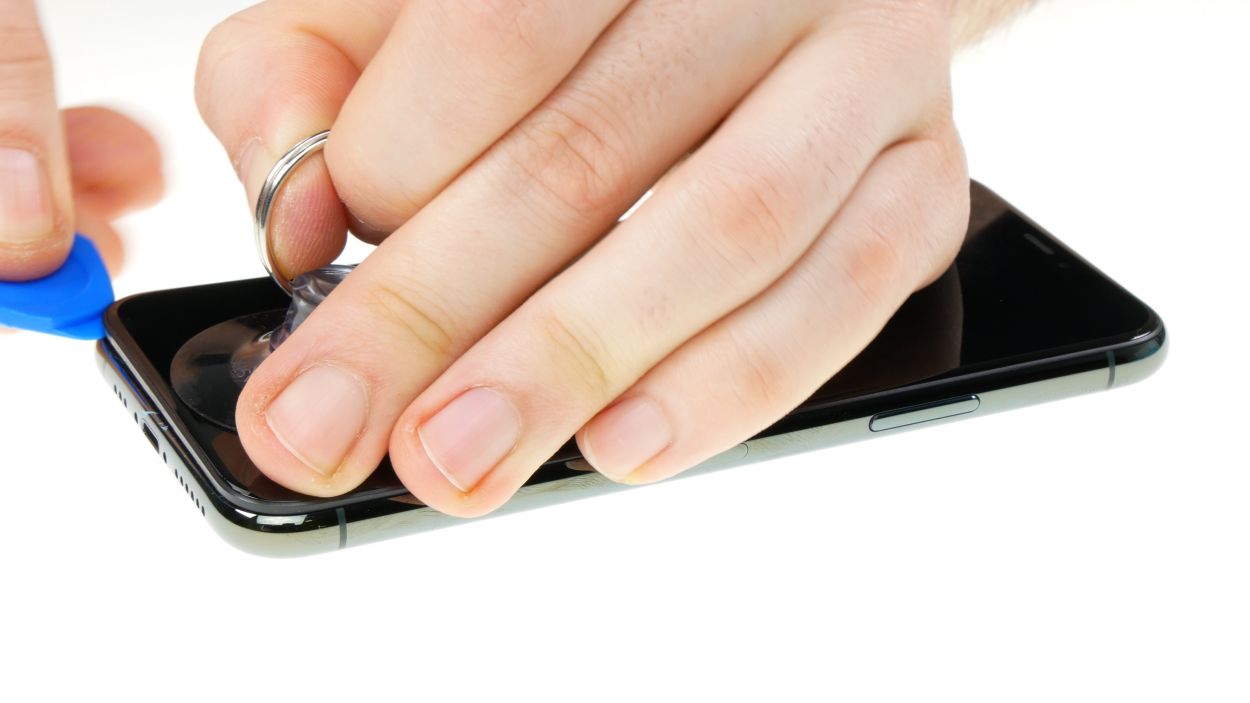
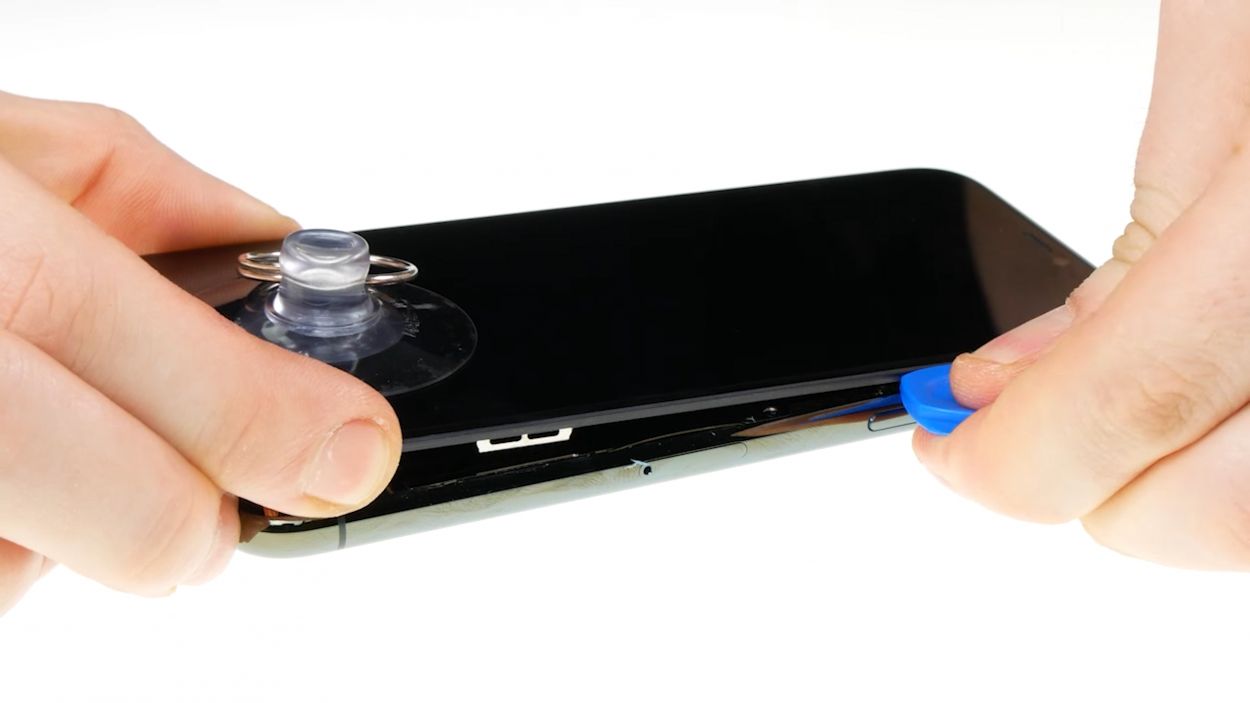
– Kick things off by placing a suction cup on the bottom edge of the display. Gently pull it upwards to create a snug little gap between the display and the case.
– Next, slide in a flat, sturdy tool to widen that gap. A hard plastic plectrum and the iFlex are your best buddies for this part!
Opening your iPhone 11 Pro means waving goodbye to the manufacturer’s warranty and the IP68 dust and water protection warranty. So, think twice before diving in!
Hey there! The hard plastic plectrum is designed to be just a tad thinner at the corners. This little feature makes it super easy to slip in, but it also keeps you from pushing it too deep into your device. On the flip side, the iFlex is crafted from ultra-thin, sturdy metal with sharp edges. To keep your device’s frame looking sharp and scratch-free, we suggest kicking off this step with the iFlex and switching to the hard plastic plectrum as soon as you can. You’ve got this!
Tools Used
- Pick Set
- screen and the frame. The practical iFlex is made of stainless steel and sits comfortably in the hand. This makes it the perfect assistant for every smartphone repair.” rel=”noopener”>iFlex Opening Tool
- VAKUPLASTIC Suction Cup
Step 5


While you’re at it, keep that display angle under 180°! We want to protect those delicate flex cables from any unexpected breakdance moves.
Hey there! You can give that glue a little extra love by reheating it with some hot air every now and then. This will make it much easier to peel off, just like unwrapping a present!
– Glide that hard plastic plectrum all the way around the display frame like a pro! As you do, give it a gentle upward nudge to free those pesky hooked lugs of the display from the rear case.
Tools Used
Step 6


2 × 1.5 mm Y-Type
4 × 1.46 mm Y-Type
When you’re about to detach those connectors, remember to kick things off from the side without any tiny components hanging out. It’s a smart move to keep everything safe and sound!
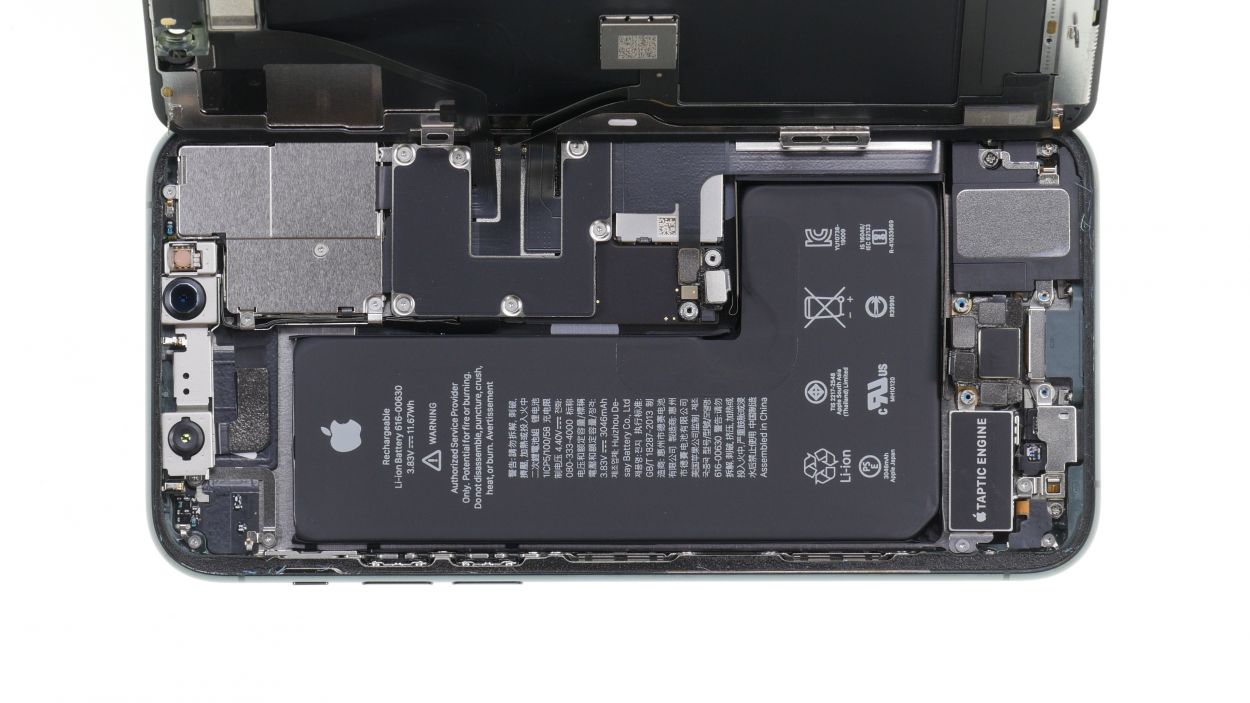
– First, let’s take off that bracket plate resting over the battery connector by unscrewing those Y-type screws. You’ve got this!
Step 7


6 × 1.16 mm Y-Type
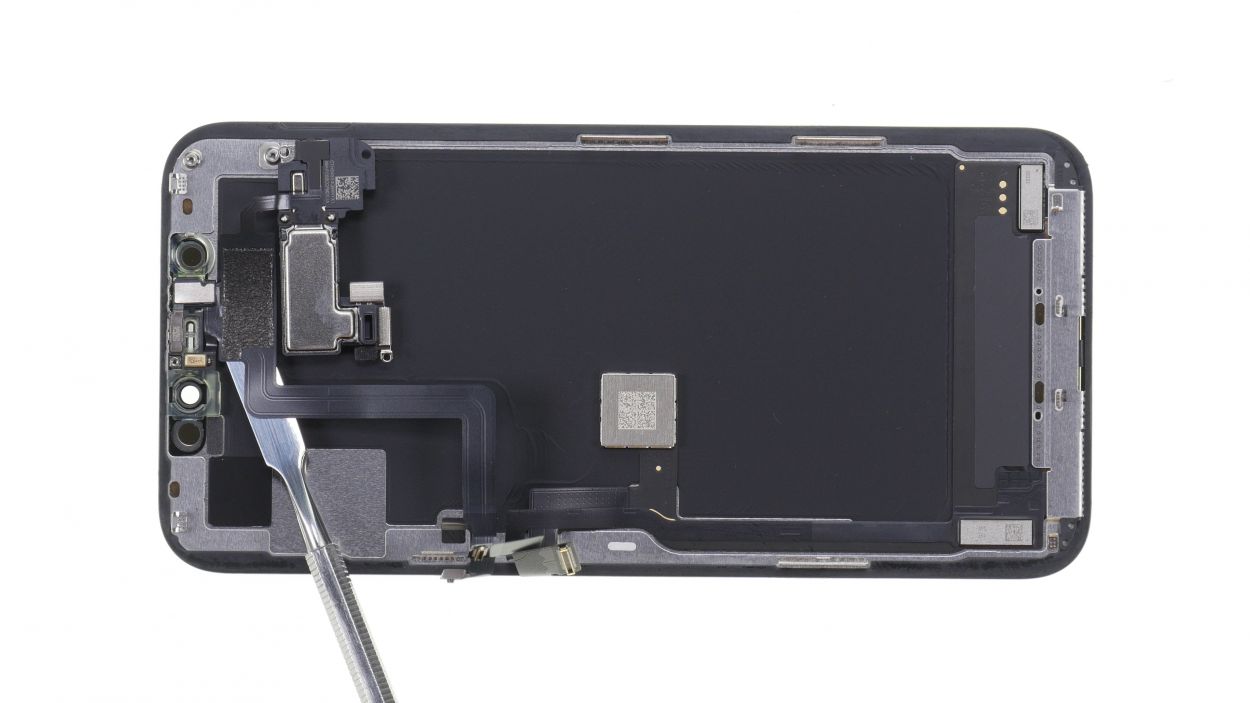
Connectors
When you’re ready to detach those connectors, kick things off from the side that’s free of any tiny components. It’s a smart move to keep everything safe and sound!
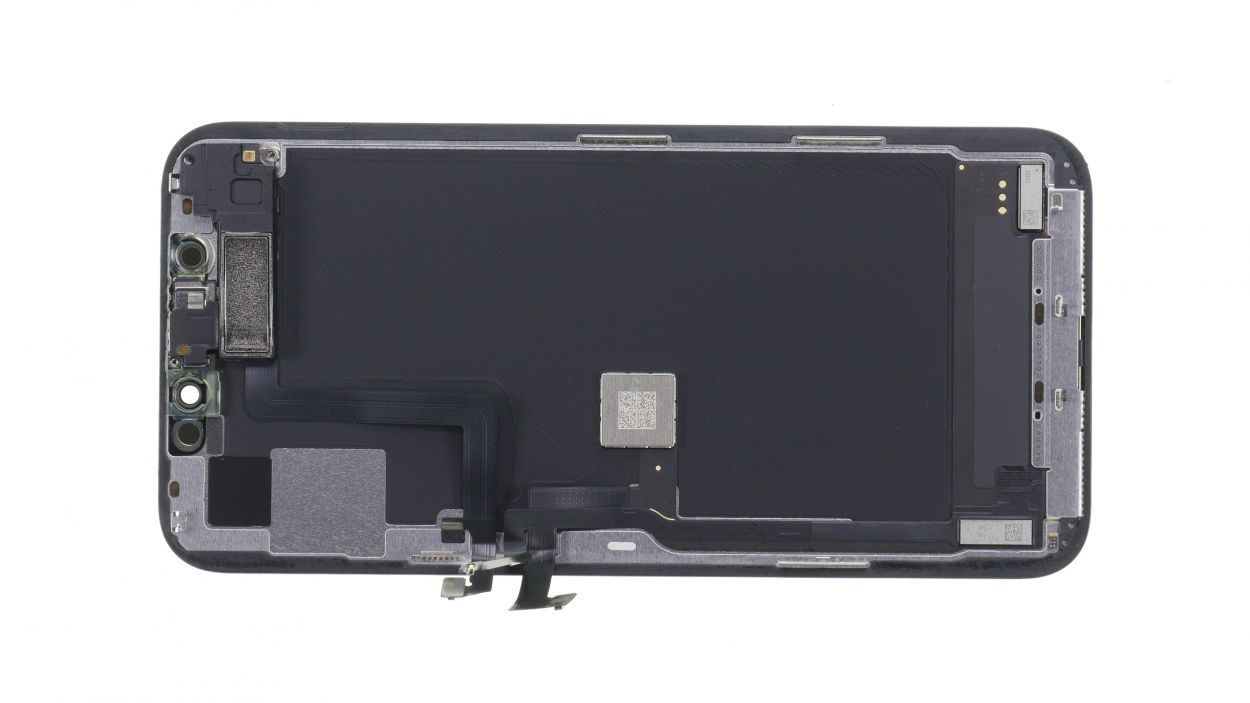
– First, let’s take off that bracket plate lounging over the display connectors by loosening those Y-type screws. You’re on the right track!
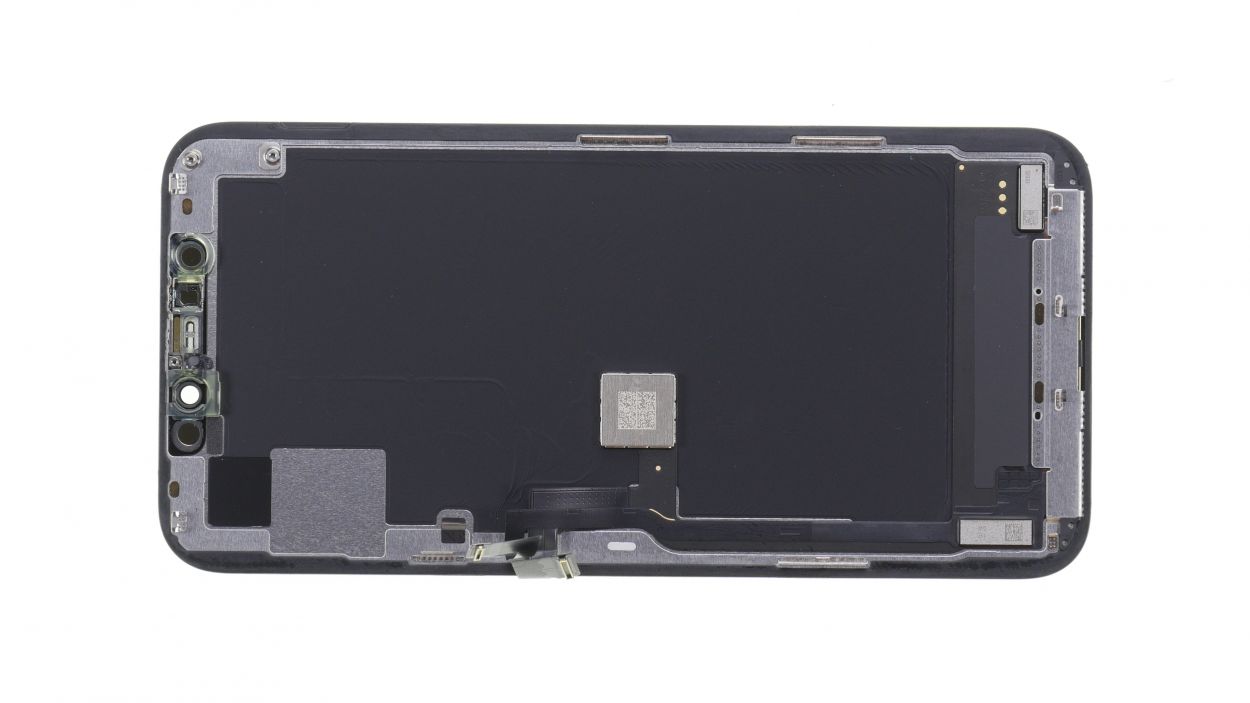
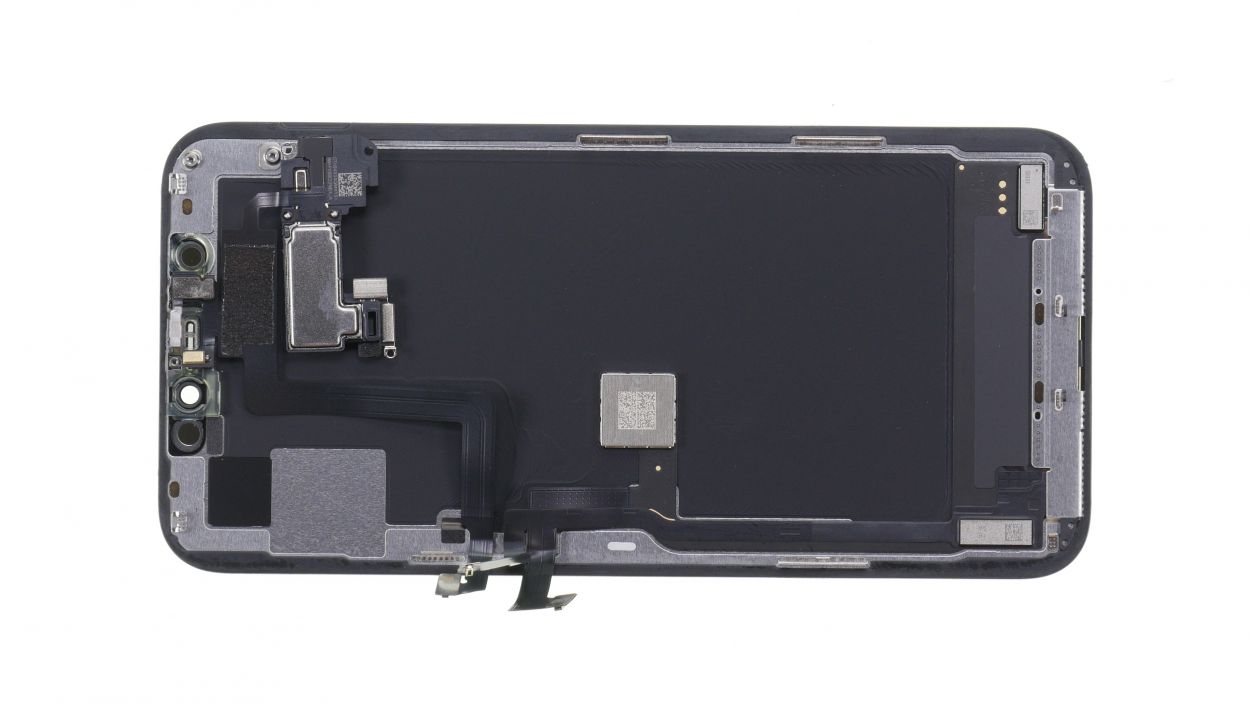
Step 8


1 × 1.75 mm Y-Type
1 × 1.30 mm Y-Type
1 × 1.25 mm Y-Type
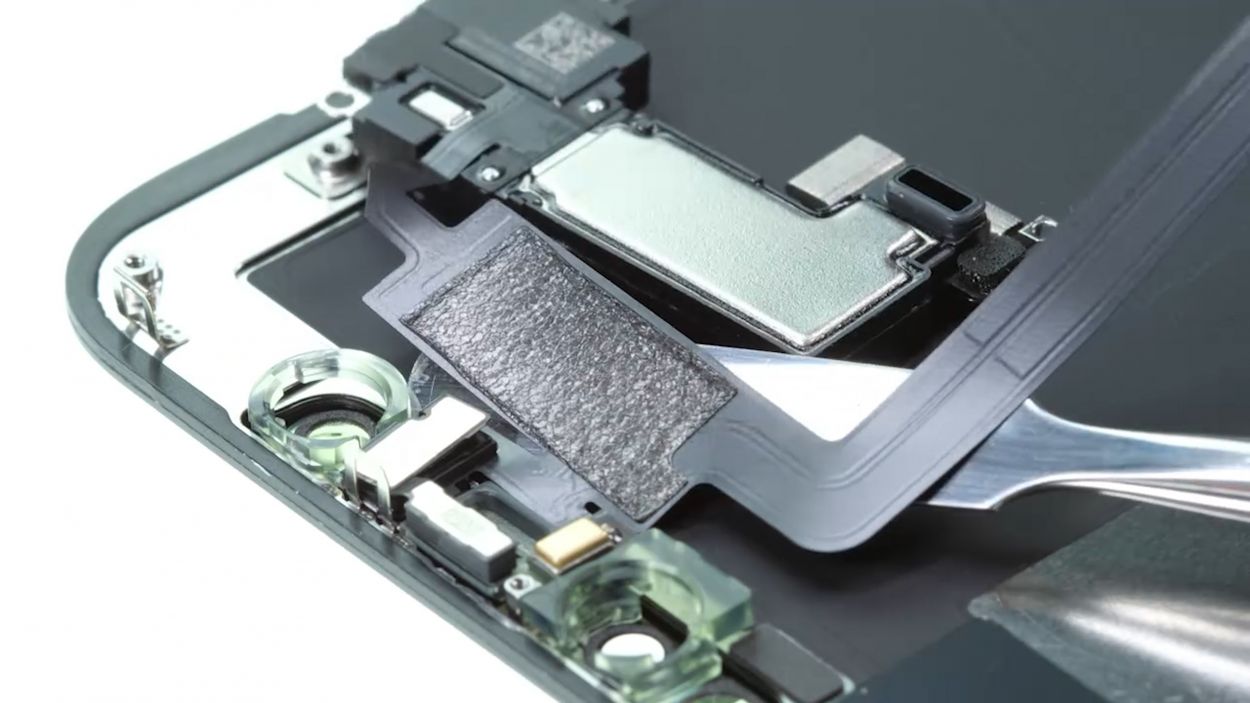
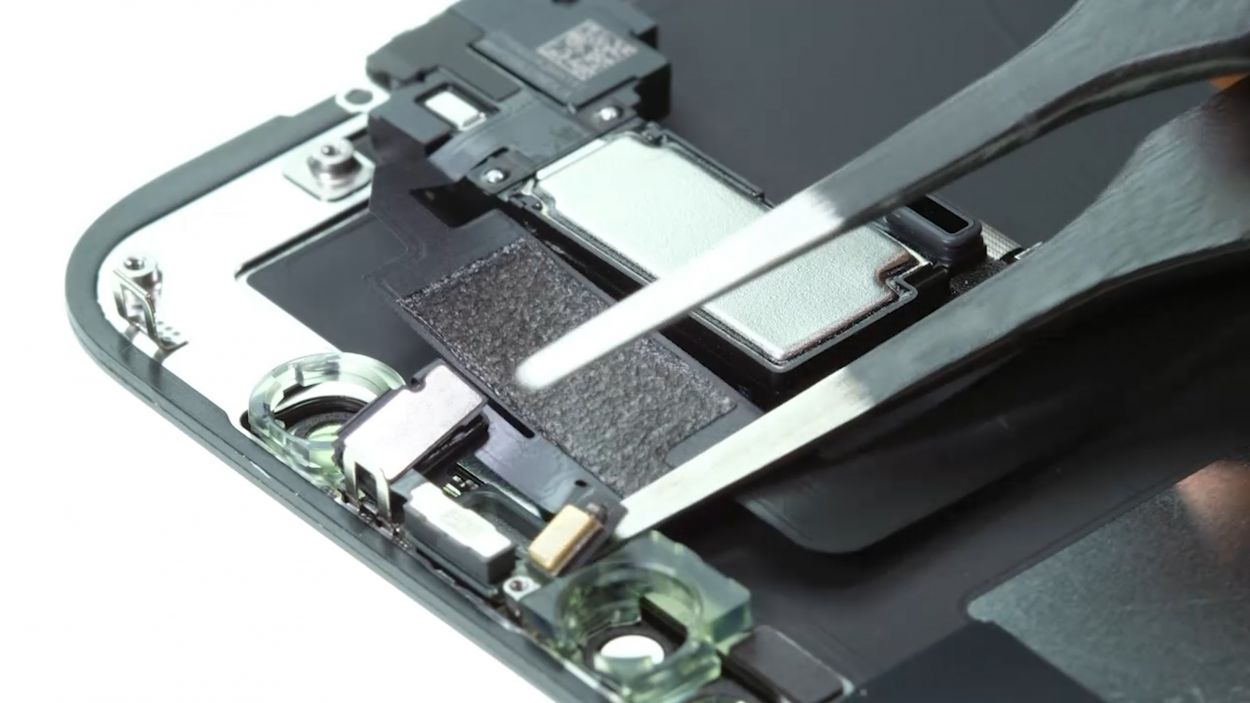
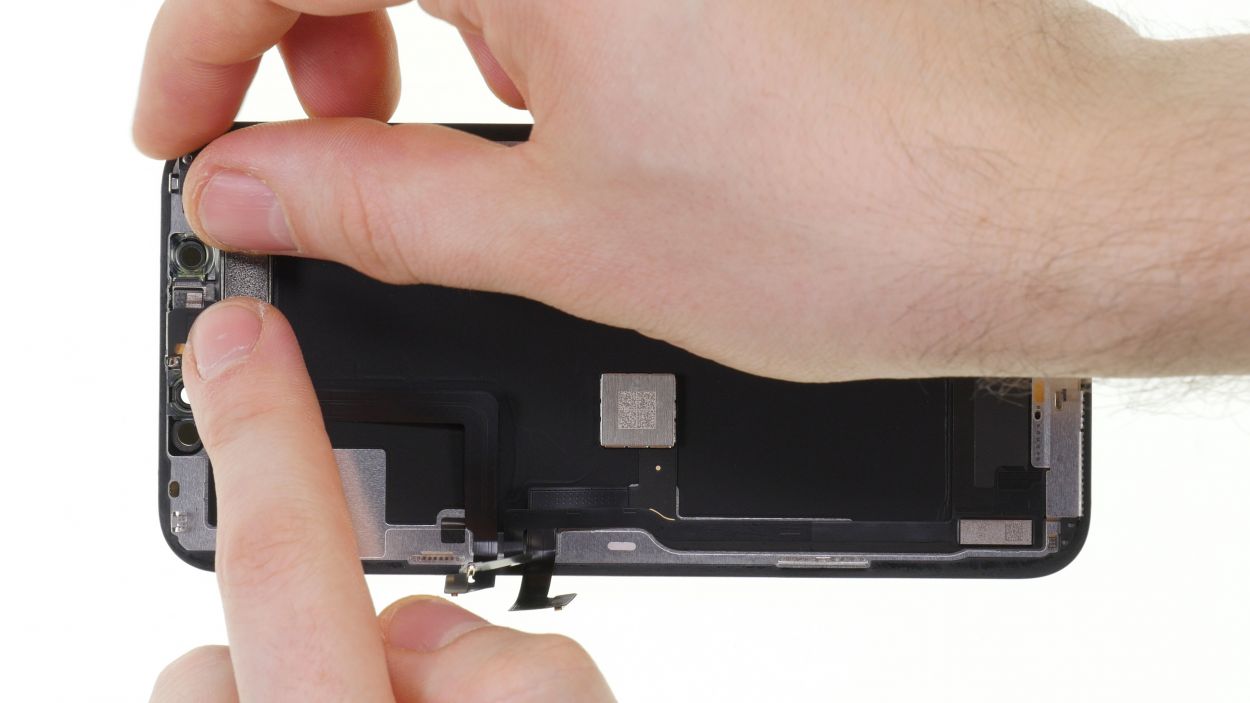
– To take out the earpiece, start by unscrewing the three screws that are holding it snugly to the display unit.
– Gently use tweezers to loosen the earpiece from the sensor cable and fold it back.
– Slide a steel spatula underneath the sensor cable and carefully pry it away piece by piece from the display unit.
– Don’t forget to use the steel spatula or tweezers to pop the sensors out of their leads at the top edge of the display.
Step 10
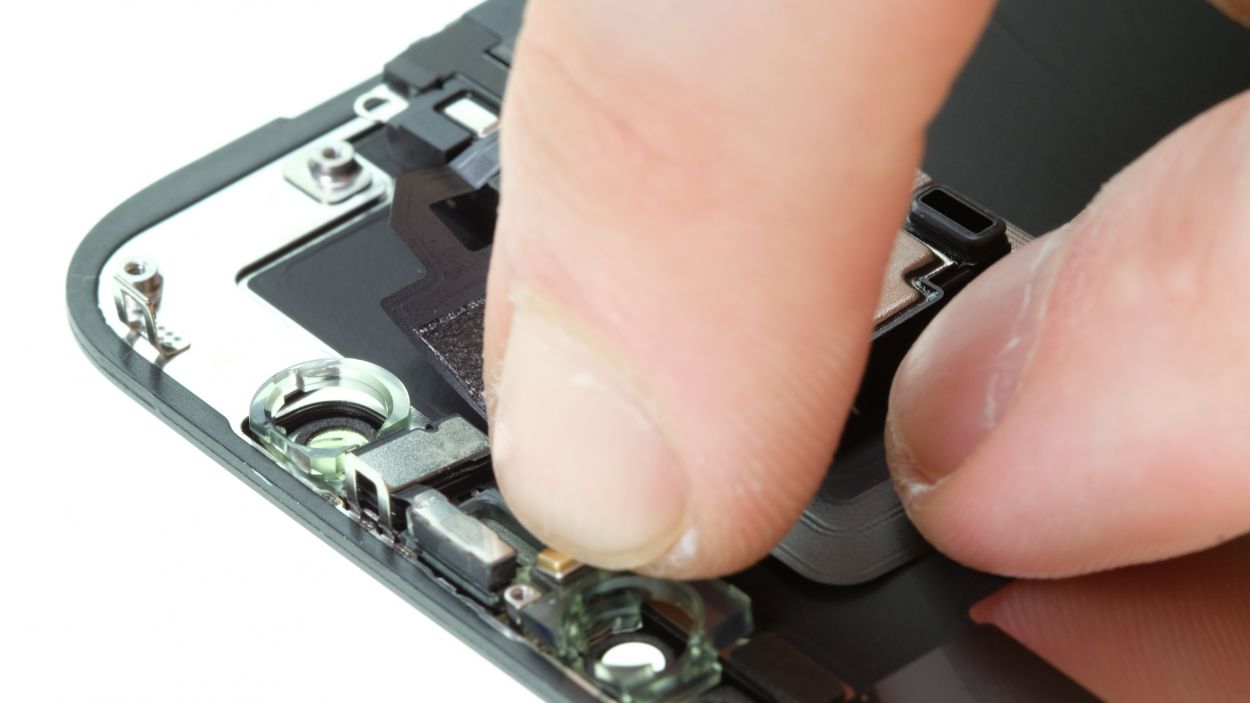
1 × 1.75 mm Y-Type
1 × 1.3 mm Y-Type
1 × 1.25 mm Y-Type
Be sure to give those sensors a snug fit in their leads! If they’re not seated just right, they might decide to take a vacation and not work properly.
– Position the earpiece snugly at the top edge of the display unit and gently nudge those sensors back into their cozy little homes.
Tools Used
Step 11


Connectors
6 × 1.16 mm Y-Type
Hey, just a friendly reminder: don’t force those connectors together! If you do, you might end up damaging a connector or the slot, which could spell trouble for the entire component. Let’s keep everything in tip-top shape!
– Prop the display against something sturdy to keep those flex cables from getting a workout while you connect them. You’ve got this!
Step 12


4 × 1.46 mm Y-Type
2 × 1.15 mm Y-Type
– Gently press the battery connector down onto the board until you hear a satisfying click, ensuring it’s snug and secure.
– Place the bracket plate over the connector and fasten it with screws to keep everything in place.
Step 13
Step 14


When you’re sealing up the display, just keep an eye out for those flex cables! We wouldn’t want them getting squished in the process.
– To wrap things up, gently fold that display over and press it down evenly into the rear case until you hear it click into place. You’ve got this!
Tools Used
Step 15

2 × 6.7 mm Pentalobe
– Time to secure those Pentalobe screws on either side of the Lightning connector! Let’s get them snugged in place.
Tools Used