DIY Guide: How to Replace Google Pixel Daughterboard
Duration: 45 minutes
Steps: 25 Steps
This repair guide was created by a fantastic member of the iFixit community and isn’t officially backed by Google. Curious about our repair guides? Check them out here!
Hey there, repair champion! This guide comes from one of our awesome friends at the iFixit community, and while it’s not given a thumbs up by Google, it’s all about helping you out. If your device is playing hard to get by not charging or sounds like a whisper in audio recordings, it might be time to swap out that microphone and charging port. Don’t sweat it, these components are cozy on the daughterboard and we’re here to guide you through the fix. And if you find yourself stumped, remember, you can always schedule a repair.
Step 1

Hey there! The areas around the speaker and microphone (that’s top and bottom for reference) have a bit more adhesive love going on. These spots might need a tad longer to soak up the heat. Aim to warm up the display until it’s just a smidge too hot to touch, hanging out with that heat for about two minutes. You’ve got this!
– Start by switching off your device – it’s time to get started on this repair journey.
– Now, let’s get your iOpener ready to gently heat the edges of the display and loosen the adhesive underneath. If you don’t have an iOpener, a heat gun or hair dryer will also do the trick. If you need help, you can always schedule a repair
Tools Used

Step 2


Hey there! Just a friendly reminder: inserting an opening tool deeper than 1.5 mm into the sides of your device, or more than 9 mm into the top and bottom, could lead to some serious display damage. We want your device to stay safe and sound! If you need help, you can always schedule a repair.
In the next steps, you’ll be gently slicing through the adhesive that holds the display to the Pixel’s chassis. Let’s get that display separated like a pro! If you need help, you can always schedule a repair.
– For reference, check out the back of the display panel – you’ll notice the narrow gap between the side of the display unit and the OLED panel. The bezels on the front give you an idea of this spacing. If you need help, you can always schedule a repair
Step 3


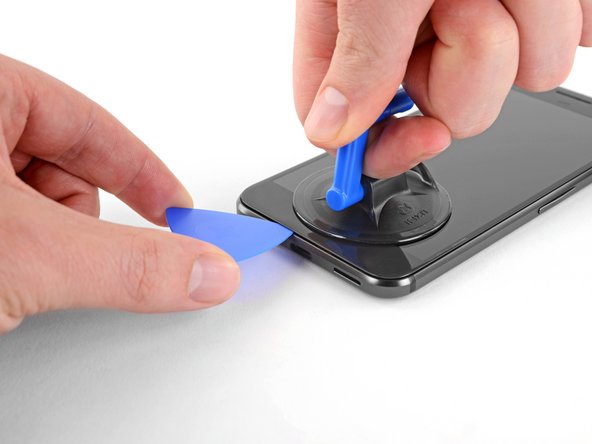
Got a cracked display? No worries! Just stick some packing tape over it. This will help the suction cup get a grip and keep those pesky glass shards from escaping. You’re doing great!
– Grab your trusty suction handle and give that display a gentle pull to create a little gap between it and the phone’s chassis. You’ve got this!
– If it seems a bit stubborn, don’t sweat it! Just apply a bit more heat and remember, patience is key. Once you can slide a tool into that gap, you’re ready for the next step. If you need help, you can always schedule a repair.
Tools Used

Step 4


Hey there! Instead of trying to force the screen off with that pick, just slide it around gently to break the adhesive seal. You’ve got this!
Be gentle with that display panel – it’s super fragile. When you’re using your tool to separate the adhesive, only insert it as far as you need to. Going too far can damage the OLED panel underneath, and that’s not what we want. If you need help, you can always schedule a repair
– Gently wiggle an opening pick or a trusty playing card into the gap between the chassis and the display assembly – it’s time to get this repair started!
– Now, carefully slide the opening pick around the edge of the display, loosening the adhesive that’s holding it in place. Take your time and work your way around – you got this! If you need help, you can always schedule a repair
Step 5


Be careful not to damage the mesh covering the earpiece speaker on the top edge of the screen – it’s a tiny but important part. If you’re missing a replacement, take your time and handle it with care.
When working with the side bezels, keep in mind they’re super thin – only 1.5 mm deep. Handle them gently to avoid any damage. If you need help, you can always schedule a repair
– Keep on gently peeling away the adhesive around the rest of your device, taking your time to enjoy the process!
Step 6


Hold up! Don’t yank that display off just yet. It’s still connected by a delicate ribbon cable. Keep it chill and avoid putting any strain on the cable while you’re moving the display around. If you need help, you can always schedule a repair
Heads up! There’s sticky adhesive everywhere, so try slipping an opening pick between the screen and display to keep the gunk at bay!
– With the adhesive all sorted, gently lift the display from the top (that’s the side with the speaker grille cutout), and carefully flip it over towards the bottom of the device. Just let it rest on its face, as you see in the image.
Step 7

While you’re working on this, keep track of every screw and make sure it gets back to its original spot. If you need help, you can always schedule a repair.
– Grab your T5 Torx driver and gently unscrew the two sleek black 3.5 mm T5 screws that are holding the display cable connector bracket in place. You’ve got this!


Step 9

Take it easy with that connector! Don’t force it into place, or you might end up with a bummer of a situation. Look for a gentle snap, but remember—too much pressure will mess up your connector for good!
– Grab your trusty spudger and carefully lift the display cable connector to free up the display.
– During reassembly, snap one side in gently, then do the same for the other side.
Tools Used

Step 10

– Remove the display.
– Some replacement displays might not have an earpiece speaker grille. If your new screen lacks one, make sure to transfer the grille from your old display to the new one.
– During reassembly, take a moment to test the functionality of your new part and replace the display adhesive.
– During the boot-up process after reassembly, the screen will go through a calibration sequence. Avoid touching the screen during this time to prevent touch issues. If you need help, you can always schedule a repair.
Step 11

– Let’s get started by using a T5 Torx driver to remove the nine 3.5 mm screws that hold the midframe in place. If you need help, you can always schedule a repair
Step 12

– The midframe is securely fastened by five clips. Don’t worry, they’re easy to release – just apply some gentle inward pressure with an opening tool, and you’ll be golden. Check out the steps below to see how it’s done. If you need help, you can always schedule a repair
Step 13

– Let’s get started by carefully wedging an opening pick into the notch at the bottom right corner of your phone. Take your time and make sure it’s securely in place.
Step 14


Hold up! Don’t yank that midframe just yet—there’s a delicate ribbon cable underneath that’s connecting the earpiece speaker to the motherboard. If you need help, you can always schedule a repair.
If the clasps are being stubborn, try pushing the edge inward with your hand, or use a thicker tool like a spudger.
Remember, the clips aren’t released by sliding through them, but by the inward pressure the opening pick creates as it enters the gap around them.
– Gently slide the opening pick into the snug little gap between the midframe and the rear case on both sides of the device. This will help you pop those clips loose and get things moving!
Tools Used
Step 15


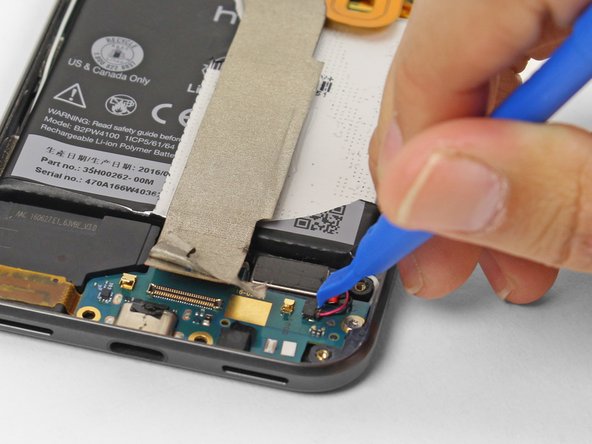
– Grab your trusty spudger and pop that earpiece speaker cable connector straight up to disconnect it from the motherboard.
– Gently lift the mid-frame off the device.
– While putting it all back together, reattach the earpiece speaker cable and fit the top side of the mid-frame before you snap those clips back into place.
Tools Used


Step 17

– Grab a spudger and pop that interconnect ribbon cable off the daughterboard. If you need help, you can always schedule a repair
Tools Used
Step 18

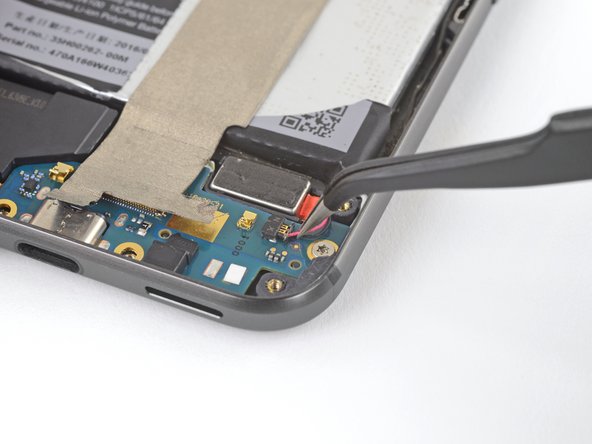
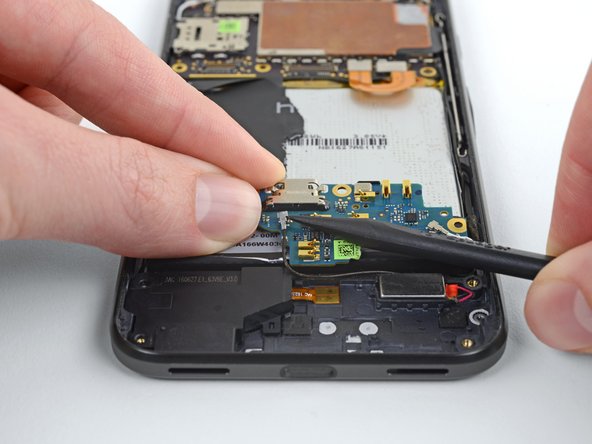
The connector should slide out of the socket without a hitch. If it’s being stubborn, resist the urge to yank on those cables like a superhero! Grab an opening tool and give it a gentle nudge to coax it out.
The vibration motor is hooked up to the daughterboard using a tiny socket connector.
– Grab those tweezers and gently tug the connector away from the socket by its cables. You’re doing great!
Tools Used
Step 19

– Let’s get started by removing the silver 2.5 mm T5 screw that’s holding the daughterboard in place. If you need help, you can always schedule a repair
Step 20

– Grab those tweezers, and gently lift the contact pads chillin’ to the left of the daughterboard. If you need help, you can always schedule a repair.
Tools Used
Step 21

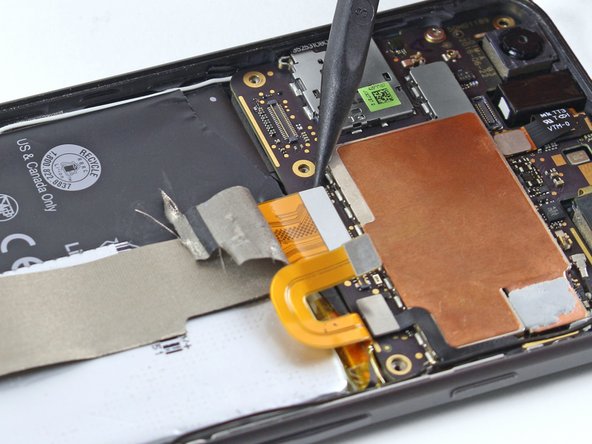
If you’re thinking about disconnecting this interconnect cable, just remember to put it back the same way it came off. Your phone might decide to take a nap and not power on if the cable is flipped upside down.
Feel free to take a quick breather here! Removing the interconnect cable from the motherboard can help keep things tidy while you tackle the daughterboard removal. It’s all about making your life easier!
– Alright, let’s get to it! Gently peel back the sticker on the motherboard side and grab your trusty spudger to lift that connector straight up. You’ve got this!
Tools Used
Step 22


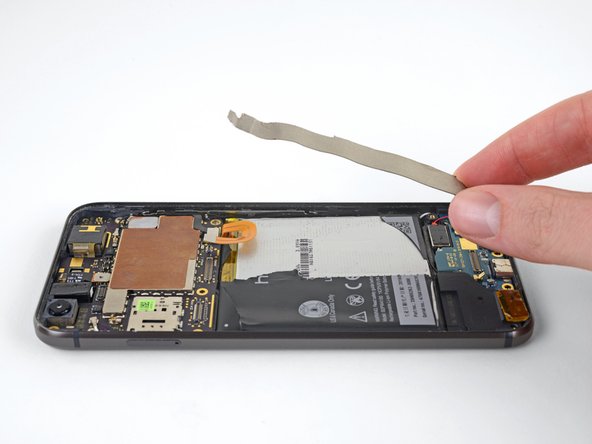
Hold up! Before you go yanking on that daughterboard, remember there are still two coaxial cables hanging out under there. Let’s keep everything connected, shall we?
– Grab your trusty tweezers and gently lift the daughterboard. Give it a little flip over onto the battery, like a pro!
Tools Used
Step 23
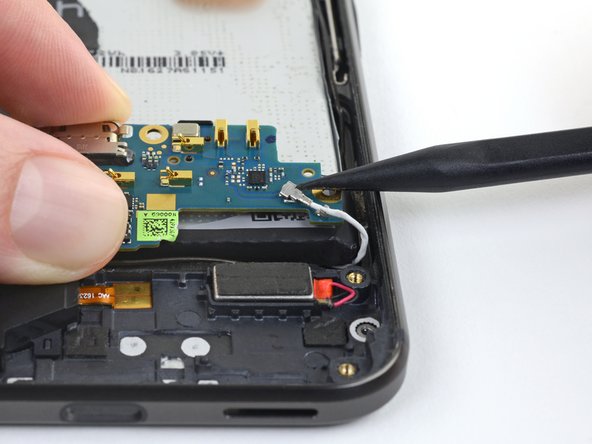

Coaxial cable connectors and sockets can be a bit delicate. To keep them safe and sound, make sure to gently wiggle them straight off the board. Remember, a little care goes a long way! If you need help, you can always schedule a repair.
– Grab your trusty spudger and gently lift the black and white coaxial cables from the underside of the daughterboard. They’re a bit shy, but you got this!
– When it’s time to reconnect these cables, flip the daughterboard upside down onto the battery. With your tweezers, position each connector right over its socket on the board. Press straight down until you hear that satisfying snap! It’s like a high-five, but for electronics!


Step 25


Grab some adhesive or double-sided tape to securely fasten the vent to the new part. Just remember, keep that vent hole at the bottom clear for optimal airflow! If you need help, you can always schedule a repair
– Pop that daughterboard out of your device like a pro.
– If your new part didn’t come with a plastic barometric vent, grab your opening tool, and gently lift the vent off the old daughterboard. Then, transfer it to the new one. If you need help, you can always schedule a repair