DIY Guide: How to Replace Microsoft Surface Laptop 4 (15-inch) Charging Port
Duration: 45 minutes
Steps: 18 Steps
Get ready to tackle the removal or replacement of the Surface Connect port/charging port in your Microsoft Surface Laptop 4 (15-inch)! If you notice a swollen battery, please take the necessary precautions. While some images in this guide might showcase a different model, don’t worry! These slight visual differences won’t hinder your repair adventure. Let’s dive in and make your device shine again!
Step 1


Let your laptop’s battery drop below 25% before you dive into this fix. A charged battery could cause a fiery situation if things go awry.
– Disconnect all cables and power down your laptop completely.
Step 2


– Flip your laptop over and lay it down with the back facing up – this will give you access to the four rubber feet on the bottom.
Step 3


Each foot has a little indentation that makes it easier to pry it off the laptop.
– First, take a look at the bottom of your laptop and find the back feet recesses – they’re the ones closest to the edge furthest from you.
– Next, locate the front feet recesses, which are conveniently positioned near the front edge of your laptop, closest to you.
Step 4


The feet pop out super fast—keep an eye on them so they don’t go missing!
– Wedge one arm of your tweezers into the groove under one of the feet.
– Give those tweezers a twist and pop it up—this will loosen the adhesive and unhook the foot from the laptop.
– Take the foot off.
– Repeat these steps for the rest of the feet.
Tools Used

Step 5
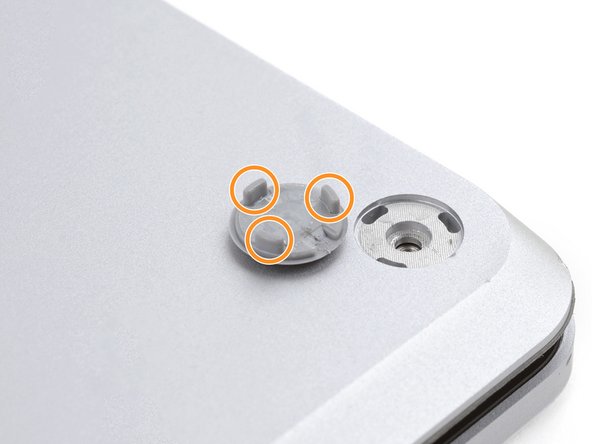

– Alright, this laptop has two kinds of feet, and they’re not interchangeable! When putting things back together, make sure each foot finds its perfect little home.
– Pop those feet into their spots to lock them onto the frame—easy peasy!
– The rear feet only have one center clip, so they’re pretty straightforward.
– Now, the front feet are a bit fancier—they’ve got three clips and only fit one way. You’ve got this!
– If the feet aren’t sticking anymore, no stress. Peel off the old adhesive and slap on a tiny strip of Tesa Tape where the adhesive used to be—it’s like giving the feet a fresh start!
Step 6


– Got some tired feet on your device? Grab some 8 mm rubber furniture pads.
– Peel the pad off its backing.
– Line it up over the foot cavity and press it down firmly to secure it. Easy peasy!
Step 7

These screws can be a bit temperamental! Keep a steady, downward pressure while you work to avoid any stripping mishaps.
As you tackle this repair, keep tabs on every screw and make sure each one finds its way back to its original home. You’ve got this!
– Let’s get started by removing the four 3mm screws that hold the upper case in place – grab your trusty T5 Torx driver and get to work!
Step 8


– Turn your laptop upside down and swing that screen wide open!
Step 9


Hey there! Just a friendly reminder: don’t go all out trying to yank off the upper case—it’s still hanging on by a cable. Let’s keep it together!
Make sure the upper case is snug all around the edges. If you spot any gaps near the screen, it could lead to some screen drama when it closes. Let’s avoid that!
The top cover is held in place by some nifty magnets.
– Grab the top edge of the upper case, right above the keyboard, and lift it straight up to pop it loose—easy peasy!
– Gently lift the bottom edge of the upper case and pull it away from the laptop, but be mindful of the delicate ribbon cable underneath.
– When putting it all back together, just lower the upper case onto the lower case, let the magnets snap it into place, and make sure it’s laying flat. Smooth moves!
Step 10

The keyboard and touchpad cable is the lifeline that connects the upper case to your laptop—kind of like the handshake that keeps everything working smoothly.
– Take the pointed end of a spudger, slide it under one edge of the magnet connector, and gently lift to disconnect.
– To reconnect the cable, align the magnet connector over its socket with the cable facing the bottom of the laptop. Press down on the connector to snap it in place.
Tools Used

Step 11

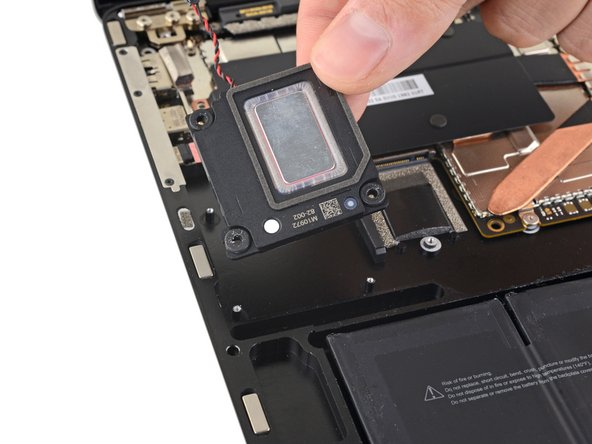
– Pop off the upper case and place it keyboard-side down on a clean, safe surface. Easy peasy!
Step 12

Once the screw is out, the SSD pops up at a chill little angle—ready for you to grab and go!
– Grab your trusty T5 Torx driver and unscrew that 2.7 mm screw holding the SSD in place—let’s get this party started!
Step 13


Be gentle—pulling up at a steep angle might wreck the SSD or its socket, and nobody wants that kind of drama.
Taking out the SSD also acts like unplugging the battery. It’s a two-for-one deal!
– Gently pull the SSD out of its socket – it’s time to set it free! Remove it completely to make way for the new one.
– When putting everything back together, insert the SSD at a slight angle, and it should slide in smoothly.
Step 14
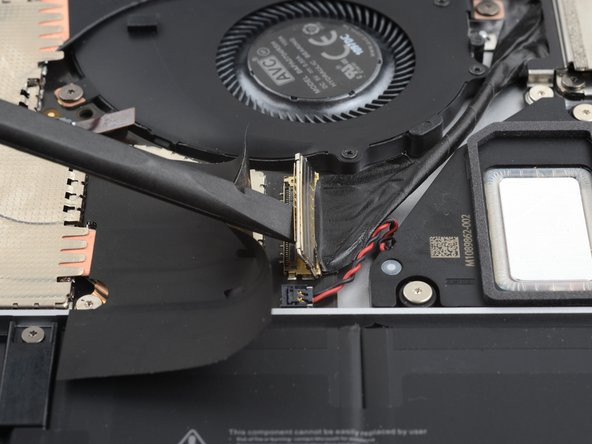

Keep the tape out of your way, if you need to.
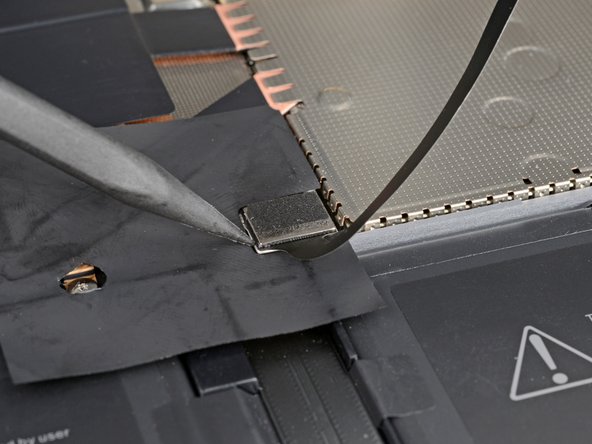
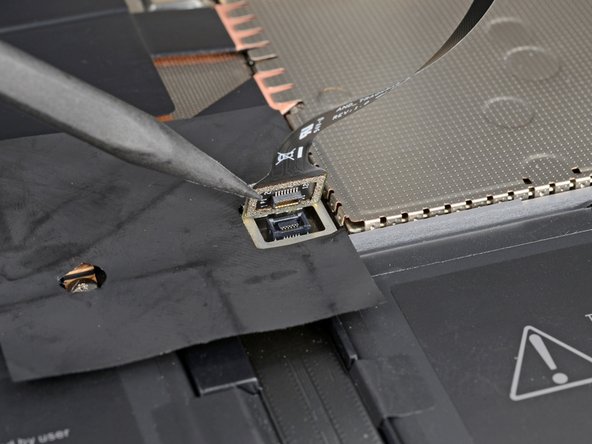
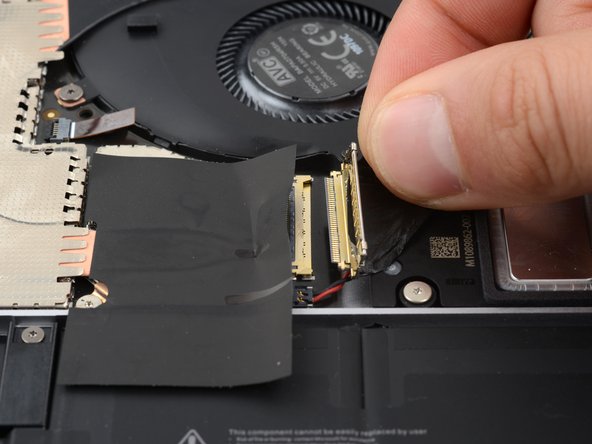
– Time to get this repair started! Use the flat end of your trusty spudger to carefully flip open the gold locking arm on the Surface Connect port motherboard connector.
– Now, gently grip the Surface Connect port cable and pull it away from its connector to disconnect it – you’re making great progress!
Tools Used
Step 15

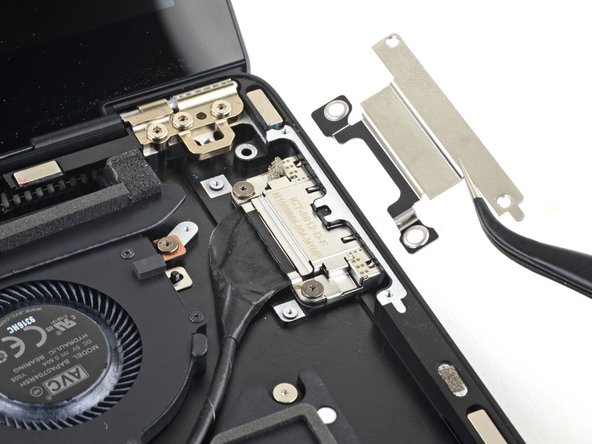
– Grab your trusty T3 Torx driver and unscrew the four screws holding the Surface Connect port cover in place:
– Two 2.0 mm screws
– Two 2.2 mm screws
Step 16

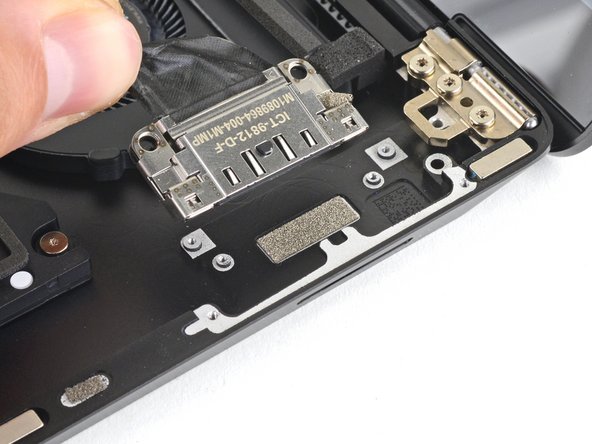
– Pop off that Surface Connect port cover like a pro!
Step 17

– Grab your trusty T3 Torx driver and gently unscrew those two 3 mm screws that are holding the Surface Connect port in place. You got this!
Step 18


– Match your new part to the original—you might need to move over any remaining components or peel off adhesive backings before installation.
– To put your device back together, just follow these steps in reverse order.
– Dispose of your e-waste at an R2 or e-Stewards certified recycler.
– Repair didn’t go as planned? Try some basic troubleshooting or check out our Answers community for help.
– If you need help, you can always schedule a repair
Success!