DIY Guide: Microsoft Kinect Motherboard Replacement Tutorial
Duration: 45 minutes
Steps: 13 Steps
Alright, let’s tackle this motherboard removal! This is the heart of the Kinect, so if it’s not working, you might have a motherboard issue. No worries, we’ll figure it out together. Let’s get this done, you’ve got this!
Step 1


Be careful not to overheat your device, as this can cause damage to its internal components. If you’re not comfortable with this step, don’t worry – you can always schedule a repair
A bit of muscle might be needed to pry off the adhesive. Warming it up can help make that process a whole lot smoother!
– Let’s get started by removing the two plastic strips from the bottom of the main Kinect housing. Use the sharper side of your trusty metal spudger to gently pry them off.
– Next, peel off the two Xbox 360 stickers from the bottom of the case. This will reveal two hidden screws that we’ll need to access in the next step.
Tools Used

Step 2

– Let’s get started by removing the six 12mm T10 Torx screws – simply unscrew them to begin the process.
Step 3


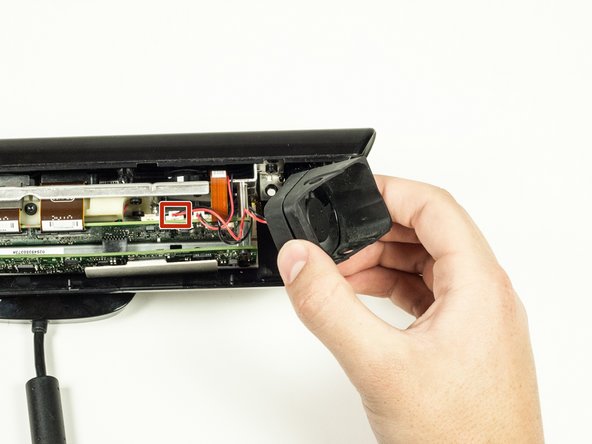
When you’re unplugging the fan, make sure to grab the white connector at the end of the wire—it’s the safest way to keep it intact and avoid any mishaps!
– Let’s kick things off by gently lifting the top part of the case away from the rest of the device. Easy peasy!
– Next up, it’s time to unclip those side sections of the case from the body. Just a little wiggle and they’ll be free!
– Now, let’s take out the fan piece from the side. Don’t forget to unplug it from the logic board to completely set it free!
Step 4

The bottom of the case can be a bit stubborn to remove, especially if there’s leftover adhesive stuck in there. Don’t worry, just apply some gentle heat and wiggle it out – it’ll come loose in no time! If you need help, you can always schedule a repair
– Gently slide the bottom part of the case out from beneath the body, like you’re unveiling a surprise!
Step 5

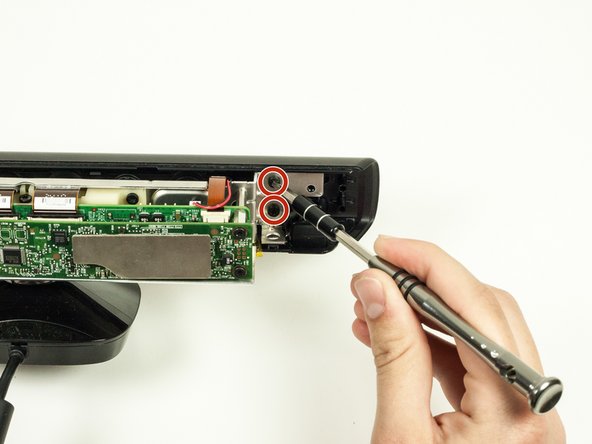
– Unscrew those four 7mm T10 Torx screws—two on each side of the metal body. You’ve got this!
Step 6


– Gently take off the front part of the case that houses the camera lens covers. You’ve got this!
– The LED component is snugly attached to the front case. To free it, simply give it a little tug to disconnect it from its plastic connector.

Step 8

Gently wiggle that cable out like you’re coaxing a shy cat—no sudden moves to keep it safe and sound!
– Pop off the microphone panel and weave the cable that was linked to the motherboard through the opening on the camera panel.

Step 10

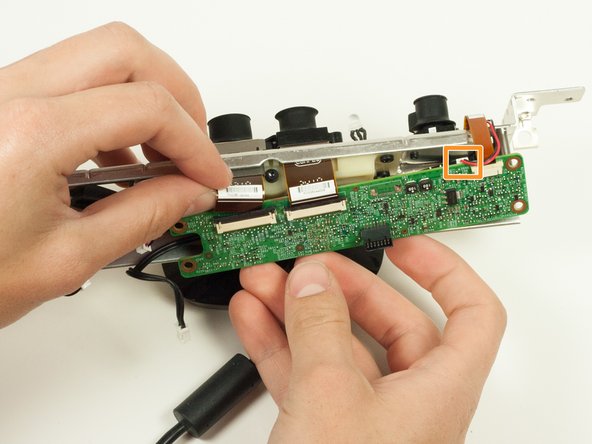
– First things first, go ahead and disconnect that bridge linking the first layer of the motherboard to the second. We’re making progress!
– Now, gently lift off the first layer of the motherboard like it’s a lid on a treasure chest. You’ve got this!
Step 11

– Let’s get started by disconnecting the LED cable from the motherboard. Simply locate the cable and gently pull it out.
Step 12

– Pop off the three 16.5mm screws with the 5mm Nut Driver. You got this!
– Undo the one 6.5mm T10 Torx screw. Almost there!
Tools Used

Step 13

– To wrap things up, simply reverse the steps you followed to get here – easy peasy!
– If you didn’t quite get it done, no worries! You can always schedule a repair and let the pros at Salvation Repair lend a hand.
– You’re all done! Pat yourself on the back, you’ve successfully completed this step-by-step repair guide.
Success!
