DIY Guide: Microsoft Surface Laptop 3 (15-inch) Teardown
Duration: 45 minutes
Steps: 13 Steps
Tackling a Surface Laptop teardown has often been a bit of a headache — but with the Surface Laptop 3, Microsoft has hinted at a refreshing change! Should you dive in again? We suggest setting aside your tools and letting the pros handle this one first. Oh wait, that’s us! For more thrilling teardown updates, don’t forget to check out our YouTube channel, follow us on Twitter, Instagram, or Facebook, and subscribe to our newsletter. Plus, don’t miss our 13.5” Alcantara Laptop 3 teardown video!
Step 1


– Alright, before we dive into the nitty-gritty, let’s take a quick peek at what this Surface beauty is packing:
– A stunning 15-inch PixelSense Display rocking a sharp 2256 × 1504 resolution (201 ppi).
– It’s powered by the AMD Ryzen 5 3580U mobile processor with Radeon Vega 9 graphics—yep, smooth and snappy.
– You’ve got 8 GB of DDR4 RAM to keep things running seamlessly.
– Storage? A generous 256 GB removable SSD for all your needs.
– Say cheese with the 720p front-facing camera, complete with Windows Hello sign-in for that extra security flair.
– Ports galore: USB-C, USB-A, a 3.5 mm headphone jack, and the trusty Surface Connect port.
– Connectivity options include Wi-Fi 5 (802.11ac) and Bluetooth 5.0 to keep you linked up.
Step 2


Speaking of designs, this one keeps the sleek, monochrome Windows logo that we’ve seen on previous Surface Products. There are whispers that vibrant logos might be making a comeback, so who knows, maybe Microsoft will jump in on the fun?
– So far, the Surface Laptop 3 feels quite familiar, but we’ve been eagerly anticipating the cool upgrades hiding behind this sleek exterior since the keynote.
– Speaking of sleek designs, take a look at this incredible X-ray (shoutout to Creative Electron!). It gives us a sneak peek at all the usual laptop components, plus some intriguing dark bars around the edges. Are those magnets we see?
– Underneath it all, along with vents and the standard regulatory markings, we’ve spotted a new model number: 1873.
Step 3


– The brand-new 15″ Surface Laptop totally flexes on its 13.5″ sibling. It’s bigger, tougher, and packs a custom Ryzen processor. But hey, the 13.5″ model has something the 15″ doesn’t: a sweet, cozy spot for your palms to chill.
– Stack it up against the 15″ 2019 MacBook Pro, and you’ll notice more differences. The Surface Laptop’s got a slightly thicker, wedge-like vibe going on. Both laptops rock USB ports, but the Surface swaps out one USB-C in favor of a trusty USB-A.
– And like every Surface Laptop before it, there’s that signature Surface Connect port off to the side. It handles both power and high-speed data like a champ.
– Remember those magnetic charging ports that Apple made famous? Well, Microsoft’s got you covered now—they’ve totally embraced that convenient, stress-free charging life.
Step 4


Hold up, is that a screw I see?
Take hold of your ESD-safe tweezers and give us a pinch—this must be a dream come true.
– Our hopes are low as we start prying off the bottom feet. After all, the last time we tried this, it was the beginning of a slightly frustrating, yet still manageable journey.
– Each bottom foot hides a Torx Plus screw—not the most common screw out there, but thankfully, our Mako kit can handle it with a little precision.
– With all four Torx Plus screws out of the way, we carefully work our opening tool around the seam between the upper and lower case—and voilà! It comes apart without a hitch, and not a drop of messy glue in sight!
– Once the initial shock wore off, we gave it a go with a 13.5″ Alcantara-covered Surface Laptop, and guess what? Same smooth results!
Tools Used

Step 5


He mentioned that attempting this at home isn’t the best idea. Lucky for us, we’re in the workshop!
– And just like that, the entire top cover assembly pops off! It’s a moment of triumph. No need for desperate measures like reaching for a knife—this design has us breathing a sigh of relief.
– Here’s a neat detail: the cover is attached by a single flex cable with plenty of slack. Even better, the connector at the end is held in place by a magnet instead of those finicky clip-on brackets that always seem to get the better of us. Smooth move, right?
– Flip the top case over and—ta-da—magnets! So, that’s the secret behind how effortlessly this thing came off during the demo. Pretty clever, huh?
– The battery connector? Well, it’s not exactly easy to get to—par for the course with Surface devices. But wait, there’s a tiny battery icon on the main board near the top cover connector socket. Could bridging these two pins safely de-energize the board? Seems worth investigating!
Step 6
Maybe removing the SSD is like a hidden safety switch, just in case there isn’t an easy way to pop the battery out!
Step 7


– With the magnetized top cover assembly out of the picture, the first thing catching our eye is the removable SSD. If we hadn’t already seen this highlighted in Microsoft’s keynote, we might have needed a moment to compose ourselves.
– Of the two speaker siblings, only one gets a free pass to exit. The other one? It’s stuck hanging out under the heat sink for now—patience, my friend.
– Even with those pesky shields trying to hold their ground, this disassembly feels surprisingly smooth—the heat sink assembly is already loose, and nothing has met its untimely end just yet.
– A single Torx Plus screw keeps this M.2 2230 SSD in place, making upgrades and swaps feel like a dream come true—oh, but wait, they had to crush our hopes by labeling it as ‘not user removable.’
Step 8


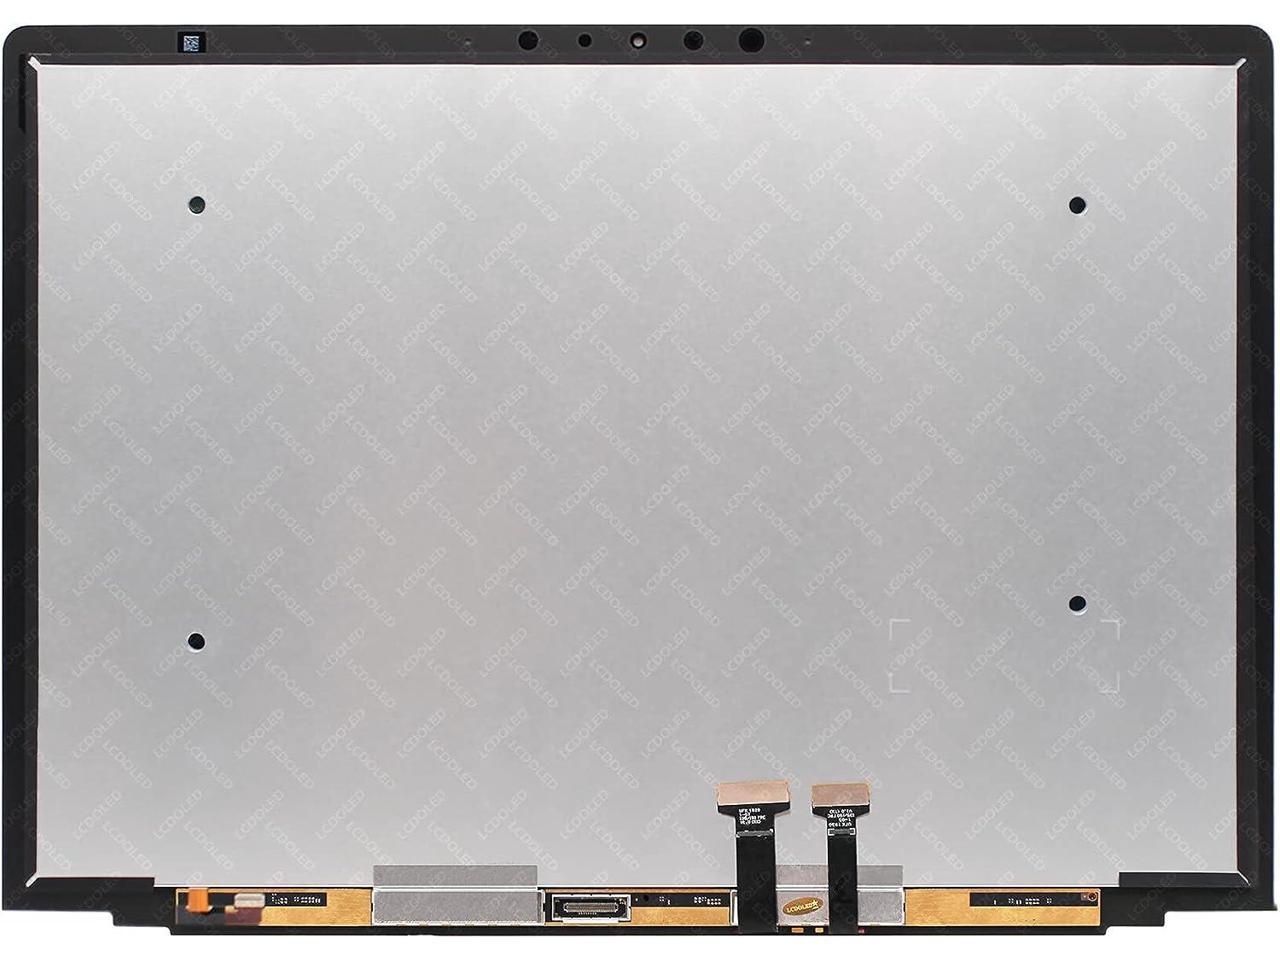
– Alright, we jumped ahead a bit, but you can actually pop off this display as soon as you get the device open.
– There are four flex cables that wrap over the hinge and tuck into the back of the frame, all covered by some prickly metal shields. Gently prying up and wiggling those shields out without harming the cables can be a bit of a nail-biter.
– Once the shields are out of the way and a few more screws are taken care of, the display should lift off with ease.
– We’re almost there in freeing the motherboard, but we hit a little snag with screws hiding under more shields.
– Just a heads up, these cables aren’t modular, so if you accidentally cut one, you’ll be in for a full display replacement adventure.
Step 9


– Alright, folks, let’s keep the momentum going and take a moment to appreciate the tech magic happening here:
– We’ve got the powerful Microsoft Surface Edition AMD Ryzen 5 3580U processor ready to rock.
– Next up, the SKhynix H5AN8G6NCJR with eight 8 Gb DDR4 SDRAM—unfortunately, it’s soldered in place, so no upgrades here, just a solid 8 GB total.
– Say hello to the NXP LPC54S001J microcontroller, a little powerhouse in our device.
– Don’t forget the Macronix MX25U1635E serial NOR flash memory, keeping things stored and organized.
– And we have the Winbond 25Q128JW 128 Mb serial flash memory, adding to our storage capabilities.
– Check out the Microsoft X904169 and X904163 display driver ICs, working hard to bring your screen to life.
– Last but not least, the Qualcomm QCA6174A Wi-Fi/Bluetooth SoC, ensuring you stay connected.
Step 10


– Let’s keep the momentum going with a bonus round for this board! Plus, here’s a peek at the clean and minimal backside:
– Texas Instruments TUSB1044 USB Type-C 10 Gbps Linear Redriver
– Texas Instruments TPS65987D USB Type-C and USB PD controller
– Texas Instruments BQ25713 battery charge controller
– Texas Instruments TS3A27518E 6-channel multiplexer
Step 11


– Even with all the bold redesigns, the Surface Laptop 3’s battery setup is playing it safe—same tucked-away connector under the board, and the removal process? Still a major headache.
– After a marathon of solvent, prying, and some serious perseverance, we finally have lift-off. This adhesive isn’t here for a quick chat—it’s stubborn and plans to stay put.
– The battery capacity is a bit higher than the original Surface Laptop (45.2 Wh) and the Surface Pro 6 (45 Wh). For those of you keeping score, it’s still less powerful than the 15″ MacBook Pro’s 83.6 Wh battery.
Step 12


Well, we were really hoping to dodge those pesky rivets this time around, but it looks like we’re still dealing with a keyboard assembly that’s firmly attached to the cover.
– Alright, what’s next? Time to remove a few more screws and two shields, and voilà—the trackpad lifts right off that magnetic top cover like magic.
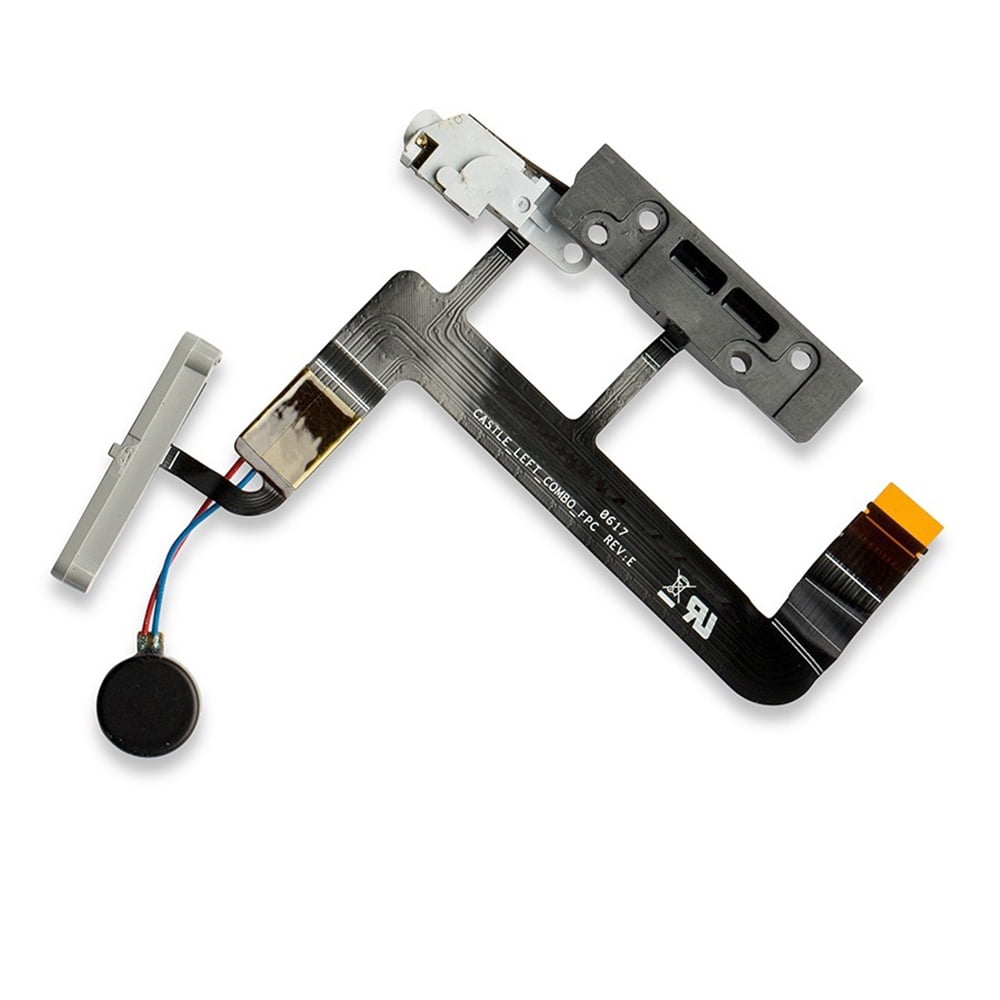
– In the back case, we’ve still got the modular headphone jack hanging out. With some finesse, you can carefully wiggle it free from under the main board. Steady hands win this one!
– Quick note: the Surface Connect cable harness has had a bit of a glow-up. It’s now dressed in sleek black tape rather than the usual rainbow parade of wire insulation. Classy touch!
– Attached to the trackpad, we spotted some familiar faces: the NXP/Freescale MK22FN512 Kinetis MCU and the Synaptics S9101B touch controller. Always nice to see old friends!
– Now, with the trackpad out of the way, swapping out the keyboard and top cover is looking like a pretty reasonable task. And hey, it’s miles easier than tackling the same job on any current MacBook Pro.
Step 13

– And there you have it, folks! We’ve reached the end of this unexpected adventure with the Surface Laptop teardown.
– At first glance, it might seem like just another Surface Laptop, but boy, were we in for a surprise! The 3rd-generation model has taken a bold leap towards being more repair-friendly.
– Kudos to Microsoft for achieving this without adding any extra bulk or awkwardness – they’ve shown that you can have a sleek design while still being kind to those who love to tinker.
– While it’s not perfect, this laptop is definitely on the right track. If Microsoft keeps this up, the future of their laptops looks promising. There are some really smart repair-friendly features included here.
– So let’s wrap this up with a score!
Success!