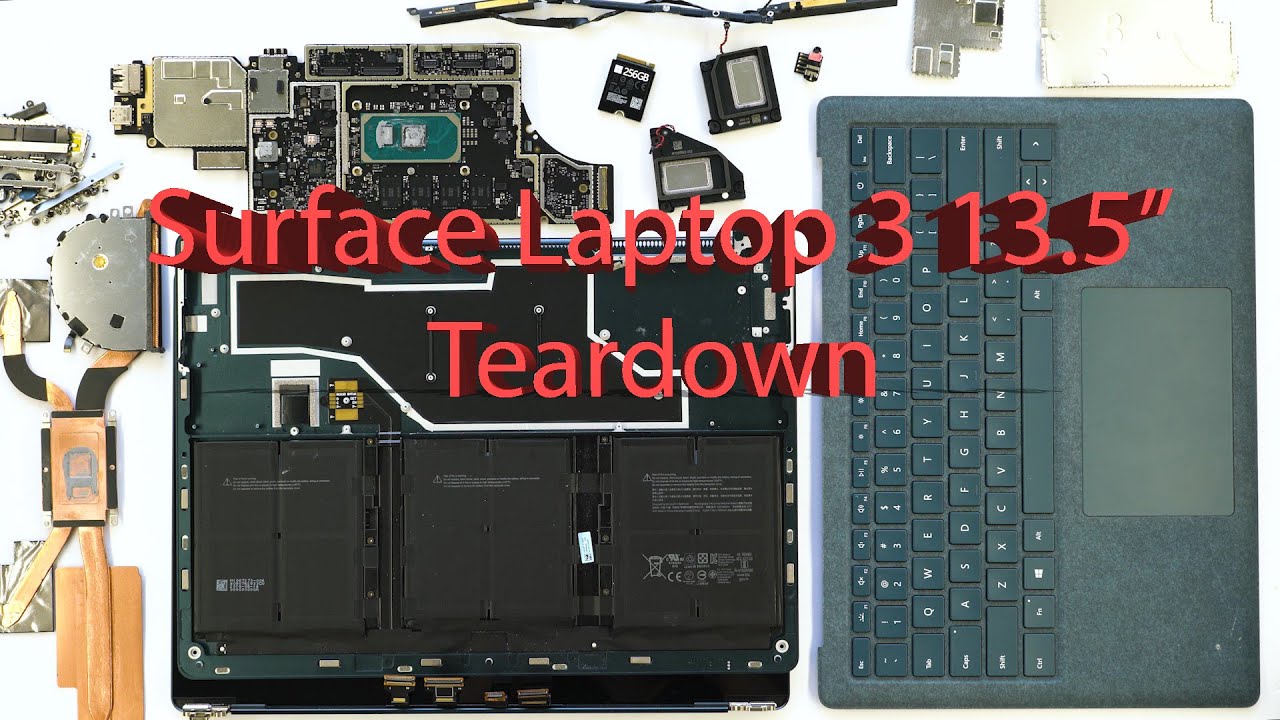
DIY Guide: Microsoft Surface Laptop 3 Speaker Replacement
Duration: 45 minutes
Steps: 17 Steps
Follow this guide to tackle the task of removing or swapping out the right speaker on your Microsoft Surface Laptop 3 (13.5″). While some of the images may showcase a different model and could show minor visual differences, rest assured they won’t interfere with the steps you need to follow. If you find yourself in a pickle, you can always schedule a repair!
Step 1


– Flip your laptop upside down and place it gently on your work surface, with the feet facing up.
Step 2


To tackle those little feet on the bottom of your laptop, grab the sharp end of your trusty spudger and get ready to pop them off with style!
Just a heads up, the two feet at the back (near the screen) are a bit different from the two at the front, so keep that in mind while you work your magic!
– Every foot has a sneaky little indent that makes removal a breeze.
– To get the spudger in just right, slide it into the nearest long edge and push parallel to the laptop’s short edges—easy as pie, as shown!
Tools Used

Step 3


The two rear feet are stuck down with a bit of adhesive, but don’t worry, it’s easy to remove!
– Slide the pointed end of a spudger under one of the two rear feet, right at the back edge.
– Gently push the spudger underneath the foot and lift up to pop it off.
– Now, do the same for the second rear foot!
Tools Used
Step 4


The two front feet are held in place with some nifty plastic clips and a touch of light adhesive.
– Slide the sharp end of your trusty spudger under one of the two front feet, right at the edge where it meets the device.
– Gently nudge the spudger upward to pop that foot off like a champ!
– Now, repeat the magic to detach the second front foot.
Tools Used
Step 5


– When piecing everything back together:
– Keep in mind the front and rear feet are not the same—they’re unique little fellows.
– The front feet only snap in one way, so make sure they’re facing the right direction before clipping them in.
Step 6


– Instead of sticking with those old, tired feet on your device, why not jazz things up with some 8 mm rubber furniture pads? They’re a fantastic alternative!
– Just peel a pad off its backing, line it up over the foot cavity, and give it a good press to make sure it sticks. Easy peasy!
Step 7

As you tackle this repair, keep an eye on each screw and remember to return it to its original spot. This little trick will help you avoid any mishaps with your laptop.
– Grab your trusty T5 Torx driver and let’s tackle those four 3mm screws hiding in the foot cavities—these little guys are holding the upper case snug and secure to the device.
– When putting everything back together, remember: no need to muscle these screws down—they’re notorious for stripping. Keep it gentle!
Step 8


– Turn the device upside down.
– Tilt the display all the way open.
Step 9


Hold up! Don’t fully pop off that upper case just yet—it’s still tethered to the rest of the laptop, so keep it chill.
Make sure the upper case hugs the edges snugly all the way around. Any little gaps near the display could spell trouble when closing it—nobody wants a squished screen!
The top casing is held securely in place by some clever magnets.
– Grab the top edge of the upper case above the keyboard, and give it a confident lift straight up—the magnets will let go like butter!
– Now, carefully lift the front edge of the upper case up and away from the laptop. Be gentle with the keyboard and touchpad ribbon cable underneath—it’s delicate, so no tug-of-war here.
– When putting it all back together, lower the upper case down onto the lower case. Let the magnets snap it snugly into place, and make sure it’s lying flat like a champ.
Step 10


The keyboard and touchpad ribbon cable is held in place by a sneaky magnet connector – pretty cool, right?
On some models, you’ll find this connector wrapped up in black tape, just waiting to be discovered!
– Take the flat end of your trusty spudger and slide it gently under one edge of the ribbon cable connector—then give it a little lift to pop it loose!
– Carefully pull the ribbon cable away from the motherboard. Easy does it!
Tools Used
Step 11


Make sure that ribbon cable is lying flat and relaxed – no twists or stress allowed!
– Pop off the upper case with care.
– Flip the upper case over and place it on a clean surface, keyboard-side down.
Step 12

Taking out the SSD does double duty as a battery disconnect, so it’s a smart move to do this before diving into any big repairs.
– Grab your trusty T5 Torx driver and unscrew that 2.7 mm screw holding the SSD in place. You’ve got this!
Step 13


Once you’ve taken out that pesky SSD screw, the SSD will gracefully lift up at a slight angle, ready for its next adventure.
– Time to set that SSD free! Grip the end of it and gently pull it away from its board connector to remove it.
– Now it’s time to put everything back together. Insert the SSD at a slight angle into its board connector, then secure it into its horizontal position with the SSD screw. You got this!
Step 14

– Gently peel back the black tape covering the right speaker and Surface Connect port connectors using your fingers. Take your time and don’t rush—you’re doing great!
Step 15
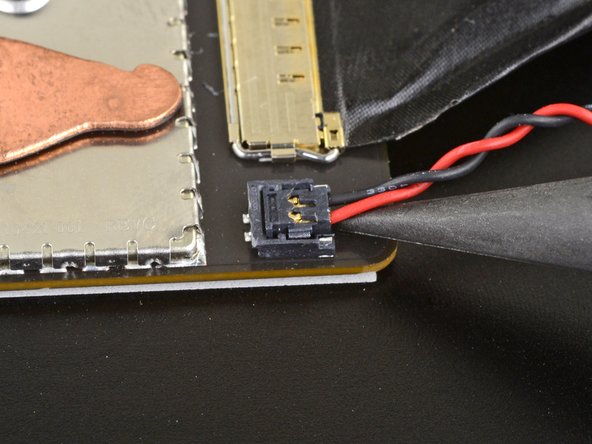
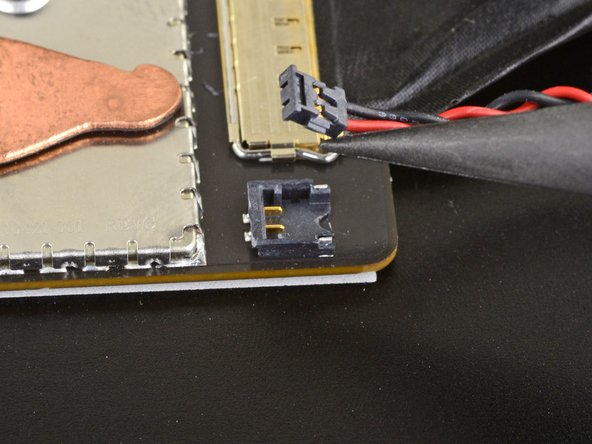

– Gently use the pointed end of a spudger to carefully lift and disconnect the right speaker wire from its cozy spot on the motherboard.
Tools Used
Step 16

– Grab your trusty T3 Torx driver and carefully take out the three 2.6 mm screws holding the right speaker in place. You’ve got this!
– When putting everything back together, remember to keep it gentle with those screws. Over-tightening can lead to some unfortunate stripping or even breaking. Let’s keep everything intact!
Step 17


– Before installing the replacement part, check it against the original—this might mean transferring leftover components or peeling off adhesive backings.
– To put your device back together, just reverse the steps you followed to take it apart.
– Dispose of your old parts responsibly—find an R2 or e-Stewards certified recycler to handle your e-waste.
– Didn’t go as smoothly as you hoped? Give some basic troubleshooting a shot or swing by our Answers community for help.
– If all else fails, you can always schedule a repair!
Success!