DIY Guide: Microsoft Surface Laptop 4 Battery Replacement Tutorial
Duration: 45 minutes
Steps: 64 Steps
Dive into this guide to swap out the battery in your Microsoft Surface Laptop 4 (13.5-inch). If you notice a swollen battery, be sure to take the necessary precautions. To wrap up this repair, you’ll need some replacement adhesive for the battery – we recommend strong double-sided tape like Tesa 61395 for the job. Just a heads up, some of the photos here may show a different model and could have minor visual differences, but not to worry – they won’t impact the steps you need to take!
Step 1


Let your laptop’s battery dip below 25% before diving into this repair. A battery that’s still charged could spark a little drama if it gets damaged!
– First things first, unplug all those cables and power down your laptop completely. Let’s give it a well-deserved nap before we dive in!
Step 2


– Gently close the screen and flip your laptop over so the back case is facing up. This will give you a clear view of those four rubber feet waiting for your attention!
Step 3


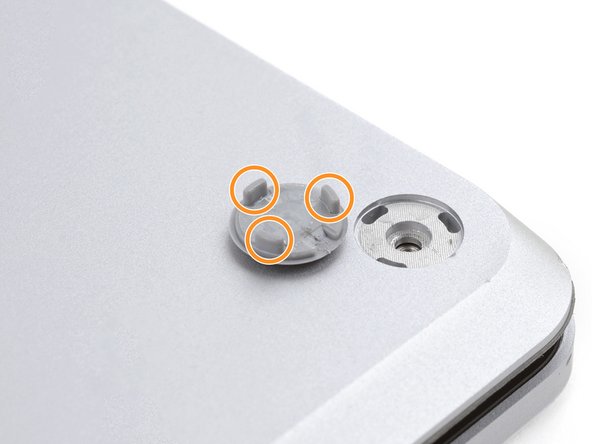
Each foot is designed with a little groove to make prying it off the laptop a bit easier.
– The back feet recesses are right up against the rear edge of the laptop.
– The front feet recesses are snugly positioned near the front edge of the laptop.
Step 4


The feet pop out quickly—watch out, you don’t want them to go AWOL!
– Gently slide one arm of your trusty tweezers into the little recess of one of the feet.
– Give your tweezers a twist and pry upwards to break free the adhesive and unclip that foot from the laptop.
– Carefully remove the foot.
– Now, just repeat this fun little dance on the remaining feet!
Tools Used

Step 5

– Let’s get this laptop back on its feet – literally! Make sure to put the feet in their correct spots when reassembling, or it just won’t feel right.
– Time to get a grip! Press those feet into their recesses to secure them to the frame. Easy peasy.
– Check out the rear feet – they’ve got a single center clip that keeps them in place. Simple, yet effective.
– Now, the front feet are a bit more particular. They’ve got three clips and can only be reinserted one way, so take your time and get it right.
– If the old adhesive on the feet has seen better days, don’t worry! Just remove the old stuff and apply a small amount of Tesa Tape where it used to be. Good as new.
Step 6


– Got damaged or worn out feet? No worries! Grab some 8 mm rubber furniture pads:
– Peel a pad away from its backing.
– Line up the pad over a foot cavity and press down to stick it in place.
Step 7

These screws can be a little tricky, so make sure to keep that steady downward pressure to avoid stripping them. You’ve got this!
Keep tabs on every screw you remove, and make sure each one finds its way back to its original spot—no screw left behind!
– Grab your T5 Torx driver and unscrew those four 3mm screws holding the upper case. Time to show those screws who’s boss!
Step 8


– Time to get started! Flip your laptop over and open the screen all the way to get ready for the repair process.
Step 9


Hold up—don’t yank the upper case completely off yet! It’s still tethered to the laptop by a sneaky cable.
Make sure the upper case hugs the laptop nice and snug all the way around. Any gaps near the screen could mess up the display when it shuts.
The top cover is held in place by magnets.
– Grab the top edge of the upper case right above the keyboard and gently lift it straight up to release it like a pro.
– Carefully lift the bottom edge of the upper case away from the laptop, being mindful not to put too much stress on the ribbon cable hiding underneath.
– When it’s time to put everything back together, lower the upper case onto the lower case until those magnets click into place and it rests nicely.
Step 10

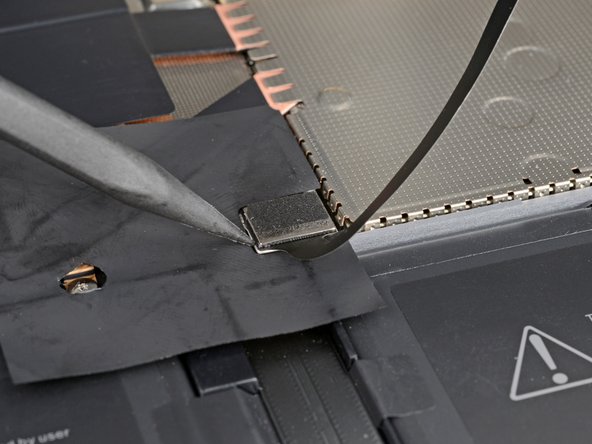
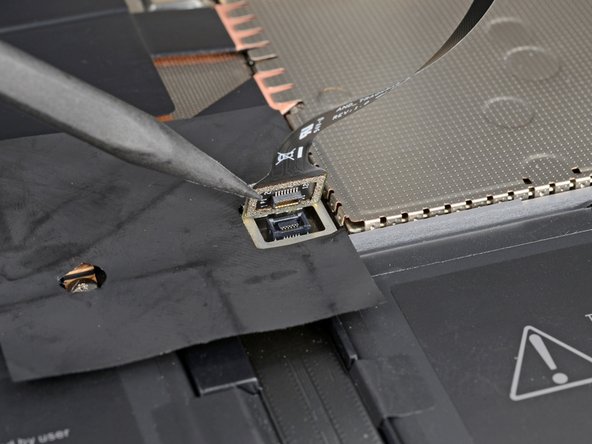
The cable connecting the keyboard and touchpad to the upper case is like the lifeline of your laptop. Let’s keep that connection strong!
– Slip the pointy end of a spudger under one side of the magnet connector and give it a gentle nudge to pop it loose.
– When it’s time to reconnect, line up the magnet connector with its socket, making sure the cable points toward the bottom of your laptop. Press down on the connector to lock it in place.
Tools Used

Step 11

– Gently lift off the upper case and place it keyboard-side down on a clean surface, ready for the next steps in your repair adventure!
Step 12

Once you’ve taken out that pesky screw, the SSD will gracefully rise at a slight angle, ready for its next move.
– Grab your trusty T5 Torx driver and pop out that 2.7 mm screw holding the SSD in place. Easy peasy!
Step 13


Be gentle when lifting, as yanking at a sharp angle might hurt the SSD and its socket.
Popping out the SSD doubles as a cool trick to cut off the battery power.
– Slide the SSD gently out of its slot and set it aside.
– When you’re putting it back, angle the SSD slightly for a smooth re-entry.
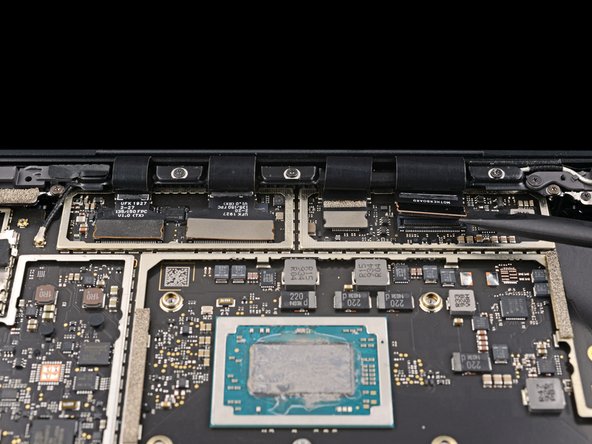
Step 14

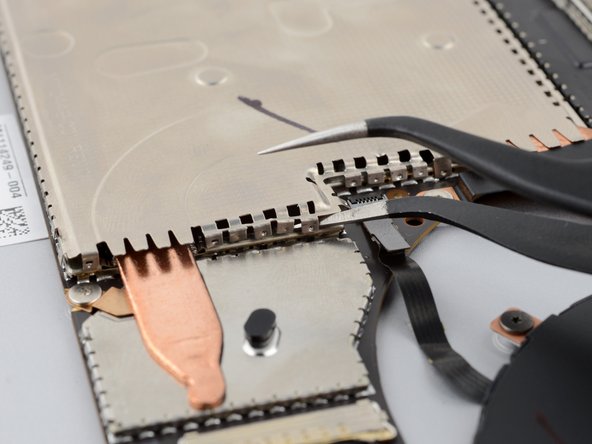
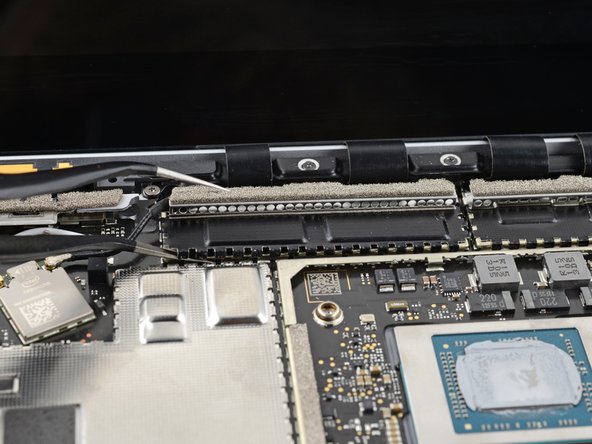
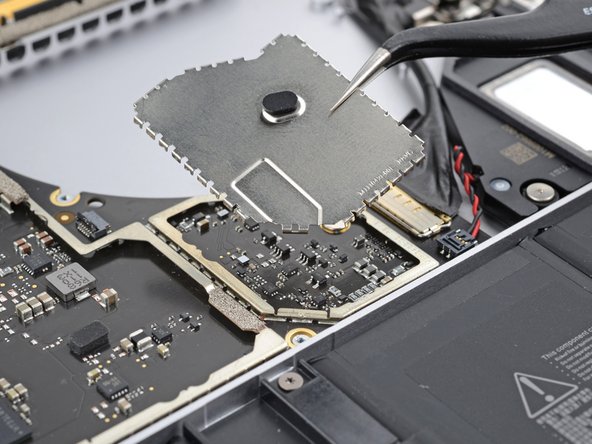
Be gentle with the shield; we want it to stay in shape for reassembly later!
– Start by gently inserting the pointed end of your spudger into one of the gaps along the top edge of the heatsink shield.
– Once in place, give it a little nudge to lift the clips that are holding the shield down.
– Work your way along the right edge, repeating the same process to loosen the shield.
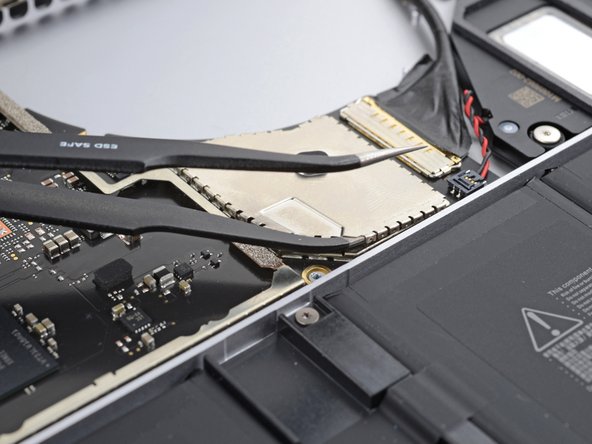
– Next, use your tweezers to slip one arm under the bottom right edge of the heatsink shield.
– Carefully pry upwards to release the final clips and free the shield.
Step 15


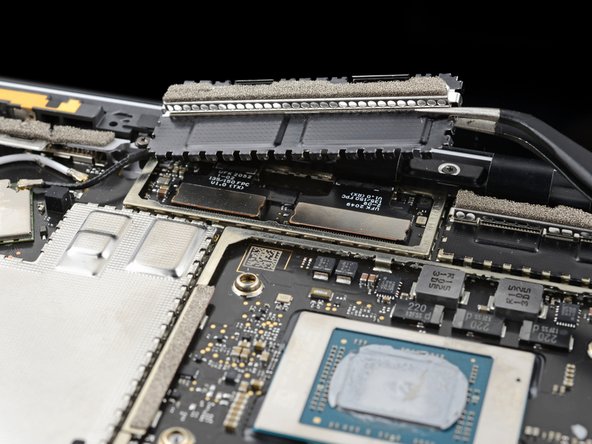
– Gently take off the heatsink shield. A little nudge and it’ll pop right off.
– To put the shield back, simply press down around the edges until the clips click into place. It’s like a mini puzzle, but way easier!

Step 17


– Grab your trusty T3 Torx driver and let’s tackle those nine screws holding the heatsink in place:
– Two 2.5 mm screws
– Two 2 mm screws
– One 3 mm screw
– Two 4.1 mm screws
– Two 3.4 mm screws
Step 18

– When putting it all back together:
– Make sure the heatsink lines up perfectly with the centering peg on the motherboard.
– Tighten the four CPU tension screws in a nice, even ‘X’ pattern: start at the top left, then move to the bottom right, top right, and finally bottom left.
Step 19


It might take a little muscle here, so go easy! Just make sure not to twist or bend those heat pipes – they’re more delicate than they look.
Thermal paste is like a cozy blanket for your CPU, connecting it snugly to the heatsink.
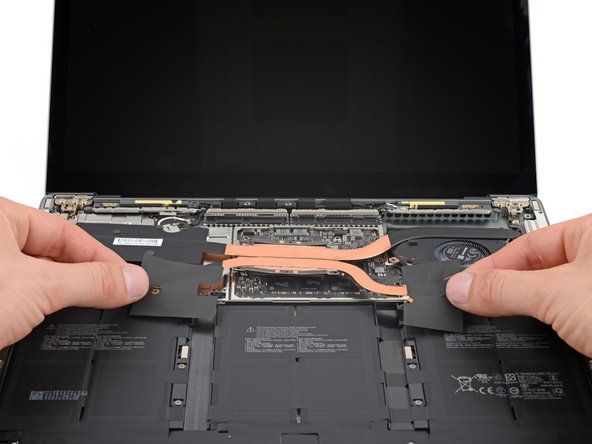
– Time to get started! Carefully insert your trusty spudger under the left heat pipe, and gently pry it up to release the left section of the heatsink.
– Now, repeat the same motion for the right heat pipe and the CPU screw mounts – you’re making great progress!
– Keep going until the heatsink is completely separated from the motherboard. You’re doing fantastic, and it’s almost time to put everything back together! If you need help, you can always schedule a repair
Tools Used

Step 20


– Hoist the heatsink and fan over the alignment peg in the upper right corner.
– Glide the heatsink and fan towards the front edge of the laptop and take it out.
Step 21

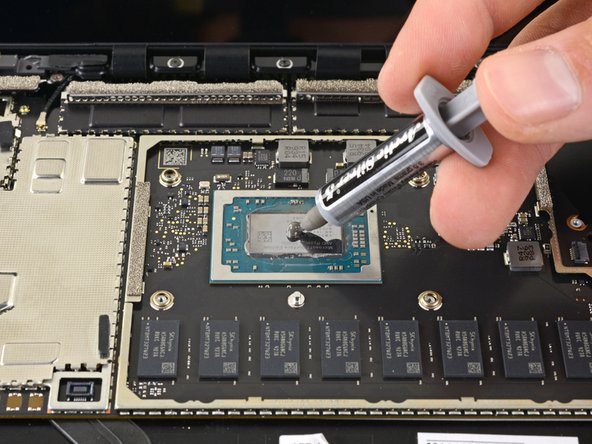
– Before you dive into reinstalling that heatsink, let’s take a moment to give it and the CPU a good clean and get some fresh thermal paste on there. You got this!
Tools Used
Step 22


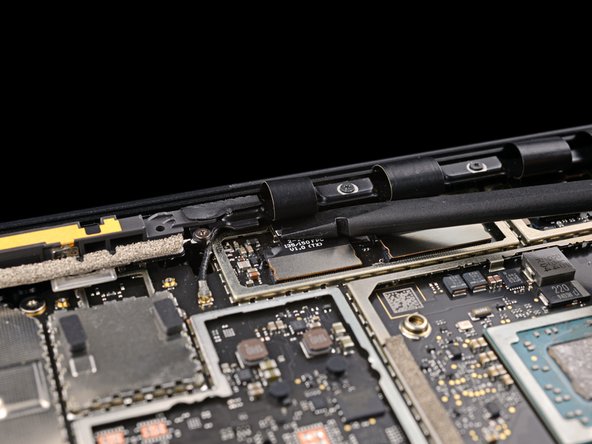
Be gentle with the shield; we want it to stay in shape for reassembly later!
– Slide one arm of your tweezers under the edge of the left display cable shield.
– Gently lift to pop the clips that are holding the shield in place.
– Keep going around the edges of the shield until it’s free and ready to be removed.
Tools Used
Step 23

– Gently pull the left display cable shield away from the screen, freeing it from its little nook.
– Now, carefully remove the shield and set it aside.
Step 24

– Now, repeat the last two moves to gracefully remove the right display cable shield. You’ve got this!
Step 25


A few motherboard screws are hidden under two of those metal shields. Pop those off!
Be gentle with the shields. You’ll need to put them back on later.
– Let’s get started! Use your trusty tweezers to carefully slide one arm under the corner of the left touchpad shield.
– Gently pry upwards to release the clips holding the shield in place – it’s like setting it free!
– Work your way around the perimeter of the shield, repeating this process until you can remove it. You got this!
Tools Used
Step 26


– Take off the left motherboard shield and reveal the magic underneath!
Step 27

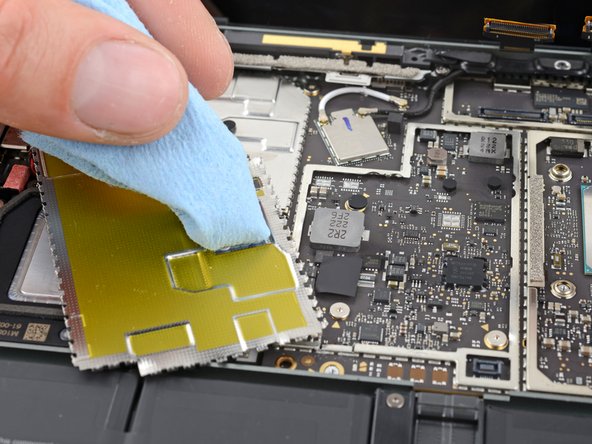
Sometimes, there’s a bit of thermal paste hanging out between the motherboard and its left shield. No biggie, but worth keeping an eye on!
– Before you pop the left motherboard shield back into place, check out this guide to give that thermal paste some TLC.
Tools Used
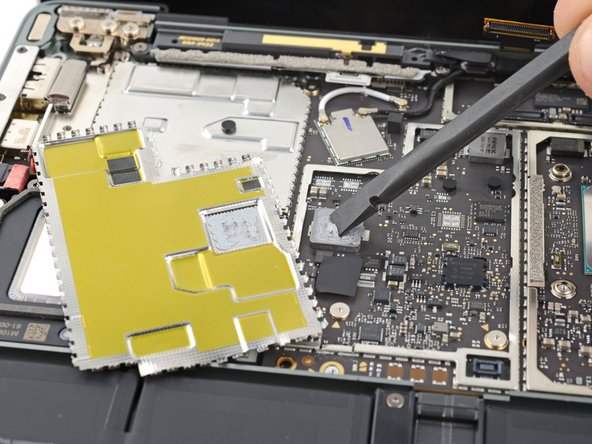
Step 28

– Grab your tweezers and slide one arm under the corner of the right motherboard shield. Gently work your way around the perimeter, lifting up to free the clips holding it in place.
– Now, go ahead and lift off the right motherboard shield.
Tools Used
Step 29

– When putting everything back together, grab the flat end of a spudger and gently guide those display cables back into their snug little spot in the lower case after reconnecting the press connectors. Take your time, and you’ll have it looking good as new in no time!
Tools Used
Step 30
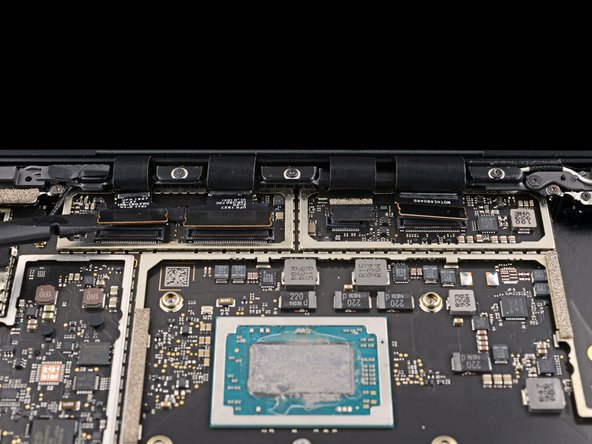

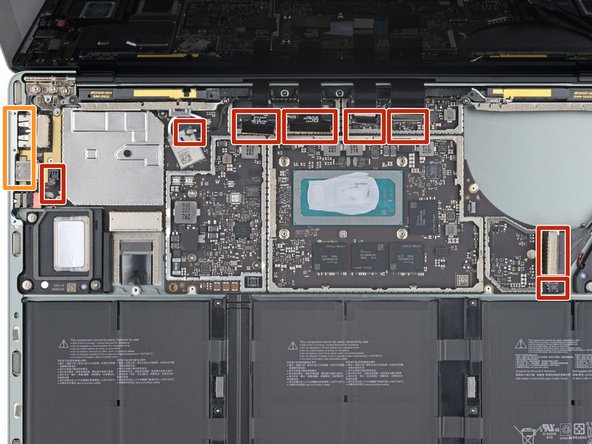
To reconnect the connectors, gently line them up and press down on one side until you hear a satisfying click. Then, do the same on the other side. Remember, don’t press in the middle—focus on the edges! If things aren’t aligned correctly, those pins can get bent and that could cause some serious damage.
– Grab the flat end of a spudger and gently pop off all four display cable press connectors. Easy does it—you’ve got this!
Tools Used
Step 31

– Grab your trusty spudger and gently pop the right speaker wire off its connector on the motherboard.
Tools Used
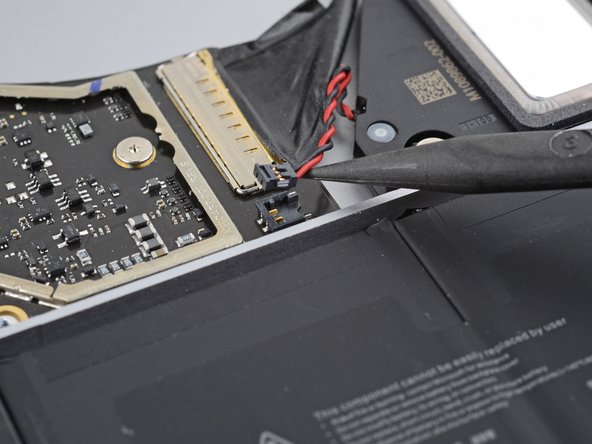
Step 32
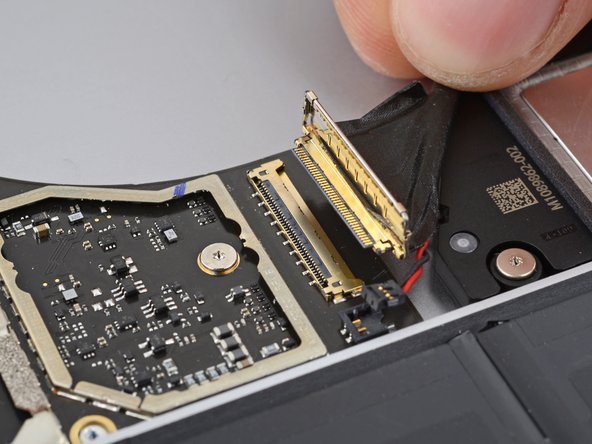

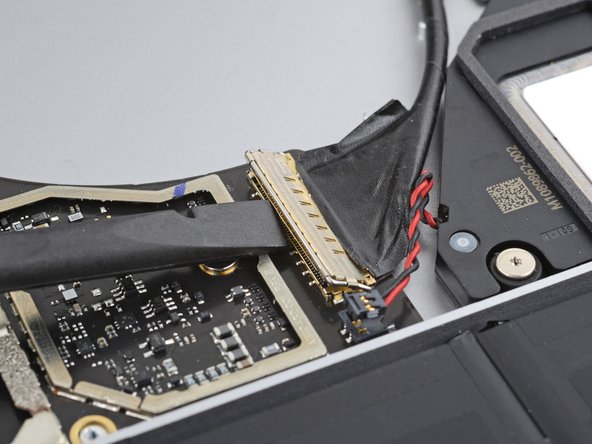
– Use the flat end of a spudger to gently pop up the locking arm on the Surface Connect port connector—like giving it a little nudge of encouragement.
– Firmly grasp the Surface Connect port cable and pull it straight out of its socket. No need to twist or tug; just a confident pull will do the trick!
Tools Used
Step 33

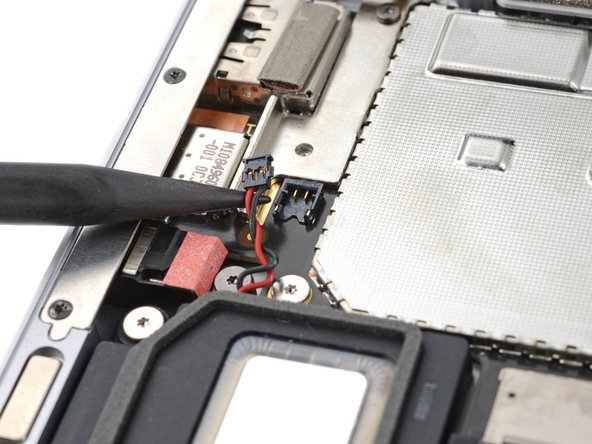
– Grab a spudger and use its pointed end to gently pop up and disconnect the left speaker wire from its connector near the left-side ports. Easy does it, you’re doing great!
Tools Used
Step 34
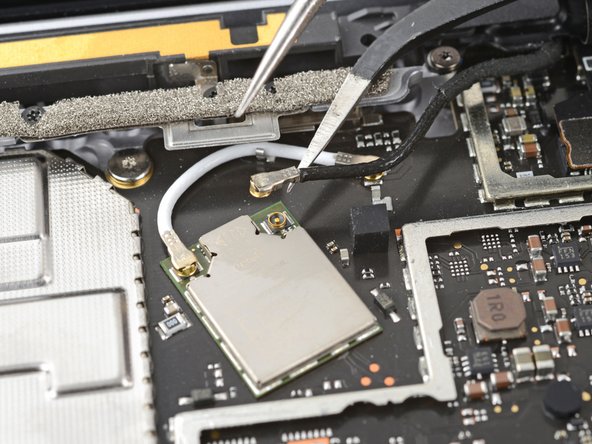

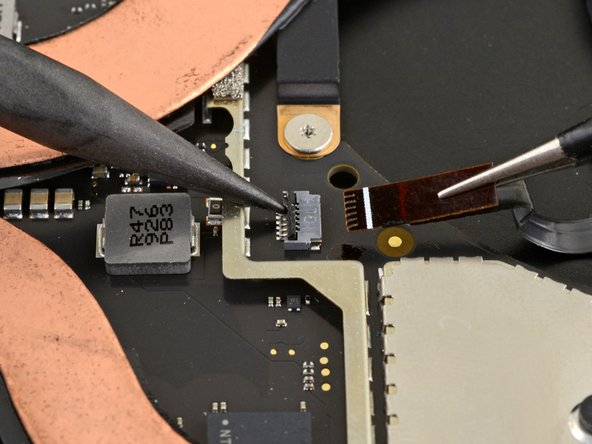
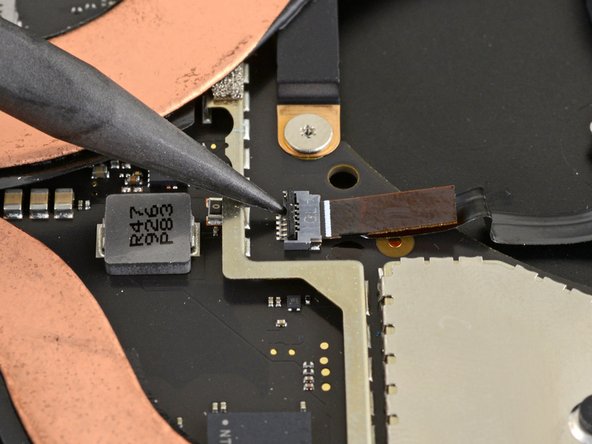
– Slip one arm of your tweezers under the black antenna connector, as close to the base as you can get.
– Gently lift straight up to pop that cable loose.
– To reconnect the antenna, line up the connector’s head over its socket and press down using the flat end of a spudger. You’ll feel it click back into place.
Step 35

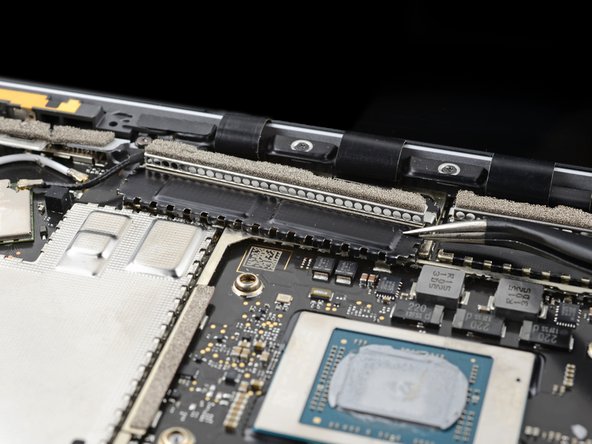
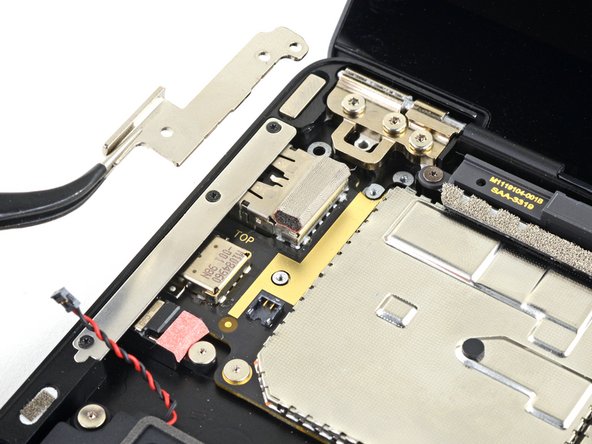
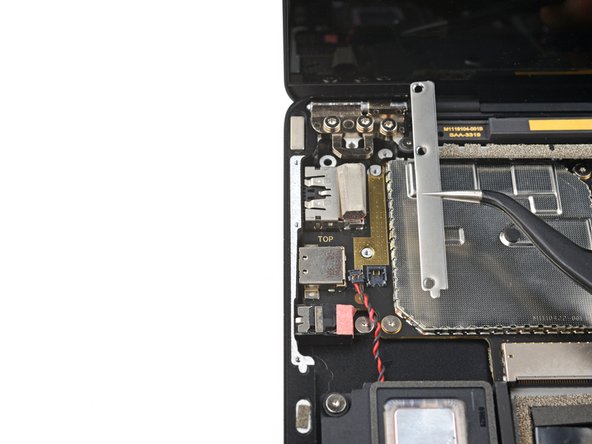
– Grab your trusty T3 Torx driver and let’s get those two 3 mm screws out of the way that are holding the motherboard bracket in place. You’ve got this!
Step 36

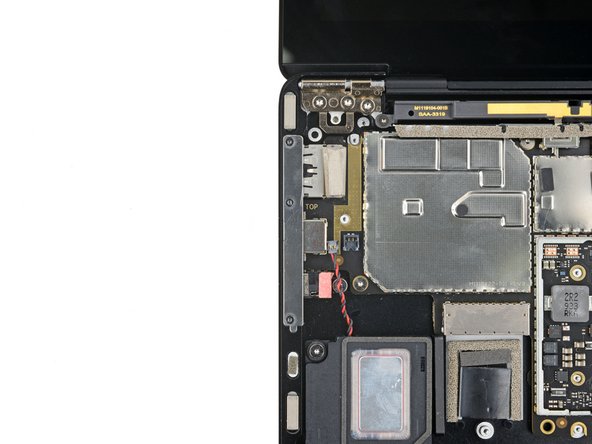
– Take off the motherboard bracket. A few twists and turns, and it’ll be free!
Step 37

– Let’s get started! Use a T3 Torx driver to remove the three 2.1 mm screws that are holding the left port cover in place. Take your time and make sure they’re all out before moving on to the next step.
Step 38

– Pop off that left port cover like a pro!
Step 39
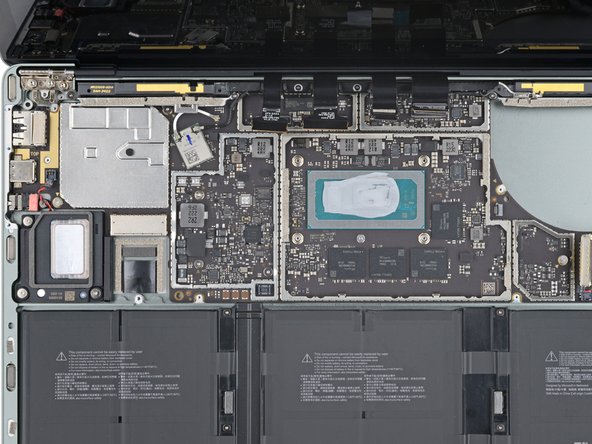

If you’ve got screws with rubber covers, just peel those off and toss them aside like a pro!
– Grab your trusty T3 Torx driver and unscrew those six 2 mm screws holding down the motherboard. You’re doing great—let’s keep it moving!
Step 40
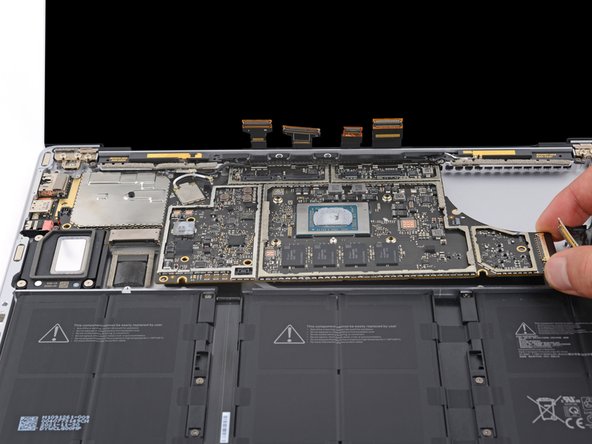

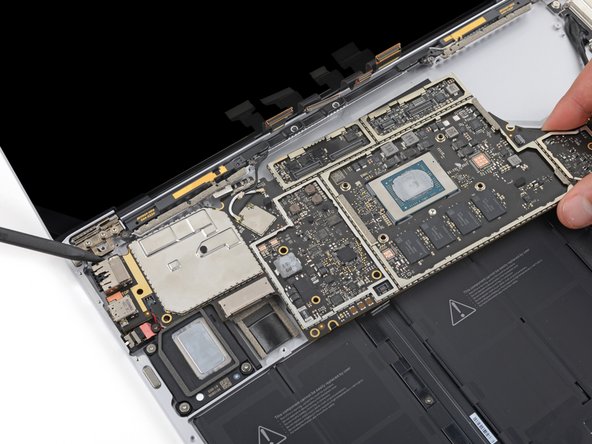
The left edge of the motherboard is snugly held in place by the port cutouts, the speaker, and the frame – let’s get it loose!
– Gently lift the right edge of the motherboard, just enough to clear the battery. You’re making great progress!
– Now, hold the motherboard steady while you work on freeing the left edge – you’re almost there!
Step 41


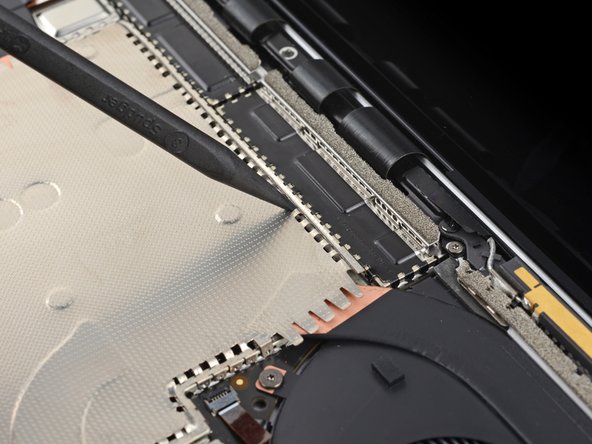
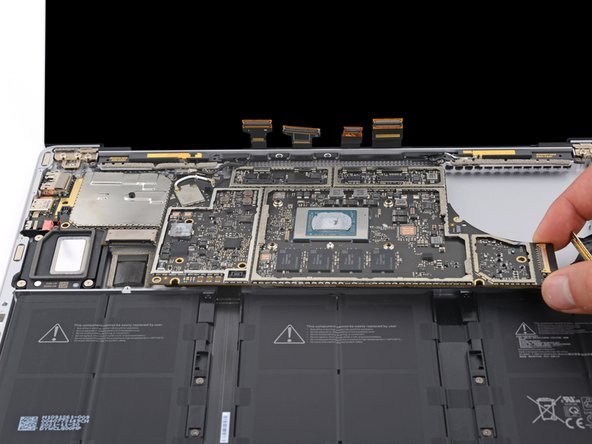
There’s a tab on the top left of the motherboard that’s making friends with some little bumps on the frame, keeping the left edge from breaking free. It’s like a lock, but don’t worry, we can unlock it!
If the motherboard still isn’t budging over the left speaker, that tab might be hanging on tight. Change up the angle of your spudger and give it another go. You’ve got this!
– Grab your trusty spudger and aim it at the tab chilling in the upper left corner of the motherboard. Slide that spudger between the frame and the hinge of the screen, like you’re sneaking into a secret club.
– Now, with a little finesse, pry up on that tab with your spudger while gently lifting the right edge of the motherboard toward the front of your laptop. Easy does it—you’re the boss here!
Tools Used
Step 42

Don’t let those two little screwpost braces under the motherboard escape during removal! Keep an eye on them; they’re important little guys.
– Gently detach the motherboard from its cozy home.
– As you put everything back together:
– Keep an eye out so that none of those eight cables sneakily hide underneath.
– Align the left ports snugly into their designated spots before you slide the motherboard back in.
Step 43

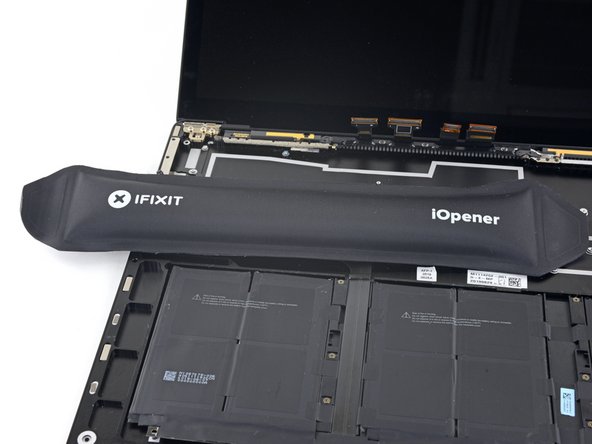
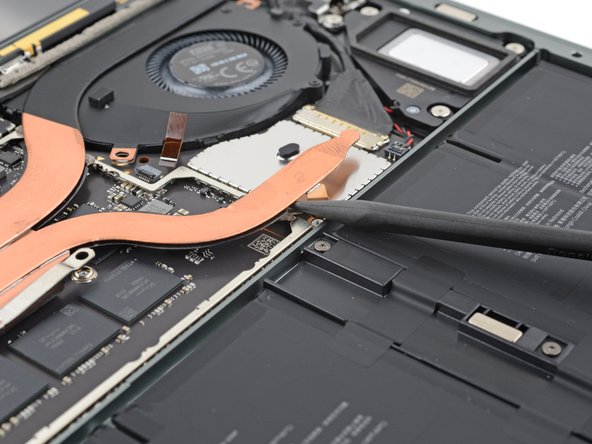
You can also get a little creative and use a hair dryer or heat gun. Just remember to keep it at a safe distance to avoid any mishaps!
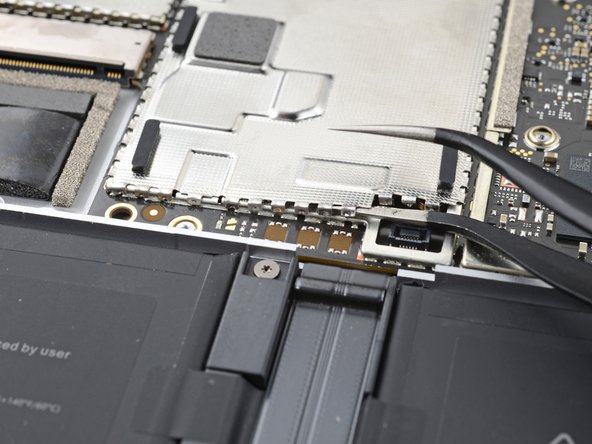
– Warm up your trusty iOpener and let it chill on the battery contact cable for about a minute.
Tools Used

Step 44
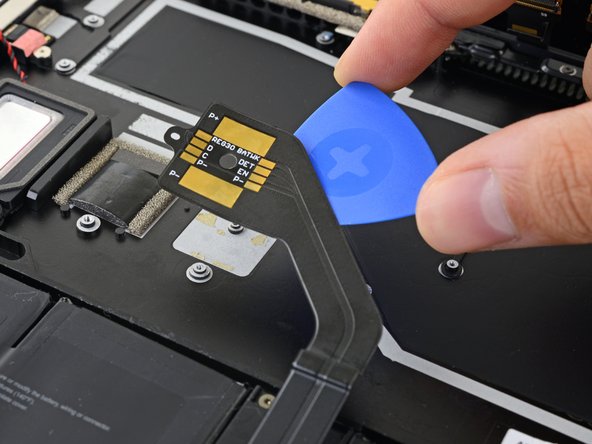
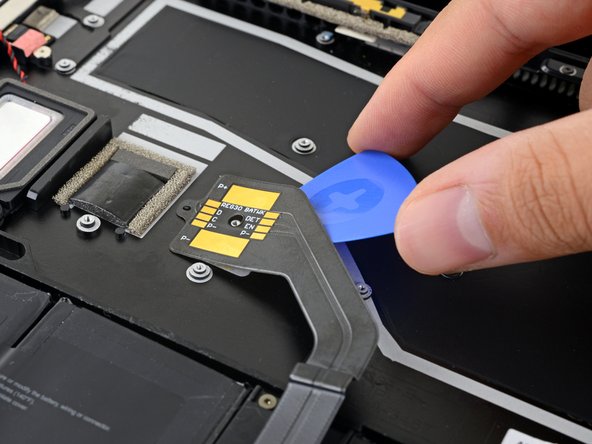

If the adhesive is being stubborn, don’t wrestle with the pick. Just give the cable a little more heat and try again – it’ll make the process way easier!
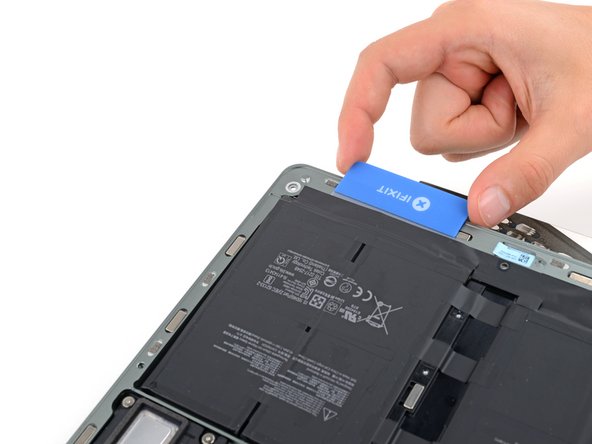
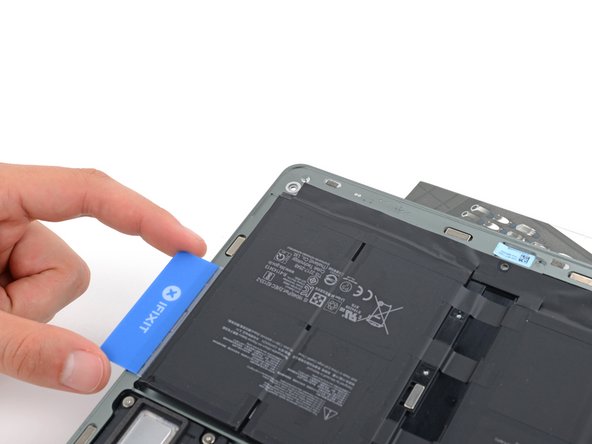
– Sneak an opening pick under the battery cable and gently pry it up to unhook it from the frame.
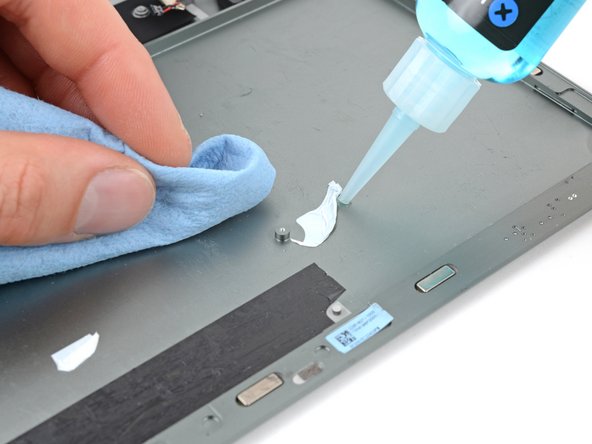
– When you’re putting it back together:
– If the battery cable has a plastic liner, remove it. If not, use double-sided tape on the underside of the cable.
– Align the cable with its screw post and alignment peg, and press it down to secure it to the frame.
Step 45

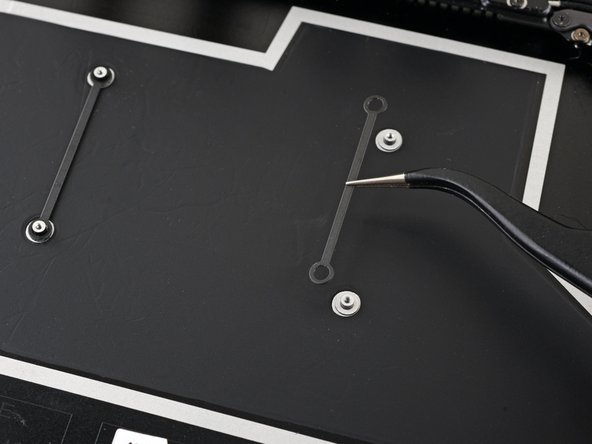
– Grab your trusty T3 Torx driver and take out those six 2.7 mm screws holding the battery spacers to the frame. Easy peasy!
– Putting everything back together? No need to mess with this step if your battery spacers are already in place—you’re good to go!
Step 46


iFixit adhesive remover has acetone in it, which can be a bit of a nuisance for your skin and eyes. So, handle with care and keep that in mind as you get your repair on!
The next few steps require adhesive remover. If you have isopropyl alcohol (above 90%), you can use that too—it just takes a bit longer.
– Pop on those safety goggles when messing with the adhesive remover!
– Skip the contact lenses unless you’ve got eye protection, alright?
– Throw on some protective gloves to keep your hands happy and irritation-free.
Tools Used

Step 47
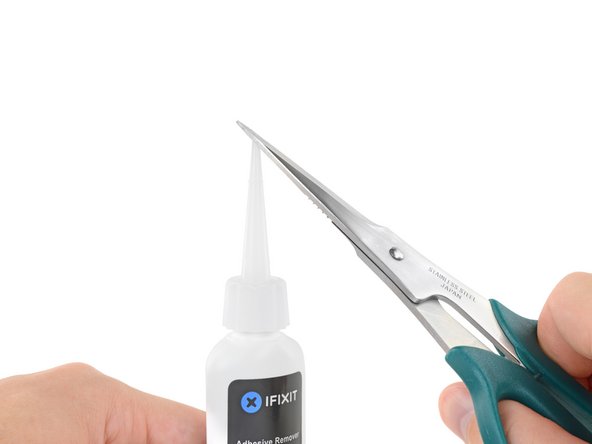

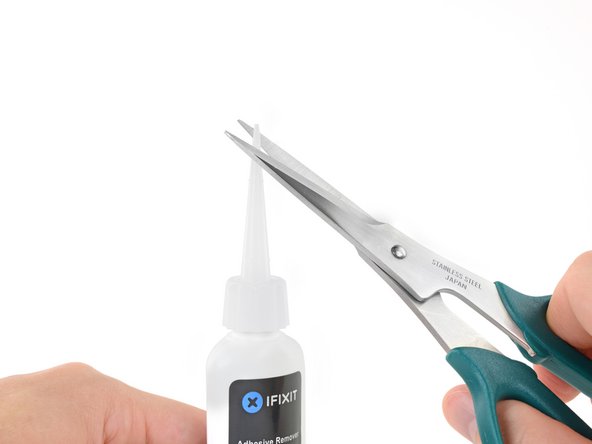
Pop off or loosen the cap before you trim the applicator tip.
Make sure to tightly seal the cap before moving on to the next step.
If you skip this step, the adhesive remover might spray out unexpectedly when you cut the tip. This will unseal the bottle and let the pressure equalize before you trim the applicator tip.
Cut the tip close to the edge so you can apply the adhesive remover in small, controlled amounts.
– Grab your bottle of adhesive remover and hold it upright, then pop off that black rubber stopper like a pro!
– Take some scissors and snip off the sealed tip of the applicator. Easy peasy!
Step 48

Adhesive remover can be a bit of a wild card—it might mess with some components inside your laptop. Handle it with care!
– Slide a paper towel under the battery contact cable to catch any extra adhesive remover from dripping through its cutout.
Step 49

– Tilt your laptop’s front edge upward just a smidge to help the adhesive remover spread under the battery like a pro.
Step 50
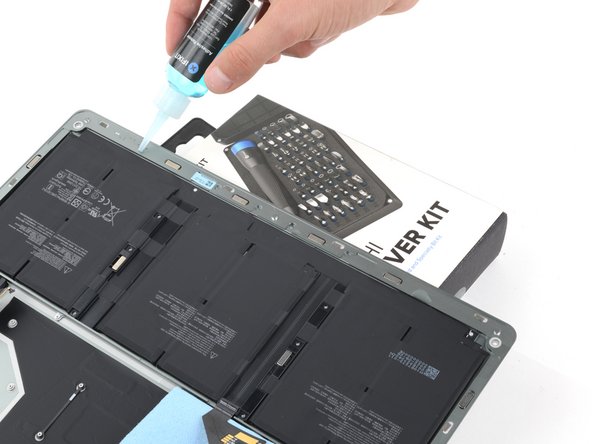

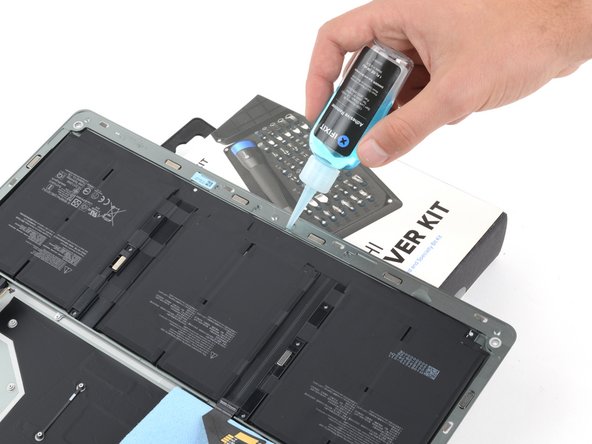
– Spread a few drops of adhesive remover evenly under the lifted edge of the battery cells—think of it as giving the battery a gentle nudge to let go.
– Take a quick two-minute break while the adhesive loosens up. Patience is key, and you’re doing great!
Step 51
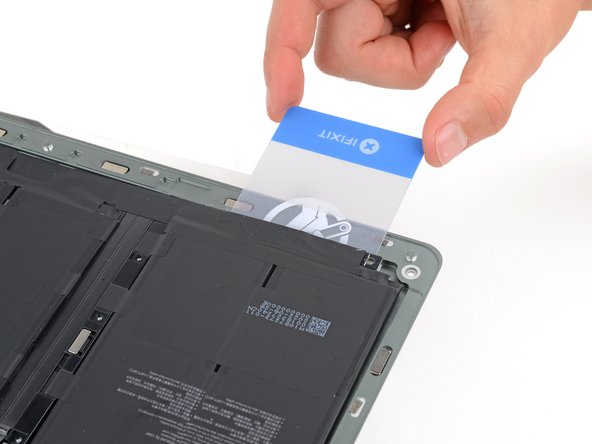

Handle the battery gently—no bending, no poking! That thing’s got some serious chemistry going on, and you definitely don’t want to start an impromptu firework show.
The battery is held in place by several layers of adhesive. If you find the battery being a bit too clingy, just add a few more drops of adhesive remover and give it a couple of minutes to work its magic before you carry on.
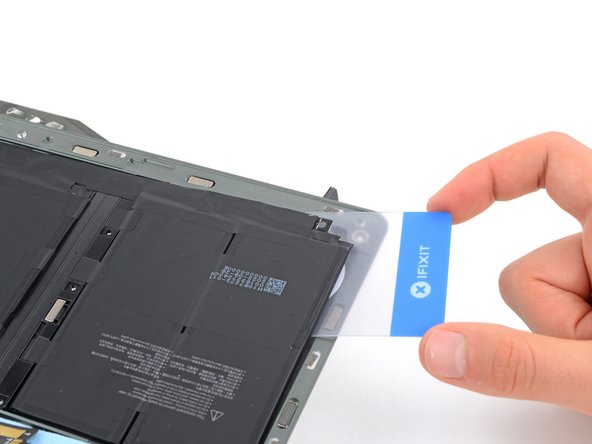
– Gently slide a plastic card under the higher edge of the left battery cell—like you’re slipping a note to a friend!
– Glide the card underneath the battery to loosen the sticky adhesive holding it down. Keep it smooth and steady!
Step 52

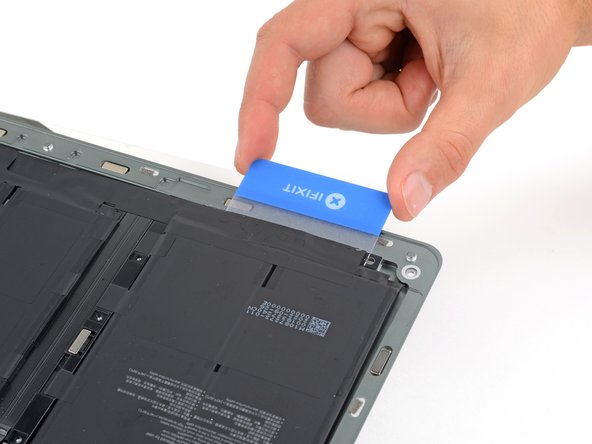
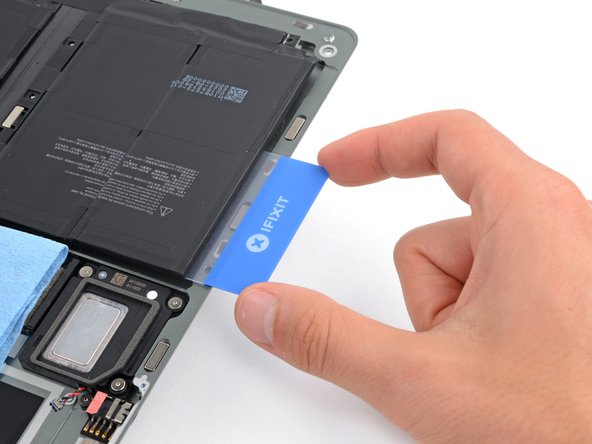
– Gently glide your trusty plastic card around the outer edge of the left battery cell.
Step 53

– Time to get this battery out! Carefully slide your trusty plastic card under the outer edge of the left battery cell to completely separate it from the frame. You’re making great progress!
Step 54

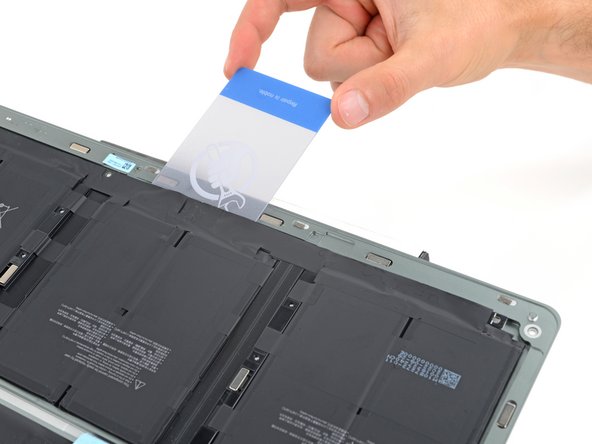
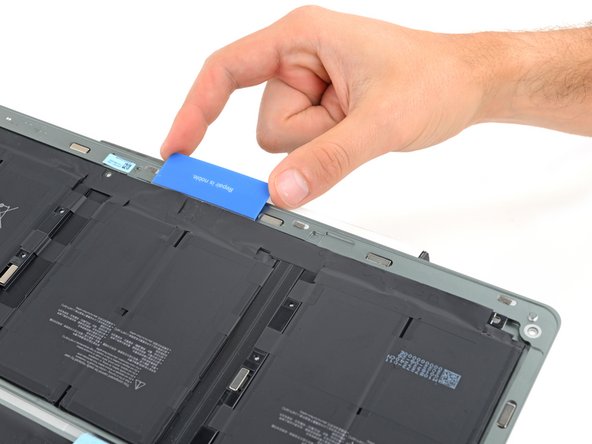
Be gentle when sliding in your card; bending the battery board can lead to a snap if you’re not careful with the angle. Keep it smooth and steady!
– Gently pull back your plastic card so it’s resting just under the battery board—nice and cozy.
– Keep sliding the card under the battery board and move it towards the middle cell. Slow and steady wins the race!
– Now, shimmy your card under the middle battery cell to loosen up that sticky adhesive holding it to the frame. You’ve got this!
Step 55

Be gentle with the battery and its board—no bending allowed!
– Peel away the adhesive from the right battery cell just like you did for the left one. You’ve got this!
Step 56
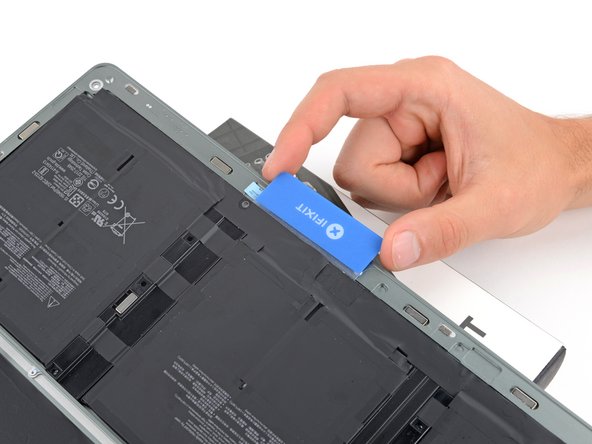

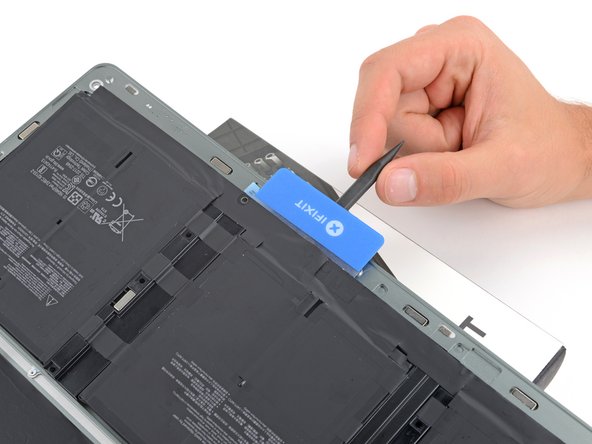
If that spacer’s holding on like its life depends on it, grab an opening pick or a spudger and ease it up just enough to slide a plastic card underneath. You got this!
– Gently slide your trusty plastic card beneath the right battery spacer, right at the inner edge of those screw posts in the frame.
– Now, take a spudger and carefully slide it under that plastic card. Give it a gentle lift to break free the adhesive that’s holding the battery spacer snug against the frame.
Tools Used
Step 57


If the battery seems a little too cozy with the frame, check for any leftover adhesive and gently slice through it using your plastic card. Keep it smooth and steady!
– Gently slide your trusty plastic card underneath the left battery spacer once more, then use a spudger to carefully pry it up.
Tools Used
Step 58
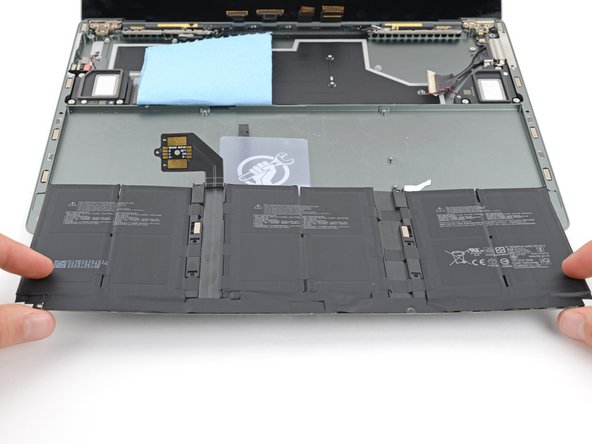

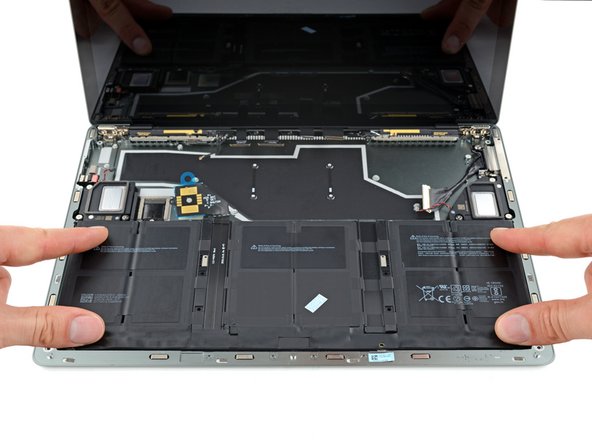
– First things first, let’s get that battery out of its cozy little spot.
– Next up, grab some adhesive remover or a strong isopropyl alcohol (like over 90%) to tackle any sticky stuff lingering on the frame.
– Now, take a microfiber or lint-free cloth and give that frame a good wipe-down to remove all the residue.
Step 59

Alright, if your new battery comes with spacers already attached, you’re good to go! Skip ahead to the installation step. If not, stick with me for the next four steps, where we’ll walk through transferring those spacers to your frame—easy peasy.
– Before you pop in that fresh battery, make sure the spacers between the cell groups are snugly in place. It’s a small step that makes a big difference, so don’t skip it!
Step 60

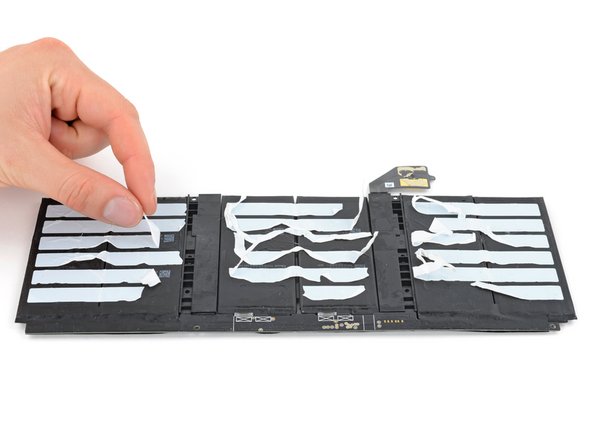
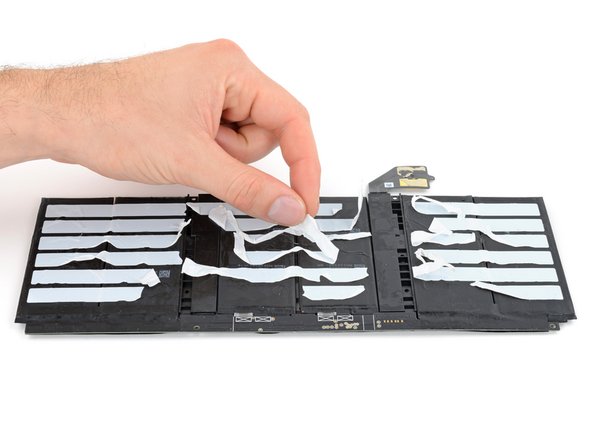
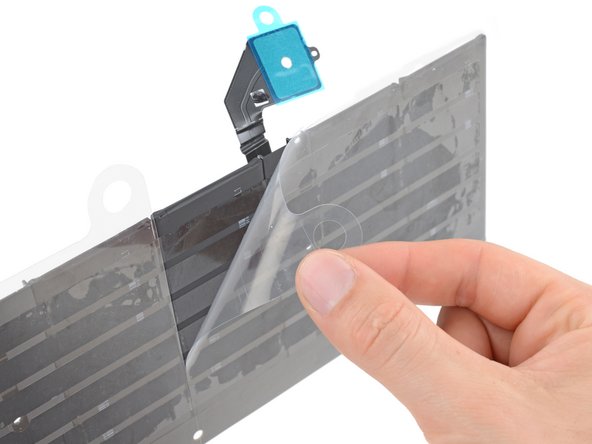
No need to stress about peeling off all that leftover adhesive—just focus on the strips that are hiding the spacers. You’ve got this!
– Time to get up close and personal with your battery! Flip it over and take a peek at the spacers between the cell groups.
– Now, use your fingers to gently peel away any adhesive strips from the battery spacers. Easy does it!
Step 61
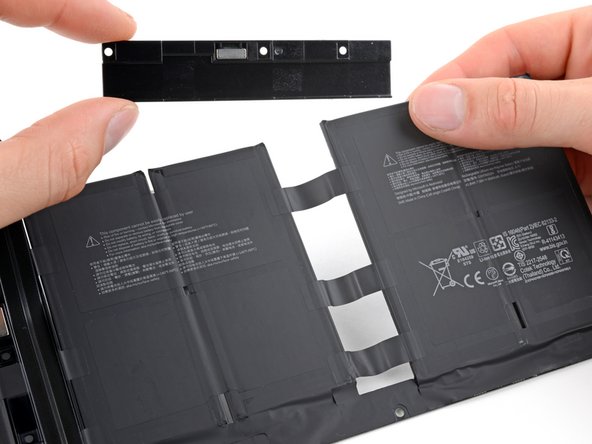

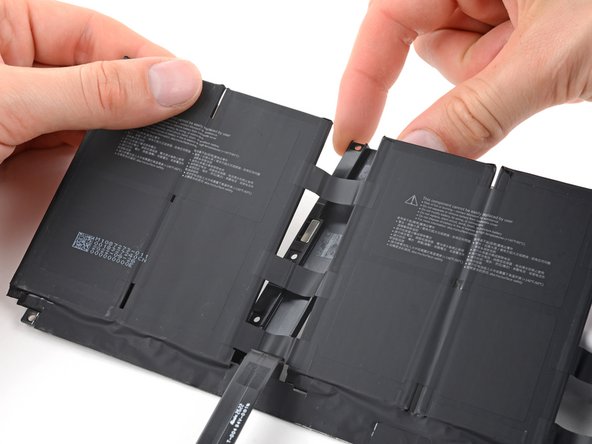
– Gently lift the battery cell groups on both sides of the right spacer – teamwork makes the dream work!
– Carefully peel back the spacer from the tape that’s holding those cell groups together. You’ve got this!
– Now, go ahead and remove that spacer. You’re on a roll!
Step 62

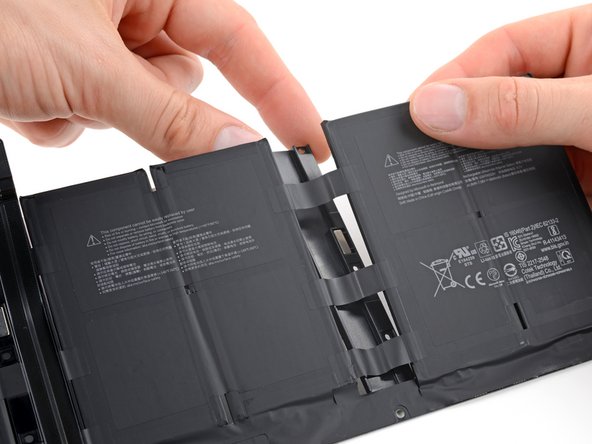
If the left battery spacer is playing hard to get, just give the battery contact cable a gentle nudge out of the way.
– Gently peel off the left spacer from the strips of tape connecting the left cell groups and lift it out of the way. You’ve got this!
Step 63

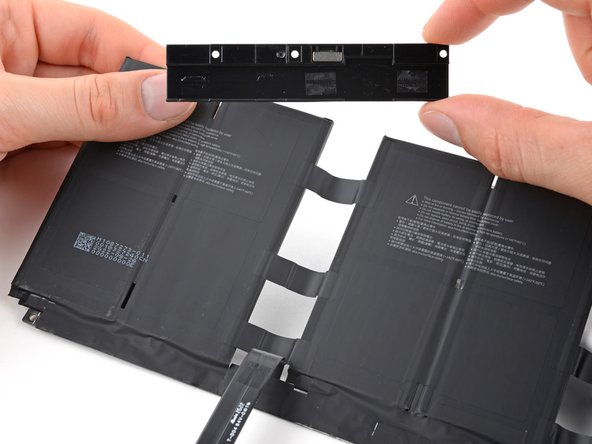
– Make sure the battery spacers are lined up with their screw holes facing outward.
– Grab your T3 Torx driver and secure the spacers by fastening the six 2.7 mm screws in place.
Step 64

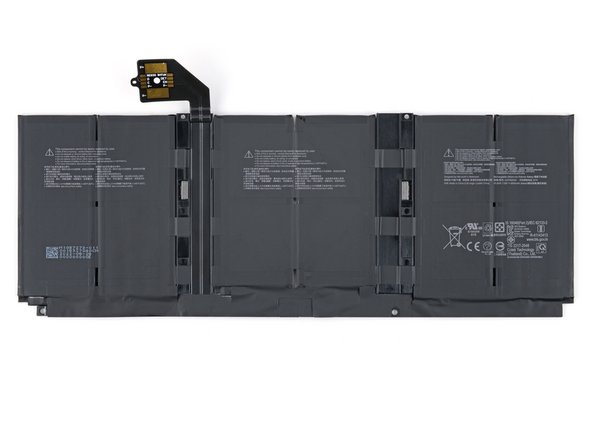
– Time for a little comparison! Check your shiny new replacement part against the original—don’t forget to move over any leftover bits or peel off those pesky adhesive backings before you dive into the installation.
– Ready to put it all back together? Just retrace your steps in reverse and you’ll be golden!
– Want your newly installed battery to work like a champ? A quick calibration after reassembly is the way to go.
– Got some e-waste? Don’t just toss it! Take it to an R2 or e-Stewards certified recycler and do your part for the planet.
– If things didn’t go quite as you imagined, no worries! Give some basic troubleshooting a shot, or swing by our Answers community for a helping hand.
– If you find yourself in a real pickle, don’t hesitate to schedule a repair!
Success!