DIY Guide: Microsoft Surface Laptop 5 (13.5-inch) Touchpad Replacement
Duration: 45 minutes
Steps: 22 Steps
Get ready to tackle the challenge of replacing the touchpad in your Microsoft Surface Laptop 5 (13.5-inch). If you notice a swollen battery, make sure to take the necessary precautions. Some of the photos in this guide come from a different model, so they might look a bit different, but don’t worry—they won’t throw you off track. Let’s dive in!
Step 1


Make sure your laptop’s battery is under 25% before diving into this repair. A charged-up battery could spark trouble if it gets damaged—play it safe!
– Disconnect all cables and power down your laptop completely.
Step 2


– Flip the screen closed, then lay your laptop down with the back panel facing upward to get to those four little rubber feet.
Step 3


Each foot features a little groove to make it easier for you to pop it off the laptop!
– The back feet? Oh yeah, those cozy little spots—they’re chilling closest to the rear edge of the laptop. Easy peasy.
– Now for the front feet—they like to hang out near the front edge of the laptop. Just match ’em up and you’re golden!
Step 4


The feet pop out pretty quickly, so keep an eye on them to avoid losing them!
– Slide one arm of your tweezers into the groove of one of the feet.
– Give those tweezers a twist and gently pry upwards to loosen the adhesive and pop that foot off the laptop.
– Say goodbye to the foot.
– Now, just rinse and repeat for the other feet!
Tools Used

Step 5
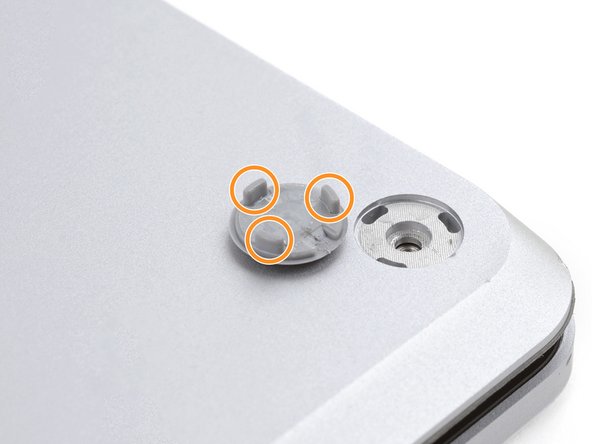

– Let’s get started with reattaching the feet to your laptop. You’ve got two types, so make sure they end up in their correct spots.
– Give those feet a gentle press into their recesses to secure them firmly to the frame. Easy does it!
– The rear feet have a single center clip, so that’s a breeze.
– The front feet have three clips, but don’t worry, they can only go in one way, so you can’t go wrong.
– If the old adhesive on the feet has given up the ghost, no problem! Just remove the old stuff and add a small amount of Tesa Tape where it used to be. If you need help, you can always schedule a repair with Salvation Repair.
Step 6


– If the feet are looking a little worse for wear, grab some 8 mm rubber furniture pads:
– Peel a pad off its backing and get ready to stick!
– Line that pad up over the foot cavity and give it a good press to make sure it’s nice and secure.
Step 7

These screws can be a bit temperamental, so keep that steady downward pressure on them to avoid any stripping mishaps!
Keep tabs on every screw you remove—they’ve got their own special spots to return to, so keep them sorted like a pro!
– Grab your trusty T5 Torx driver and let’s get those four 3 mm screws out of the way that are holding the upper case in place. You’ve got this!
Step 8


– Turn your laptop upside down and fully open the screen to get a clear view of what you’re working with.
Step 9


Hey there! Just a quick heads up: don’t try to yank off the upper case completely—it’s still hanging out with your laptop via a cable.
Make sure the upper case is snug all around the edges. Any little gaps between the upper and lower case near the screen could lead to some serious screen drama when it closes.
The top cover is held in place by magnets.
– Grab the top edge of the upper case right above the keyboard and gently lift it straight up to pop it free.
– Now, take the bottom edge of the upper case and lift it away from the laptop. Just be careful not to put too much strain on that little ribbon cable hiding underneath!
– When you’re putting things back together, lower the upper case onto the lower case until those magnets give a satisfying snap and everything sits nice and flat.
Step 10

The keyboard and touchpad cable is the lifeline that hooks up the upper case to the laptop. Keep it connected and you’re in business!
– Wiggle the spudger under the magnet connector and lift it up. You got this!
– To get that cable back in place, just line up the magnet connector with the socket and make sure the cable is pointing toward the bottom of the laptop. Give it a firm press, and it should snap right in!
Tools Used

Step 11

– Pop off the top case and place it keyboard-side down on a clean surface.
Step 12


Your SSD has thermal paste that bonds it to the upper case.
Alternatively, you can apply a bead of thermal paste directly to the SSD’s label. Use the dot method with a bead slightly larger than the screw head securing the SSD.
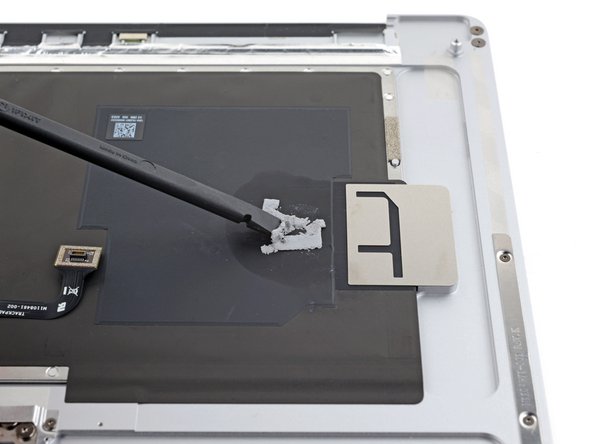
– During reassembly:
– Gently use the flat end of your spudger to remove the old thermal paste from the top of the SSD and the underside of the upper case.
– Add a few drops of highly-concentrated isopropyl alcohol (over 90%) to the SSD and upper case. Wipe off the residue with a lint-free or microfiber cloth.
– Swap the thermal pad with one that’s the same size as the SSD sticker.
Tools Used

Step 13

– Let’s get started! Use a T3 Torx driver to carefully remove the eight 1.9mm screws that hold the touchpad cover in place. Take your time and make sure they’re all out before moving on to the next step.
Step 14


– Pop off that touchpad cover with a little finesse! You’ve got this.
Step 15


Slide those tweezers in between the shield and the frame—just like you’re splitting the perfect sandwich! But hey, steer clear of prying behind that metal frame.
Keep the shield as close to its original shape as possible—it’s gotta go back in during reassembly, so don’t go wild bending it out of shape!
– Slide one end of your tweezers under the corner of the touchpad shield with a gentle touch.
– Carefully pry upwards to unclip those pesky clips holding the shield in place.
– Keep repeating this around the edges of the shield until it pops off like a champ.
– When it’s time to put the shield back on, make sure it’s facing the right way and give it a good press around the edges to snap those clips back into action.
Tools Used
Step 16


– Time to get started! Remove the touchpad shield to get to the good stuff.
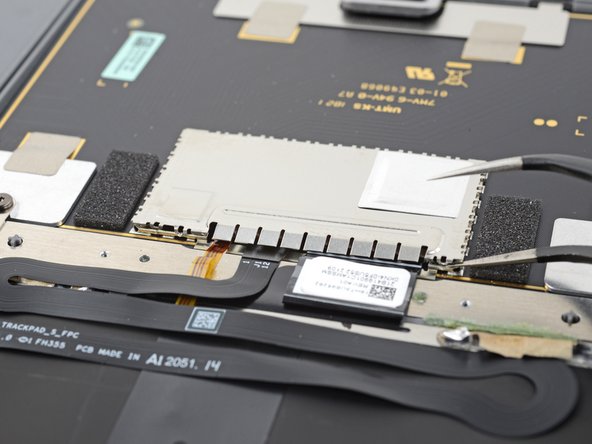
Step 17

– Grab your trusty spudger, use the pointy end, and gently pop up the locking flaps on the three ZIF connectors on the touchpad. Easy does it—it’s all about finesse here!
Tools Used
Step 18
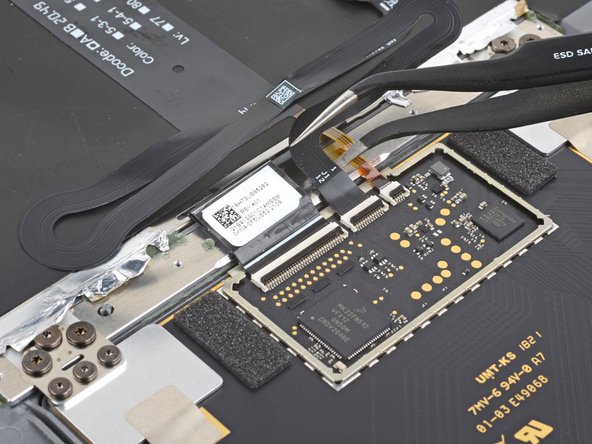

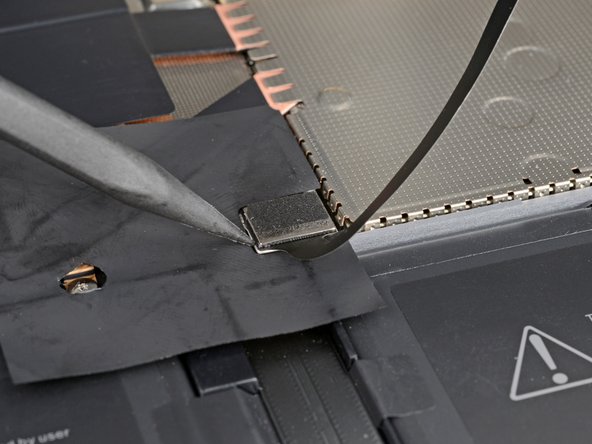
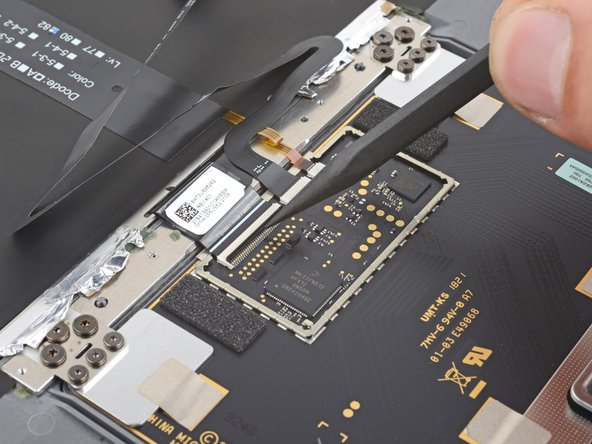
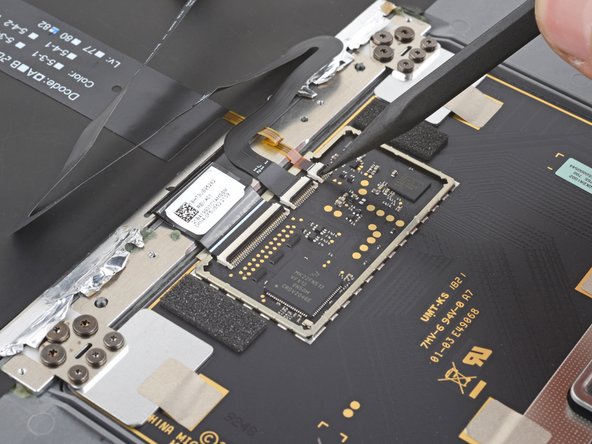
A light adhesive keeps the black ribbon cables snugly in place on the touchpad bracket.
– Gently slide one arm of your angled tweezers under that wider ribbon cable and lift it up with care to break the adhesive holding it to the touchpad bracket. You’ve got this!
– Now, let’s do the same with the middle ribbon cable. Just a gentle lift to free it from its sticky situation.
Tools Used
Step 19


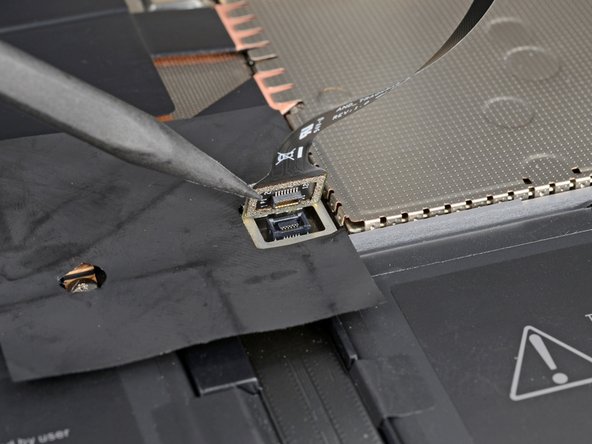
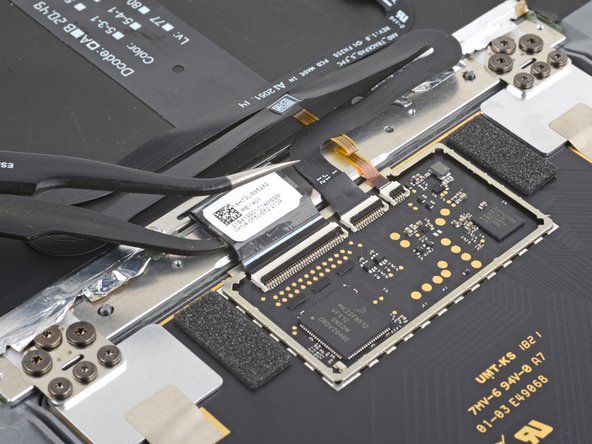
Stick to the pull tabs whenever you can—tugging on the cables themselves is like playing tug-of-war with your device, and nobody wins!
– Time to get a little handy! Use a pair of tweezers to gently coax those three cables out of their connectors on the touchpad. Take your time and work carefully – you got this!
Tools Used
Step 20

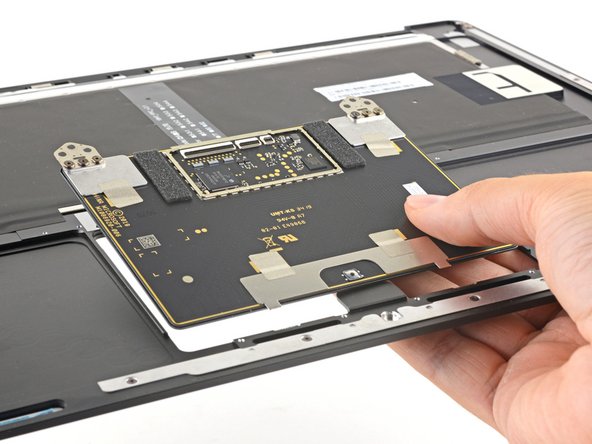
– Gently unplug the keyboard and touchpad cable (that’s the middle ribbon cable) from the upper case and set it aside so you’re all set for reassembly later on.
Step 21

– Grab your trusty T5 Torx driver and get ready to unscrew! It’s time to remove those six 3.1 mm screws that are holding your touchpad in place. You’ve got this!
Step 22
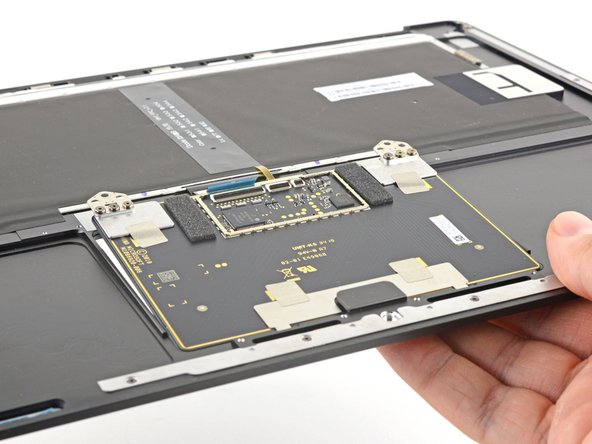

– You made it! Compare your new part to the original to make sure everything is in order—you might need to transfer some remaining components or peel off adhesive backings before installing.
– To put everything back together, just follow these steps in reverse. Easy peasy!
– Now that you’re done, be sure to responsibly recycle your e-waste with an R2 or e-Stewards certified recycler.
– If things didn’t quite go as planned, don’t worry! Try some basic troubleshooting or get help from our repair experts.
– If you need help or want to leave the repair to the pros, you can always schedule a repair.
Success!

