DIY Guide: Microsoft Surface Laptop 5 Screen Replacement (13.5-inch)
Duration: 45 minutes
Steps: 24 Steps
Get ready to tackle the screen replacement for your Microsoft Surface Laptop 5 (13.5-inch)! If you’ve got a swollen battery, make sure to handle it with care. While some of the pictures in this guide might be from a different model and show minor visual differences, rest assured they won’t throw you off track in the repair process. If you need help, you can always schedule a repair.
Step 1


Make sure your laptop’s battery dips below 25% before diving into this repair. A full battery that’s damaged might throw a fiery tantrum—and nobody wants that!
– Time to get started! First, unplug all cables and shut down your laptop completely – we want to make sure it’s fully powered off before we begin.
Step 2


– Close the screen and carefully flip your laptop over so the back case is facing up, giving you easy access to those four rubber feet.
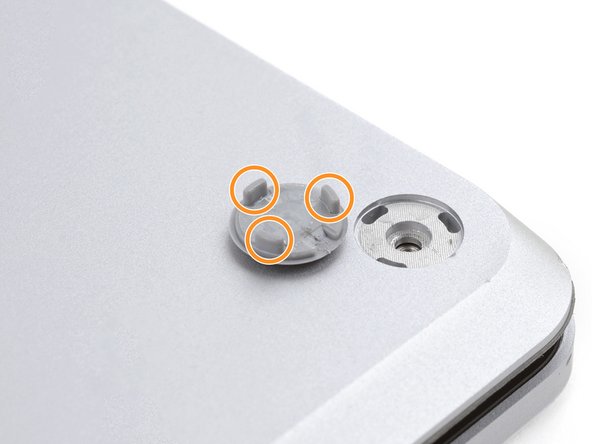
Step 3


Each foot has a handy groove to help lift it off the laptop:
– The back feet recesses are right up against the rear edge of the laptop.
– The front feet recesses are snugly positioned near the front edge of the laptop.
Step 4


The feet tend to pop out faster than popcorn—so keep an eye on them to avoid losing any!
– Slide one arm of your tweezers into the groove of one of the feet.
– Give those tweezers a twist and pop it up to break the adhesive bond and release the foot from the laptop.
– Take off the foot and set it aside.
– Rinse and repeat for the rest of the feet!
Tools Used

Step 5

– This laptop rocks two types of feet, so let’s make sure they find their cozy spots during reassembly!
– Give those feet a gentle press into their little homes to lock them in with the frame.
– The rear feet are cool with just one center clip to hold them down.
– The front feet, on the other hand, come with three clips and have a specific way of going back in, so pay attention!
– If your feet are feeling a little loosey-goosey and don’t stick anymore, take off the old adhesive and slap on a bit of Tesa Tape where the old stuff used to be.
Step 6


– If those little feet are looking a bit worse for wear, grab some 8 mm rubber furniture pads:
– Peel one of those pads off its backing like you’re unveiling a surprise.
– Line it up over the foot cavity and give it a good press to make sure it sticks around.
Step 7

These screws can be a bit tricky! Make sure to keep a steady downward pressure to avoid any stripping mishaps.
Keep tabs on all your screws and remember where each one belongs during this repair.
– Grab your trusty T5 Torx driver and let’s get to work! Remove those four 3 mm screws that are holding the upper case in place. You’ve got this!
Step 8


– Turn your laptop upside down and swing that screen wide open!
Step 9


Hey there! Just a friendly reminder: don’t go all out trying to detach the upper case completely, it’s still hanging on by a cable!
Make sure the upper case is snug all the way around. If you spot any gaps between the upper and lower case near the screen, it could lead to some screen troubles when it shuts.
The top case is held in place with magnets—pretty slick, huh?
– Grab the top edge of the upper case right above the keyboard and gently lift it straight up to pop it off.
– Carefully lift the bottom edge of the upper case away from the laptop, making sure not to put any stress on the ribbon cable hiding underneath.
– When it’s time to put everything back together, lower the upper case onto the lower case until those magnets click into place and it sits nice and flat.
Step 10

The keyboard and touchpad cable is the lifeline connecting the upper case to your laptop—kind of like the glue that keeps everything talking to each other.
– Slip the sharp end of a spudger under one side of the magnetic connector and gently pop it up to disconnect—easy peasy!
– When reconnecting, line up the magnetic connector over its socket with the cable pointing toward the bottom of the laptop. Press down firmly but gently to lock it in place. You’ve got this!
Tools Used

Step 11

– Carefully take off the upper case and place it down on a clean surface, keyboard side facing down. You’re doing great!
Step 12
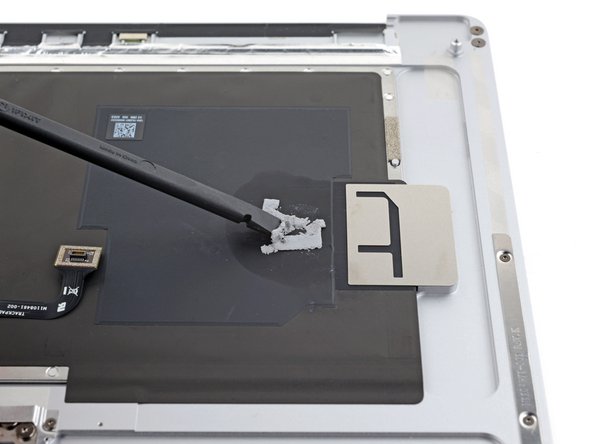


Your SSD comes with thermal paste that creates a nice snug fit with the upper case. How cool is that?
If you’re feeling adventurous, you can drop a little bead of thermal paste right onto the SSD’s label. Just remember to use the dot method and make that bead a smidge bigger than the screw head holding the SSD in place. You’ve got this!
– Time to put things back together! Start by gently using the flat end of your spudger to clean off the old thermal paste from both the top of the SSD and the underside of the upper case.
– Next, grab some high-concentration isopropyl alcohol (over 90%) and apply a few drops to the SSD and upper case. Take a lint-free or microfiber cloth and wipe away any leftover residue.
– Now, swap out the old thermal pad with a new one that’s the same size as the SSD sticker. Make sure it fits just right!
Tools Used

Step 13

With the screw out, the SSD gracefully tilts up at a gentle angle.
– Grab your trusty T5 Torx driver and unscrew that 2.7 mm screw holding the SSD in place. You’re doing great!
Step 14


Be gentle when pulling up, as yanking at a sharp angle can put your SSD and its socket at risk of damage.
Taking out the SSD? Bonus, it’s also a sneaky way to disconnect the battery.
– Gently wiggle the SSD out of its cozy socket and say goodbye to it for now.
– When you’re putting things back together, slide that SSD in at a slight angle—it’s all about that perfect fit!
Step 15

Be careful not to bend the shield too much; you’ll want it to fit snugly during reassembly.
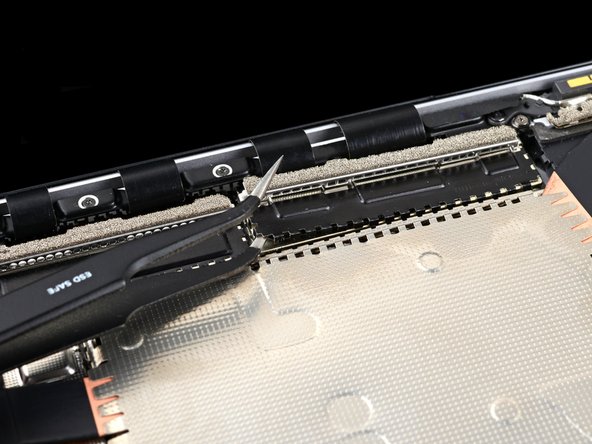
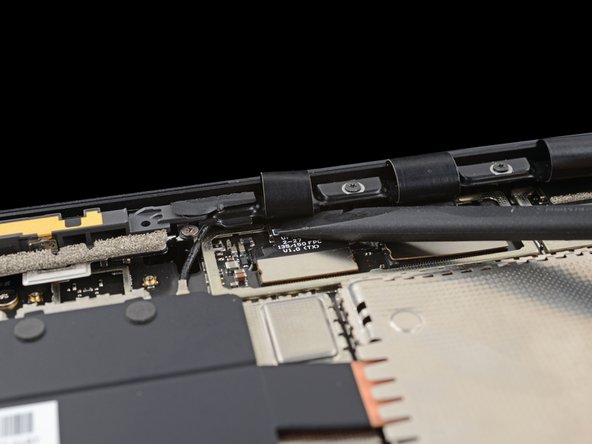
– Slip one arm of your tweezers under the corner of the right display cable shield—nice and easy!
– Carefully pop it up to loosen those clips holding the shield in place.
– Do the same thing around the left, right, and bottom edges of the shield until it’s free and ready to be removed. Take your time—you’re doing great!
Tools Used
Step 16

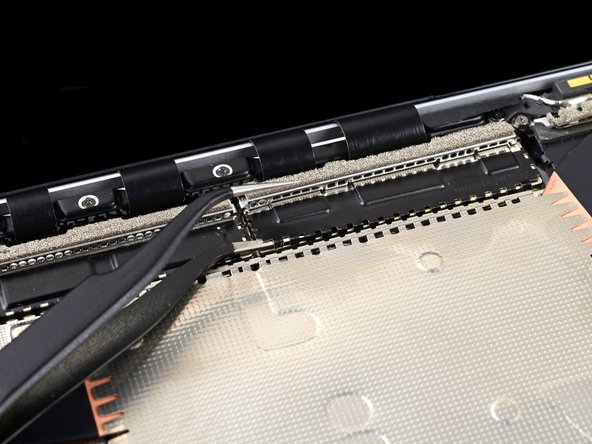
– Gently tug the right display cable shield downwards to release it from its cozy spot in the laptop.
– Now, go ahead and remove the shield!
Step 17

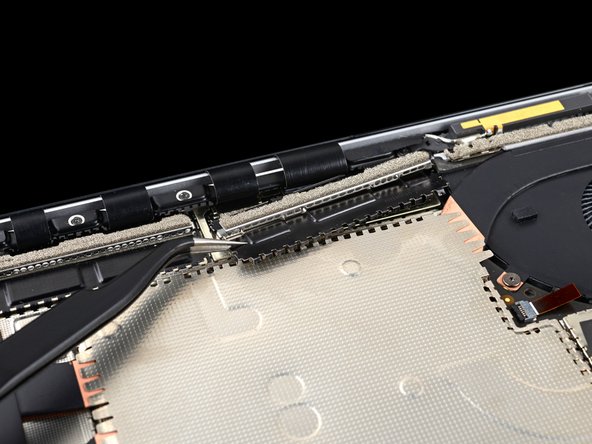
– Follow the last two steps again to pop off the left display cable shield. You’ve got this!
Step 18

– As you put everything back together, take the flat end of your trusty spudger and gently nudge those display cables back into their cozy spot in the lower case after you’ve reconnected the press connectors. You’ve got this!
Tools Used
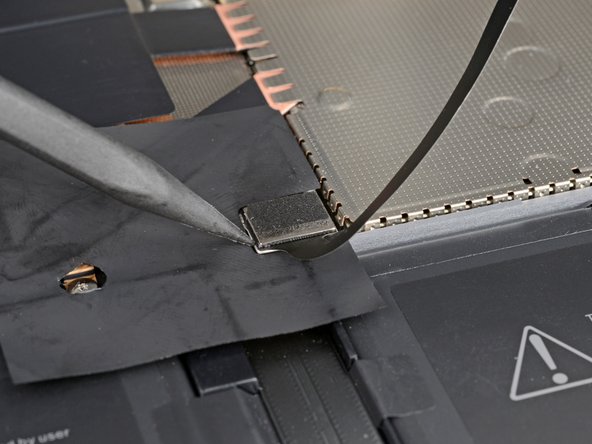
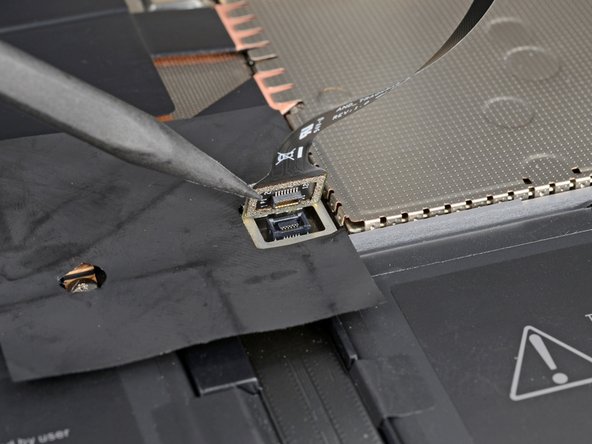
Step 19


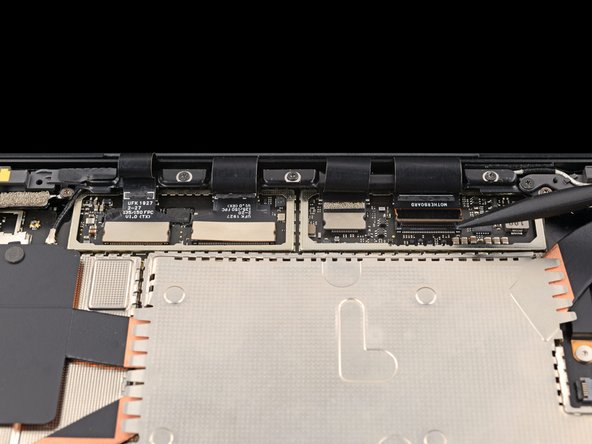
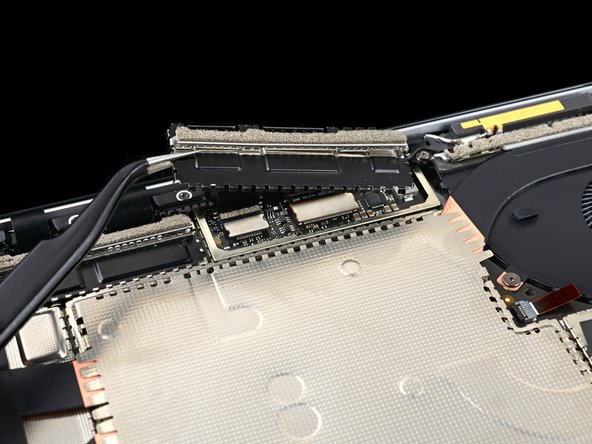
– Grab the flat end of a spudger and gently pry up to disconnect all four display cable press connectors. You’re halfway there!
– When reattaching those press connectors, line them up carefully, and press down on one side until it clicks into place. Then repeat on the other side. Be gentle—pressing in the middle could bend the pins and cause permanent damage. If you need help, you can always schedule a repair
Tools Used
Step 20

– Open the screen all the way, like you’re getting ready to dive into a great book!
Step 21


As you tackle those hinge screws, keep a steady hand on the screen! It might get a little wobbly as you unscrew, so just give it a gentle hug to keep it in place.
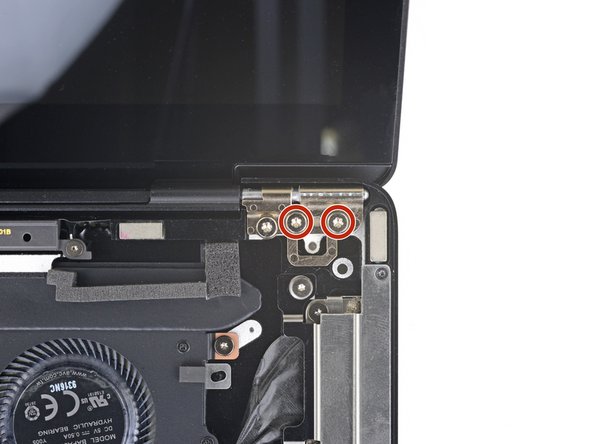
Each hinge should still have one screw left (that’s two screws in total). Just keep those screws snugly in place!
– While keeping the screen nice and still, grab your trusty T6 Torx driver and go ahead and unscrew those four outermost 5.9 mm screws that are holding the screen in place (two on each side).
Step 22

– Gently close the screen until it’s nearly vertical.
– As you put things back together, make sure the first two hinge screws are snugly in place. This will let the screen swing open just enough for you to install the remaining four hinge screws with ease.
Step 23


If your screen is lined up perfectly with the lower case, you might find that the screwdriver handle is trying to play a game of tag with the screen during removal. If you’re facing a bit of a challenge, just tilt the screen back a little to give that driver some space to work its magic.
– While keeping the screen nice and steady, grab your trusty T6 Torx driver and go ahead and unscrew those two remaining 5.9 mm screws holding the screen in place—one on each side. You’ve got this!
Step 24


– Take a moment to compare your shiny new replacement part with the original—don’t forget to transfer any leftover components or peel off those pesky adhesive backings before you dive into the installation!
– When it’s time to put your device back together, just retrace your steps in reverse. Easy peasy!
– Got some e-waste? Make sure to drop it off at an R2 or e-Stewards certified recycler. Let’s keep our planet happy!
– If things didn’t go quite as planned, don’t sweat it! Give some basic troubleshooting a shot, or feel free to reach out to our Answers community for a helping hand.
–
Success!

