DIY Guide: Replace Galaxy A23 5G Screen
Duration: Let’s aim for a quick fix in about 90 minutes, give or take a few minutes!
Steps: 23 Steps
Repairing this device is a bit of a challenge, but don’t worry! The toughest part is getting that stubbornly glued battery out. If you take your time and stay focused, everything else should go smoothly. Before you dive in, give your device a good once-over and test all its functions. And hey, don’t forget to check your replacement display for any scratches or dents! If you found our guide helpful, we’d love to hear from you with a positive review. Good luck with your repair adventure!
Step 1
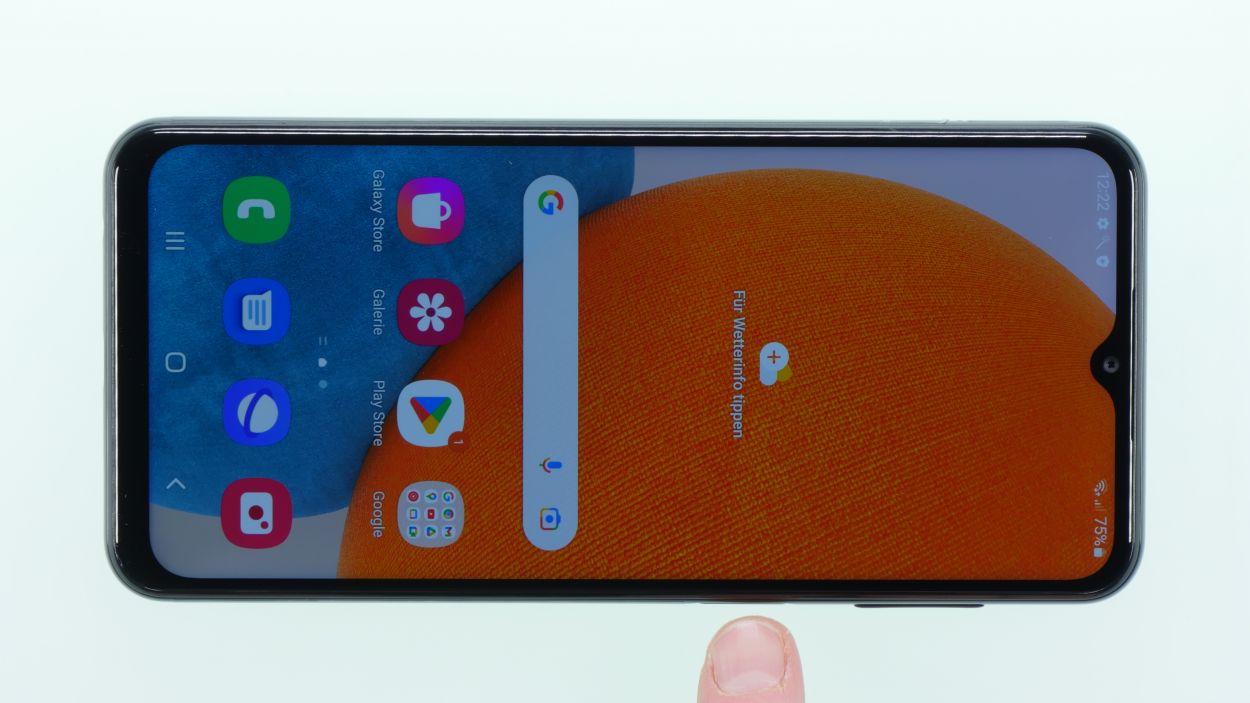
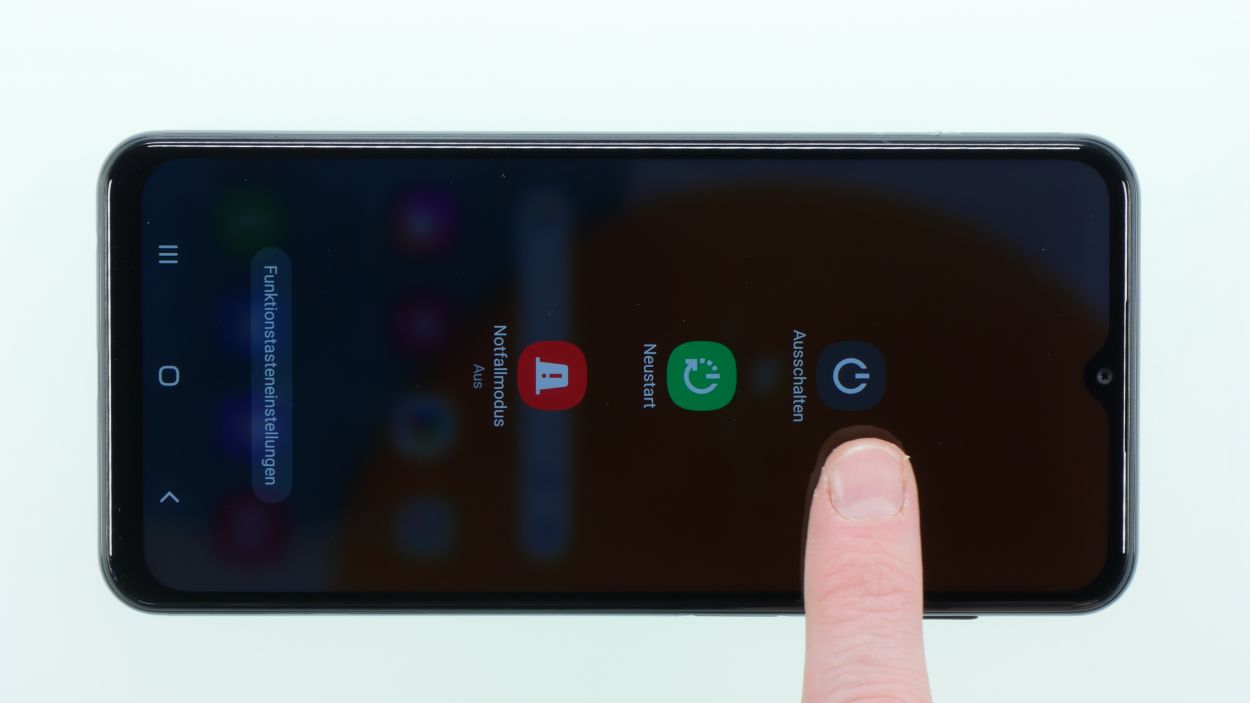
– Turn off your device before you start. To do this, press the power button until the power off icon
appears.
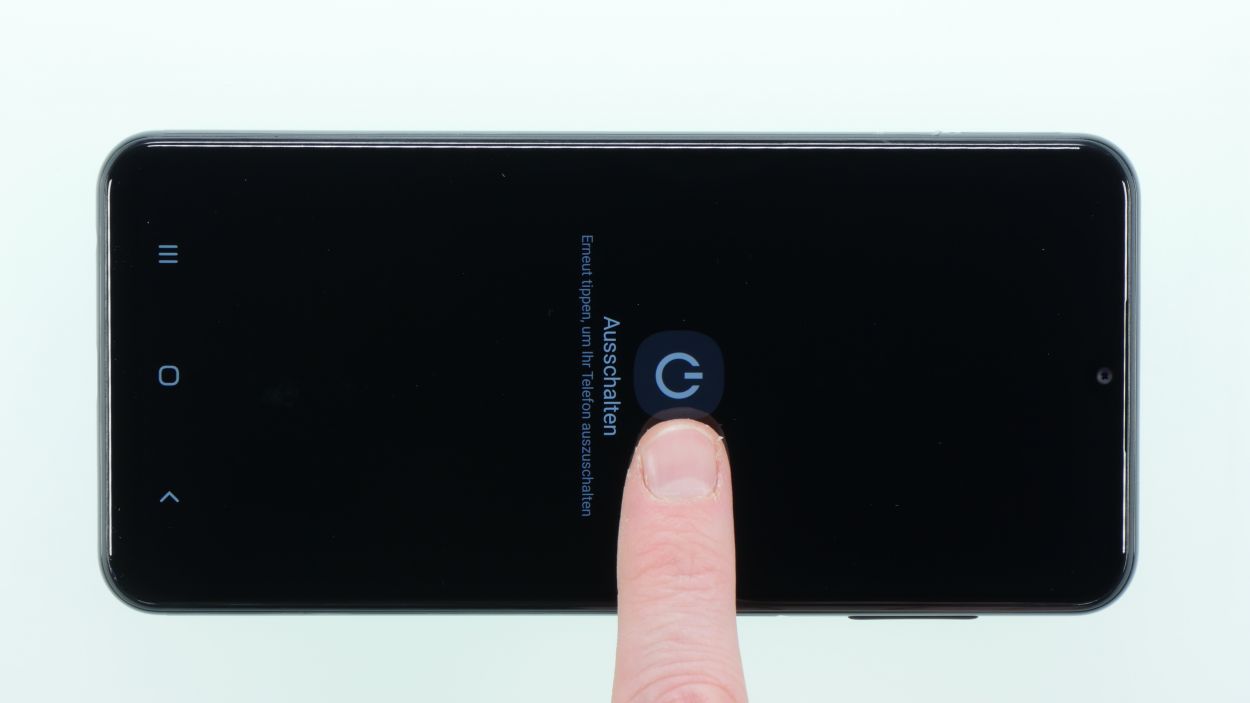
– Confirm the icon then with a tap and follow the instructions on the screen.
Step 2

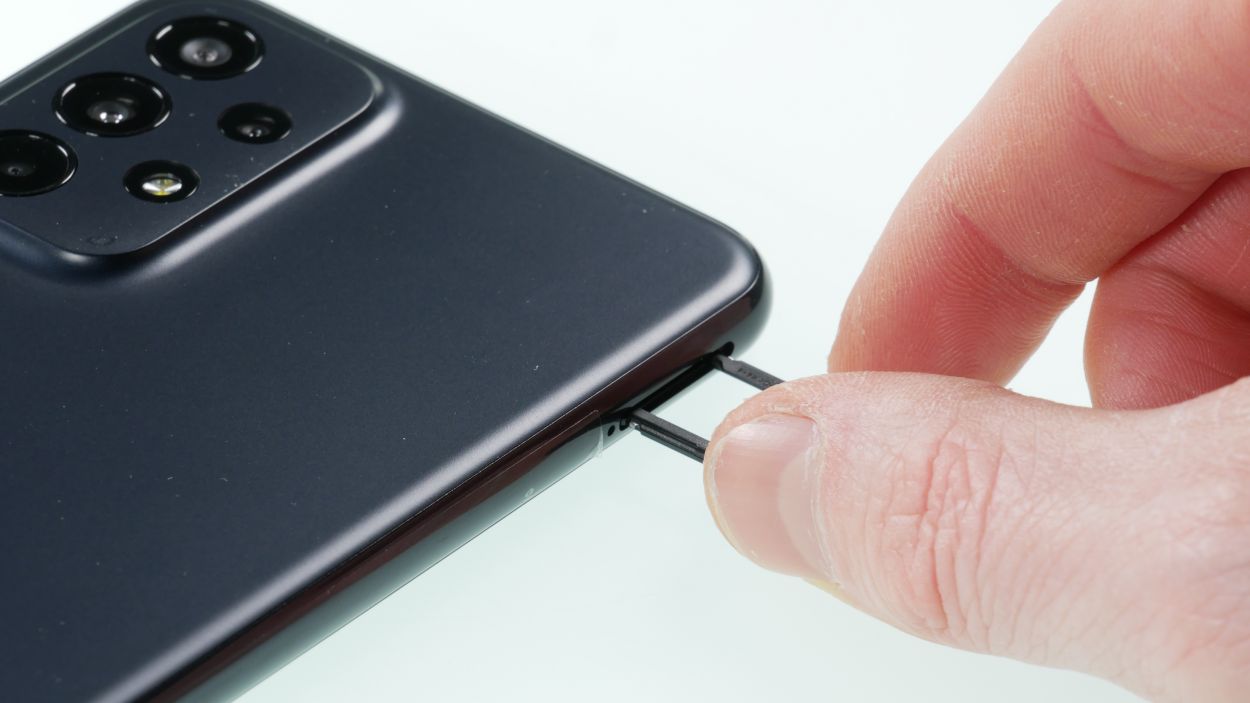
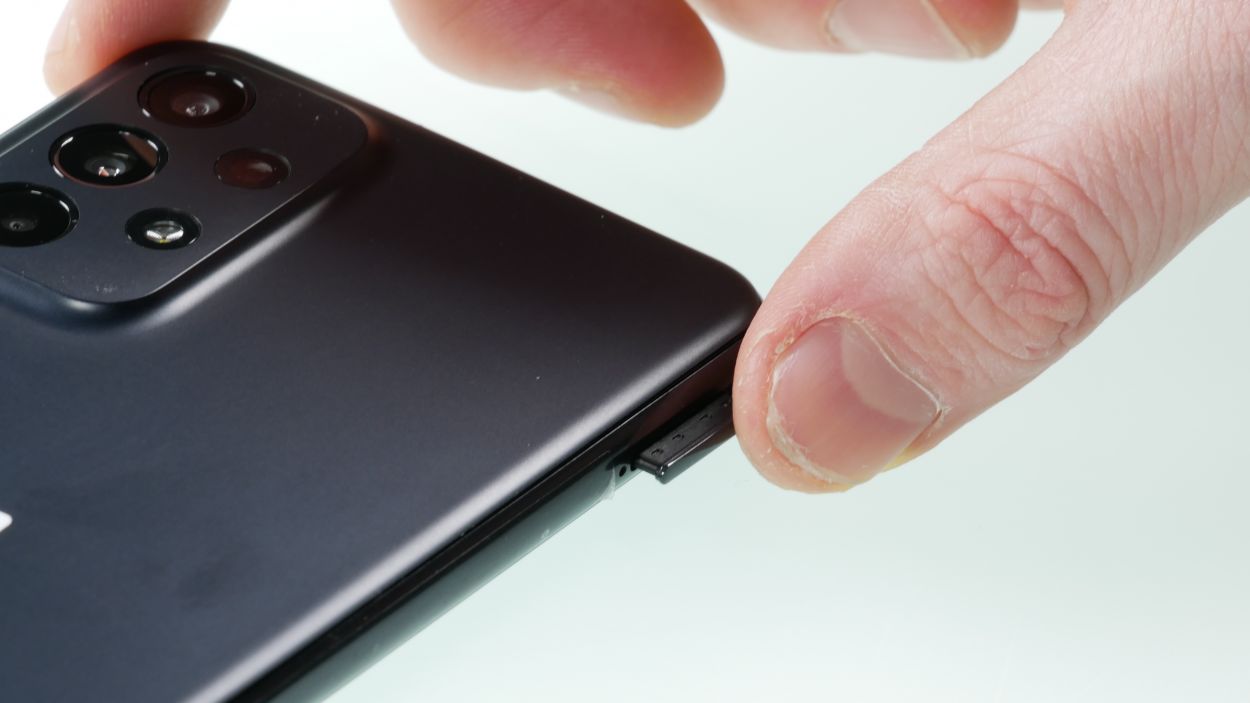
– Pop that sim card holder out using the handy sim tool! You’ve got this!
Step 3
Watch out for those sizzling temperatures! You want to keep it cool enough to still give your phone a friendly touch.
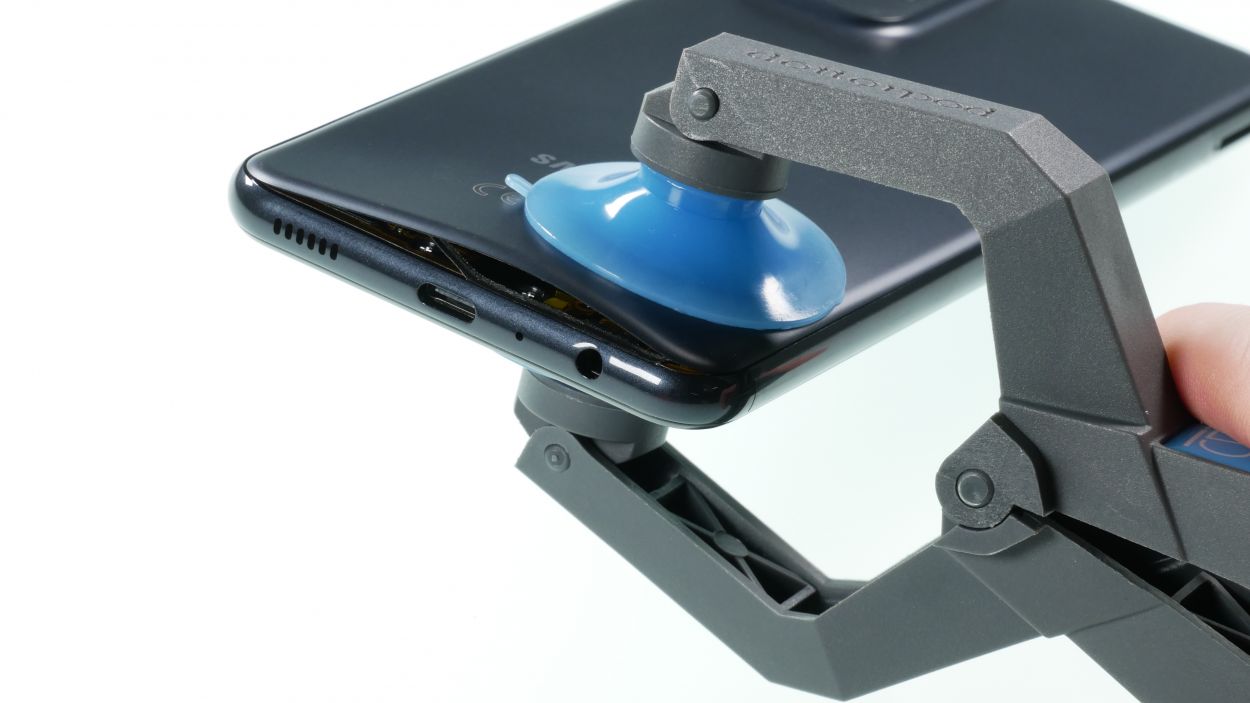
Grab that iSclack and make your life a whole lot easier for this step! Trust us, it’s a game changer.
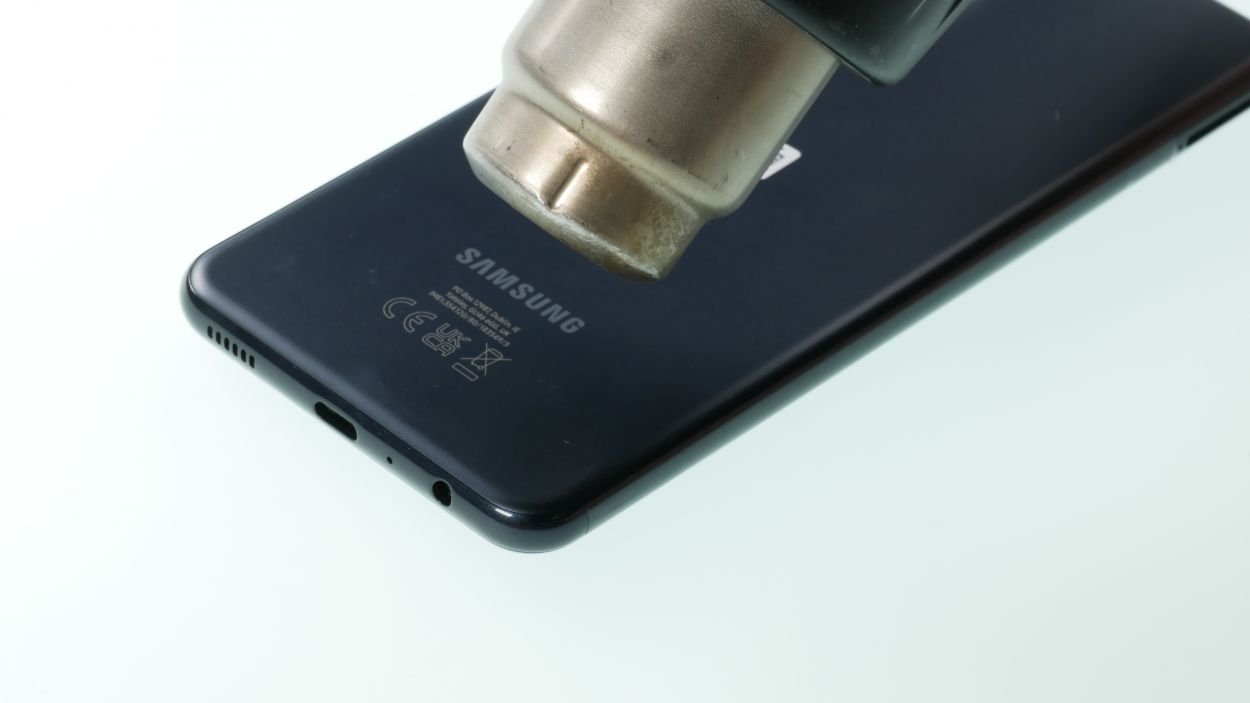
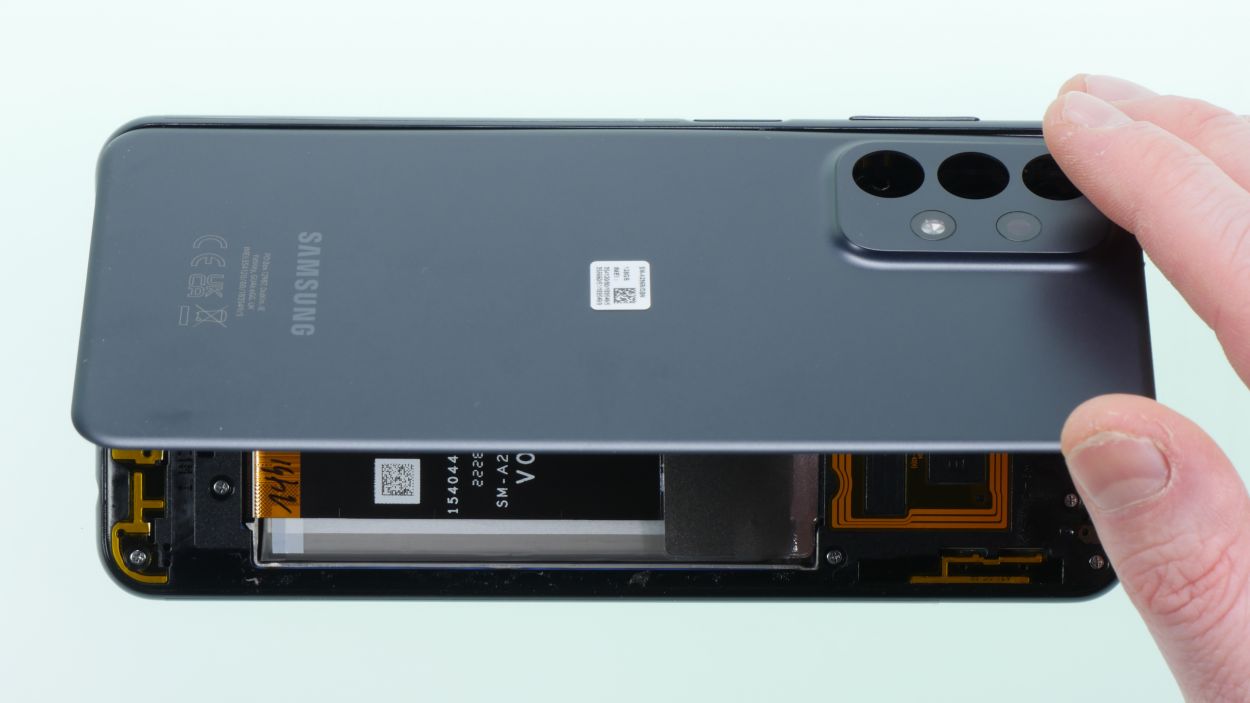
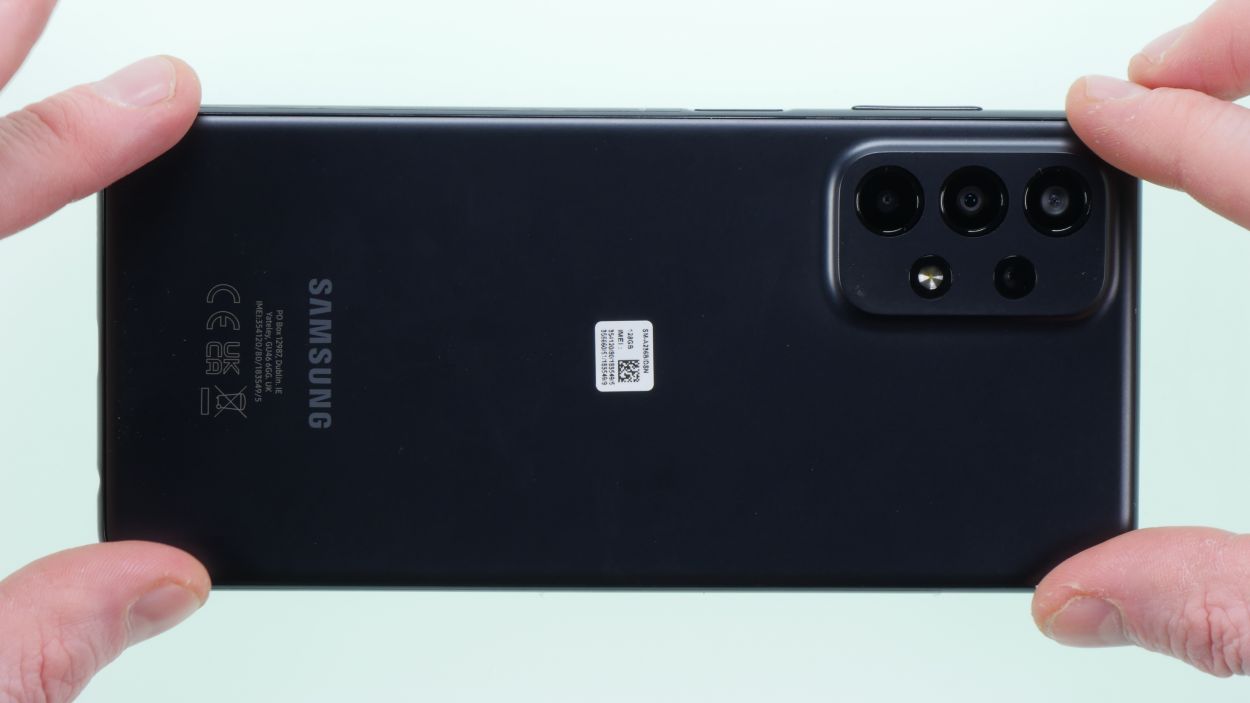
– Warm up the back cover like it’s a cozy blanket using a hot air gun or hair dryer. Focus on the edges and the camera area, where the adhesive loves to hang out.
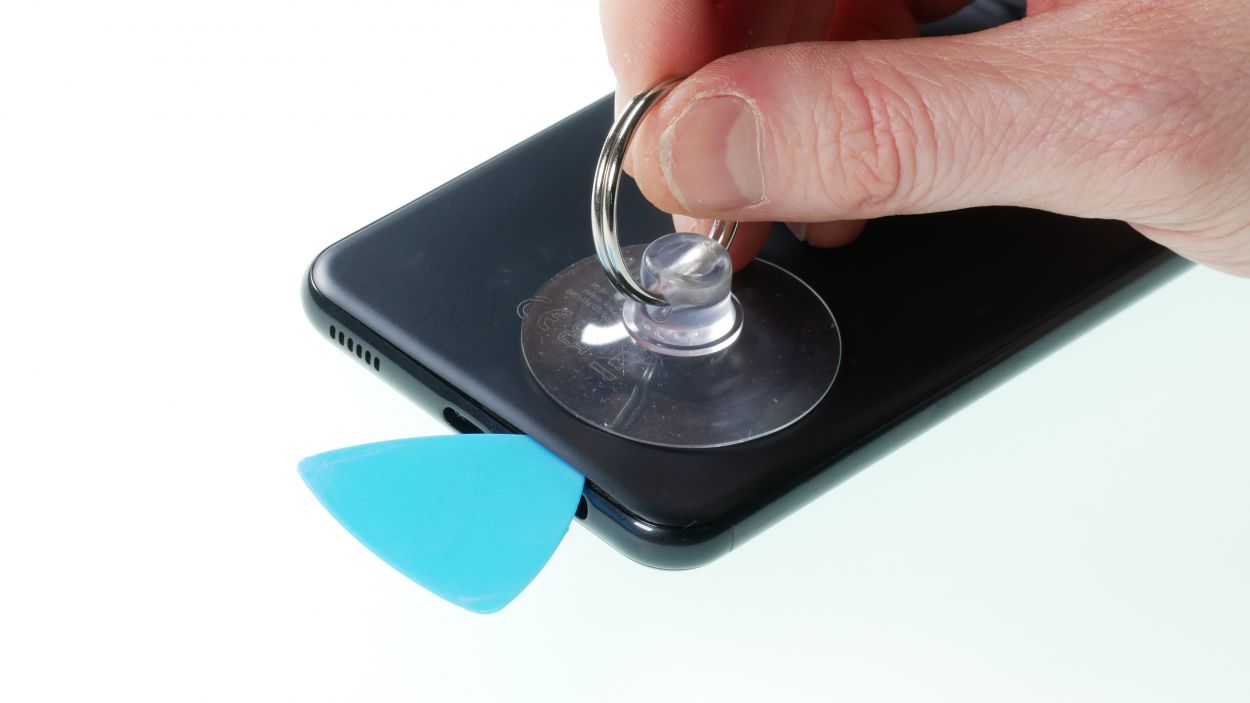
– Once the back cover feels nice and toasty, grab a suction cup and gently lift it. Slide a plectrum into the little gap you’ve created.
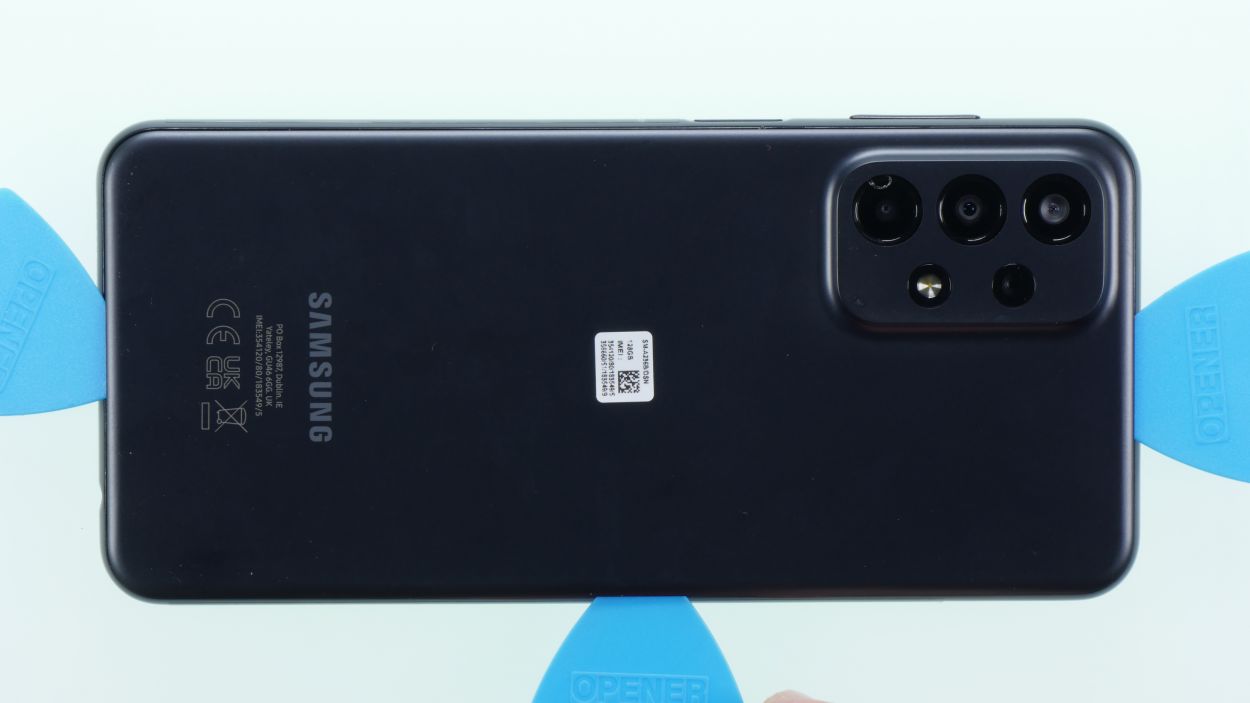
– Now, with the plectrum in hand, carefully lift the back cover off. Take your time to loosen that adhesive bit by bit!
Tools Used
- screen or back of your phone is glued very strong. With an iSclack evo, you can simplify the process. The pincer-like handle allows you to create a gap between the screen and the frame with minimal effort. At the same time, you have the other hand free to use a narrow tool such as a plectrum or the iFlex to enlarge the gap. The included cover foils allow you to use the iSclack evo even if the screen is splintered.” rel=”noopener nofollow”>iSclack evo Opening Tool
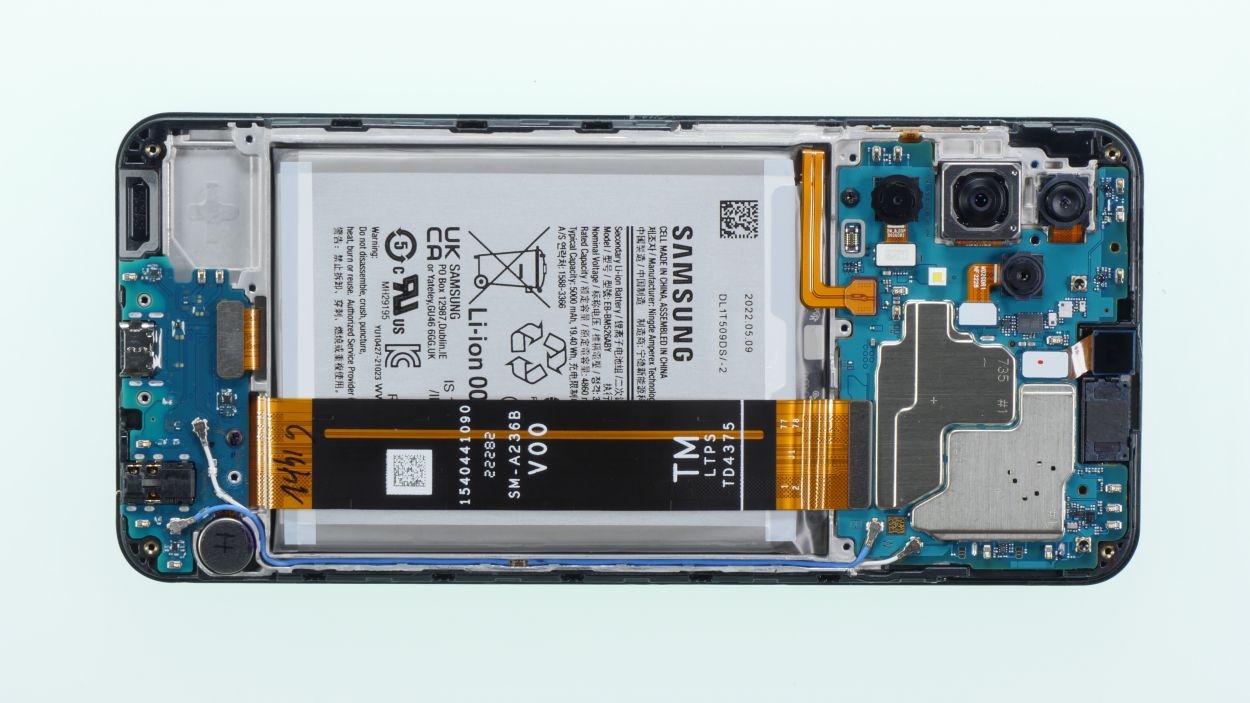
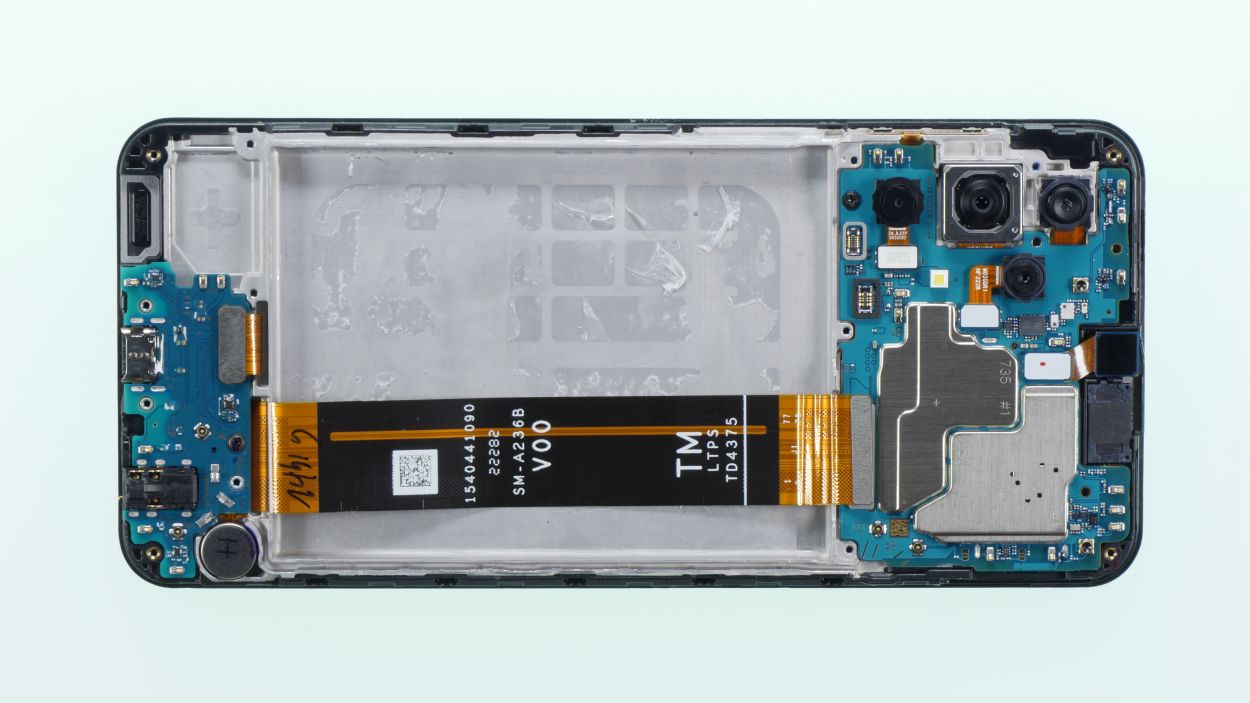
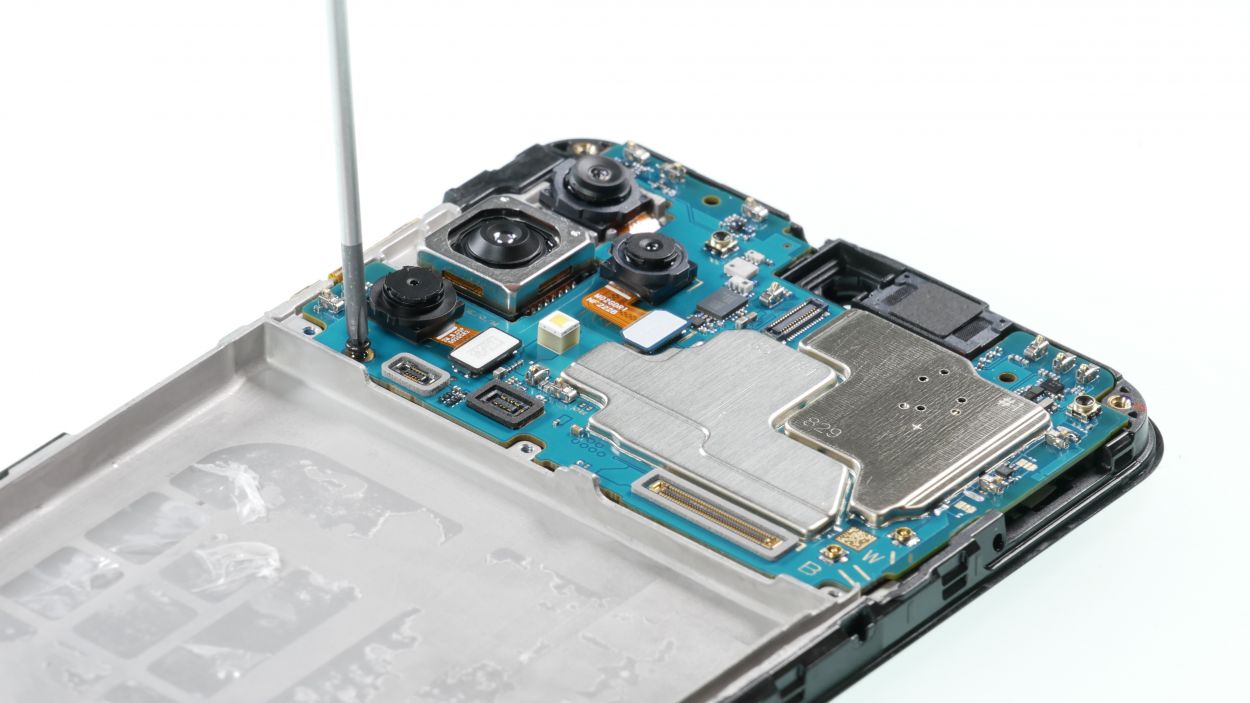
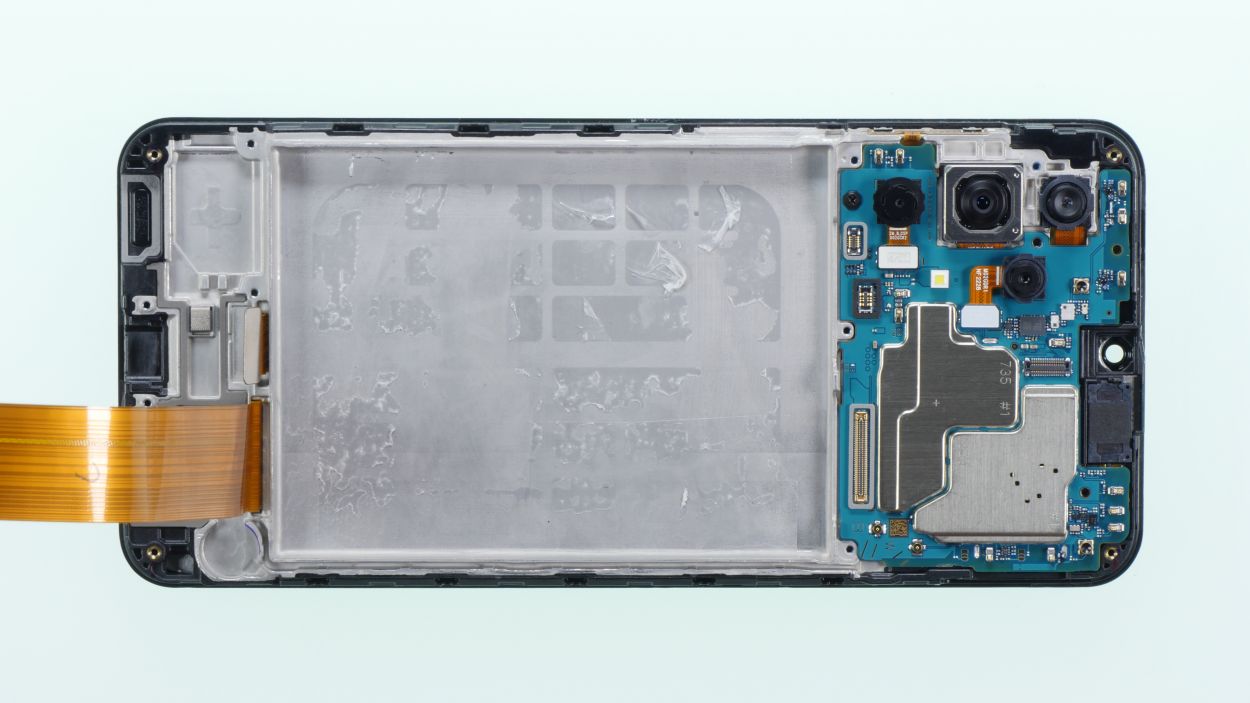
Step 4
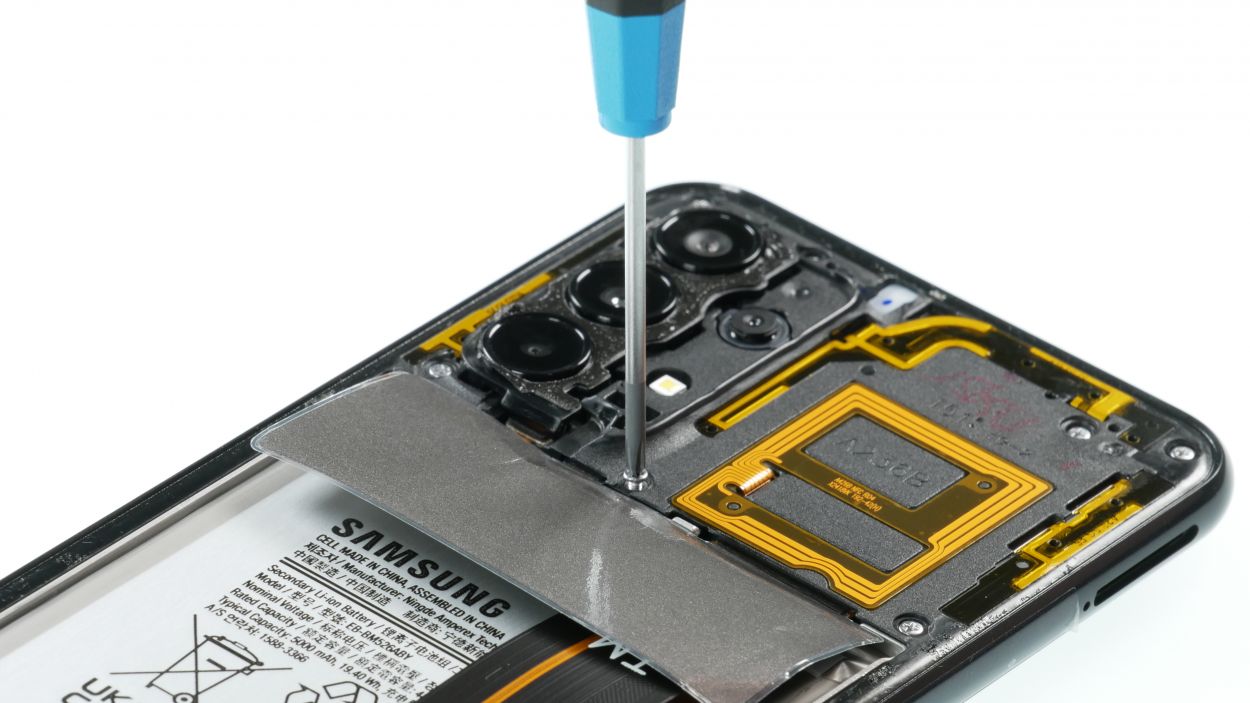
16 × Phillips 3,7 mm
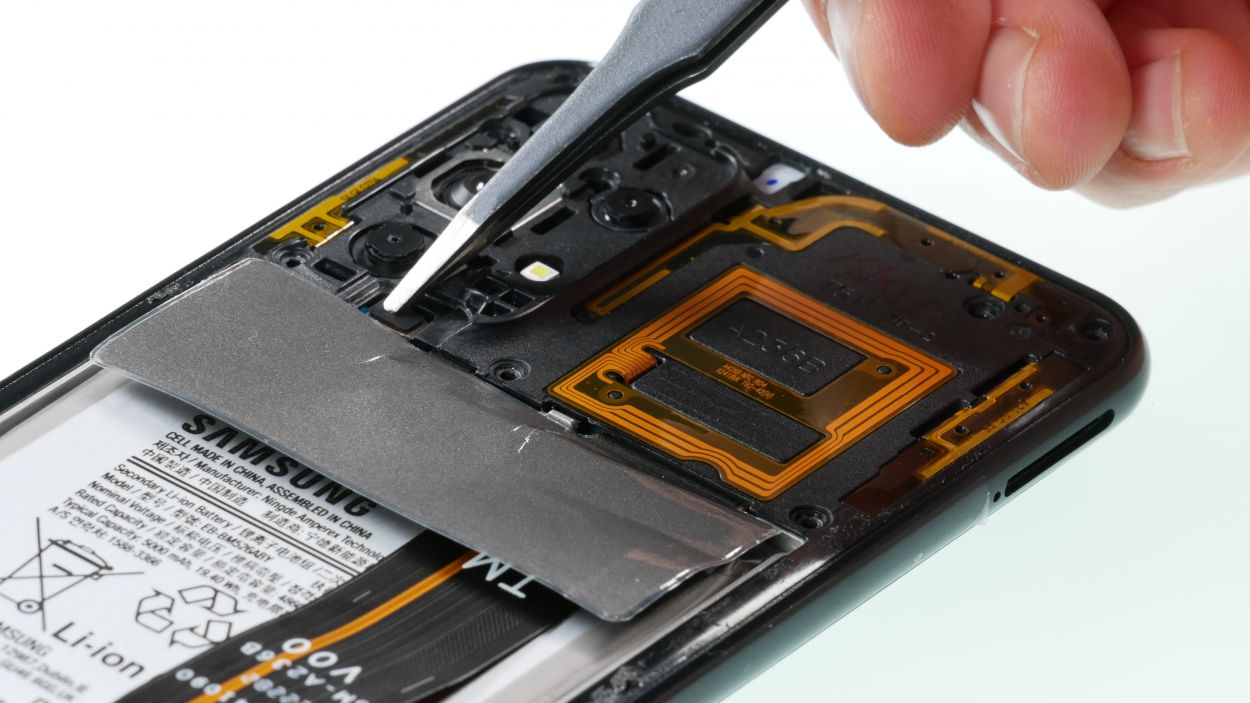
Finger Sensor Connector
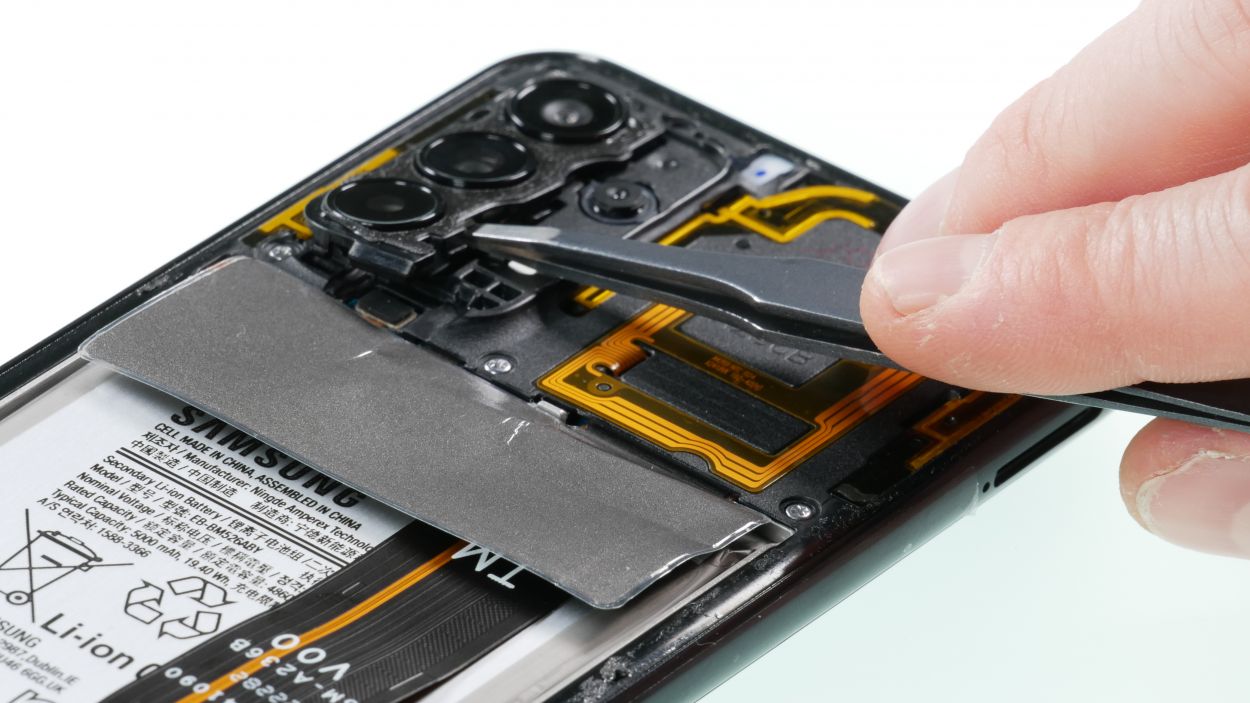
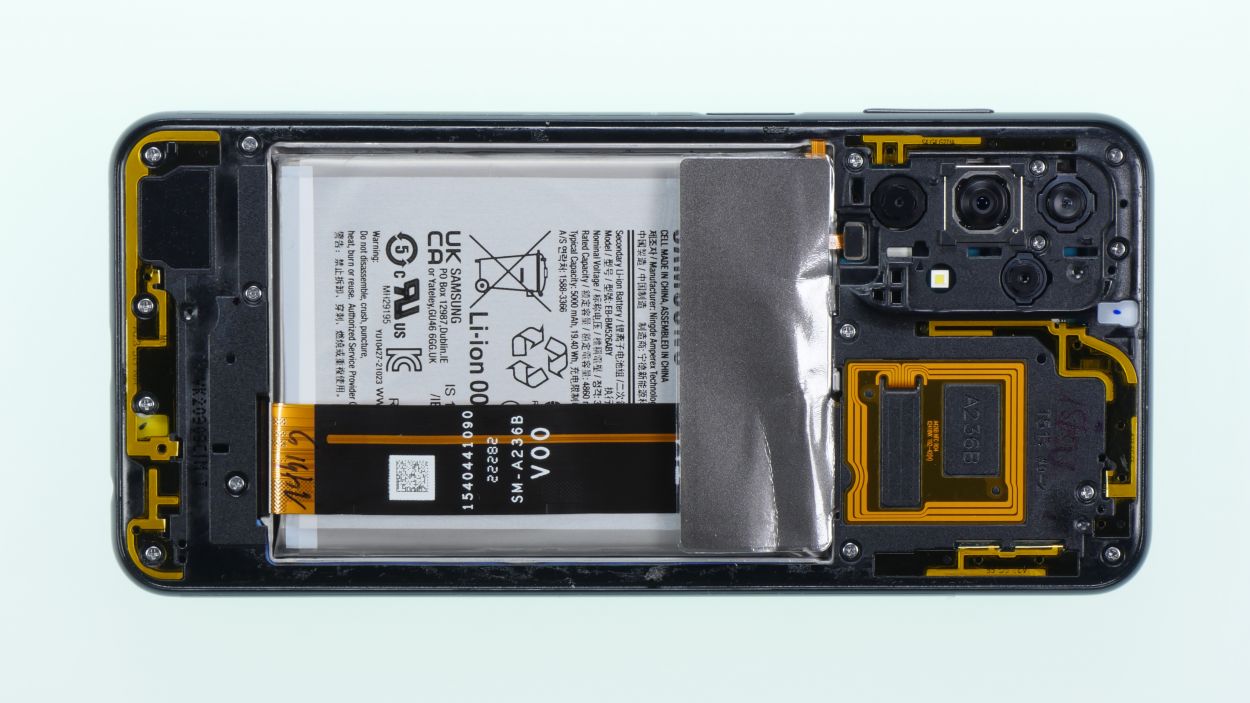
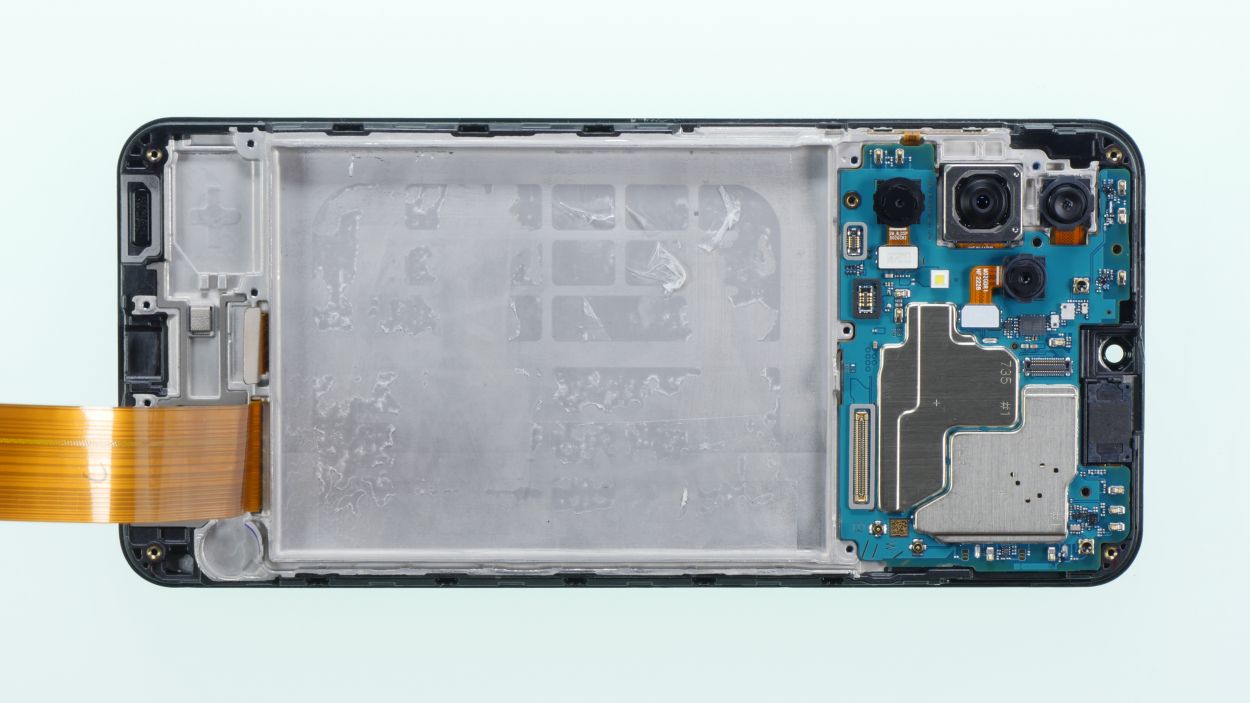
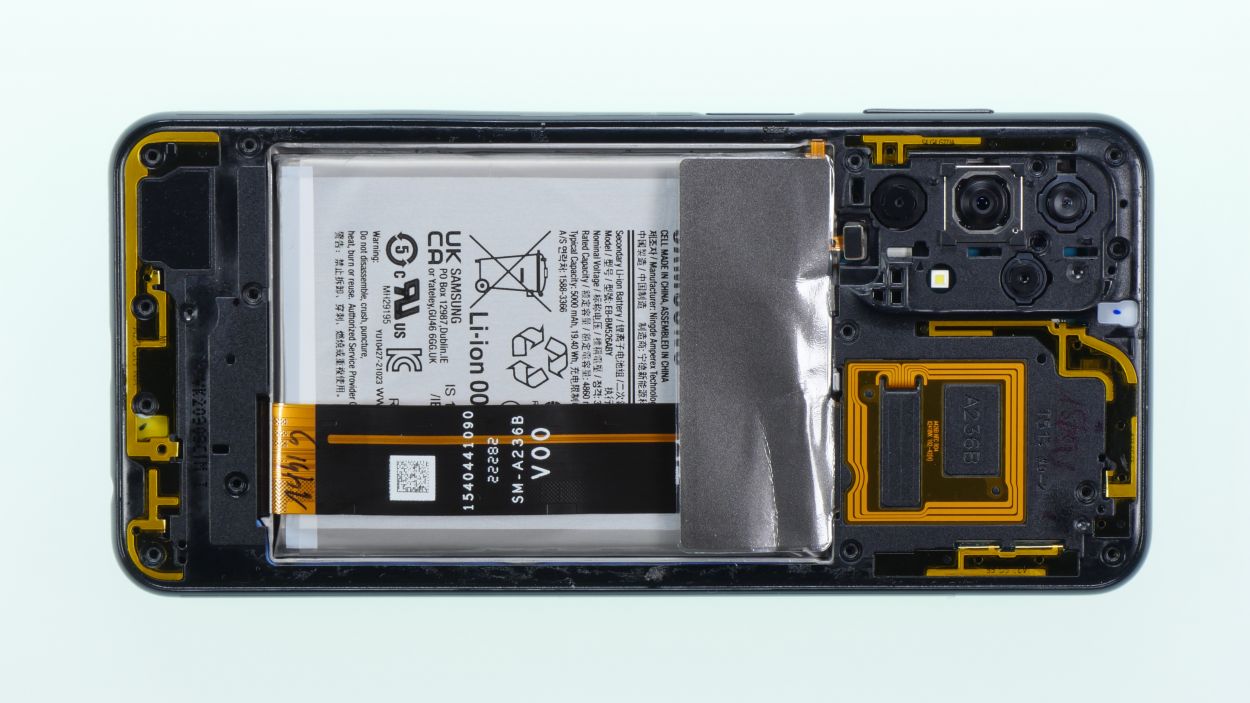
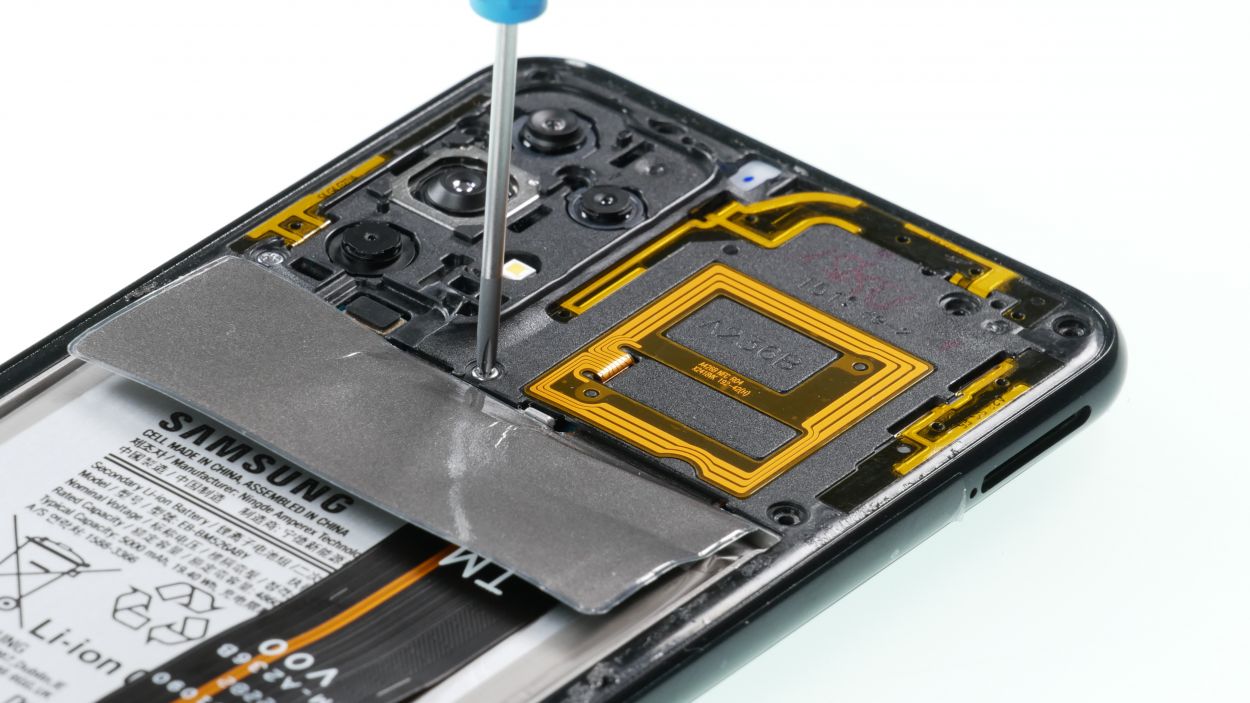
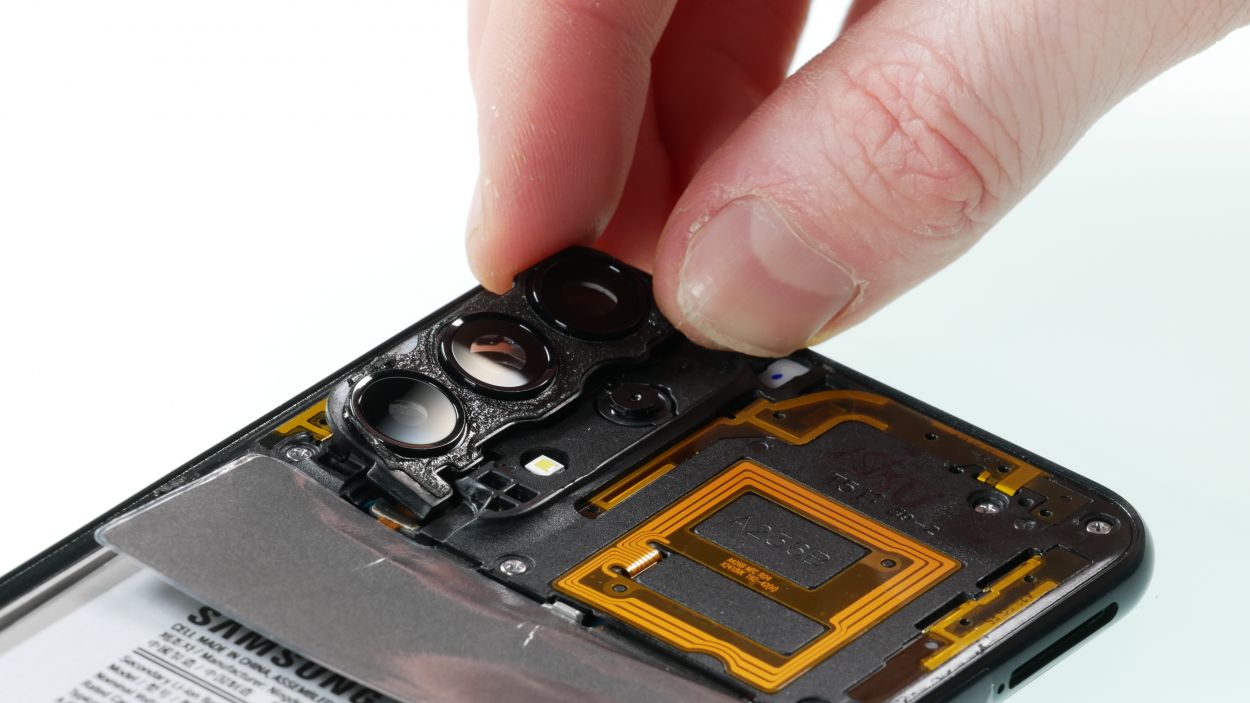
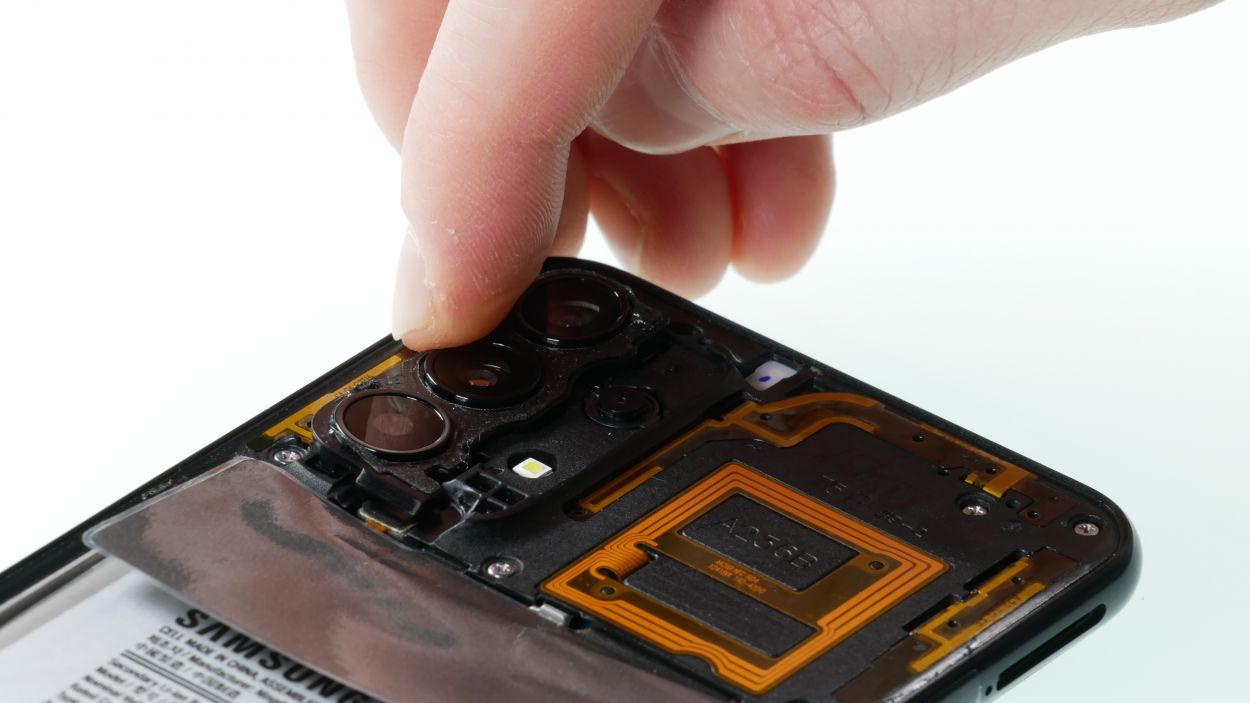
– Gently lift off the plastic frame that hugs the camera element.
– Next, unplug the fingerprint sensor nestled beneath this frame.
– Now it’s time to tackle those 16 Phillips screws to free the middle cover. A magnetic mat or another nifty storage solution is your best friend here, so those pesky screws don’t go MIA!
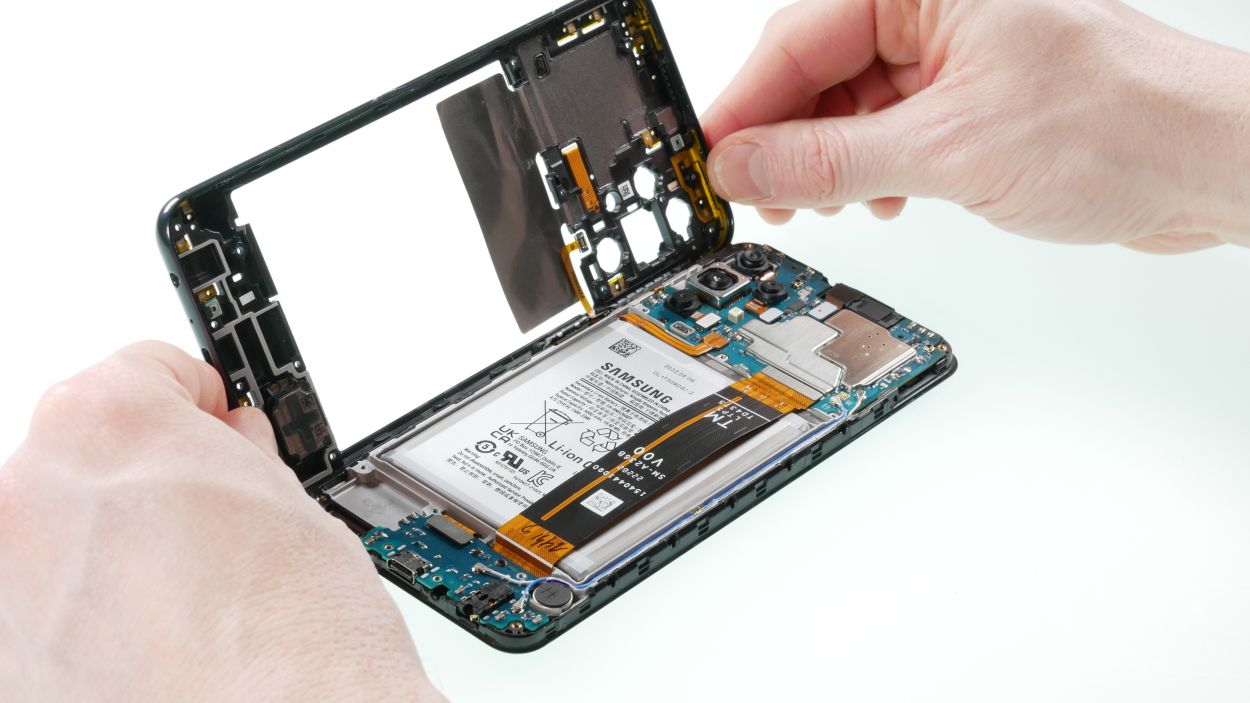
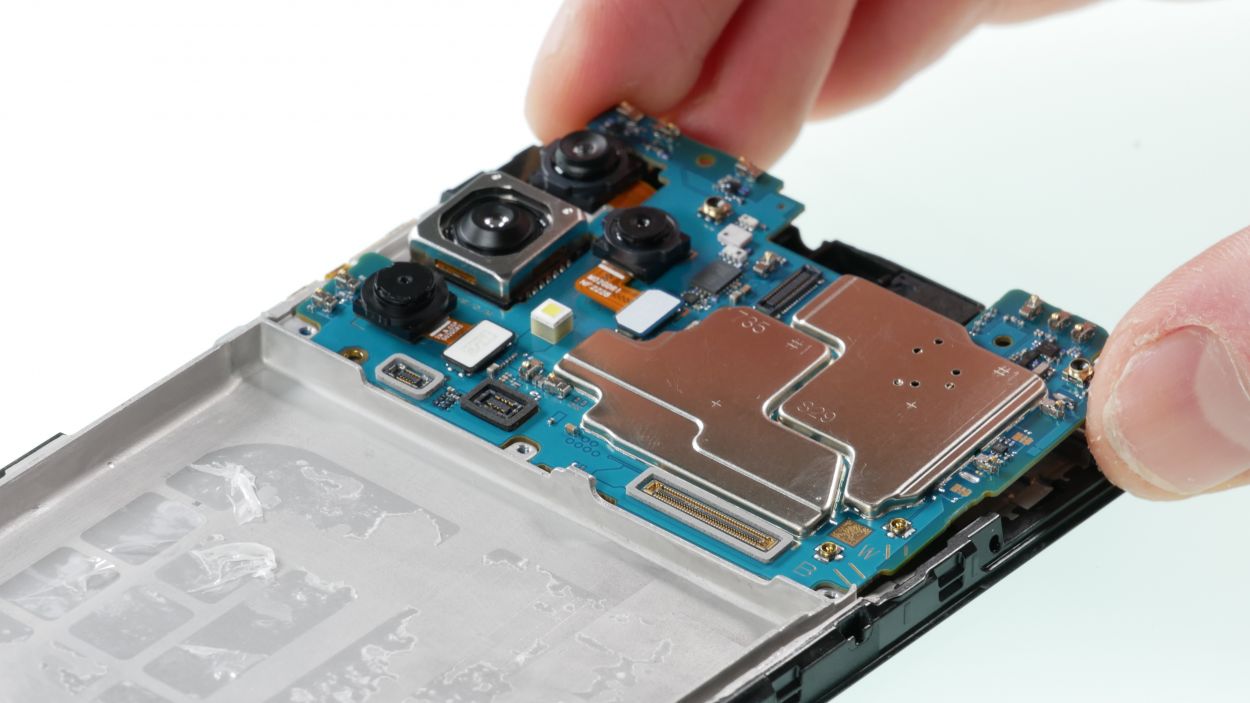
– The middle cover is attached to the display, so grab a pick and carefully loosen it from the screen support frame.
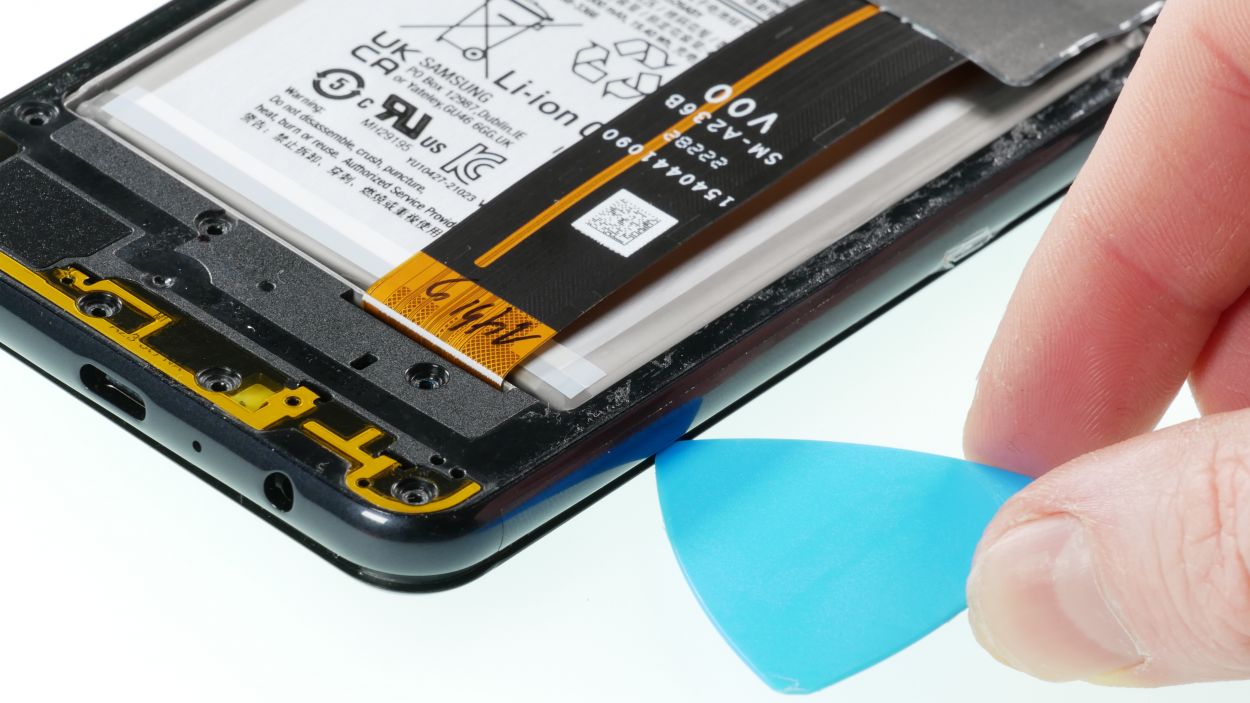
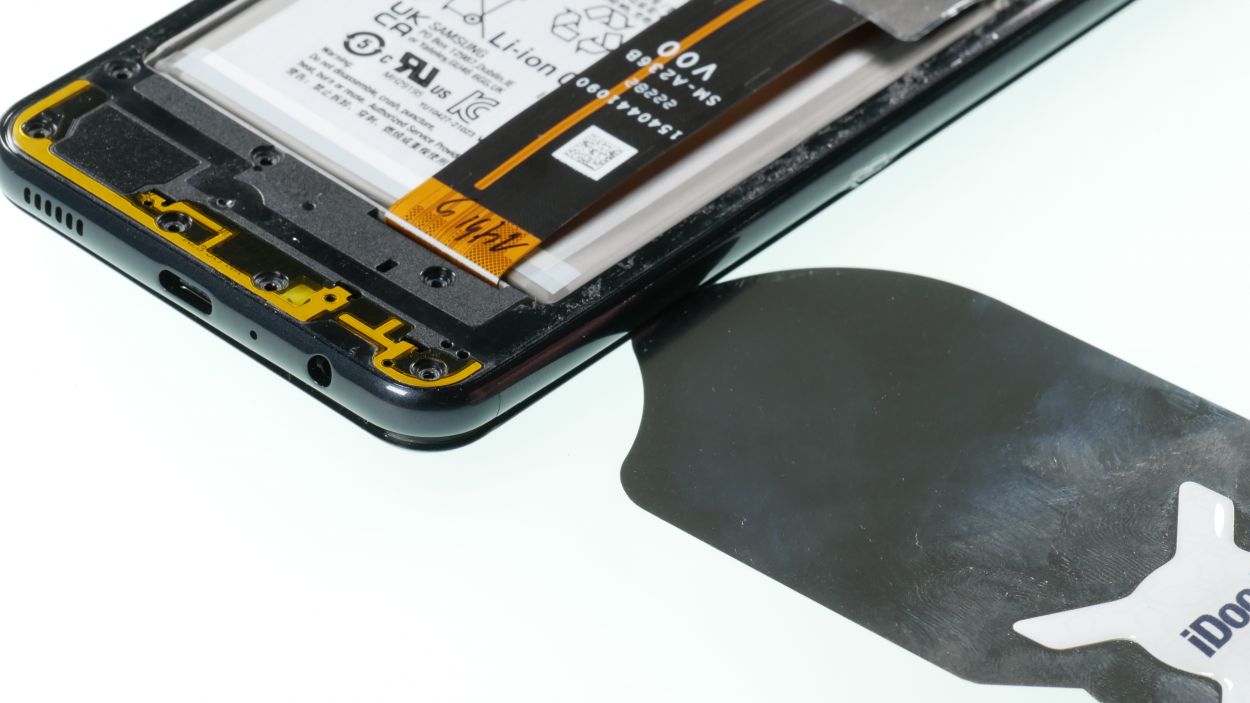
Step 6
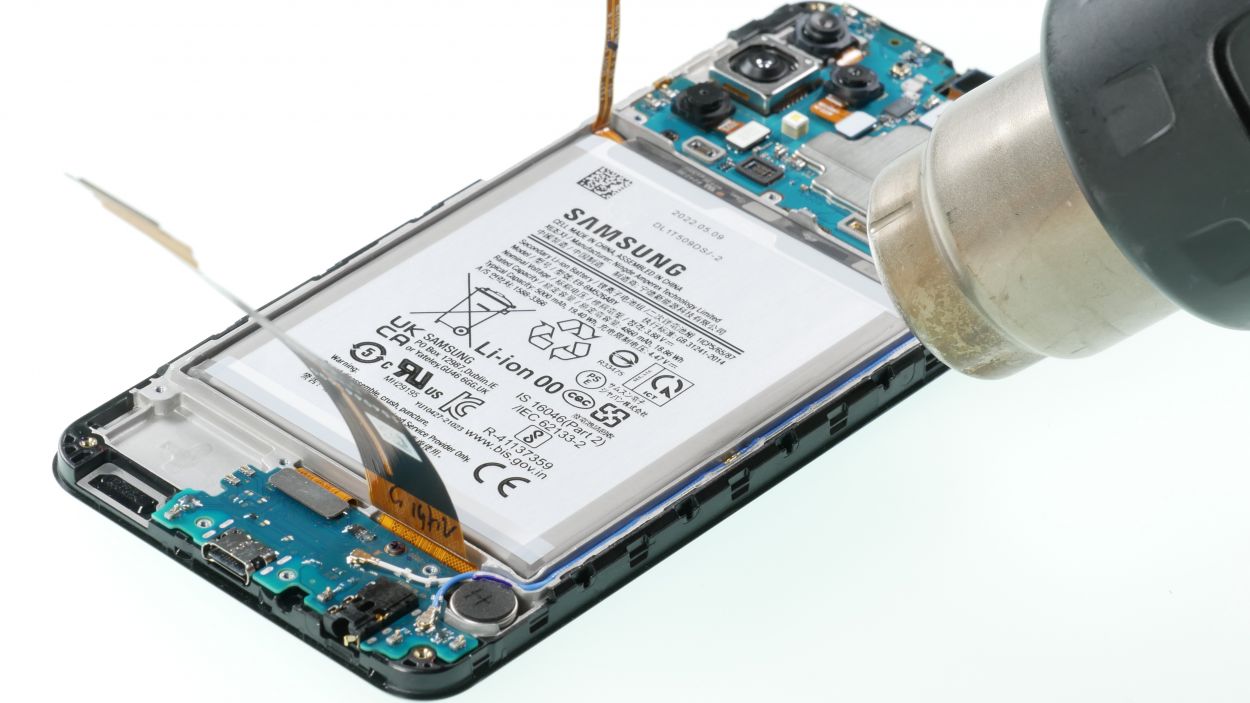
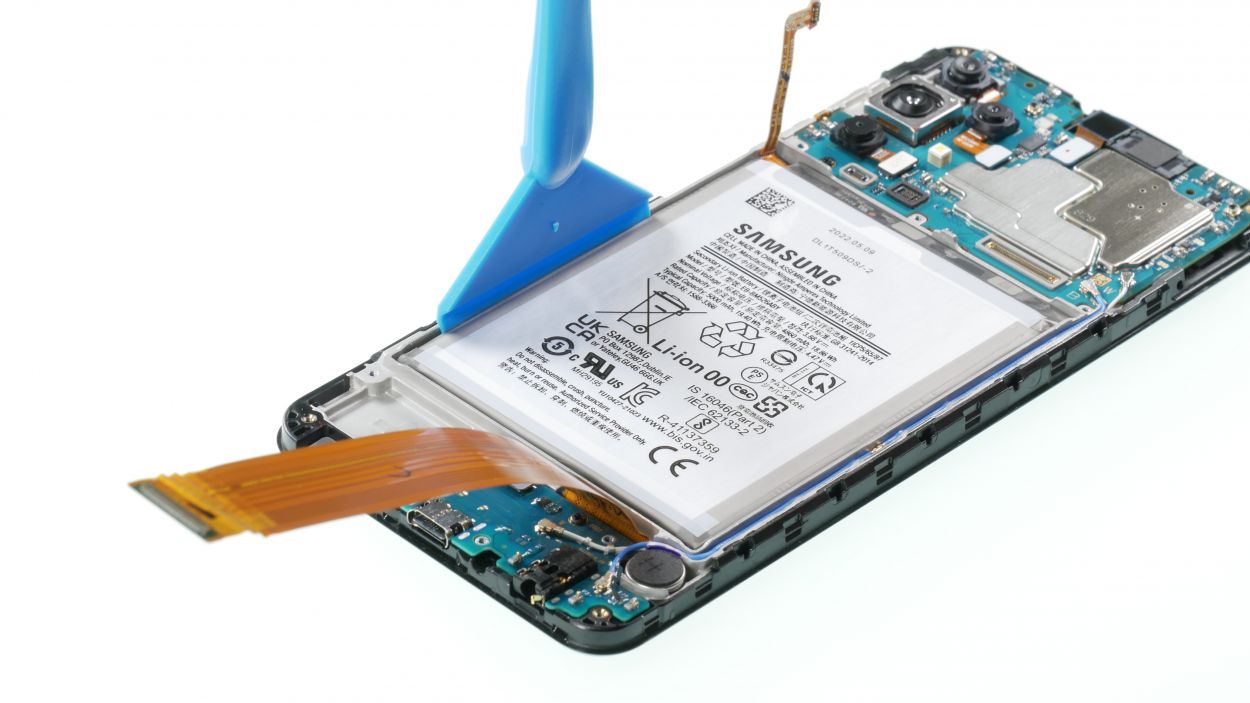

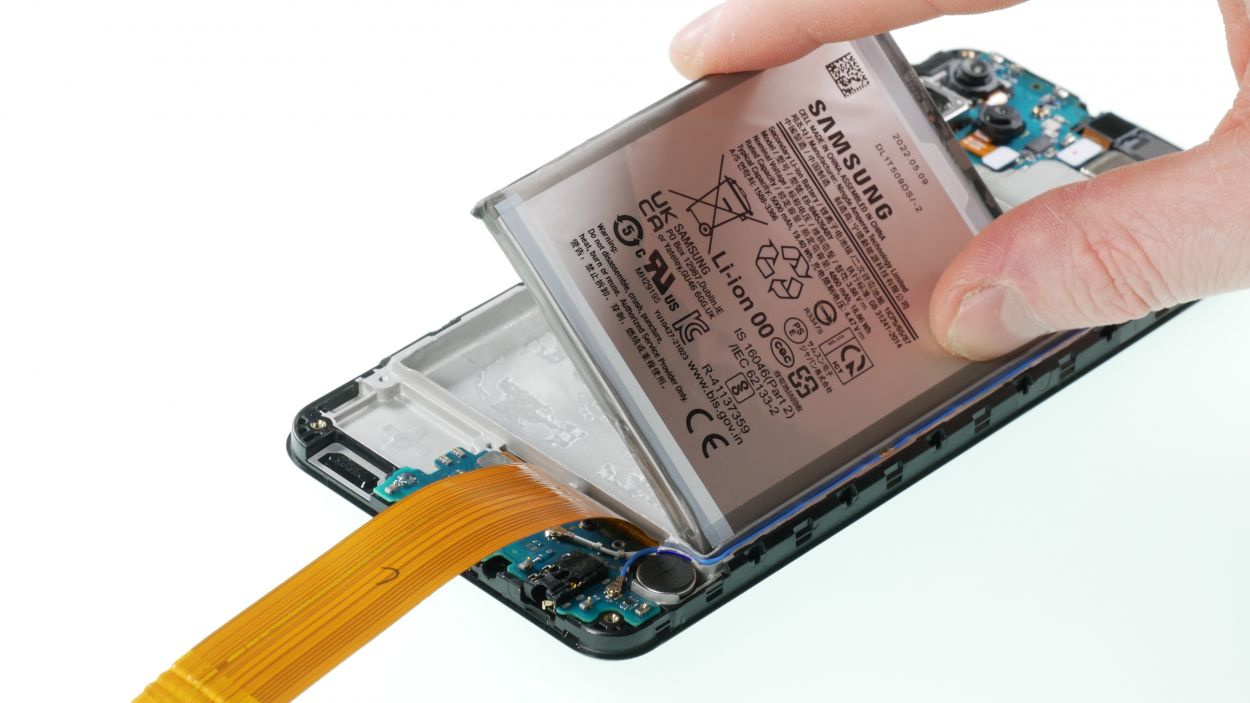
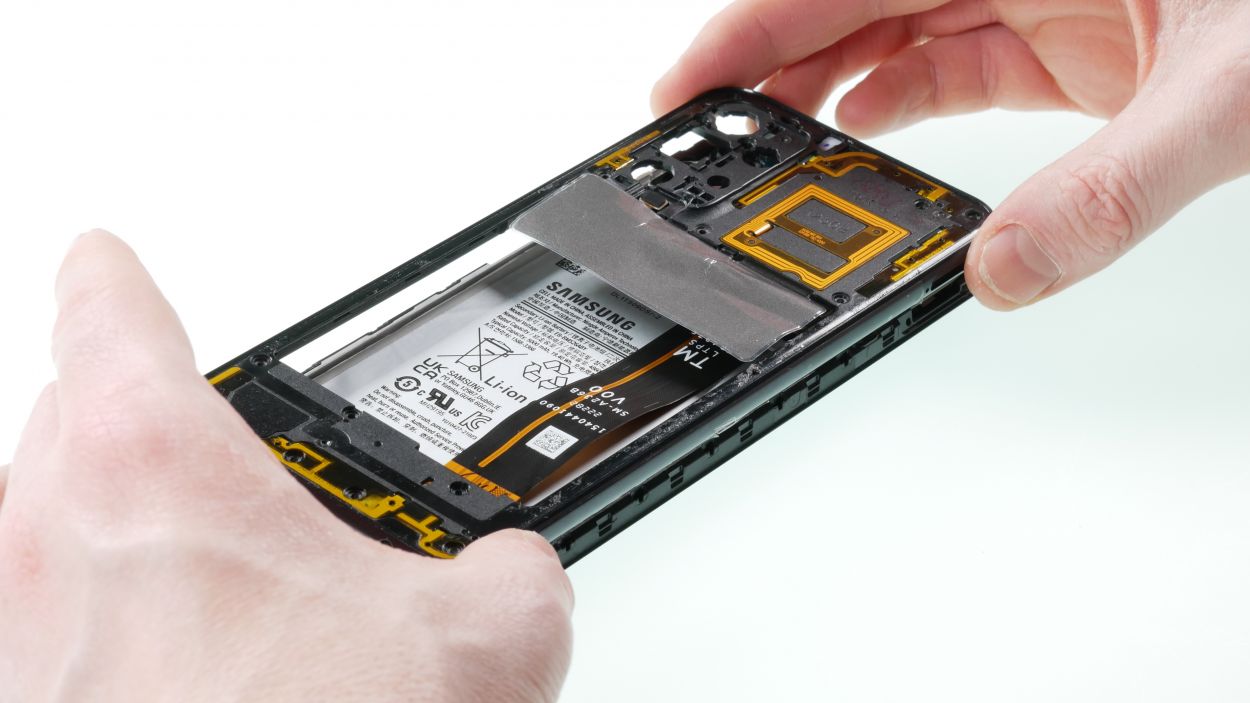
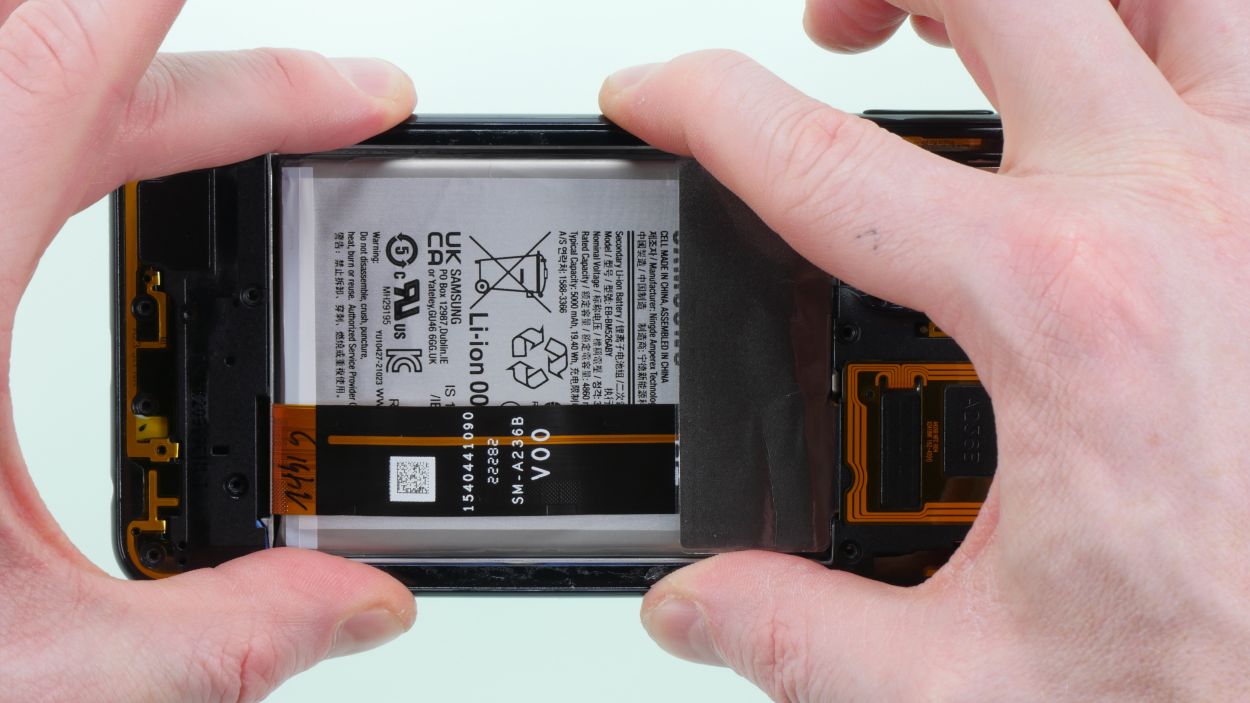
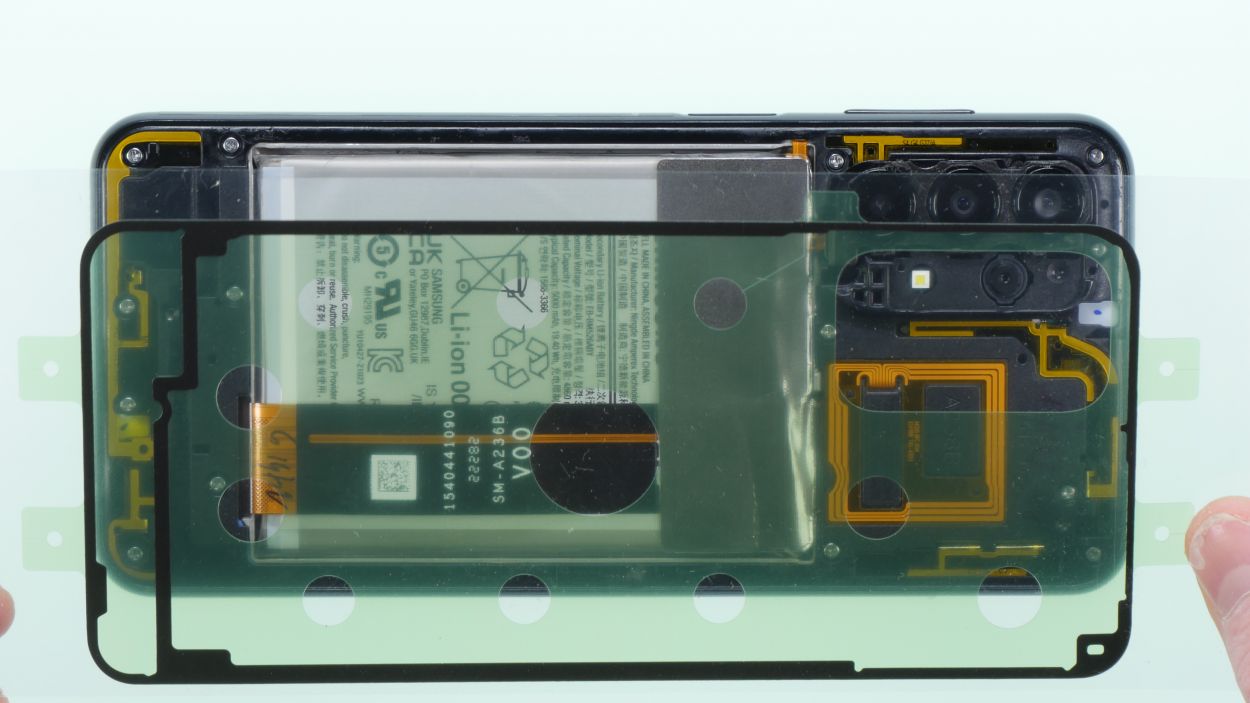
Alright, here comes the part that might test your patience a bit! Stay cool, take a deep breath, and remember: slow and steady wins the race. You’ll get to your goal in no time!
– Gently warm up that battery like it’s enjoying a sunny day with a hot air gun or hair dryer. Take your time and make sure to spread the heat evenly!
– Once it feels nice and cozy, grab your trusty battery spudger and carefully work it in to loosen and pry the battery out. If you have an iPlastix handy, it can really help in loosening that stubborn adhesive!
Tools Used
- battery? Then the iPlastix with its large blade will help you. The practical assistant is made of flexible, especially sturdy plastic and lies comfortably in the hand. Thanks to its design, you can even get into smaller gaps, for example to lift the screen or to prevent it from sticking together again.” rel=”noopener nofollow”>iPlastix Opening Tool
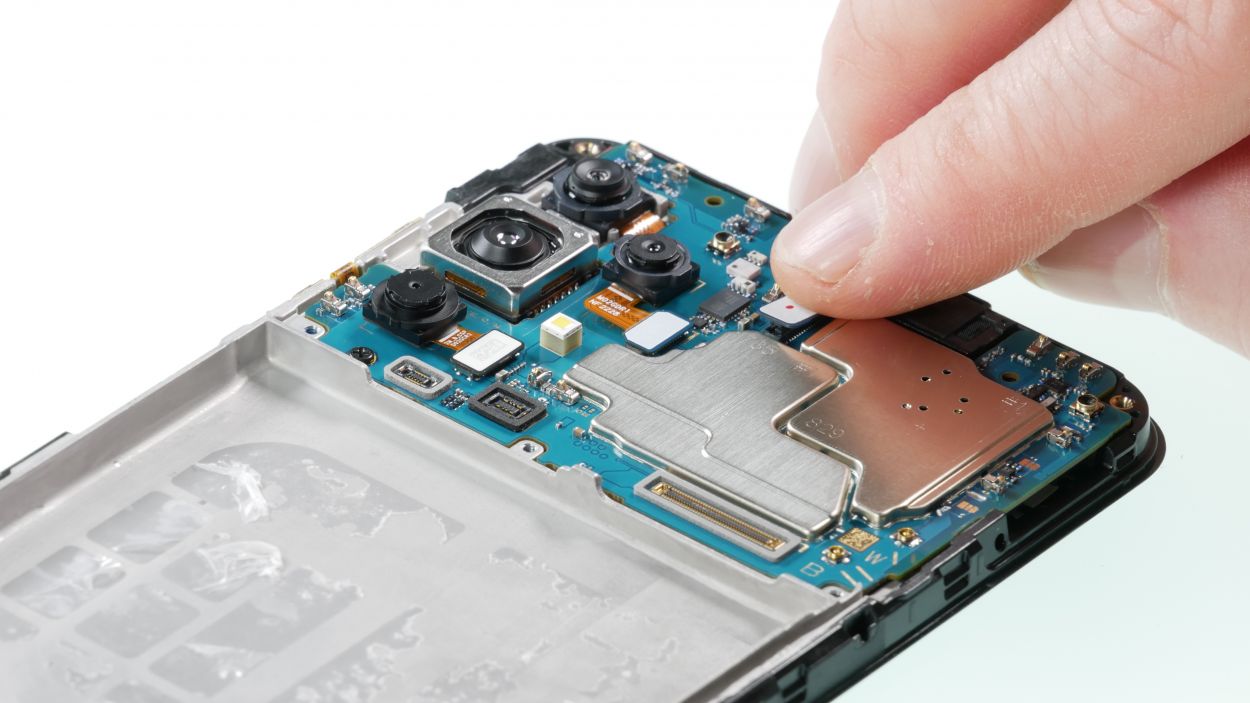
Step 7

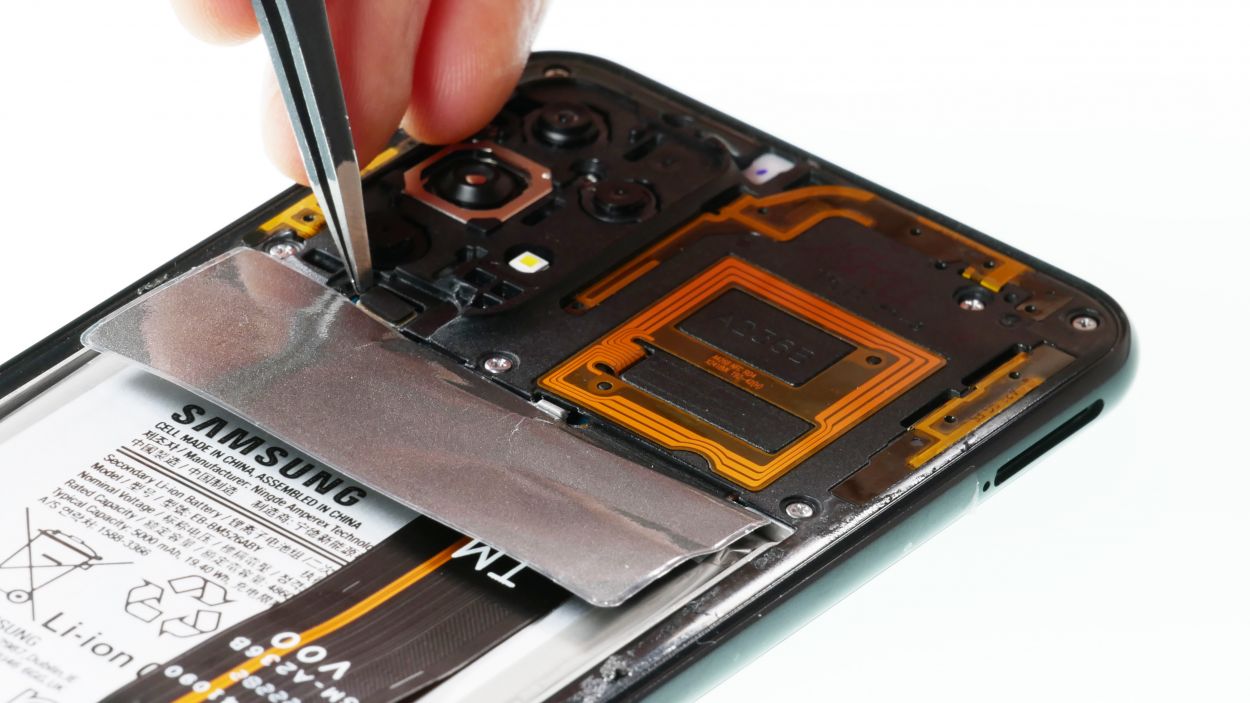
Antenna Connector
– Unplug the two antenna cables and gently lift them out of your device. Start with the blue one, then go for the white one.
Tools Used
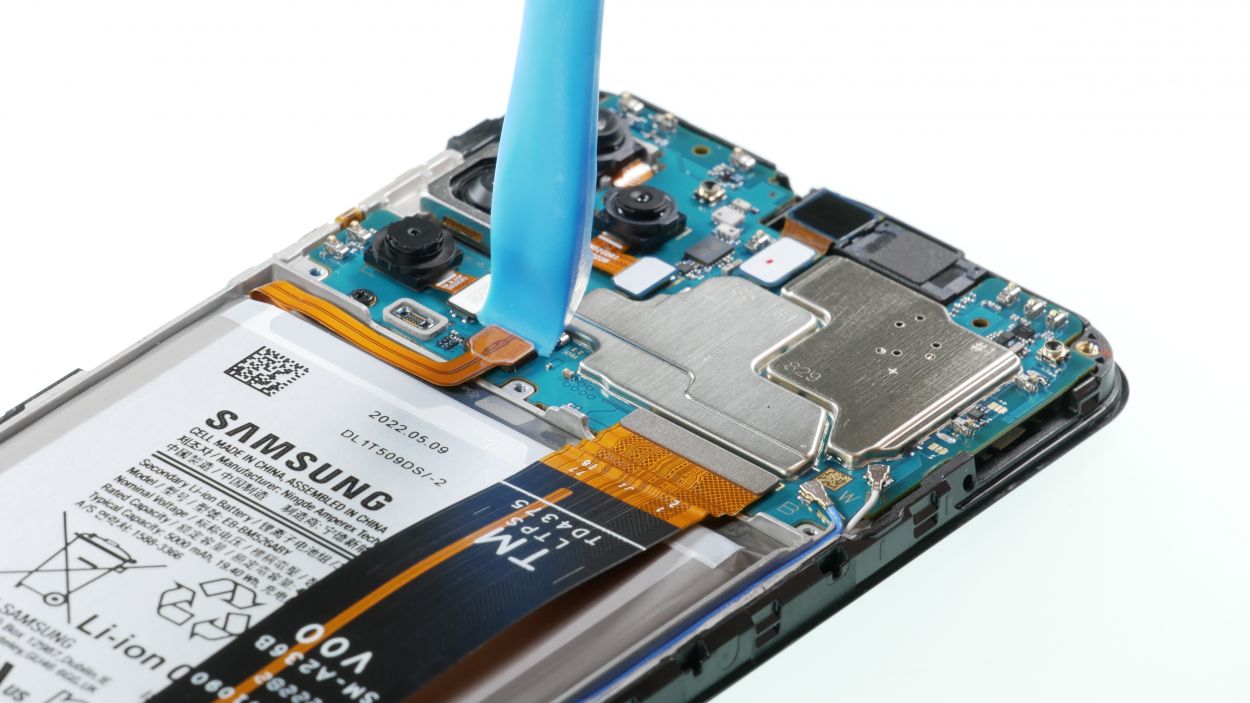
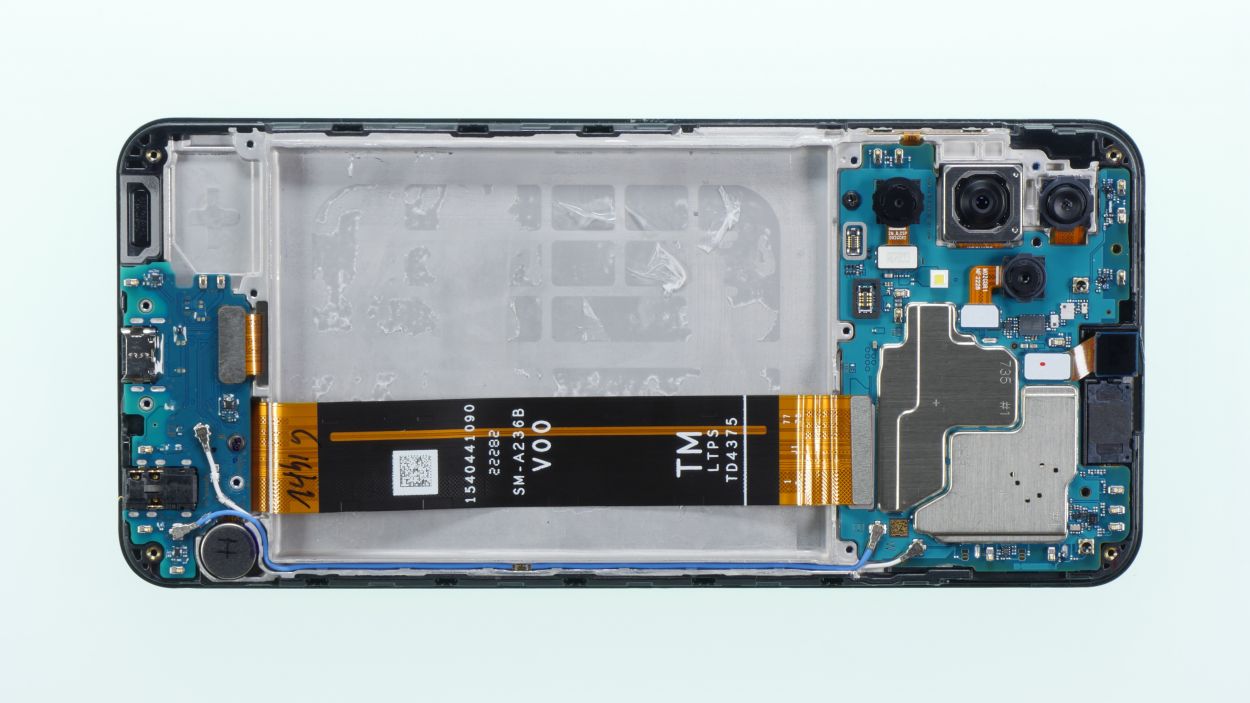
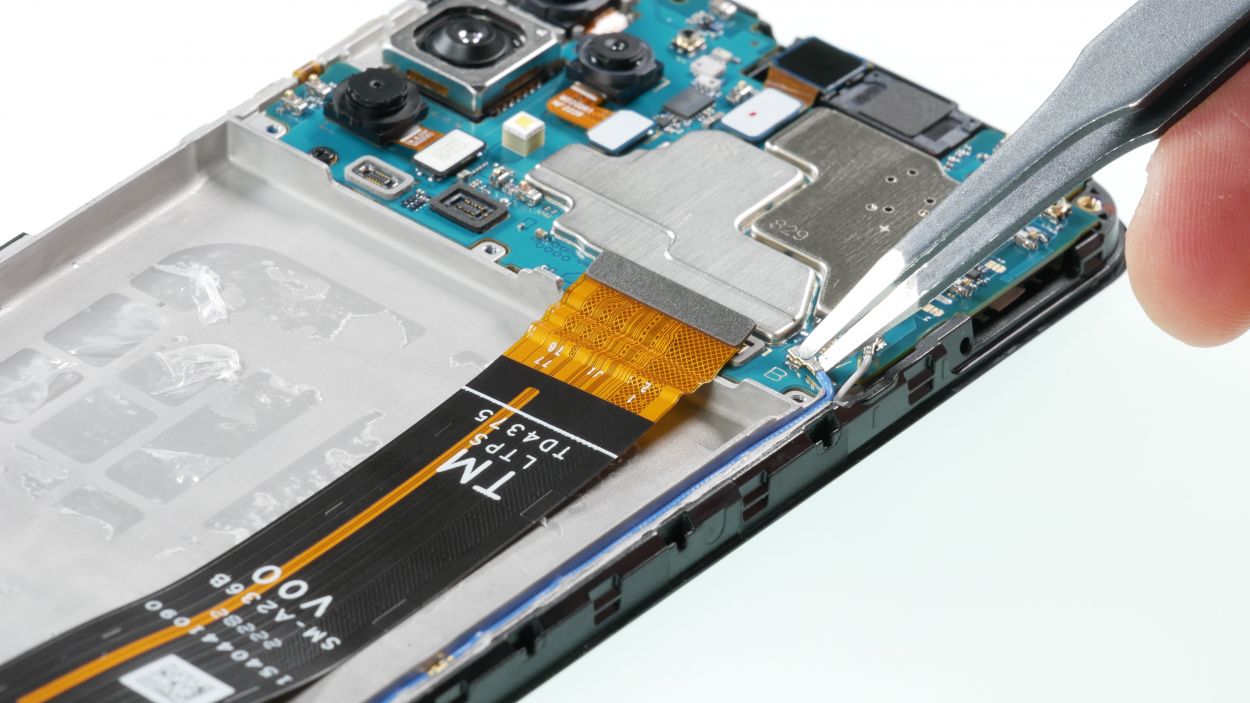
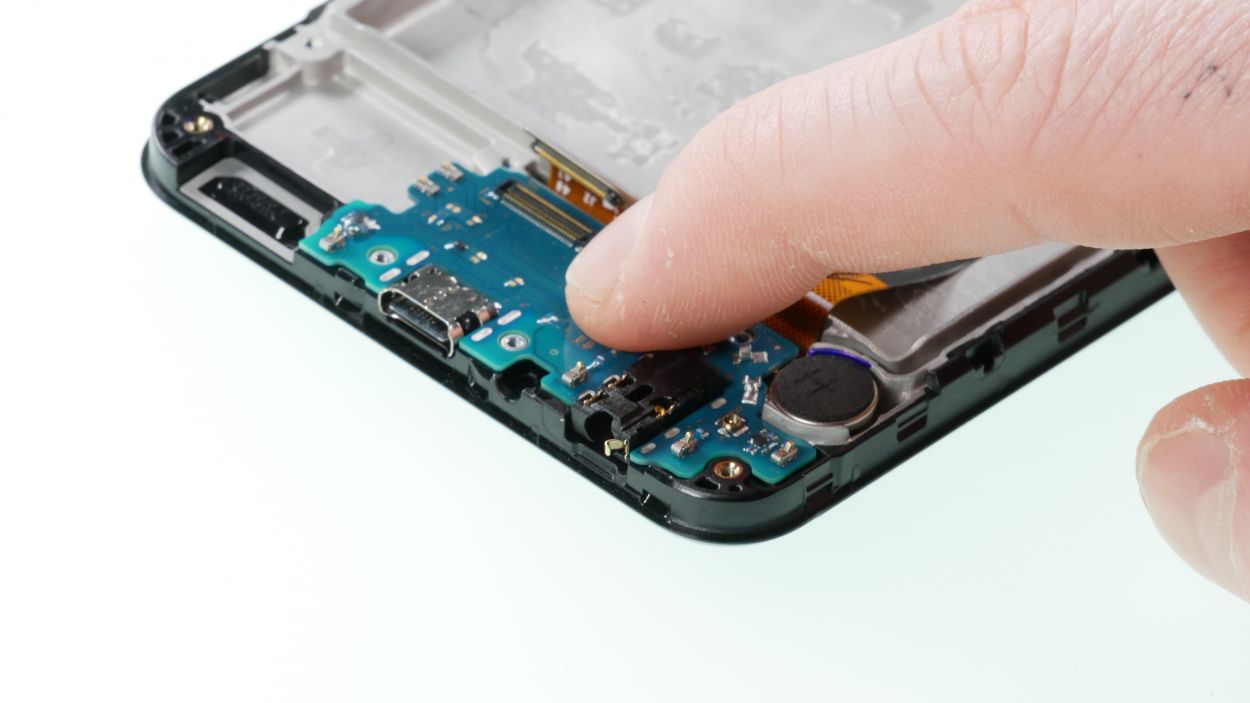
Step 8
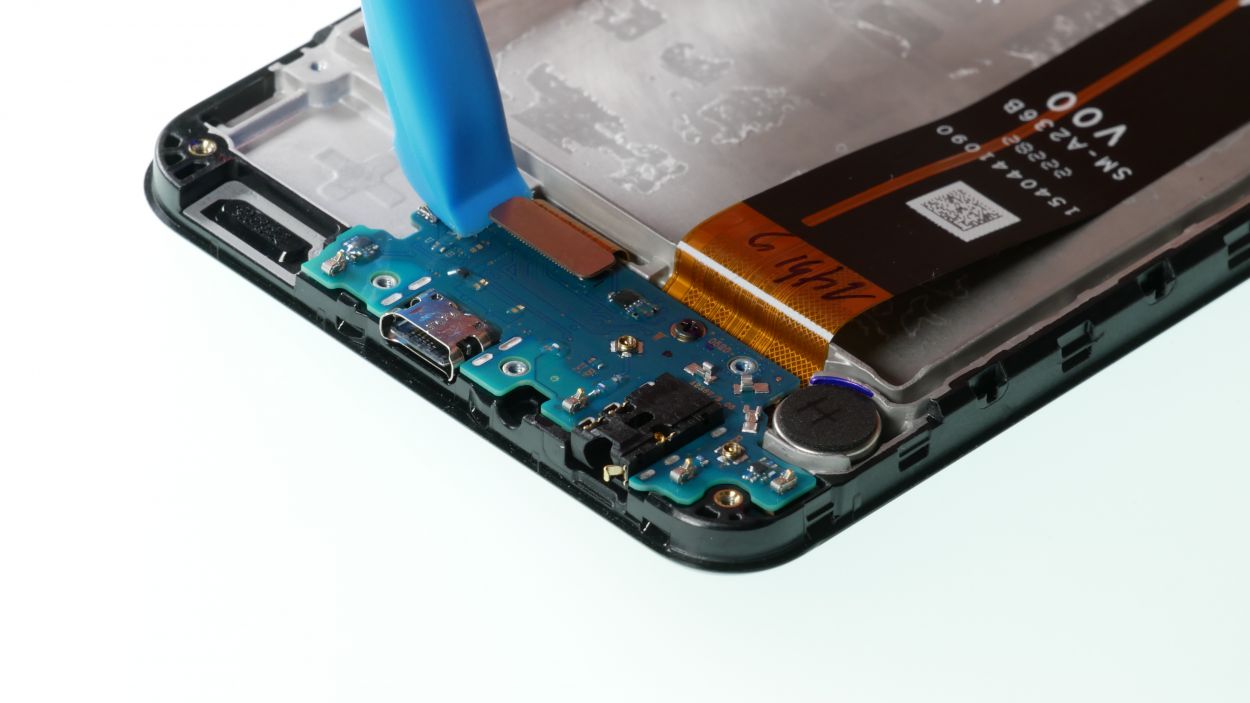
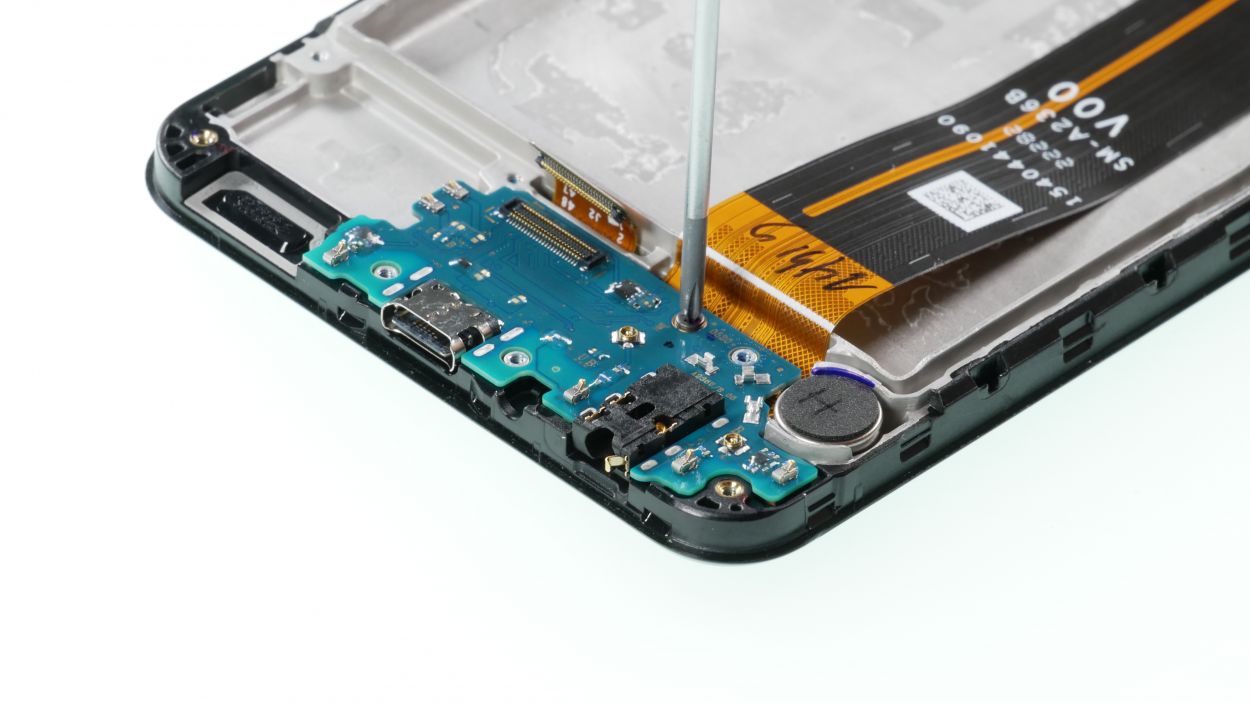
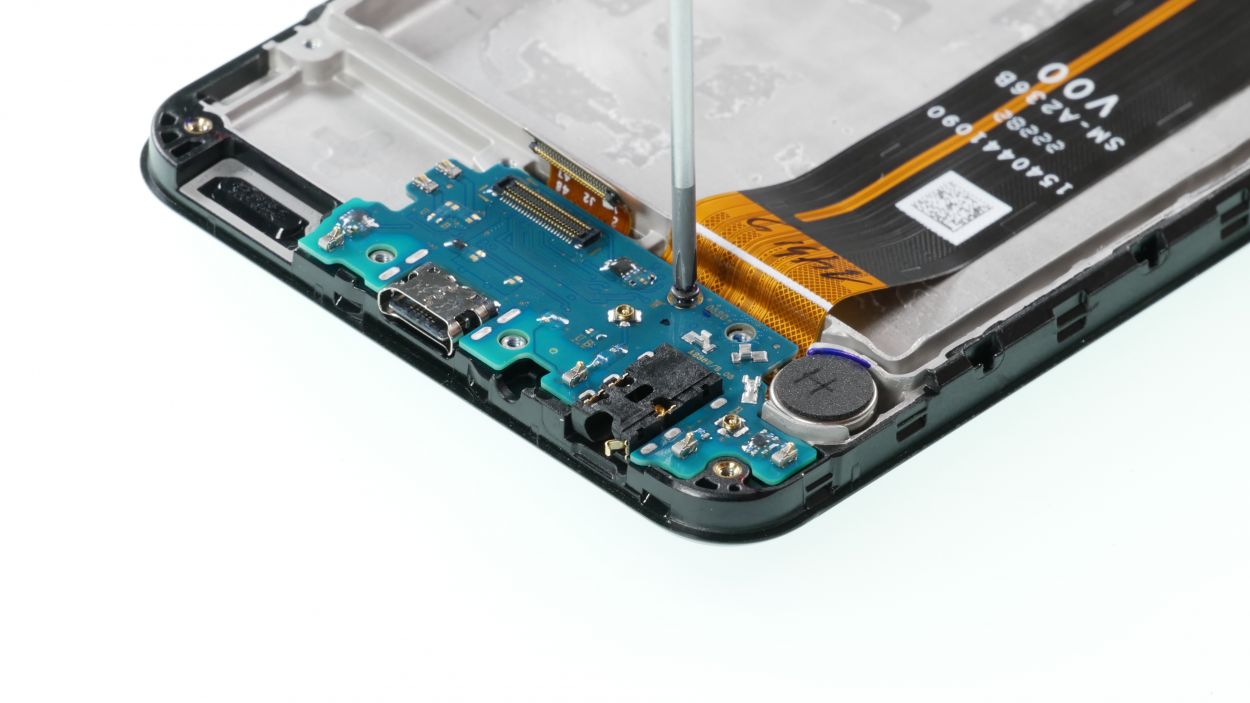
1 × Phillips 2,3 mm
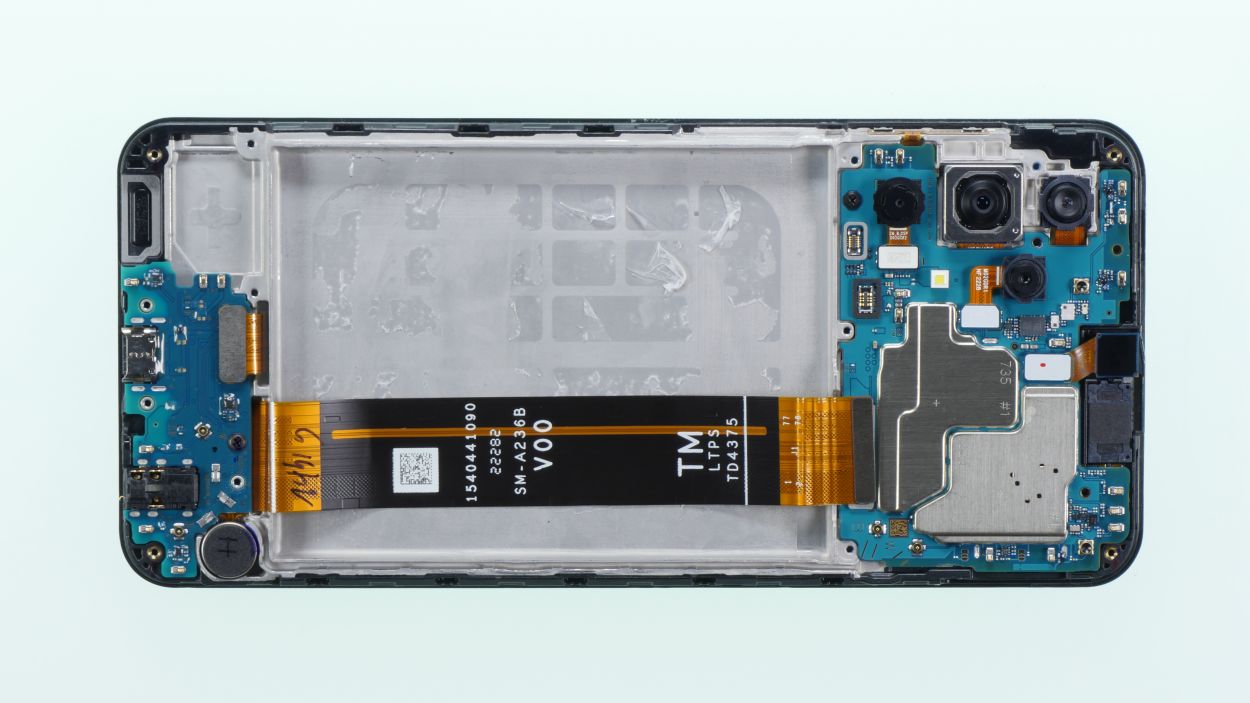
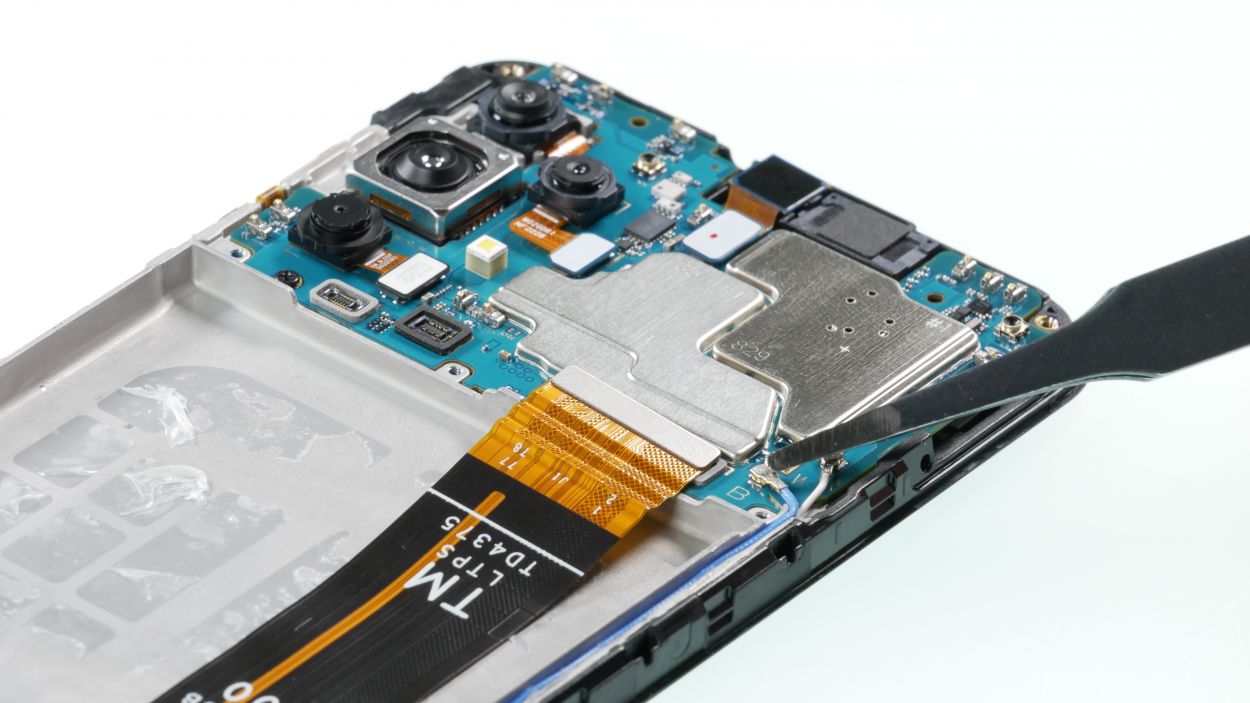
Screen Connector
– First, unplug that screen connector chilling out on the USB board. You’ve got this!
– Next, grab your trusty Phillips screwdriver and remove the screw—don’t forget to place it on your magnetic mat so it doesn’t wander off!
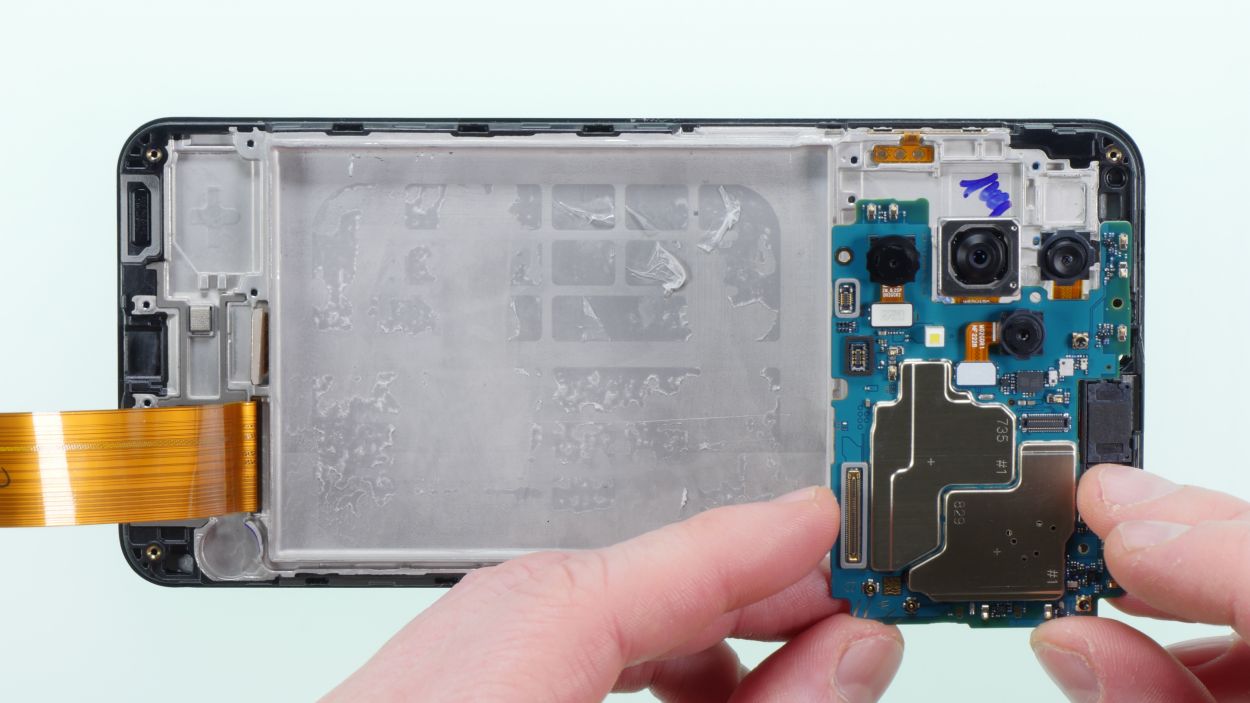
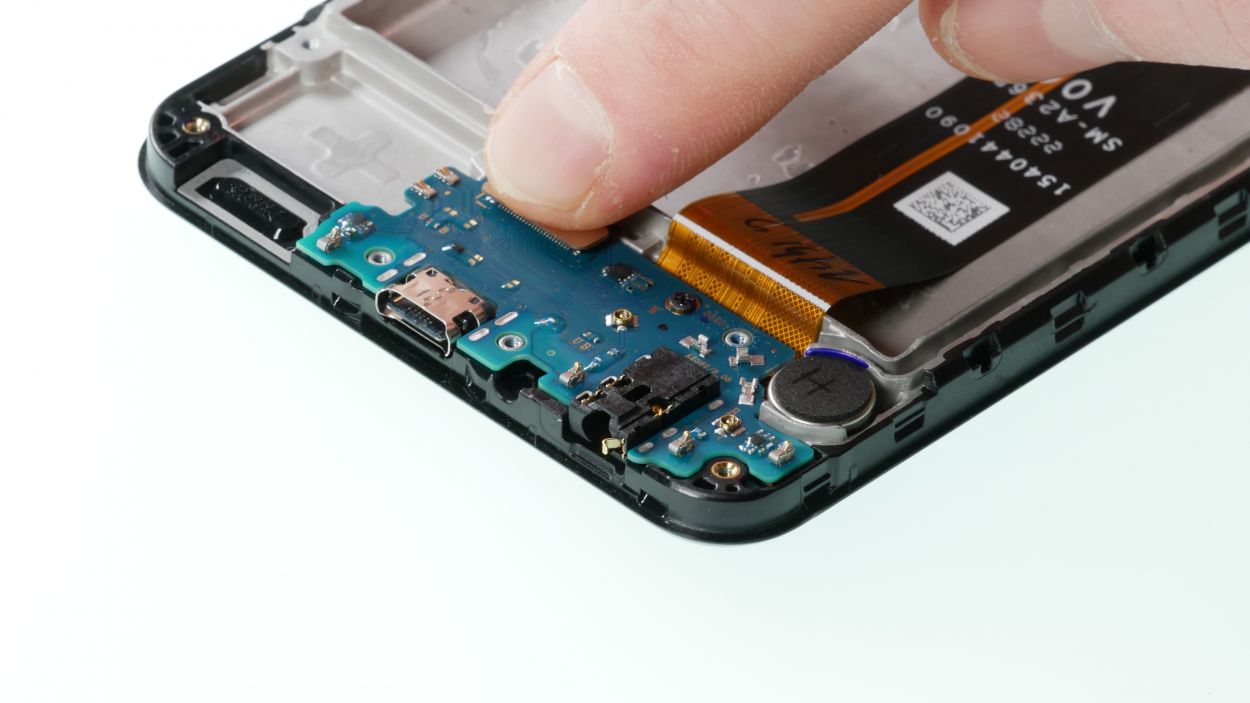
– Now, it’s your moment! Lift out the USB board. It might be a bit glued down, so give it a gentle heat to help it come out easily.
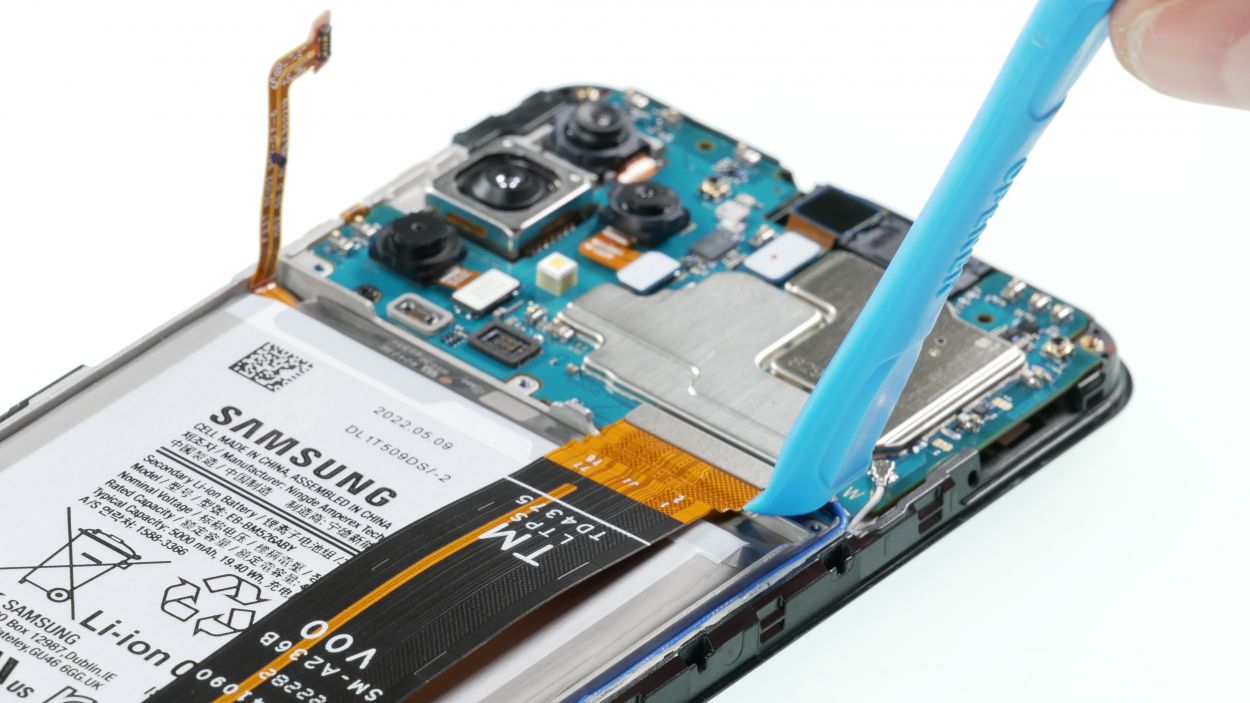
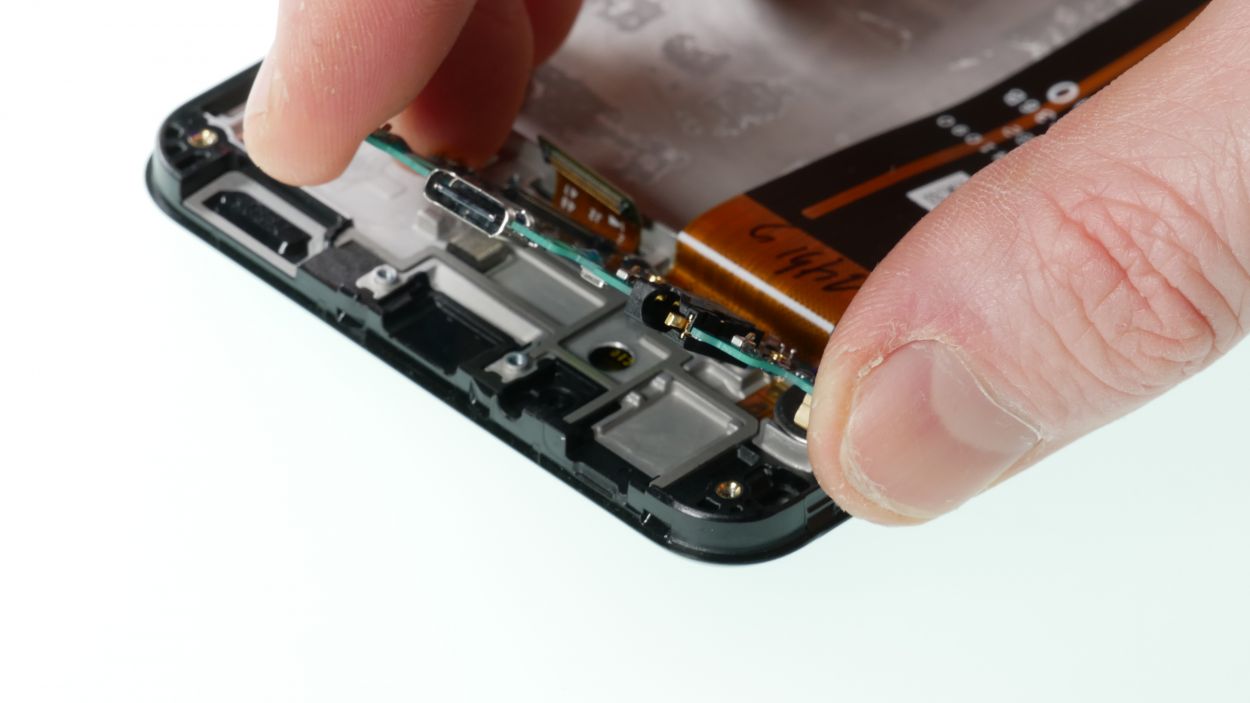
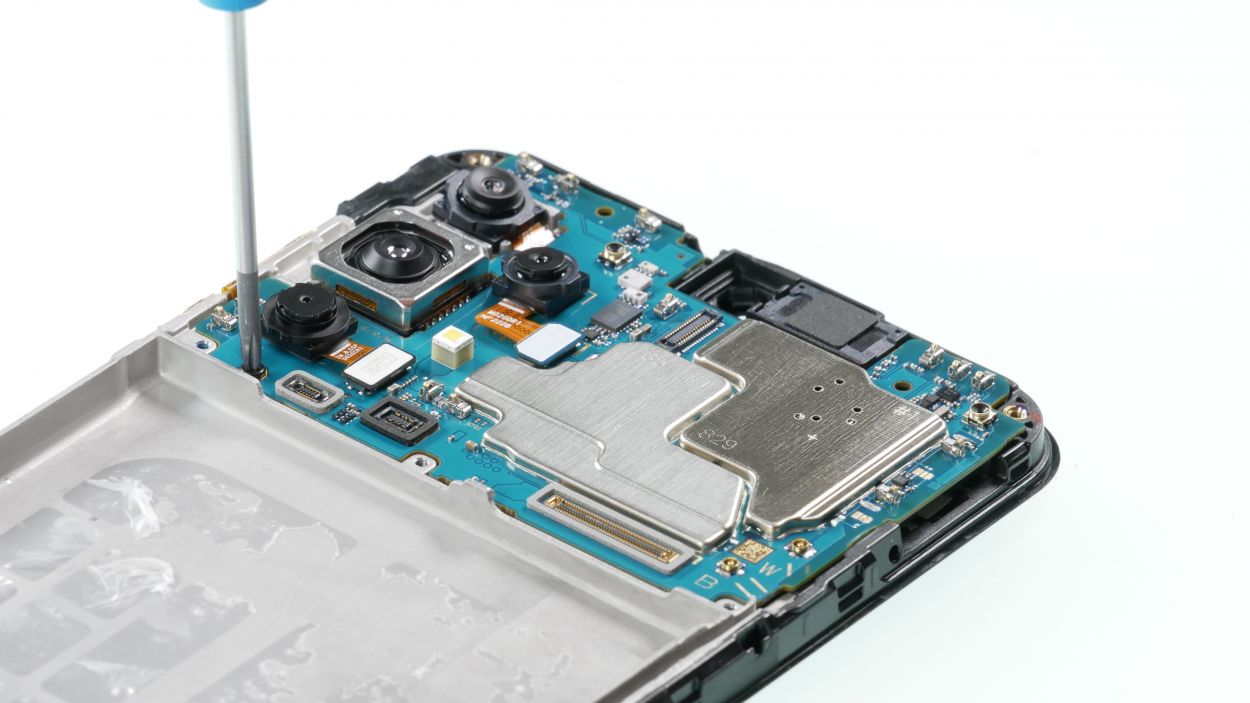
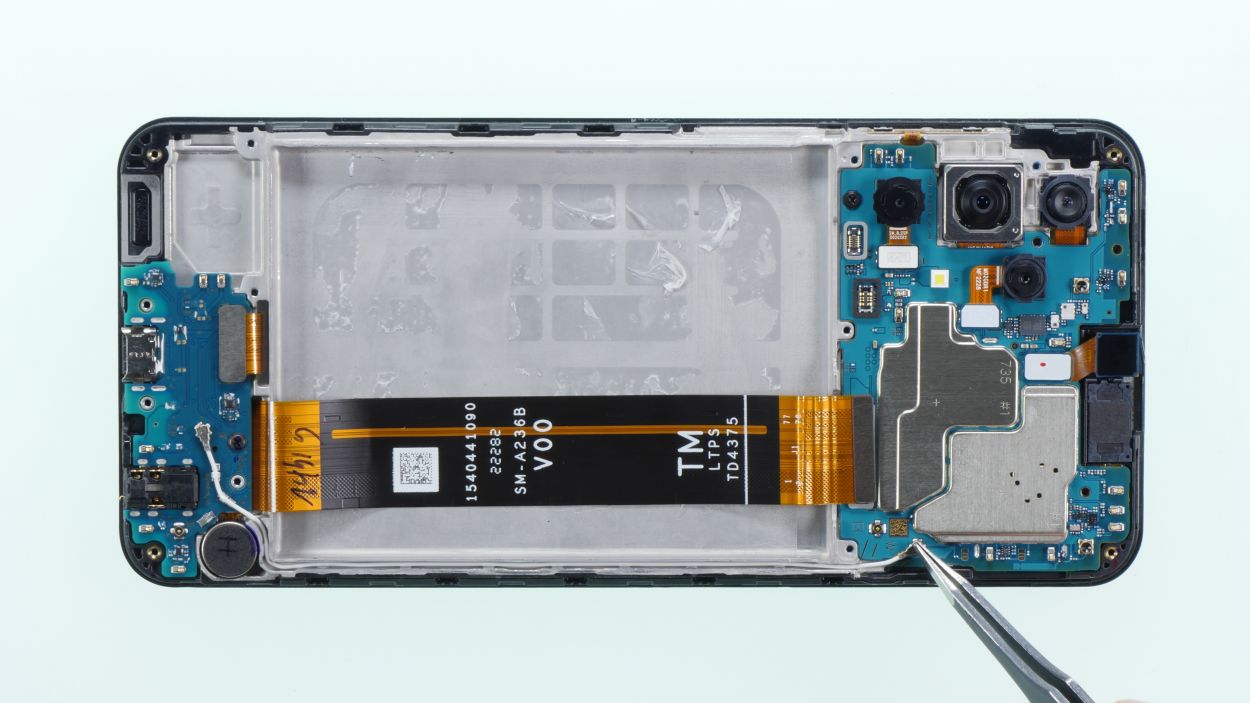
Step 9
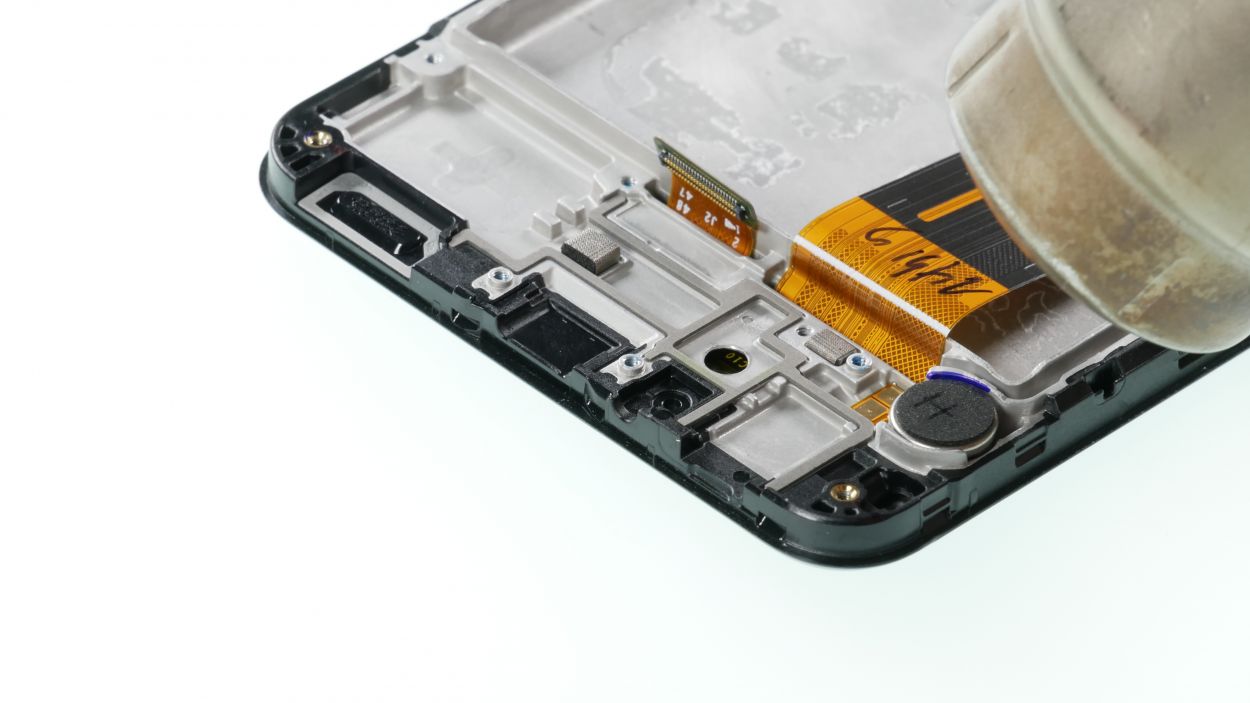
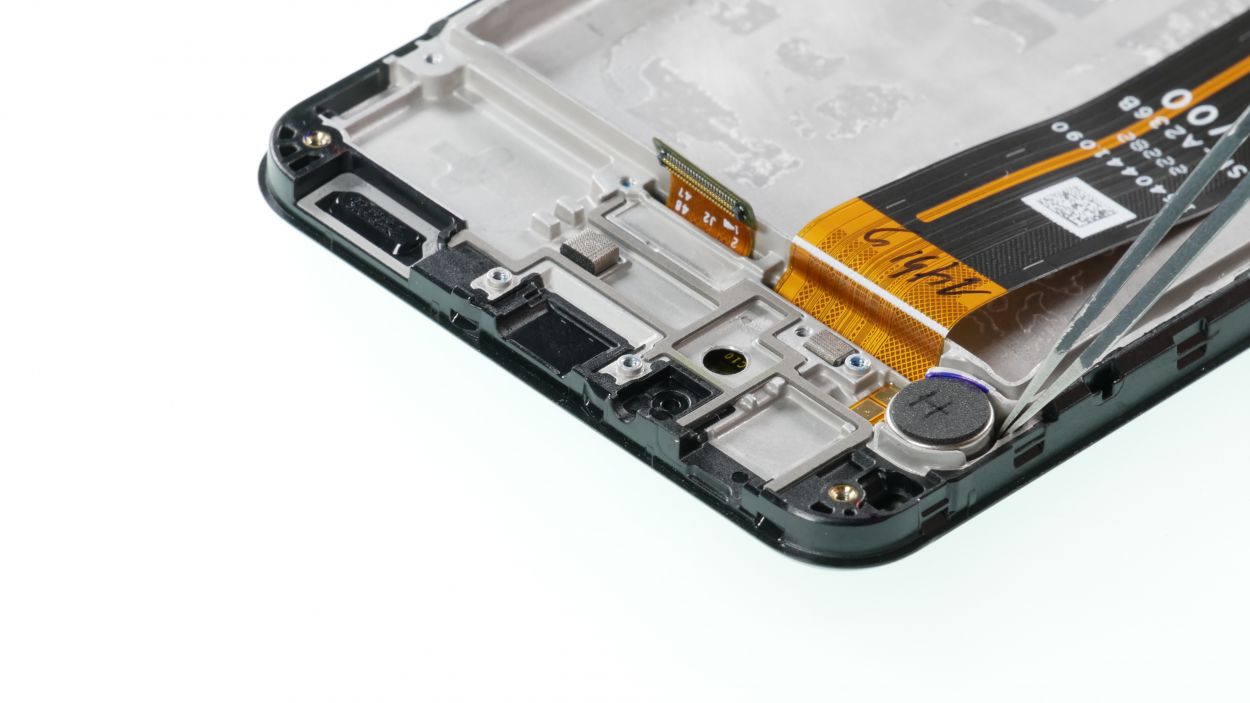
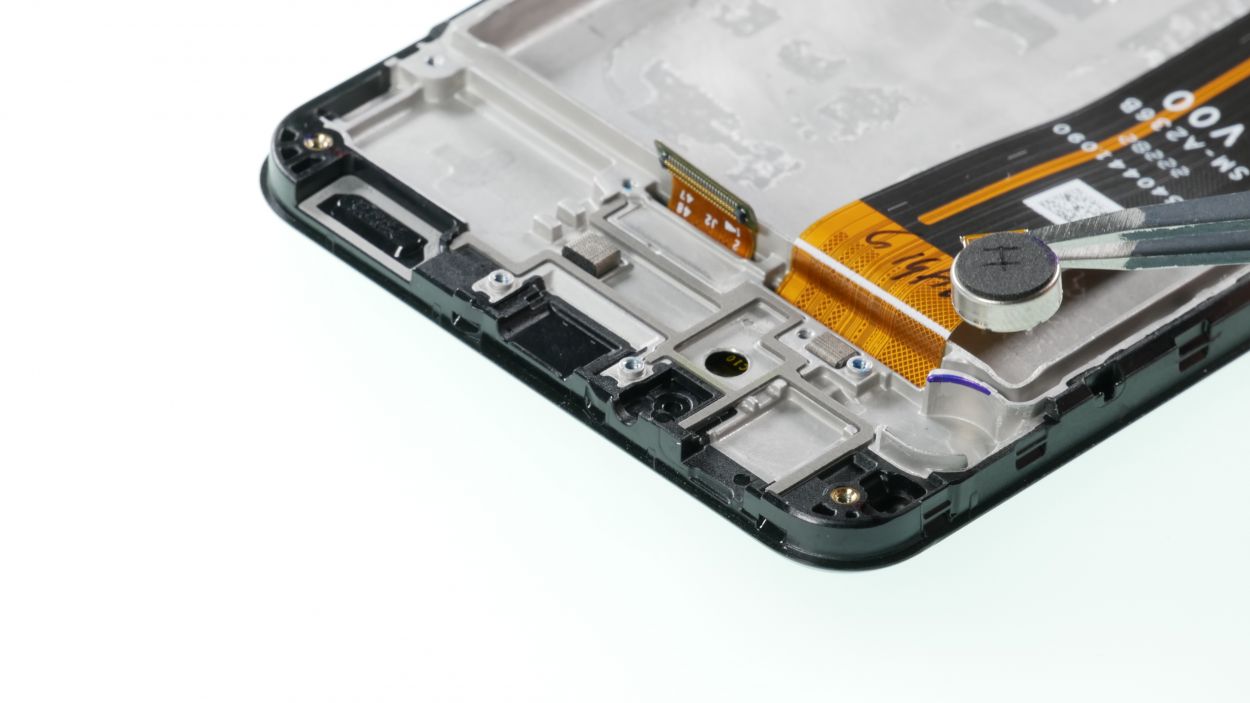
– The vibration motor is a little shy and likes to stick around. Give it a gentle warm-up, and then you can easily coax it out with your trusty tweezers.
Step 10
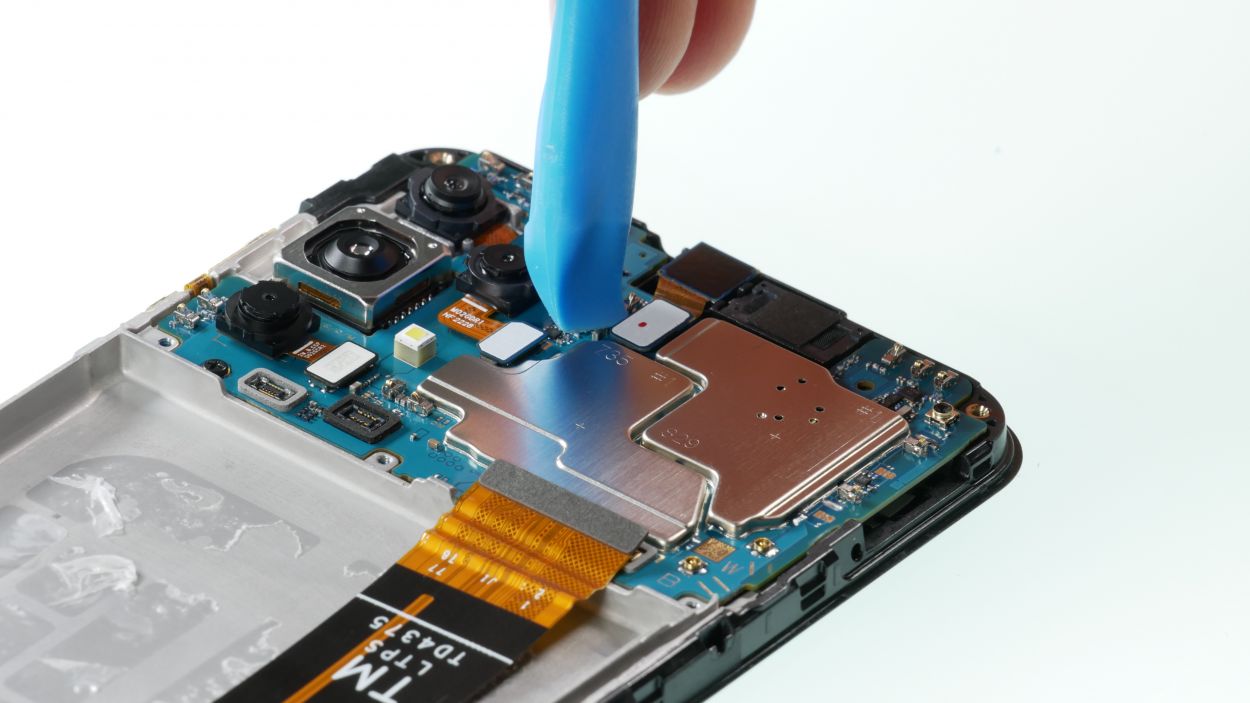
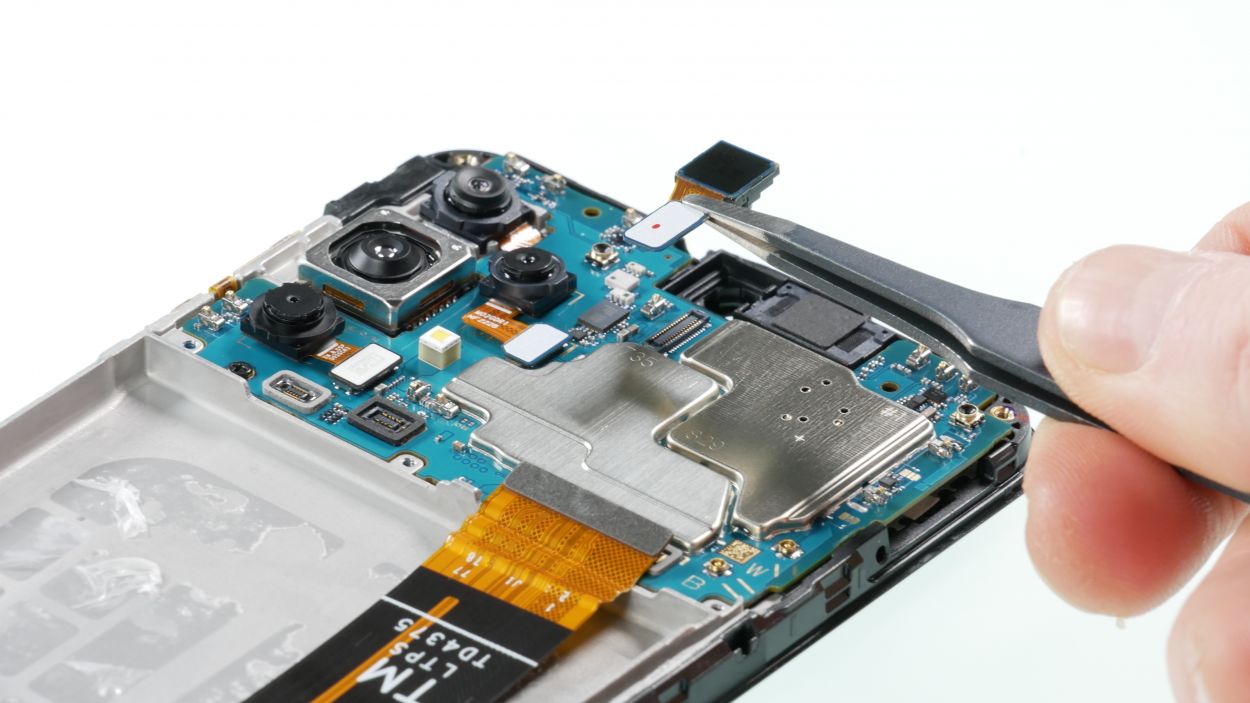
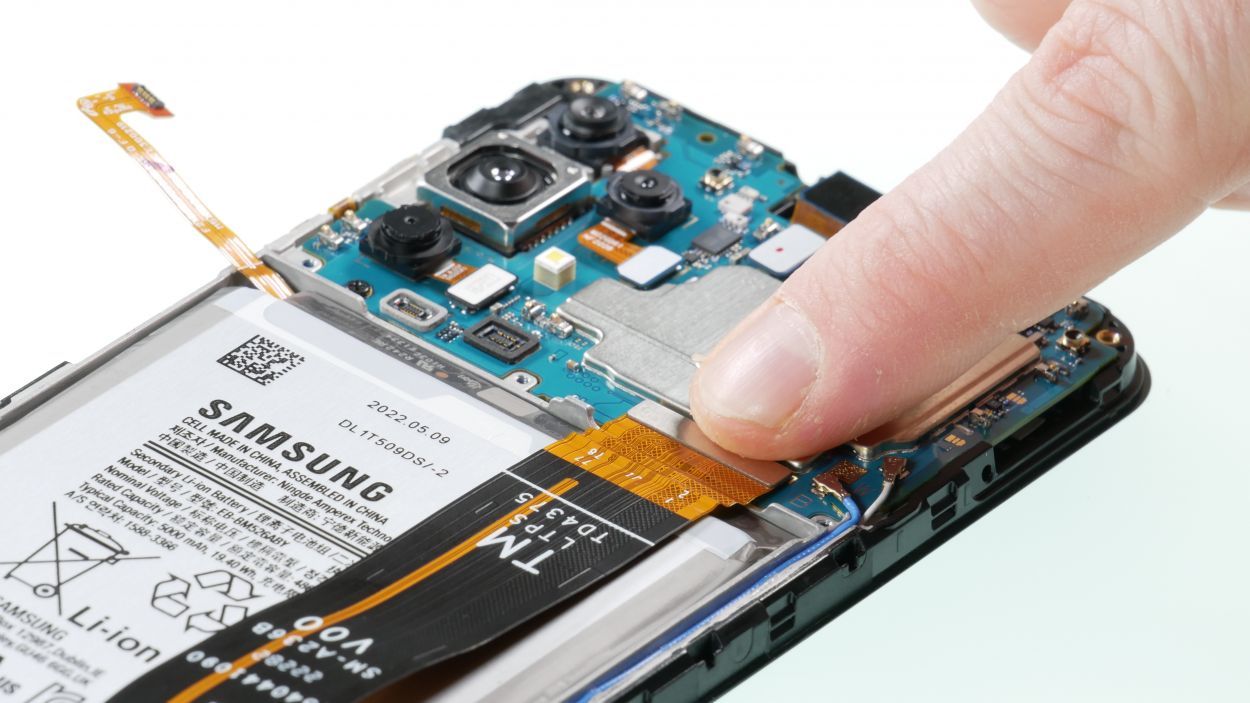
Front Camera Connector
– Now gently take out the front camera and set it aside like a precious little artifact.
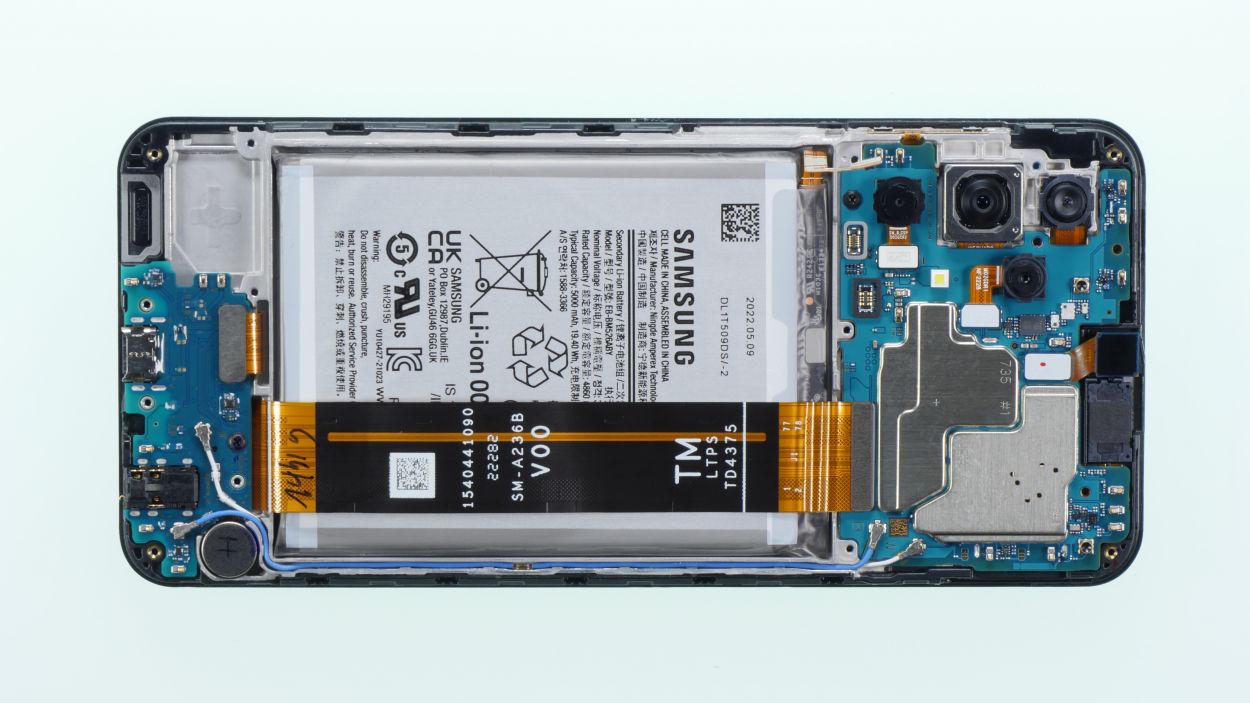
Step 12
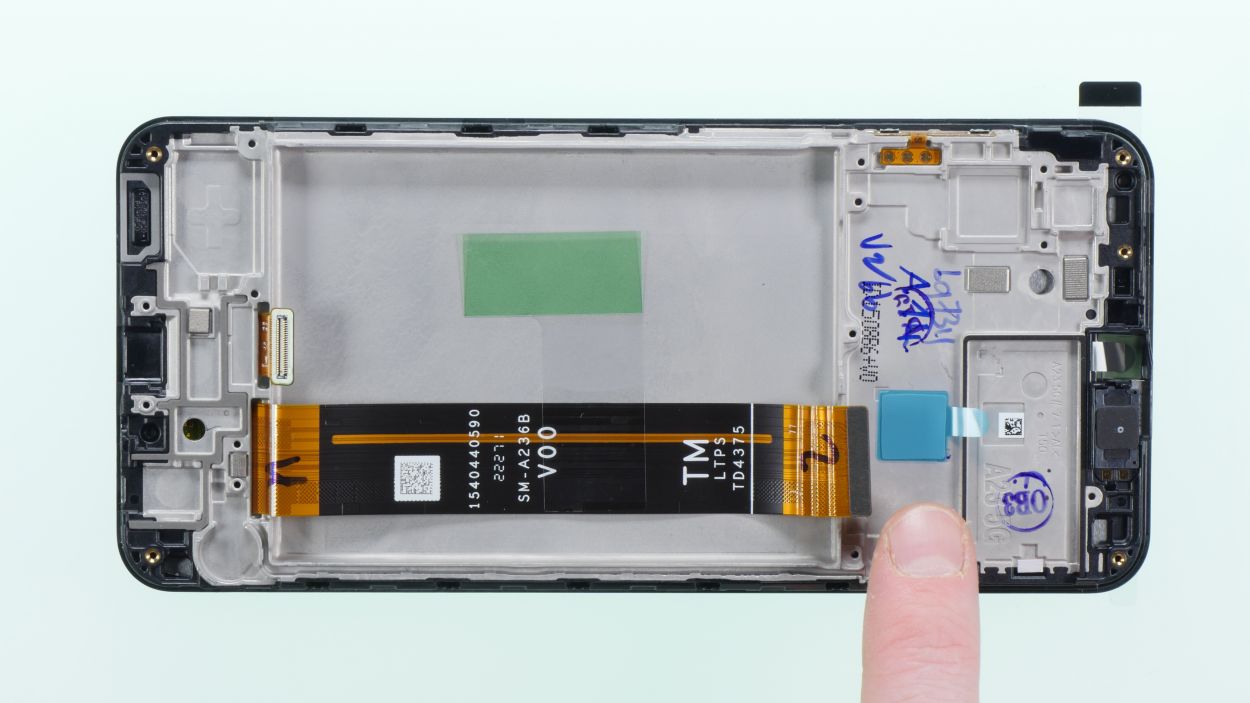

– Peel away all those protective foils on the inside like you’re unwrapping a present!
Tools Used
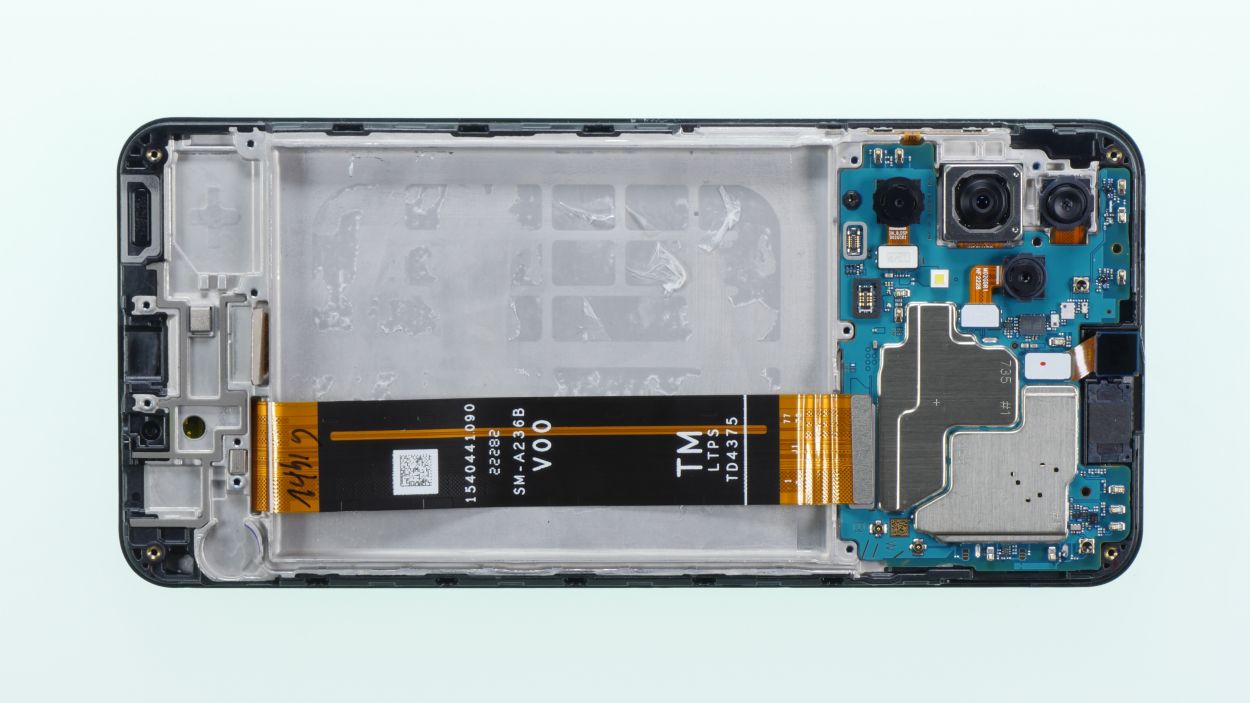
Step 14
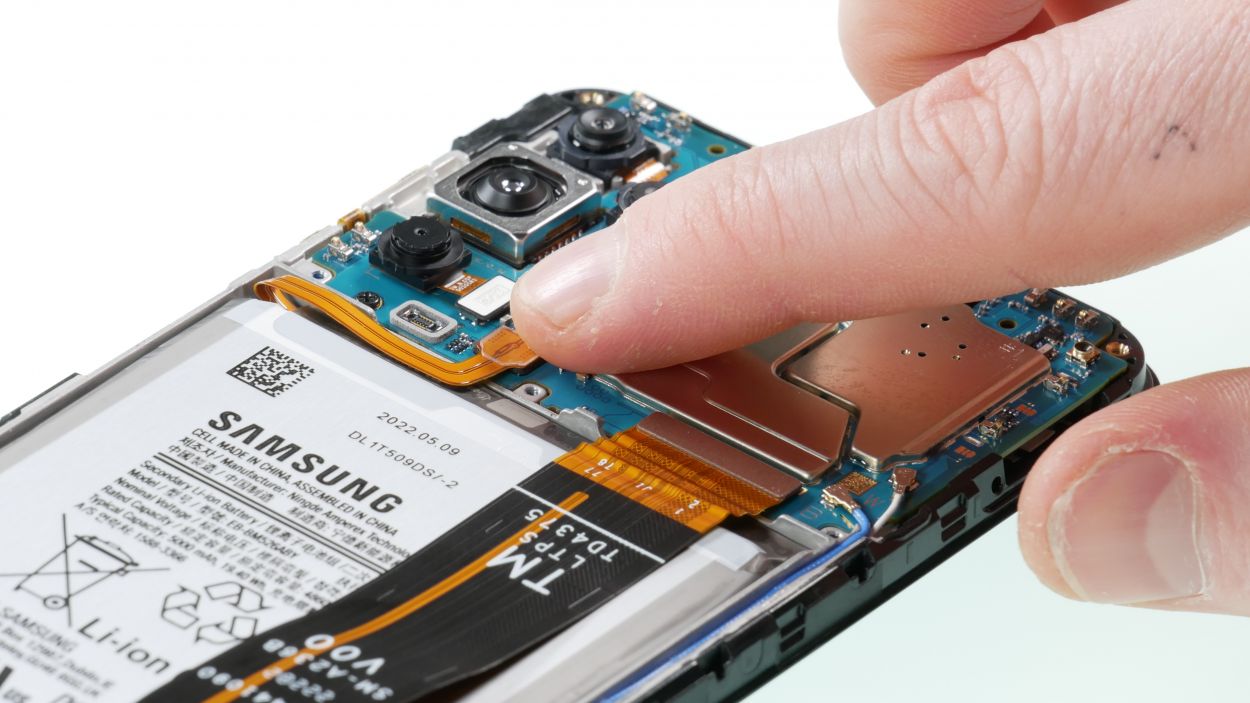
Front Camera Connector
– Carefully place the front camera back into its spot, making sure it feels right at home.
– Connect the little connector to ensure everything is snug and ready to go.
Step 15

– Pop the vibration motor into the new display and give it a gentle press down. You’re doing awesome!
Step 16
1 × Phillips 2,4 mm
Screen Connector
Make sure it clicks into place with a friendly little snap.
– Place the USB board back in its cozy spot and secure it with the Phillips screw provided—you’re almost there!
– Reconnect that highlighted connector like a pro!
Step 17


Antenna Connector
The connectors are marked with a B for Blue and a W for White. Just a little color coding to keep things fun!
– First, connect the white antenna cable to the matching plugs and tuck it back into its cozy little spots.
– Next up, do the same with the blue antenna cable. You’ve got this!


Step 20
16 × Phillips 3,7 mm
Finger Sensor Connector
– Reconnect the middle cover to the display support frame and listen for those satisfying snaps as the hooks click into place!
– Give those 16 screws a little love and tighten them up once again.
– Reconnect the fingerprint sensor’s connector and snugly press the camera frame back into position.
Tools Used
Step 21
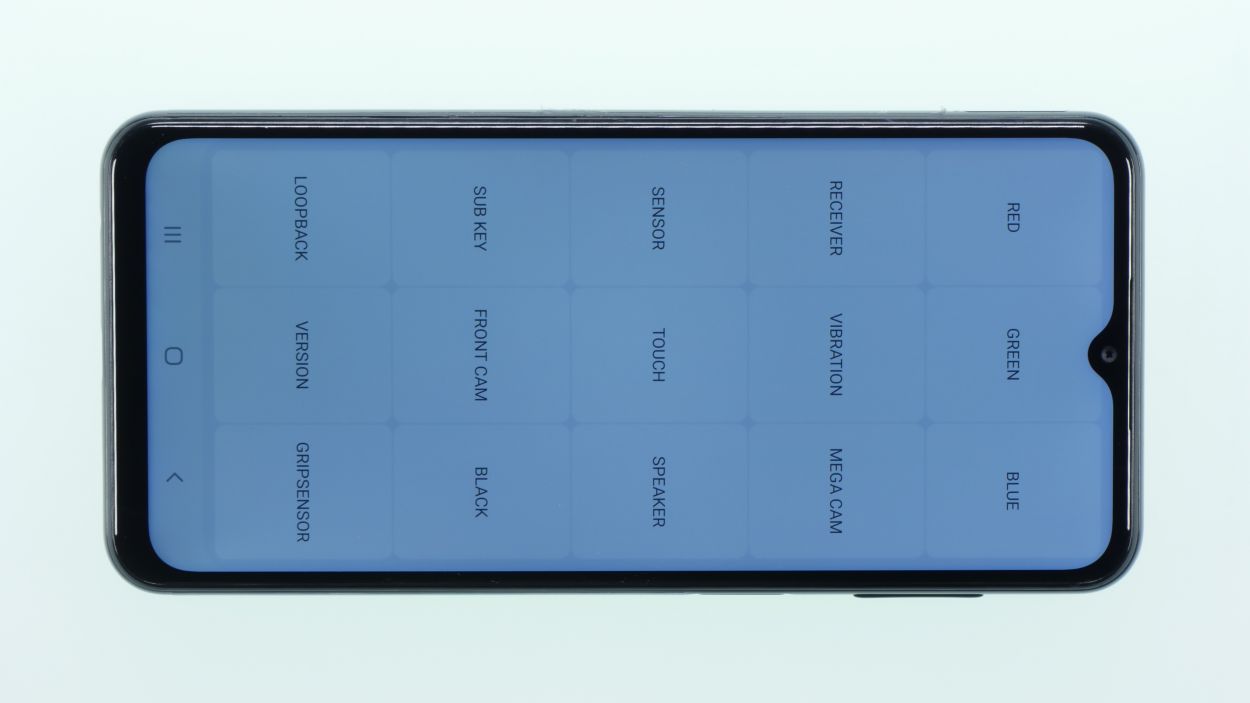
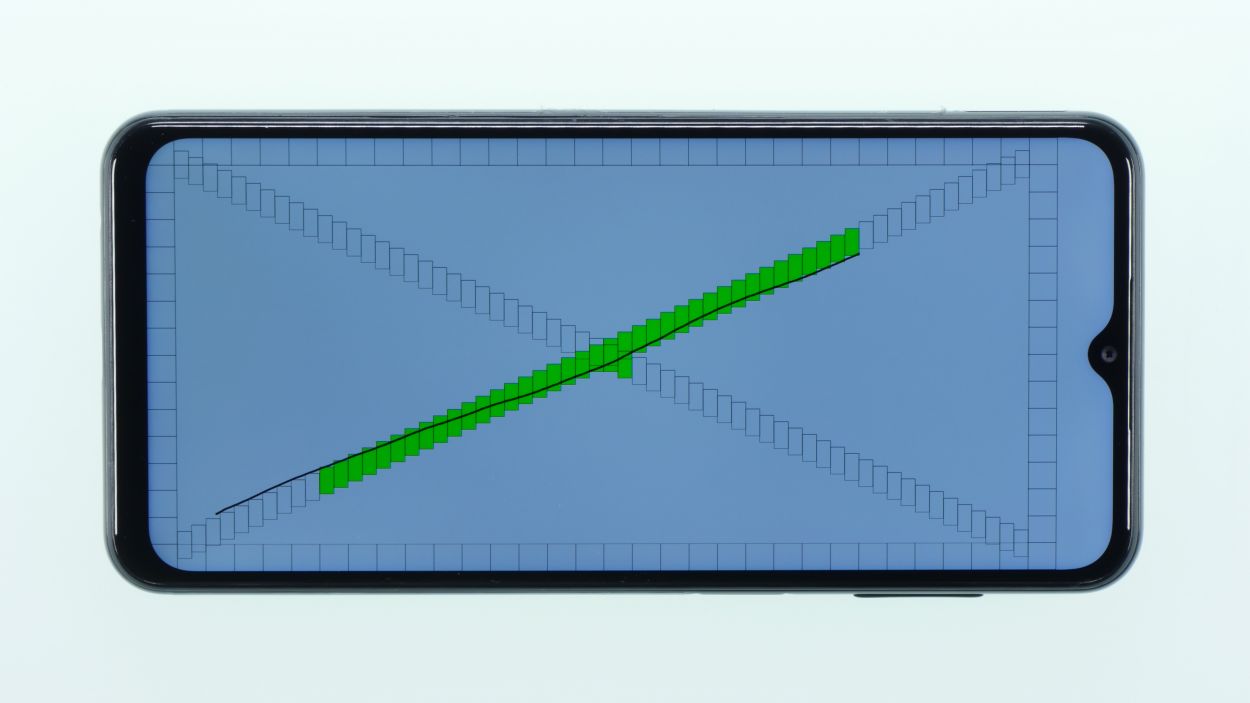
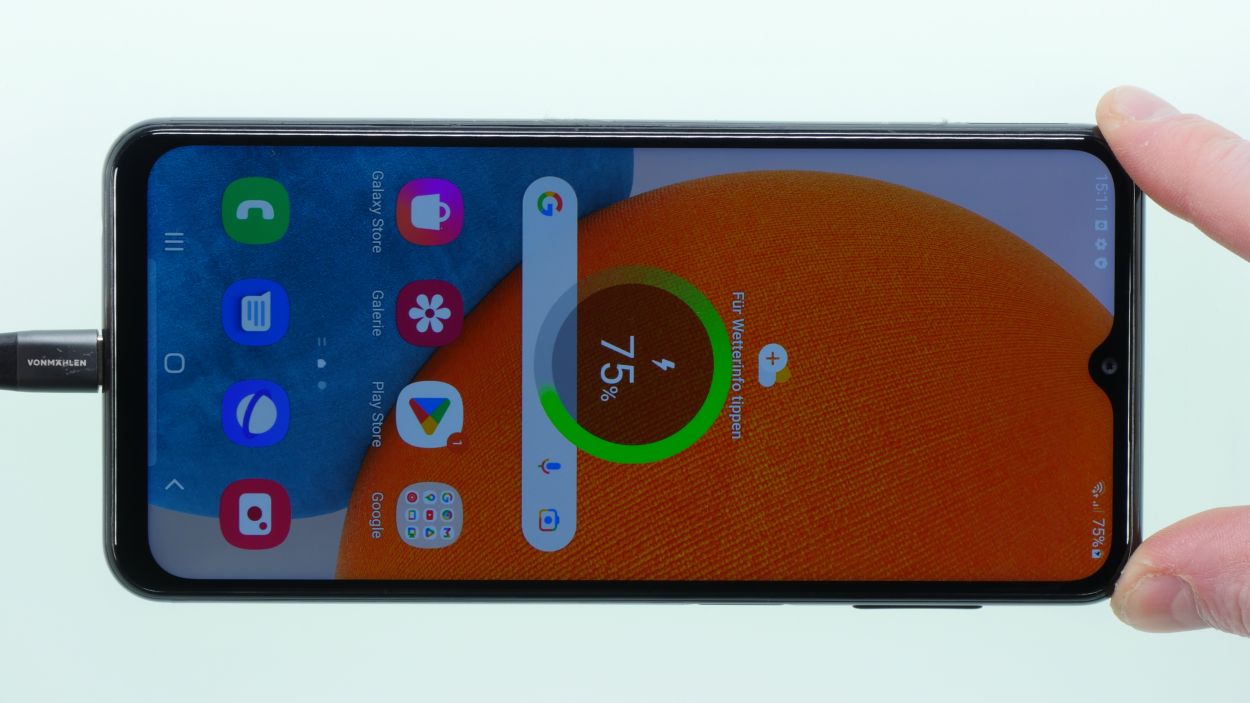
Before sealing up your device, it’s a good idea to give the screen and the whole phone a quick test drive. Power it up and dive into that secret test menu!
– Fire up your phone app and type in: *#0*#
– Next, just follow the prompts in that nifty test menu.
– And hey, don’t forget to plug in a charging cable to see if your phone’s ready to power up!
Step 22
– Is everything working like a charm? Awesome! Now it’s time to wrap things up by putting that back cover back on. Give the adhesive a little love with a hot air gun, warming it up evenly.
– Place the back cover on and press it down firmly. You’re almost done!
Step 23

– Slide that sim card holder back in like a pro! You’ve got this!