DIY Guide: Replace Galaxy S22 Ultra Back Cover
Duration: 15 min.
Steps: 5 Steps
Opening your Galaxy means saying goodbye to its IP68 certification. So, let’s keep that in mind while we tackle this repair!
Join us as we guide you through the fun process of swapping out your back cover! Our easy-to-follow photo steps will have you tackling this repair like a pro in no time.
Step 1

Before you dive into the repair zone, grab our handy checklist to ensure all the basic functions of your Galaxy S22 Ultra 5G are in tip-top shape! After the repair, you can easily check if everything is working like a charm.
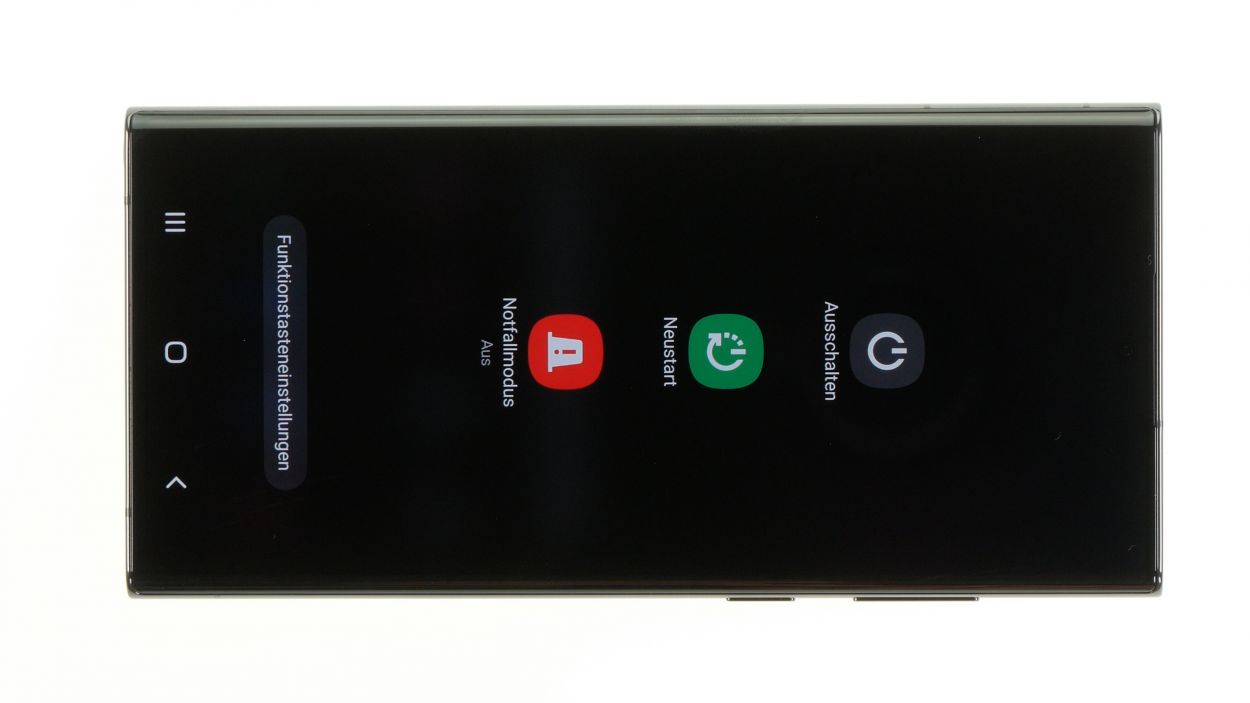
– Give that side and volume down button a good press and hold together for a few seconds—like you’re giving your phone a little hug!
– Once the menu pops up, just tap on ‘Power off’ and let your device take a quick nap.
Step 2
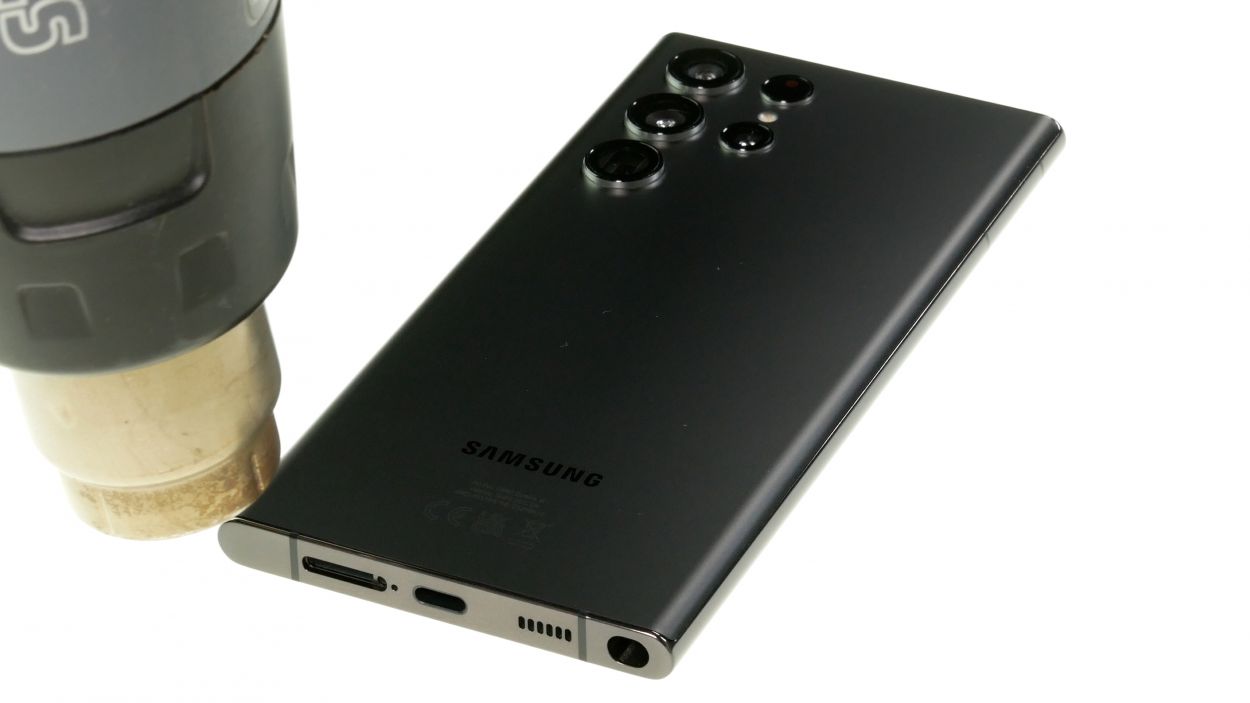
The back cover is really stuck down tight! Give it some love with a heat gun or a regular hair dryer to warm it up nicely.
– Warm up the edges of the back cover by gently waving your heat gun or hair dryer over it. Think of it like giving your phone a cozy blanket!
Tools Used
- heat gun to heat parts that are glued on so they’re easier to remove.
In most cases, you can also use a hairdryer.” rel=”noopener nofollow”>Heat gun
Step 3
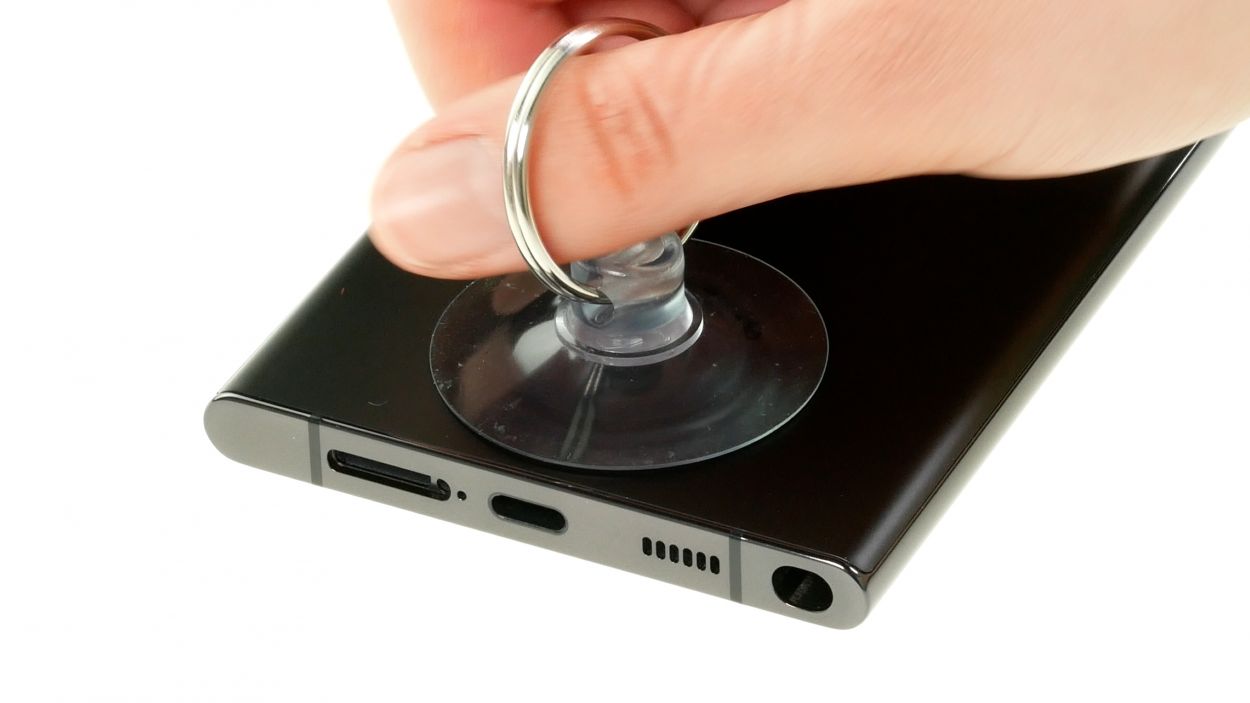

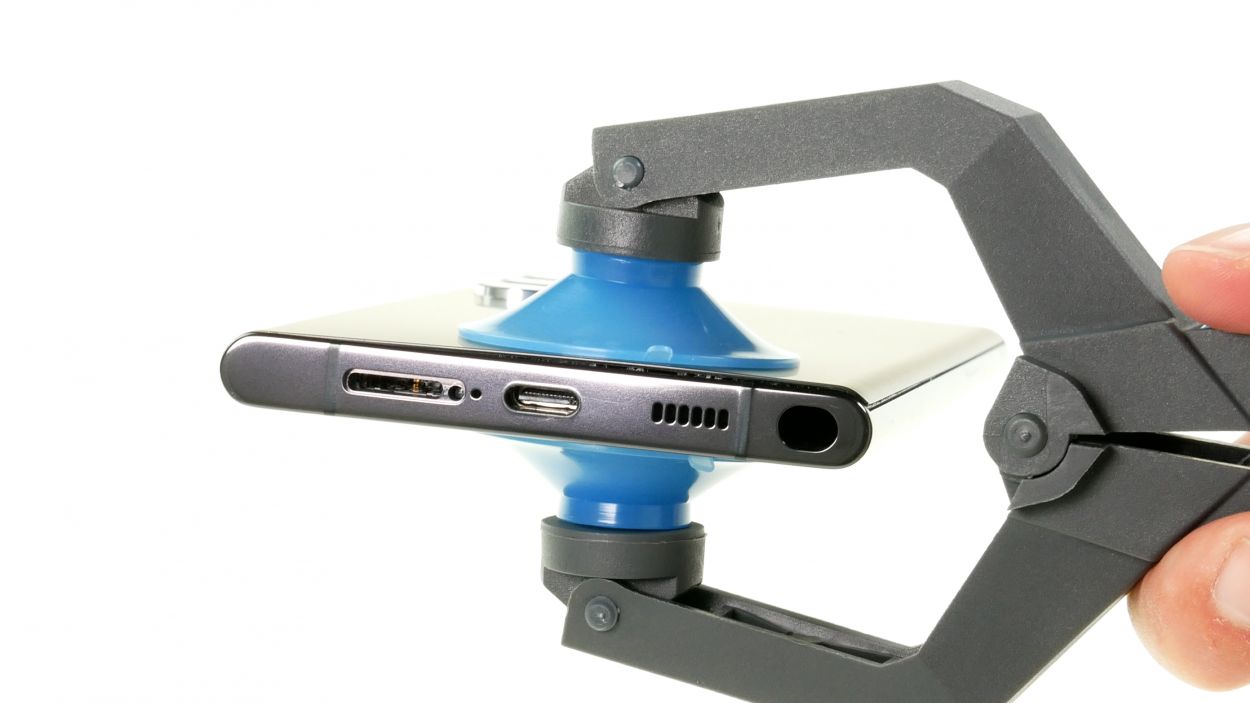
If you’re looking for a trusty sidekick to help lift that back cover, the iSclack is your go-to! It’s a breeze to use and takes less muscle to get the job done.
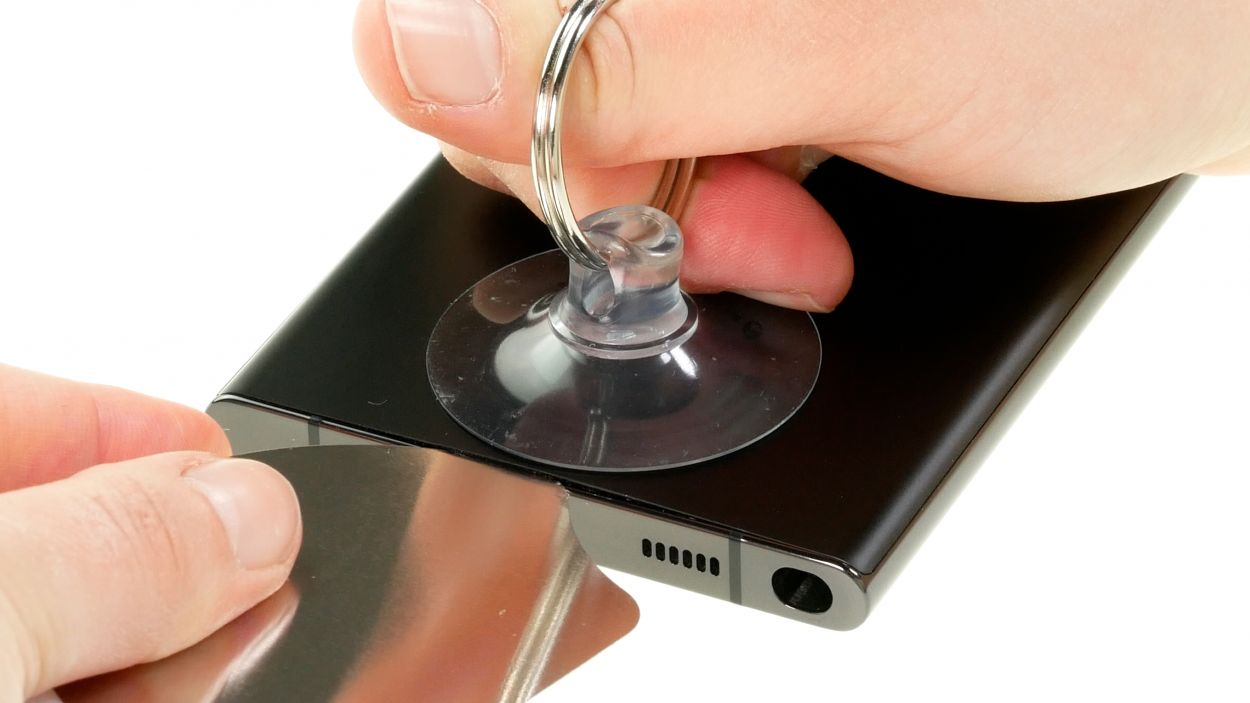
– Stick a suction cup on the lower edge of the back cover and gently pull it up to create a little opening.
– While you’re at it, slide a flat tool into that gap between the back cover and the screen.
Step 4
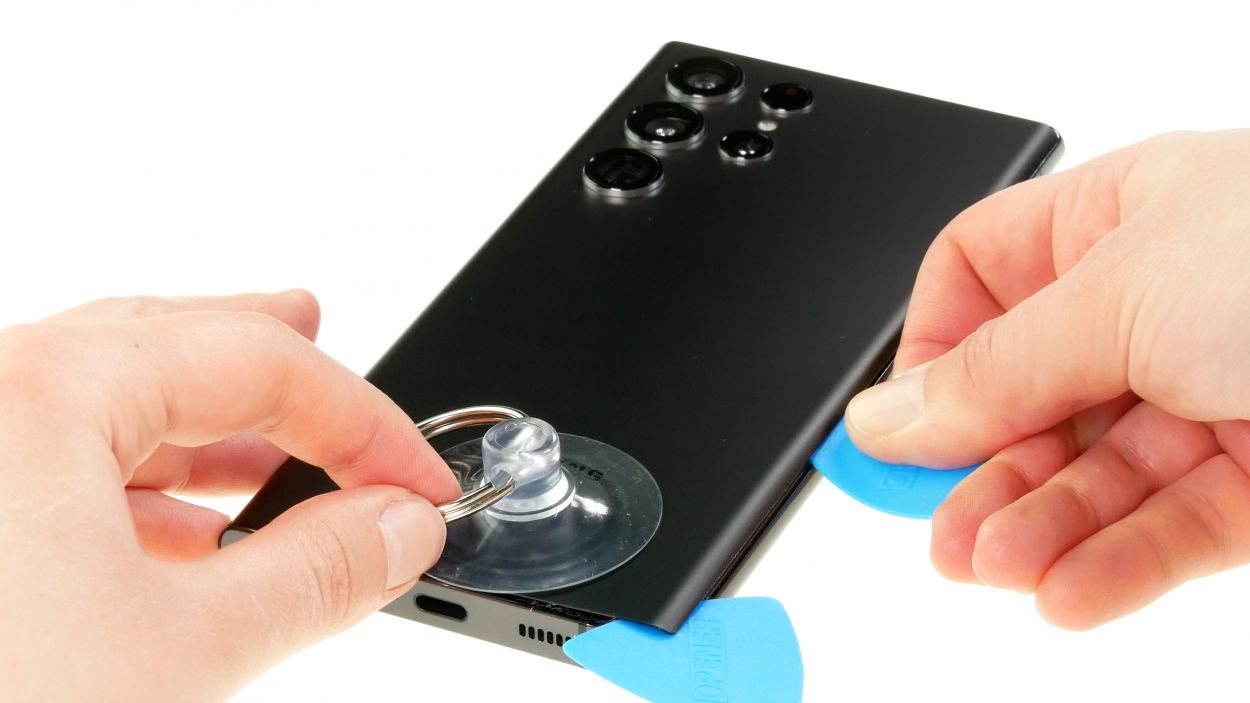
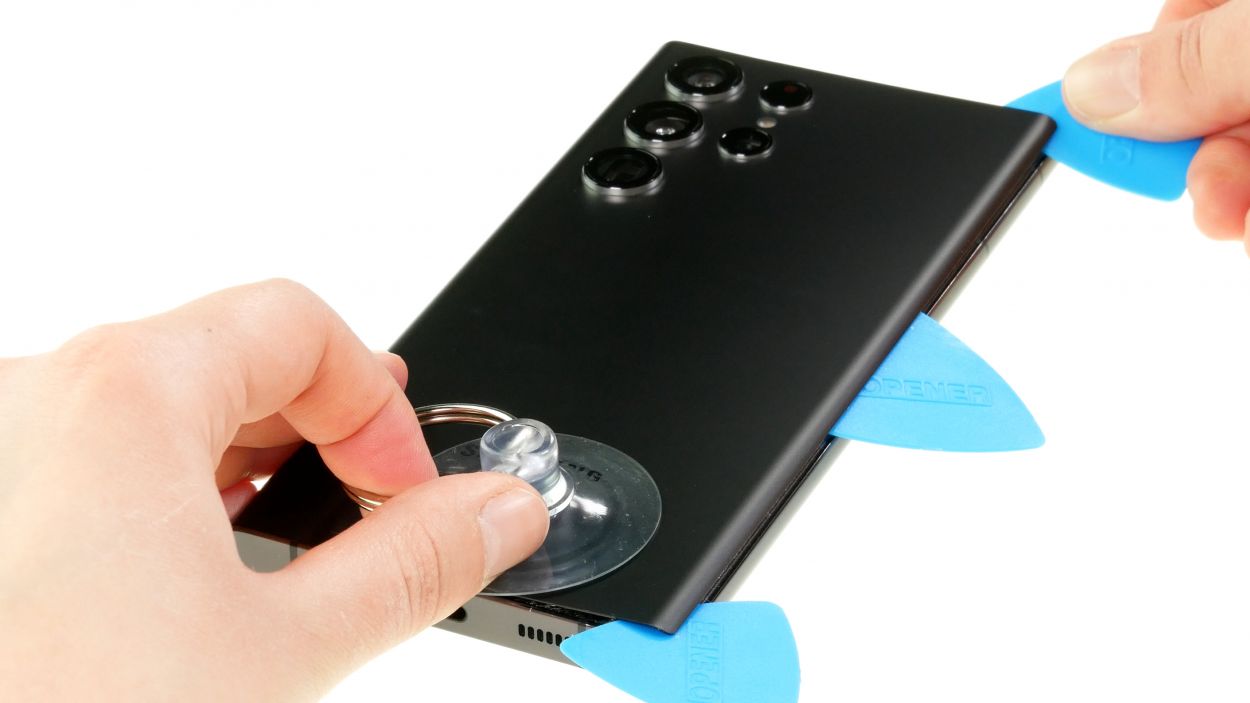
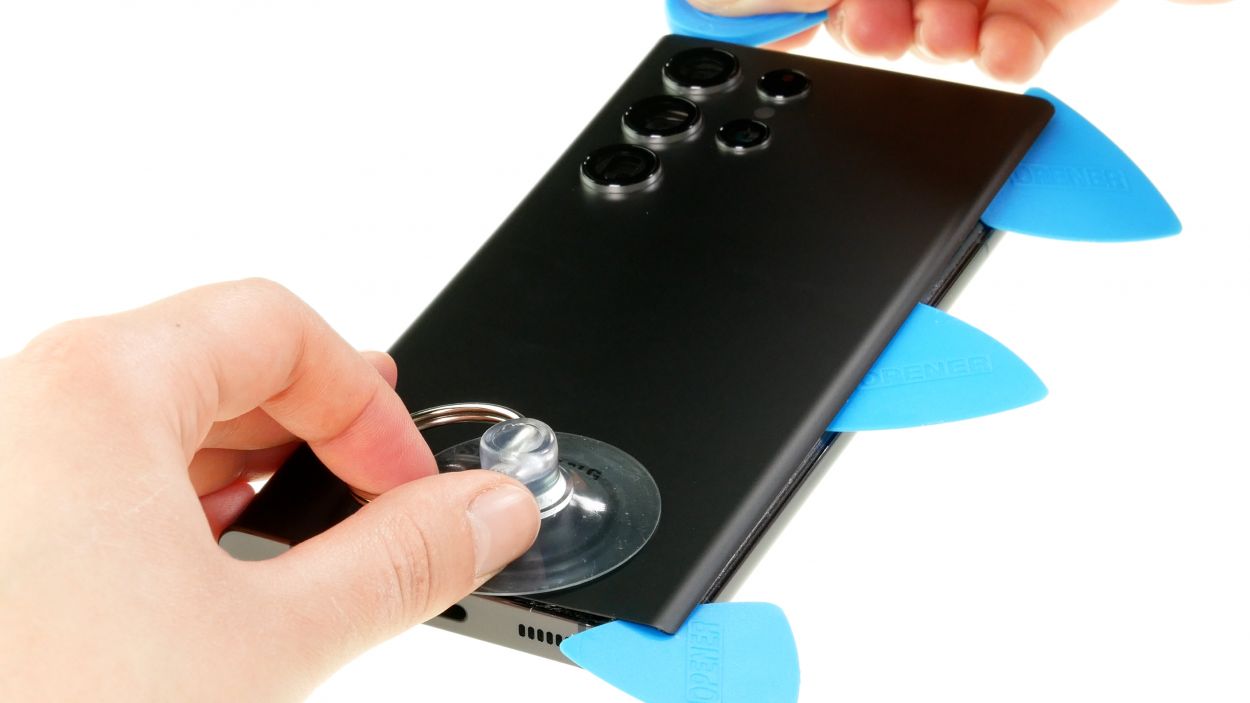

– Gently glide your tool all around the perimeter of the back cover, loosening it up bit by bit—think of it as giving your phone a gentle massage!
– Once you’ve got that back cover free, set it aside like it’s taking a well-deserved break.
Hey there! Just a friendly reminder to keep your tool at a safe distance from the camera module—no need to go too deep! A hard plastic pick is your best buddy for this part.
To keep that back cover from getting too cozy with its glue again, we suggest slipping some flat plastic picks underneath at regular intervals. It’s like giving your phone a little breathing room!
Tools Used
- heat gun to heat parts that are glued on so they’re easier to remove.
In most cases, you can also use a hairdryer.” rel=”noopener nofollow”>Heat gun - Pick Set
- Flat Picks
Step 5

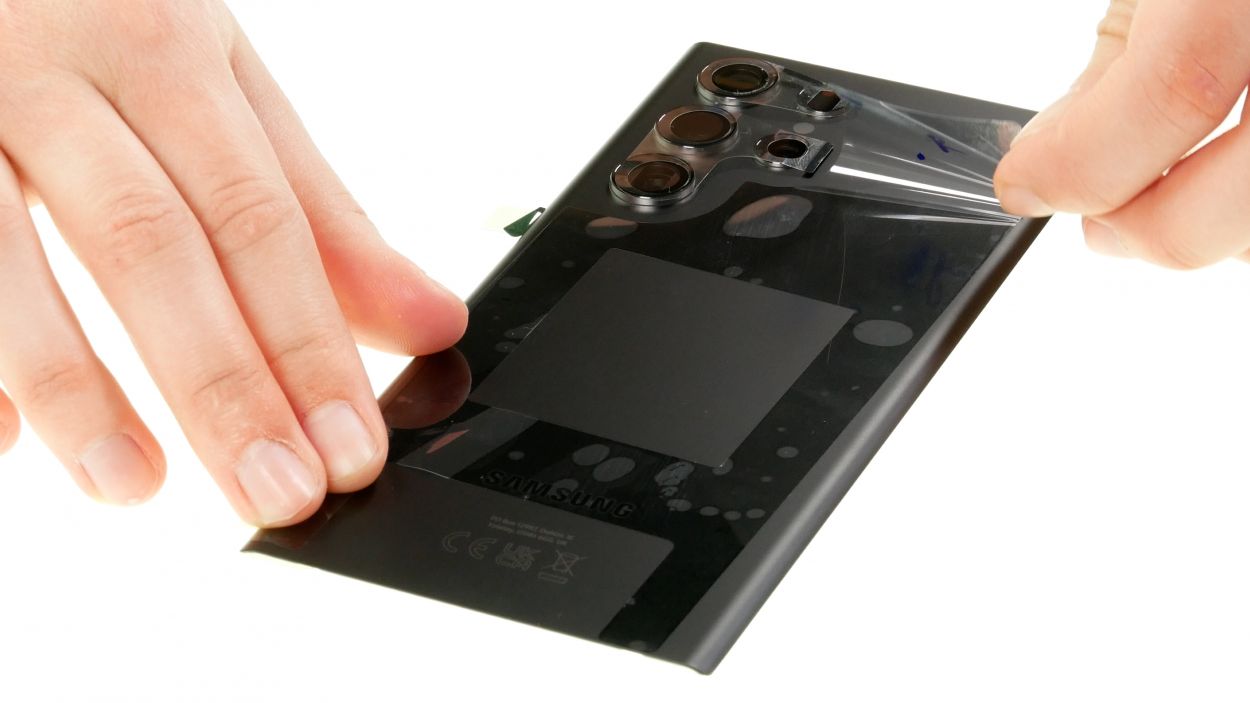
Give that back cover a little warmth by waving some hot air over its edges; it helps the glue stick like best friends! And hey, if you want to keep it in place, feel free to stack some books on top for a few minutes while it settles in.
– Peel off all those protective films from your shiny new back cover—it’s like unwrapping a gift!
– Line it up with the screen unit and give it a good, firm press. You want it to feel right at home!
Tools Used
- heat gun to heat parts that are glued on so they’re easier to remove.
In most cases, you can also use a hairdryer.” rel=”noopener nofollow”>Heat gun