
DIY Guide: Replace Google Pixel 9 Pro Fold Inner Screen
Duration: 45 minutes
Steps: 199 Steps
This repair guide was brought to you by the Salvation Repair team. Learn more about our repair guides here.
Welcome to your handy guide for swapping out the inner screen assembly on your stunning Pixel 9 Pro Fold! We’re here to help you every step of the way. If you ever hit a bump in the road, don’t hesitate to schedule a repair. Let’s dive in and get your device looking great again!
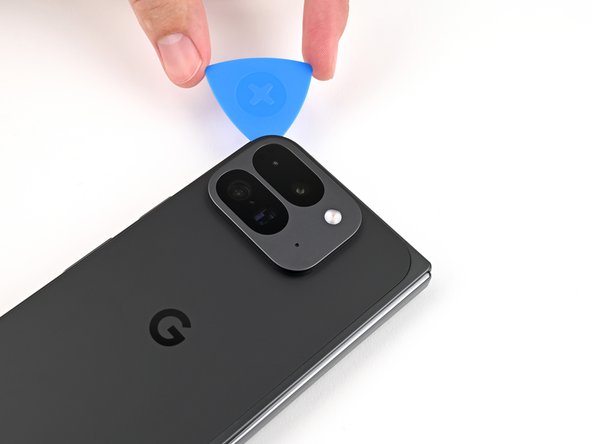
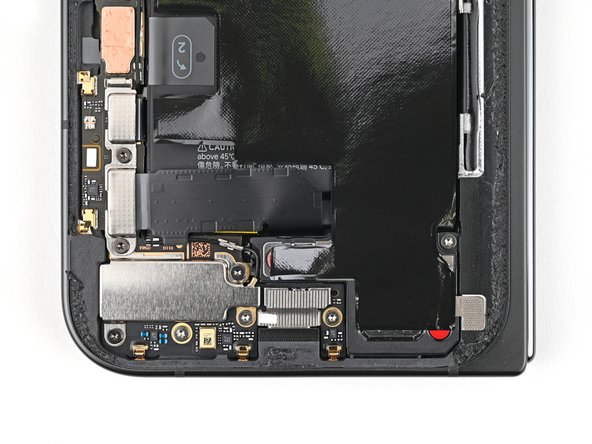
Step 1

– Disconnect all cables from your phone and power it off entirely. You’ve got this!
Step 2
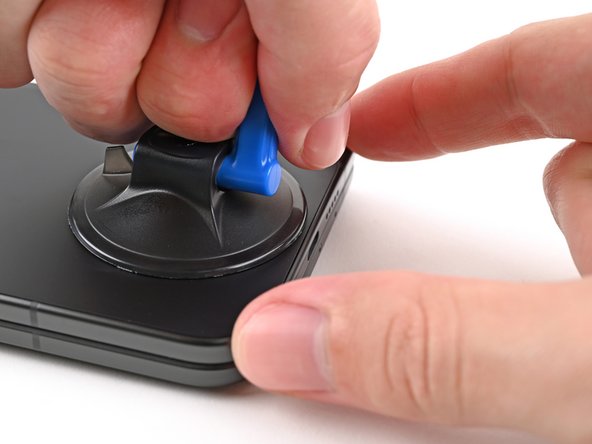


If your back cover is sporting a nasty crack, slapping on some clear packing tape can help the suction cup stick like it’s on a mission! Feeling adventurous? You can also try a super-strong tape as a backup. And if you find yourself in a real pickle, a dab of superglue on that suction cup will do the trick to secure it to the broken back cover.
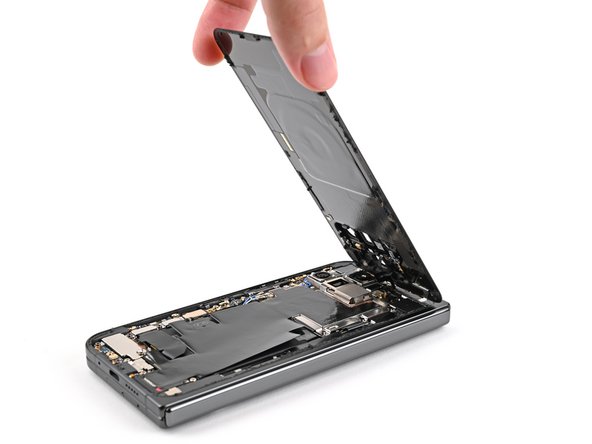
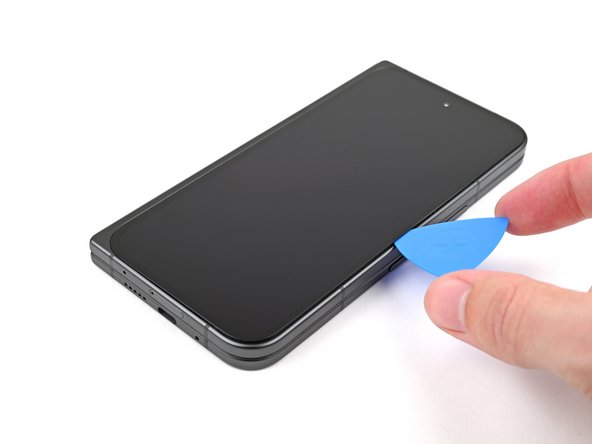
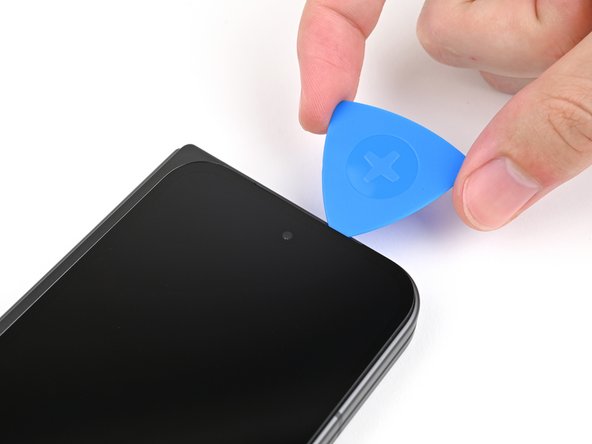
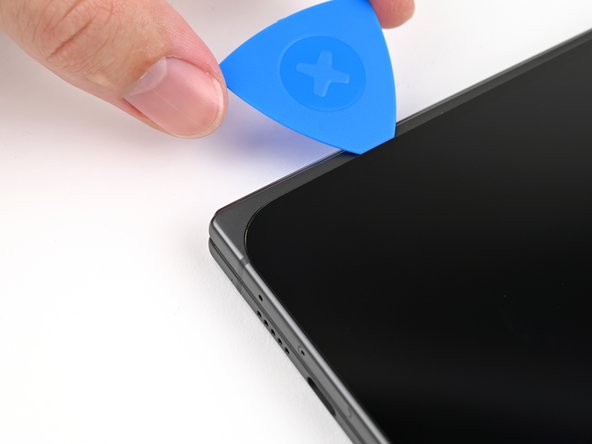
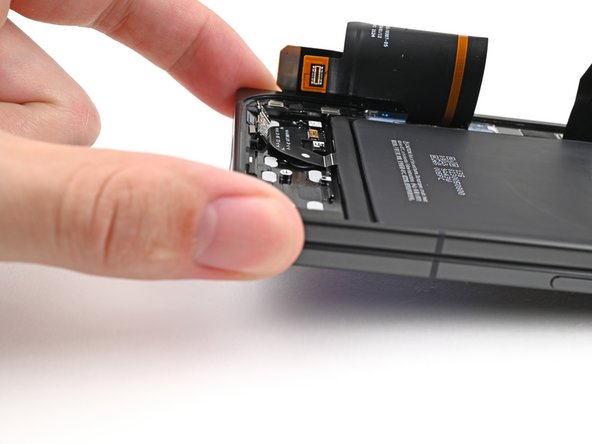
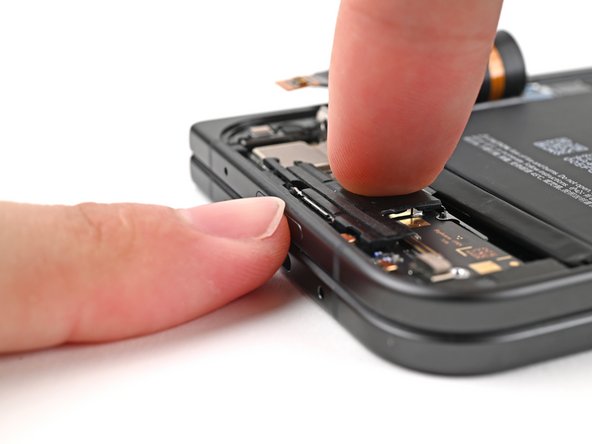
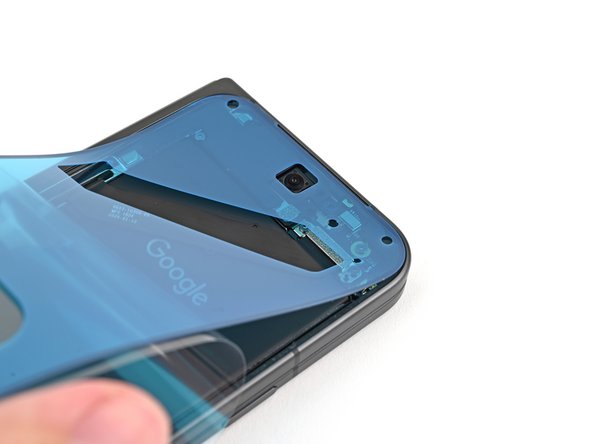
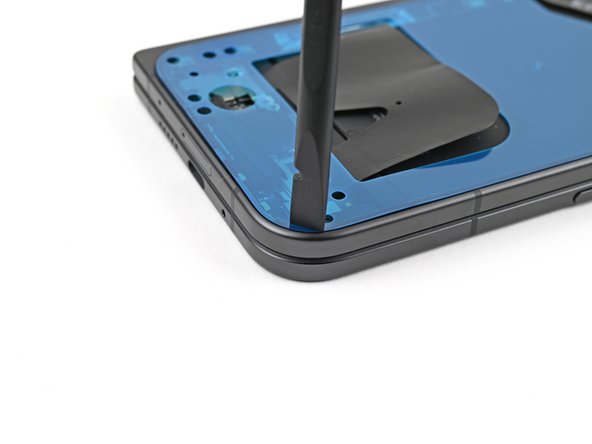
– Alright you fixin’ fiend, let’s get this bad boy open! Grab some suction cup action at the bottom edge here, and give it a mighty pull. Once you got yourself a gap, slam in that opening pick and start prying that back cover off. You’re doin’ great, just a few more moves and you’ll have this device naked in all its glory. So keep hangin’ in there! If you’re feeling a little nervous, just remember, if you need help, you can always schedule a repair to chill with a pro, y’know what I mean?
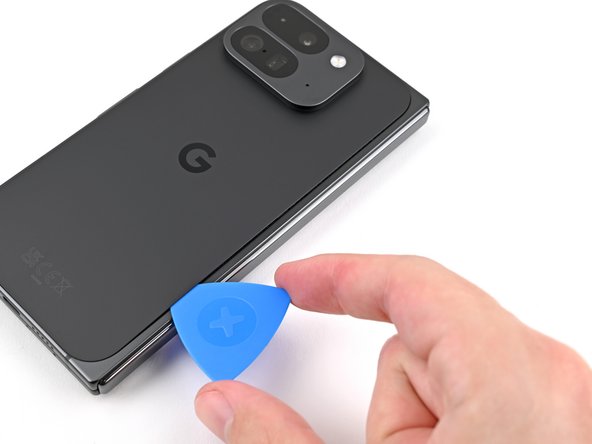
Step 3

As you tackle the next two steps, remember to keep your opening pick no deeper than 3 mm. We want to keep those metal springs around the frame safe and sound!
If you want, you can measure your opening pick at 3mm. It can make things easier to visualize!
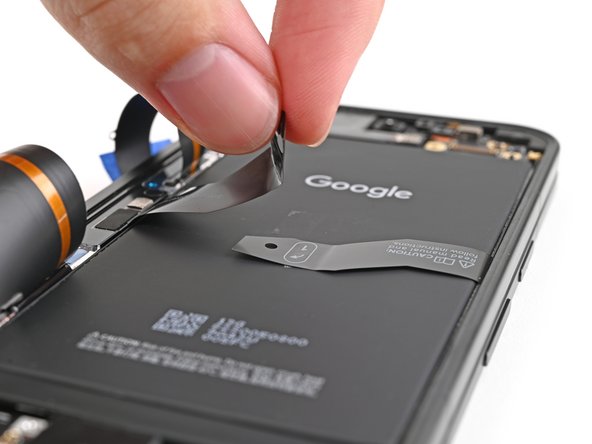
– Let’s kick things off by carefully lifting the suction handle off the back cover. It’s like unwrapping a present—just be gentle!
– Now grab your trusty opening pick and slide it around the bottom left corner, then up the left edge of the back cover. This will help you break free the adhesive hiding in there. You’re doing great!
Tools Used

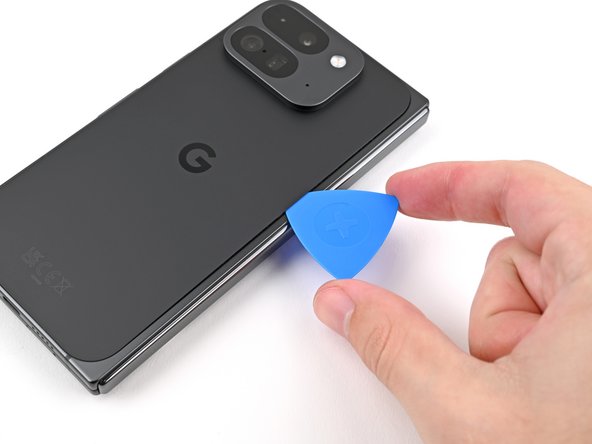
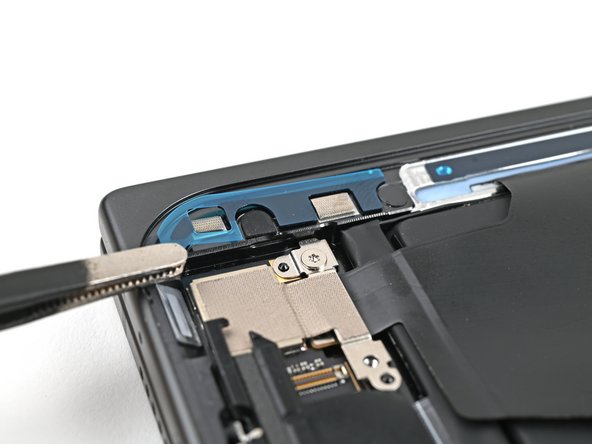
Step 4

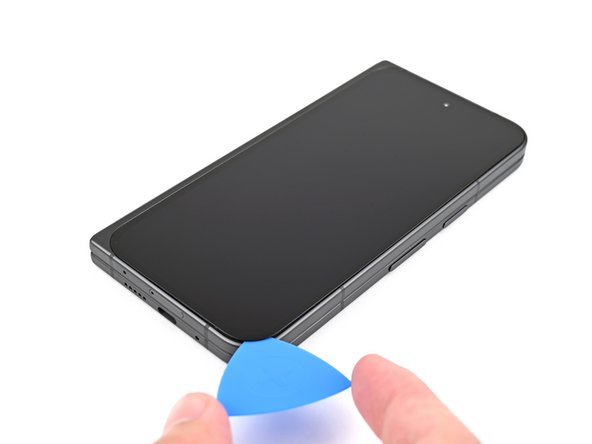
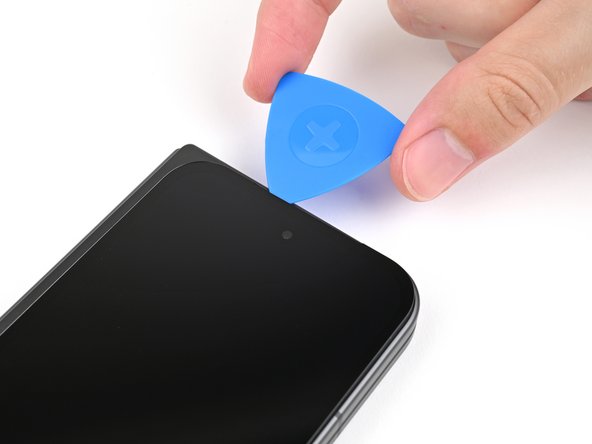
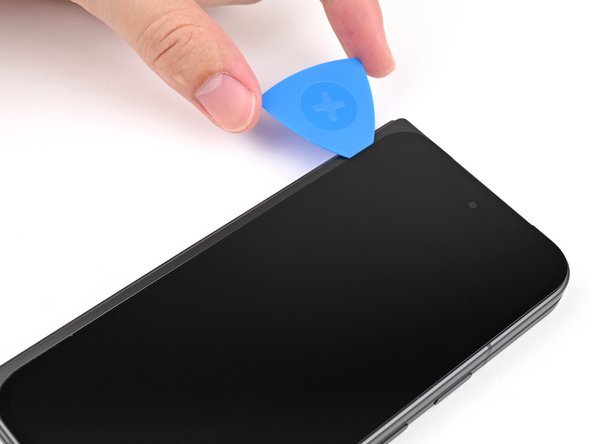
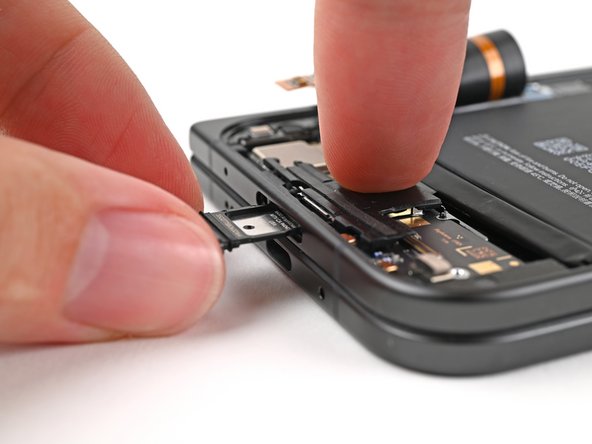
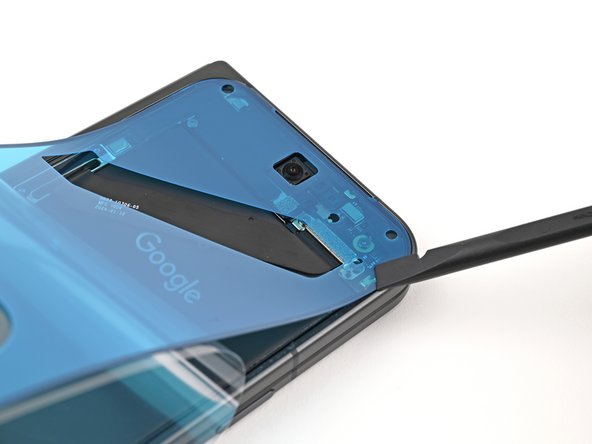
– Keep sliding that trusty pick down around the top left corner and glide it across the top edge of the back cover like you’re painting a masterpiece!
Step 5

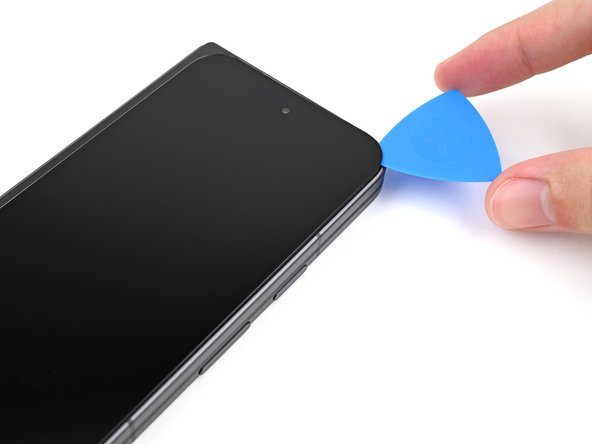
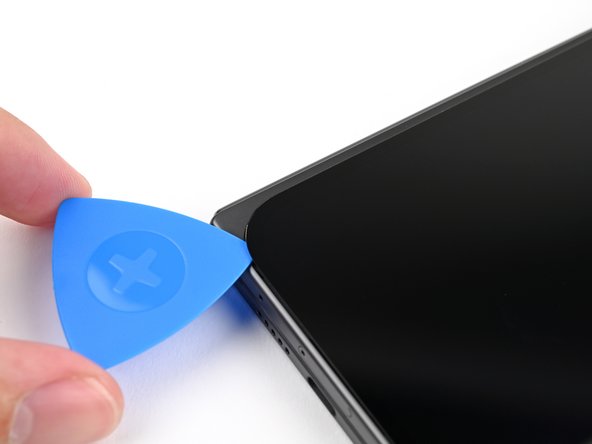
The adhesive along the right edge of the back cover has a bit more personality than the rest. Make sure to slide your opening pick in at least 4 mm to break that stubborn bond!
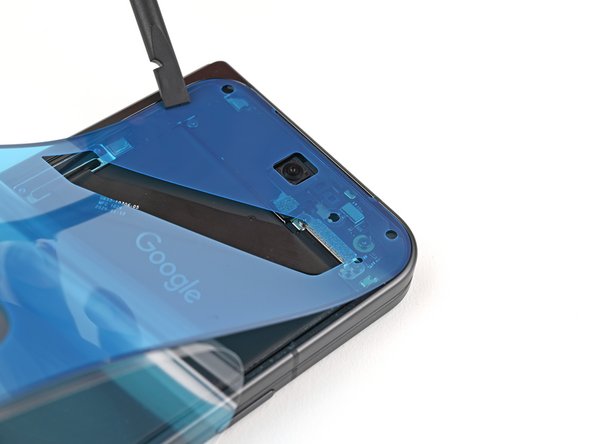
– Gently glide your pick down the right edge and around the bottom right corner to break free the rest of that sticky adhesive. You’re almost there!
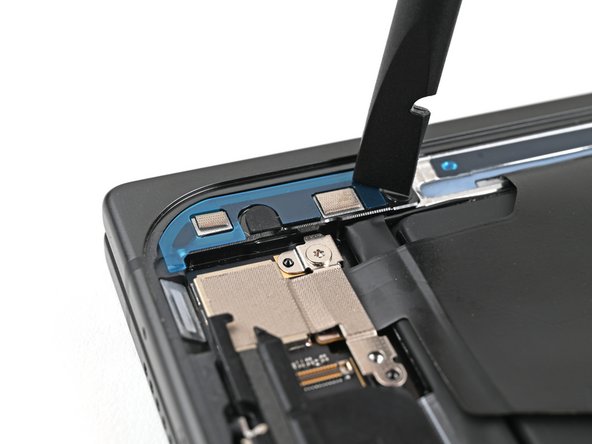
Step 6
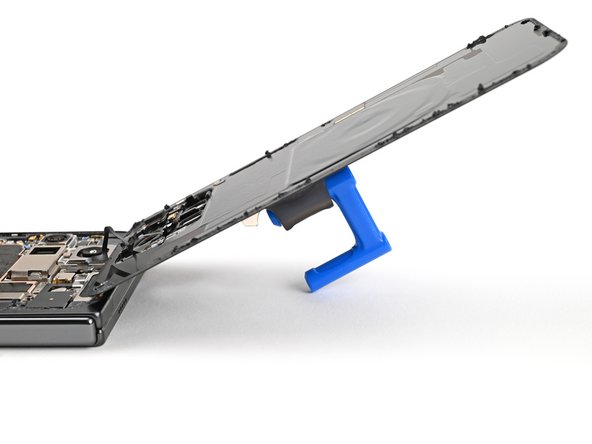

Hold your horses – don’t take off that back cover just yet! It’s still hanging on by a cable, so let’s keep it cozy for now.
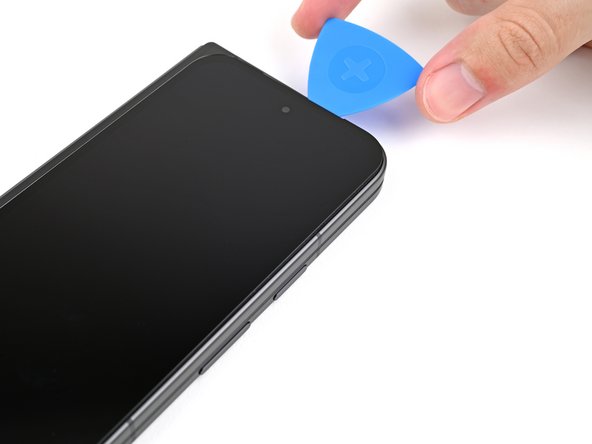
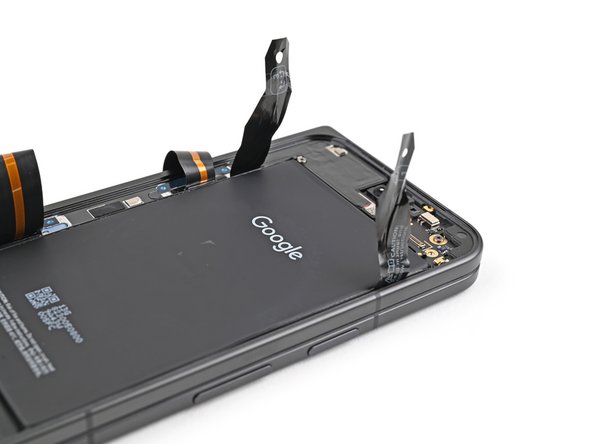
Alright, we’ve come to a point where the back cover is finally liberated from the frame! If you still feel some stubbornness around the edges, grab an opening pick and gently work it to peel away any remaining adhesive. You’ve got this!
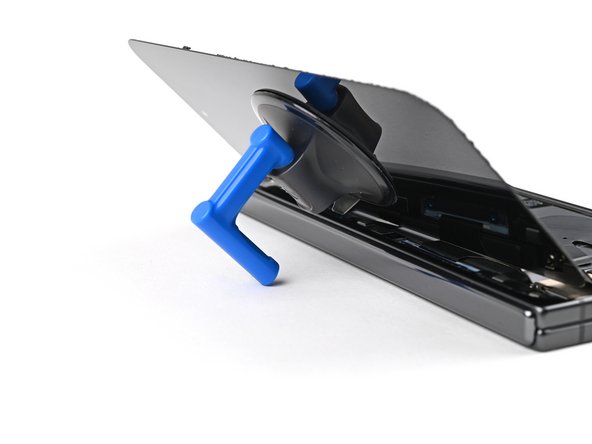
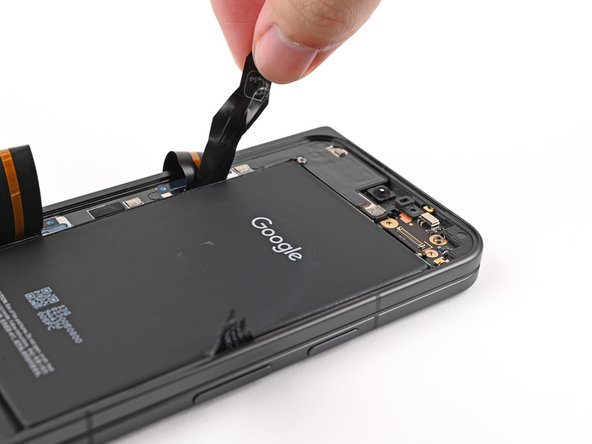
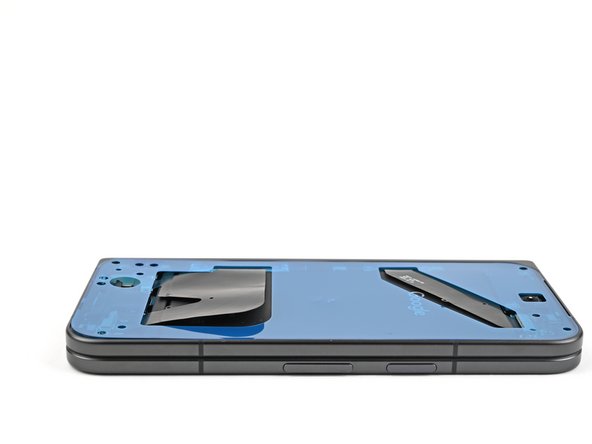
– Gently lift the lower edge of the back cover and swing it over the top—we’re just giving it a little stretch!
– Now, give that back cover some support with your suction handle or a sturdy, clean item, but be kind to that cable and don’t strain it!
Tools Used
Step 7

As you dive into this repair adventure, keep a close eye on each screw and remember to put it back in its rightful place when you’re done!
The Pixel 9 Pro Fold may come with Torx Plus screws, but don’t fret! Standard Torx bits can do the trick too. Just grab the same size or one size larger (T3 or T4 Torx bits work well with those 3IP Torx Plus screws) and make sure to apply steady, downward pressure to keep things from stripping.
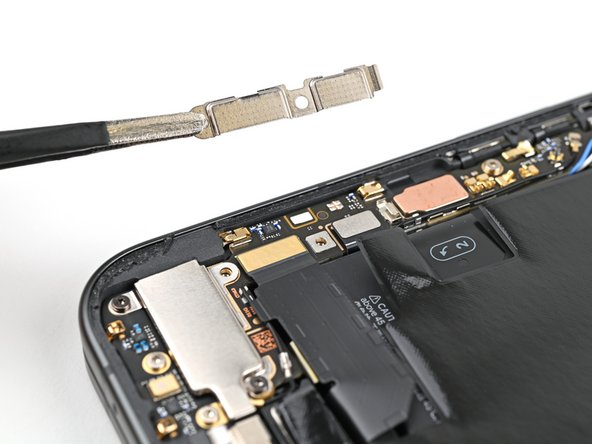
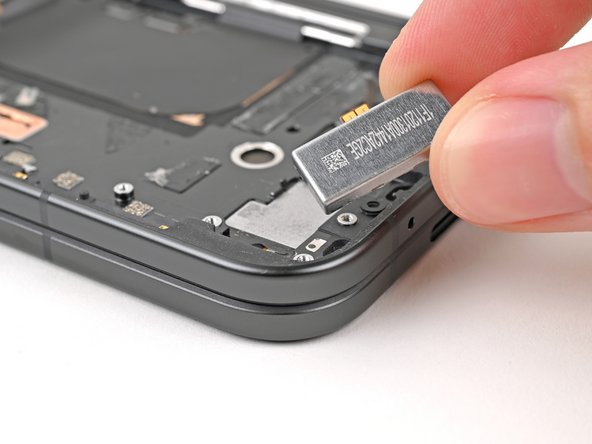
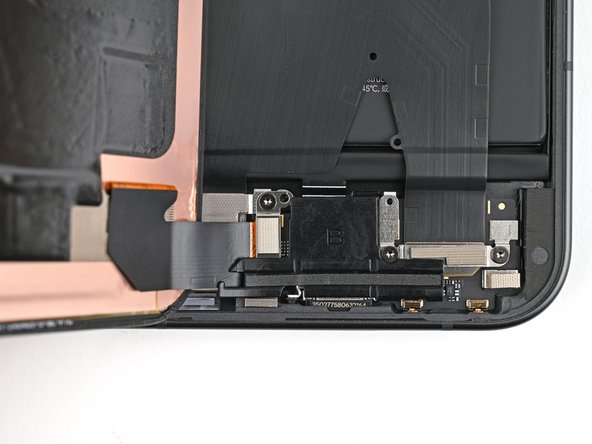
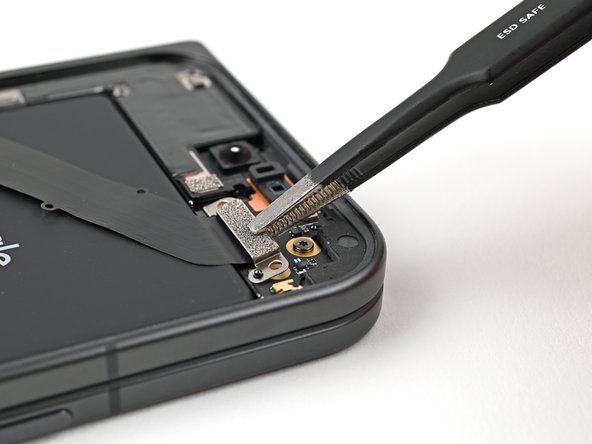
– Grab your trusty Torx Plus 3IP driver and let’s tackle that 3.0 mm-long screw holding the top bracket in place. You’ve got this!
Step 8

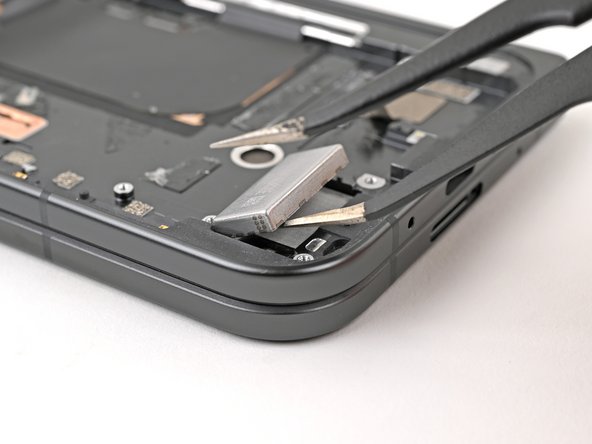
– Grab those tweezers or just use your fingers to gently tug the top bracket upwards, freeing it from its snug little clip.
– Carefully take out the top bracket and set it aside.
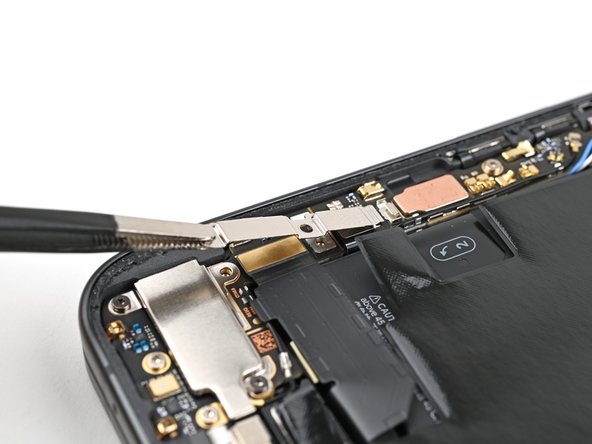
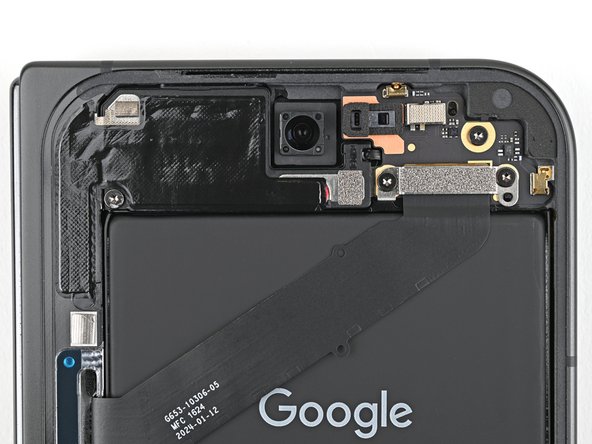
Step 9

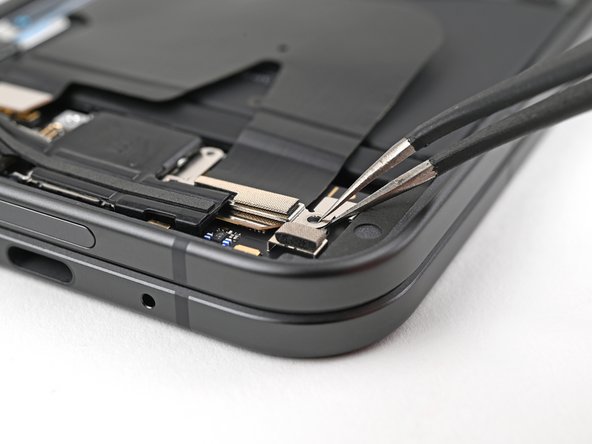
Keep that spudger strictly in its lane! If you stray too far, you might accidentally knock off some tiny surface-mounted components. Let’s avoid that, shall we?
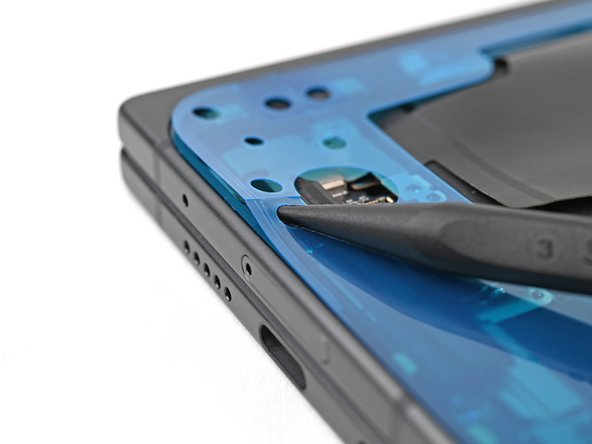
– Gently slide your spudger under the edge of the back cover cable connector—nice and easy does it!
– Carefully lift and pop that back cover cable free. You’ve got this!
Tools Used

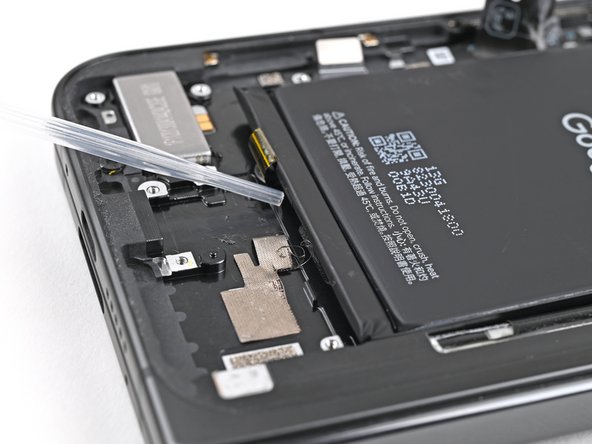
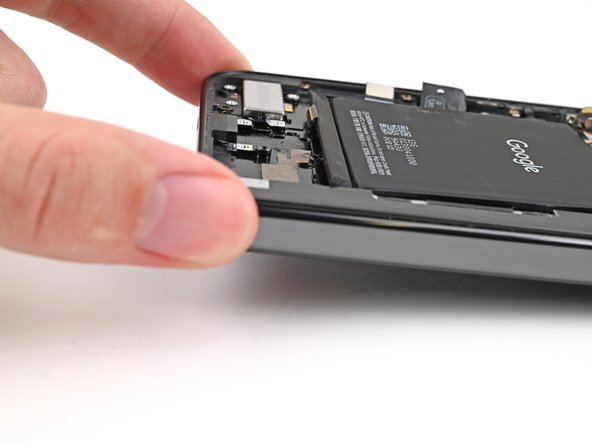
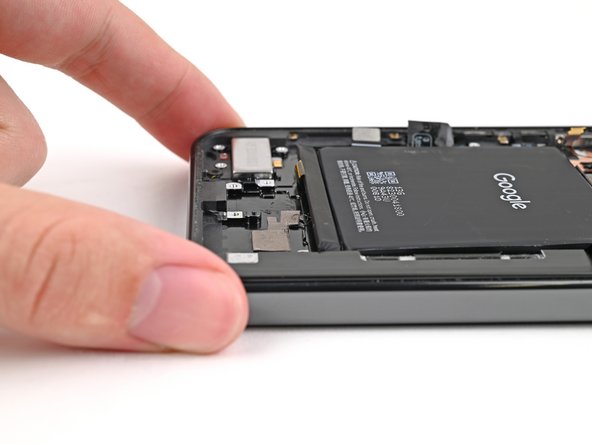
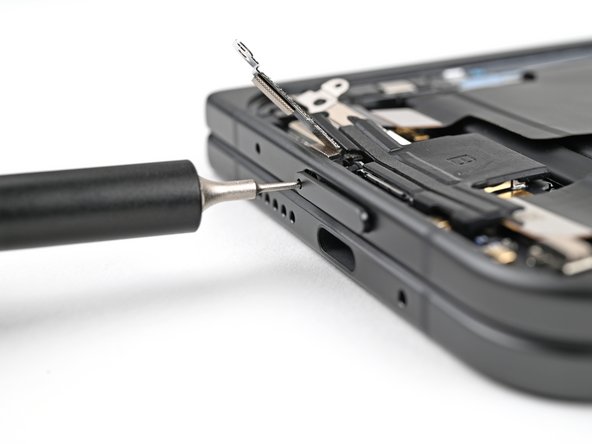
Step 10

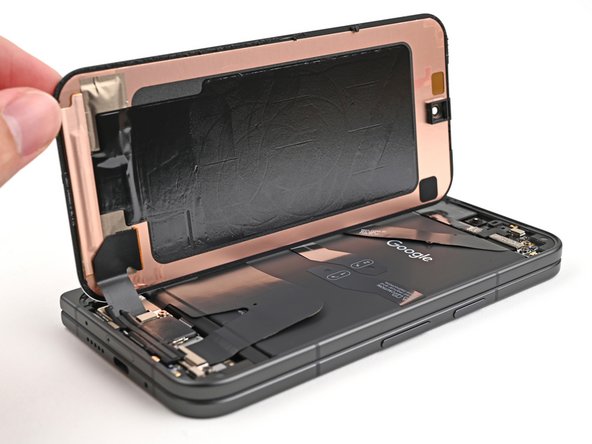
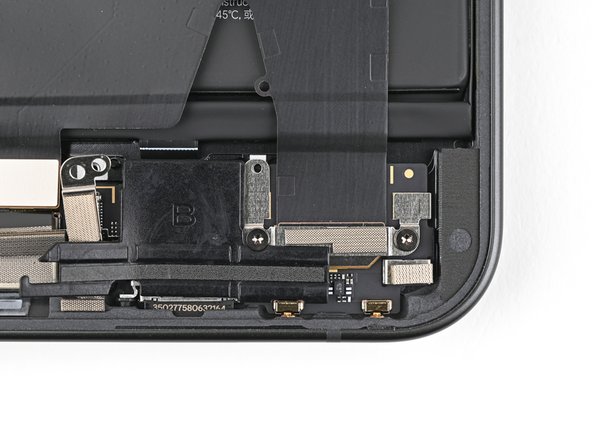
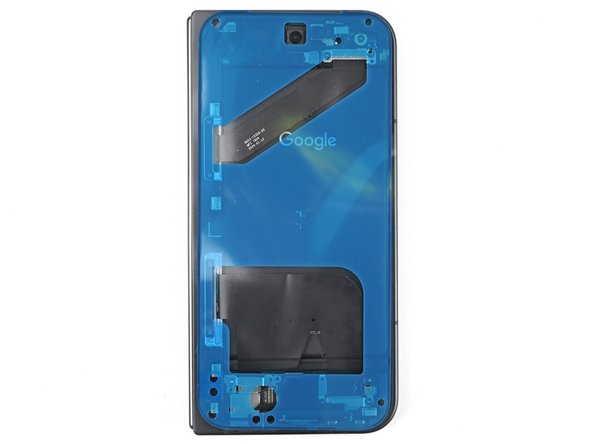
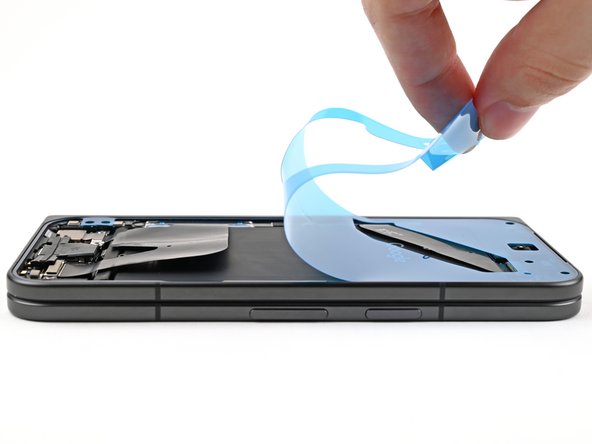
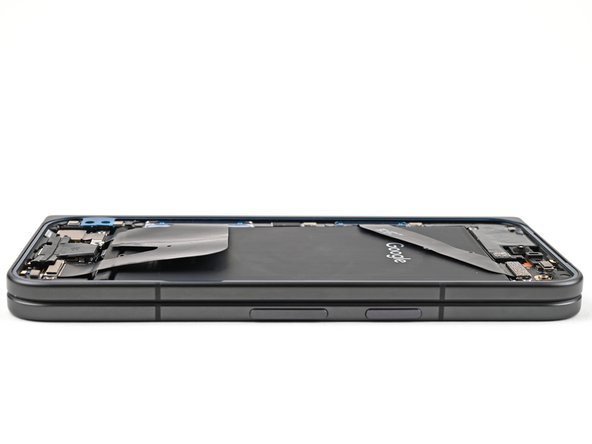
– Time to get that back cover off! Carefully lift it away from the frame and give it a little wiggle until it comes free. You got this!
Step 11

– Grab your trusty Torx Plus 3IP driver and gently unscrew those two screws, each a delightful 3.0 mm long, keeping the base battery bracket snug in place. Let’s get that bracket off and make some magic happen!

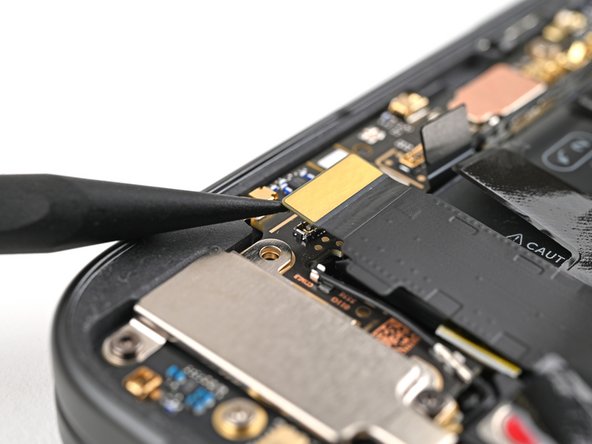
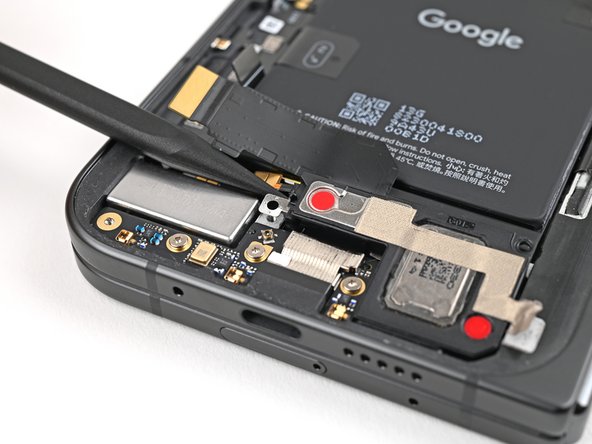
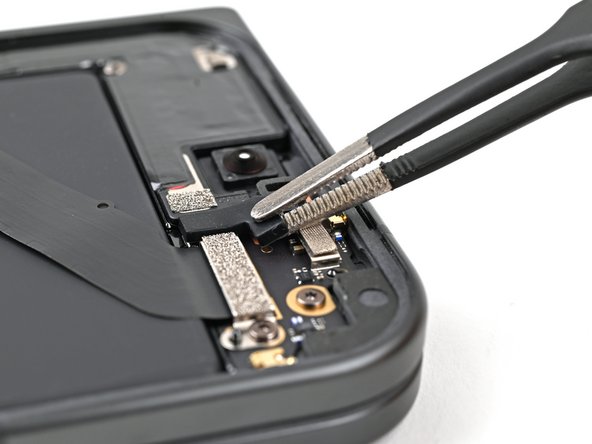
Step 13


Keep your spudger in the designated areas only—going rogue might dislodge those tiny surface-mounted components!
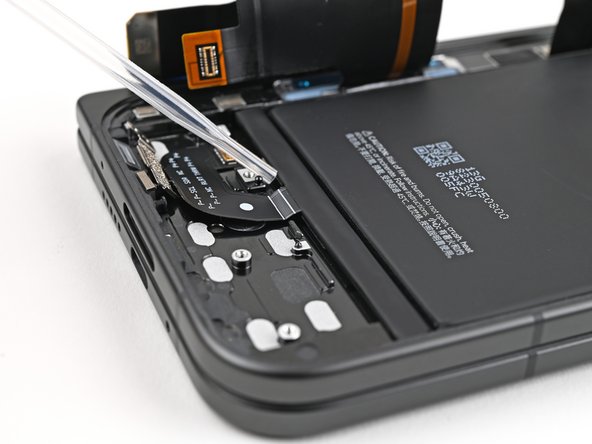
– Slide the tip of your trusty spudger under the bottom left corner of the base battery press connector, just beside that shiny gold marker.
– Gently pry it up and disconnect the base battery with care.
Tools Used
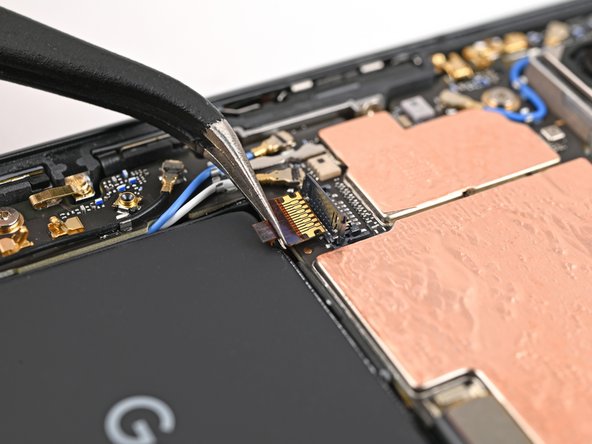
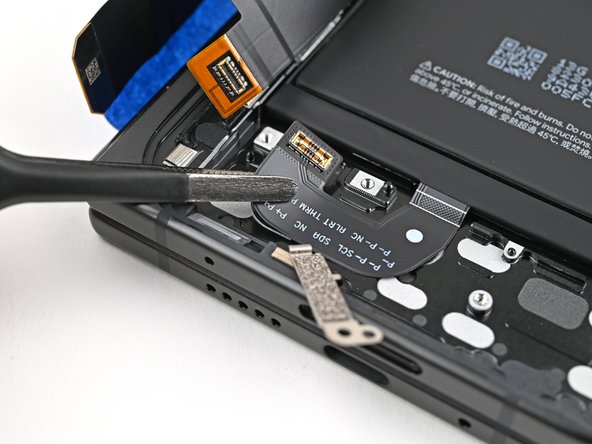
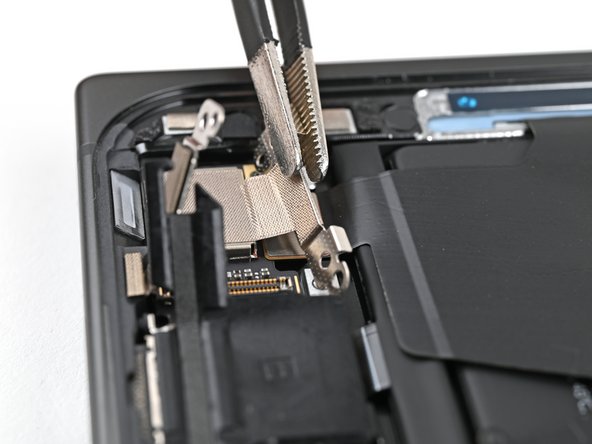
Step 14

– Grab your trusty spudger and gently lift to disconnect the USB-C port board cable press connector. Easy peasy! If you hit a snag, you can always schedule a repair.
Tools Used
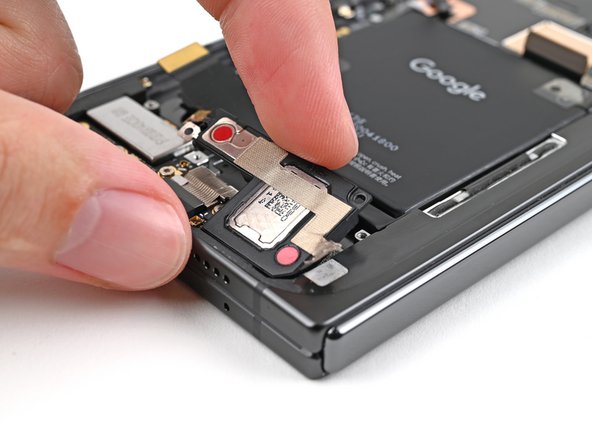
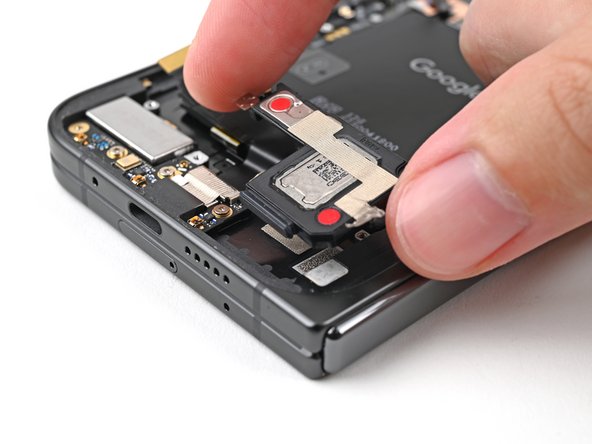
Step 15

– Grab your Torx Plus 3IP driver and unscrew the two 3.0 mm-long screws holding the vibrator bracket in place. Easy peasy!

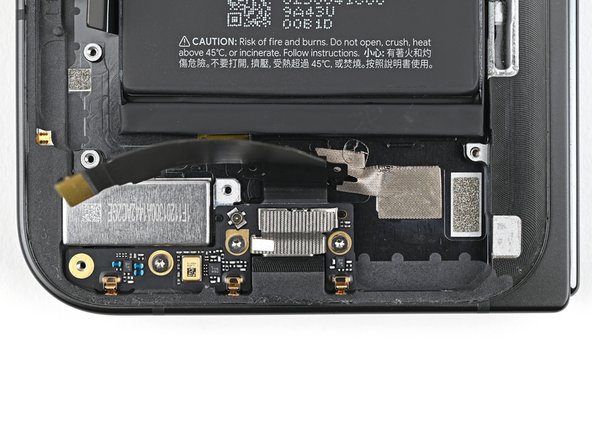
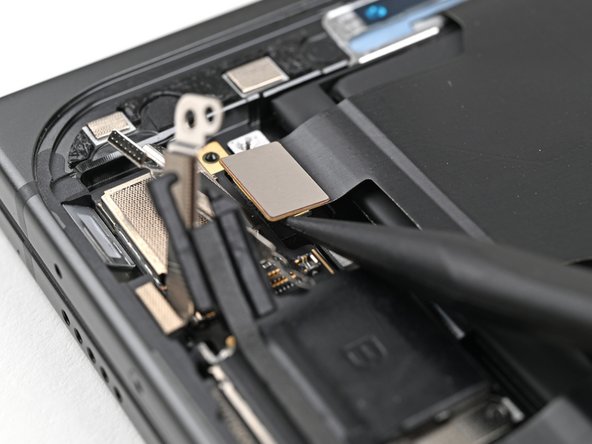
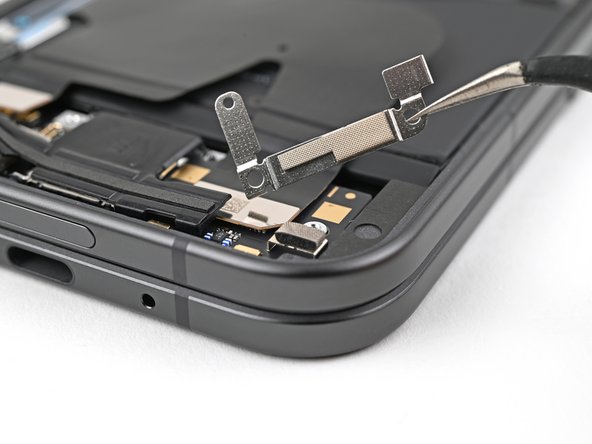
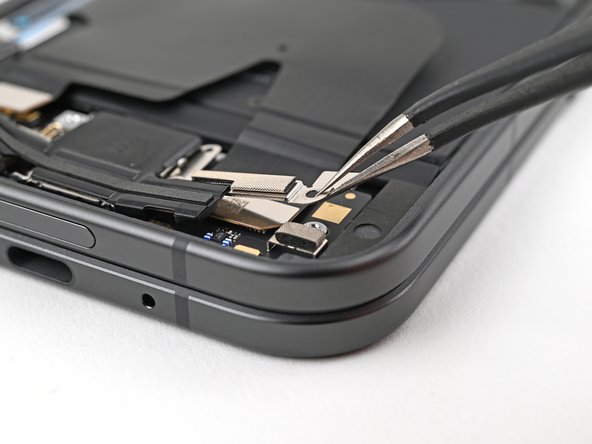
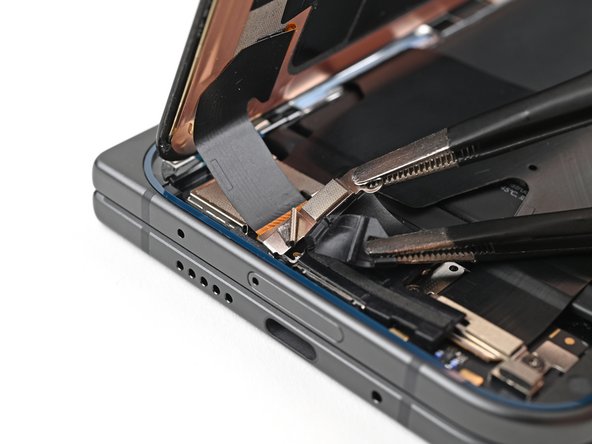
Step 17

– Gently slide one arm of a pair of angled tweezers under the metal neck of the black antenna cable’s connector head on the USB‑C board.
– Carefully lift straight up to disconnect the cable.
Tools Used

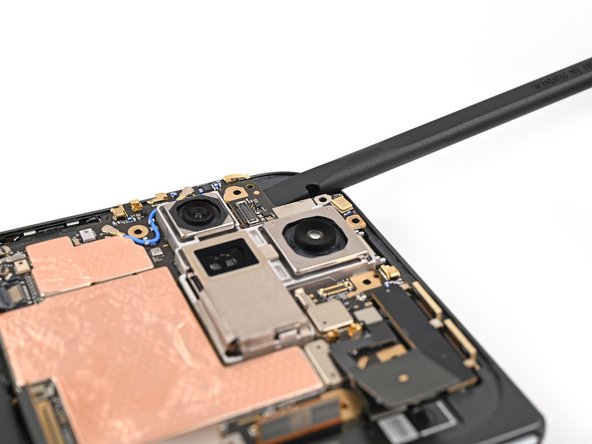
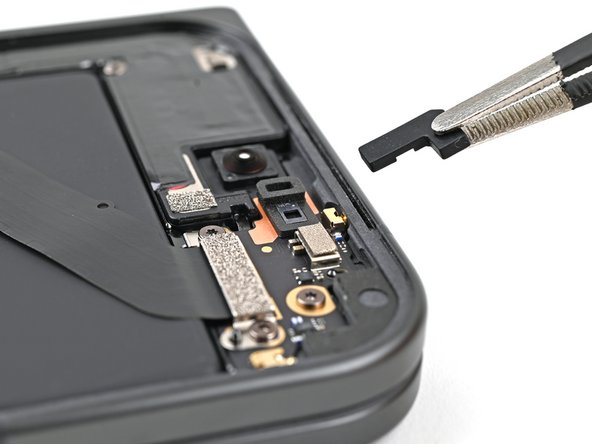
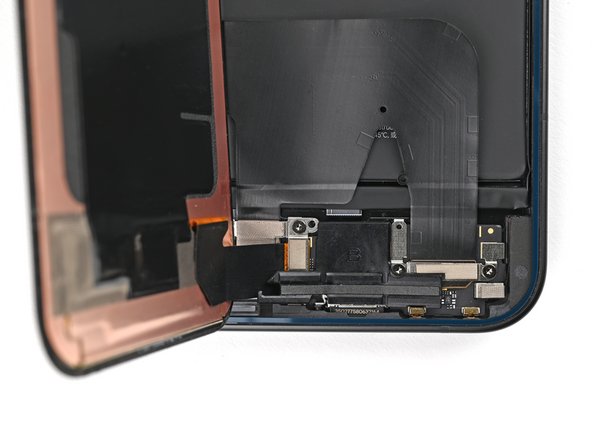
Step 18

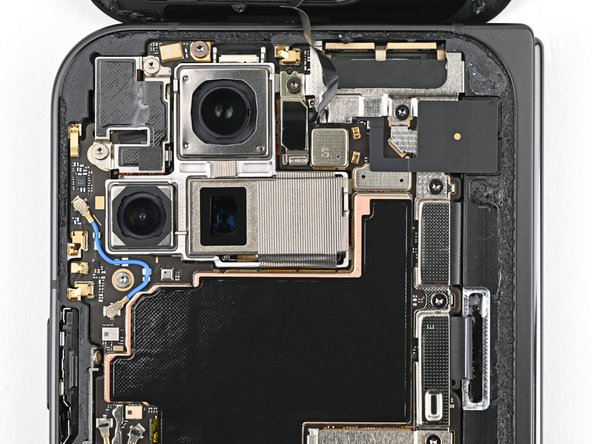
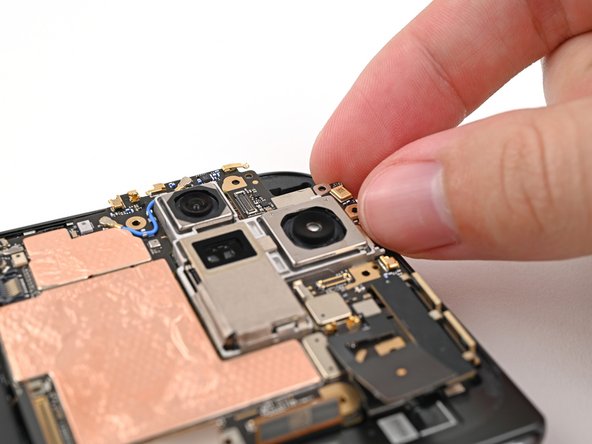
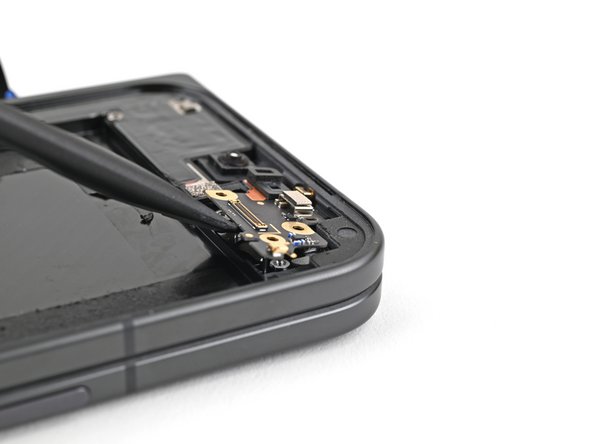
– Grab your trusty Torx Plus 3IP driver and let’s get to work! Carefully unscrew those two 2.6 mm-long screws that are holding the inner front camera bracket in place. You’ve got this!
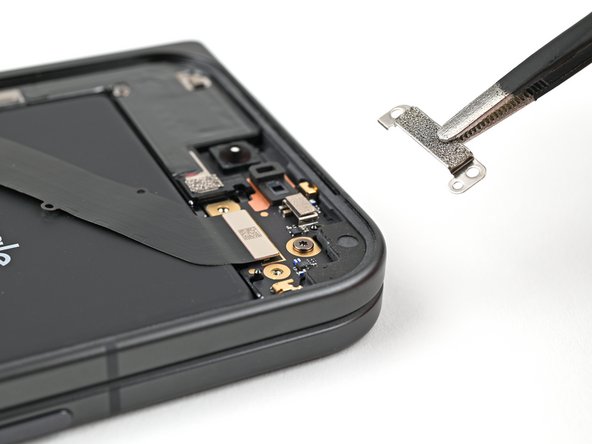
Step 19

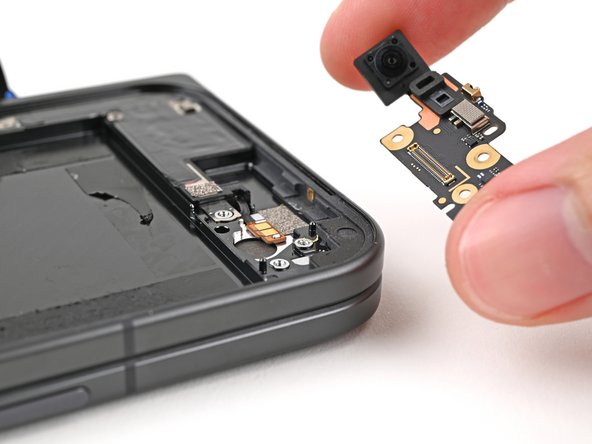
– Grab your tweezers or use those nimble fingers to gently lift the inner front camera bracket up and slide it toward the left edge of the phone to pop it free. Easy does it!
– Now, just remove the inner front camera bracket. You’re doing great!
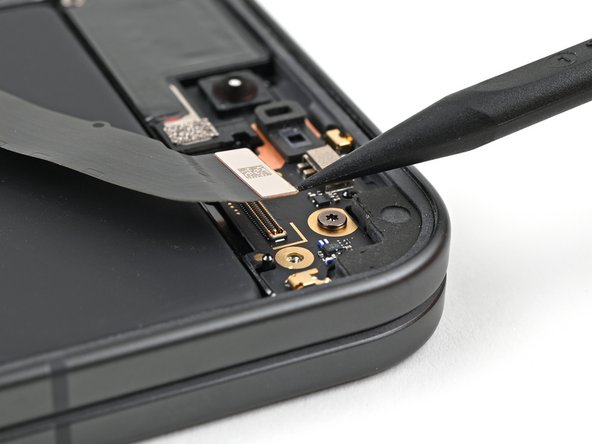
Step 20

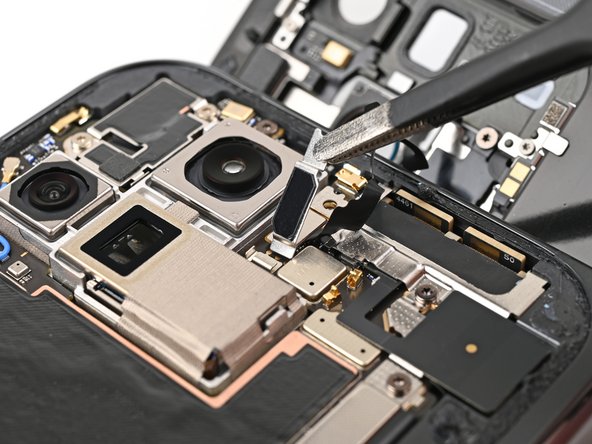
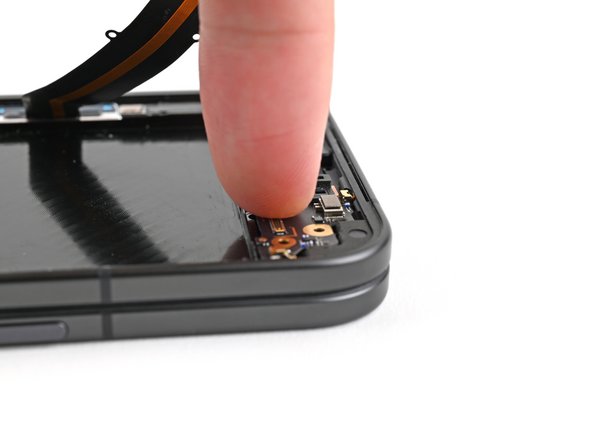
– Alrighty! Time to go on a tiny treasure hunt and disconnect that inner front camera press connector! Use this spudger, your new best friend, to delicately pry it up and free it from its home. Going on an adventure always feels so exciting, right? If you need help, you can always schedule a repair. 😉
Tools Used
Step 21


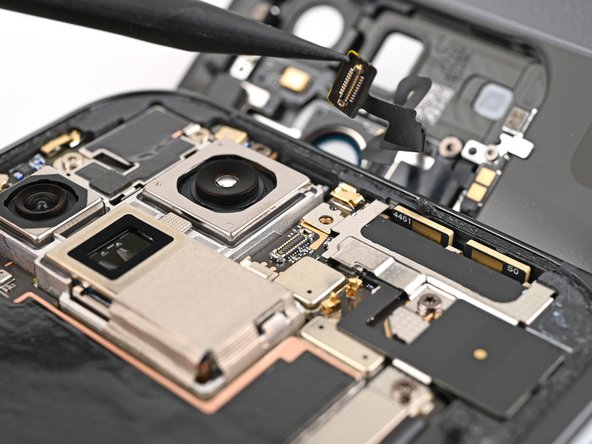
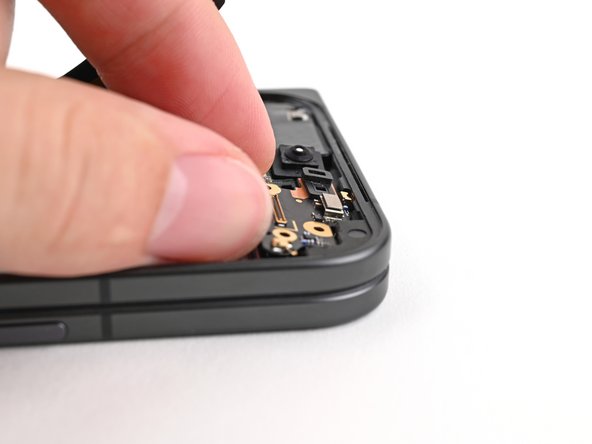
– Now, it’s time to gently nudge the inner front camera loose. Use the tip of your spudger to pry it up, freeing the adhesive holding it to the frame.
– Once you’ve gently nudged it free, you can remove the inner front camera.
Tools Used
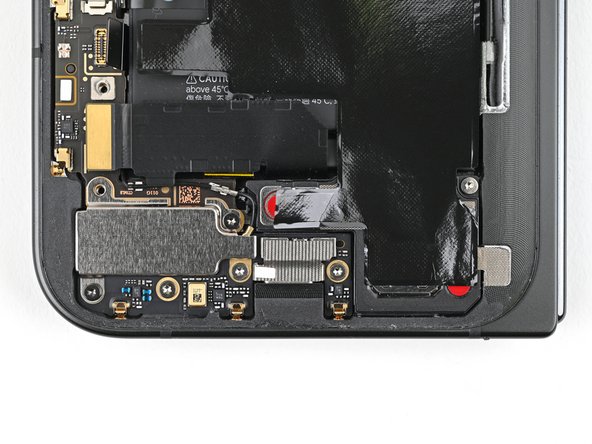
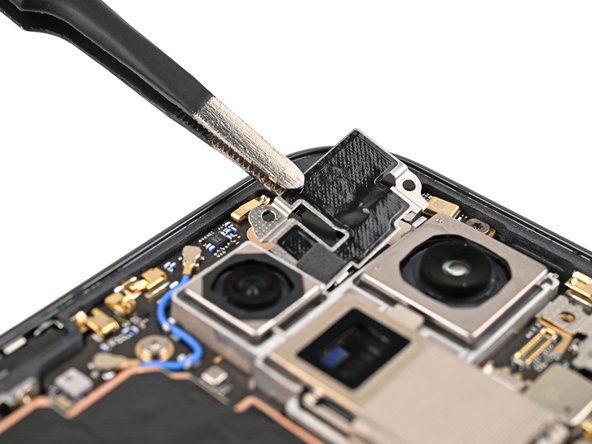
Step 22

– Gently slide the flat end of a spudger under the ultra wideband antenna to break free the adhesive foam that’s keeping it snug against the frame.
– With a little finesse, use tweezers or your fingers to lift the antenna off the frame, ensuring any leftover adhesive says goodbye.
Tools Used
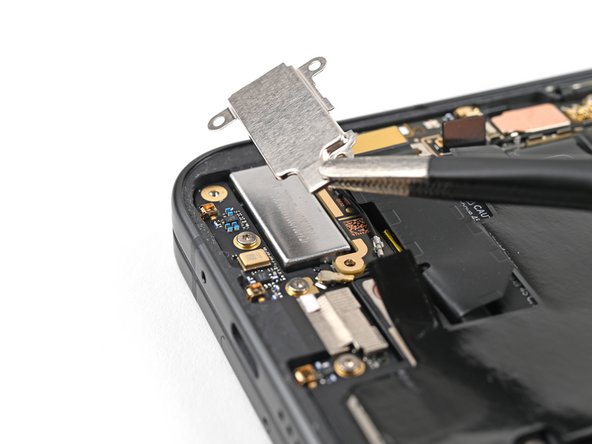
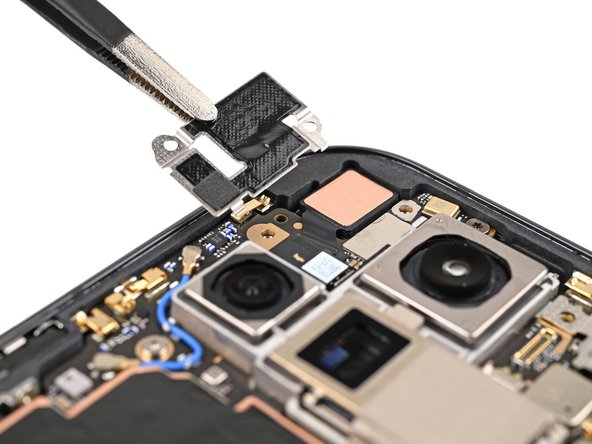
Step 23
– Get ready to unplug that ultra wideband bracket! Whoa, awe-yeah! You just need a Torx Plus 3IP driver. Trust us, it’s bigger than a breadbox. Now, it’s time to show off your driver skills and remove the two 3.0 mm-long screws. You’re on a roll! If you need help, you can always schedule a repair
Step 24

– While keeping the ultra wideband antenna out of the way, gently tug the bracket down towards the bottom of the phone to pop those clips loose.
– Now, go ahead and take out the ultra wideband bracket.
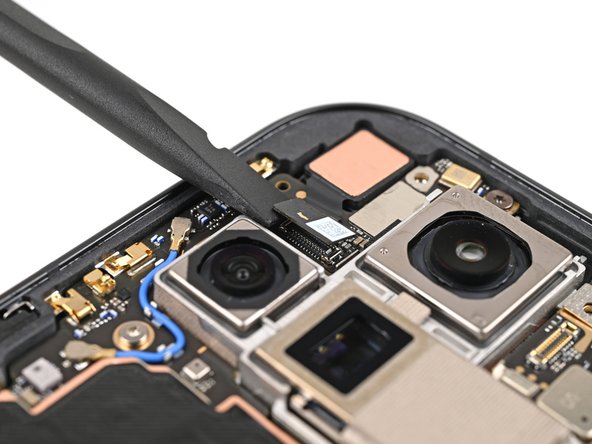
Step 25

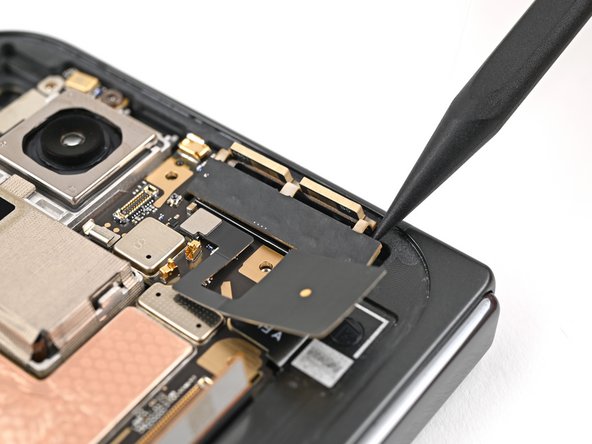
– Grab your Torx Plus 3IP driver and unscrew that 3.0 mm gem holding the interconnect cable bracket. You got this!
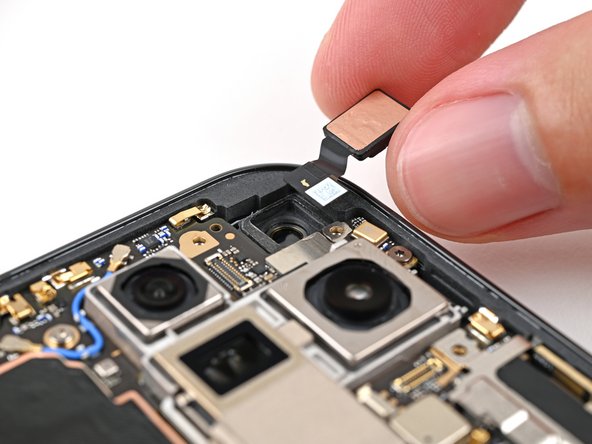
Step 26

– Grab your tweezers or use your fingers to gently tug the bracket towards the right edge of the phone—this’ll pop that clip right off!
– Now, go ahead and remove the bottom interconnect cable bracket. Easy peasy!
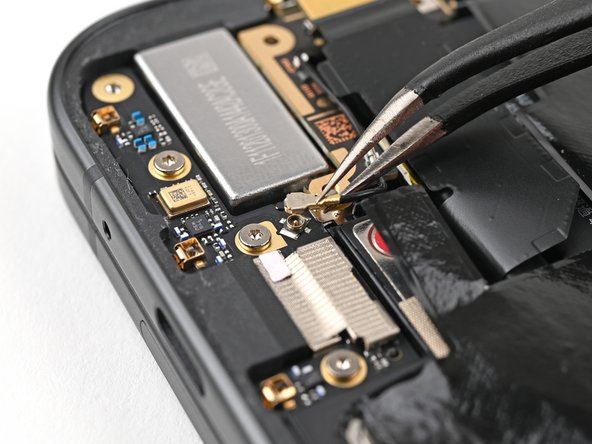
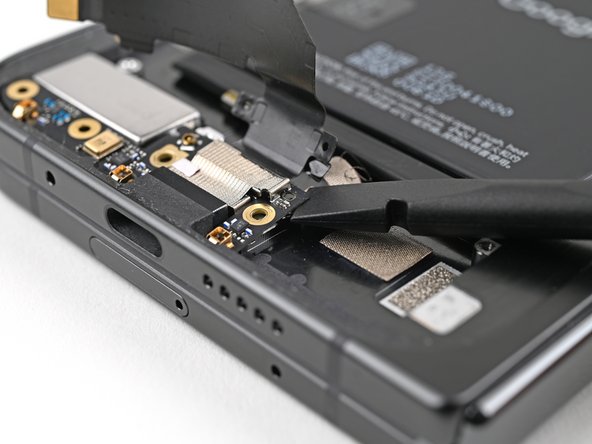
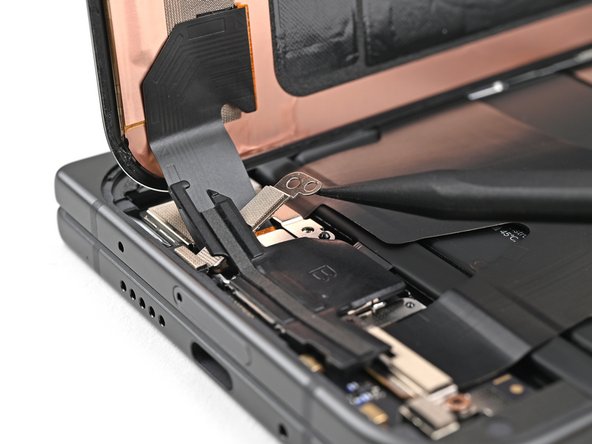
Step 27

– Let’s get this party started! First things first, grab your trusty Torx Plus 3IP driver and give that 3.0 mm‑long screw holding down the inner display cable bracket a little nudge. It’s time for that cable to come on out!
Step 28

Step 29

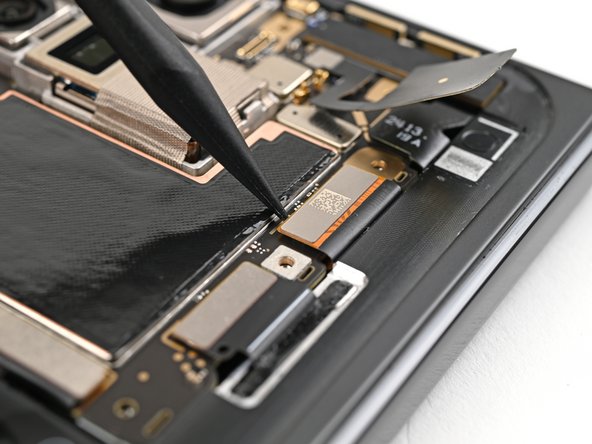
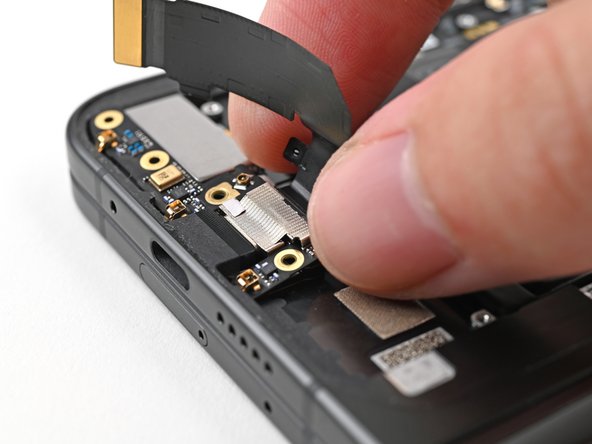
Keep your spudger in its happy zone! Straying too far might send some of those delicate surface-mounted components on a little vacation. Let’s avoid that, shall we?
– Let’s get this inner display cable unplugged! Grab your trusty spudger and gently slide the tip under the bottom left corner of the inner display press connector. You’ll see a gold marker on the logic board – that’s your target zone!
– Now, carefully pry up and disconnect the inner display cable. You’re doing great!
Tools Used
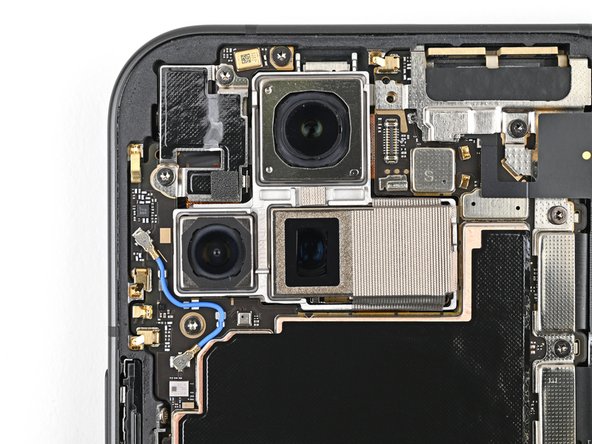
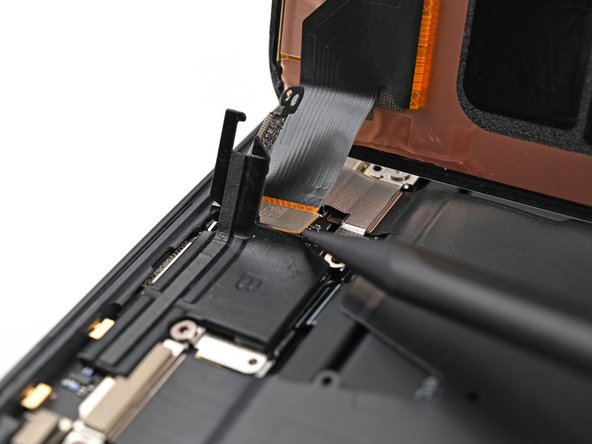
Step 30
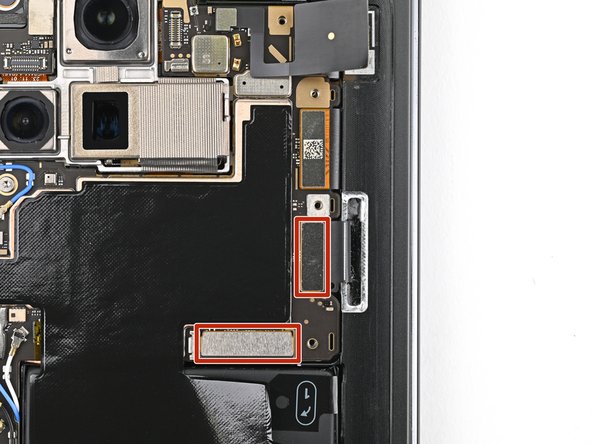
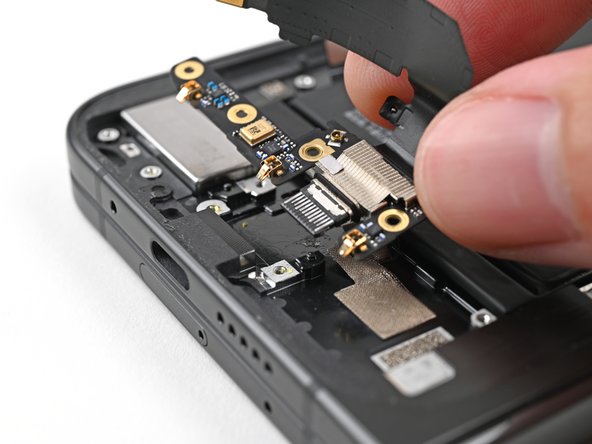
– Okay, now just repeat that last step to disconnect those interconnect cables at the top and bottom. You know the drill – just pry next to the gold markers. You’ve got this!
Step 31


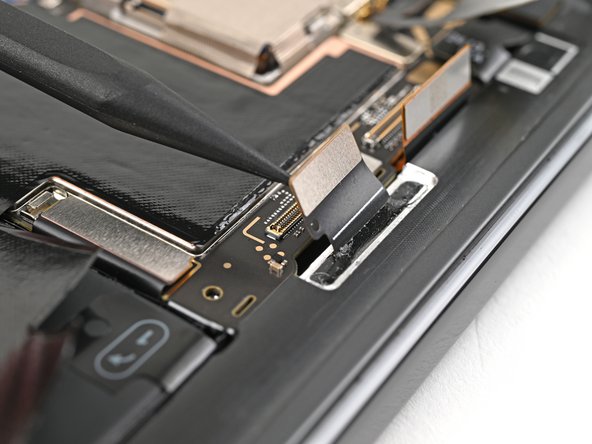
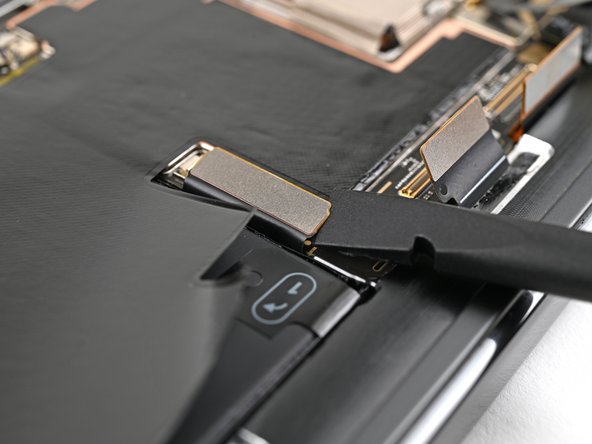
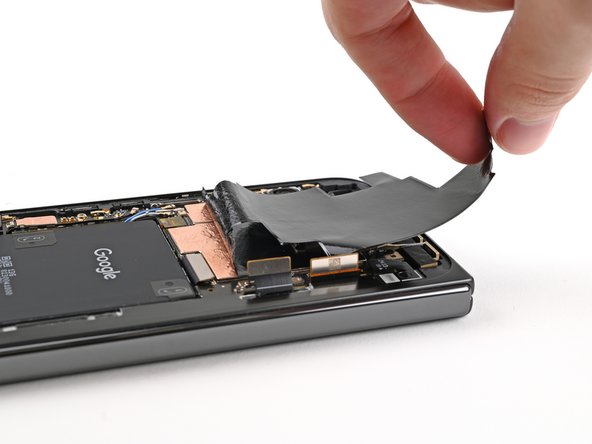
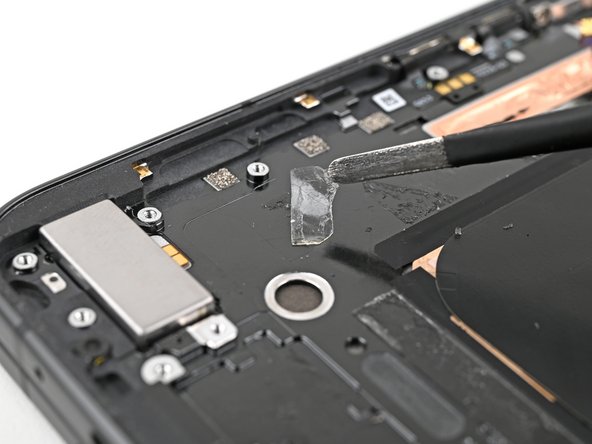
– Let’s peel that graphite sheet right off the bottom speaker like a sticker, so we can break it free from the sticky adhesive holding it in place. Yay for peeling!
Step 32
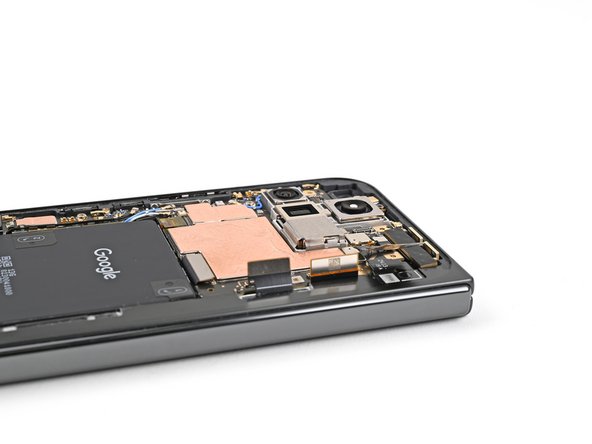

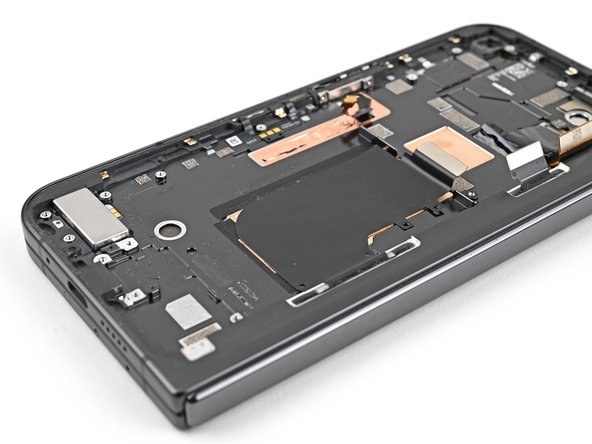
– Keep peeling that graphite sheet away from the logic board to free up the last bits of adhesive. You’re doing great!
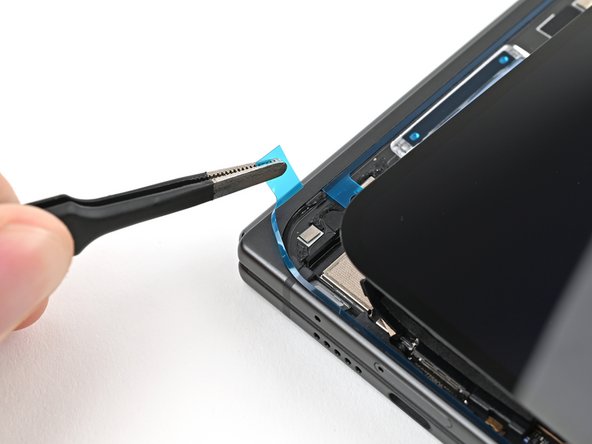
Step 33

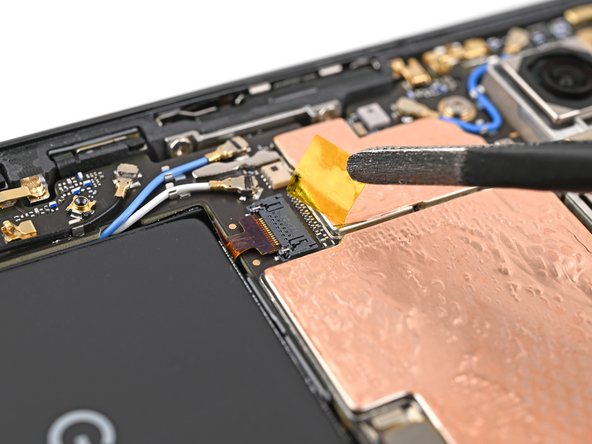
– Grab your trusty tweezers, or just use your fingers, to gently lift off that yellow tape from the side button cable ZIF connector. It’s like unwrapping a present!
– Once you’ve got that tape off, set it aside for now. You’ll want it later when you’re putting everything back together, so don’t lose it!
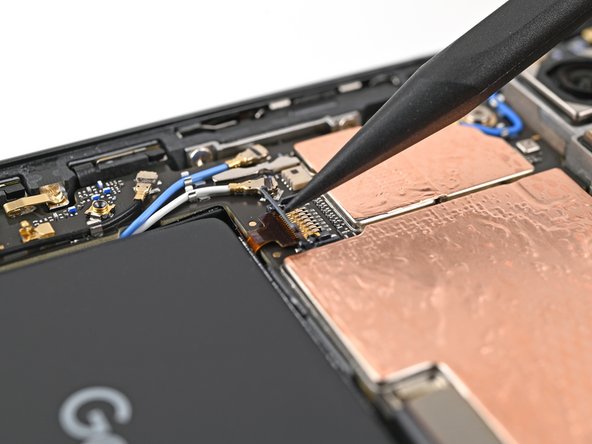

Step 35

Hey there! Be super careful not to poke the battery—it might just spill some nasty stuff or even go up in flames. Let’s keep it safe and sound!
– Time to give that side button cable a little nudge! Grab your angled tweezers and gently pull it straight out of its slot. Easy peasy, right?
Tools Used
Step 36

A fun little thermal pad lightly sticks the 5G mmWave antenna to the frame.
– Gently use the tip of a spudger to lift the 5G mmWave antenna away from the frame, making sure to separate it from the thermal pad with care.
Tools Used
Step 37

– Grab your trusty Torx Plus 3IP driver and let’s get those screws out! You’ll need to remove three little helpers that are keeping the logic board in place:
– One screw that’s 2.2 mm long, just waiting to be freed.
– Two screws that are a bit longer at 2.6 mm each, ready to join the party.
Step 38

You may encounter a bit of pushback as the logic board is snugly glued to the frame with thermal paste.
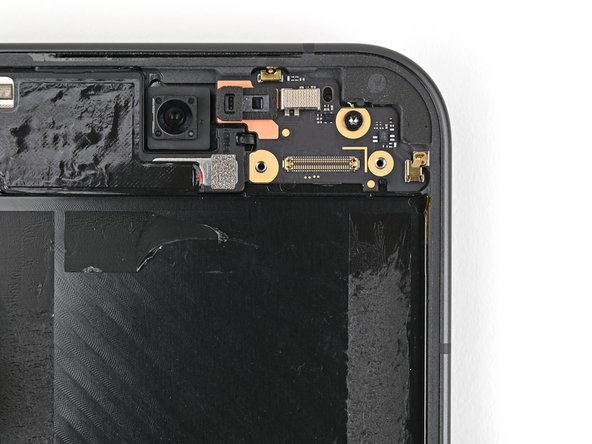
– Let’s gently lift that logic board! Slide the flat end of your trusty spudger under the top left corner, right next to where the inner front camera hangs out.
– Now, give that logic board a little nudge to get it moving. You’ll want to pry it up just enough so you can grab hold of the top edge with your fingers. You got this!
Tools Used
Step 39

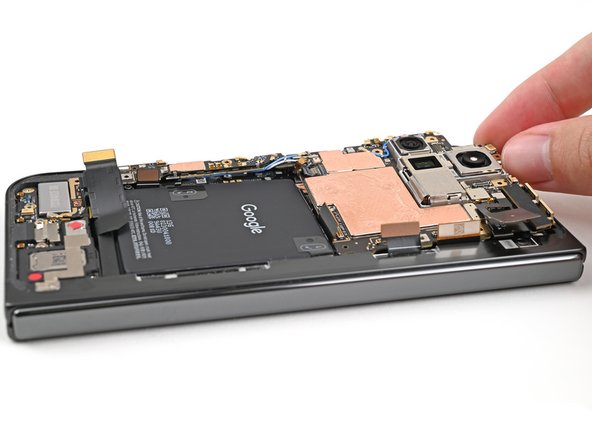
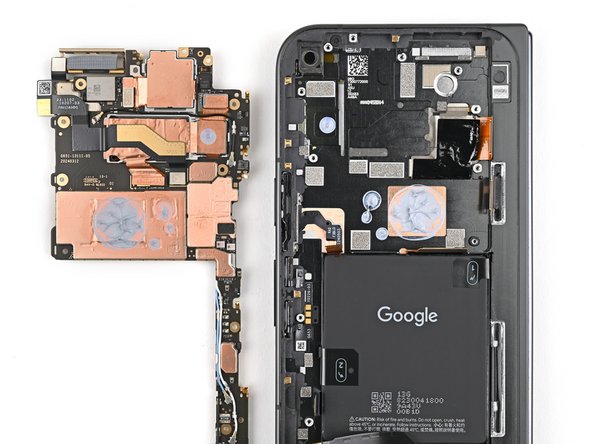
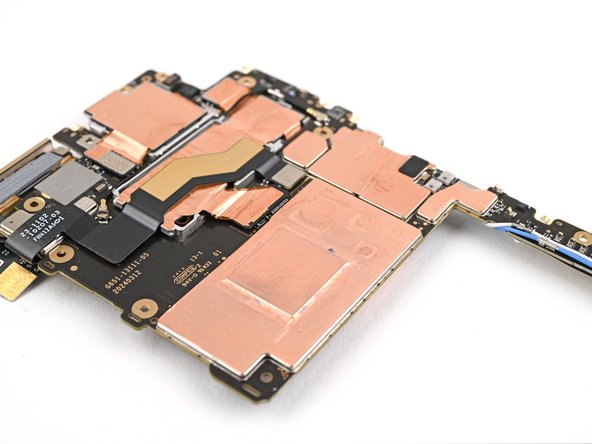
– Gently lift the logic board out of its cozy frame and give it a little freedom by removing it.
– Now, flip the logic board over and let it rest comfortably on a clean surface.
Step 40
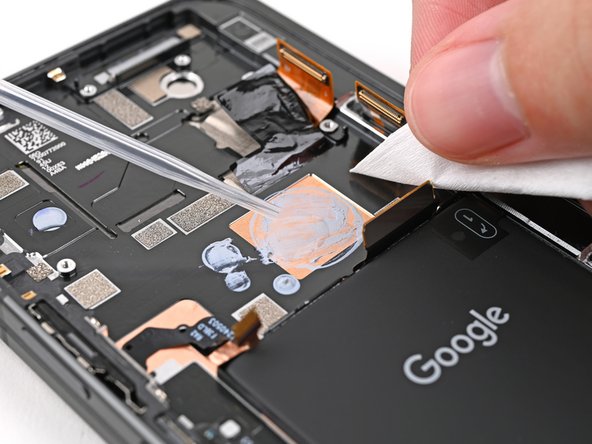

– Yippee! Time for some fun thermal paste sleuthing! Use the flat side of your trusty spudger to gently brush away those big chunks of old paste from the frame.
– Next, sprinkle a few drops of our favorite cleaning pal, isopropyl alcohol, on any lingering thermal paste residue.
– Finally, give the frame a swab-down with a coffee filter or lint-free cloth to make sure it’s all sparkly clean!
Tools Used
Step 41
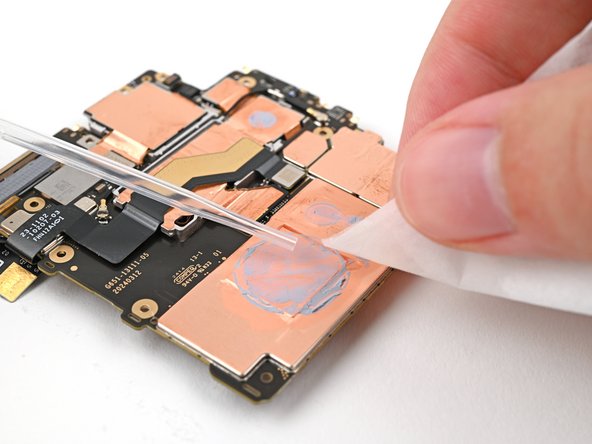

Be gentle with the logic board while giving it a clean! Pressing too hard can bend those little metal springs or leave smudges on the rear camera assembly. Keep it light and breezy!
– Give the underside of the logic board another round of that thermal paste cleanup.

Step 43

Heads up! Avoid puncturing the battery—it could leak nasty stuff or even spark a mini fireworks show. Safety first!
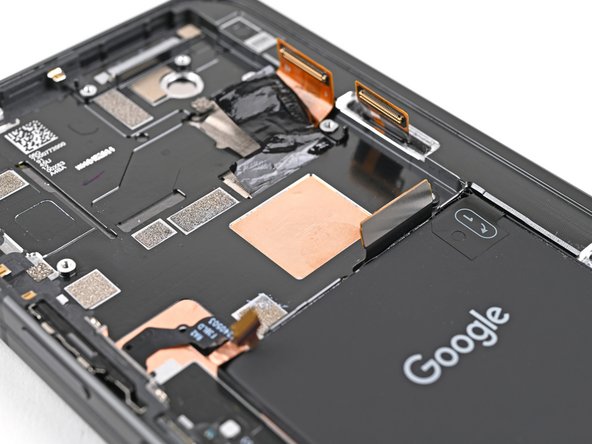
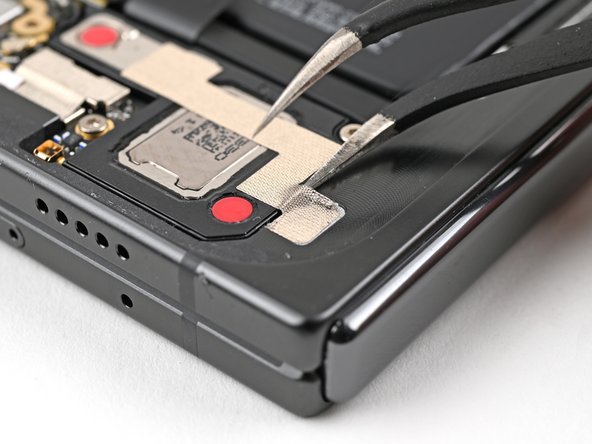
– Gently slide one arm of your trusty angled tweezers under the contact pad that’s cozying up to the loudspeaker.
– Carefully lift the contact pad to break free from the adhesive that’s keeping it snug against the frame.
Tools Used
Step 44

– Let’s give that speaker some freedom! Use a Torx Plus 3IP driver to give those 2.6 mm‑long screws holding the loudspeaker a little nudge and send them packing.

Step 46

– Gently use your fingers to lift the top edge of the loudspeaker and ease it out from its cozy little spot in the frame.
– Now, go ahead and remove the loudspeaker!
Step 47


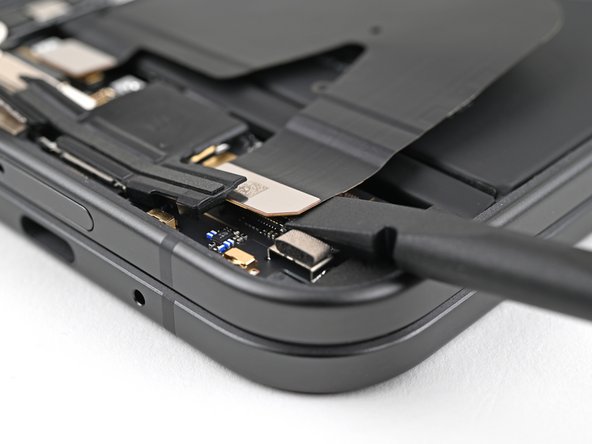
– Time to give that USB-C port cable a little wiggle room! Gently slide the tip of your opening pick under the cable to loosen the adhesive holding it to the frame.
Step 48

– Grab your trusty Torx Plus 3IP driver and get ready to rock! It’s time to unscrew those three 2.6 mm screws holding the USB-C port board in place. You’ve got this!
Step 49

– Gently wiggle a spudger into the top right corner of the USB-C port board and pop it up to release it from the frame. You’ve got this!
Tools Used
Step 50
– Gently wiggle and lift the USB-C port board out of its cozy spot in the frame—easy does it! If you need help, you can always schedule a repair.
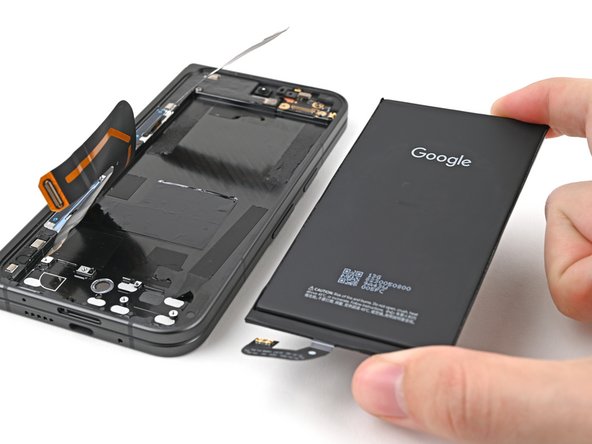
Step 51
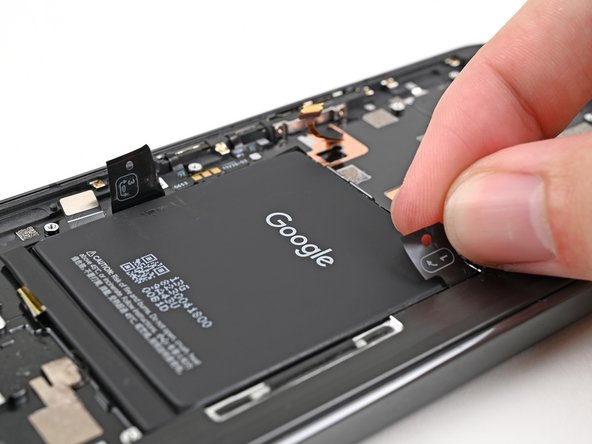
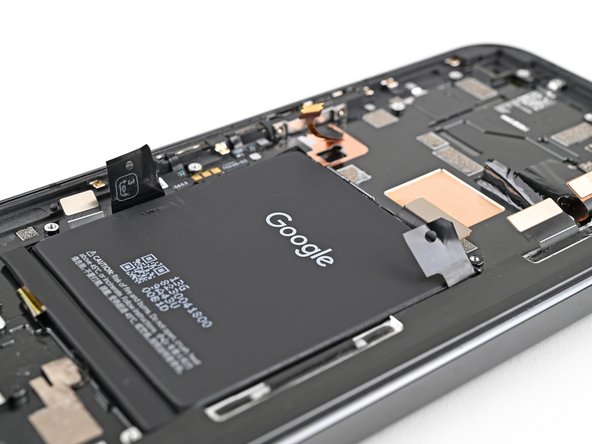

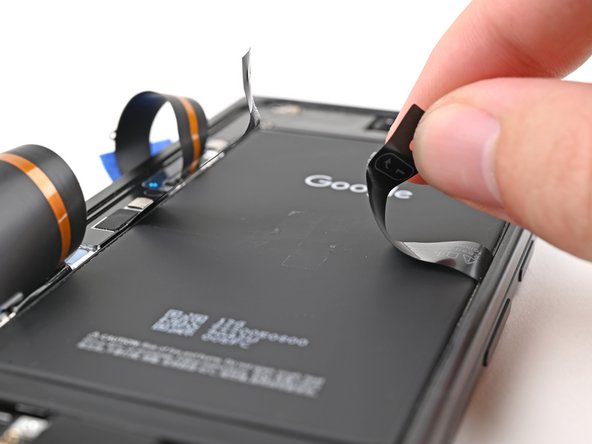
– Gently lift the two edges of the pull tab at the base of the battery with your fingers. You’ve got this!
Step 52

Keep the heat to a quick 30 seconds or less—your screen will thank you for it!
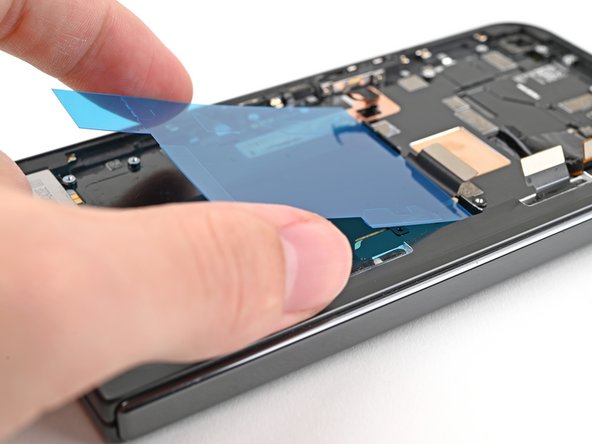
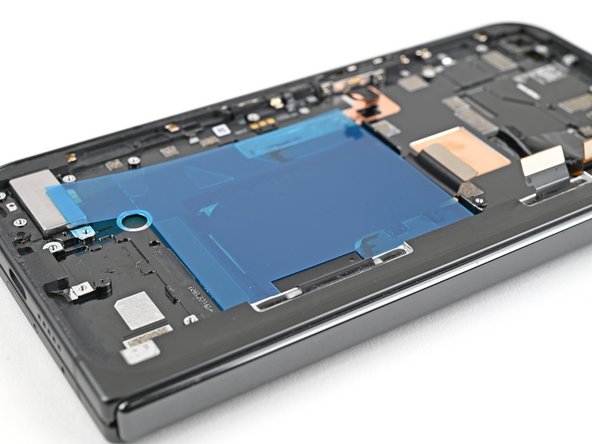
– Alright, let’s get this party started! Open up your phone and give that inner screen a little flip so we can get to work.
– Now, grab your trusty hair dryer (or heat gun if you’re feeling fancy) and give the section of the inner screen behind the battery a gentle warm-up. We’re talking barely too hot to touch – think warm hug, not fiery inferno.
Tools Used


Step 53

– First, let’s give your phone a little fold and flip it over so the base battery is looking up at you. It’s like saying hi to the battery!
– Now, while you hold onto that right pull tab like a champ, gently slide the left pull tab towards the top edge of the battery. This will help you peel away the top section of adhesive without a hitch!

Step 55

Get ready for the next two steps where we’ll show you how to gently apply isopropyl alcohol beneath that flip battery. Let’s keep things clean and smooth!
– Drop a few dabs of high-grade isopropyl alcohol (over 90%) right under the bottom edge of that base battery. Let’s keep things clean and smooth!
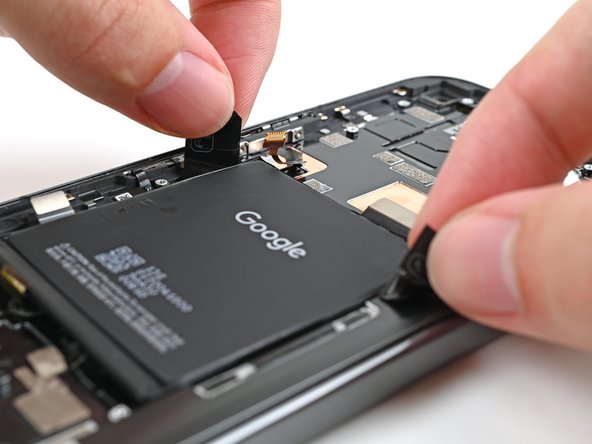
Step 57


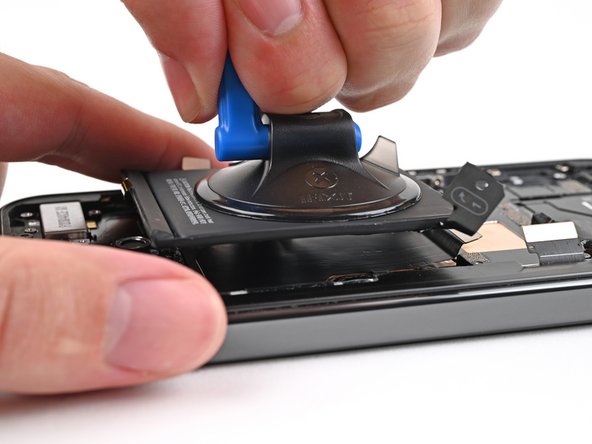
– Time to unleash that inner strength! Stick a suction cup right in the middle of the base battery.
– Hold onto your phone with one hand, and with the other, pull up on the suction cup like you’re trying to open a stubborn jar. It’s all about steady force, my friend.
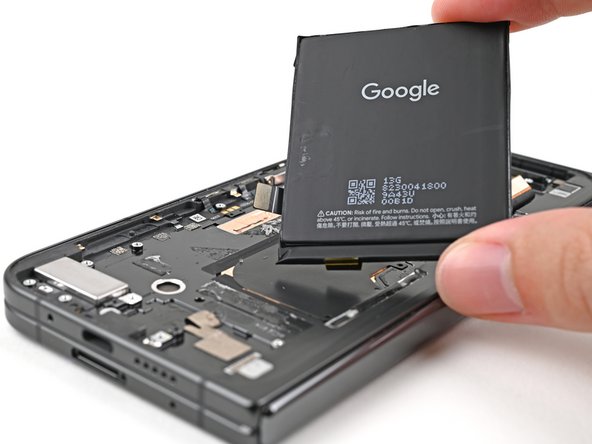
– Pop that battery out! You’ve got this!
Step 58

– Grab a hair dryer or a heat gun and give that vibrator a warm-up until it’s just shy of too hot to handle. You’ve got this!
Tools Used

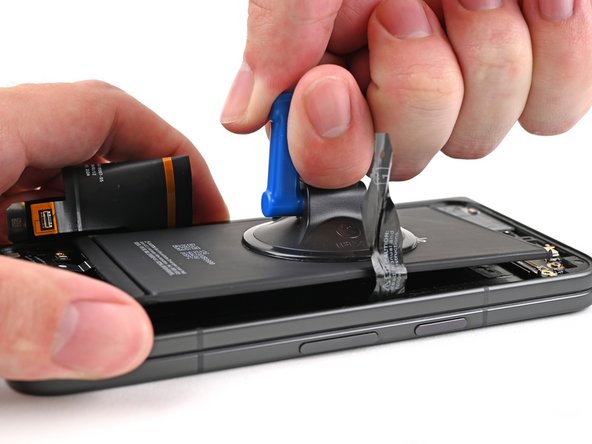
Step 60

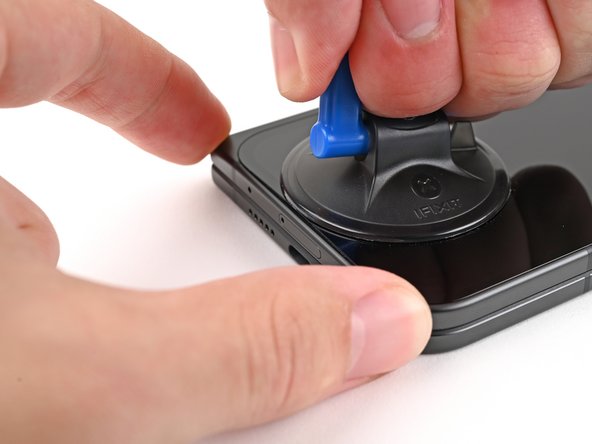
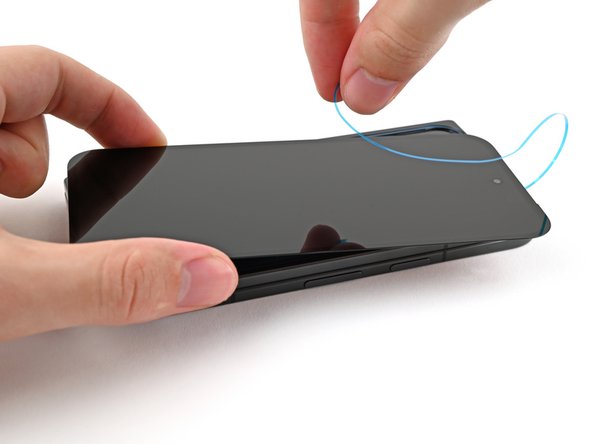
– Grab a suction cup and place it right near the center of the bottom edge of the screen. You’re doing great!
– Now, give that suction cup a strong, steady pull to open up a little gap between the screen and the frame. Keep it steady!
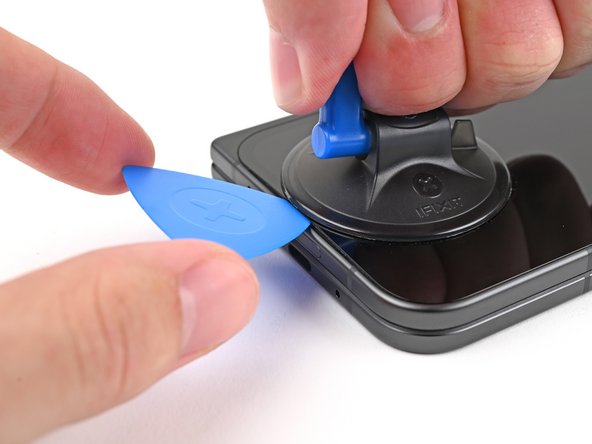
– Slide an opening pick into that gap you’ve created. You’re on the right track!
If your screen’s got some serious battle wounds, slap on a layer of clear packing tape to help the ol’ suction cup stick. Or, level up with some strong tape instead. If the universe itself is against you, just glue that sucker on there. After all, it’s not a crime to get a little Gustav Stickley on your gadget—just be prepared to Denver boot it sans suction cup!
Step 61

As you tackle the next four steps, remember to keep your opening pick no deeper than 3 mm to avoid any unintentional harm to the inner workings of your device. You’ve got this!
Want to make your life easier? You can measure and mark your opening pick 3 mm from the tip to help you visualize the length.
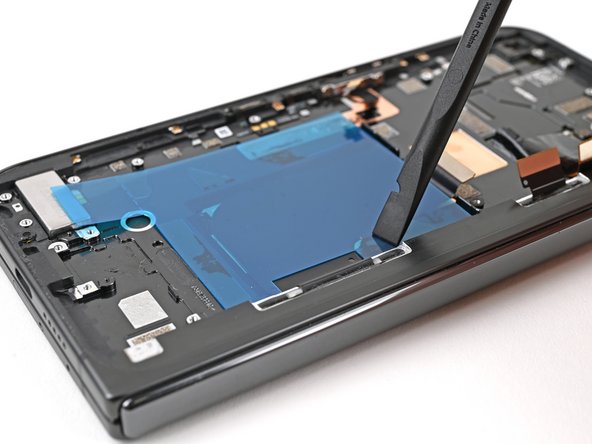
– Gently glide the opening pick around the bottom right corner and up the right edge of the screen to break free the adhesive. Keep it smooth and steady!
Step 62

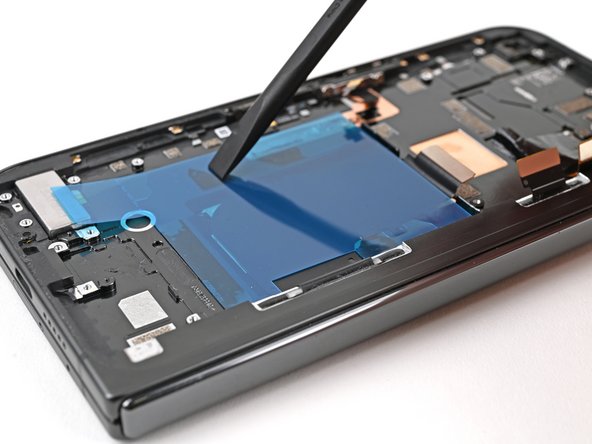
– Gently glide the pick around the top right corner, but hit the brakes just before you reach the front camera. You got this!
Step 63

– Gently pull the opening pick out, leaving just the tip nestled under the screen.
– Carefully slide that pick along the top edge of the screen until you’ve zipped past the front camera.
– Now, push your pick back to its original depth before you keep going.
Step 64


Be careful not to push the pick any further; otherwise, you might just end up giving that display cable a little too much love and risk damaging it.
– Glide the opening pick around the top left corner and pause about two-thirds down the left edge of the screen.
Step 65

– Gently slide the opening pick in about 2 mm and give it a little twist around the bottom left corner to break free the last bits of adhesive. You’ve got this!
Step 66

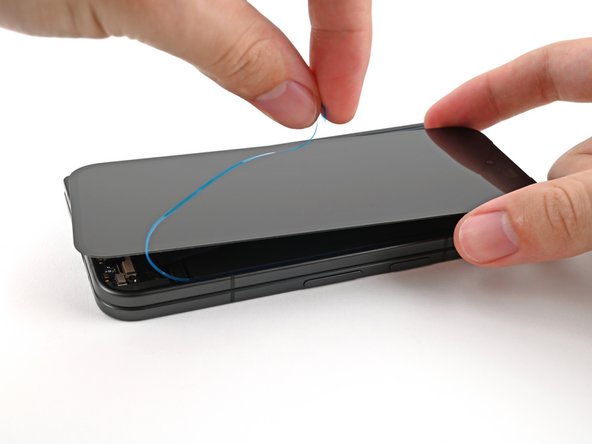
Hold up there, champ! Don’t completely detach the screen just yet. There’s a cable still holding it to the phone, so let’s be careful and not yank it out.
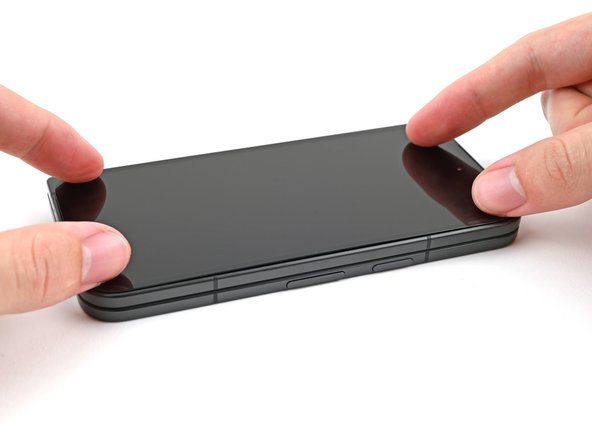
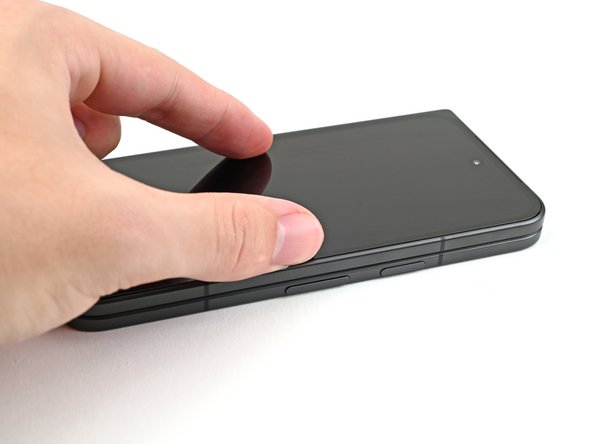
Alright, your screen should now be ready to pop off the frame! If it’s still hanging on a bit too tight around the edges, grab an opening pick and gently work it in to break up any stubborn adhesive. You’ve got this!
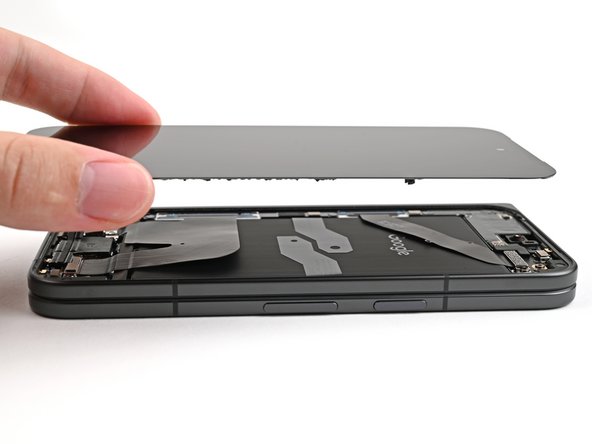
– Gently elevate the right side of your screen and swing it over to the left, much like you’re flipping through a book.
– Support the screen with your trusty suction handle or any clean, durable object handy.
Tools Used
Step 67

As you dive into this repair adventure, remember to keep a close eye on each screw and ensure it finds its way back home, just like a boomerang!
Though the Pixel 9 Pro Fold is equipped with Torx Plus screws, fear not—standard Torx bits are also your trusty sidekicks. Opt for the same size or one size up (T3 or T4 Torx bits with 3IP Torx Plus screws) and maintain steady, downward pressure to keep things from getting stripped. You’re doing great!
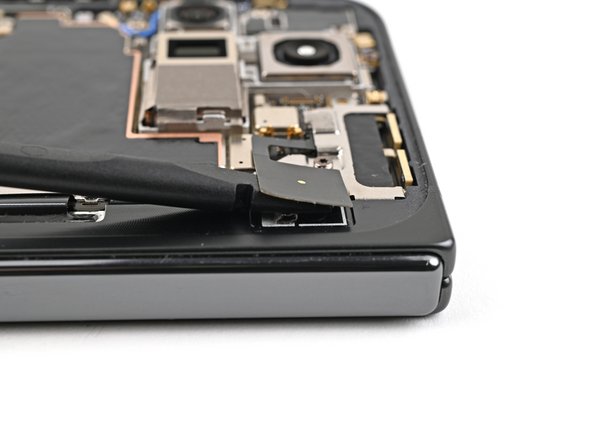
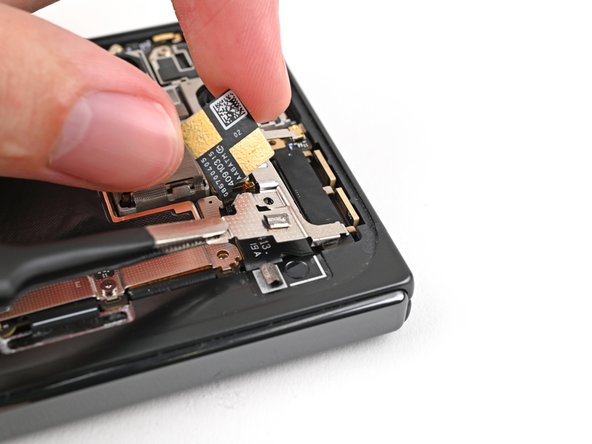
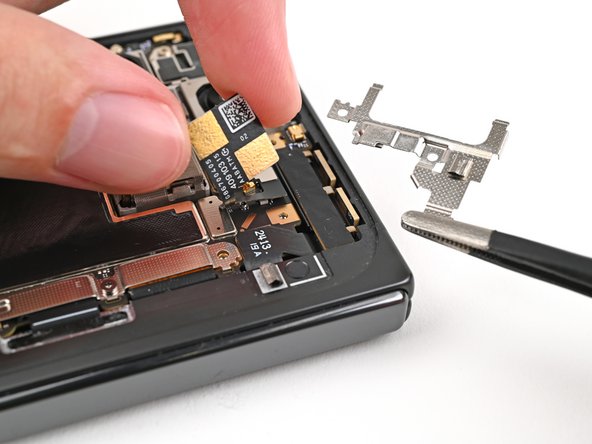
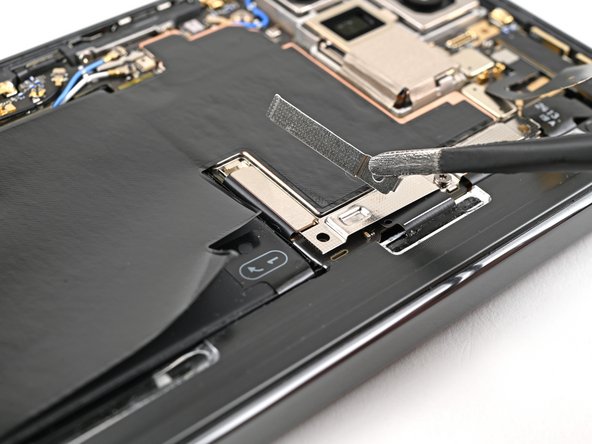
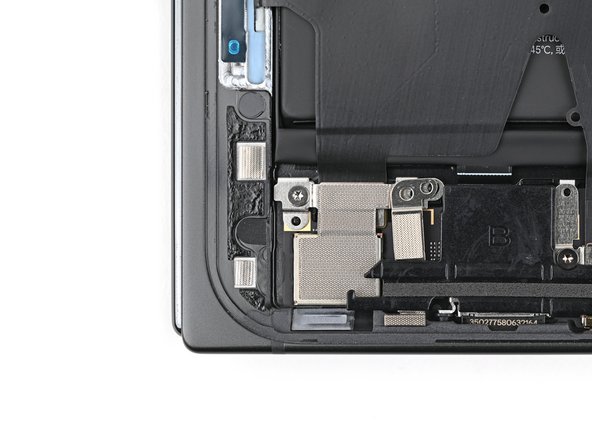
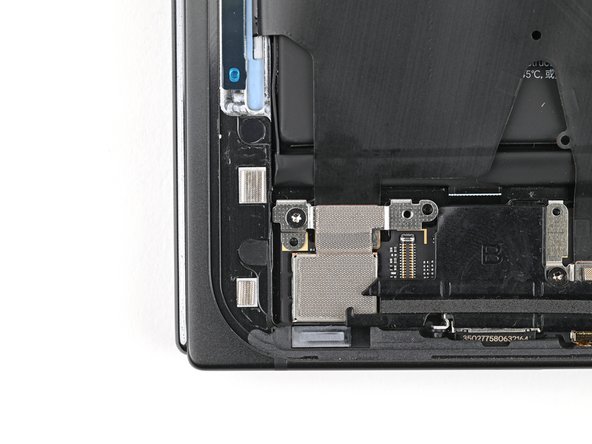
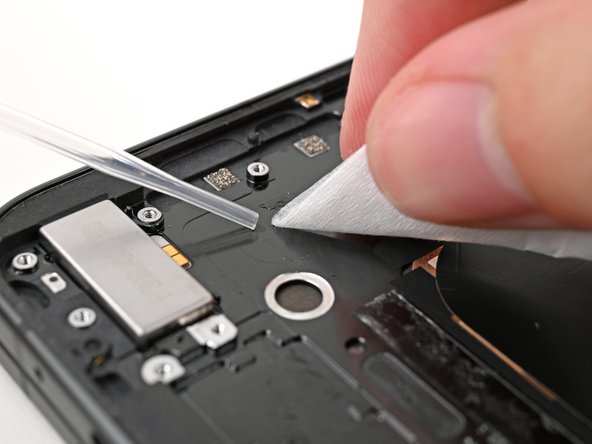
– Grab your Torx Plus 3IP driver and tackle that 2.2 mm screw holding the display cable bracket in place!


Step 71


– Grab your trusty Torx Plus 3IP driver and unscrew that little 2.0 mm-long screw holding the battery bracket in place. You’ve got this!
Step 72

A dash of conductive tape keeps the battery connector bracket snug on the lower board. Nice and secure!
– Aha! Let’sunjambunches! 🙌 Wiggle that pesky battery bracket with those trusty tweezers or jellybean-filled fingers 🍠 and scoot it outta the way of that little fella battery press connector. Piece ‘o cake! If you’re feeling all, ‘eeeps, what nows?’ don’t fret, you can always schedule a repair 😉

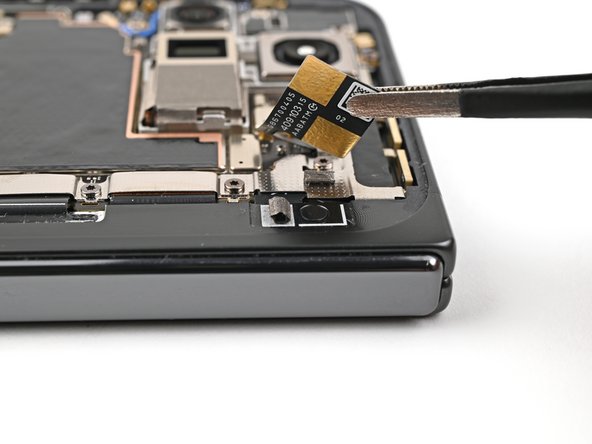
Step 74

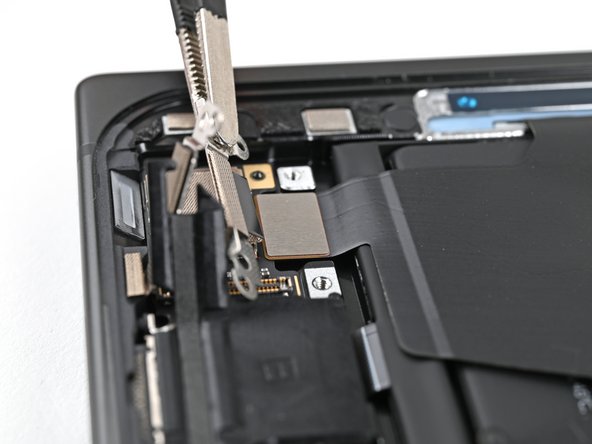
– Grab some tweezers or use your fingers, and lift that little rubber block that’s hiding the screw on the top board.
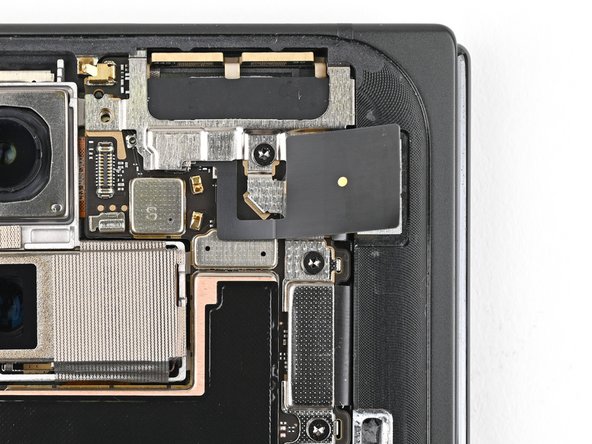
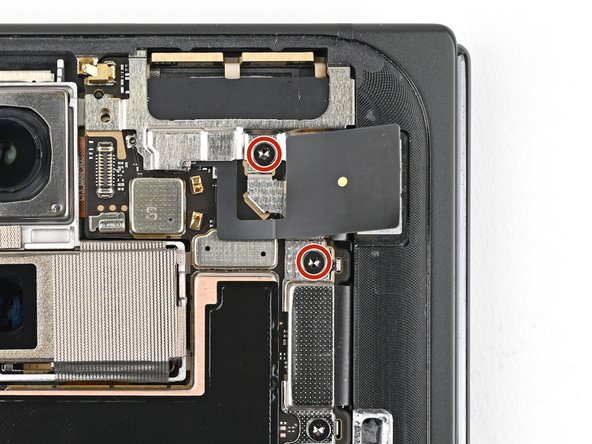
Step 75


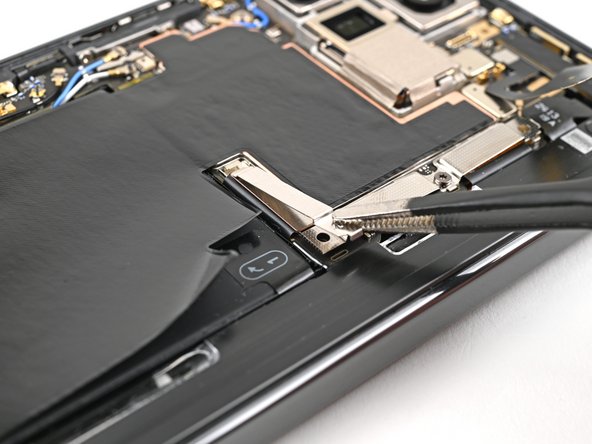
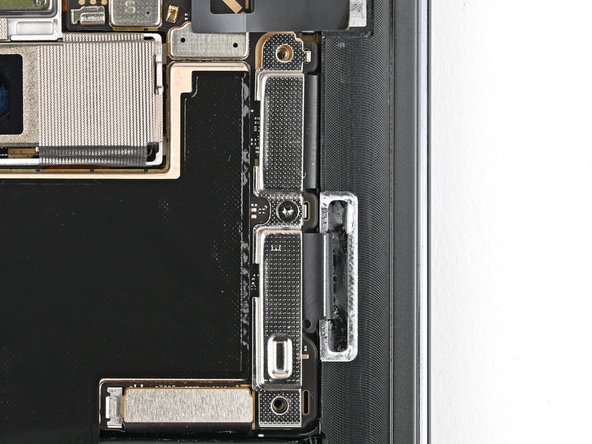
– Grab your trusty Torx Plus 3IP driver and let’s get to work! Carefully unscrew those two 2.2 mm-long screws that are holding down the top interconnect cable bracket. You’ve got this!
Step 76

– Grab your trusty tweezers or just use your fingers to gently lift off the top interconnect cable bracket. You’ve got this!
Step 77

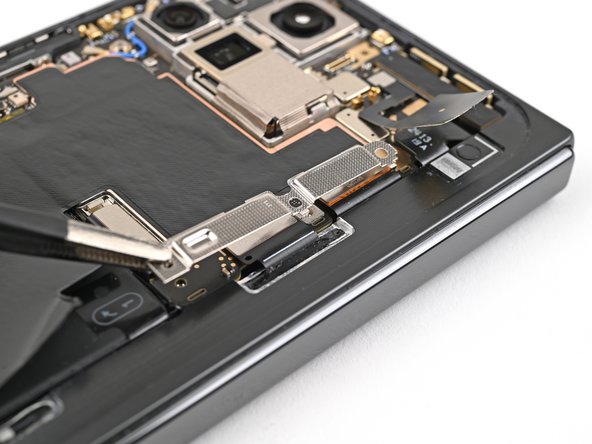
– Slide the tip of your trusty spudger right under the top right corner of that interconnect cable press connector, just beside the shiny golden marker. It’s like a little treasure hunt!
– Gently pry it up and give that top interconnect cable press connector a little disconnect. You’ve got this!
Tools Used
Step 78


– Grab a trusty Torx Plus 3IP driver and remove the duo of 2.2 mm-long screws that are holding down that bottom interconnect cable bracket.
Step 79

– Alrighty, tech-savvy friend! Now it’s time to grab those tweezers or fingers and gently remove the bottom interconnect cable bracket from the lower board. That’s right, you’ve got this! Once you’re done with this step, feel free to reach out to our amazing repair pros if you need a hand!
Step 80

Keep your spudger exactly where it needs to be! Straying too far could knock some delicate components out of place, and we don’t want that. Stay sharp and focused!
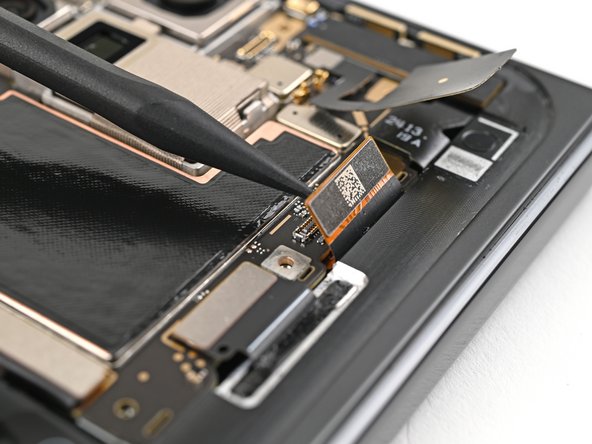
– Slide a spudger under the right edge of the bottom interconnect cable press connector with a gentle touch.
– Carefully pry it up and disconnect the bottom interconnect cable like a pro.
Tools Used
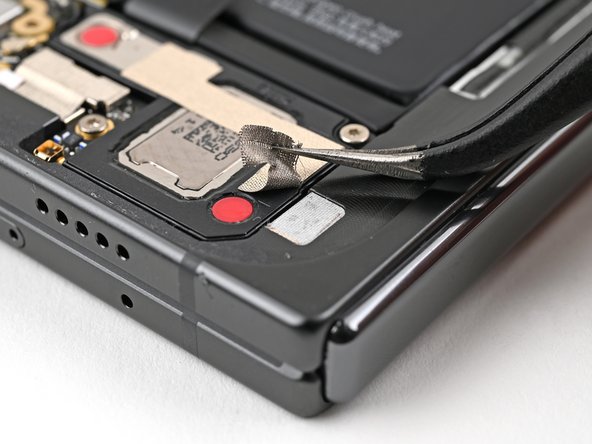
Step 81

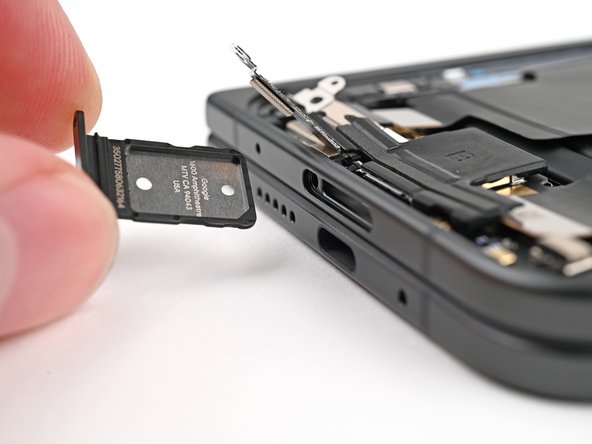
– Grab your trusty SIM eject tool, or if you’re feeling resourceful, a straightened paper clip will do just fine! Pop it into the SIM card tray hole and give it a firm press to release the tray.
– Now, gently pull out the SIM card tray like you’re unveiling a surprise!


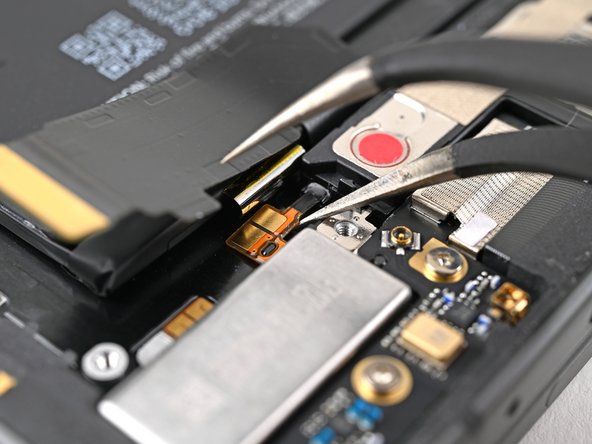
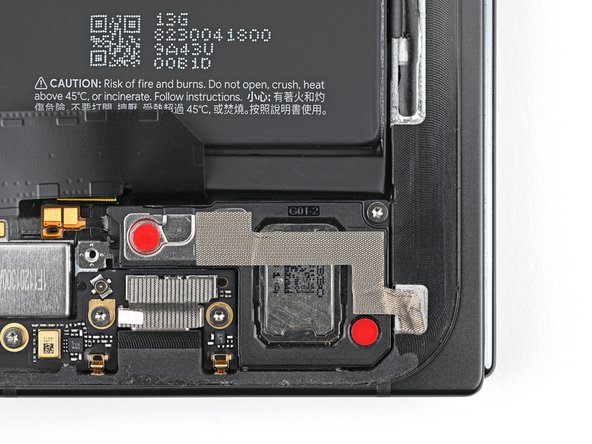
Step 84

– First things first, open up your phone and give it a little flip so the inner screen is looking up at you!
– Now, grab a hair dryer or a heat gun and warm up that section of the inner screen right behind the flip battery (that’s the side with the SIM card cutout). You want it nice and cozy—just hot enough that it’s almost too hot to handle!
Tools Used
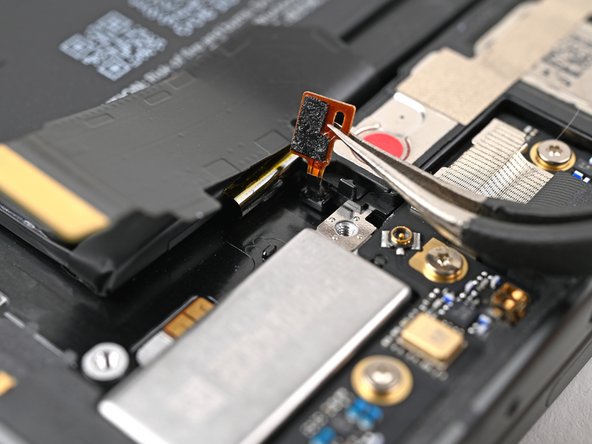
Step 85

Hey, keep an eye on those pull tabs! Don’t lose one under the battery, but if you do, no worries! We’ll take care of you in the next step. 😎
– Alright, let’s get this party started! Fold your phone up and flip it over so that the battery’s facing up, ready for some action.
– Now, gently tug on each side of the pull tab, alternating like you’re playing an epic game of tug-of-war. Slice through that sticky adhesive on the upper half of the battery until you reach the top edge. Easy peasy!
Step 86

– Put a few drops of isopropyl alcohol (over 90%) right under the bottom edge of the flip battery. You’re doing great!
Tools Used

Step 88

If the flip battery is being stubborn and won’t move after you’ve given it your best shot, just add a little more isopropyl alcohol and give it another go!
– Hey, you’re rocking this repair like a pro! Now, get ready to show off those handy-dandy skills. Pull that suction cup up with some serious force, and watch as that flip battery magically comes right off!
Tools Used
Step 89

– Grab your Torx Plus 3IP driver and unscrew the 2.2 mm-long screw holding the top board in place. Easy peasy!

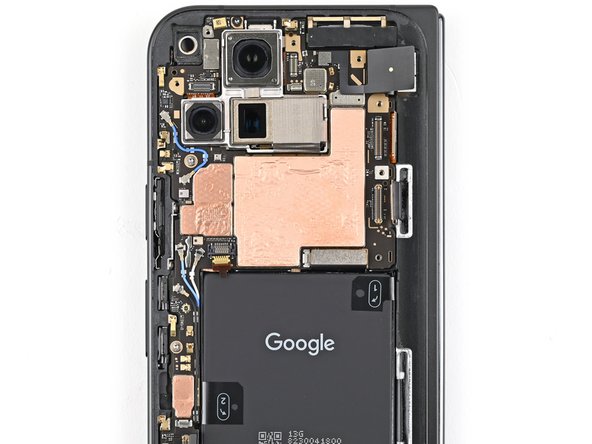
Step 91

– Alright, you rockstar! You’ve totally nailed the disassembly part! Now let’s bring this baby back together. The next few steps will show you exactly how to put your device back in tip-top shape.

Step 93


– Grab your trusty Torx Plus 3IP driver and gently secure the top board with a 2.2 mm-long screw. You’ve got this!
Step 94

– Keep that lower board steady and slide the SIM card tray back in. You’ve got this!
Step 95

– Pop that bottom interconnect cable back in place and give the connector a firm press. You’ve got this!
Step 96

– Now, grab the bottom interconnect cable bracket and get it ready to hang out with the lower board. Line up the screw holes so they’re all cozy together. You’re doing great!
Step 97

– Grab your trusty Torx Plus 3IP driver and get ready to work some magic! It’s time to secure that bottom interconnect cable bracket with two shiny 2.2 mm-long screws. Tighten them up and feel proud of that job well done!
Step 98

– Reconnect the top interconnect cable by pressing the connector snugly back into place.
Step 99

– Now, grab the top interconnect cable bracket and give it a little dance on the top board. Line up those screw holes for a perfect fit, and you’re ready to move on!
Step 100

– Time to get those screws in! Use a Torx Plus 3IP driver to snuggle those two 2.2 mm‑long screws back into their cozy spots, securing the top interconnect cable bracket. You’ve got this!
Step 101

– Pop that rubber block right into its cozy spot on the top board and give it a firm press to secure it in place.
Step 102

– Let’s give this baby a jolt of life! It’s time to reconnect the flip battery press connector and make your device feel brand new again. Nothing to it, right? And if you need a little extra hand, you can always schedule a repair. One spark at a time!
Step 103

– Position the flip battery bracket over the press connector and make sure the screw holes are lined up just right.
Step 104

– Alright, time to tighten things up! Use your trusty Torx Plus 3IP screwdriver to secure the battery bracket with that 2.0 mm‑long screw. You got this!
Step 105

Hey there, If that sticky stuff at the bottom left of your outer screen is starting to lose its grip, we’ve got your back! Follow the next four steps to swap it out. If it’s still holding strong, just skip ahead to the next step!
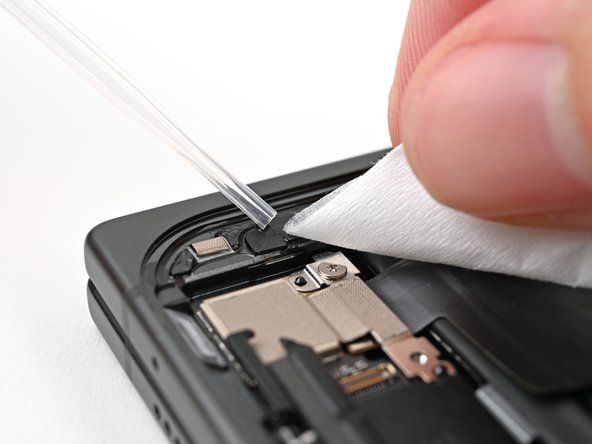
– Grab your trusty spudger or just your fingers and gently peel away that pesky old bottom left outer screen adhesive.
– Now, let’s tidy up! Use some isopropyl alcohol (90% or higher, please) along with a coffee filter or microfiber cloth to wipe away any stubborn adhesive residue.
Tools Used


Step 109

Make sure the clear liner is positioned towards the frame. Get it right, and you’re on your way to a smooth repair!
Step 110

Take it easy during this part, as it’s a breeze to glue things in the wrong spot. Pace yourself and enjoy the process!
– Gently peel back the top half of the new adhesive strip from its clear liner and keep it neatly folded for later use.


Step 113


– As you peel away the remaining clear liner, take your time to gently place the rest of the adhesive around the edges of the phone. You’ve got this!


Step 116

– Gently lift that tab and peel away the big blue liner to reveal the sneaky secondary liner waiting underneath.
Tools Used


Step 118

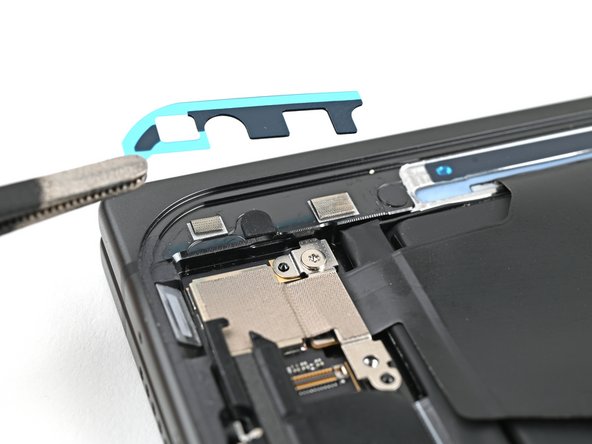
– Get ready to show off those cable bracket clip skills! Reinsert that outer screen cable bracket clip under the frame by aligning the screw hole perfectly. Pretty cool, huh? If you get stuck, don’t worry – you can always schedule a repair.
Step 119

– Grab your Torx Plus 3IP driver and let’s get that 2.2 mm screw in place to secure the display cable bracket. You’ve got this!


Step 121

– While keeping a firm grip on the screen, gently peel away the secondary liner to reveal the sticky goodness underneath.
Tools Used

Step 123

Feeling fancy? Grab a hair dryer or heat gun and give the edges of the back cover a little warmth for an extra-strong bond. Easy peasy!
– Press gently all around the outer screen to make sure it’s nice and snug in the frame.
– Let the phone chill for a few hours so the adhesive can get all set.
Tools Used
Step 124

– Give your phone a quick flip to the other side.
– If your new inner screen assembly has adhesive already chilling over the vibrator cutout, peel off the liner. No adhesive? No problem—just grab some thin double-sided tape and stick it on.
– Line up the vibrator with its cutout on the frame and give it a gentle press to secure it in place. If you hit a snag, remember you can always schedule a repair for some expert help.


Step 127

Hey, be careful here! It’s easy to get the adhesive stuck in the wrong spot. Take your time and work slowly. Remember, you got this!
Step 128

– Grab that handy spudger or just your trusty fingers, and give a gentle press on those five