DIY Guide: Replace Nintendo Switch Joy-Con Step-by-Step
Duration: 45 minutes
Steps: 7 Steps
Make sure to power off your console first to avoid any unexpected connections. It’s always better to be safe than sorry!
Get ready to dive into this step-by-step guide on swapping out the joystick of your Joy-con! We’ll be focusing on the right Joy-con(R), but don’t worry—the left one is practically a twin in this process. Just remember to power down your console first to avoid any surprise connections. Let’s get started!
Step 1


Be sure to power off your device before diving into repairs. We don’t want any surprise connections or accidental starts while you’re working on it!
– Let’s get started! Begin by removing the four Y00 screws located on the back of the joy con. This is the first step in our step-by-step repair guide, and we’ll walk you through it with ease.
Step 2


Heads up! There are two ribbon cables for the charging port and the SL/SR buttons, so proceed with a little extra caution!
– Gently slide the flat edge of a spudger into the curved side to pop that back cover open like a pro!
Tools Used

Step 3
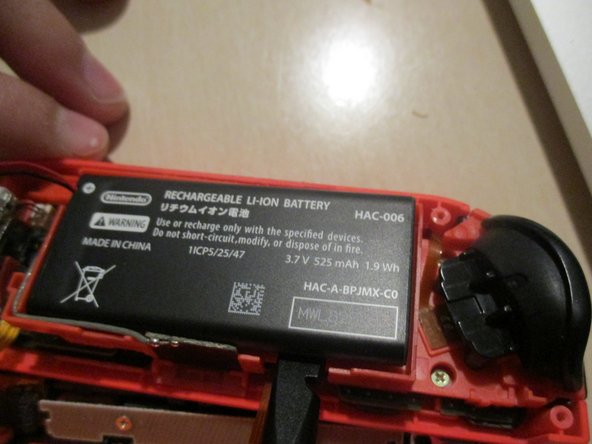

Hey there! To keep everything safe and sound, go ahead and pop that battery out of the controller.
Just a quick tip: when you’re disconnecting, remember to pull the connector straight up, not sideways like a zif connector. You’ve got this!
The battery might be a little clingy thanks to some light adhesive, but don’t worry, you can gently coax it off its frame.
– Gently wiggle the battery connector out from the bottom using your trusty tweezers. Take it slow, you’re the boss here!
– Pop that battery out by sliding the flat side of your spudger underneath. Nice and easy does it!
Tools Used
Step 4

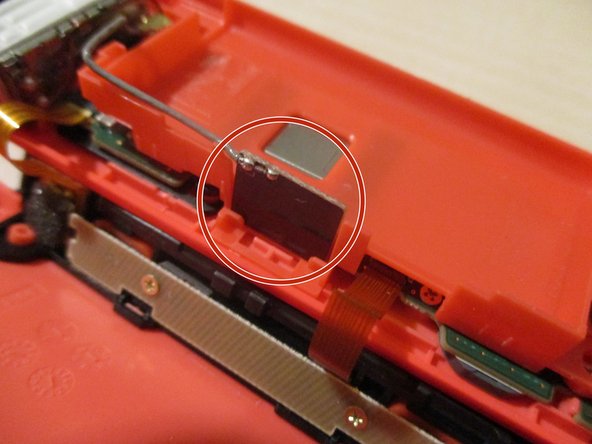
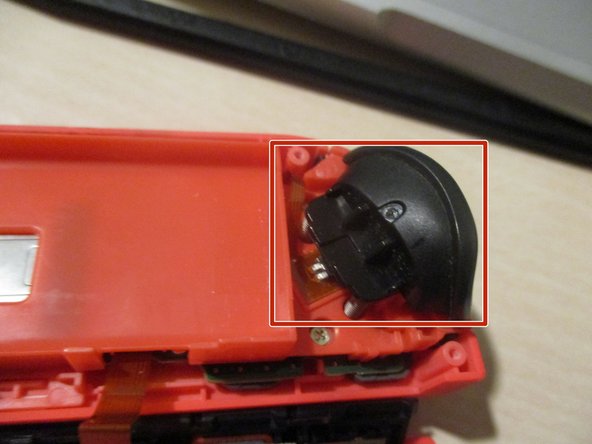
– Gently pop off the golden SMP RF connector linking the Bluetooth antenna to the main board. It’s like unplugging a tiny golden handshake!
– Carefully slide out the square antenna nestled next to the battery compartment. Easy does it!
Step 5
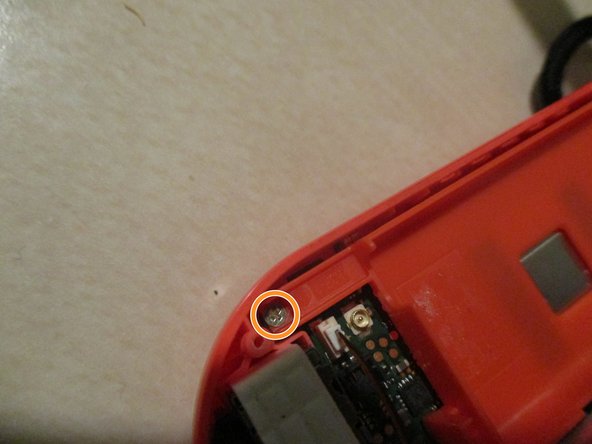
Hey, a heads up: the screw for the ZR button board is a bit shorter than the others, so keep that in mind when you’re sorting your screws with a magnetic project mat or the cover of a Mako driver kit.
– Pop off the ZR button and its springs—easy does it! Those clips holding it in place are the real MVPs, so handle them with care.
– Time to unscrew the four PH000 screws keeping the battery compartment and ZR button board locked down. Watch out for the sneaky one hiding next to the HD rumble module. Gotcha!
– Lift up the battery compartment like a pro. You’re cruising now!
Step 6

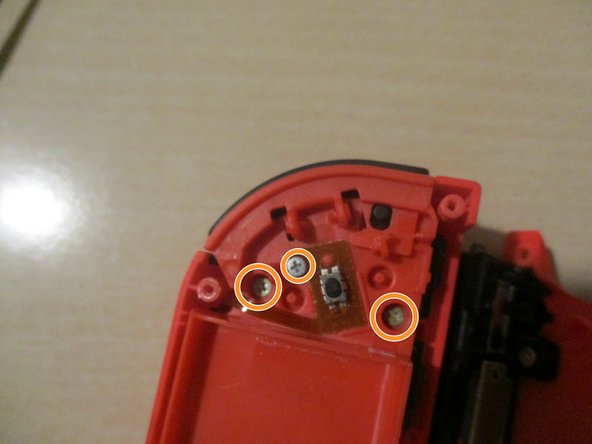
Just a heads up! There’s a tiny gasket hanging out below the joystick, and it’s super important to make sure it gets snugly back in place before you pop in the new joystick. You’ve got this!
– Pop out those two tiny PH000 screws holding the joystick in place—easy peasy, just give them a twist!
– Whatever you do, keep those two side board cables connected. Trust me, we don’t want to mess with those—they’re delicate and super important!
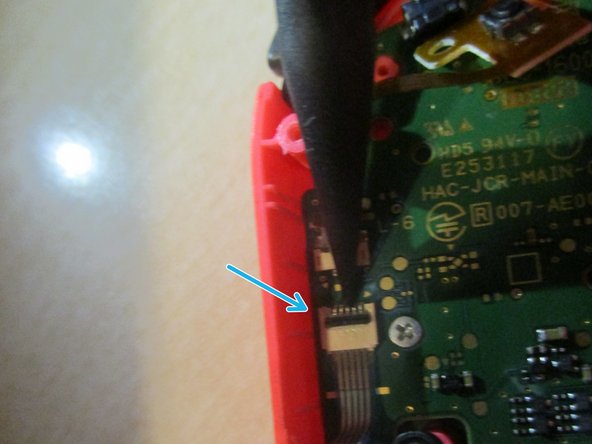
– Before freeing the joystick, gently unclip the ribbon cable using a spudger tip. Slide it out like a pro and keep it chill. Take your time!
Tools Used
Step 7

– Alright, let’s get that new joystick in! Just give it a good push until it sits snugly through the gasket we talked about earlier.
– Now, it’s time to secure it. Screw it in tight and pop that ribbon cable into its socket. And remember, don’t skip locking that cable in place!
Success!


