DIY Guide: Replace Samsung Galaxy Nexus Micro USB Port
Duration: 45 minutes
Steps: 9 Steps
Step 1


I took out the original board, which was revision LF-A G 1145. The shiny new one I’m putting in now (check out the picture!) is LF-A G 1150 23-3.
– Hey there, champ! So your Verizon Galaxy Nexus is giving you charging trouble? No worries, we’ve got this! This might mean your micro USB connector board needs some love.
– Let’s get our tools ready for this awesome repair! You’ll need:
– An opening tool.
– A small Phillips screwdriver.
– A replacement micro USB board. If you need help finding one, you can always schedule a repair.
Step 2


– First, let’s get started by taking out the battery and SIM card – easy peasy!
– Now that we’ve got those out of the way, remove the six screws from the back, and we’ll be ready to dive in. If you need help, you can always schedule a repair
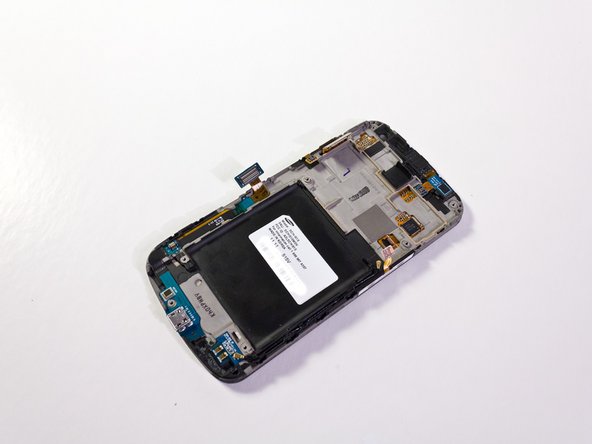
Step 3
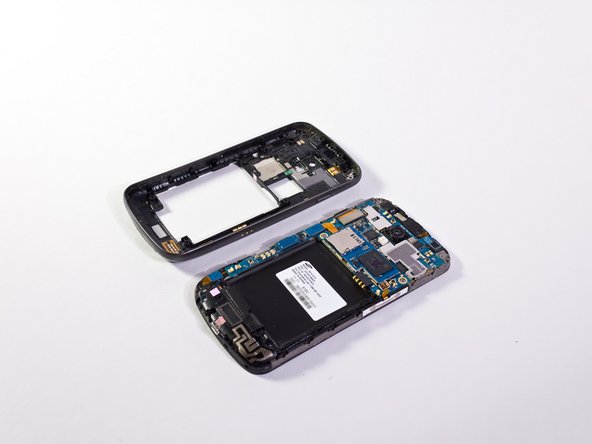

– Alright, time to give that back cover the boot!
– Grab your trusty plastic opening tool (or a credit card, we’re not judging!) and gently slide it around the edge of the screen. It’ll pop right off, no drama.
Step 4

– Let’s get started by taking out the antenna, speaker, and vibrator assembly from the bottom. This is a crucial step, so take your time.
– Begin by removing the screw – it’s the first step to freeing up the parts you need to access.
– Next, use your trusty opening tool to carefully disconnect the ribbon cable. If you need help, you can always schedule a repair
Step 5

CDMA: Give that assembly a spin! Rotate it counter-clockwise. Be careful though, we don’t want any casualties. If you find yourself in a sticky situation, you can always schedule a repair.
– The assembly is securely clipped to the magnesium body of your phone, and we’ll need to carefully unclip it. If you’re working with a Google GSM phone, you’re in luck – it’s a bit easier to remove.
– Take a look at where the clip is located – it’s usually right here.
– For Google GSM phone owners, simply push the clip away from the assembly to release it. If you’re not comfortable with this step or need a little extra help, don’t worry – you can always schedule a repair with Salvation Repair.
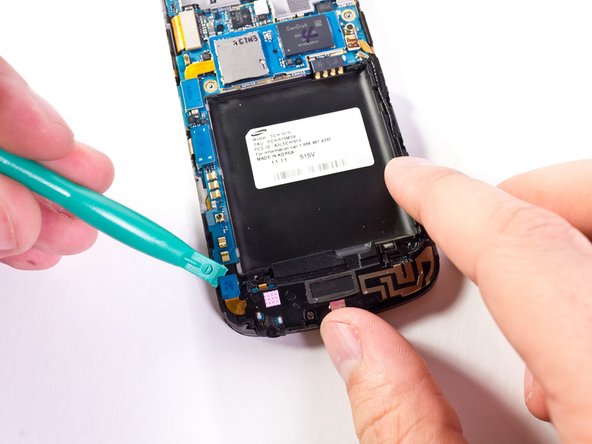
Step 6
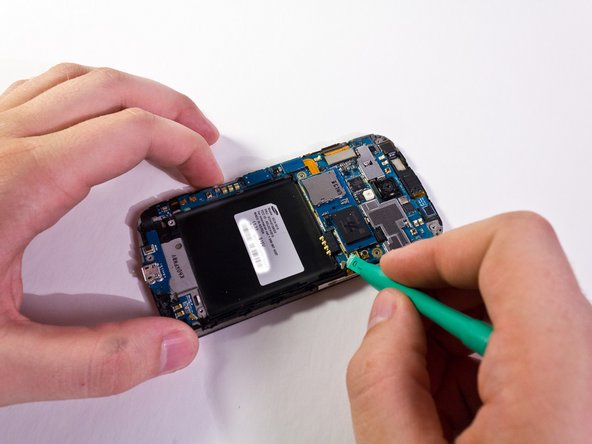

– Let’s get started by carefully detaching some ribbon cables and an antenna cable from the main circuit board. Take your time and be gentle.
– Use your trusty plastic opening tool to pry them loose. Don’t worry, it’s easier than it sounds.
– Now, take a look at the Micro USB board. You’ll also find the front notification LED and the main microphone here.
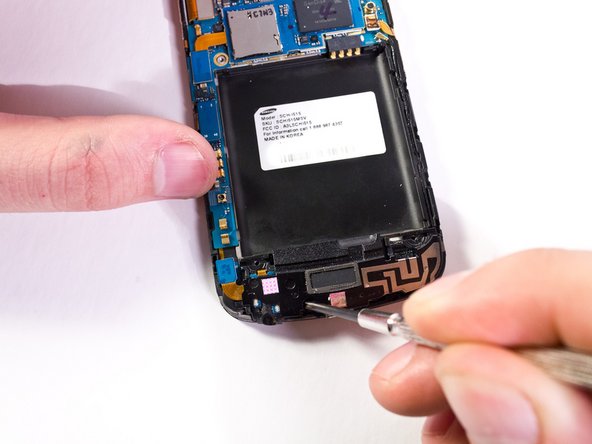
– Next up, we have the screen connector. Make sure to handle it with care.
– The volume rocker is next. Keep in mind that some phones have this soldered to the mainboard, so it might not be removable on your device – especially if it’s a CDMA model.
– You’ll also find the antenna in this area. Be careful not to damage it.
– If you have a GSM model or the volume rocker is soldered, don’t worry. One trick is to leave the volume rocker alone and focus on the power button instead. You can gently separate the power button from the case – it’s only held in place by glue – without detaching it from the circuit board. Then, you can rotate the circuit board out of the way. If you need help, you can always schedule a repair.
Step 7
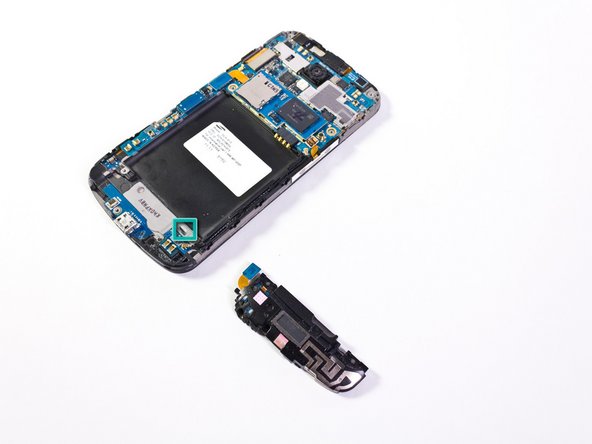
Remember, there are some ribbon cable connectors hiding under the board. They should come off easily, but if you need a little extra help, use your opening tool to gently coax them out once you’ve lifted the board up a bit. Just a heads up: you’ll need to reconnect these when you’re putting everything back together!
The main circuit board is also hooked up to the main camera and the front-facing camera with more ribbon cables. Try to keep these attached, and be gentle when handling them – you don’t want any dust getting in there when you seal everything up! If you need help, you can always schedule a repair
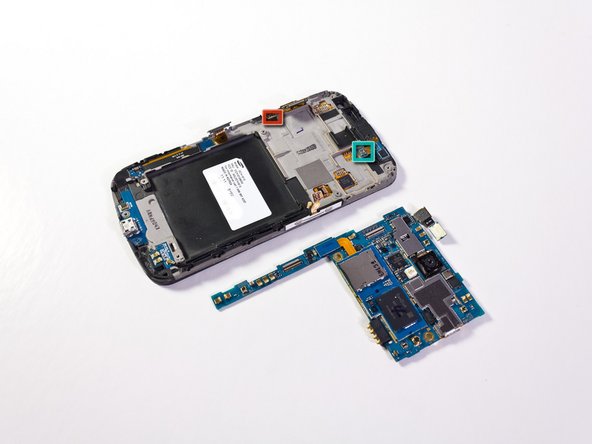
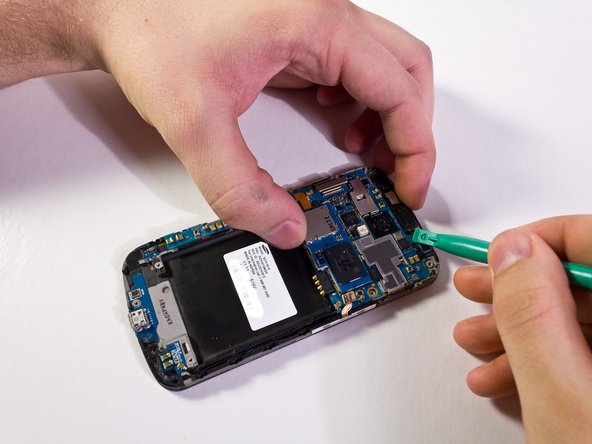
– Let’s get started by carefully removing the main circuit board – take your time and be gentle.
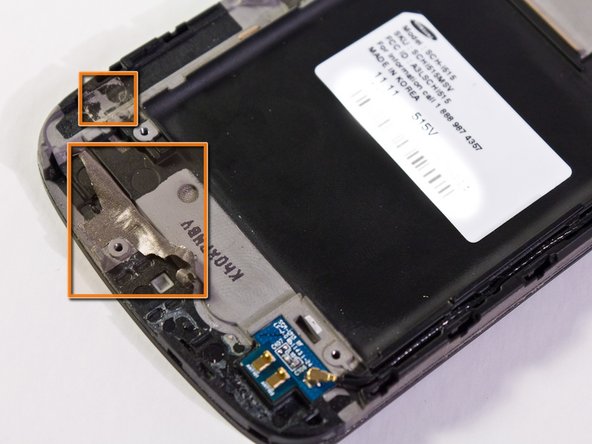
– Next, locate the power button cable and set it aside for now.
– You’ll also want to disconnect the earphone cable, easy does it.
Step 8

– Alright, we’re finally ready to swap out that micro USB board!
– It’s held on with some light adhesive, so a little work with your pry tool and your fingers should do the trick.
– The board might leave behind some sticky residue. Make sure to clean that up before moving on. If you need help, you can always schedule a repair
Step 9


– Now that the old USB board is out, it’s time to bring in the new one!
– Remove the adhesive backing from the new board and get it ready for installation.
– Don’t worry, the pins and guides will help you get it in just the right spot – making the process a breeze. If you need help, you can always schedule a repair


