DIY Guide: Replace Samsung Galaxy Note10+ 5G Earpiece Speaker
Duration: 45 minutes
Steps: 26 Steps
Get ready to tackle the earpiece speaker replacement on your Samsung Galaxy Note10+ 5G! First things first, you’ll need to take out the motherboard to access the speaker. Just a heads up, this guide is based on the non-5G Note10+, so some images might look a bit different. No worries though, these little quirks won’t mess with the overall process. If you need help, you can always schedule a repair.
Step 1


– Let’s get that SIM card out! Grab your SIM eject tool (or a straightened paperclip if you’re feeling resourceful) and pop it into that tiny hole on the top of the phone. Give it a gentle push to make the tray pop out. Now, carefully remove the SIM card tray – you’re almost there!
Step 2

Be sure to power down your phone completely before diving into disassembly. Safety first, and we’re here to help if you need it!
When using heat to loosen the adhesive, be careful not to get too aggressive – your phone’s display and battery aren’t fans of extreme temperatures. A hair dryer, heat gun, or hot plate can be used, but keep an eye on things to avoid any damage. If you need help, you can always schedule a repair
– Alrighty, tech enthusiasts! Let’s heat things up with our iOpener and get that left edge of the rear cover all warm and toasty for a full minute. We’re on a mission to make your device feel better, and when we’re done, it’ll be ready to rock ‘n’ roll again! If you need help, you can always schedule a repair.
Tools Used

Step 3


Hey, if your back cover is looking a little worse for wear, give it a little TLC with some clear packing tape. It’ll help the suction cup stick like glue! Or, if you’re feeling extra strong, go for some heavy-duty tape instead. If all else fails, you can always superglue the suction cup to the cover. No sweat!
Depending on your phone’s age, getting the back off might be a little tricky. If you’re having trouble, just give that edge some extra love with some heat and try again.
– Grab a suction cup and gently press it onto the warm edge of the rear cover, sticking it as close to the edge as you can. You’ve got this!
– Now, with a firm and steady pull, lift up the suction cup to wiggle a little gap between the rear cover and the frame. Keep it strong, you’re doing great!
– Slide the tip of an opening pick into that gap you’ve just created. Easy peasy!
Step 4


Keep that opening pick to a safe distance—don’t poke it in more than halfway, or you might end up with a surprise from the internal components!
– Let’s get this party started! Slide the opening pick along the left edge towards the bottom left corner to slice the adhesive.
– Keep the pick inserted in the bottom left corner to keep the adhesive from sticking back together. You got this!
Step 5


Keep on going, the rear cover will start to come loose as you work around the edges. You’re almost there!
– Now it’s time to repeat the heating and cutting process for the remaining three sides of your phone – just like you did before, but on the other sides. Keep it up, you’re doing great!
– As you move on to the next side, make sure to leave an opening pick in place to prevent the adhesive from sneaking back in. You’re making progress, and that’s something to be proud of! If you need help, you can always schedule a repair
Step 6


Alright, let’s give this thing a test drive! Power up your device and make sure everything’s working like a charm before you get all fancy with the adhesive and sealing things up. If you’re feeling a little lost, remember, you can always schedule a repair with our awesome crew at Salvation Repair.
– Gently lift the rear cover straight up to set it free.
– Check out this guide to snugly reinstall the rear cover and swap out that adhesive.
– If you’re using Tesa tape to stick things back together, be sure to follow this guide.
Step 7

– Grab your trusty Phillips screwdriver and give those five 4 mm screws securing the wireless charging coil a friendly goodbye!


Step 10


– Grab your trusty spudger and gently use its pointed end to unplug the wireless charging coil connector from the motherboard. You’ve got this!
Tools Used
Step 11


The wireless charging coil is held in place with a bit of light adhesive magic.
– Time to get that metal shielding outta there! Give it a little tilt so you can get a good grip with your fingers.
– Alright, now let’s peel that wireless charging coil up and away from the device – think of it like a little wireless dance party!
– Now you can remove the wireless charging coil. You’re doing great! You’re almost there! If you need help, you can always schedule a repair
Step 12

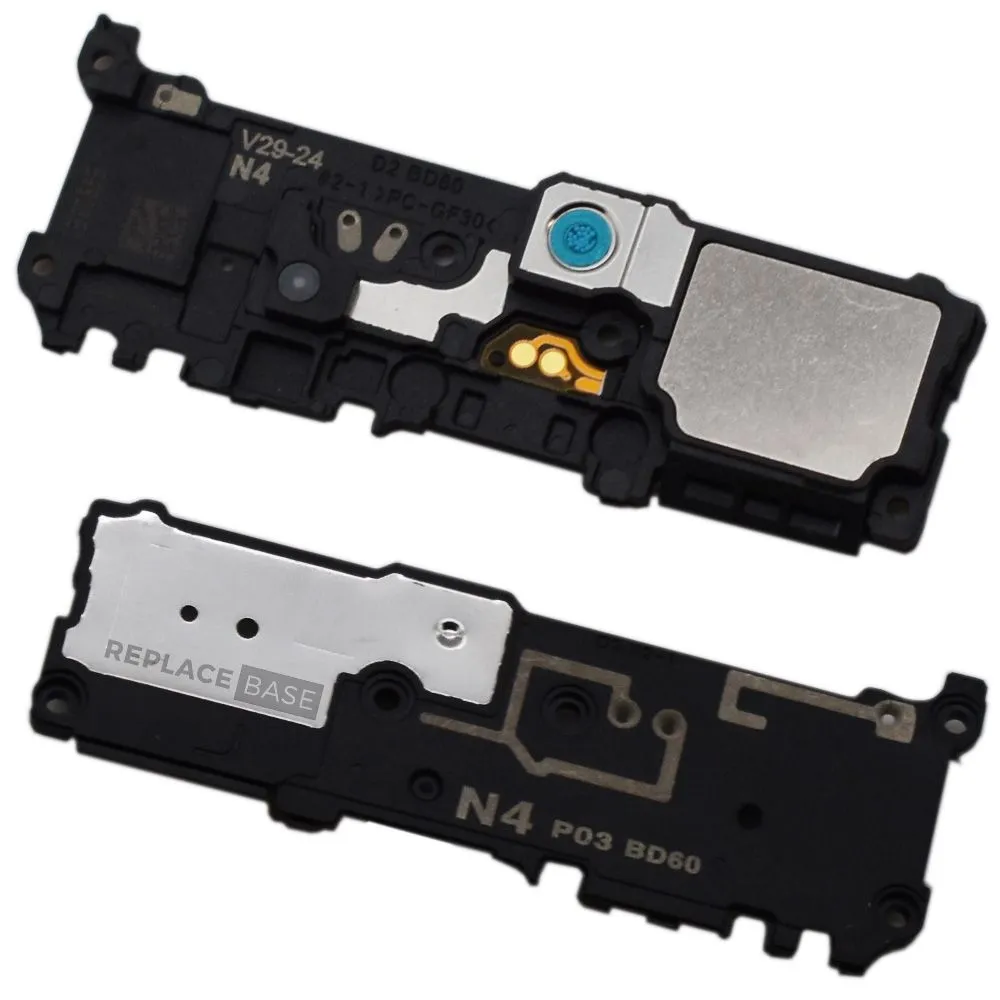
– Grab your trusty Phillips screwdriver and get ready to tackle those five 4 mm screws holding the loudspeaker in place. You’ve got this!


Step 14


– Let’s get started by using the pointed end of a spudger to carefully disconnect the main interconnect cable from the motherboard. Take your time and make sure it’s fully released.
– Next, locate the secondary interconnect cable and gently disconnect it from the motherboard. If you need help, you can always schedule a repair
Tools Used


Step 16

– Time to disconnect that main interconnect cable. It’s like giving the device a little break from the wires.
Step 17


Hey there, hold on! That secondary interconnect cable is linked to the side 5G mmWave antenna, so let’s keep it put. If you need help, you can always schedule a repair.
– Gently fold that secondary interconnect cable away from the battery using a spudger or your fingers. Easy peasy, right? If you need help, you can always schedule a repair.
Tools Used
Step 18

– Let’s get this party started! Use a Phillips screwdriver to pop out those four 4mm screws holding the top plastic cover in place. You got this!


Step 20


– Time to give those connectors a little TLC! Gently use the pointed end of a spudger to disconnect the touch layer connector from the motherboard.
– Now, let’s disconnect the side button connector from the motherboard. It’s like giving it a little break, so it can relax.
Tools Used
Step 21


– Grab your trusty spudger and gently pry up that 5G mmWave antenna connector to disconnect it from the motherboard—easy peasy!
– Now, take a moment to carefully bend the cable away from the motherboard. You’ve got this!
Tools Used
Step 22


– Now, let’s give that S-Pen charging coil connector a little break! Use the pointed end of your spudger to gently disconnect it from the motherboard. Don’t worry, it’s a simple disconnect. If you need help, you can always schedule a repair.
Tools Used
Step 23


– Grab your spudger and gently pry the display cable away from the motherboard. It’s like giving the cable a little high-five, but with a tool!
Tools Used
Step 24


Hey there, if the motherboard seems a little stubborn, just double-check that the SIM tray is out of the way. You’ve got this! If you need help, you can always schedule a repair.
– Grab your trusty spudger and use its pointed end to gently lift the motherboard just enough to get a good grip with your fingers.
– Now, go ahead and remove that motherboard!
Tools Used
Step 25
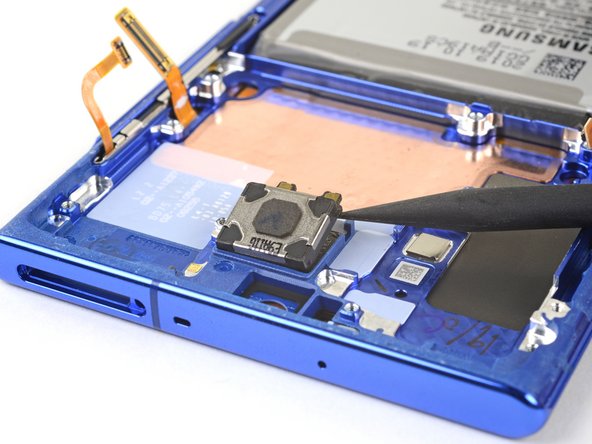

The earpiece speaker is held in place with a bit of adhesive, so be gentle when removing it. If you need help, you can always schedule a repair
– Gently slide the pointed end of a spudger into the little gap between the earpiece speaker and the phone’s frame, right near the bottom left corner of the speaker.
– Give it a little pry to help loosen the earpiece speaker from its snug spot.
Tools Used
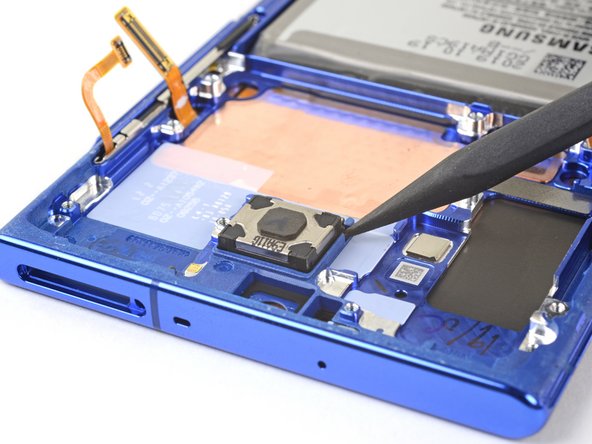
Step 26
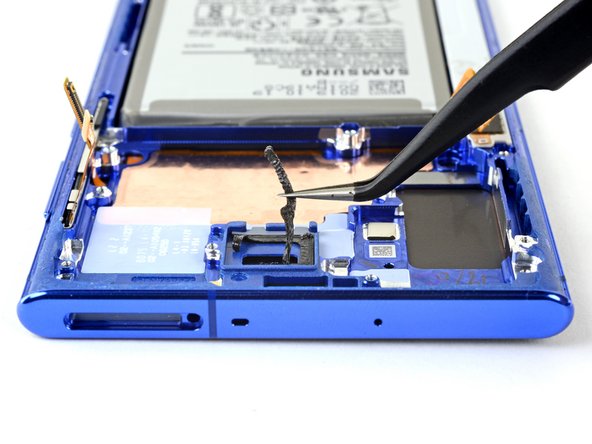


– Grab a trusty pair of tweezers and gently lift the earpiece speaker out of its cozy little spot. It’s time for a new one!
– Before you pop in the fresh earpiece speaker, make sure to clear away any old adhesive. A clean start is always the best way to go!
Tools Used