DIY Guide: Samsung Galaxy M51 Battery Replacement Tutorial
Duration: 45 minutes
Steps: 21 Steps
Hey there, wanna give your Galaxy M51 a fresh battery boost? This guide will show you how to swap out that old, tired battery. If it’s looking a bit swollen, be careful! For everyone’s safety, make sure the battery’s charge is below 25% before you start taking things apart. That helps keep things cool and calm during the repair. You’ll need some fresh adhesive to put everything back together when you’re done. If you need help, you can always schedule a repair.
Step 1


When putting the cards back in, just make sure they’re facing the right way in the tray. You’ve got this!
– Grab your trusty SIM eject tool and slide it into the tiny hole on the SIM card tray found on the left side of your phone.
– Give it a gentle but firm press to pop that tray out.
– Now, go ahead and pull out the SIM card tray with ease.
Step 2

Alright, let’s get this party started! First things first, make sure your phone is completely powered off. You wouldn’t want any surprises while you’re working on it, right?
If you’re feeling a little warm under the collar, use a hair dryer, heat gun, or hot plate to give your phone a little TLC. Just be careful not to go overboard with the heat—we don’t want to fry anything! The display and battery are pretty sensitive, so keep that in mind. If you need help, you can always schedule a repair.
– Grab your iOpener, that little heat-wielding hero, and give the back cover a nice warm hug for at least two minutes.
Tools Used

Step 3


– Grab a suction handle and place it on the back cover, aiming for a spot near the USB-C port. Let’s get that cover off!
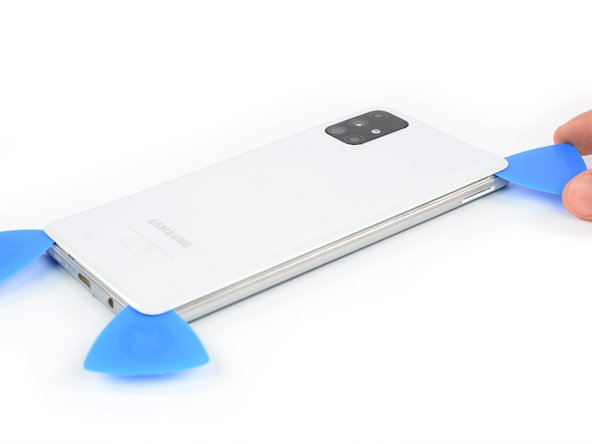
– Gently lift the bottom edge of the back cover with your suction handle to create a tiny gap between the cover and the frame. Just a little wiggle will do!
– Take the tip of an opening pick and slide it into that gap you just made. You’re doing great!
– Now, glide that opening pick over to the bottom left corner and leave it there. Nice work!
Tools Used

Step 4


– Now, grab another opening pick and slide it along the bottom edge, from left to right. Think of it as a mini-dance party for your pick! You’re basically cutting the adhesive holding things together.
– Leave those picks in place to keep the adhesive from getting cozy again. They’re like little protectors, keeping things separated.
Step 5

If you’re running into a bit of a sticky situation, just crank up the heat a little more to loosen that adhesive. Be sure to check out the iOpener instructions to keep things from getting too toasty!
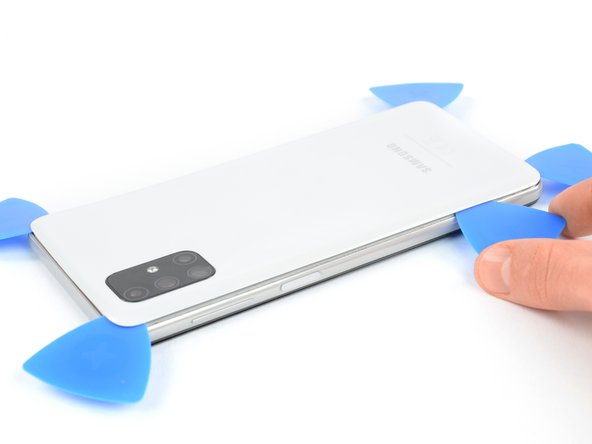
– Now it’s time to get that back cover off – start by inserting a third opening pick under the bottom right corner.
– Gently slide the pick along the right edge of your phone, working your way up to the top right corner. This will help cut through the adhesive.
– Leave that pick in place at the top right corner to keep the adhesive from sealing back up. If you need help, you can always schedule a repair
Tools Used
Step 6


– Slide a fourth opening pick into that cute top right corner.
– Gently glide it along the top edge all the way to the left corner to get that adhesive all loosened up.
– Keep that opening pick right where it is to stop the adhesive from being all clingy again.
Step 7

– Pop in a fifth opening pick at the top left corner and gently slide it along the edge to slice through the last bits of adhesive. You’re almost there!
Step 8

– Alright, let’s get this party started! First things first, we need to remove the back cover.
Step 9


– Now, grab your trusty spudger and use the pointy end to gently disconnect the fingerprint sensor from the motherboard. It’s like giving it a little nudge to say “see ya later!”
Tools Used

Step 10

– Let’s get started by removing the 15 Phillips #00 screws that are 4.0 mm long and hold the midframe in place. If you need help, you can always schedule a repair
Step 11

The midframe is secured by some nifty plastic clips.
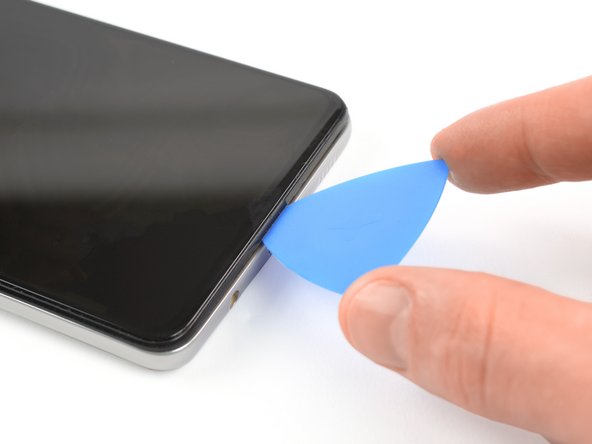
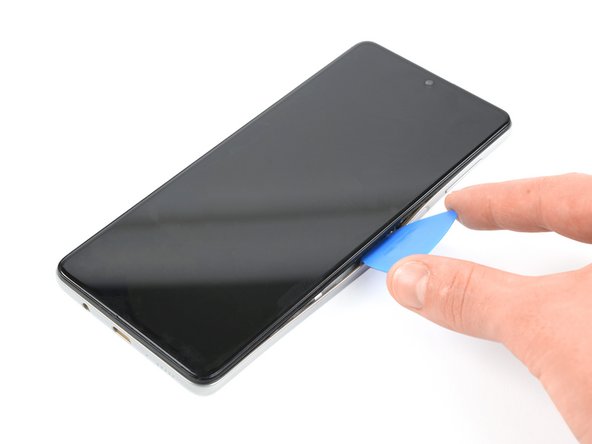
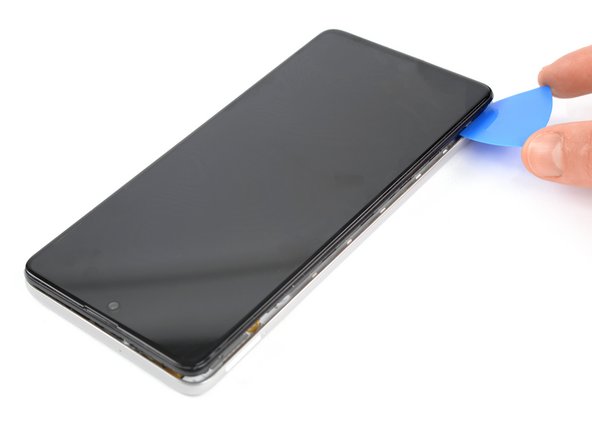
– Start by slipping an opening pick between the midframe and display, near the USB-C port – it’s the perfect spot to get started.
– Now, gently slide the opening pick down to the bottom right corner, releasing those plastic clips with ease. If you need help, you can always schedule a repair
Step 12

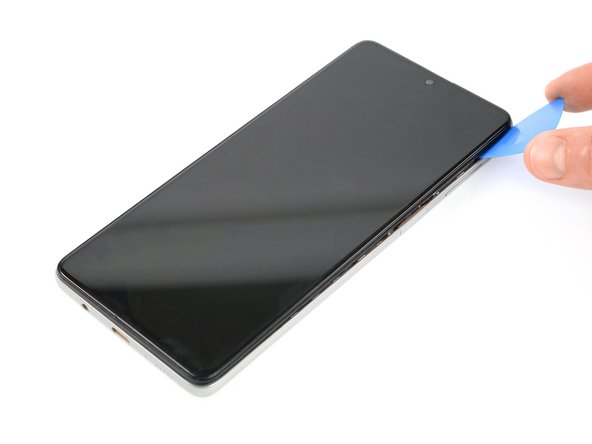
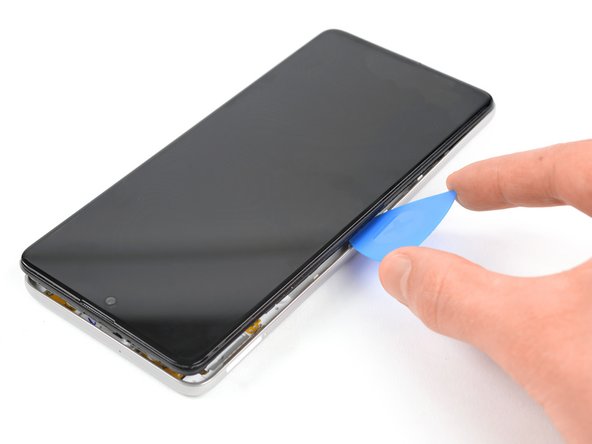
– Now it’s time to get those plastic clips to release – simply slide the opening pick along the right edge to set them free.
Step 13

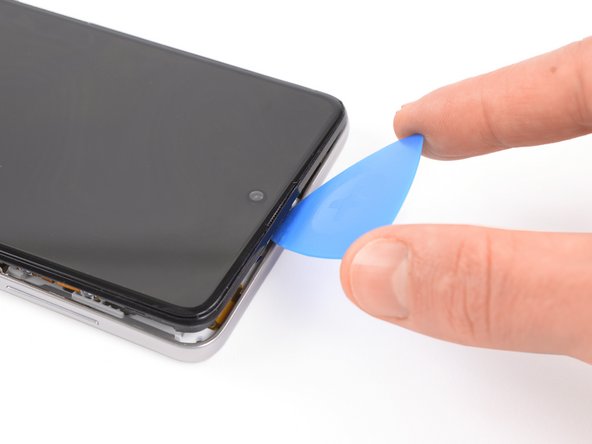
– Now it’s time to get this repair started – gently slide the opening pick along the top edge to release the midframe from those plastic clips. If you need help, you can always schedule a repair
Step 14

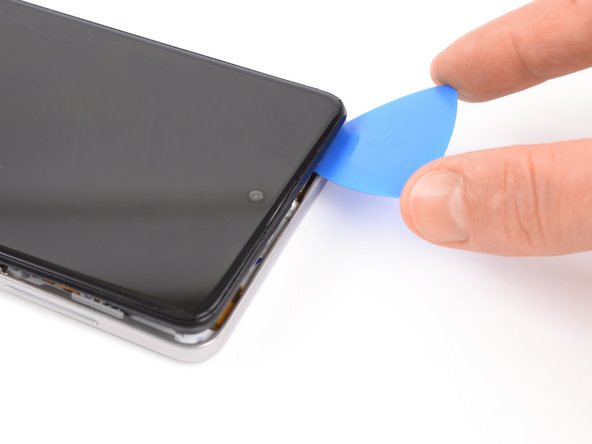
– Now, let’s gently slide that opening pick along the left edge, freeing those little plastic clips. We’re almost there!


Step 17

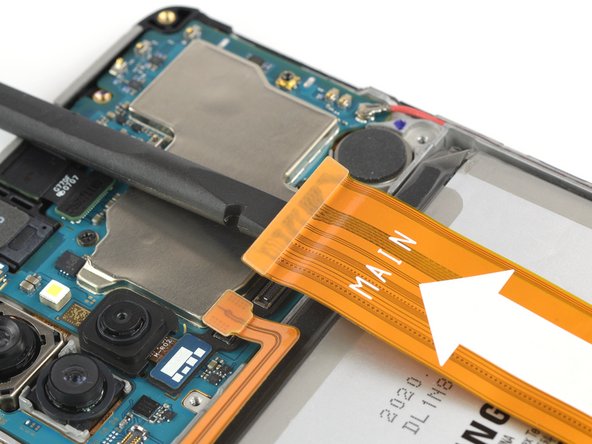
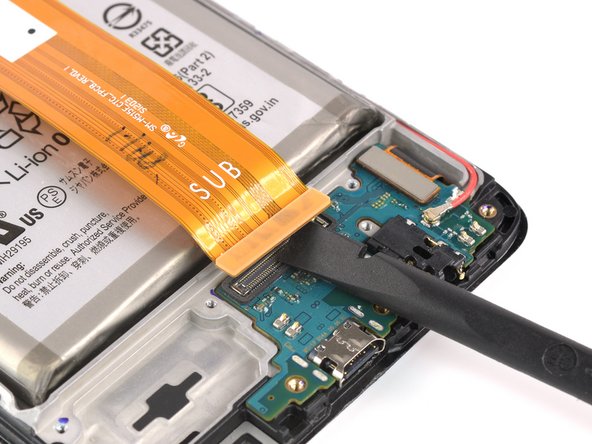
– Grab your trusty spudger and gently use the flat end to disconnect the interconnect flex cable from the motherboard. You’ve got this!
Tools Used

Step 19

If you’re having a bit of trouble getting that battery out, don’t sweat it! A little bit of high concentration (over 90%) isopropyl alcohol on the edges of the battery can help loosen up the adhesive. Just be careful, we don’t want any spills! If you need help, you can always schedule a repair.
– Get your trusty iOpener and give that screen a nice warm hug for 2-3 minutes. This’ll help loosen up the glue holding everything together. You might need to repeat this love tap a few times during the battery swap, but hey, that’s just how we roll! If you need help, you can always schedule a repair
Tools Used
Step 20


Alright, let’s be careful with the battery! These guys are kind of delicate. Don’t squeeze or bend it too much. A little pressure could make it unhappy, and nobody wants a battery that’s feeling stressed. If you need help, you can always schedule a repair.
Step 21

Hey, don’t go putting a busted or bent battery back in! Safety first, always. If you need help, you can always schedule a repair.
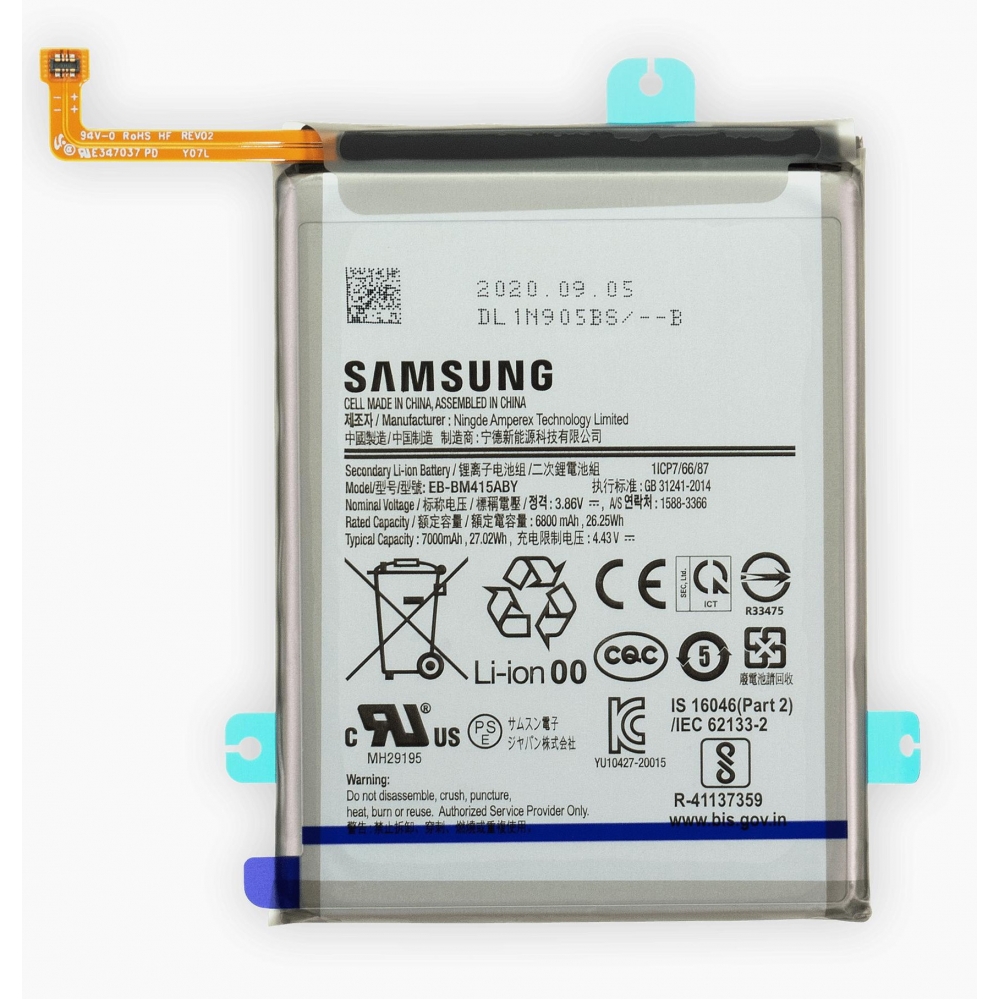
– Let’s get started by removing the battery to ensure your safety while working on the device.