DIY Guide: Step-by-Step Acer Iconia B1-710 Camera Replacement
Duration: 45 minutes
Steps: 9 Steps
Ready to tackle your Acer Iconia B1-710 tablet camera? We’ve got you covered with this step-by-step guide! If your camera has scratches, breaks, or just isn’t working right, these instructions will help you replace it with ease. Remember, your device is delicate, so proceed with a gentle touch.
Step 1
Hey, just a heads-up: Don’t yank those pieces apart with too much gusto. There’s a wire that’s pretty delicate and might snap.
– Pop open the back cover by gently prying it off with an opening tool.
Step 4
Stash those screws in a secure spot, you’ll need ’em later, trust us!
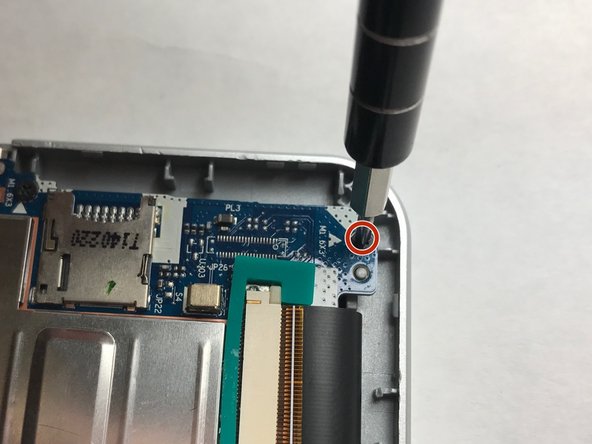
– First, let’s get started by removing the five 3mm Phillips #000 screws. Take a look at the picture above and you’ll see the screw locations circled in red – that’s where you’ll need to focus your screw-removing skills!
Step 5
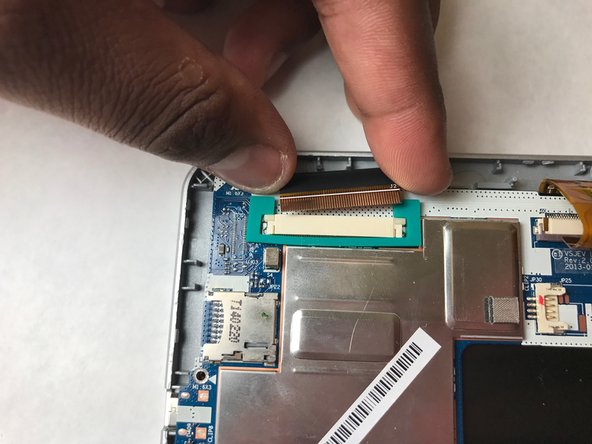
Gently lift that sticky LCD plug with a spudger, and you’ll be golden! If you’re struggling, don’t sweat it – our experts are here to help. If you need help, you can always schedule a repair
– Alright, time to unplug the LCD! Gently lift the LCD plug off the white board. Check out the red-circled spot in the picture above to see exactly where that sneaky plug is hiding.
Tools Used
Step 6
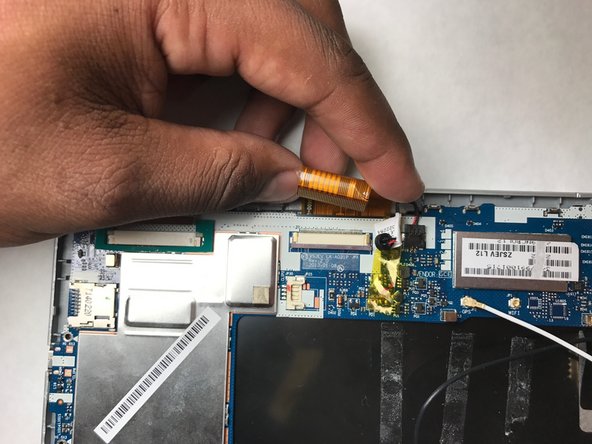
Be super careful with the orange strip! It’s delicate, so gently unplug it and make sure it stays in one piece.
– Alright, time to handle that orange strip! Carefully lift it up to unhook it from the motherboard. You can spot it in the picture above—it’s circled in red so you can’t miss it. Be gentle and precise!
Step 7
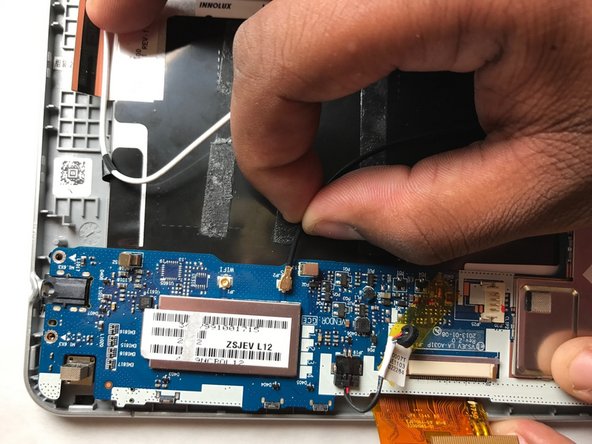
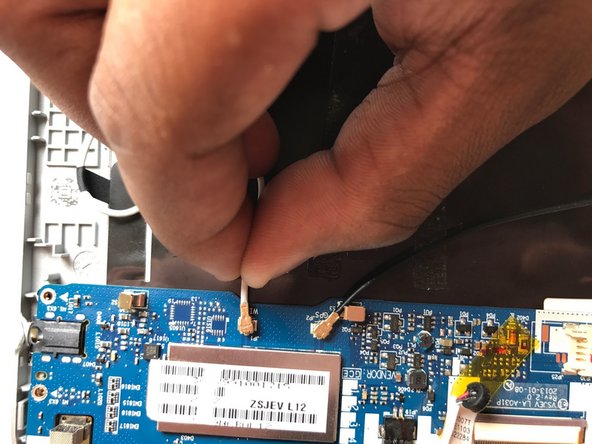
– Disconnect the white wire (marked red above).
– Disconnect the black wire (marked orange above).
Step 9
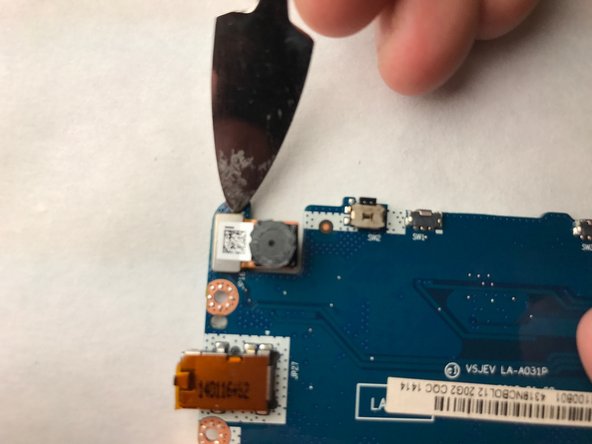
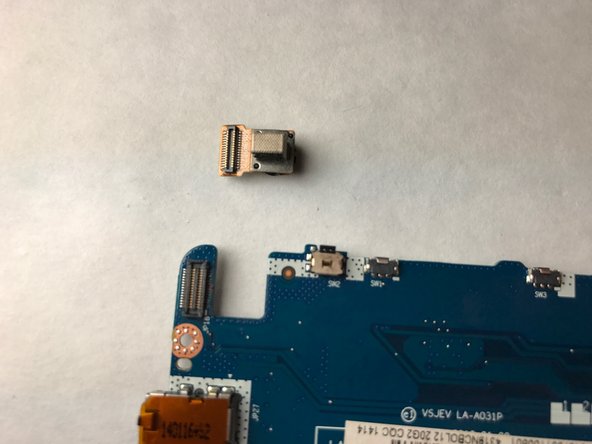
Handle the camera plug with care—it’s super fragile, so take it slow and steady!
– To put your device back together, just follow the steps above in reverse. Easy peasy!
– Cancel: Oops, I didn’t finish this guide.
– Need help? You can always schedule a repair
Tools Used
Success!


