DIY Guide: Step-by-Step Apex Tablet 7 Battery Replacement
Duration: 45 minutes
Steps: 17 Steps
Ready to breathe new life into your device? This guide will walk you through the simple steps to swap out that tired battery for a fresh one, perfect for when your battery’s feeling a bit under the weather. Let’s get started!
Step 1
– Remove the two 2.70 mm Phillips #00 screws located on the side of the tablet with the buttons and headphone jack (that’s the bottom side when you’re holding it upright).
Step 2
Heads up! When you’re taking off the back panel of the tablet, be extra careful around the speaker. It’s hanging out in the lower right corner on the back. There are two delicate wires connecting the back panel to the device, and if you’re not gentle, you might accidentally disconnect them. So, take your time and be cautious!
– Take a peek at the pictures and you’ll see this connection highlighted in red – it’s your next stop!
Step 3
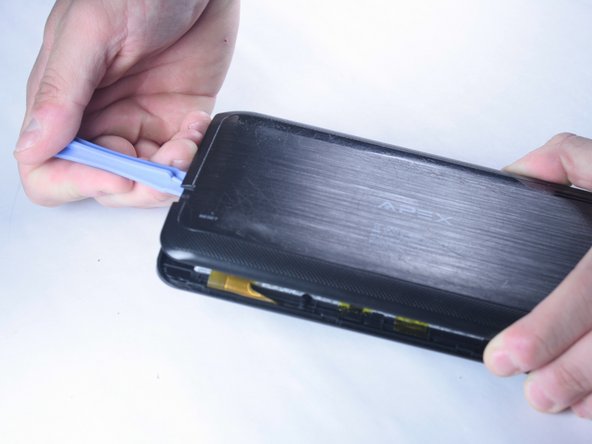
– Get started by sliding a plastic opening tool into the gap between the back panel and the top edge of your device – it’s like the key to unlocking a fresh new look!
– Now, run that plastic opening tool along the sides of your tablet, keeping it snug in the crack between the tablet and the back panel. This will help you create an opening and get things moving.
Step 4
– Gently press down with your hand to carefully pop off the back panel, making sure to be extra cautious around that speaker connection. You’ve got this!
Step 5
– Pop off that back panel, and you’re in! You’ve got access to all the parts you need to repair or replace in the tablet.
Step 6
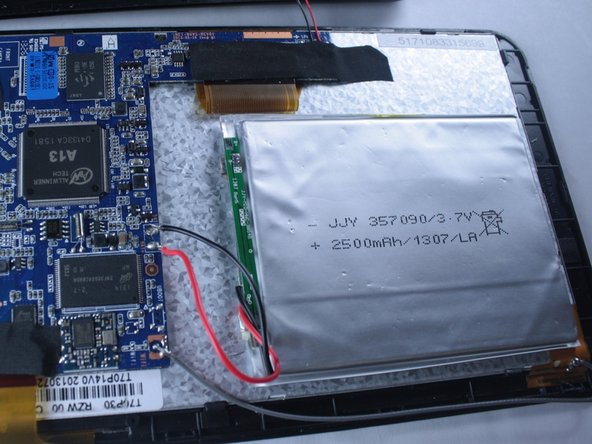
– Find the battery and spot those wires connected to it!
Step 7
– Grab your trusty tweezers or just use your fingers to gently peel away that yellow tape keeping the battery snug as a bug in your device. It’s time to set it free!
Tools Used
Step 8
Batteries can be a bit delicate, so when you’re removing the old one, it might get a little bumpy. Handle with care if you want to keep it in one piece!
Watch out for bending or poking the battery—it could lead to a fiery situation. Let’s keep things safe and sound!
– The battery is stuck to the back of your device with some sneaky adhesive. Grab a ruler or a spudger and gently work your way around, easing the battery free from its sticky prison.
Tools Used
Step 9
– The battery should now pop up easily from the device.
Step 10
– Alright, it’s time to disconnect the red and black leads from the battery to the circuit board. Let’s get that done!
– To achieve this, grab your hot soldering iron tip and desolder those connections.
Tools Used
Step 11
– Warm up the solder that’s anchoring both the black and red wires to the circuit board. At the same time, give a gentle pull using tweezers. When it’s heated enough, the wire should slip right off the joint like butter.
Tools Used
Step 12
– Now that you’ve disconnected everything, gently lift out the old battery and say goodbye to it.
– Look at that! You’ve got a cozy little spot ready for the shiny new replacement battery.
Step 13
– Grab your shiny new replacement battery!
– Position it right in the middle of the device where the old battery used to chill.
Step 14
– Locate those spunky red and black wires that are making their way from the battery. Now, it’s time to get your soldering iron ready and reconnect those little rascals back onto the circuit board where the old connections once were.
– Remember, the red wire is your hero, connecting to the positive (+), while the black wire is the trusty sidekick, linking to the negative (-), just like you see in the picture.
Step 15
– First up, grab that red wire tip and place it right on the positive terminal. Now, hold the solder strand so it’s making contact with both the terminal and the tip. Get your soldering iron ready and apply some heat until they cozy up together, and don’t be alarmed if you see a little smoke – that’s just them bonding!
– Next, let’s do the same thing with the black wire tip for the negative terminal. You’re doing great!
Tools Used
Step 16
– Alright, you’ve made it this far! Your battery is now successfully soldered to the tablet. Take a moment to double-check your work and make sure everything is secure.
Step 17
– Alright, grab that trusty heat-resistant tape and secure the battery snugly onto the device. Make sure it’s centered just right—like the star of the show—and then apply strips of tape until it’s steady and locked in place.
– Boom! Your battery is now all hooked up and cozy in your tablet, ready to power up your adventures.
Success!


