DIY Guide: Step-by-Step Nintendo Switch Lite Digitizer Replacement
Duration: 45 minutes
Steps: 77 Steps
Ready to fix that cracked or busted digitizer on your Nintendo Switch Lite? Let’s do it! Good news—there’s no need to mess with the joysticks or buttons, though removing them can make things a bit easier. The Switch Lite comes with JIS screws, but if you’re in a pinch, a Phillips screwdriver will do the trick. Just go easy and avoid stripping those screws! (Pro tip: Phillips bits often work great with JIS screws.) Heads up: This guide is all about replacing the digitizer. If the LCD isn’t working, it might just need a swap instead of the digitizer. Got a broken screen where the LCD and digitizer are attached? Check out the linked guide for that fix. One more thing—this repair involves removing the shield plate and heat sink, so you’ll need to clean off the old thermal paste from those parts (and the CPU) and slap on some fresh paste before putting it all back together. You got this!
Step 1
Before you dive into this repair adventure, ensure your device is fully powered down. Safety first, my friend!
While you’re diving into this repair, keep tabs on each screw and make sure it finds its way back home.
– Grab your Y00 screwdriver and use it to unscrew the four 6.3mm screws holding the back panel in place. Once they’re out, you’re one step closer to getting things fixed!
Step 2
To keep those stubborn screws from getting all stripped out, press down firmly, take it slow, and if they refuse to budge, give a different screwdriver a shot.
– Let’s get started by removing the screws that hold the back panel in place. Grab your trusty JIS 000 driver or an official PH 000 driver and get ready to unleash your inner repair rockstar!
– First, locate the two 3.6 mm-long screws at the top of the device. Remove them with your driver to begin the process of freeing the back panel.
– Next, head to the bottom of the device and find the two more 3.6 mm-long screws. Remove these as well to further loosen the back panel’s grip.
Step 3
Be careful not to push the opening tool in too deep; we want to keep that speaker module safe and sound!
– Gently slide an opening tool into the left speaker grille at the bottom of your device.
– Give that opening tool a little twist to pop those clips holding the back panel in place.
Step 4
– Gently glide your opening tool along the bottom-left corner and work it up the left edge, popping those clips free as you go—easy does it!
Step 5
Keep the opening tool’s dive shallow—no need to go deep! This keeps the speaker module safe and sound.
– Slide an opening tool into the right speaker grille at the bottom of the device.
– Give the opening tool a little twist to pop those clips loose.
Step 6
– Take your opening tool and glide it around the bottom-right corner, giving those clips on the right side a gentle nudge to pop them free. Easy does it!
Step 7
– Keep on gliding and wiggling that opening tool along the top gap of your device to pop those clips loose!
Step 8
– Gently lift up the bottom edge of the back panel, flipping it open like you’re turning the page of your favorite book.
– Carefully take off the back panel and set it aside.
Step 9
– Grab a JIS 000 driver or an official PH 000 driver (either works) and unscrew these four screws:
– Three screws, each 3.1 mm
– One screw, 4.5 mm
Step 10
You might encounter a little pushback here, and that’s totally cool! The shield plate is just a bit snug against the heat sink thanks to some thermal paste bonding them together.
– Grab a spudger or use your fingers, and gently lift that shield plate up and out—like you’re dishing out a slice of pie.
– Next up, say goodbye to the shield plate—remove it completely.
– Time for a little cleanup! Use isopropyl alcohol and a microfiber cloth to wipe off the old thermal paste from the shield plate and heat sink. Then, spread a fresh layer of thermal paste on the heat sink before putting everything back together.
Tools Used
Step 11
– Grab your trusty opening tool or even your fingernail and gently flip up that tiny, hinged locking flap on the motherboard interconnect cable’s ZIF connector. You’ve got this!
Step 12
Skip the metal tweezers—seriously! Using metallic ones might cause a short circuit in the ribbon cable or connector. Play it safe with nylon-tipped or ceramic-tipped tweezers instead.
– Grab those tweezers and gently slide the interconnect cable out of its cozy spot on the motherboard.
Tools Used
Step 13
– Grab your trusty spudger and gently pop the battery connector straight up and out of its socket on the motherboard. Easy peasy!
Tools Used
Step 14
Just peel back the foam a bit, enough to give the fan some room to breathe.
– Time to get up close and personal with that foam! Use the flat end of a spudger or your fingers to gently pry up the foam that’s stuck to the fan. Take your time, be careful, and you’ll be a pro in no time!
Tools Used
Step 15
– Grab your trusty JIS 000 driver or the official iFixit PH 000 driver and get ready to tackle those three 3 mm screws holding the heat sink snugly to the motherboard. You’ve got this!
Step 16
Don’t be surprised if it feels a little stuck—that’s totally normal! The heat sink and CPU are held together by thermal paste, so just give it a bit of steady effort.
– Gently pop the heatsink off the motherboard with a spudger or your fingers—it’s like lifting the lid off a treasure chest!
– Wipe away the old thermal paste from both the heatsink and CPU using some isopropyl alcohol and a microfiber cloth. Then, spread a fresh dollop of thermal paste on the CPU, so it’s ready to chill properly when you put it all back together.
Tools Used
Step 17
– Grab your trusty opening tool or use your fingernail to gently pop up the little locking flap on the ZIF connector for the game card reader cable.
Step 18
– Grab a JIS 000 driver or the trusty iFixit PH 000 driver, and let’s tackle those seven 3.1 mm screws that are holding the game card reader and headphone jack in place. You’ve got this!
Step 19
– Grab some tweezers or just use your trusty fingers to gently lift the game card reader. Slide it to the left like a smooth operator to free the cable from its connector.
– Now, carefully take out the game card reader and headphone jack. Easy peasy!
Tools Used
Step 20
– Grab your trusty JIS 000 driver or the official iFixit PH 000 driver, and let’s get those two 4.5 mm screws out of the way! They’re holding the right trigger button assembly snugly to the motherboard, and it’s time to set it free!
Step 21
– Take off the right trigger button assembly with care.
Step 22
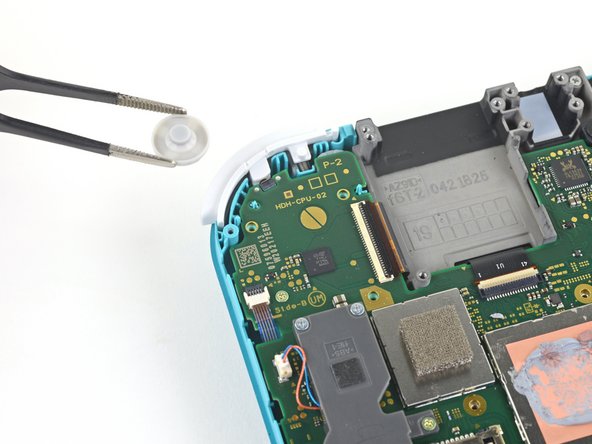
– Gently coax the rubber pad off the right trigger button assembly using tweezers or your fingers if it decided to play hide and seek with the button assembly.
Tools Used
Step 23
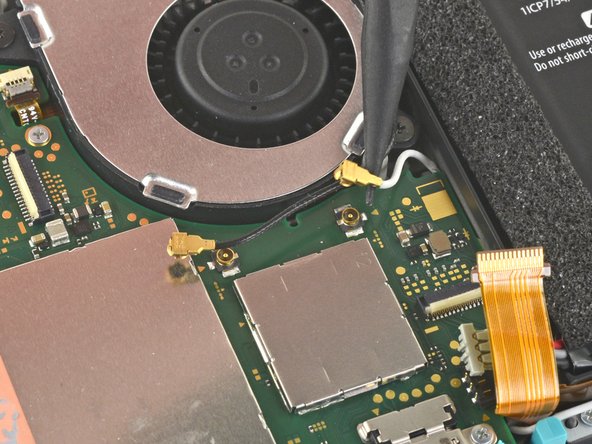
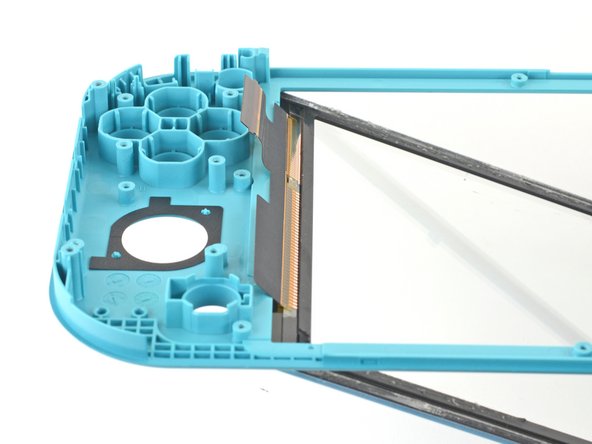
– Grab a spudger and gently pop the black antenna cable straight up and out of its socket on the motherboard. Easy peasy!
– Now, give the white antenna cable the same treatment—same tool, same move. You’re on a roll!
Tools Used
Step 24
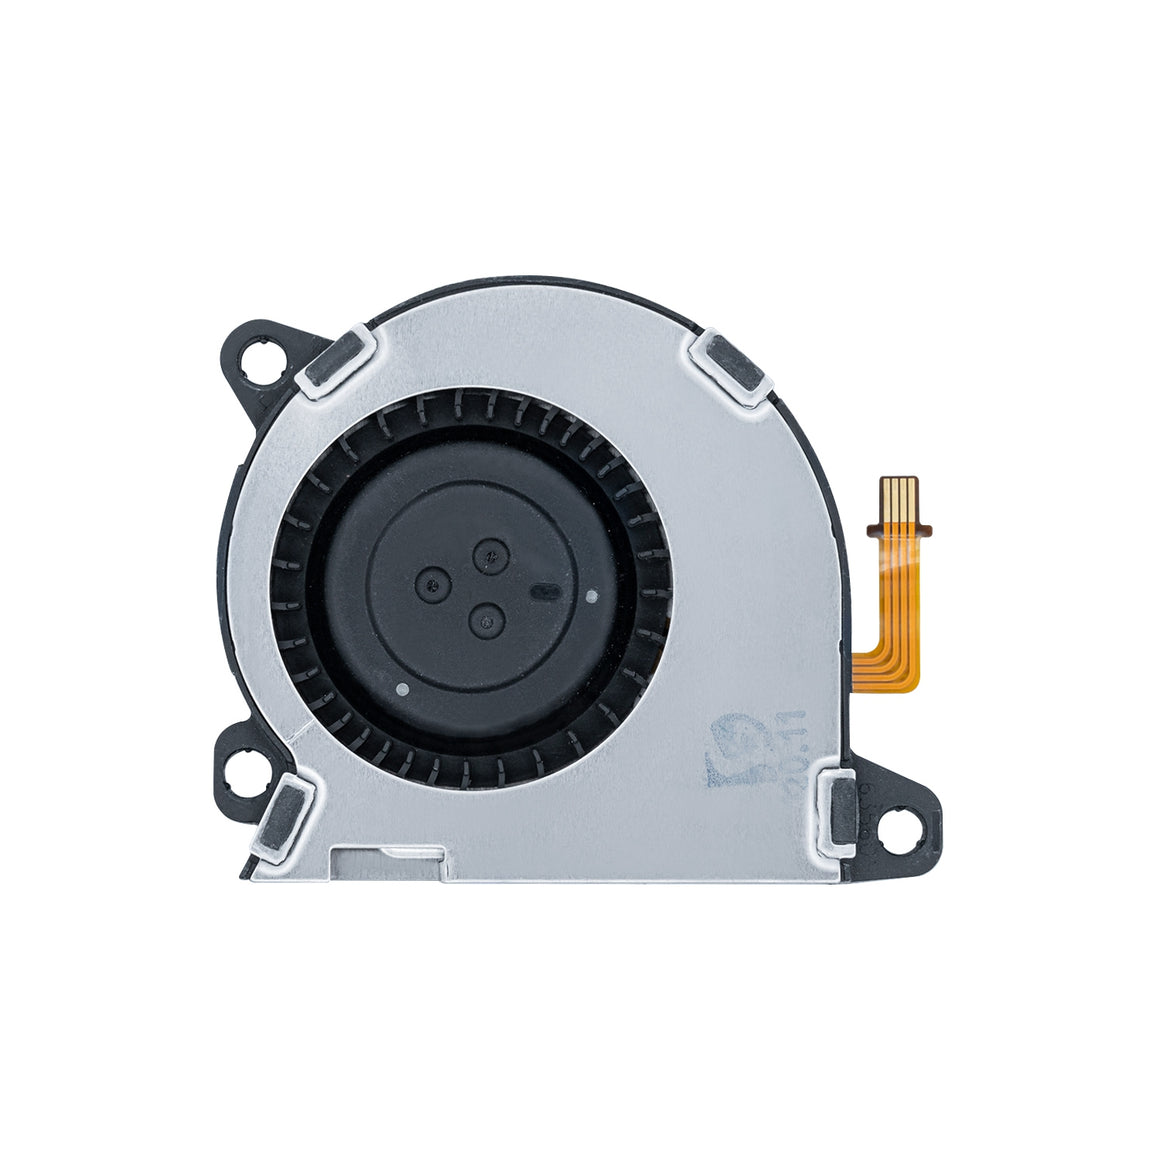
– Grab an opening tool or just your fingernail and gently pop up that tiny, hinged locking flap on the fan cable’s ZIF connector. Easy does it—no rush!
Step 25
– With a trusty pair of tweezers, gently nudge the fan cable out from its connector on the motherboard—nice and easy!
Tools Used
Step 26
– Grab a trusty opening tool or just use your fingernail and gently flip up the tiny, hinged locking flap on the ZIF connector for the screen cable—take it slow and steady, you’re doing great!
Step 27
– Grab a trusty pair of tweezers and gently wiggle that screen cable out of its cozy connector on the motherboard. You’ve got this!
Tools Used
Step 28
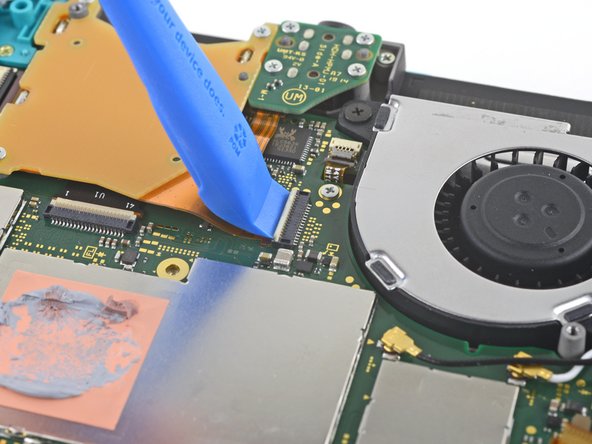
– Gently use an opening tool or your trusty fingernail to lift the tiny, hinged locking flap on the digitizer cable’s ZIF connector. You’ve got this!
Step 29
– Grab your trusty tweezers and gently wiggle the digitizer cable out of its connector on the motherboard. Take it slow—no need to rush perfection!
Tools Used
Step 30
– Grab your trusty opening tool—or even just your fingernail—and gently pop open the tiny, hinged locking flap on the ZIF connector for the right joystick cable. Easy does it!
Step 31
– Grab a pair of tweezers and gently ease the right joystick cable out of its connector on the motherboard. Take your time, no rush!
Tools Used
Step 32
– Grab your JIS 000 driver or a cool official PH 000 driver from Salvation Repair, and let’s get rid of these six sneaky screws holding down the motherboard:
– Three 3.1 mm screws
– Three 4.5 mm screws
Step 33
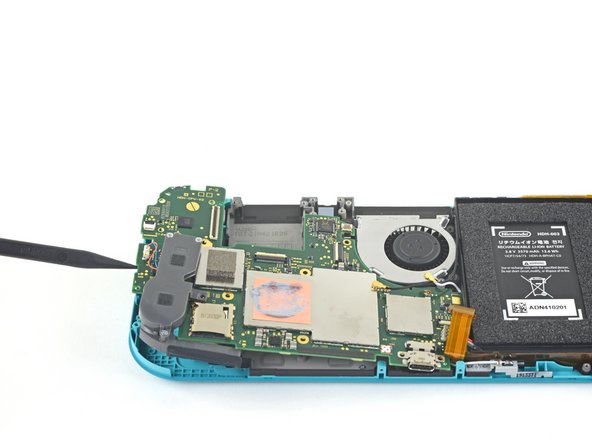
– Pop a spudger into the little gap between the frame and the motherboard, then gently wiggle and lift the motherboard up and out of its cozy spot.
– Carefully take out the motherboard assembly.
Tools Used
Step 34
– Grab a JIS 000 driver or an official PH 000 driver from iFixit and get ready to tackle those two 3.5 mm screws holding the joystick in place. You’ve got this!
Step 35
There’s a slim black gasket snug around the hole where the joystick peeks through the frame. Be cool and leave this gasket alone while you pop out the joystick.
– Gently use your fingers to lift off the joystick.
Step 36
Don’t yank on those wires, or you might end up detaching them from the connector. Stay gentle, and you’ll be golden!
– Grab those tweezers (or just use your fingers if you’re feeling bold) and gently lift the left speaker cable straight up and out of its cozy little socket on the daughterboard.
Tools Used
Step 37
– Grab your JIS 000 driver or a trusty PH 000 driver, and unscrew that 4.5 mm little guy holding the left speaker module in place. You’ve got this!
Step 38
Be gentle with the speaker module as it has a delicate ribbon cable right underneath it. Make sure to avoid snagging the speaker module on the cable while you’re carefully removing it.
– Gently coax the speaker module out of its cozy little home by lifting it up with your fingers. It’s time for it to see the world outside its recess!
Step 39
– Grab your trusty opening tool or just your fingernail, and gently lift that little hinged locking flap on the ZIF connector for the motherboard interconnect cable. You’ve got this!
Step 40
– Grab a trusty pair of tweezers and gently wiggle that motherboard interconnect cable out of its cozy connector on the daughterboard. You’ve got this!
Tools Used
Step 41
– Time to get started! Use an opening tool or your trusty fingernail to carefully flip up the tiny, hinged locking flaps on the two ribbon cable ZIF connectors. This is a breeze, and you’re doing great!
Step 42
– Grab your trusty tweezers and gently slide the daughterboard screen cable out of its connector on the motherboard.
– Now, do the same for the volume buttons cable. You’ve got this!
Tools Used
Step 43
– Grab a pair of tweezers or simply use your fingers to gently remove the volume buttons.
Tools Used
Step 44
– Grab your handy opening tool (or your trusty fingernail) and gently flip up the tiny, hinged locking flap on the ZIF connector for the left joystick cable. Take it easy—no need to force it!
Step 45
– Grab a trusty pair of tweezers and gently wiggle the left joystick cable free from its cozy connector on the daughterboard. You’ve got this!
Tools Used
Step 46
– Grab a JIS 000 driver (or an official PH 000 if you have one) and carefully unscrew the two 4.5mm screws holding the left trigger button assembly in place. You’re almost there!
Step 47
– Pop off the left trigger button assembly like a pro—you’re doing great!
Step 48
– Grab your trusty JIS 000 driver or the official iFixit PH 000 driver, and let’s get to work removing those pesky screws:
– Two 4.5 mm screws—easy peasy!
– And don’t forget about the two 6 mm screws—just as simple!
Step 49
– Gently coax the daughterboard out of its cozy little spot by lifting it up with your fingers. It’s like giving it a little nudge to say, ‘Time to come out and play!’
Step 50
– Grab your trusty JIS 000 driver or a PH 000 driver and carefully unscrew the two 3.5 mm screws holding down the left joystick. You’ve got this!
Step 51
Be careful with the sleek black gasket that hugs the hole where the joystick pops through the frame. It’s a delicate little thing, so try to keep it happy while you gently remove the joystick.
– Grab the flat end of a spudger and gently pop that joystick out of its cozy little nook.
– Now, use your fingers to pluck the joystick out and set it aside like a pro.
Tools Used
Step 52
– Grab your trusty JIS 000 driver or the official iFixit PH 000 driver, and let’s tackle those screws! You’ll need to remove four of them:
– Three screws measuring 2.5 mm
– One screw that’s 6 mm
Step 53
– Time to get that midframe assembly out! Use a spudger or your fingers to gently pry it up and out of its cozy little home.
– Now that it’s loose, carefully lift the midframe assembly out of the way.
Tools Used
Step 54
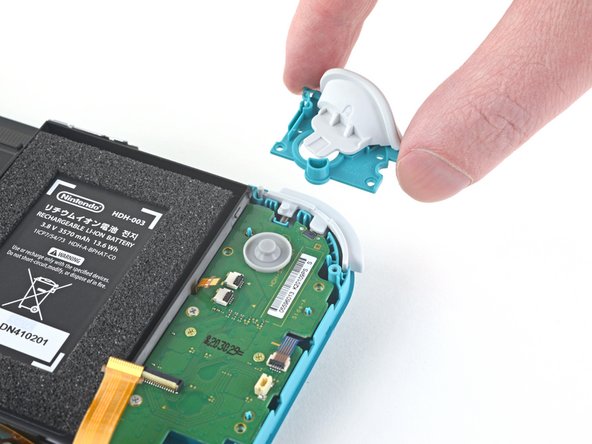
Check out these two photos to get a better understanding of what you’re working with.
– Alright, now’s the time to pop out all those buttons if you haven’t already. Trust me, it’s way better than chasing after tiny escape artists later!
Step 55
You can also use a hair dryer or heat gun, but be mindful not to overheat the LCD if you plan on reusing it, as it’s prone to heat damage.
– Warm up an iOpener and gently press it against the back of the LCD along the top edge for about 2 minutes. You’ve got this!
Tools Used
Step 56
Slide the pick all the way under the LCD panel to avoid any breakage or damage.
You’ll know you’re on the right track with the panel when the shiny silver backing starts to bubble up and peel away from the white lining. Keep going, you’re doing great!
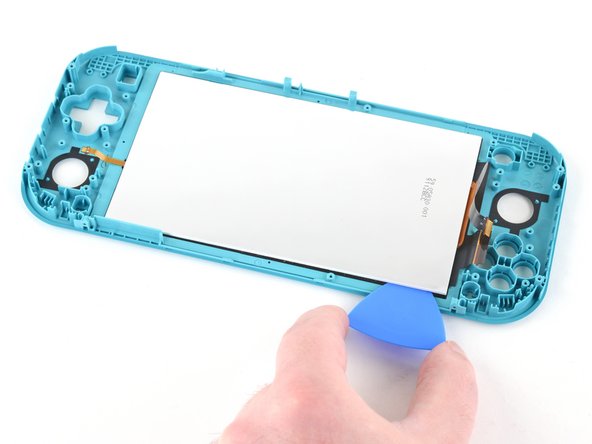
– Slide an opening pick between the frame and the top edge of the LCD to kick off the separation of these two components. You’ve got this!
Step 57
– Glide the opening pick along the top edge of the LCD with a steady hand to separate the adhesive—you’re making smooth moves!
Step 58
– Time to get this repair started! Apply some heat to the back of the LCD, right edge, using a heated iOpener for about 2 minutes. This will help loosen things up and make the next steps a breeze.
Tools Used
Step 59
The LCD and digitizer cables are carefully arranged to avoid getting snagged by the opening pick, but it’s still a good idea to be gentle while sliding that pick along the gap. Keep it cool and steady!
– Keep sliding that opening pick along the right edge of the LCD, slicing through the adhesive like a pro. You’re doing awesome—keep it up!
Step 60
– Warm up that iOpener and give it a cozy hug to the back of the LCD along the bottom edge for a solid 2 minutes. You’ll be melting away those stubborn connections in no time!
Tools Used
Step 61
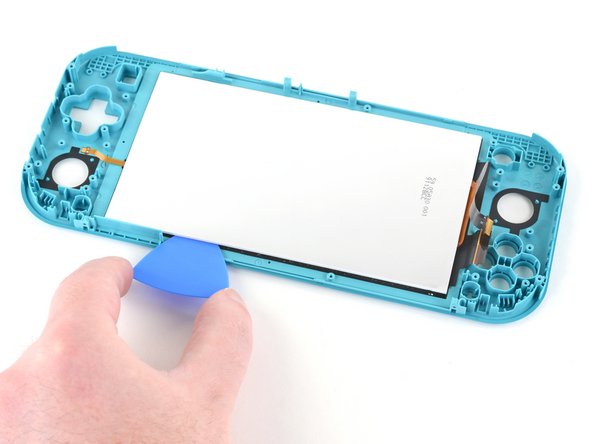
You’ll want to wiggle that opening pick in and out at different spots along the LCD’s edge to navigate around the frame like a pro.
– Keep gliding that opening pick along the bottom edge of the LCD to cut through the adhesive like a pro!
Step 62
– Warm up a heated iOpener and press it gently against the back side of the LCD, focusing on the left edge, for about 2 minutes.
Tools Used
Step 63
Be careful not to snag the LCD’s daughterboard cable with the opening pick—keep it smooth and steady!
– Keep that opening pick gliding along the left side of the LCD to break through the adhesive. You’ve got this!
Step 64
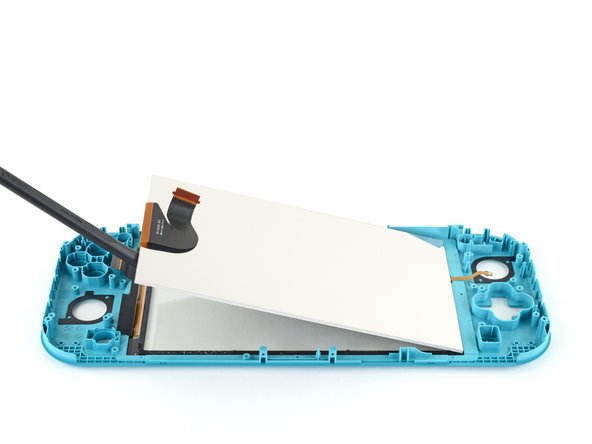
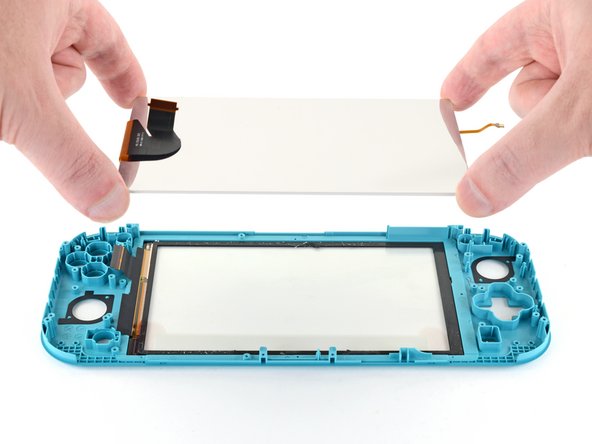
– Grab the flat end of a spudger or just use your fingers to gently lift the LCD up and pop it out of the frame—you’re removing it like a pro.
– If you’re planning to reuse the LCD (or your shiny new LCD doesn’t already have adhesive pre-installed), check out this guide to stick on pre-cut adhesive around the edges before putting it all back together.
Tools Used
Step 65
If you’re also swapping out the digitizer, feel free to breeze right past this step!
– Grab your trusty spudger and gently use the flat end to scrape away any stubborn adhesive lurking around the edges of the digitizer. It’s like giving your device a little spa day!
– Before you pop in that shiny new LCD, take a moment to pamper the back side of the digitizer. Use some isopropyl alcohol with a microfiber cloth to wipe away any leftover adhesive. Let it sit for a few minutes to let the alcohol do its thing and evaporate completely before you install the LCD. Trust us, your device will thank you!
Tools Used
Step 66
– Heat up the iOpener and lay it on the front side of the digitizer along the left edge for a chill 2 minutes.
Tools Used
Step 67
Having trouble making a gap? Try adding a bit more heat and you’ll be golden!
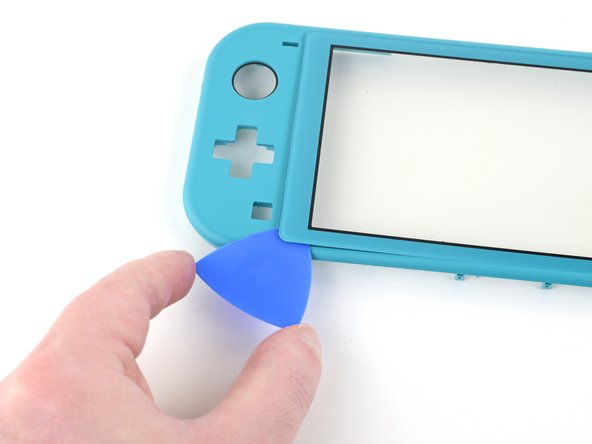
– Gently flex the left side of the frame to make a small gap between the digitizer and the frame—just enough to work with.
– Slide an opening pick into that gap like a pro. Nice and easy does it!
Step 68
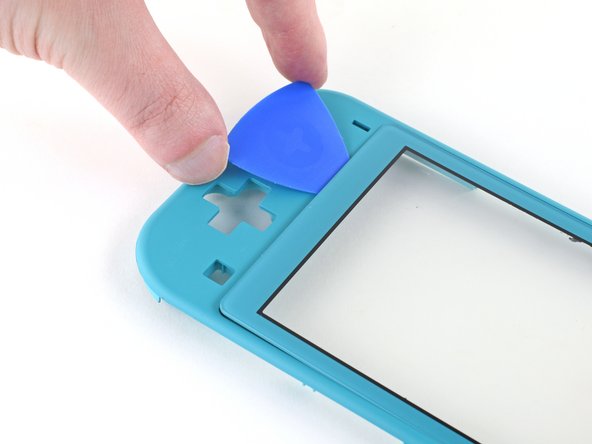
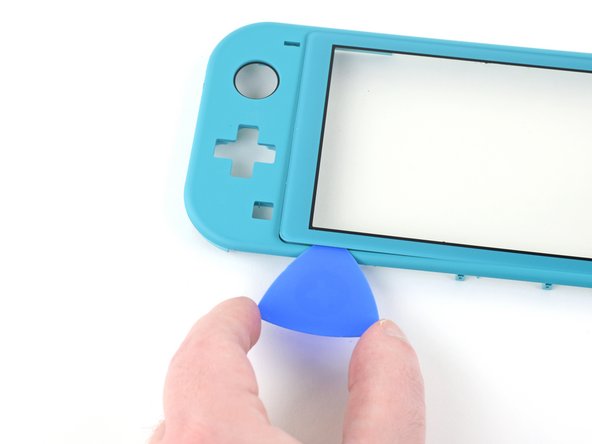
– Gently slide the opening pick along the left edge of the digitizer to carefully cut through the adhesive. Take it slow and steady, and you’ll be golden.
Step 69
– Let’s get this repair started! Apply some heat to the front side of the digitizer along the top edge using a heated iOpener for 2 minutes. This will help loosen things up and make the next steps a breeze.
Tools Used
Step 70
– Keep gliding the opening pick smoothly along the top-left edge of the digitizer to slice through that pesky adhesive like butter.
Step 71
– Now it’s time to get this repair party started! Carefully slide the opening pick along the top edge of the digitizer to break through the adhesive.
Step 72
– Let’s get this repair started! Apply some heat to the front of the digitizer, specifically along the bottom edge, using a heated iOpener for about 2 minutes. This will help loosen things up and make the next steps a breeze.
Tools Used
Step 73
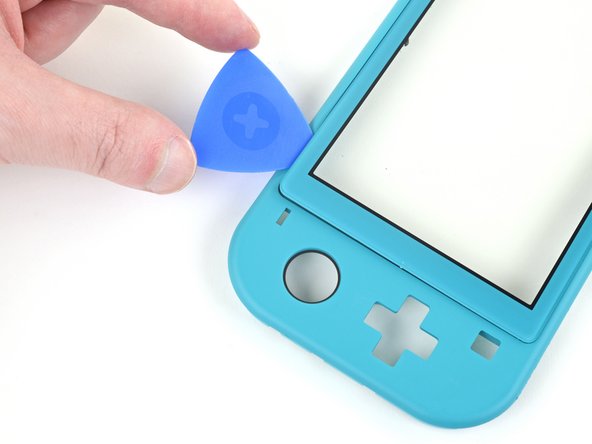
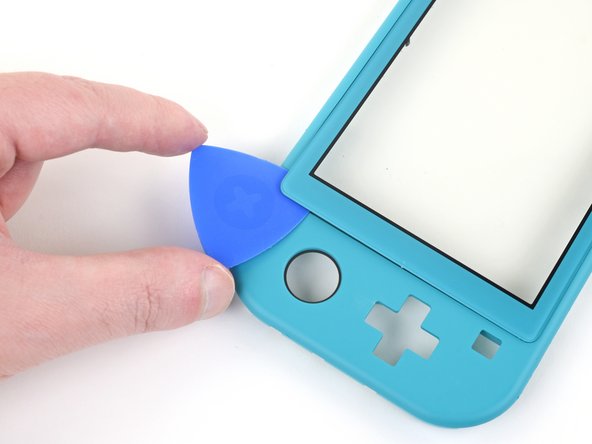
– Keep working the opening pick along the bottom-left edge of the digitizer, gently slicing through the adhesive as you go.
Step 74
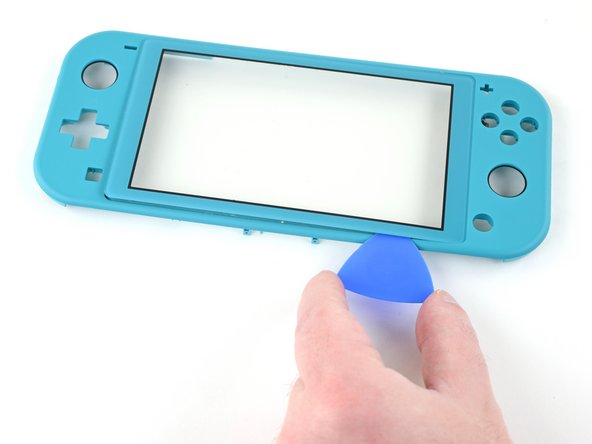
– Now it’s time to get this repair started! Carefully slide the opening pick along the bottom edge of the digitizer to gently cut through the adhesive holding it in place.
Step 75
– Warm up your heated iOpener and place it on the front of the digitizer along the right edge for 2 minutes. You got this!
Tools Used
Step 76
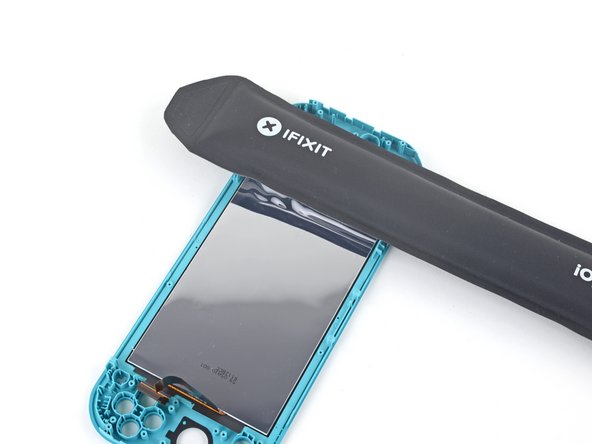
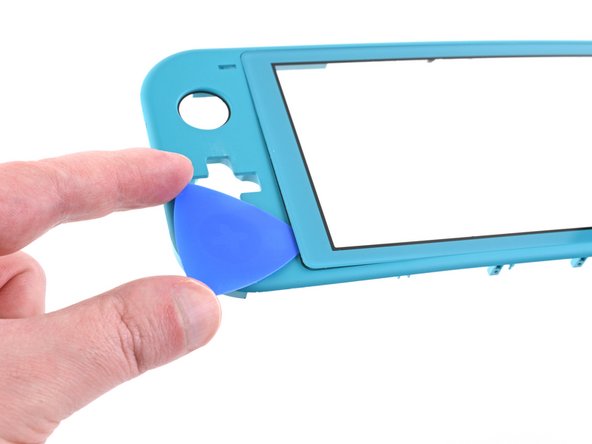
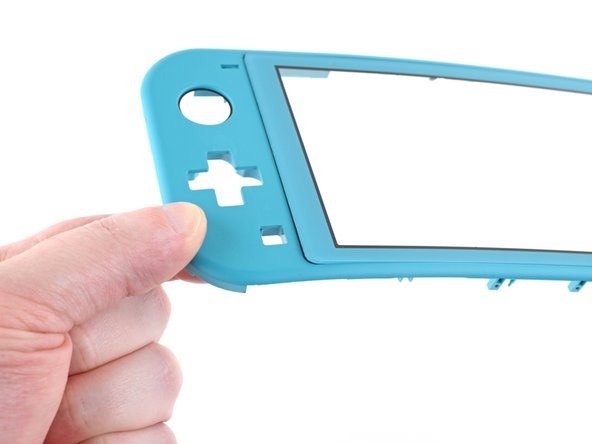
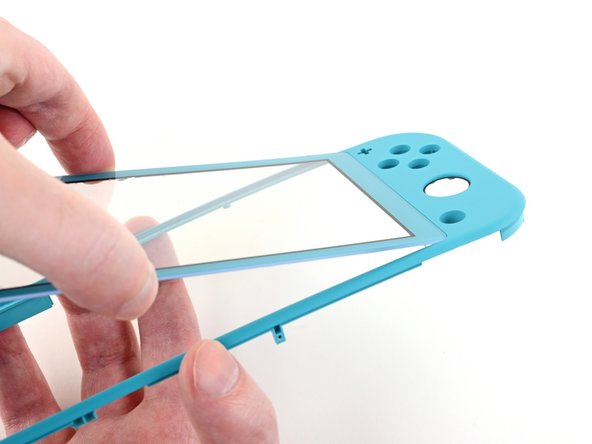
Because of how the digitizer cables are positioned, you can’t just yank the digitizer off the frame.
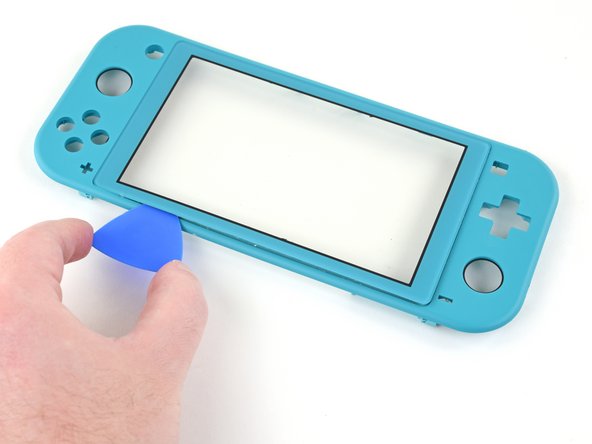
– Gently start lifting the left side of the digitizer with your hands, just like you’re opening a book. Take it slow and steady, you’ve got this!
Step 77
– Now it’s time to put your device back together—just retrace your steps like a pro!
– Got some old tech lying around? Make sure to drop it off at an R2 or e-Stewards certified recycler.
– If things didn’t go as smoothly as you hoped, don’t sweat it! Give some basic troubleshooting a shot, or swing by our Nintendo Switch Lite Answers community for a helping hand.
– Remember, you’re not alone in this journey!
Success!


