
DIY Guide to Replace Apple Watch – Original Force Touch Sensor
Duration: 45 minutes
Steps: 39 Steps
Whoa, buddy! This step’s got a bit of a challenge to it. Pay attention and be gentle with those parts. You’ve got this! And hey, if it gets tricky, you can always schedule a repair with the experts.
Heads up! When you open up your Apple Watch, there’s a chance the Force Touch sensor might take a hit. This little guy also doubles as the gasket seal, keeping things nice and snug. It’s made of two layers stuck together, and they might decide to part ways when you crack open the watch, potentially leaving things not as tight when you put everything back together. If this happens, you’ll need to patch up or swap out that sensor before sealing the deal. If you need help, you can always schedule a repair.
Step 1
Is your touchscreen acting up and stopping your watch from powering off? No worries, here’s a cool workaround to shut it down. And hey, if you’re stuck, you can always schedule a repair.
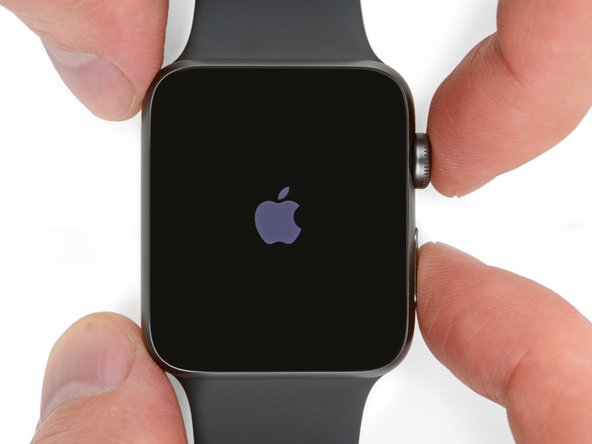
– Before diving into the repair action, make sure to unplug your watch from the charger and power it down. Let’s get started on making it shine again!
Step 2

You might need to give the iOpener another warm-up or shift it to a different spot on the screen as some areas start to cool, to get that screen just right for lifting it off. If you need help, you can always schedule a repair.
– Get your iOpener ready (or grab a trusty hair dryer or heat gun) and warm up the front of the watch until it feels a tad too hot to handle.
– Keep that iOpener cozy on the watch for at least a minute so it can work its magic, heating up the screen and loosening the adhesive that’s holding it snug in the case.
Tools Used

Step 3


Keep those fingers safe and sound by steering clear of the knife! If you’re feeling iffy, grab a sturdy glove, like a leather shop glove or a gardening pal.
Easy does it! Too much pressure could send your knife skidding into a hand or wreak havoc on the watch.
Pop on some eye gear because we don’t want any airborne shards from a rebellious knife or glass. And hey, if you need a hand, you can always schedule a repair!
Hey there, tech hero! So, the screen and watch body are super close-knit, and you’ll need a sharp blade to gently split them up. But before you dive in, make sure to read these crucial warnings to keep everything cool and safe.
Step 4


Handle the knife with care—once you create that gap, if you push too hard, it could slip and accidentally poke the battery. Stay in control and keep it safe!
Opt for a curved blade to keep that case scratch-free and glass intact! Remember, only use the curved part for prying—leave the tip and flat section out of it.
This nifty maneuver should help create a gap and let the glass pop up just a bit from the case.
– Slide that curved blade magic into the groove at the bottom edge of your watch’s face and give it a firm push straight down. You’ve got this!
– Once you see that glass starting to nudge up, gently tilt the knife down, allowing that opening to grow. Push the glass upward with care and watch the magic happen.
Step 5


Heads up! When using the opening pick, remember just to dip it in about 1/8″ (roughly 3 mm). Going any deeper might snag some cables, and we definitely don’t want that. If you need help, you can always schedule a repair!
– Now that you’ve opened the gap just right, it’s time to slide the tip of your opening pick under the glass. You’ve got this!
– Gently glide the pick along the bottom edge to break free the adhesive that’s keeping the screen snug against the case. Keep it steady!
Step 6


Just a friendly reminder: don’t press the pick in too deep! A little rolling motion works wonders and keeps you from dragging it along like a reluctant puppy. Keep it light and easy!
– Slide that pick along the side where the button hangs out, and give it a gentle nudge to peel away the adhesive while making that gap a little bigger as you continue. If you need help, you can always schedule a repair.
Step 7


– Gently slide your pick around the top right corner and glide it merrily along the top edge of the screen. If you need help, you can always schedule a repair.
Step 8


Keep that pick right where it is to stop the adhesive from getting all clingy and sealing the screen back up. Stay focused and let’s keep things moving!
– Keep that pick moving around the edge of the screen, smoothly gliding down the left side to slice through the last bits of adhesive. You’re almost there!
Step 9


– Keep the first pick in position, and take a second one to make sure you’ve rocked and rolled through all the adhesive around the whole edge of the screen. If you need help, you can always schedule a repair.
Step 10


Heads up! There are two sneaky cables connecting the screen to the inside of the watch near the top left corner. Take it easy while prying to avoid any potential cable carnage. If you need help, you can always schedule a repair.
– Gently lift the right side of the screen to release it from any stubborn adhesive. You’ve got this!
– Next, give the left side a little pry to set it free too—but hold your horses! The screen is still attached by two sneaky cables, so let’s not try to yank it off just yet.
Step 11


Uh-oh! If you catch a glimpse of the top layer of your Force Touch sensor peeking through the display adhesive, it seems like the layers decided to take a break from each other—and that’s your cue for a replacement or fix. No worries, we’ve got your back!
Salvation Repair’s fantastic screen and battery kits come with a fresh Force Touch sensor ready to rock, so if you’ve got one, no stress here! And if you need help, you can always schedule a repair.
– If the top layer of the sensor is stuck to the back of the screen, gently press it down and carefully peel it away. You’ve got this!


Step 13

Don’t jostle the screen or put too much pressure on those cables while you’re tinkering away.
– Set your watch on a raised surface—around 1/2″ or 1 cm high will do the trick. A little box or the edge of a book works perfectly! This way, the screen can dangle down, making it super easy to access the battery. You’re doing great!
Step 14


Hey, leave that battery right where it is! It’s still connected, no need for removal!
Handle the battery with care—no smooshing or poking allowed!
– Grab some scissors and snip one of your opening picks down to about the same width as the battery. Let’s keep those corners nice and smooth, shall we?
– Slide that modified pick right between the battery and the case on the right side.
– With a steady hand, gently pry the battery upward. We’re just looking to break free from that adhesive holding it tight to the system board.
– For those bigger (42 mm) models, be mindful not to poke too deep and engage the system board under there. Just get the pick in enough to lift the battery without causing any drama.
– If you’re having a bit of a struggle, a splash of high concentration isopropyl alcohol (90% or greater) around and underneath the battery can help loosen things up nicely.
Tools Used

Step 15


– Twist the battery to the left and reveal its connector like a magician unveiling a secret!
Step 16


– Gently lift the battery out of the way to reveal the battery cable connector. You’ve got this!
– Grab a plastic opening tool and nudge it against the bottom of the case to delicately disconnect the battery cable from the watch’s battery cable. Easy peasy!
– Carefully take out the battery from the watch. You’re doing great!
Step 17


– Gently lift the screen and swing it to the right, revealing the hidden cables beneath. Keep it smooth and steady!
Step 18


Be careful when prying near the watch band; you don’t want to accidentally snag those delicate cables!
The connectors for the display and digitizer cables are snugly tucked under a tiny metal bracket that’s glued to the speaker. Just a little extra love holding things together!
– Grab that trusty plastic opening tool and smoothly flip the bracket up toward the display—say hello to that speaker! If things get tricky, remember, help is just a click away. Schedule a repair and we’ll get you sorted!
Step 19


Getting the cover off can be a bit tricky and might take a couple of tries. Keep your cool, and remember to avoid yanking on the bracket or ripping any cables. If you need help, you can always schedule a repair.
Give those two slotted tabs a gentle nudge! They’re the ones keeping the cover snugly attached to the bracket, and once you release them, the cover should pop right off.
– Grab that bracket from the left with your fingers or even tweezers. Easy enough!
– While you’re at it, sneak a 1 mm flathead screwdriver under the little tab on the right. Steady now!
– Lastly, slip a finger behind the tab, and give that bracket a fierce little pinch between your finger and the screwdriver to pop off the cover. Nice work!
Tools Used

Step 20


– Take your trusty tweezers, grab hold of the cover, and give it a little slide towards the top of the watch to unhook that last tab. Now, voilà! The cover is off. If anything seems off, don’t hesitate to schedule a repair.
Tools Used
Step 21


Hey there! Avoid touching those exposed pins with your fingers, because oils from your skin might mess up their mojo. But if you ever need help, you can always schedule a repair.
Step 22


This screw is tiny and can easily get stripped. Make sure to keep your driver at the right angle and give it a little push while turning to keep things smooth.
– Grab your trusty Y000 driver and gently take out the lone tri-point screw that’s keeping the Force Touch sensor connector cable in place. You’ve got this!
Step 23


– Grab your trusty plastic opening tool and flip that Force Touch sensor cable connector downward to unplug it. It’s like a gentle high-five for your gadget! Remember, if you need help, you can always schedule a repair.

Step 25


– Grab a trusty plastic opening pick and your handy tweezers to gently lift that Force Touch sensor out of its cozy little home in the case. You’ve got this!
Tools Used
Step 26


Take it slow here! Any leftover residue might keep your display from sticking to the case and could lead to it coming loose down the line. If you need help, you can always schedule a repair.
– Grab those tweezers and clear out any leftover sticky bits from the lower case.
– Give the case a solid cleanup! Get rid of all that adhesive gunk (plus any stray glass shards if you’ve got ’em) before sealing up your watch again. Wrap an opening tool or spudger in a lint-free cloth or a coffee filter, dab on some strong isopropyl alcohol (go for 90% or higher), and scrub away. And hey, if it’s feeling a bit tricky, don’t sweat it—you can always schedule a repair.
Tools Used
Step 27


– If you’re sticking with your old screen, now’s the perfect time to bid farewell to that old adhesive. (If you’re putting in a shiny new screen, feel free to skip this step!)
– Grab a plastic opening tool and gently scrape away the old adhesive clinging to the edges of the screen. If you can, use tweezers to peel off the bigger bits.
– Give the area underneath the adhesive a good cleaning with some isopropyl alcohol to ensure a fresh start.
Tools Used
Step 28

– Place your spiffy new Force Touch sensor face-down, making sure those connector pins are aiming away from you—just like watching your favorite movie hero in stealth mode!
– Gently peel off and toss away the first protective liner to reveal that sticky adhesive, ready for action. If you need help, you can always schedule a repair!
Step 29


– Alright, here’s the part where we get a bit hands-on! With the sticky side down, gently place the Force Touch sensor into its cozy spot in the watch case. Take a moment to line it up just right.
– Remember, we want the connector chilling at the lower left corner, looking upwards. If things get tricky, no worries, you can always schedule a repair!
Step 30


– With a gentle yet confident touch, press the Force Touch sensor snugly all around the edge of the watch case. You’ve got this!
Step 31


– Grab those tweezers and gently fold the Force Touch sensor cable connector back up into its cozy socket.
– Next, take your trusty plastic opening tool and give that cable connector a little nudge to ensure it’s snug in the socket.
Tools Used
Step 32

– Swap out the Y000 tri-point screw that holds the Force Touch sensor connector cable in place. You’re doing great!
Step 33


Hey, watch out and try not to touch those exposed pins directly! Your finger oils could mess with the connection. And remember, if you need help, you can always schedule a repair.
– Grab a trusty plastic opening tool and carefully reconnect those display data and digitizer cable connectors. You’re doing great!
Step 34


– Position that display connector bracket cover just right and give it a little slide to lock in the big slotted tab on one end.
– Now, give the cover a gentle press to snap those two smaller tabs into their cozy spots at the other end.
Step 35


– Align the battery connector with its counterpart on the cable tucked inside the watch body.
– Grab your tweezers and gently press the two connectors together.
Tools Used
Step 36


It’s a great time to fire up your watch and give that force touch feature a whirl! If it doesn’t spring to life, just take a moment to check those three connectors again and give it another go.
– If your shiny new replacement battery comes with adhesive all ready to go, just peel off that protective tab and let the sticky magic happen!
– Gently tilt the battery down into its cozy little slot and give it a firm push to settle it in.
– Press that battery down onto the system board and let it stick like it’s meant to be there.
– If you want to keep things eco-friendly, feel free to re-use the old adhesive to hold the battery snugly. If not, a small piece of double-sided tape like Tesa 61395 or a little dab of liquid adhesive such as E6000 will do the trick!


Step 38


Step 39

– To get the best results, take off the watch band and wrap a couple of rubber bands around your Apple Watch’s case. This little trick will help the adhesive stick just right!
