DIY Guide to Replace Battery in Samsung Galaxy A53 5G
Duration: 45 min.
Steps: 17 Steps
If your battery is puffed up, remember that the gas inside is a bit of a fire hazard and could escape. If you’re not feeling up to the task, it’s totally cool to schedule a repair at a shop!
In this fun and easy-to-follow photo guide, we’ll walk you through the steps to swap out your battery like a pro!
Step 1


Before diving into the repair fun, grab our checklist to test the core features of your Galaxy A53 5G. This way, you’ll know if your repair mission was a total success afterwards!
– Give that side and volume down button a friendly squeeze together for a few seconds.
– Select Power off from the menu that pops up.
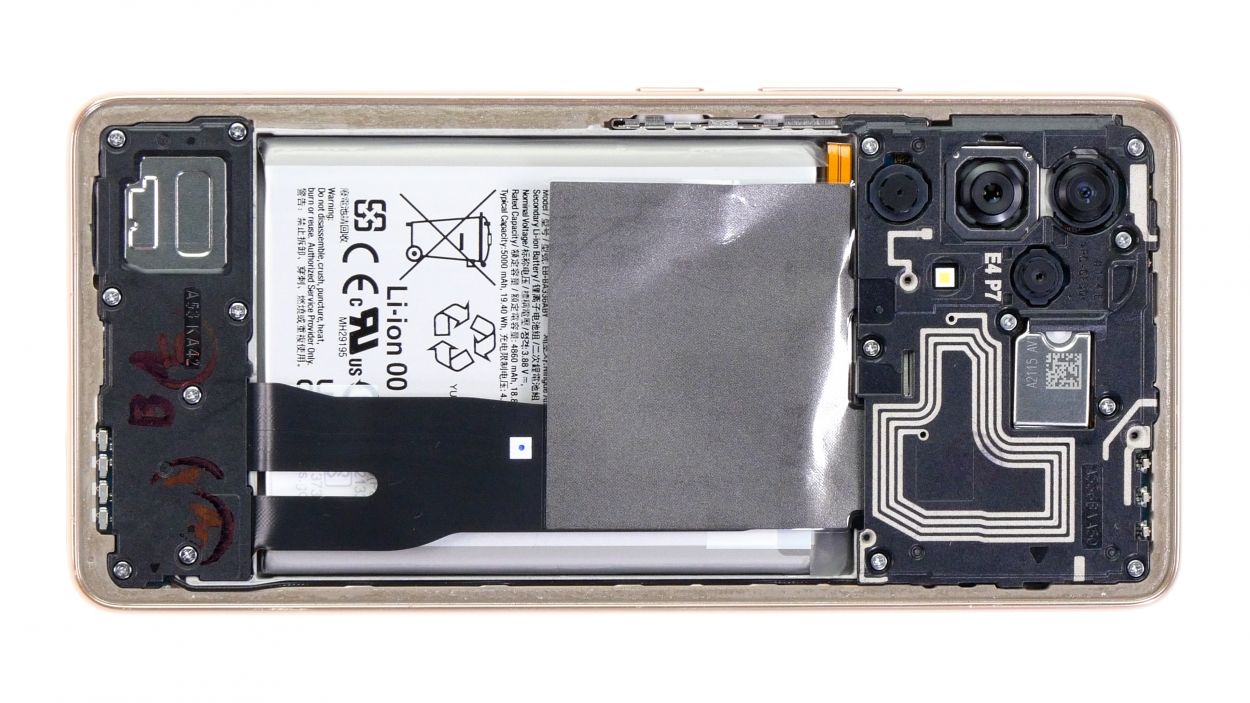
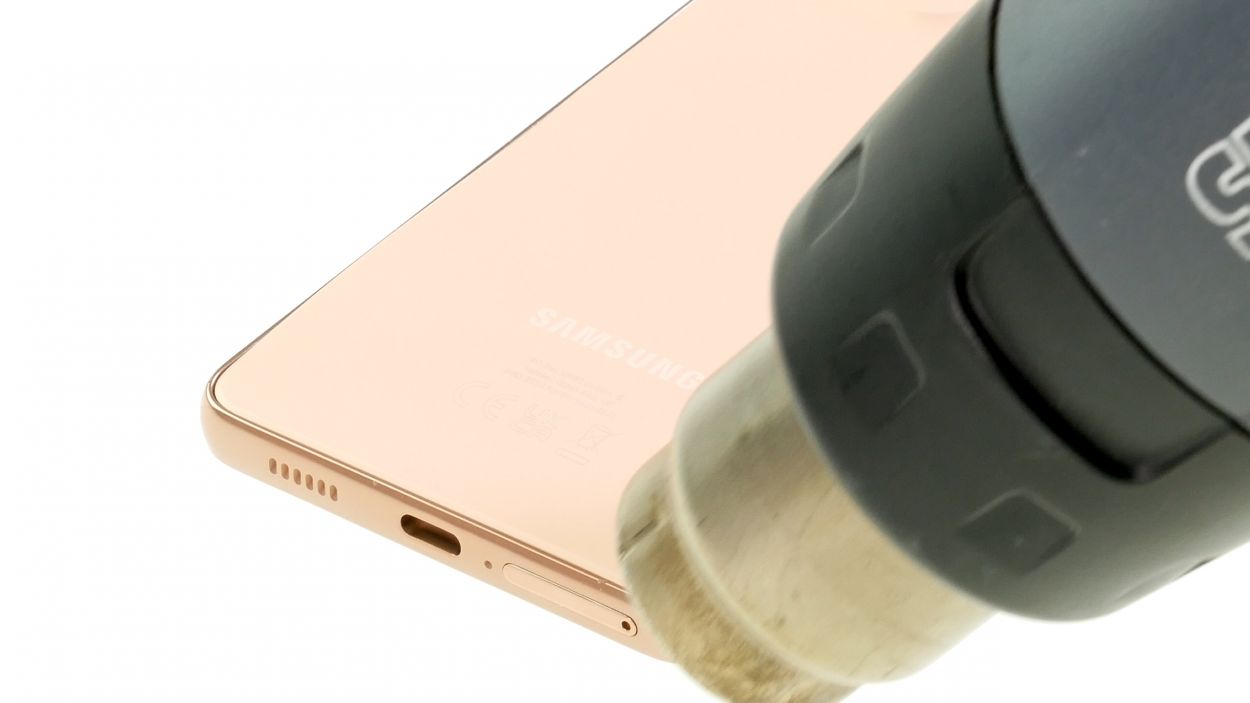
Step 2


The back cover is really stuck on there! Give it some love with a heat gun or a regular hair dryer to warm it up nicely.
– Warm up the edge of the back cover by gently gliding your hot air tool along it like you’re giving it a cozy hug.
Tools Used
- heat gun to heat parts that are glued on so they’re easier to remove.
In most cases, you can also use a hairdryer.” rel=”noopener”>Heat gun
Step 3


If you’re looking for an easier way to lift off that stubborn back cover, give the iSclack a whirl! It’s a nifty tool that needs way less muscle to get the job done.
– Grab a suction cup and stick it to the lower edge of the back cover. Now, gently pull it upwards to open up a little gap.
– While you’re at it, slide a flat tool into that gap between the back cover and the screen unit. You’ve got this!
Step 4


Hey there! Just a friendly reminder: don’t go too deep with your tool when you’re near the camera module. The hard plastic pick is your best buddy here!
To keep the back cover from getting too cozy with the glue again, slide those flat plastic picks under it at regular intervals. It’s like giving it a little breathing room!
– Run your trusty tool all the way around the edge of the back cover to gently loosen it up piece by piece, like unwrapping a present.
– Once you’ve got it off, set that back cover aside and give it a little wave goodbye.
Tools Used
- heat gun to heat parts that are glued on so they’re easier to remove.
In most cases, you can also use a hairdryer.” rel=”noopener”>Heat gun - Pick Set
- Flat Picks
Step 5

8 × 3.8 mm Phillips
We suggest grabbing a handy screw storage solution, like our magnetic pad, to keep all those tiny parts and screws safe and sound while you work your magic!
– Unscrew those eight Phillips screws from the board cover and tuck them away safely in your screw storage.
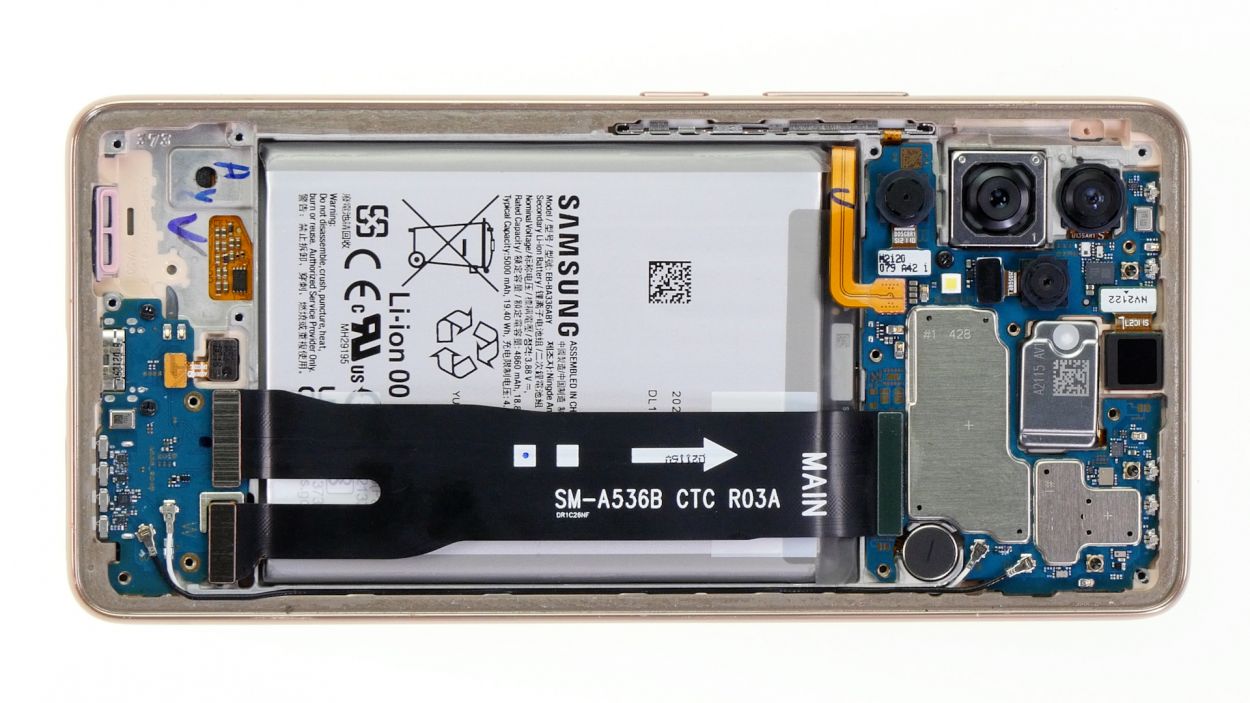
Step 6


To keep things safe and sound during your repair journey, make sure to disconnect the battery as soon as you can. It’s a smart move to avoid any potential short circuits!
– Gently wiggle that orange battery connector free from the motherboard using your trusty spudger. You’ve got this!
Tools Used
Step 7


7 × 3.8 mm Phillips
– Start by loosening those seven Phillips screws that are keeping the speaker snug in its spot.
– Now, gently use a spudger to pry the speaker out of its resting place and set it aside with care.
Step 8

The connecting cable is the bridge between your USB and motherboard, featuring three connectors in total. One of these connectors is snugly linked to the screen cable, making everything work in harmony!
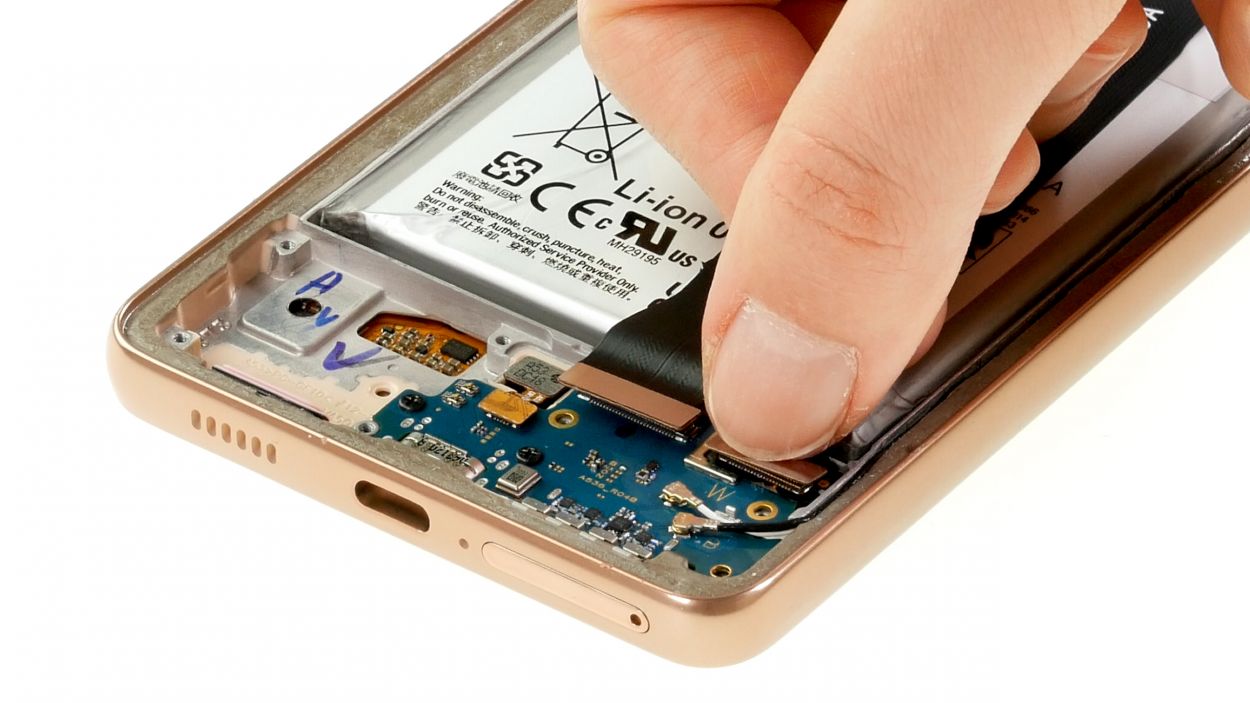
– Gently pry apart the three connectors of the connecting cable using your spudger like a pro.
– Set that detached cable aside and give it a little rest.
Tools Used
Step 9
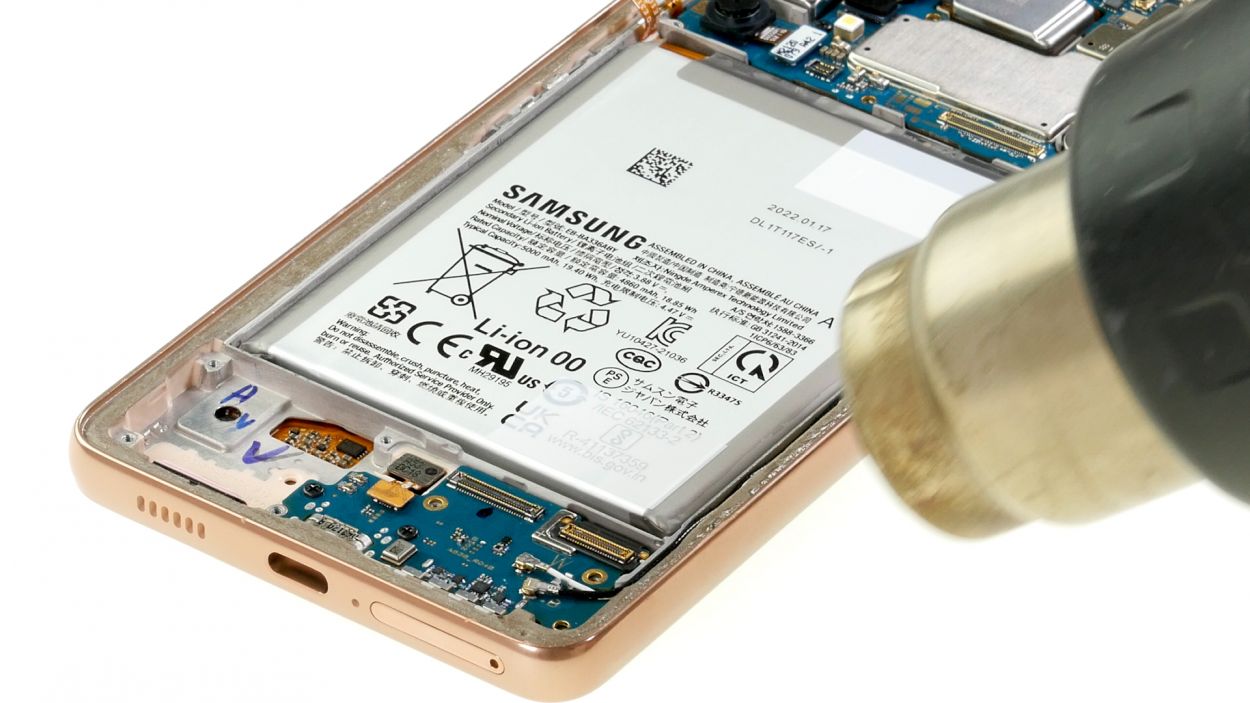

Hey there! Just a quick note: when you’re warming up that battery, make sure to give it some love from the edges of the case or the side of the screen glass. Direct heat on the battery is a no-go!
The battery of your A53 5G is stuck on there like a stubborn sticker! To safely get it loose, warm up that glue first with some gentle heat. You’ve got this!
Tools Used
- heat gun to heat parts that are glued on so they’re easier to remove.
In most cases, you can also use a hairdryer.” rel=”noopener”>Heat gun
Step 10


To loosen that battery, just slide the iPlastix underneath it with a gentle cutting motion. It’s like giving it a little nudge to say, “Hey, time to come out!”
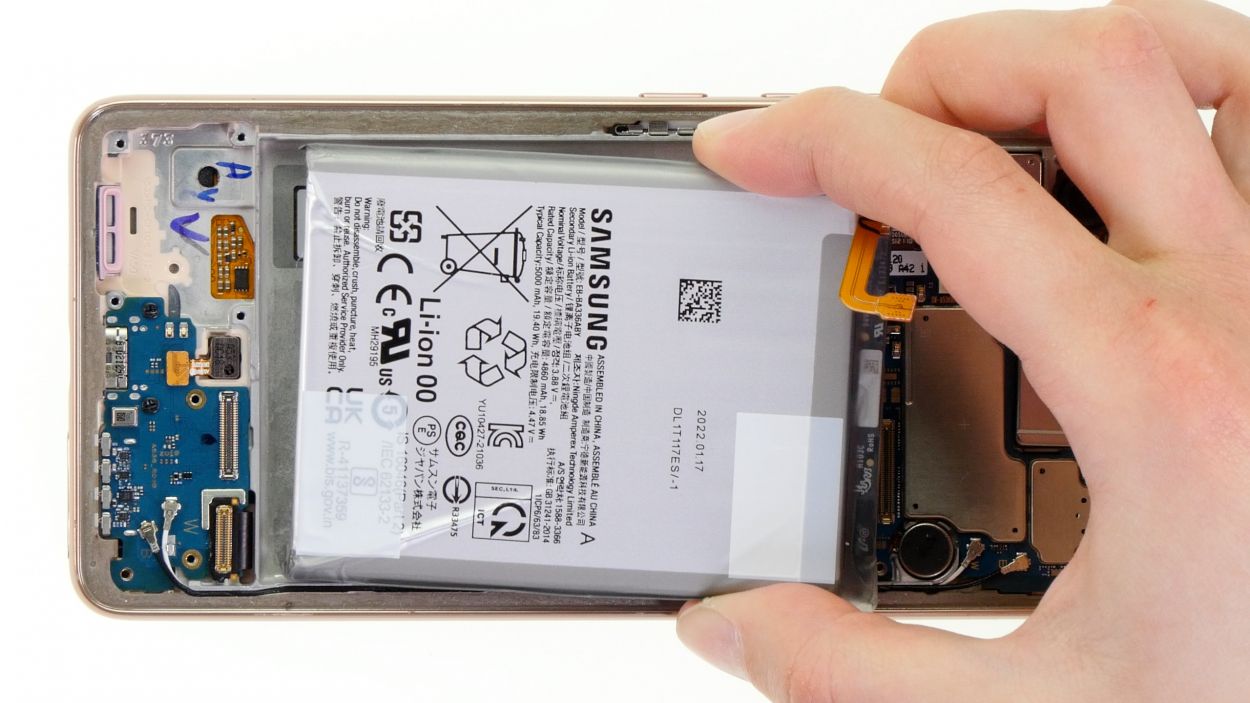
– Grab your trusty battery spudger and gently place it on the lower edge of the battery, giving it a careful lift upwards.
– Once the battery is free, just lift it out of the device with ease.
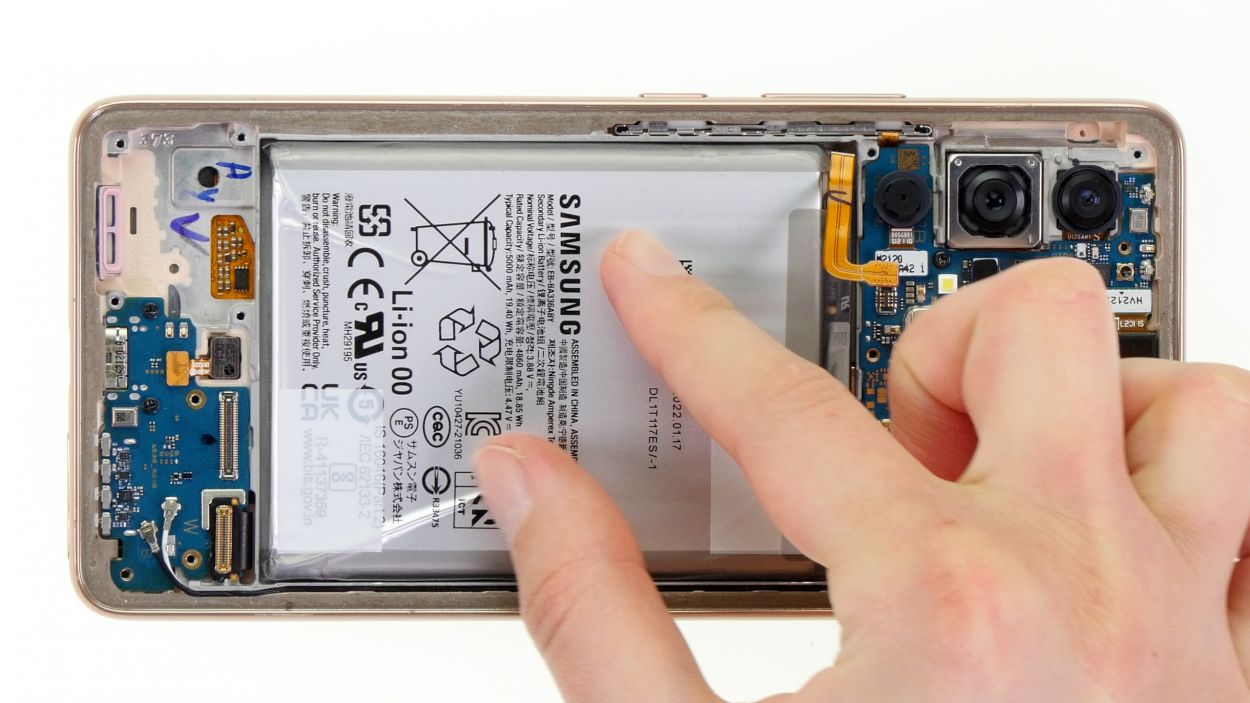
– Now, slide that flat iPlastix under the battery at the edge you just lifted and slowly work your way around, detaching it bit by bit from the bottom of the screen unit.
Tools Used
Step 11
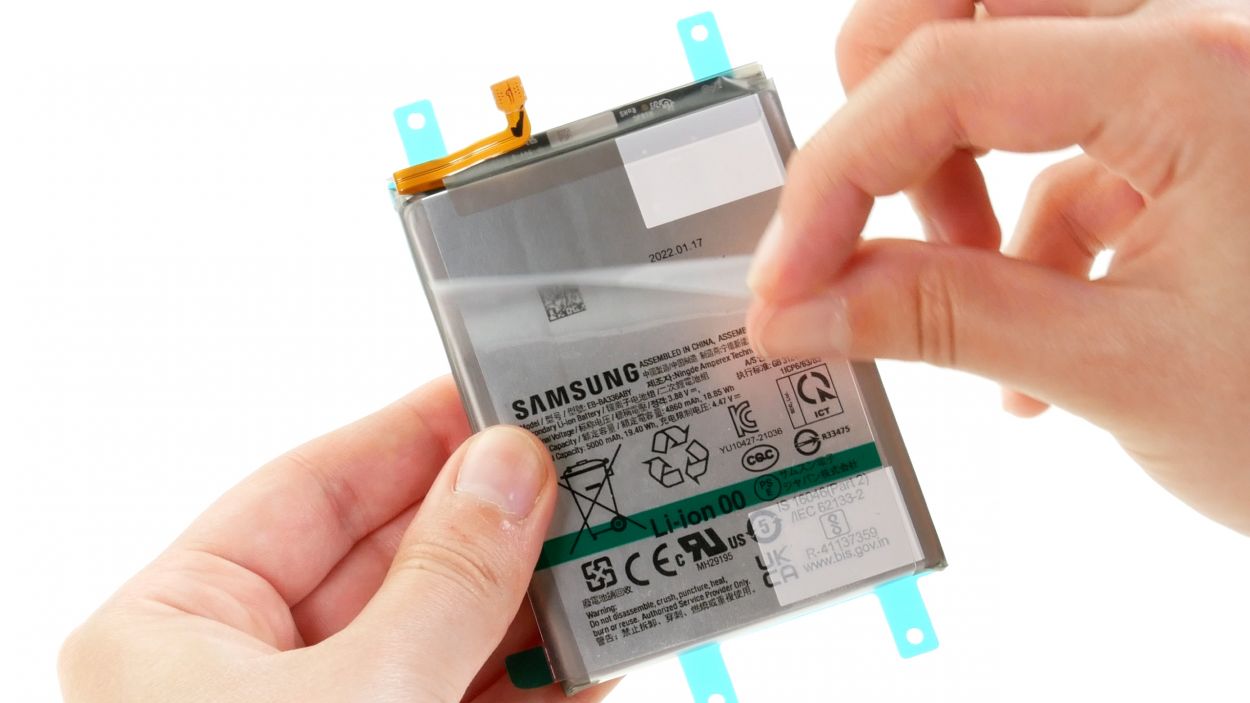
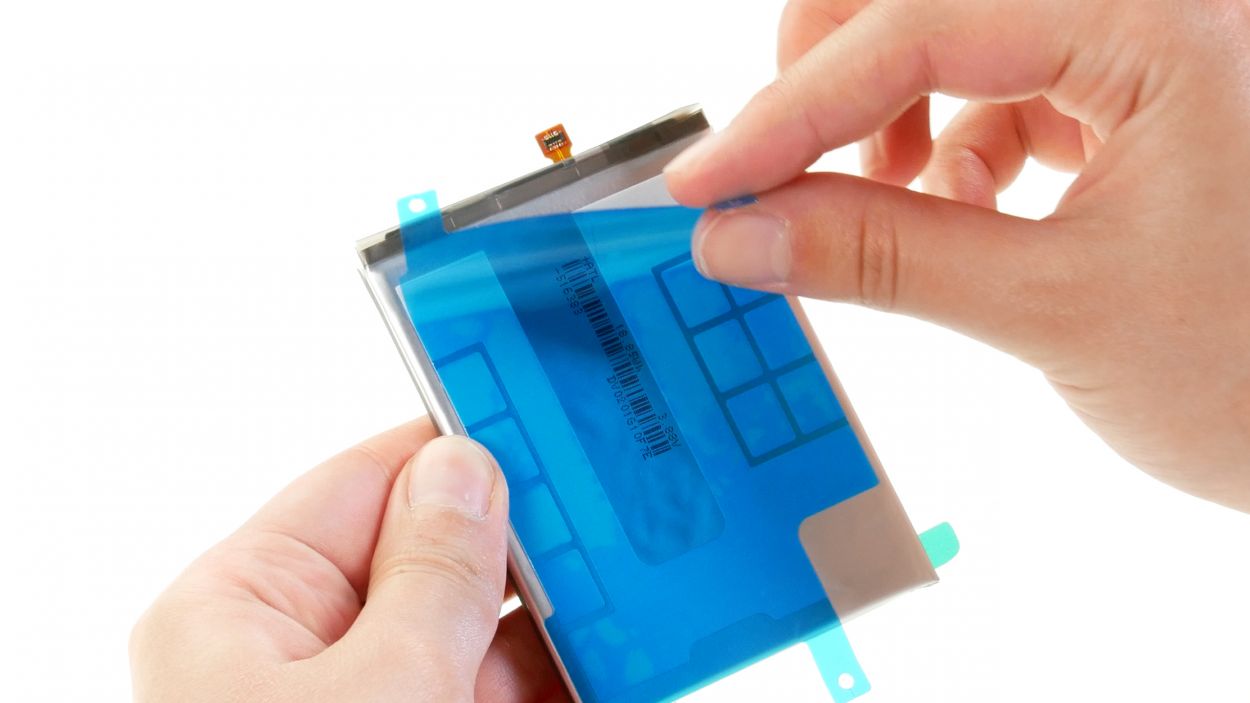
– Peel off the protective films from both the front and back of your shiny new battery.
– If needed, give that battery connector a little bend to ensure it sits snugly in its motherboard slot.
– Carefully slide the replacement battery back into its cozy spot and give it a firm press to secure it.
Tools Used
Step 12


The labels on the cables are here to be your trusty guides, helping you line everything up just right in your device!
– Carefully line up that connecting cable and snugly attach its three connectors to both the USB and the motherboard. You’re doing great!
Step 13


7 × 3.8 mm Phillips
Ensure your speaker is sitting nice and flat all around. Those plastic lugs should snugly fit into the edge of the case, just like a puzzle piece finding its home!
– Carefully place the speaker back where it belongs, just like tucking in a cozy blanket.
– Secure it in place with those seven Phillips screws, making sure it’s snug and happy.
Tools Used
Step 14

Try to hold off connecting that battery until the very end of your repair journey. It’s a clever way to dodge any pesky short circuits!
– Reconnect that battery by giving its connector a gentle nudge onto the motherboard. You’re almost there!
Step 15
Now that you’ve got that shiny new battery in place, it’s time to put it to the test! Check out our handy checklist to make sure everything is functioning smoothly. And don’t forget to access the internal Samsung test menu by dialing *#0*# for a little extra fun!
– Plug your Galaxy into the wall and see if that new battery starts soaking up some juice!
Step 16


– Get that new adhesive frame lined up with the back cover. Those nifty cutouts in the film are here to guide you along!
– Peel off the carrier film from the bottom of the adhesive frame and press it down onto the edge of the back cover like you’re giving it a warm hug.
– Now, with a gentle touch, remove the remaining protective films from the top of the adhesive frame. You’re almost there!
Tools Used
Step 17

For a solid bond, give the edge of that back cover another round of hot air love! And if you want to keep it in place, feel free to stack some books on top for a few minutes while it sets.
– Wrap up your Galaxy A53 repair by gently pressing that back cover back onto the screen unit. It’s like giving your phone a cozy blanket to snuggle up in!
Tools Used
- heat gun to heat parts that are glued on so they’re easier to remove.
In most cases, you can also use a hairdryer.” rel=”noopener”>Heat gun