DIY Guide to Replace Battery in Samsung Galaxy Note 10+
Duration: 75 min.
Steps: 18 Steps
Ready to give your Galaxy Note 10+ a little boost? It’s time for a battery swap! In this easy-to-follow photo guide, we’ll walk you through each step of the process. Just a heads-up, replacing the battery on the Note 10+ can be a bit tricky since both the back cover and the battery are pretty well stuck together. So, make sure to set aside some time for this repair adventure. Good luck, and most importantly, enjoy the journey! And remember, if you need help, you can always schedule a repair.
Step 1
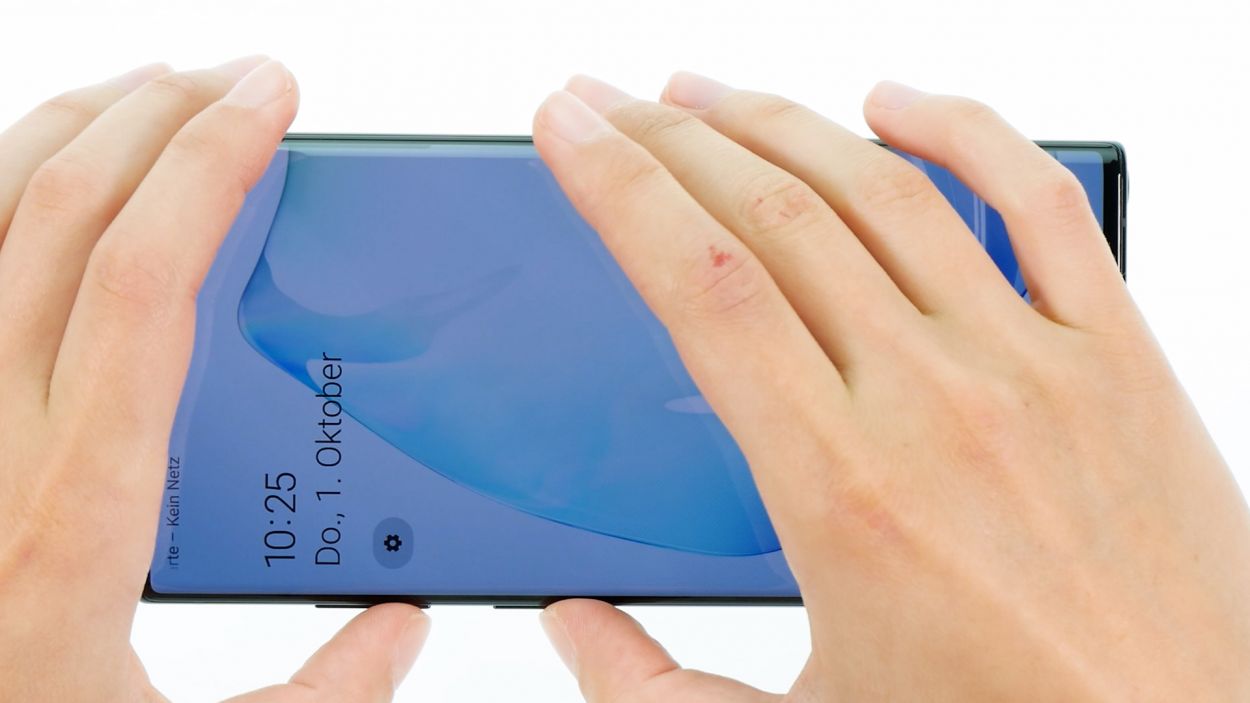
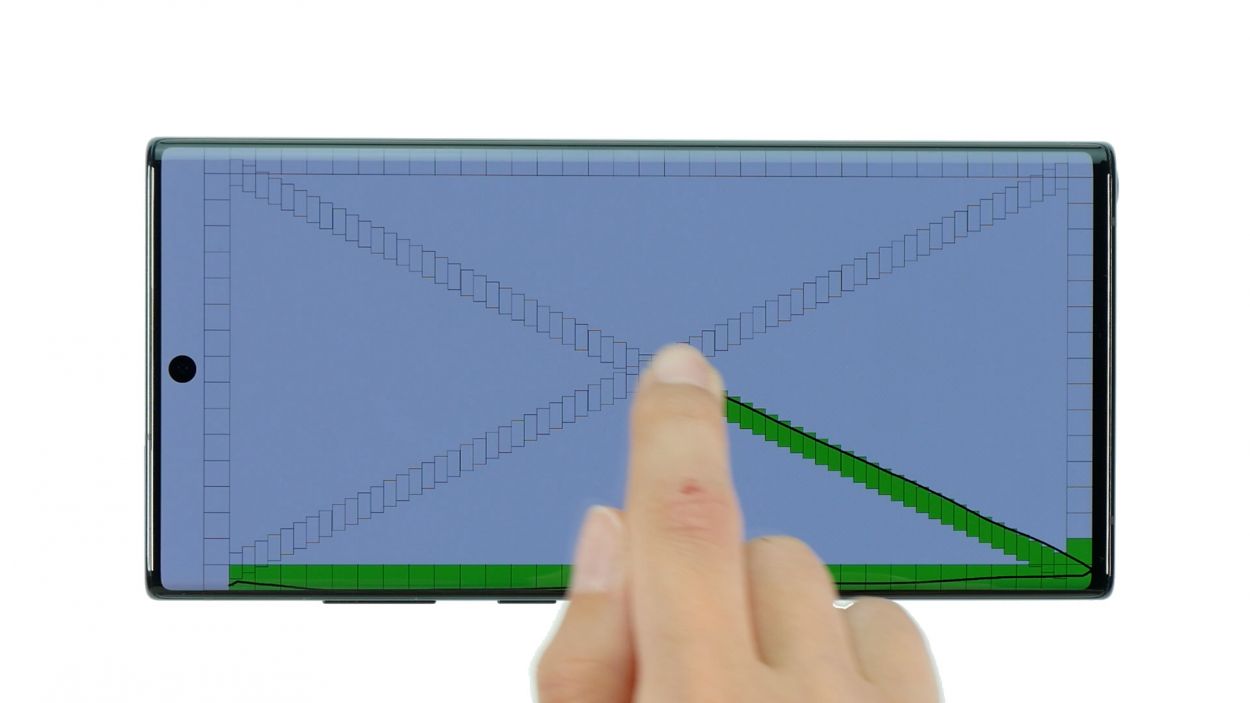
– Alright, let’s kick things off! Press and hold the side button and the volume down button together for a few seconds.
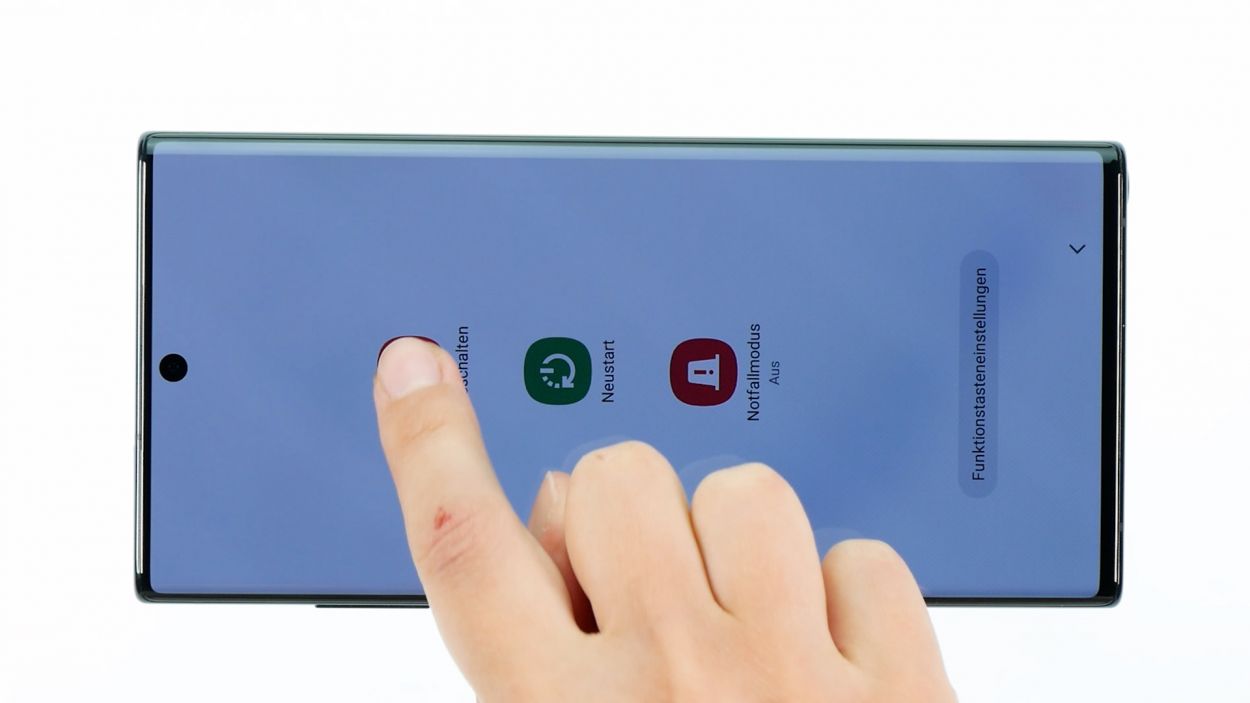
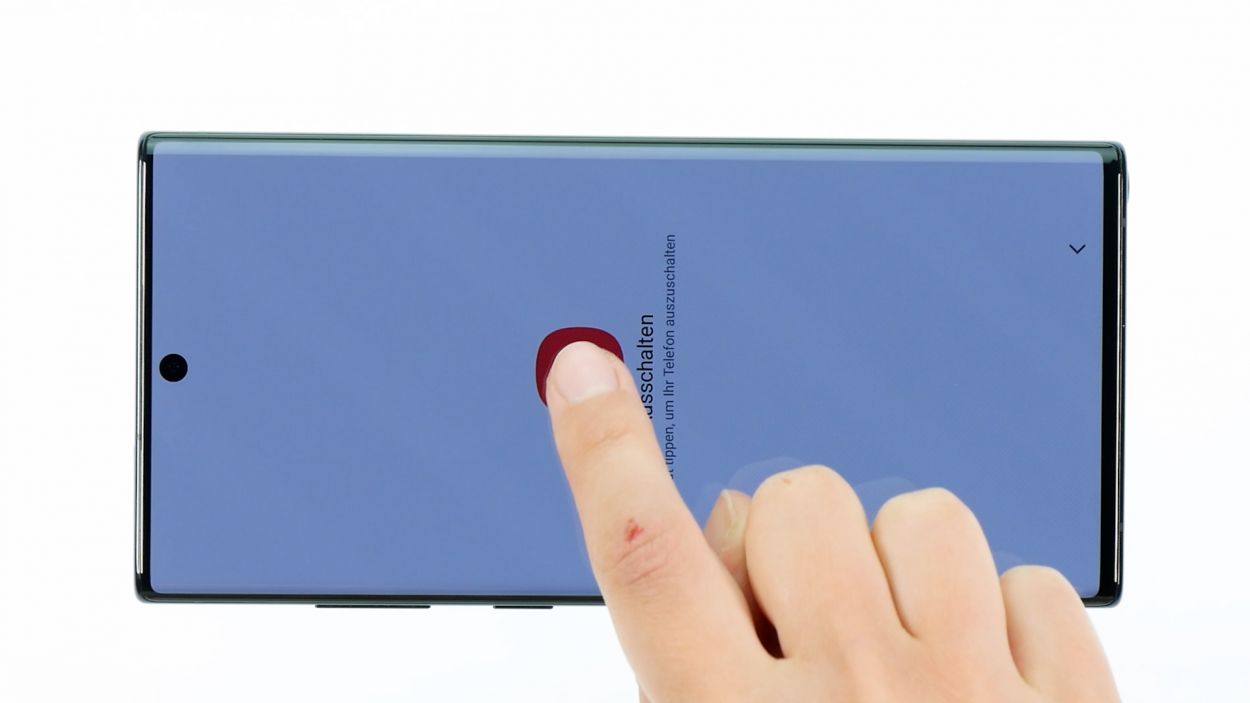
– Next, tap on ‘Switch off’ in the menu that pops up.
– In just a few moments, your phone will power down completely. Easy peasy!
Step 2
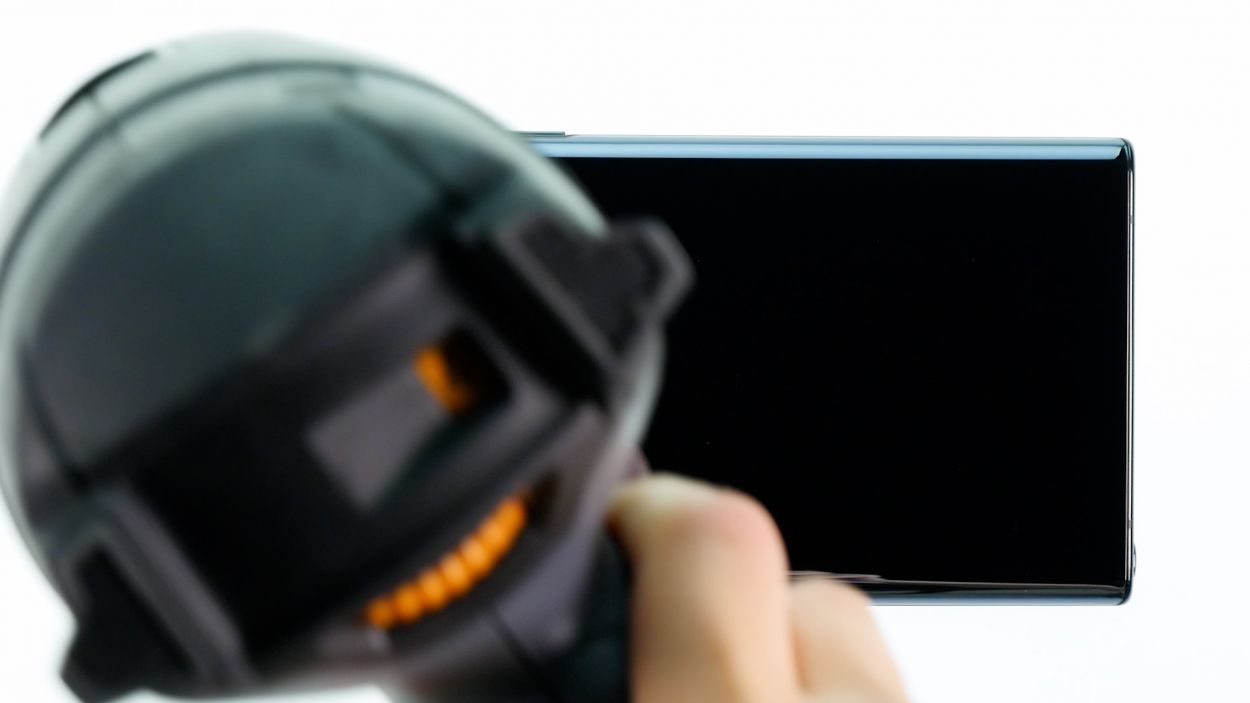
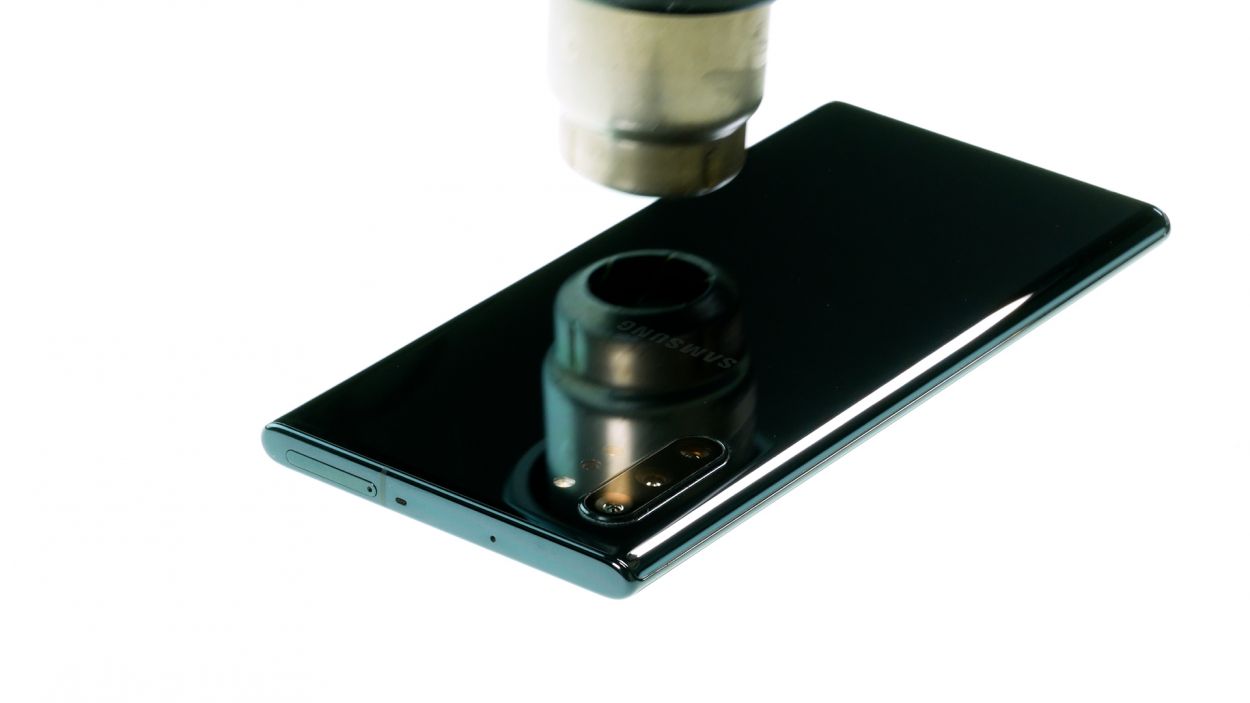
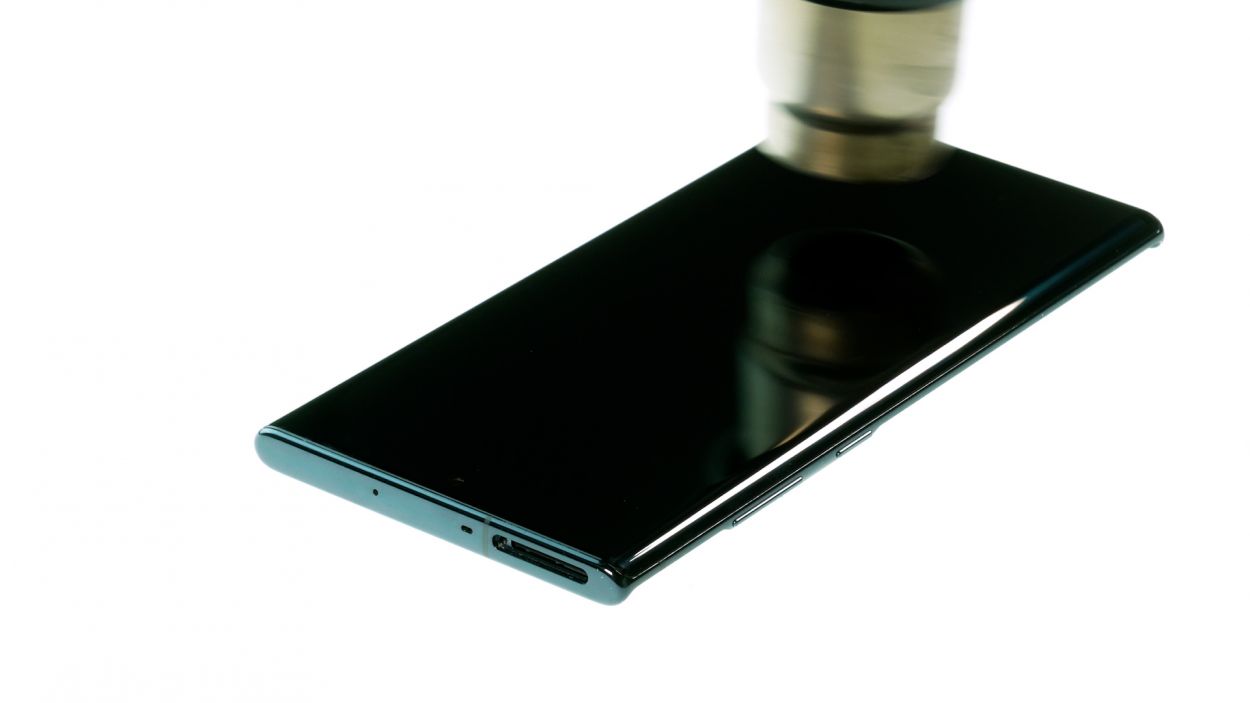
Here’s a handy tip: When you’re heating up the edge of the back cover, make sure it’s just warm enough that you can touch it comfortably without feeling like you’re about to roast your fingers. Keep it cozy!
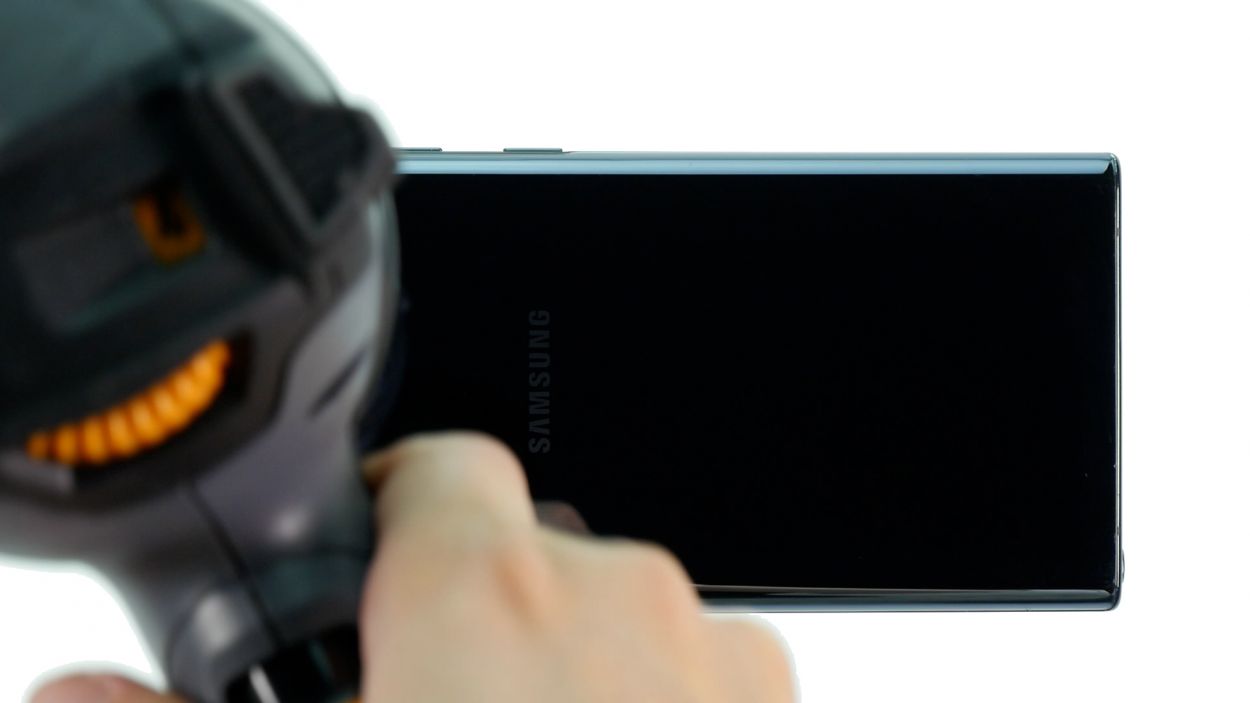
– Flip your phone over so it’s resting on the back—make sure it’s on a nice, soft surface to keep it cozy.
– Gently glide the hot air tool along the edge of the back cover, just like you’re painting a masterpiece.
Tools Used
- heat gun to heat parts that are glued on so they’re easier to remove.
In most cases, you can also use a hairdryer.” rel=”nofollow noopener”>Heat gun
Step 3
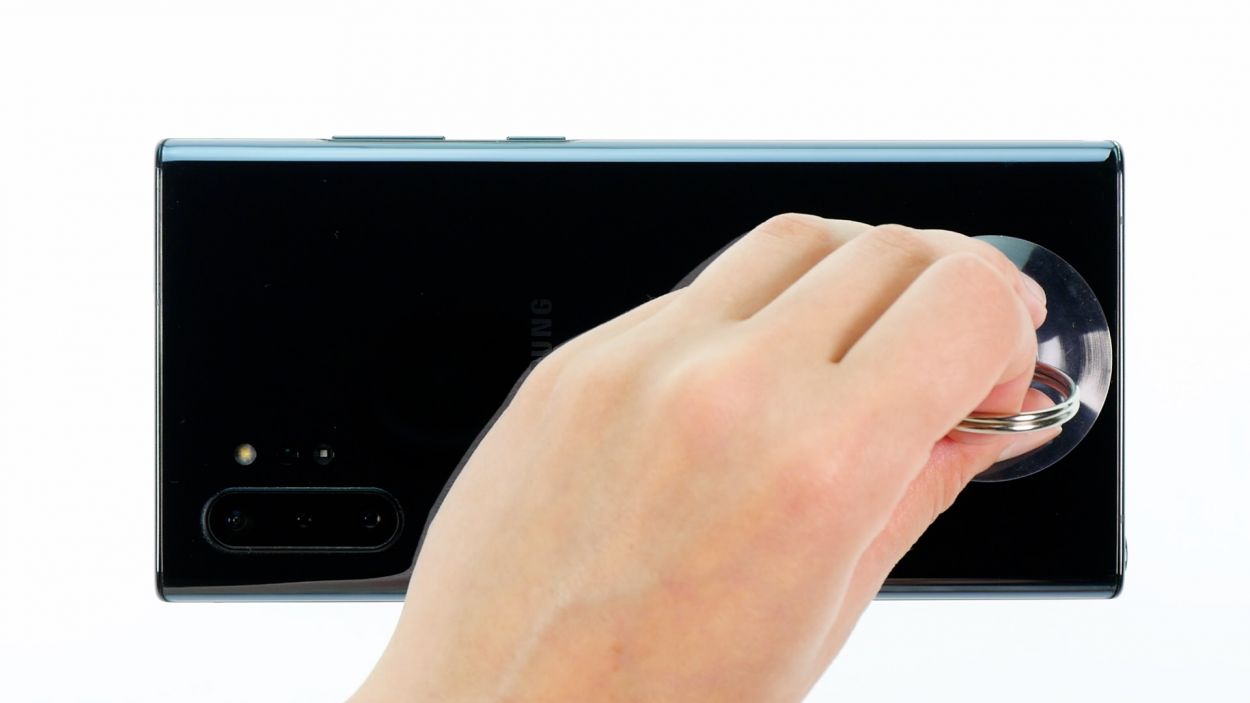
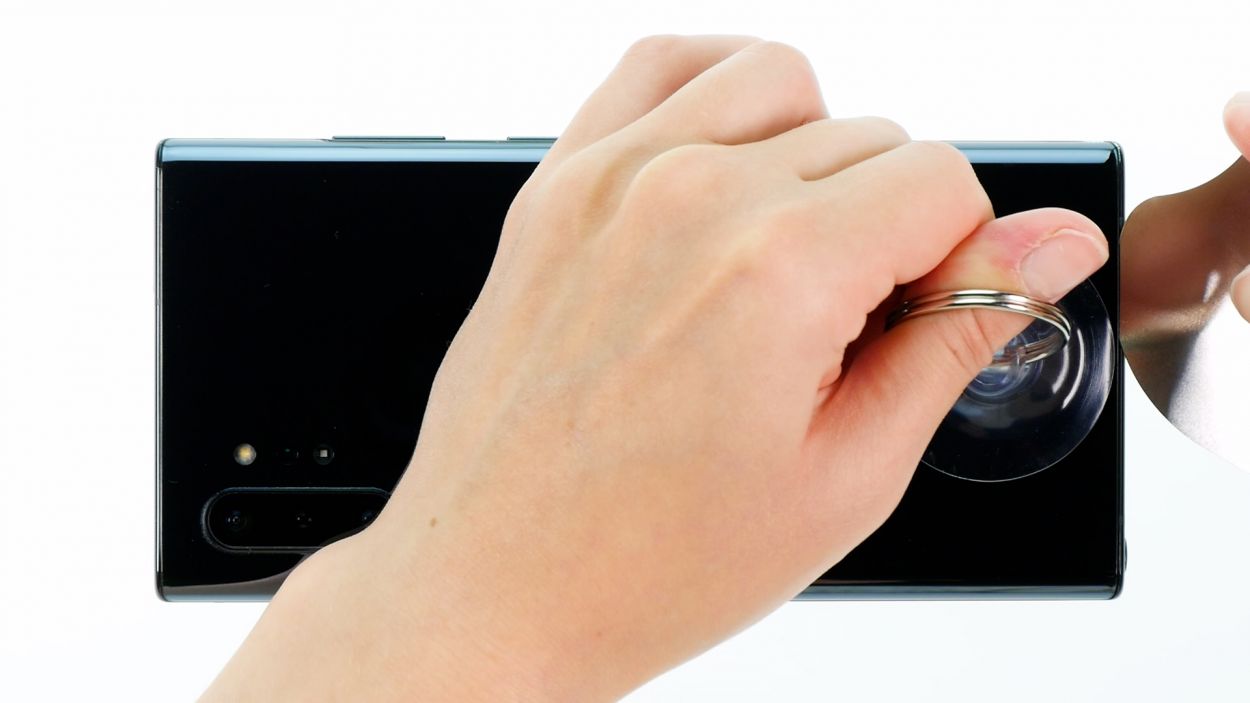
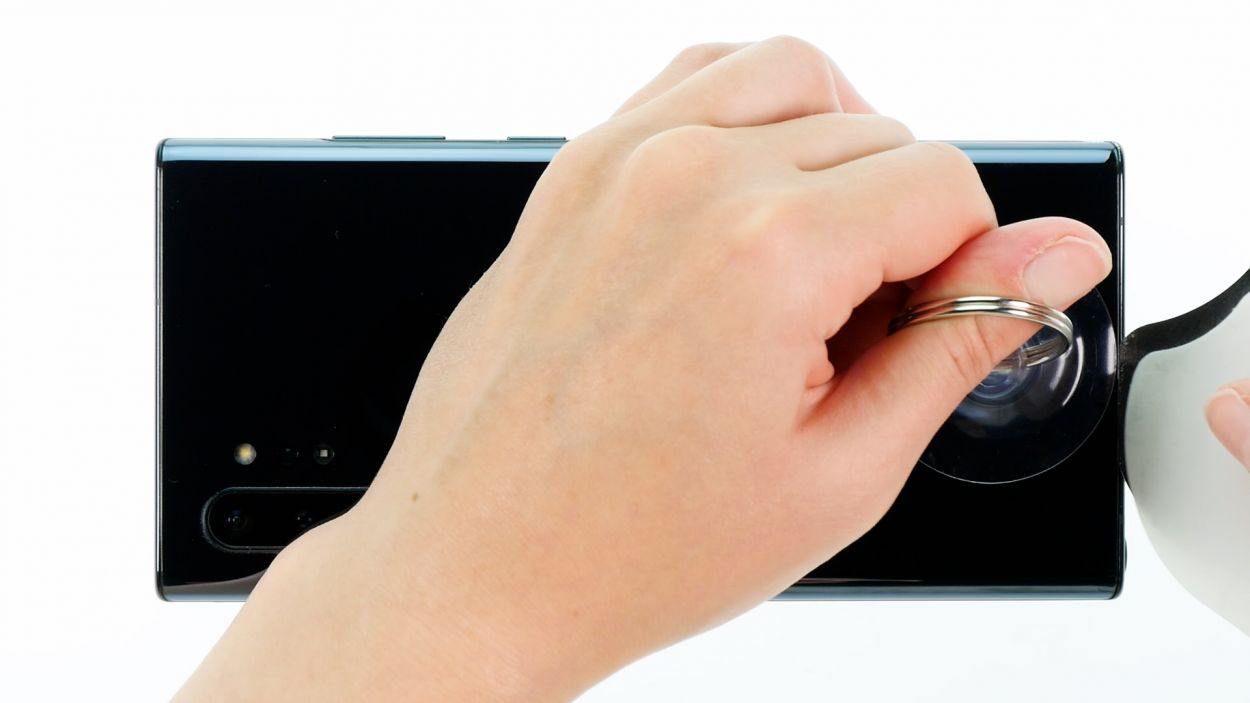
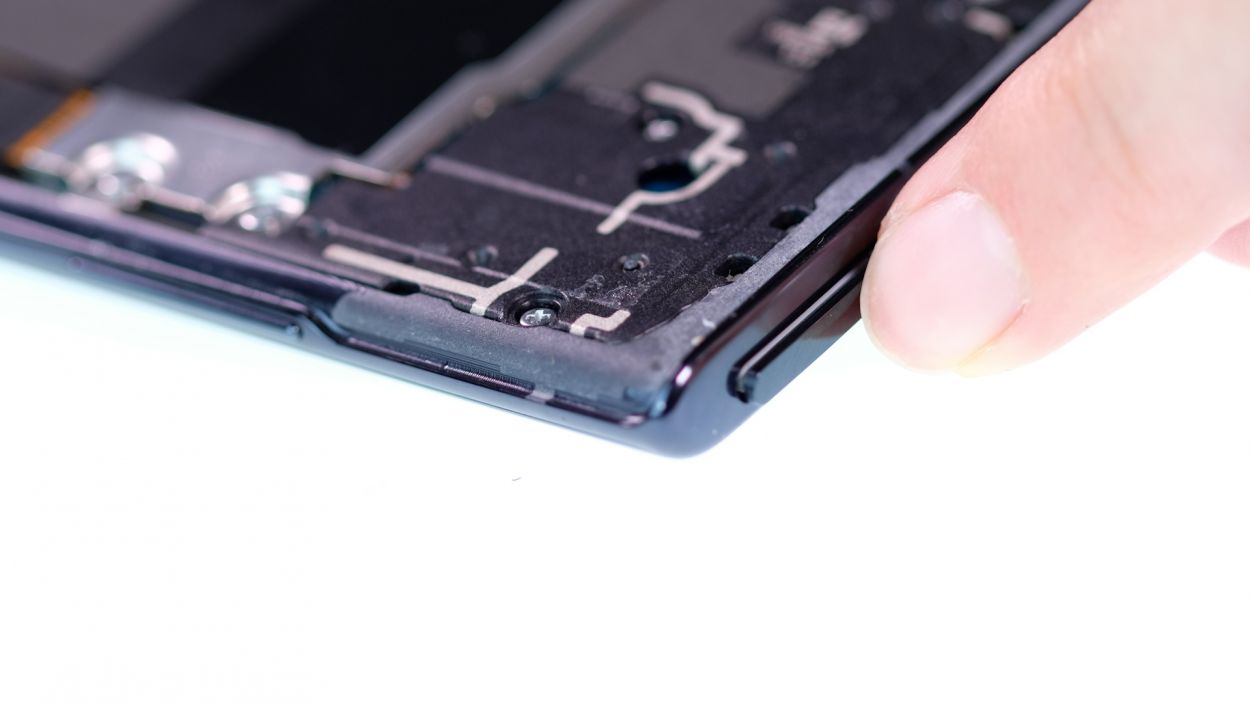
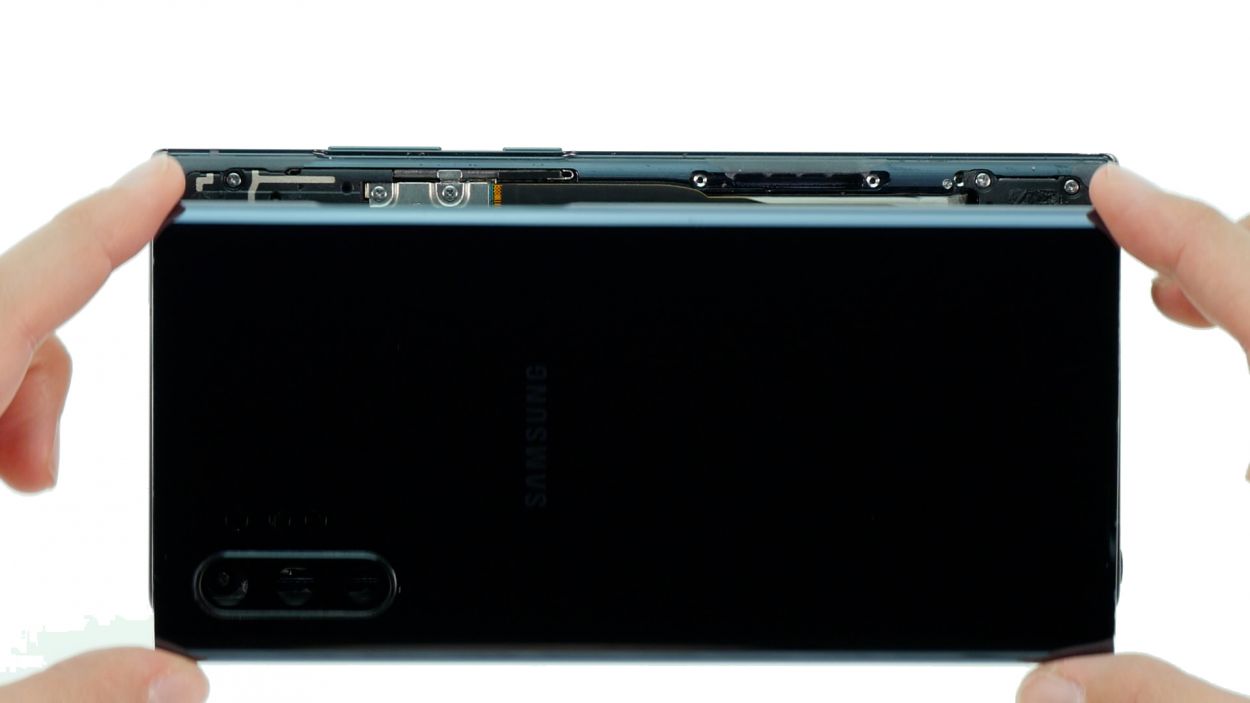
– Grab a suction cup and stick it on the lower part of the back cover, then give it a gentle pull upwards. This will help you create a little gap between the back cover and the rear case.
– While you’re at it, slide a flat, sturdy tool into that gap to widen it a bit more. The iFlex is a great choice for this task!
Opening up your Galaxy Note 10+ could put the manufacturer’s warranty on the chopping block. Just a friendly heads-up!
The iFlex is crafted from sleek, sturdy metal and features sharp edges, making it a breeze to insert. Just a heads up, though – it might leave a few scratches along the way. So, we suggest kicking things off with the iFlex and switching to a plastic tool as soon as you can. Remember, if you need help, you can always schedule a repair!
Tools Used
Step 4
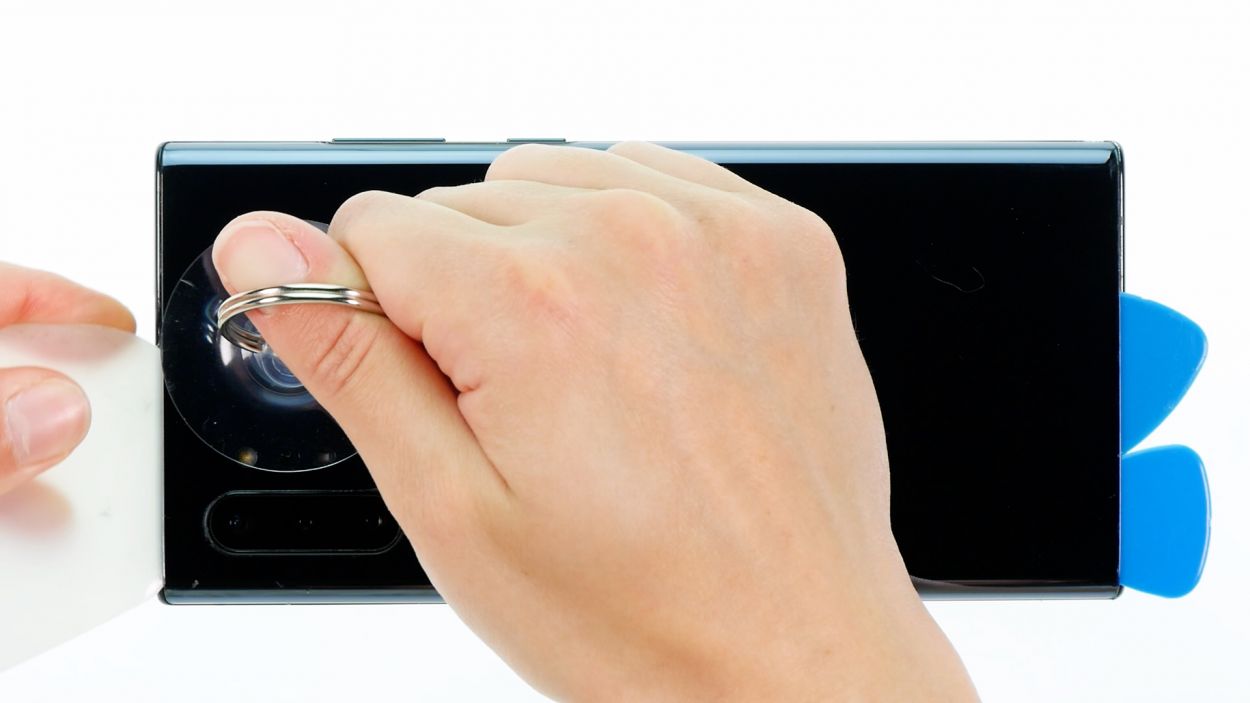
Whoa there, cowboy! Don’t go poking around too deep – you might accidentally bonk something important. Take it easy and go slow.
Hey there! The iPlastix is a super-thin, bendy piece of plastic. Unlike its cousin, the iFlex, it’s all smooth curves – no pointy bits to worry about!
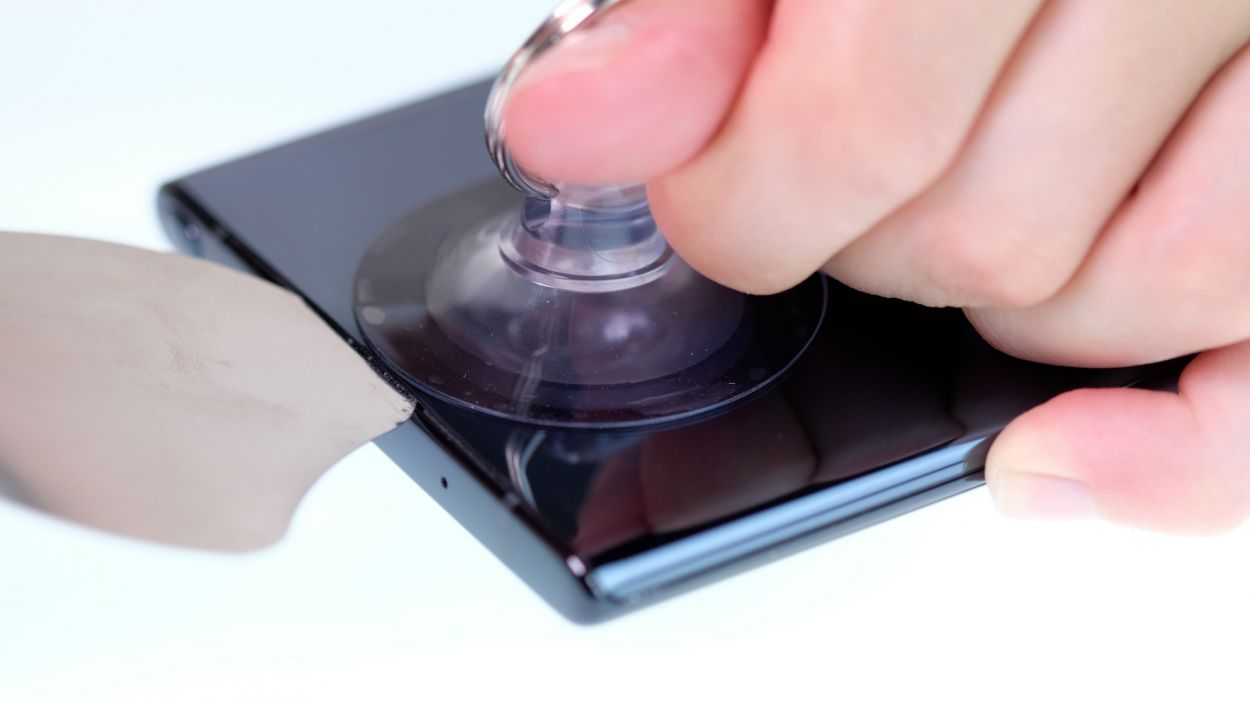
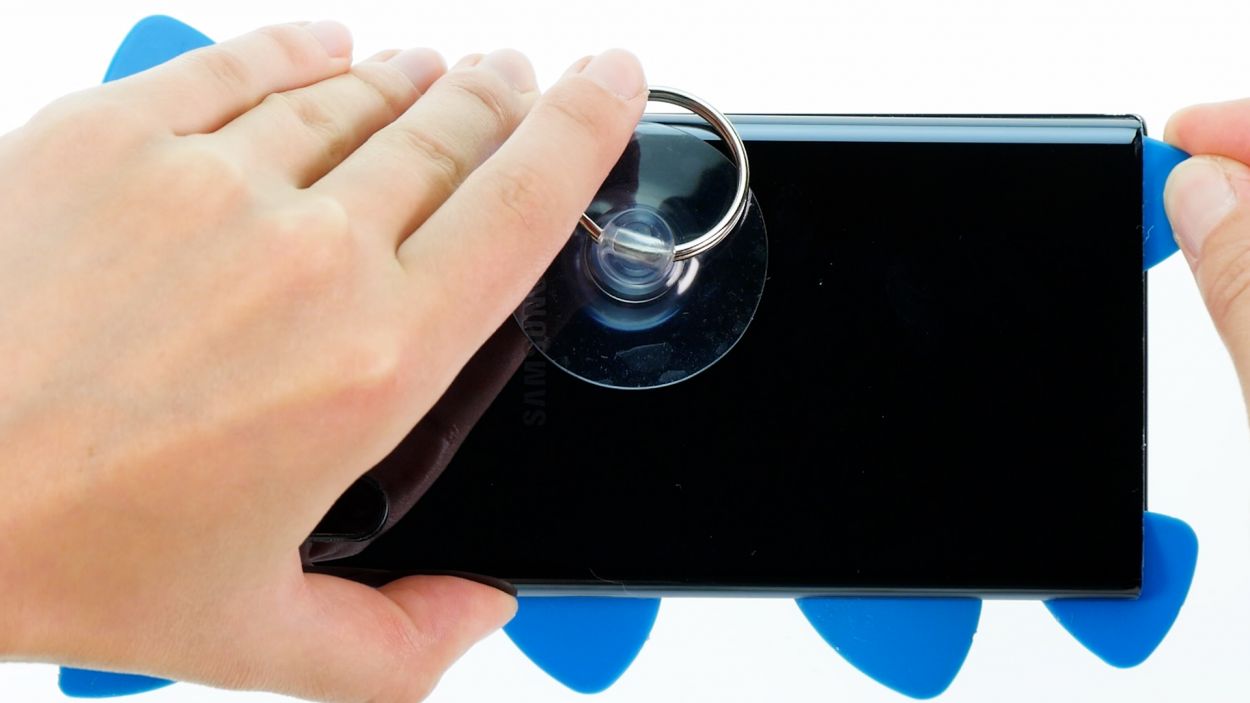
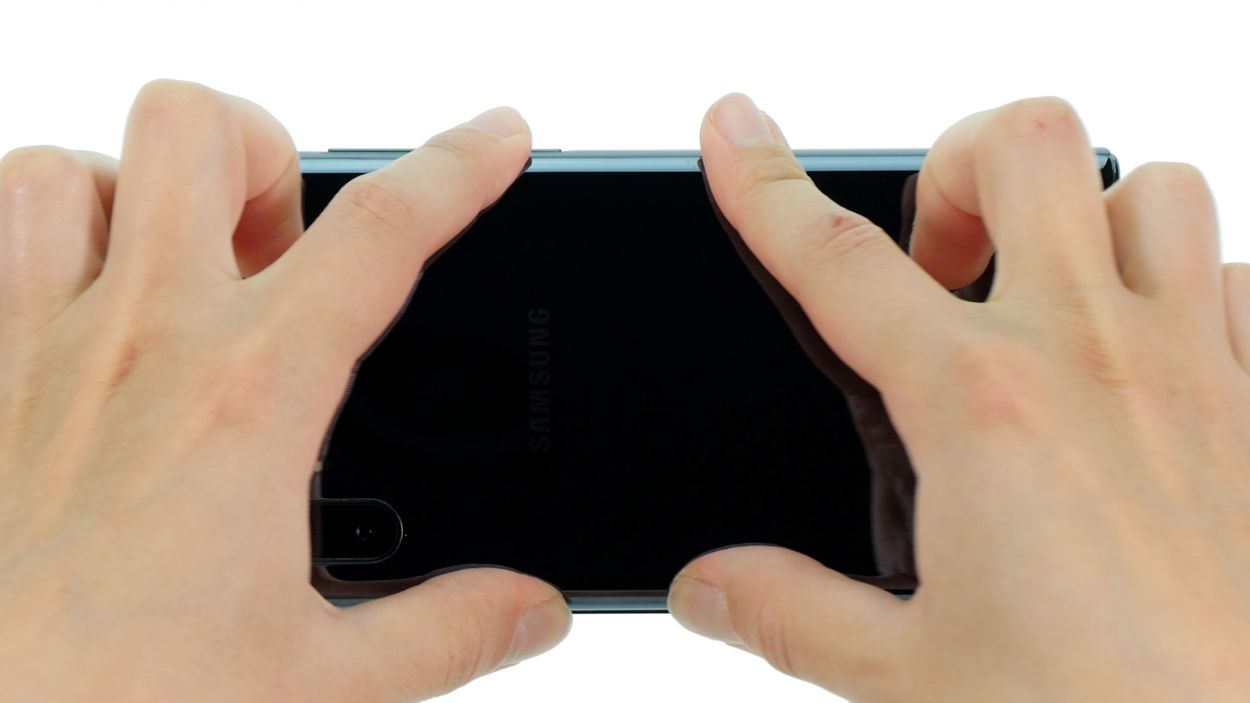
– Gently detach the back cover from the rear case frame, taking your time to slide a plastic tool along the edge. For this task, the iPlastix is your trusty sidekick!
Tools Used
- Flat Picks
- battery? Then the iPlastix with its large blade will help you. The practical assistant is made of flexible, especially sturdy plastic and lies comfortably in the hand. Thanks to its design, you can even get into smaller gaps, for example to lift the screen or to prevent it from sticking together again.” rel=”nofollow noopener”>iPlastix Opening Tool
Step 5


– Grab a slim, pointy thing – like a SIM ejector tool – and gently press it into the tiny round hole of the SIM tray. Give it a little push, and voilà! The tray should pop out of your device frame like magic.
– Once it’s popped, simply pull that tray all the way out and celebrate your small victory!
Tools Used
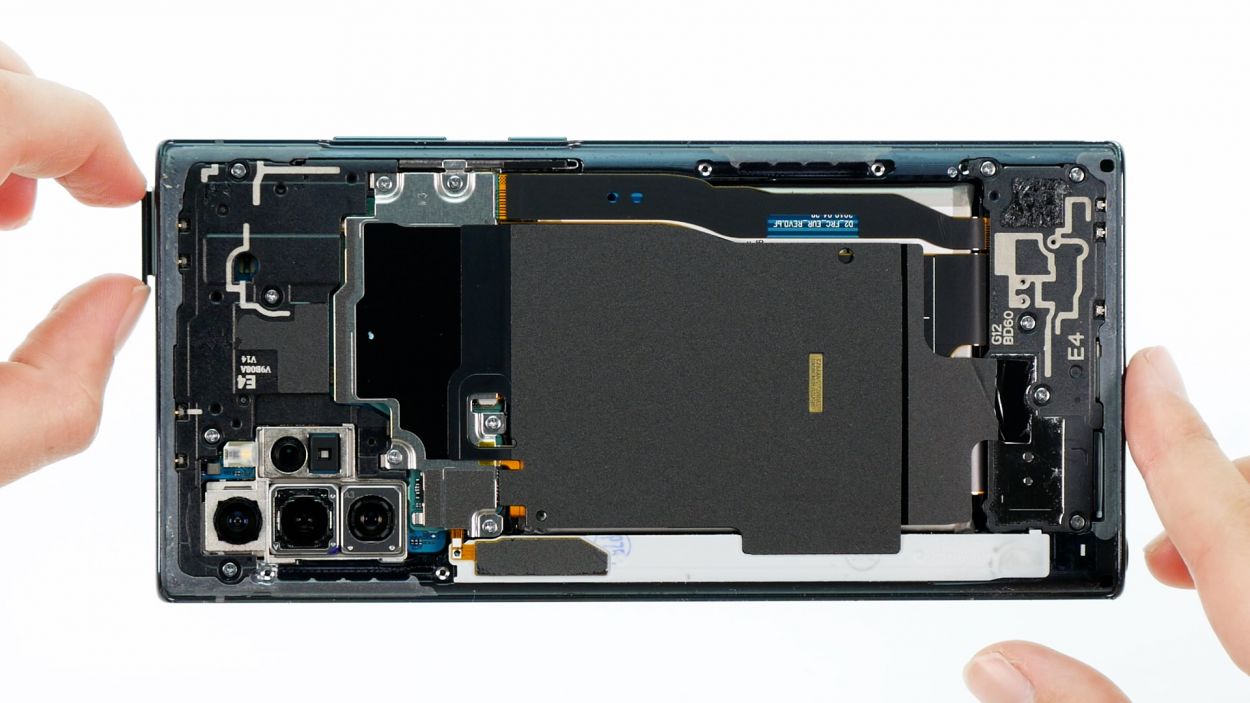
Step 6
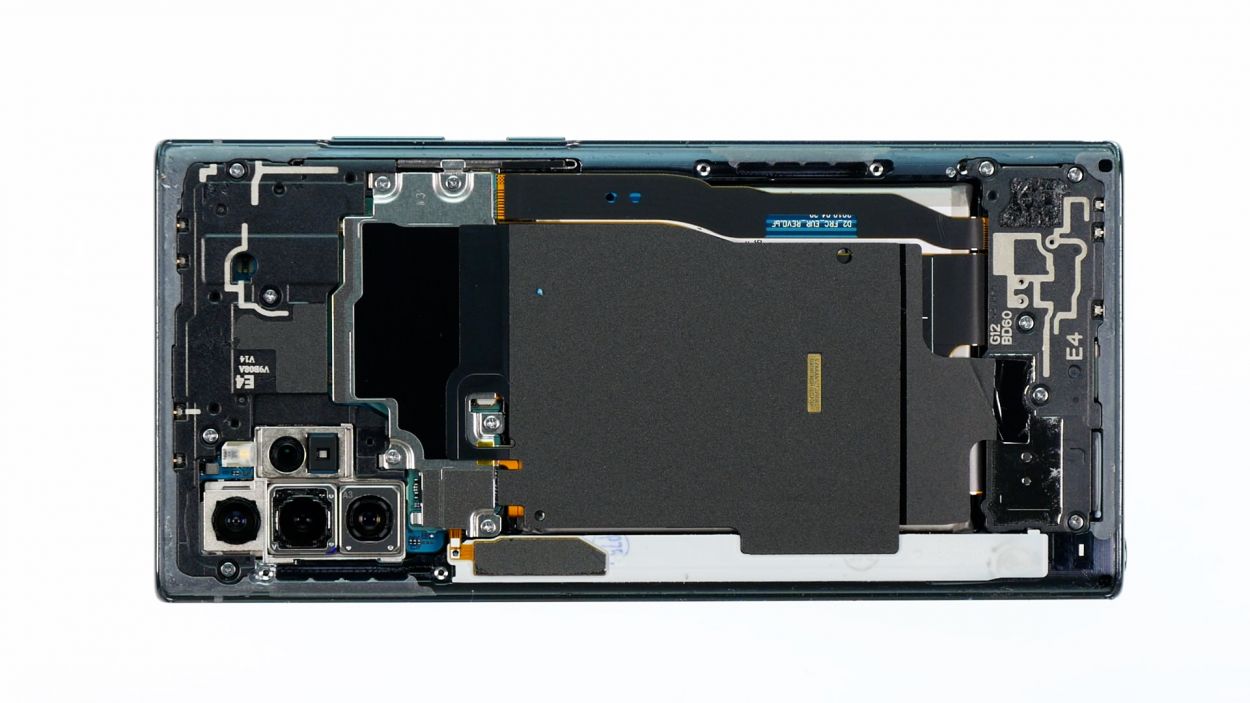

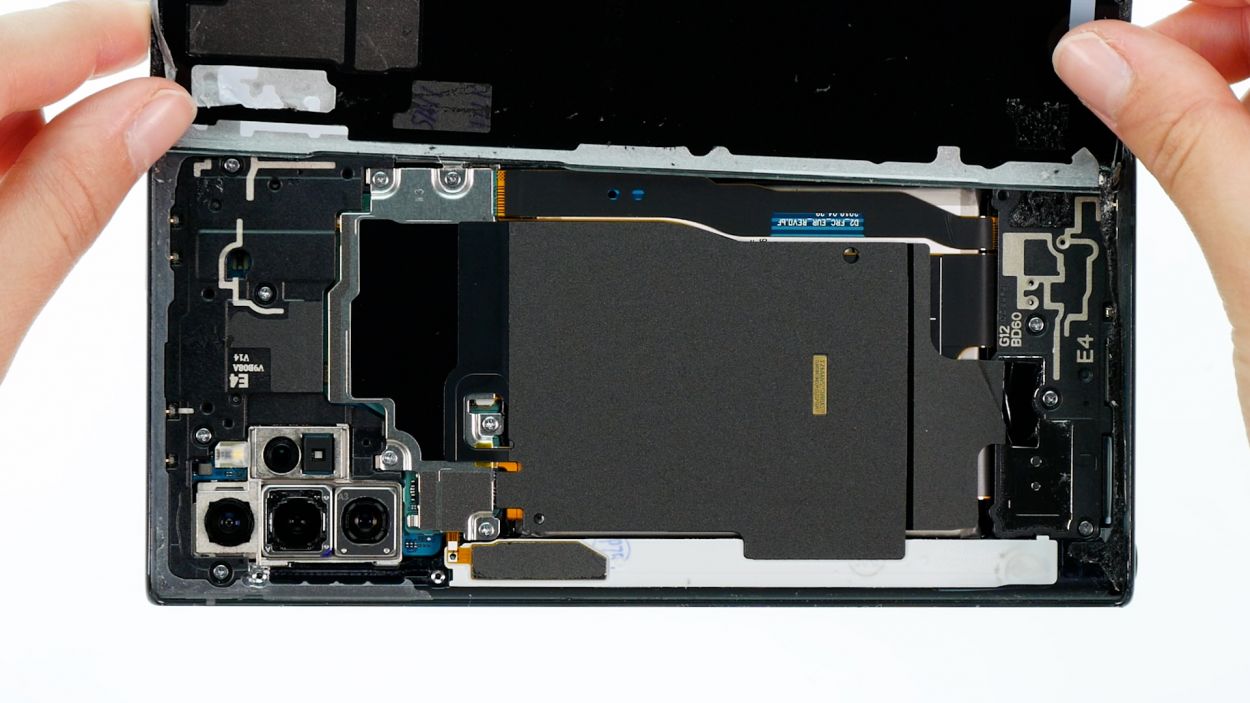
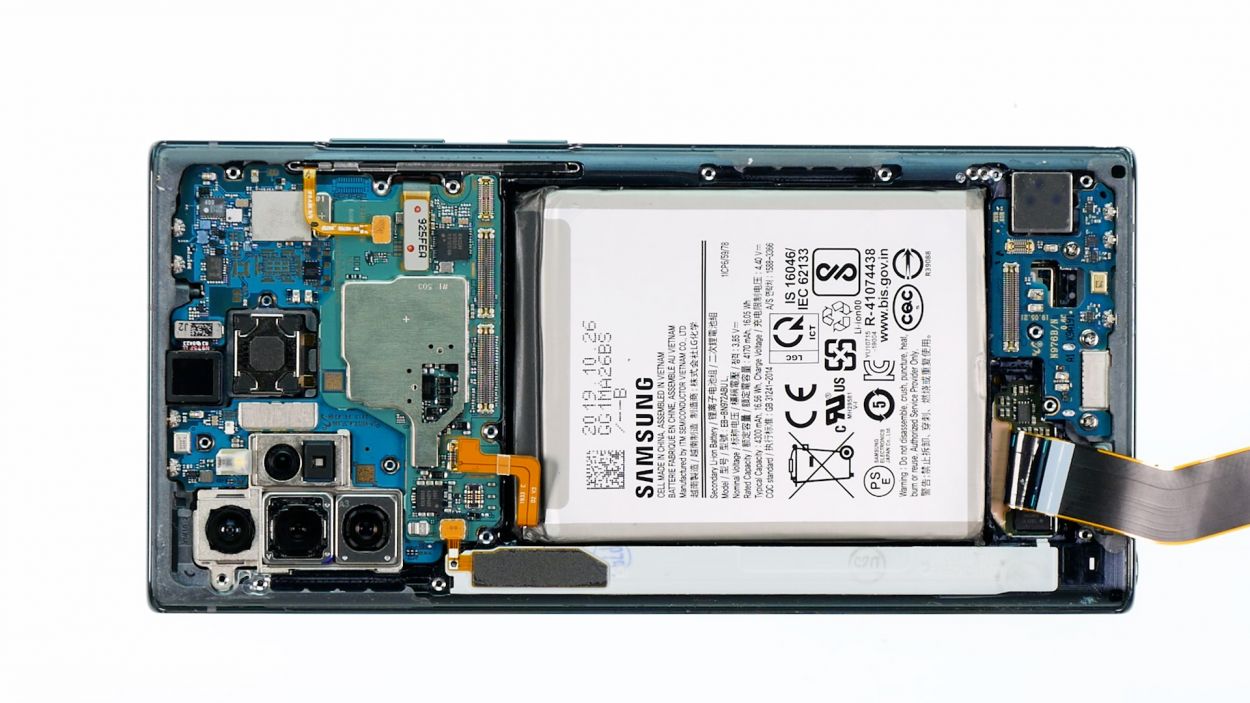
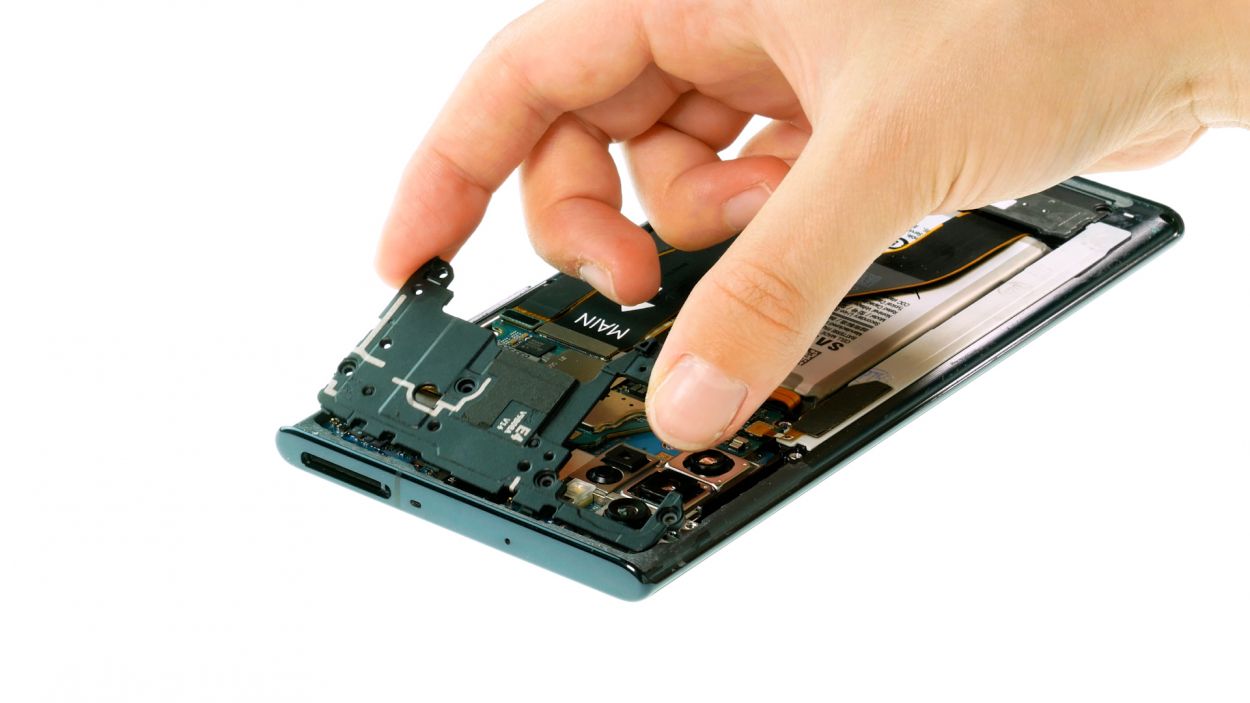
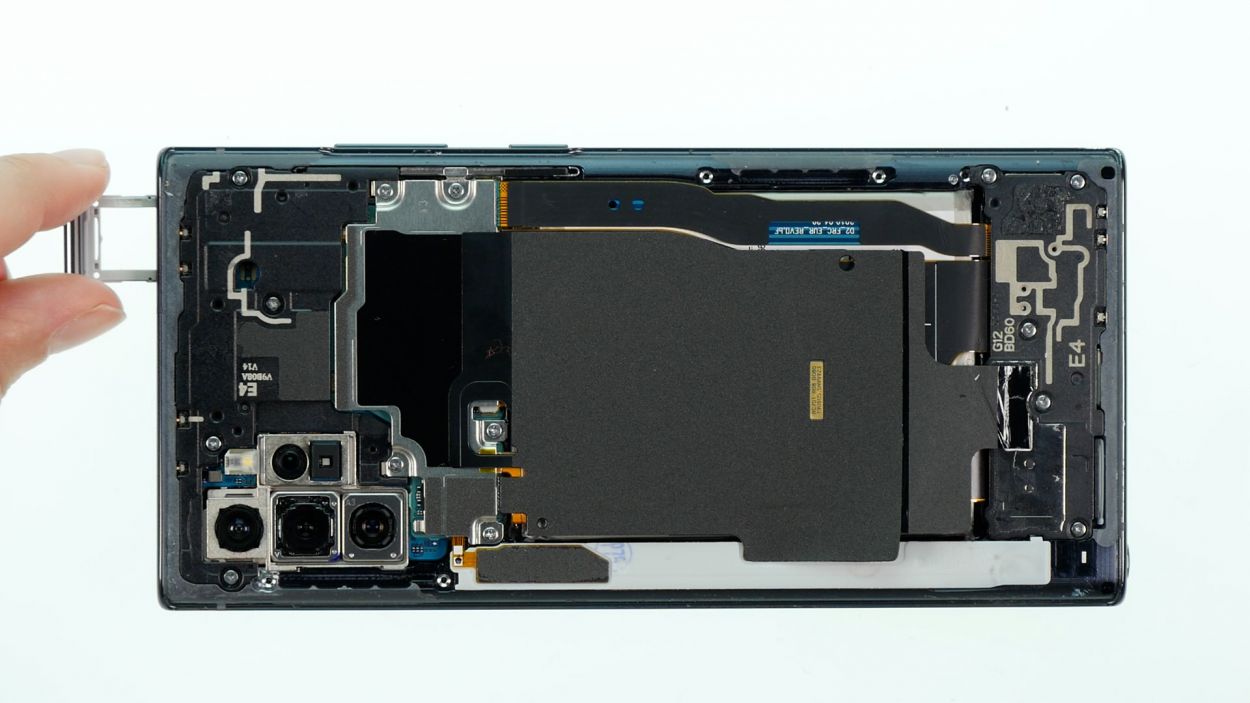
– To kick things off, go ahead and unscrew those 14 Phillips screws from the covers. You’ve got this!
14 × 4.0 mm Phillips
Hey there! Just a quick tip: to keep your mainboard safe and sound, always use your tool from the side without the tiny components. You’ve got this!
To keep those pesky screws and tiny parts from disappearing into the abyss, grab yourself a screw storage box! Our magnetic pad is a great choice for this task. It’s super handy for laying out the parts just like they were in your device, making reassembly a breeze!
Step 7

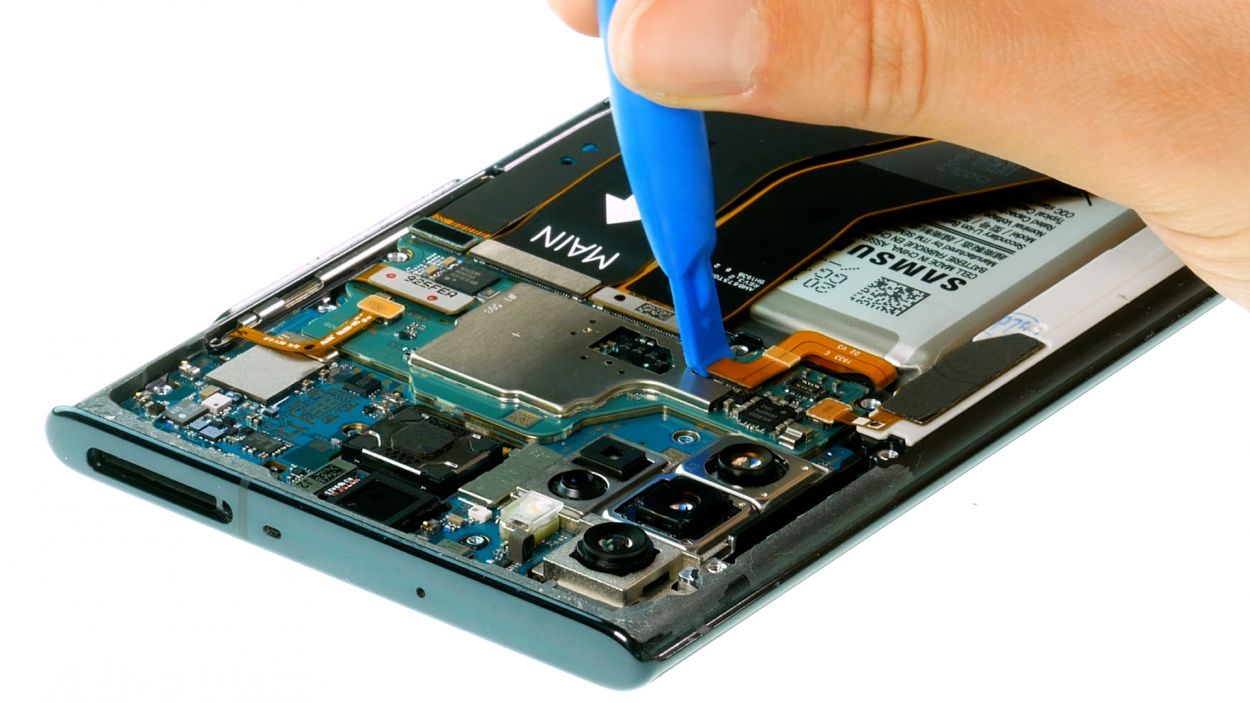
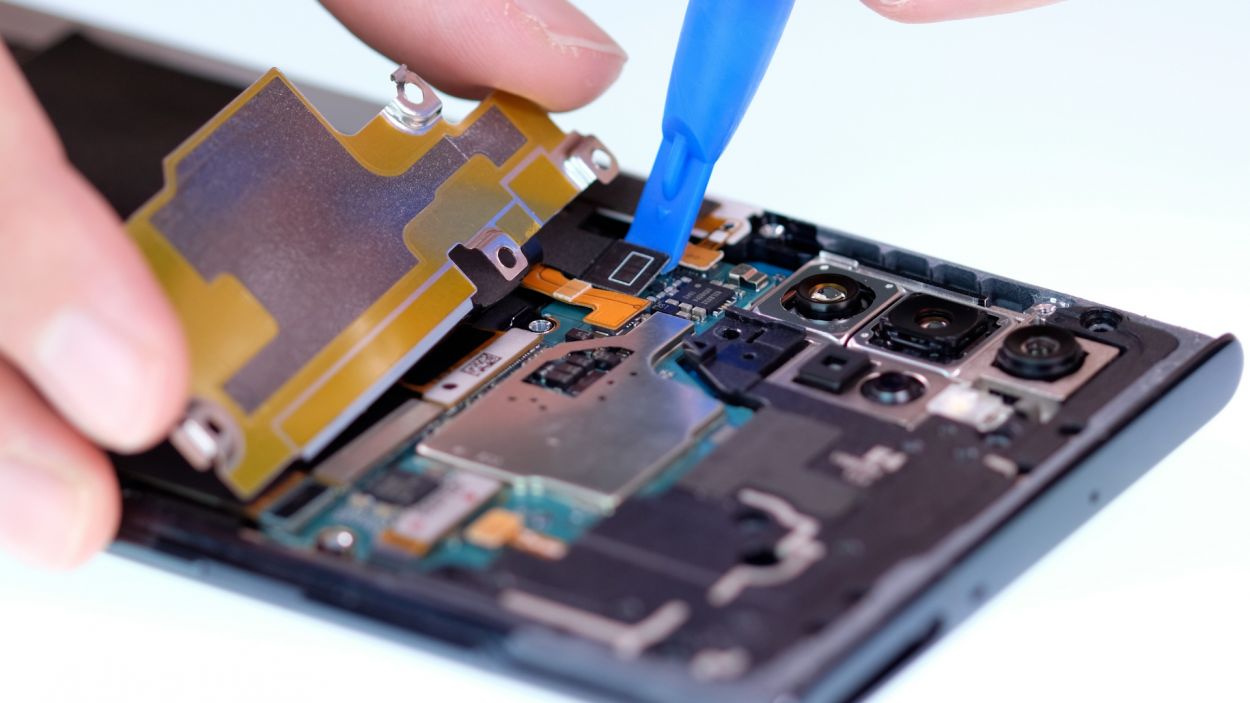
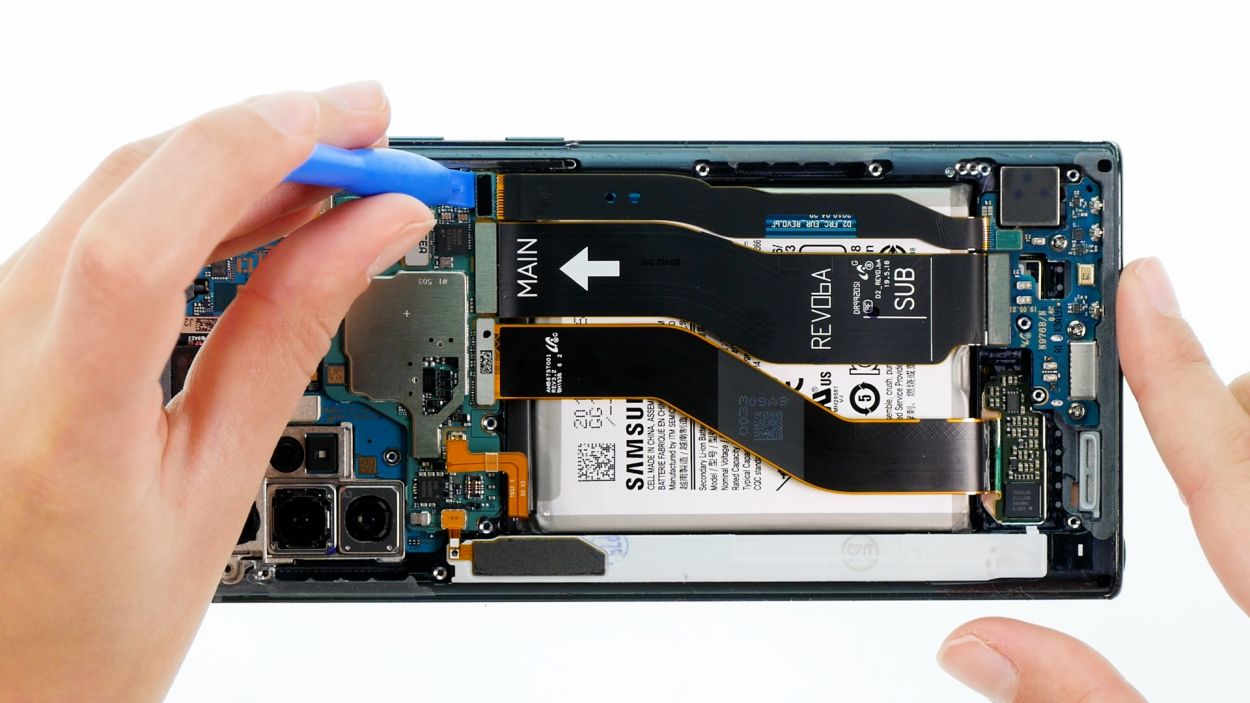
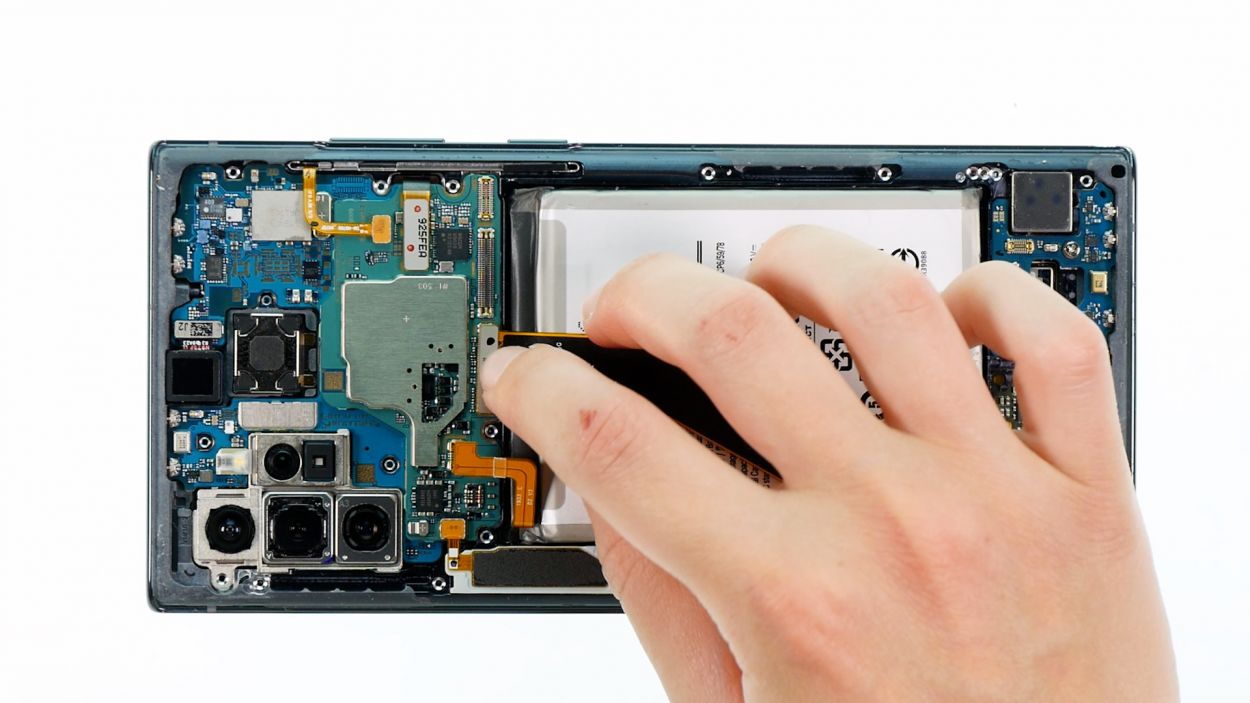
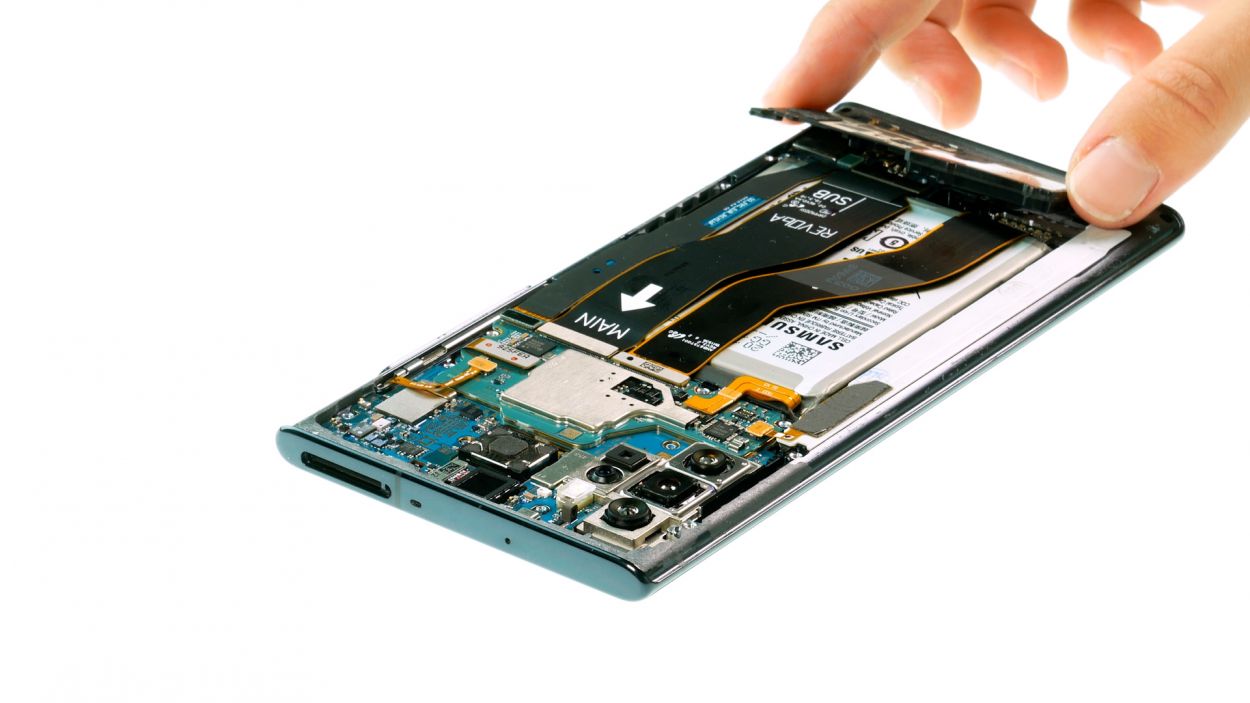
When you’re ready to detach that battery connector, kick things off from the side without any tiny components hanging around. Trust us, it’s the best way to keep everything safe and sound!
– Grab that trusty plastic spudger and slide it carefully under the battery connector. With a gentle nudge, you’ll lift it right off the mainboard. You got this!
Tools Used
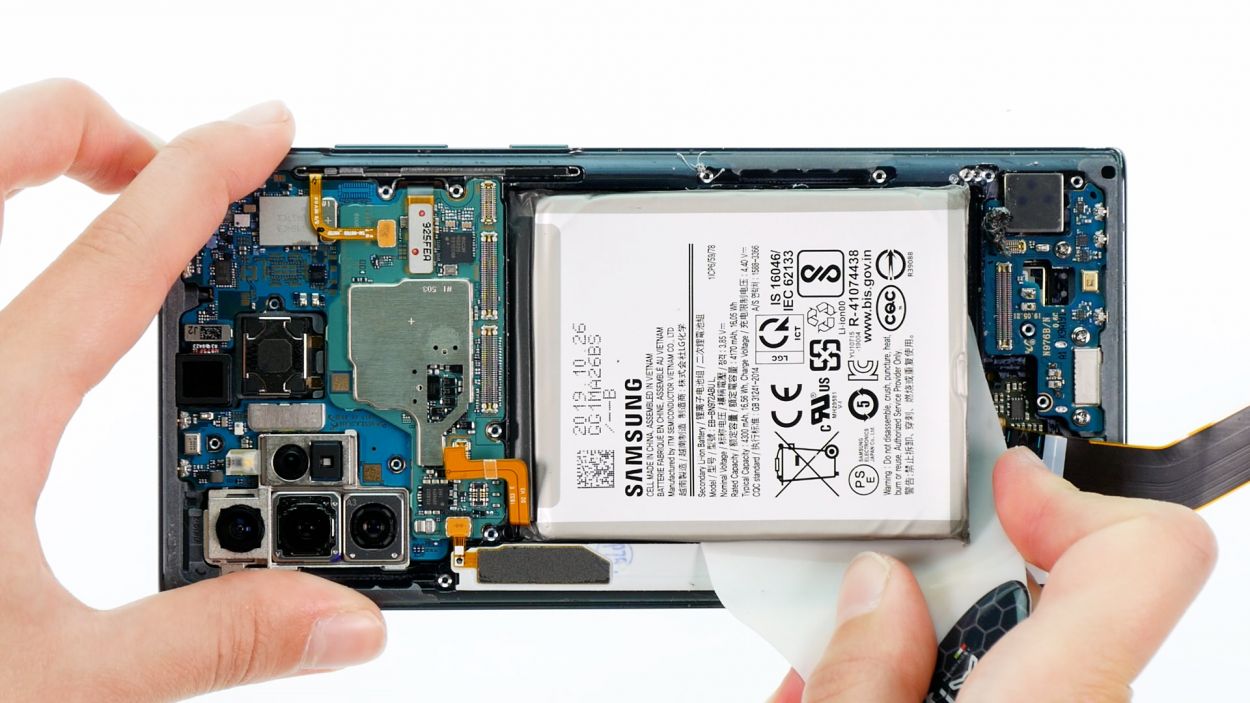
Step 8

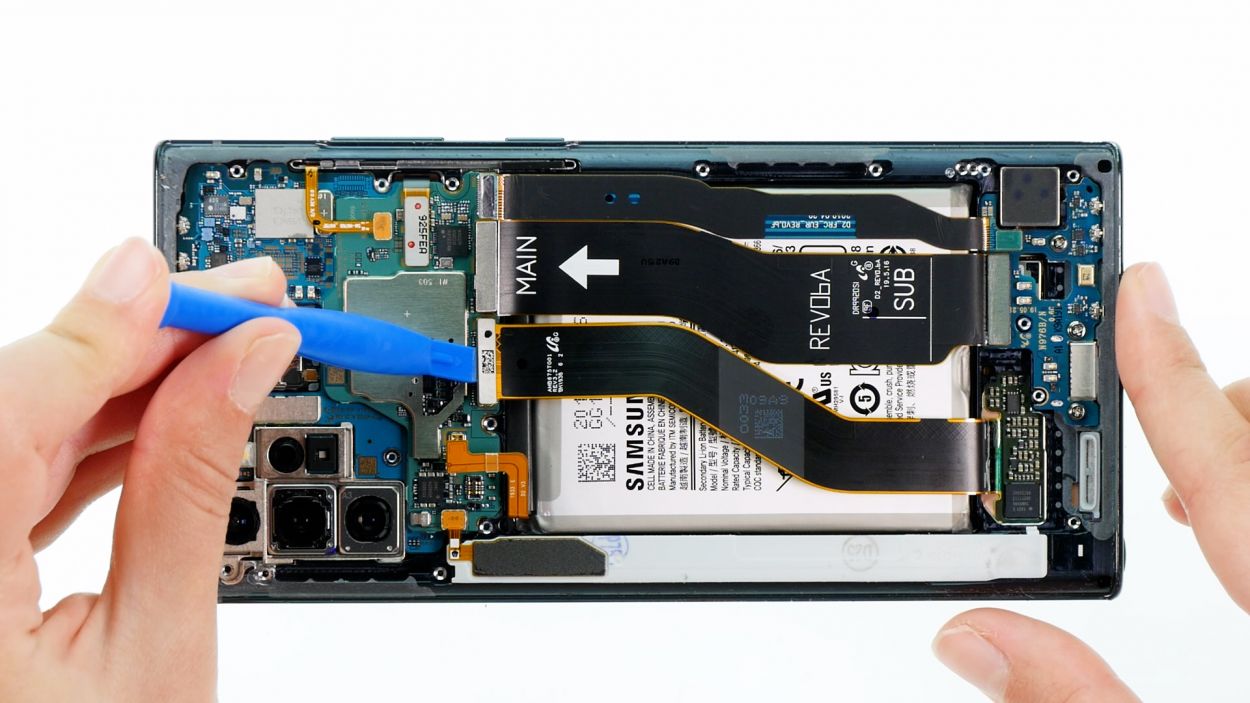
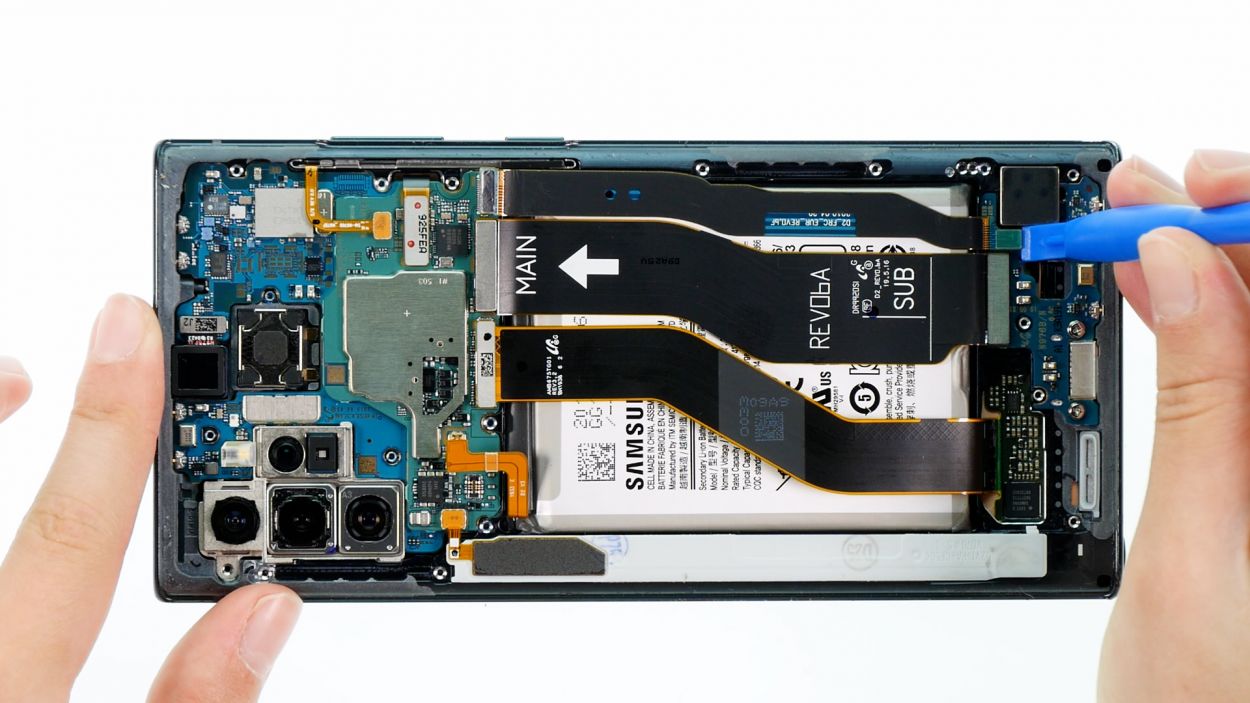

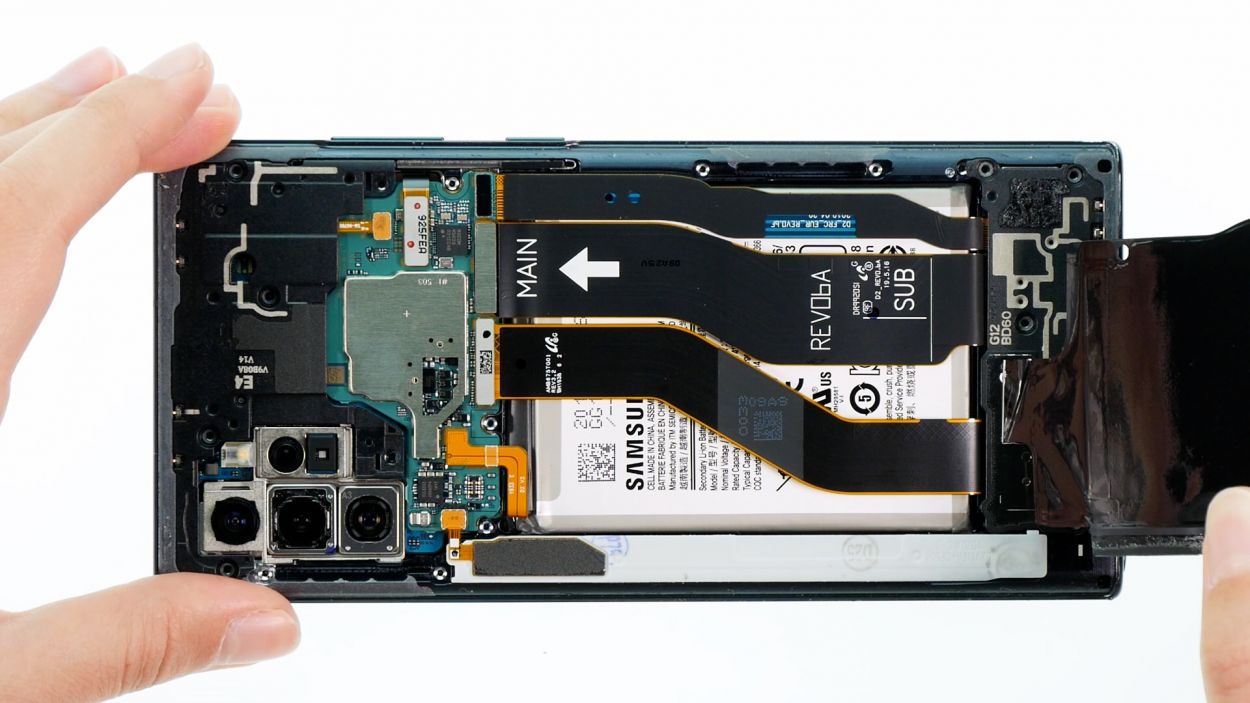
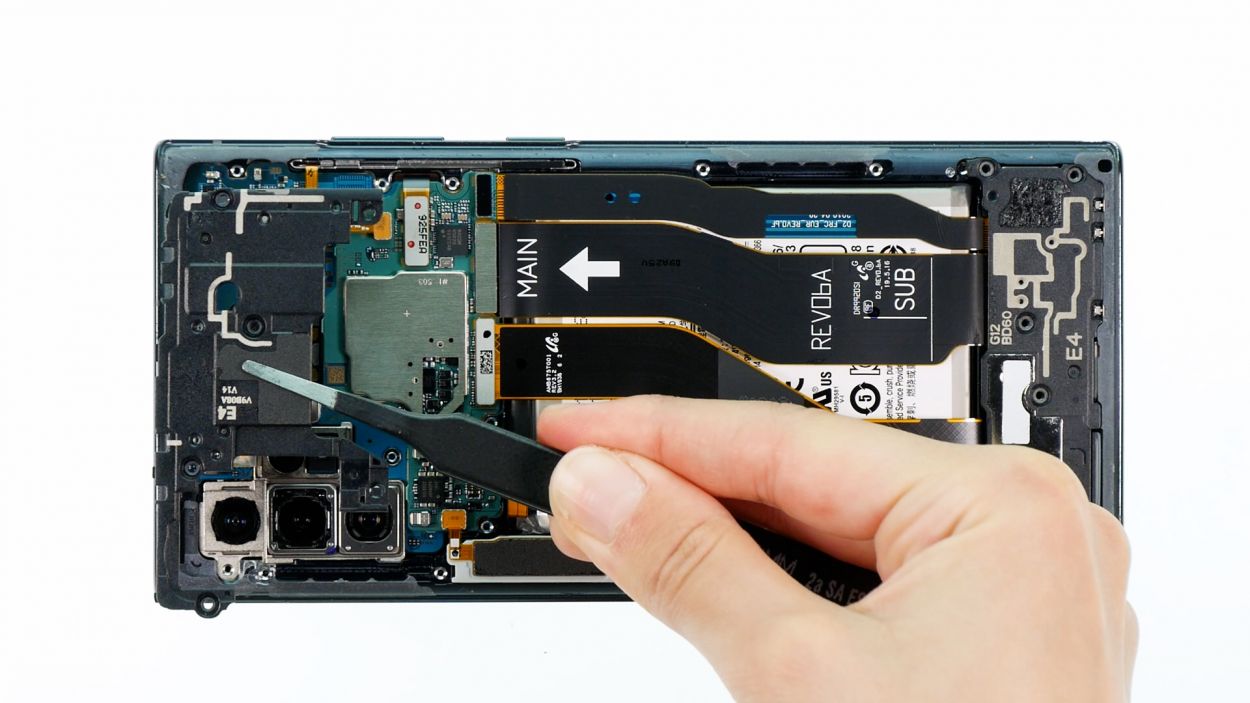
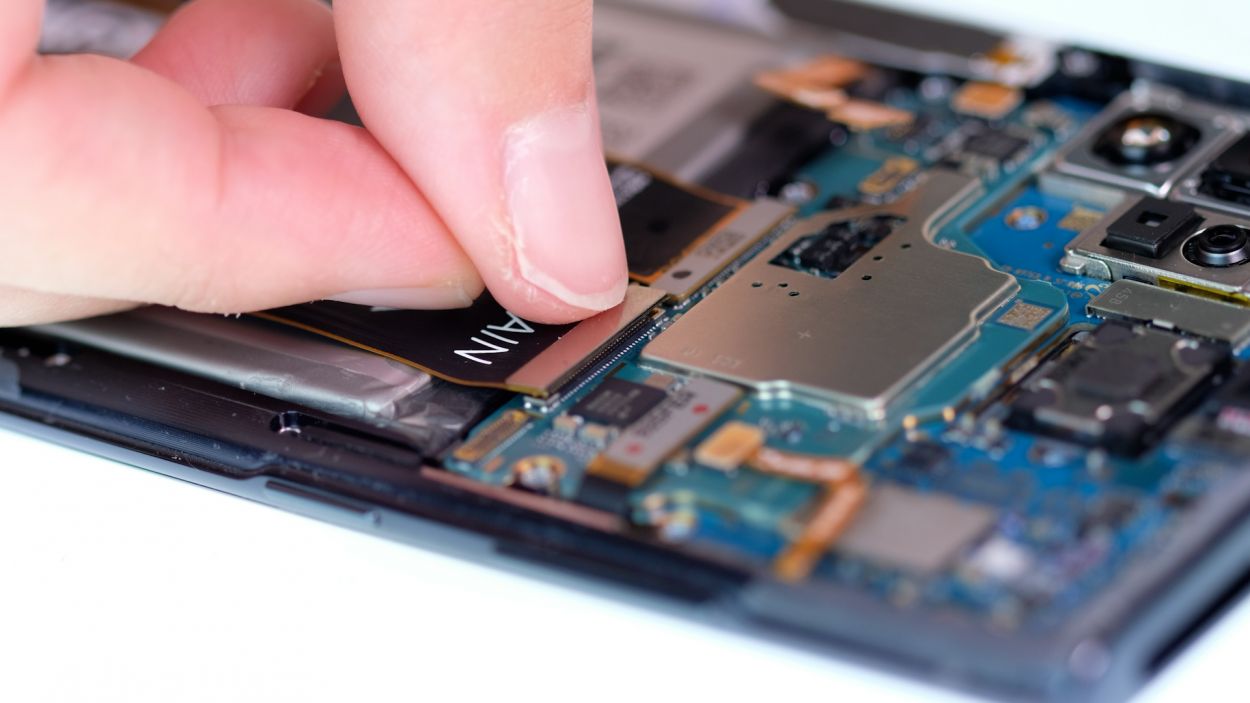
– Gently slide the spudger under each flex cable connector, one by one, and lift them off the mainboard and USB board with care. You’ve got this!
When you’re disconnecting those flex cables, remember to slide that spudger in from the side where there aren’t any tiny components hanging out. This little trick helps you dodge any potential mishaps. You’ve got this!
Tools Used
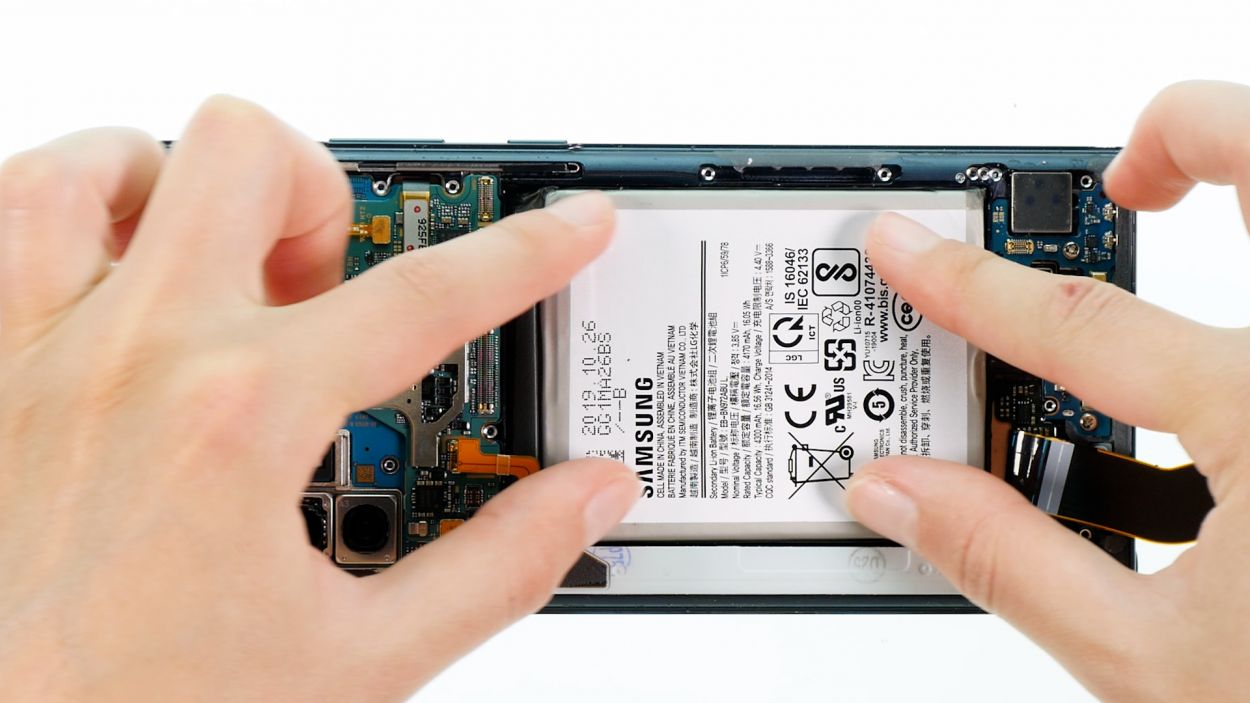
Step 9
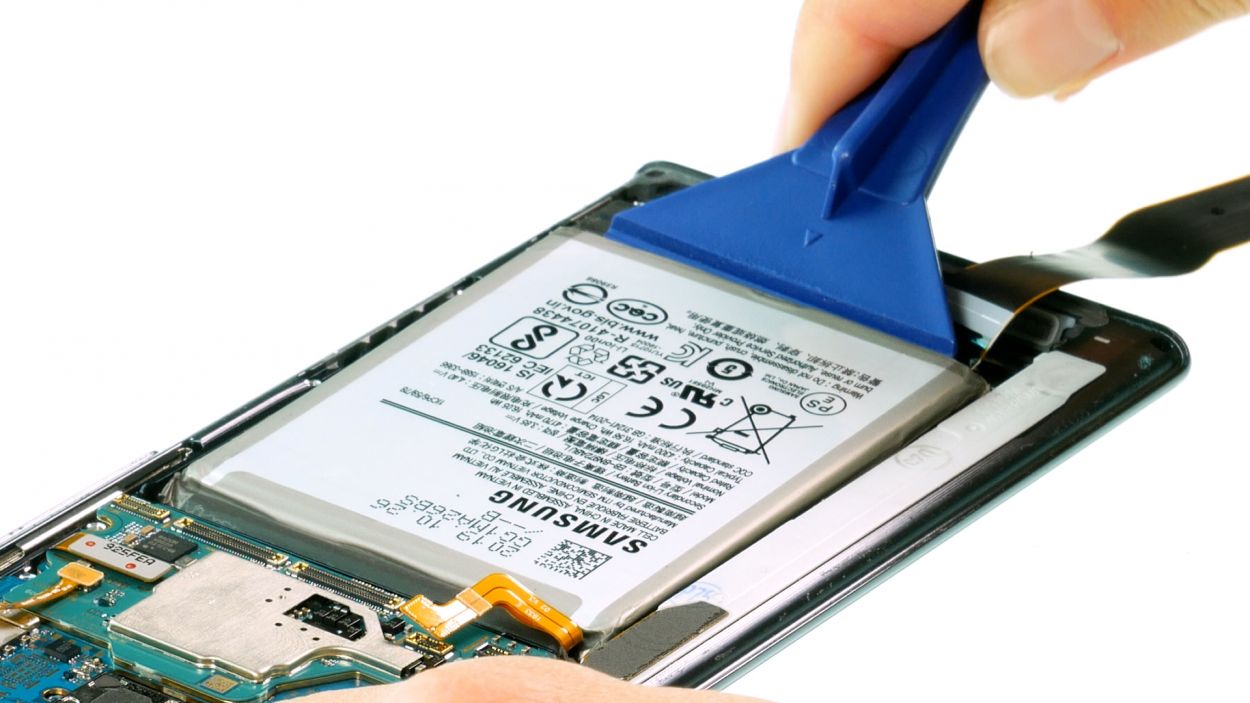
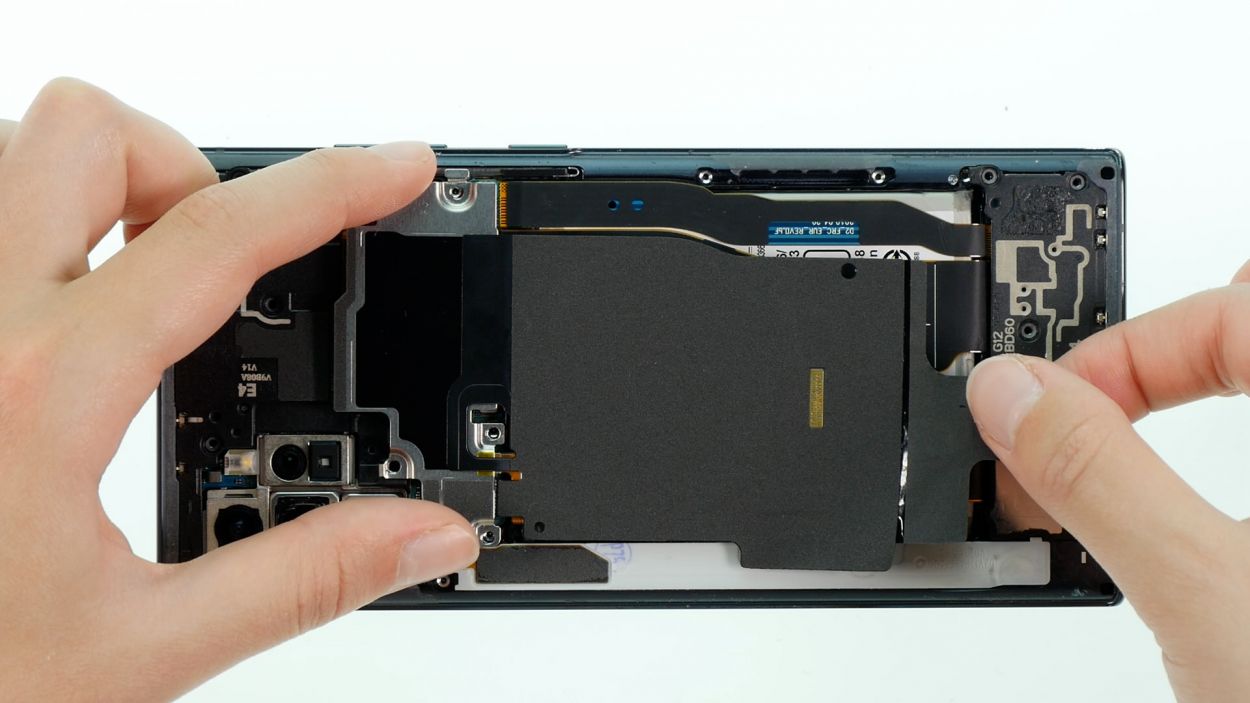
– Flip your phone over so the screen is facing up and gently blow some warm air over the battery area. It’s like giving your phone a cozy little spa treatment!
– Now, turn the display unit back over and grab a trusty plastic tool. Slide it under one edge of the battery to give it a gentle nudge upwards. A battery spudger works wonders for this!
– If the battery is feeling a bit loose, you can use a flat, flexible tool like the iPlastix to slide it beneath the battery and completely free it from the display unit. Easy peasy!
Tools Used
- heat gun to heat parts that are glued on so they’re easier to remove.
In most cases, you can also use a hairdryer.” rel=”nofollow noopener”>Heat gun - iFlex Opening Tool
- Battery Spudger
Step 10
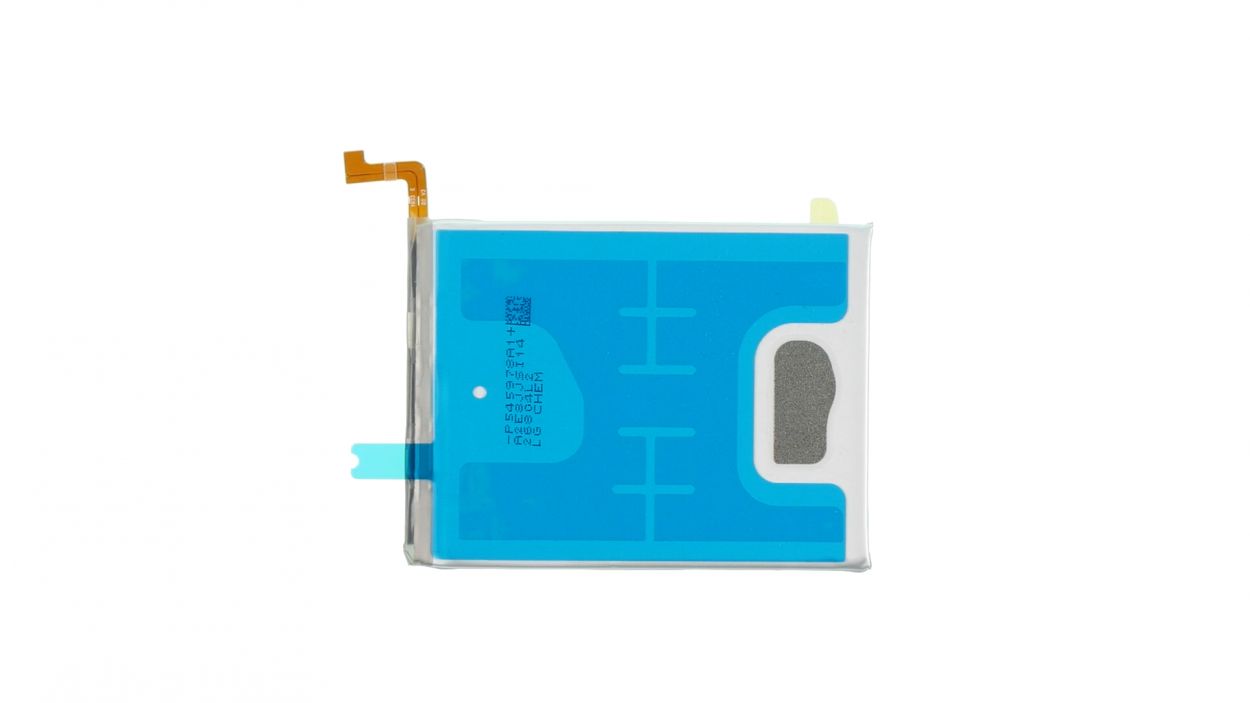
– First things first! To get your spare battery ready for action, make sure to peel off that protective film from the back. It’s like unwrapping a gift, but this one powers up your device!
Tools Used
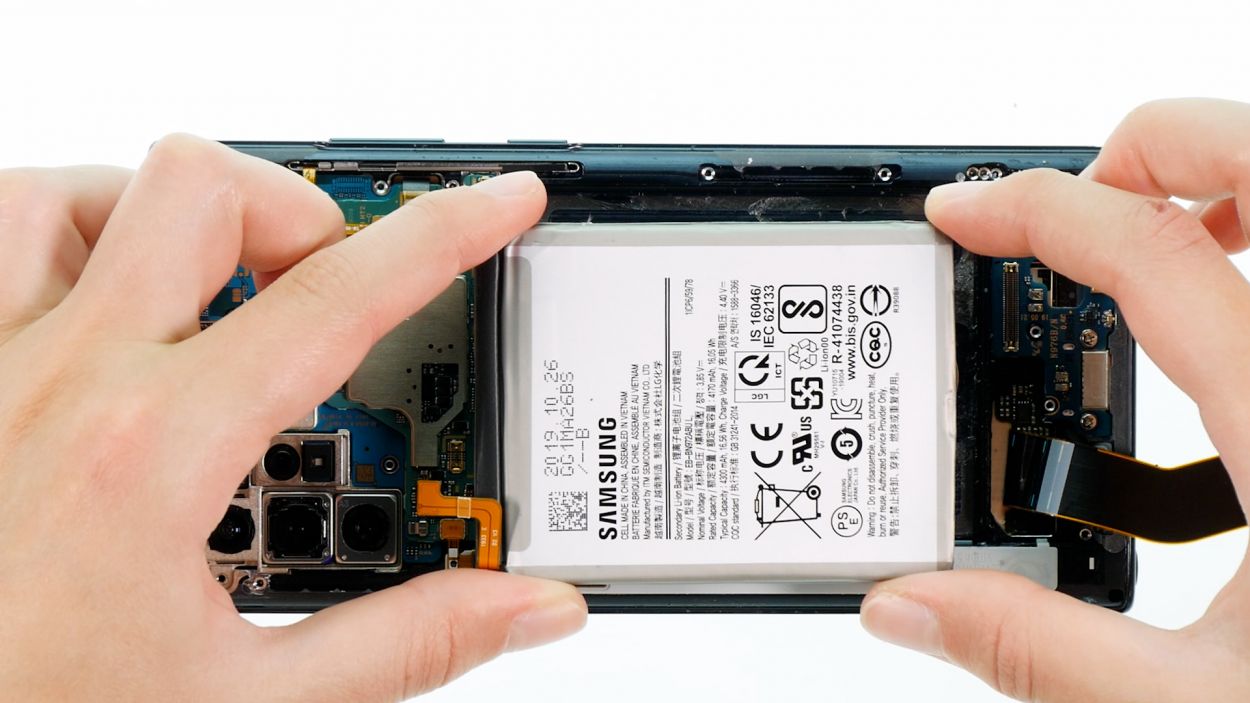
Step 12
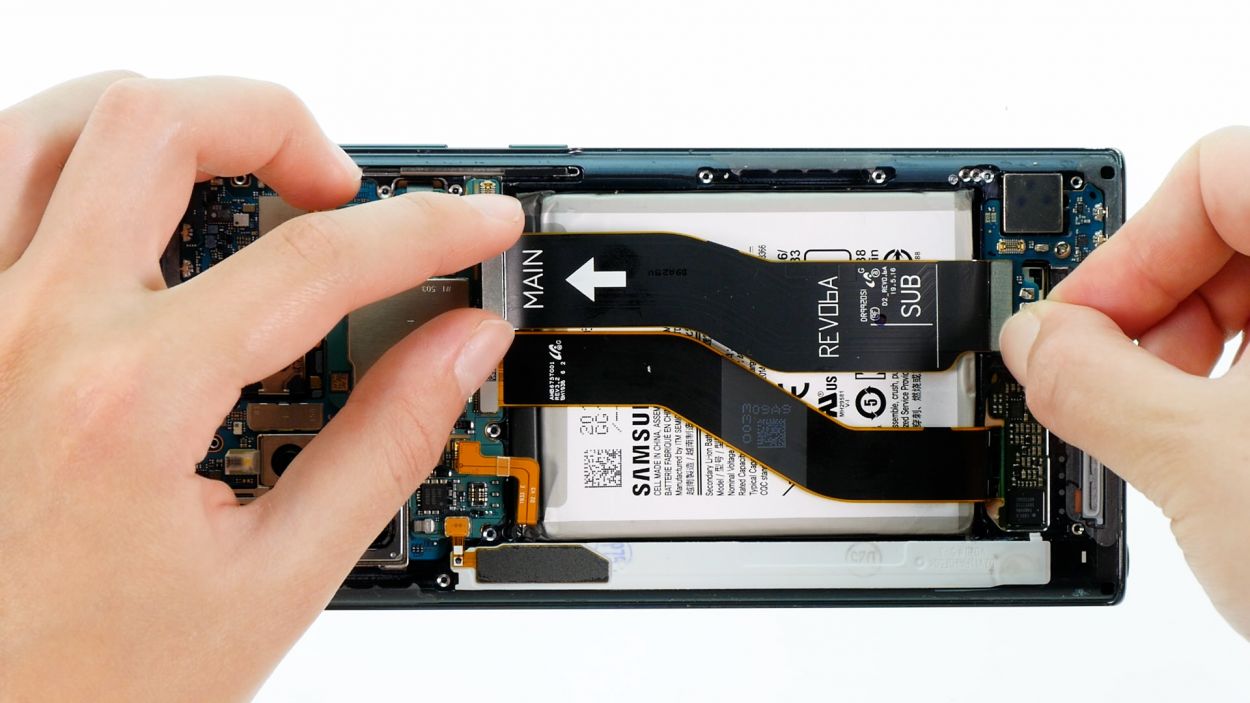
Hey there! Just a friendly reminder: don’t force those connectors together. Giving them a little extra muscle can cause some serious damage, and we definitely don’t want that! Keep it gentle and your components will thank you. If you need help, you can always schedule a repair.
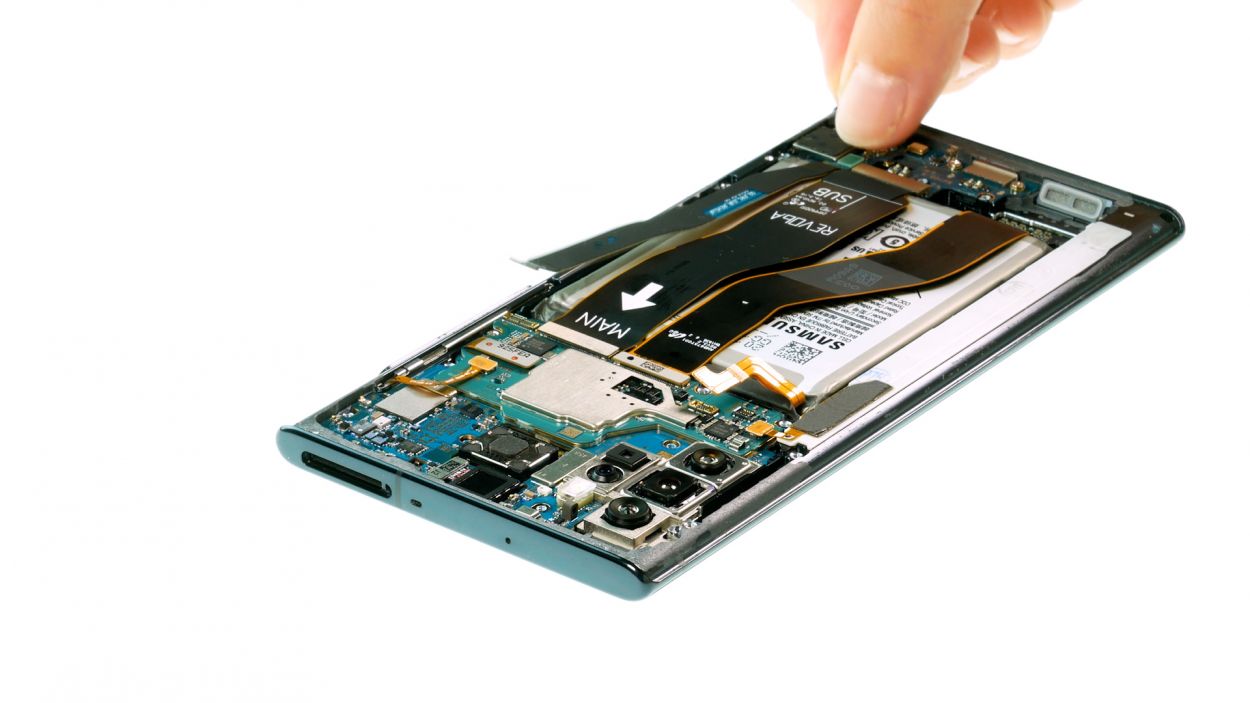
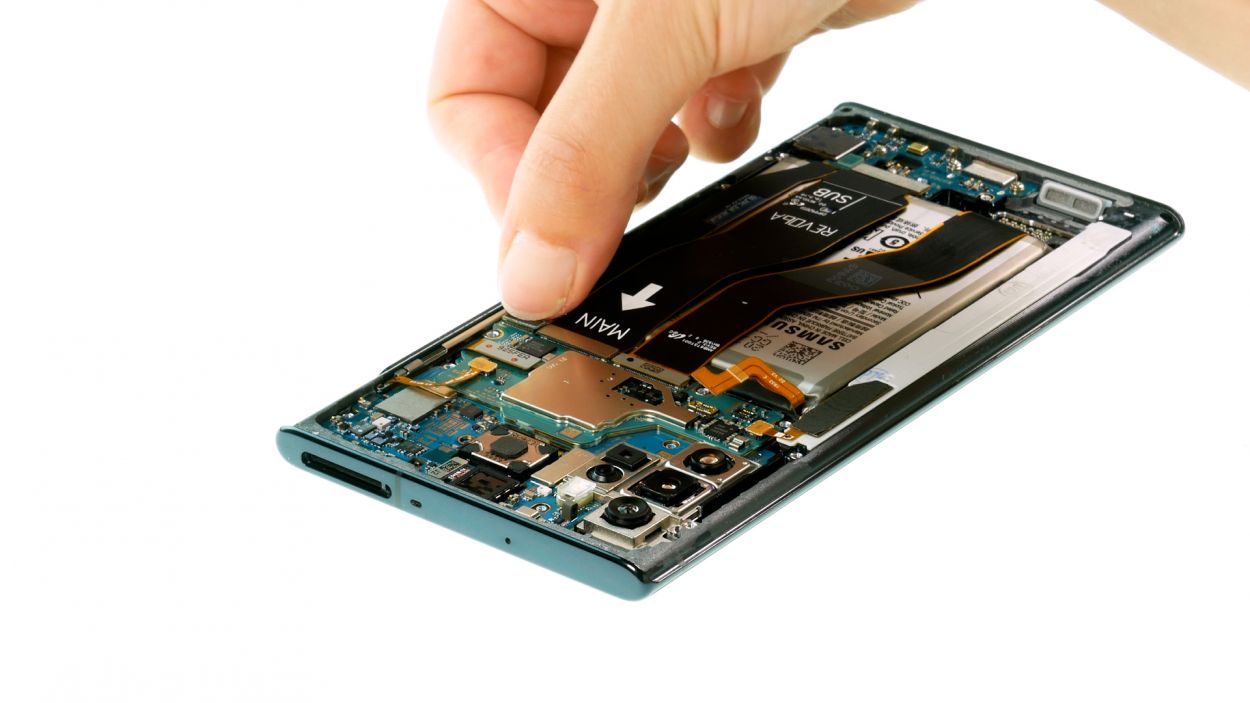
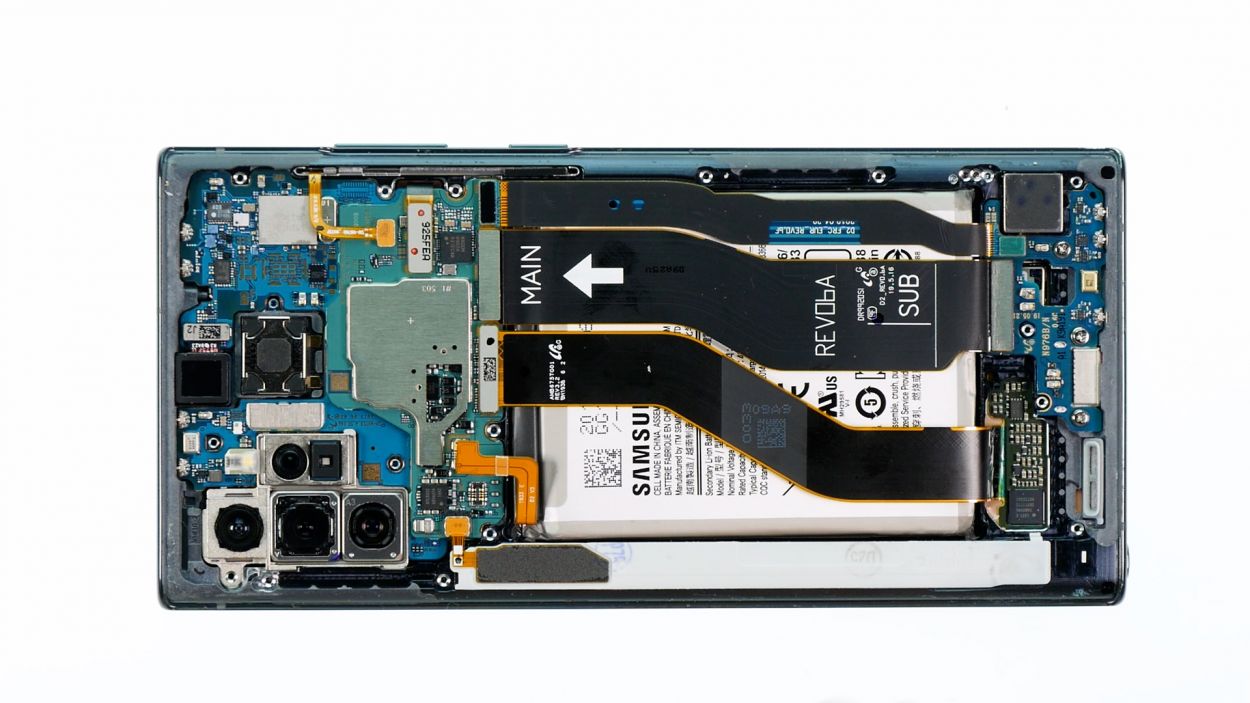
– Yo, let’s get those cables hooked up over the battery. They’re like the cool kids on the block, they need to be in the right spot to do their thing. Just check out the labels on the cable and the connector positions, and you’ll know exactly where they belong. Let’s do this!
Step 13

Hey there! Just a friendly reminder: don’t force those connectors together. They can be a bit sensitive, and a little pressure can cause big problems for the whole component. Keep it gentle and everything will be just fine!
Step 14


Feel free to give other components a whirl, like the vibration motor and speakers. It’s all part of the fun!
Step 15

14 × 4.0 mm Phillips
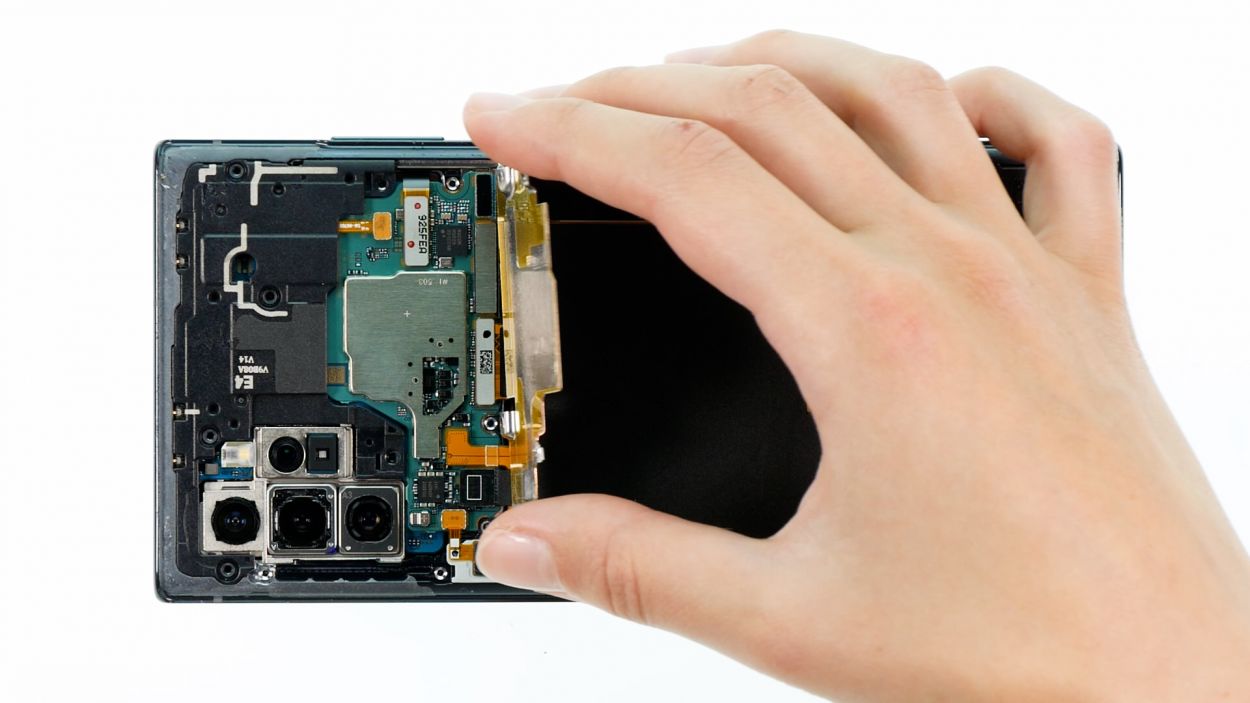
The plastic covers come with little lugs on their edges, which are like tiny hooks that need to click into the housing frame for a snug fit. Just give them a push, and they’ll be all set!
– First, gently slide those two plastic covers back into their original spots. You’ve got this!
Tools Used
Step 16
– Gently slide the card holder back into its cozy spot in the rear case frame until you hear that satisfying click, letting you know it’s snug and secure!
Step 17
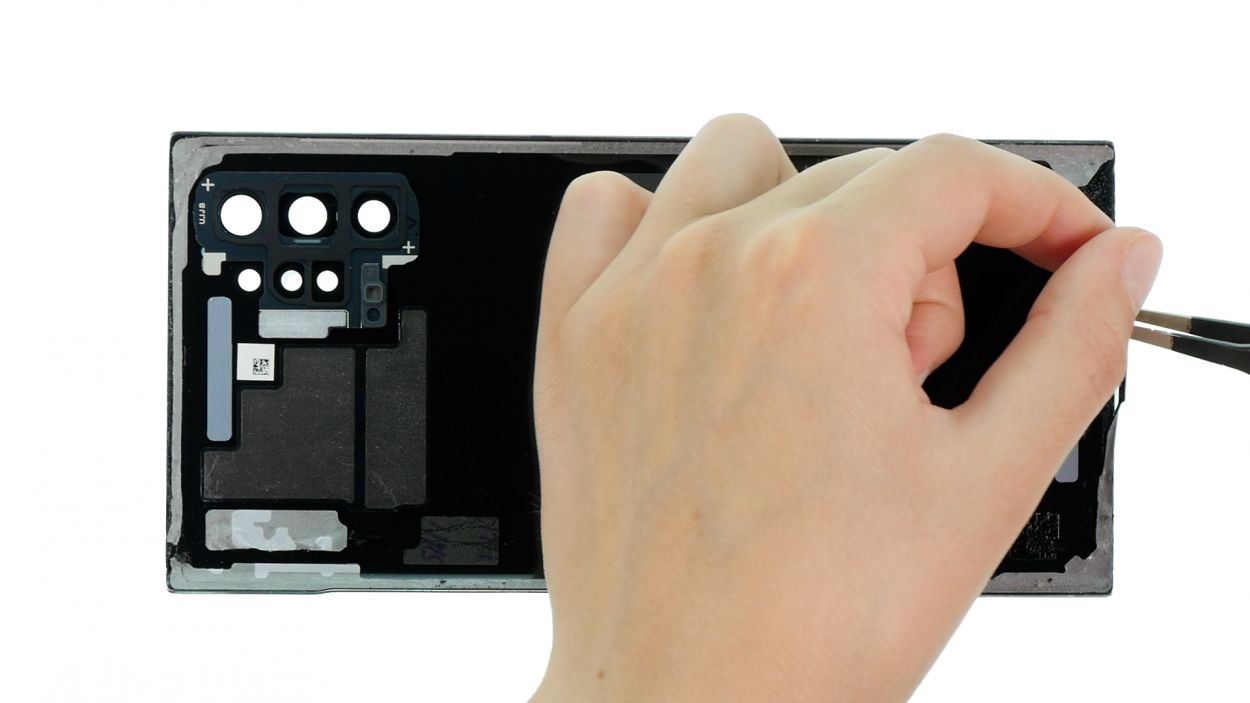
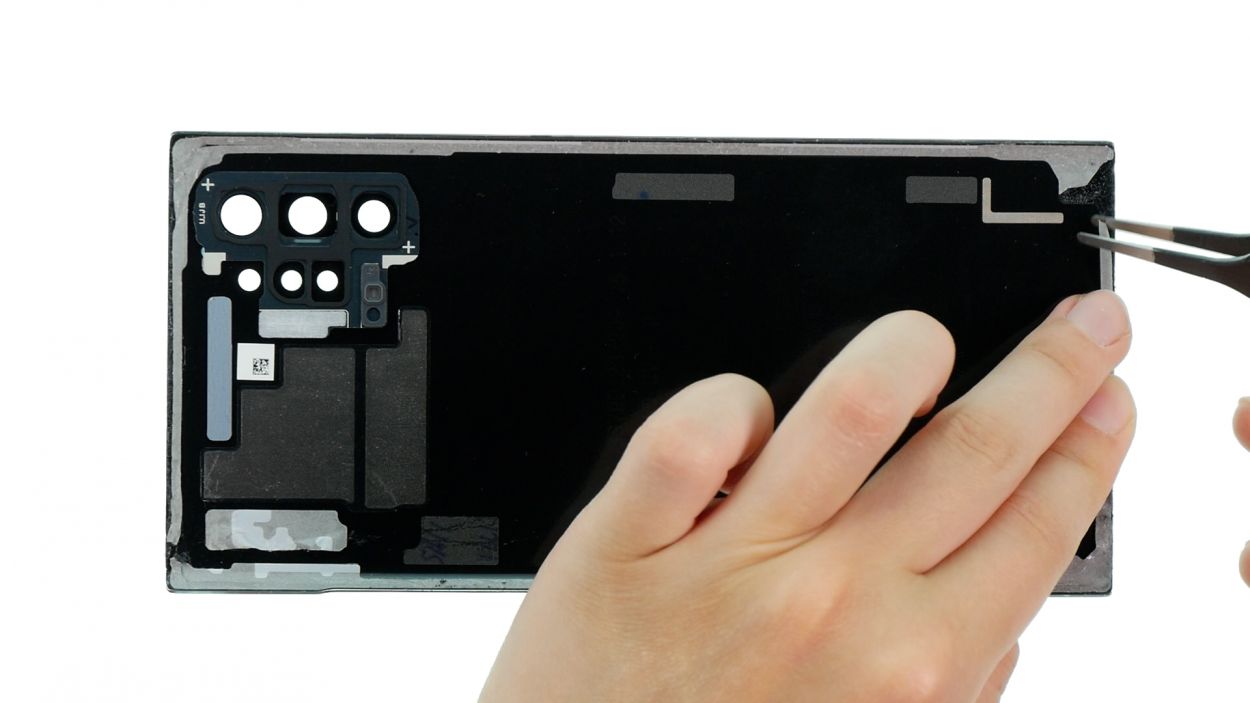
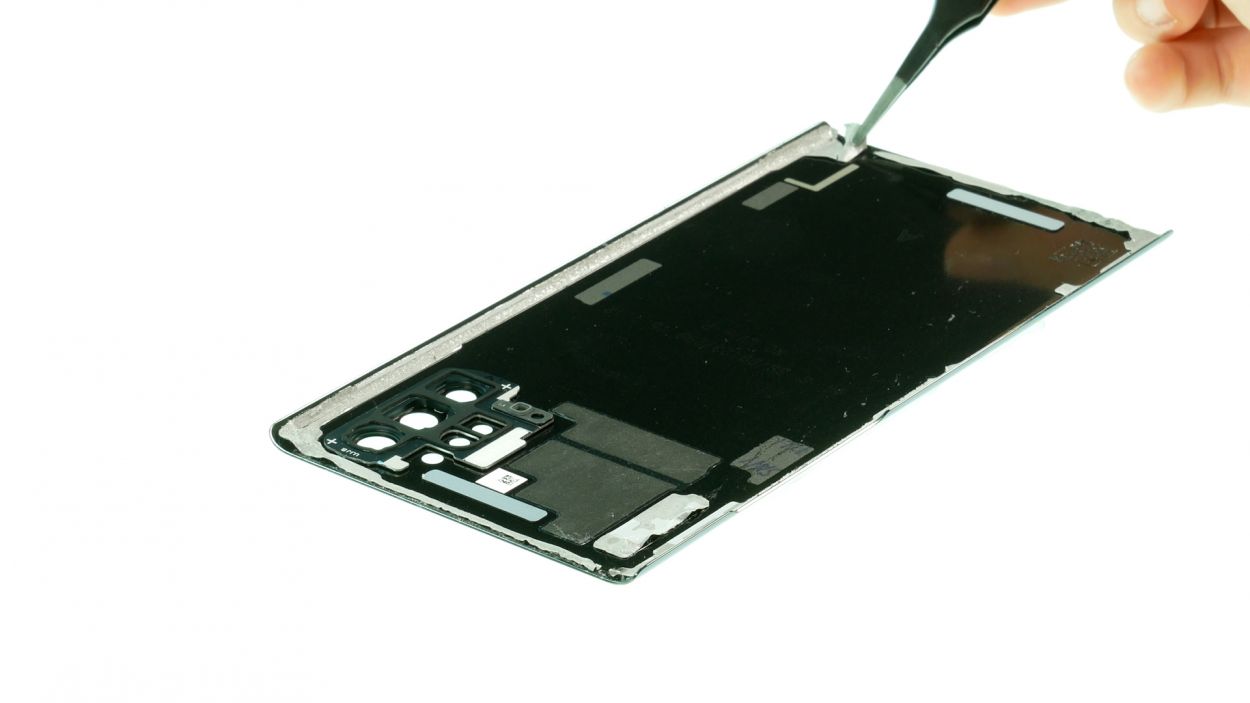
– If the adhesive frame on the inside of the back cover is still in good shape, feel free to give it another go! Just make sure it’s nice and smooth—no wrinkles or lumps allowed. If it’s a bit too big, trim it down to size and use tweezers to line it up perfectly.
Tools Used
Step 18

– Gently place the back cover you prepped earlier onto the display unit and give it a good press to stick it down.
– To make sure that adhesive really gets cozy, we suggest warming up the edges of the back cover again.
– And for the grand finale, weigh down your device with something like books. We like to use clamps for this job, but feel free to get creative!
Tools Used
- heat gun to heat parts that are glued on so they’re easier to remove.
In most cases, you can also use a hairdryer.” rel=”nofollow noopener”>Heat gun