DIY Guide to Replace Google Pixel 4 Microphone
Duration: 45 minutes
Steps: 41 Steps
This repair guide was written by the awesome folks at iFixit, and it’s not a Google product (but it’s still super helpful!).
Hey there, just a heads-up:
The team at Salvation Repair put together this guide to help you replace the bottom side’s microphone on your Google Pixel 4. Keep in mind that the microphone is sealed to the frame with an adhesive gasket, so removing it will affect your phone’s water resistance. Before you start, be aware that taking apart the front laser assembly can expose you to infrared laser emissions – check out Google’s safety warnings here. If you need help, you can always schedule a repair. Follow these steps to remove or replace the microphone, and don’t hesitate to reach out if you have any questions.
Step 1
– Let’s get that SIM card tray out! Grab a SIM eject tool, a small bit, or even a straightened paperclip – whatever you’ve got. Find the tiny hole on the SIM card tray on the left side of the phone.
– Give that hole a gentle but firm push with your tool. You’ll feel the tray start to pop out.
– Now, carefully slide the tray out, and there’s your SIM card!
Step 2
You can use a hair dryer, heat gun, or hot plate too. Just watch the heat—your phone’s display and battery don’t play well with too much heat. If you need help, you can always schedule a repair.
– Let’s get this party started! Heat up your iOpener and lay it on the bottom edge of the back panel for a minute. You’ll be peeling this thing off in no time.
Tools Used
Step 3
If your back glass is badly cracked, don’t worry – we’ve got you covered. Try slapping a layer of clear packing tape over it, and the suction cup should stick just fine. If that doesn’t work, you can use some seriously strong tape as a substitute. And if all else fails, a tiny bit of superglue can help the suction cup stick to the broken panel. If you need help, you can always schedule a repair
– Get ready to rock and roll! Place a suction cup on the heated edge of the back panel and press down to make it stick, as close to the edge as possible. You got this!
Step 4
Depending on how old your phone is, this might be a bit tricky. If you’re running into some hiccups, just warm up the edge a little more and give it another go!
– Time to give that back panel a little love tap! Gently pull up on the suction cup with steady force to create a little space between the back panel and the frame.
– Now, slide the point of your trusty opening pick into that gap. You got this!
Step 5
– Let’s get this party started! Slide the opening pick along the bottom edge towards the left corner, slicing through that sticky stuff like butter.
– Keep the pick in place and smoothly glide it from the bottom left corner to the bottom right corner. We’re cutting through the adhesive all the way.
– Leave the pick nestled in the bottom right corner – it’s like a little party favor to keep the adhesive from sticking back together. If you need help, you can always schedule a repair
Step 6
– Grab your trusty iOpener and gently place it on the left edge of the phone. Let it work its magic for about a minute.
Tools Used
Step 7
– Let’s get that back panel off! Insert a second opening pick underneath the back panel directly over the charge port.
– Now, slide that opening pick to the bottom left corner of the phone. You’re doing great!
Step 8
That adhesive can be quite sticky! To make slicing easier, try pushing the pick in and out with a gentle sawing motion. You’ll get the hang of it in no time!
– Gently glide the opening pick around the bottom left corner and along the left side of your phone to break that adhesive seal. You’re doing great!
– Pause when you hit the top left corner, close to the camera, and keep that pick in place. Nice work!
Step 9
– Grab your iOpener and give it a cozy spot on the right edge of your phone for a full minute. Let it work its magic!
Tools Used
Step 10
– Keep the first two opening picks in place, then slide a third pick into the lower part of the right-hand side.
– Glide the opening pick up towards the top, slicing through the adhesive on the right side.
– Pause at the top right corner and leave the pick there.
Step 11
– Gently glide the third opening pick around the top right corner and along the top edge of the phone, carefully cutting through that last stubborn strip of adhesive.
Step 12
– Alright, now that you’ve carefully sliced around the phone, let’s give that back cover a little lift on the right side. Think of it like opening a book – slow and steady!
– Don’t get too excited and yank it off just yet, though. There’s still a little bit holding it to the phone. We’ll take care of that in the next step.
Step 13
– Gently swing open the back panel until it comfortably rests on the left edge of your phone, but be careful not to strain that delicate ribbon cable attached inside.
– Now’s a great time to power up your phone and check that everything’s working smoothly before sealing up the back panel. Just remember to turn your phone off completely before diving back into the repair!
Step 14
Stay organized during this repair by keeping track of each screw and making sure it ends up back in its original spot. If you need help, you can always schedule a repair
– Let’s tackle those five T3 Torx screws holding down the battery connector shield:
– Four 4.0 mm screws
– One 2.1 mm screw
Step 16
– Time to disconnect that battery. Use the pointed end of your trusty spudger to carefully pry the battery connector straight up from the motherboard. Easy does it!
– Now, let’s get that connector back in place. To reattach, line it up just right and gently press down on one side until you hear that satisfying click. Then, repeat on the other side. Remember, no pressing down on the middle, or you might end up with bent pins and a bigger problem on your hands. If you need help, you can always schedule a repair
Tools Used
Step 18
– Grab your trusty T3 Torx driver and get ready to tackle those two 4 mm screws holding down the back panel connector cover. You’ve got this!
Step 21
– Let’s get that back panel off, shall we? A gentle tug will do the trick!
– When you’re putting everything back together, refer to this guide to stick on those custom-cut adhesives perfectly tailored for your device.
– Using a pre-cut adhesive card? Just follow along with this guide for a seamless application!
Step 22
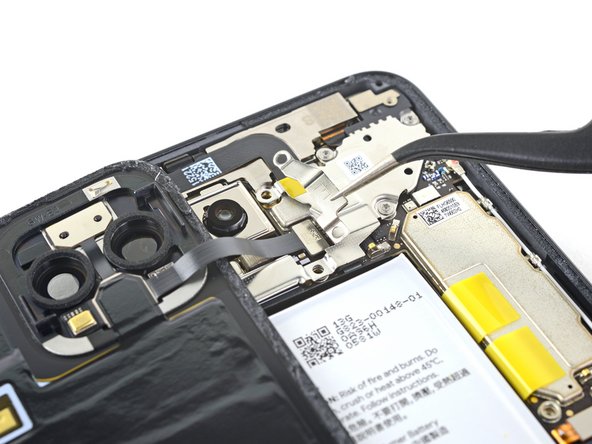
– Let’s get started by using a T3 Torx driver to remove the four 4mm screws that hold the camera connector cover in place. If you need help, you can always schedule a repair
Step 23
– Grab those tweezers and give the camera cover a gentle nudge upward! Then, slide it right out of its cozy spot in the upper right corner of your phone. Easy peasy! If you need help, you can always schedule a repair.
Tools Used
Step 24
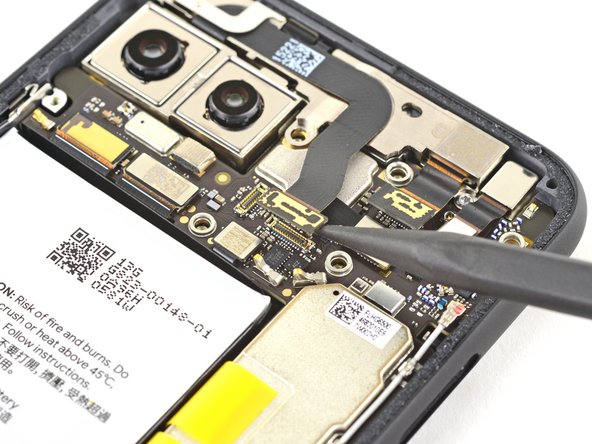
– Grab your trusty spudger and gently nudge the camera and sensor connectors upwards from the motherboard. You’ve got this!
Tools Used
Step 25
– Go ahead and unplug that laser module connector like a pro!
Step 26
– Grab your trusty T3 Torx driver and let’s get those two 2.4 mm screws out of the way that are holding the front camera and sensor assembly in place. You’ve got this!
Step 27
– Grab a trusty pair of tweezers and gently wiggle out the front camera and sensor assembly. You’ve got this!
Tools Used
Step 28
– Let’s get those two T3 Torx screws off and free the vibration motor shield:
– One 4.2 mm screw
– One 4.4 mm shouldered screw
Step 29
– Time to get up close and personal with that vibration motor shield! Use a trusty pair of tweezers to carefully remove it. If you need help, you can always schedule a repair
Tools Used
Step 30
– Grab your trusty spudger and gently use its pointed end to unplug those two rear-facing camera connectors from the motherboard. You’ve got this!
Tools Used
Step 31
– Check out these fun and friendly steps to disconnect the side buttons and earpiece speaker connectors on your device! If you need help, you can always schedule a repair.
Step 32
– Let’s give those connectors a break! First, gently disconnect the left grip sensor connector from the motherboard.
– Now, let’s disconnect the charge port connector from the motherboard. We’re getting closer to fixing things!
Step 33
– Unplug the display connector from the motherboard.
– Detach the right grip sensor connector from the motherboard.
Step 34
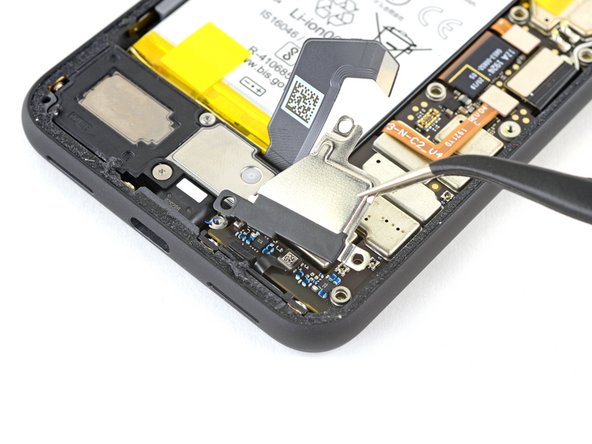
Now it’s time to get a little gentle with your device. Use a spudger to carefully pry up and unclip the bottom antenna connector from the motherboard. If you need help, you can always schedule a repair
– Grab your trusty tweezers and get a good grip on that metal clip. Now, carefully pull the connector straight up and off the motherboard. If you need help, you can always schedule a repair
Step 35
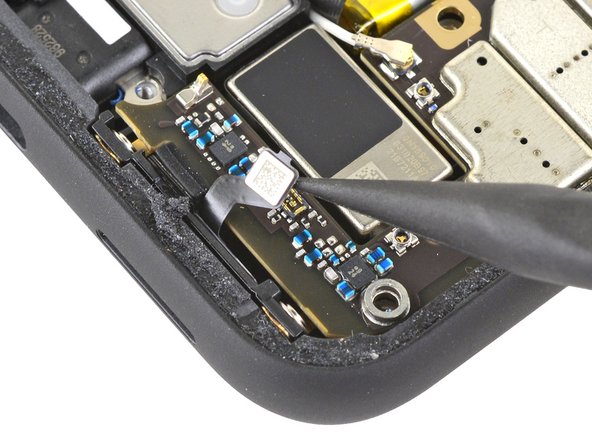
– Alright, let’s disconnect that bottom microphone connector from the motherboard. Just gently pull it apart – no need to be rough! If you need help, you can always schedule a repair.
Step 36
– Gently give those battery adhesive pull tabs a little nudge—they’re lightly stuck to the motherboard. We just want to loosen them up, not yank ’em off!
Step 37
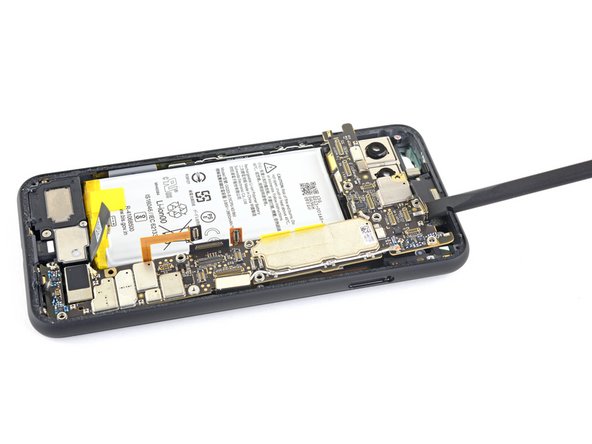
– Now, grab your trusty spudger and gently pry up the top end of the motherboard. It’s like giving it a little high five to say ‘see ya later’ to the phone’s frame!
Tools Used
Step 38
The rear-facing camera module connectors take a little loop around the motherboard, and the camera module isn’t glued down, so it might pop off with the motherboard during this step. Don’t sweat it – just make sure you don’t lose it!
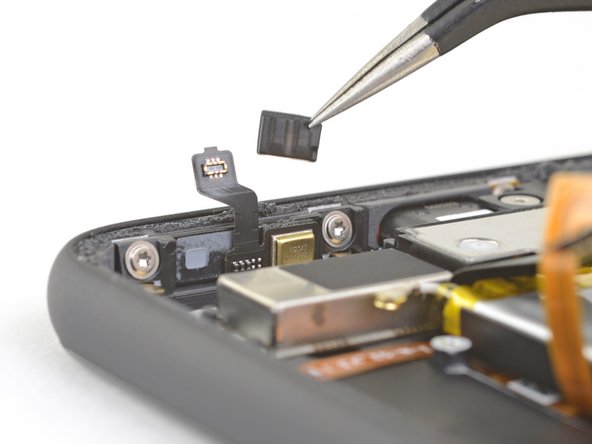
When you’re removing the motherboard, you might see a tiny rubber cover for the bottom microphone fall off. Just keep an eye on it and don’t lose it – it’s a little guy! If you need help, you can always schedule a repair
– Time to gently lift that motherboard out! Be super careful not to snag any of those little ribbon cable connectors, they’re delicate.
– Now, give that motherboard a proper send-off and remove it completely.
– When you’re putting it back in, make sure those ribbon cable connectors aren’t hiding under there. We don’t want any surprises!
Step 39
– Time to get up close and personal with that microphone! Use a trusty pair of tweezers to carefully remove the small rubber cover – it’s like a little reveal. If you need help, you can always schedule a repair
Tools Used
Step 40
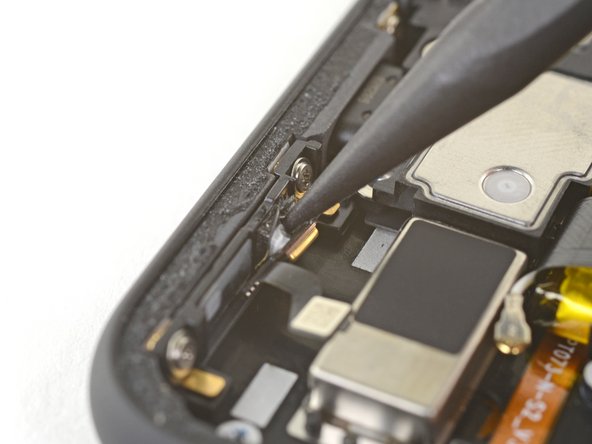
– Grab your spudger, that handy little tool with the pointed end, and gently pry the microphone away from the bottom edge of your phone’s frame. It’s just lightly stuck, so don’t worry about going overboard. You’ve got this! If you need help, you can always schedule a repair
Tools Used
Step 41
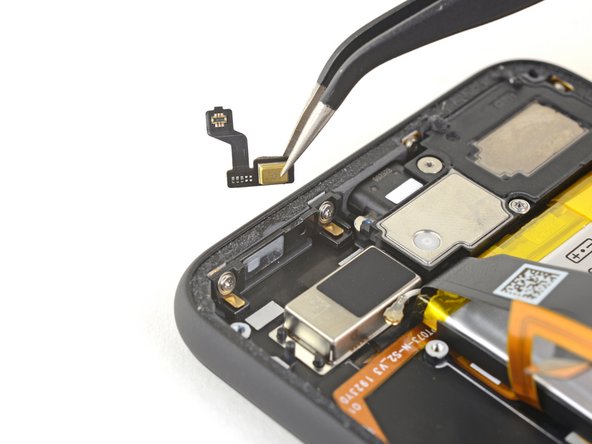
– Grab your trusty tweezers and gently pull out the microphone.
– Before you pop in that shiny replacement microphone, take a peek at the adhesive gasket:
– If it’s looking good, feel free to reuse it! Just make sure it doesn’t block the hole.
– If the gasket is out of whack, go ahead and take it off. Then, stick on some fresh adhesive using a pre-cut strip or Tesa tape.
Tools Used


