DIY Guide to Replace Huawei P10 Battery Step-by-Step
Duration: 60 min.
Steps: 16 Steps
Is your battery feeling a bit sluggish? No worries, fixing your Huawei P10 is a breeze! Each step is packed with clear photos to help you through the screen replacement. First things first, you need to open up that Huawei P10 to get to the battery. The good news? The back cover is not glued on, making it easier to access! Just remember to back up your data before diving in, work on a clean surface, and take your time. It’s also a smart move to check your spare part for any defects before you start. If you spot any issues, don’t hesitate to reach out to your vendor! And if you have any questions along the way, feel free to use the live chat on our website or drop a comment. Happy repairing!
Step 1
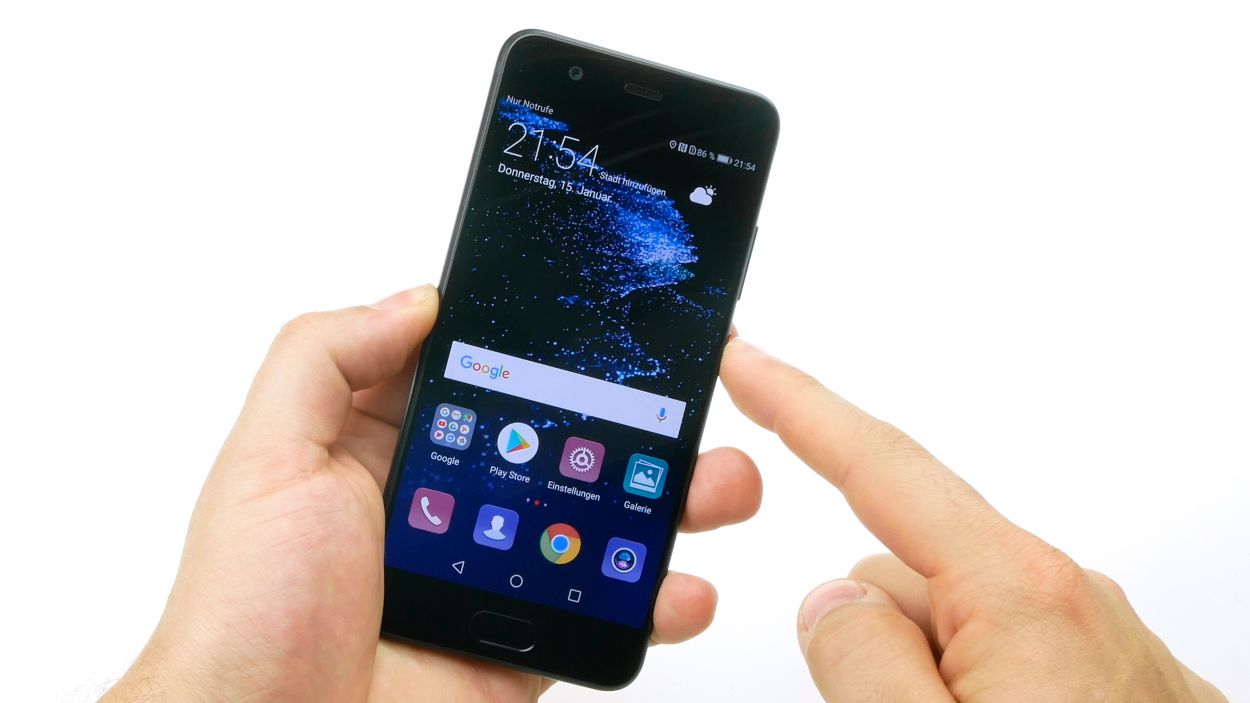
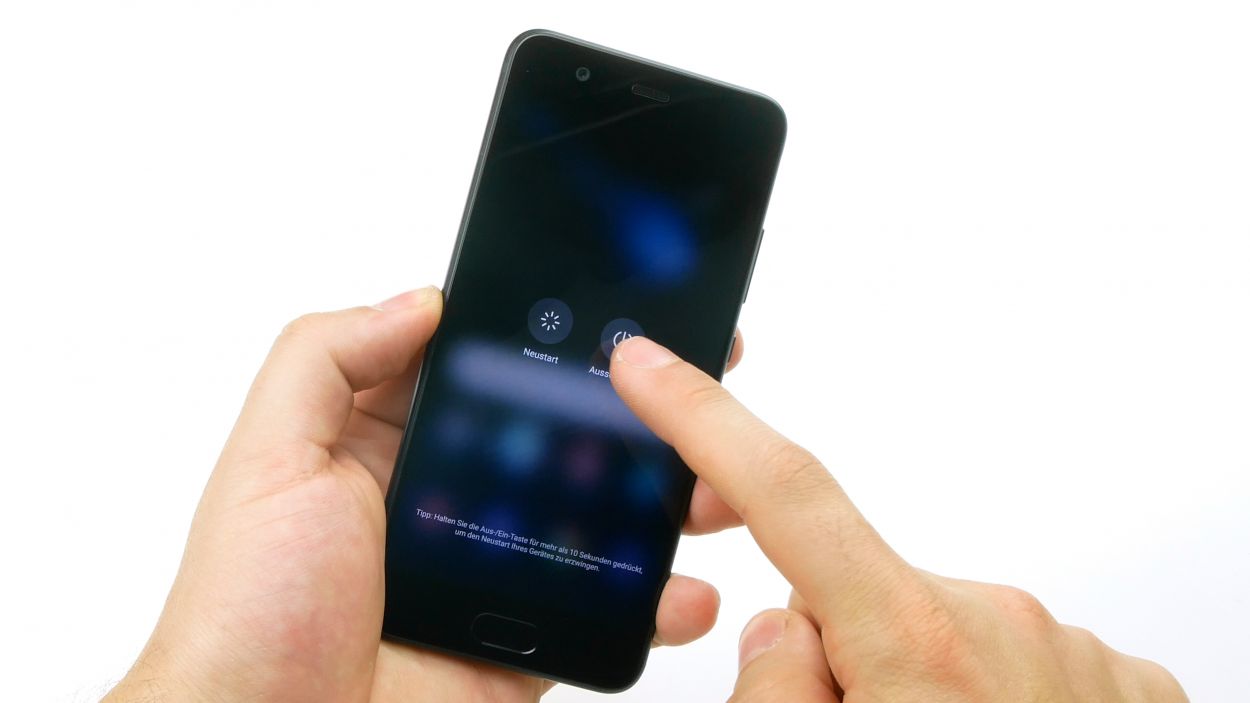
– Give that power button a good press and hold until you see the power off icon pop up.
– Now, give it another tap to turn off your device.
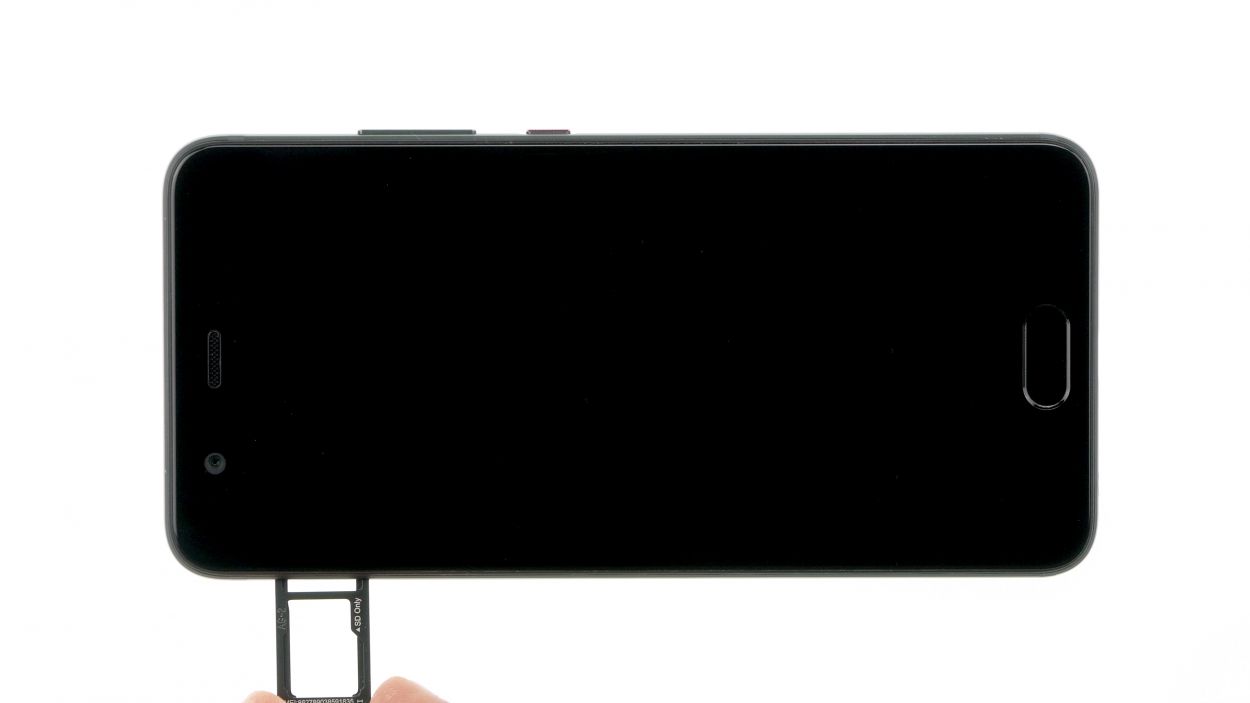
Step 2
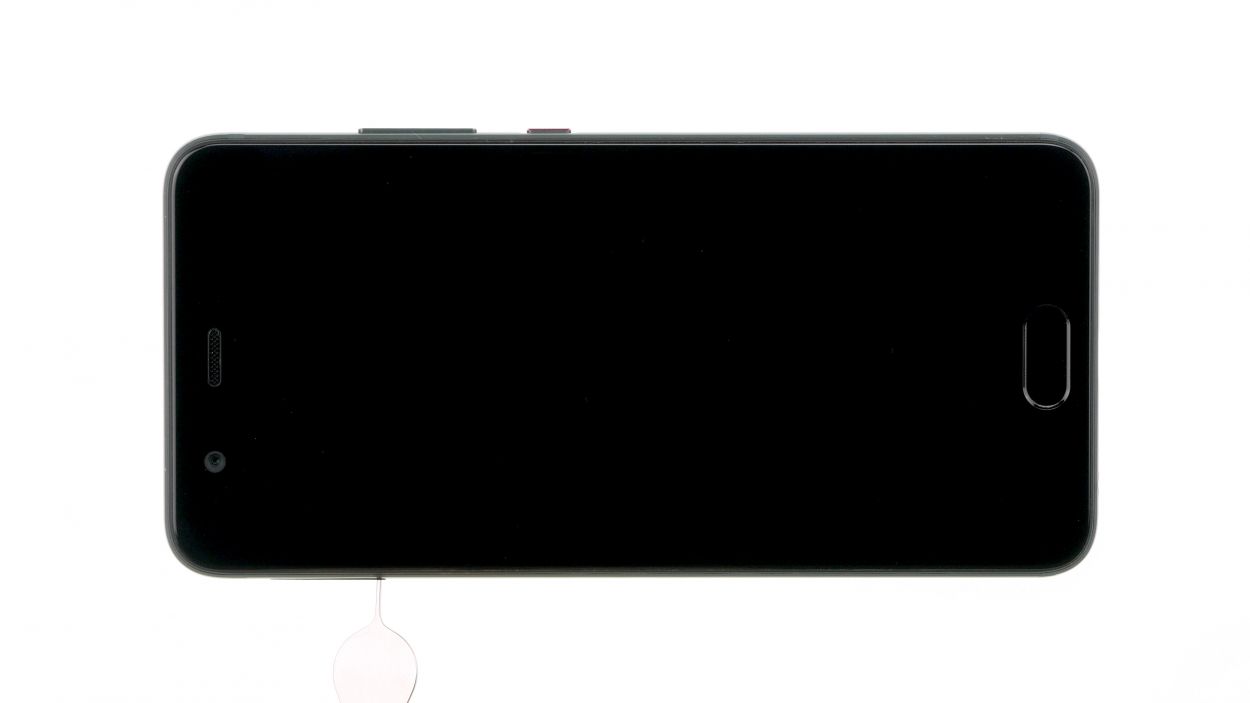
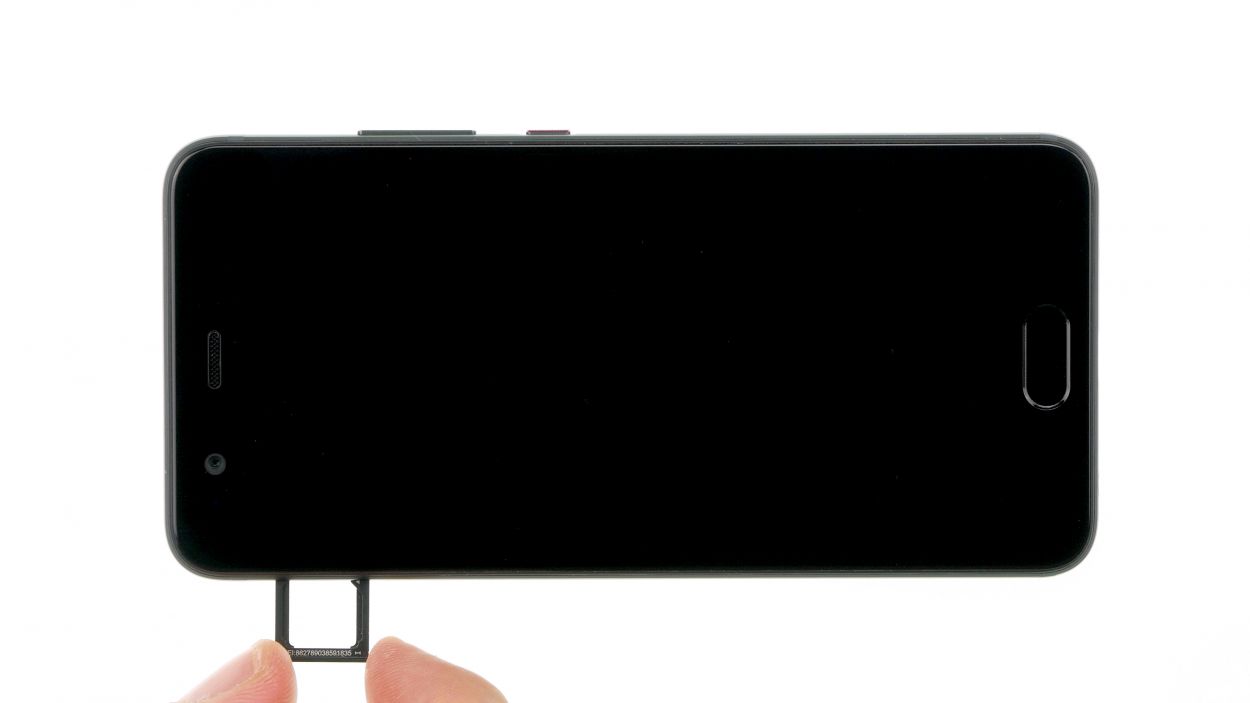
– Gently insert a SIM tool into the tiny hole and wiggle it a bit to pop out the holder.
Step 3
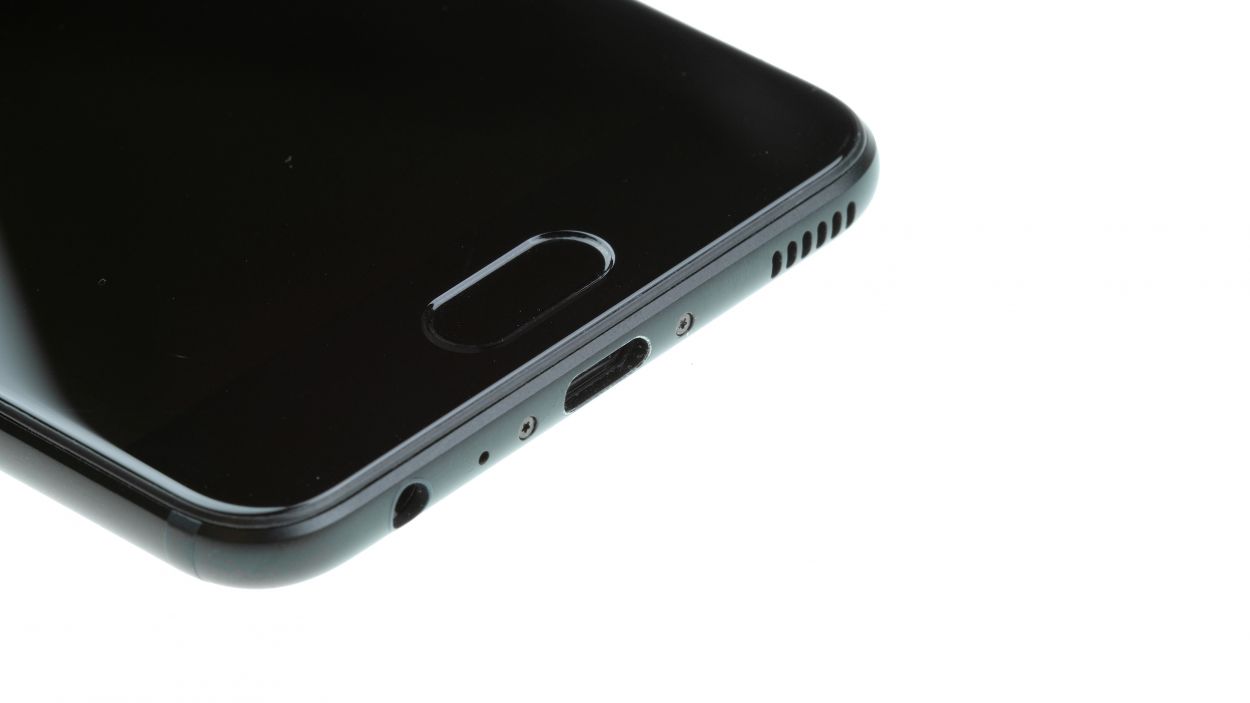
– Now remove the rear case screws to therightandleft oft he USBport.
2 × 3,0mm Pentalob
Heads up! Huawei has decided to use Apple Pentalobe screws, which means you’ll need a Pentalobe PL1 screwdriver to get the job done. Just a friendly reminder: using a different screwdriver could lead to stripped screw heads, and nobody wants that mess! If you need help, you can always schedule a repair.
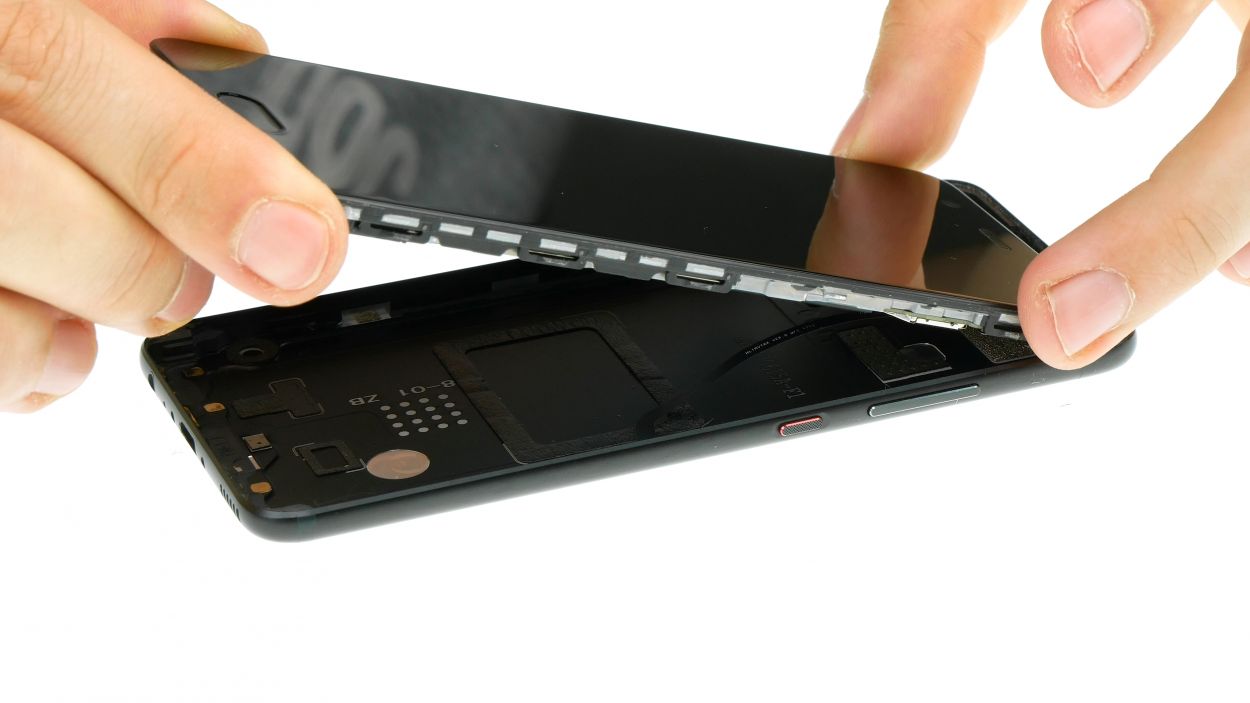
Step 4


Heads up! The display is still linked by a slim flex cable that handles the standby and volume buttons. So, tread carefully!
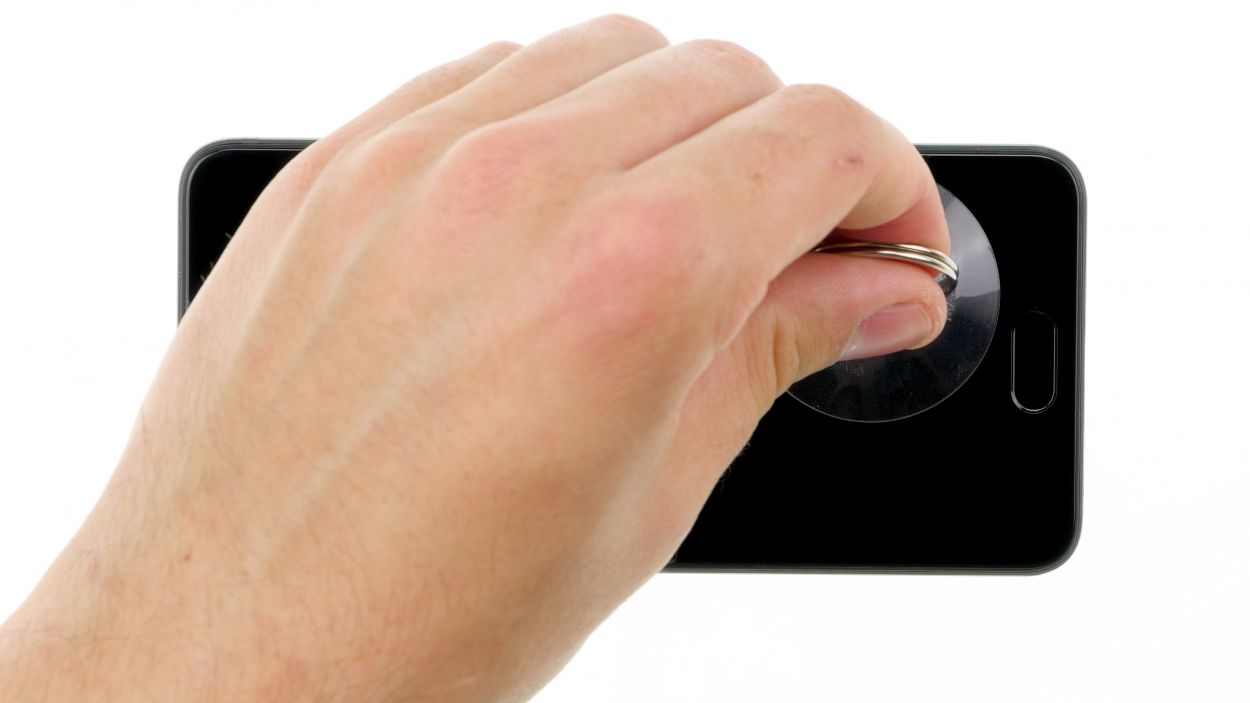
The display is not glued, but snap fitted on the long edges. It has positioning tabs on the top edge.
– Grab that suction cup and stick it right above the Home button on the display.
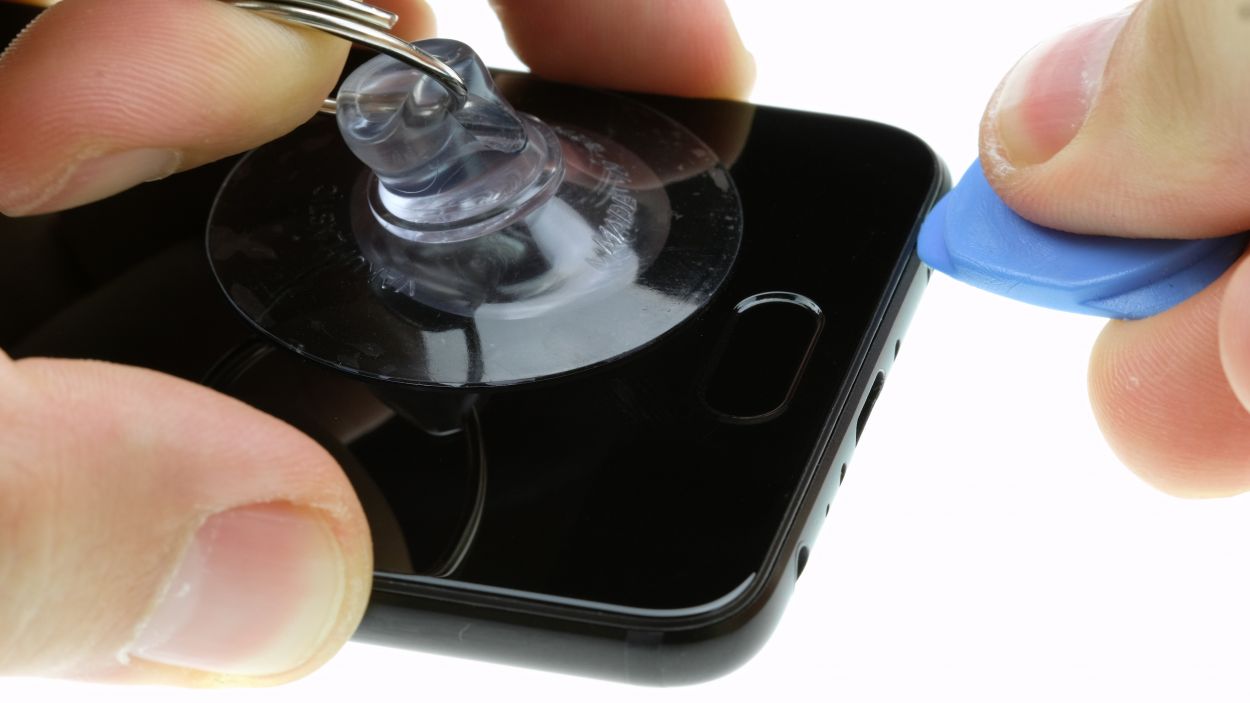
– Give the suction cup a good pull while using a pick to gently pry open a tiny gap between the case and the display.
– Carefully twist the pick to help pop off the display.
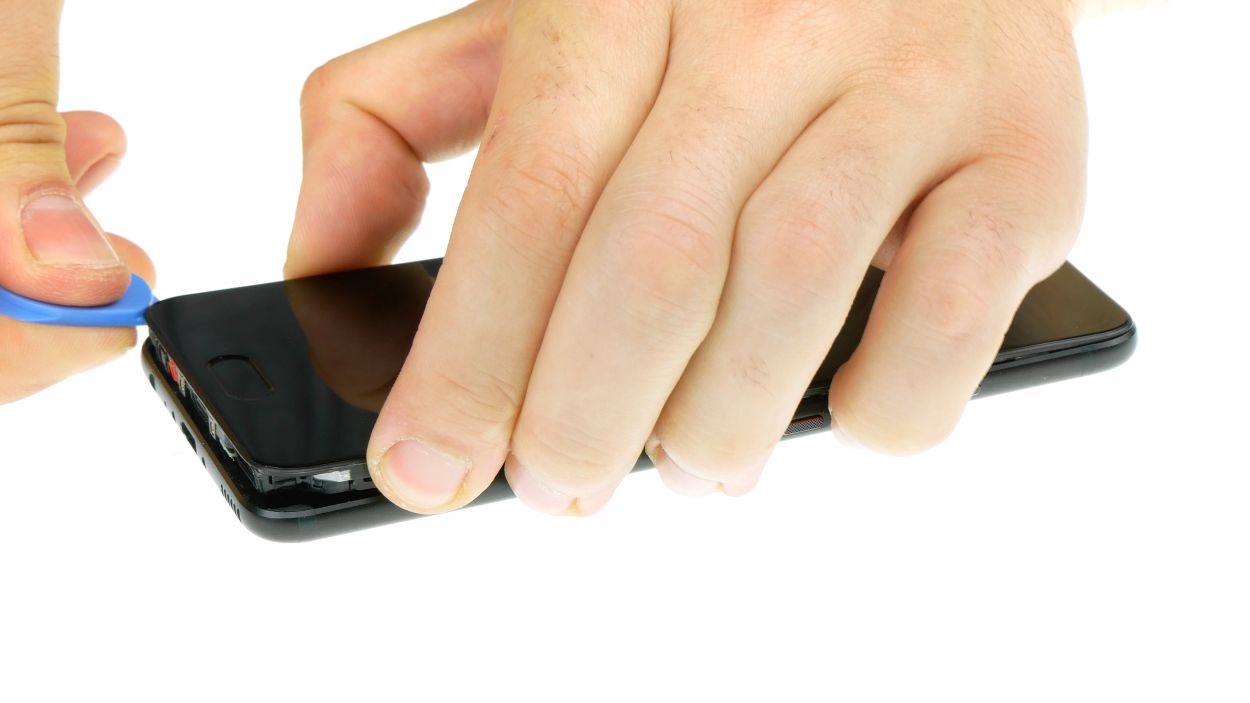
– Once you’ve got the display loose all around, just fold it open like a book!
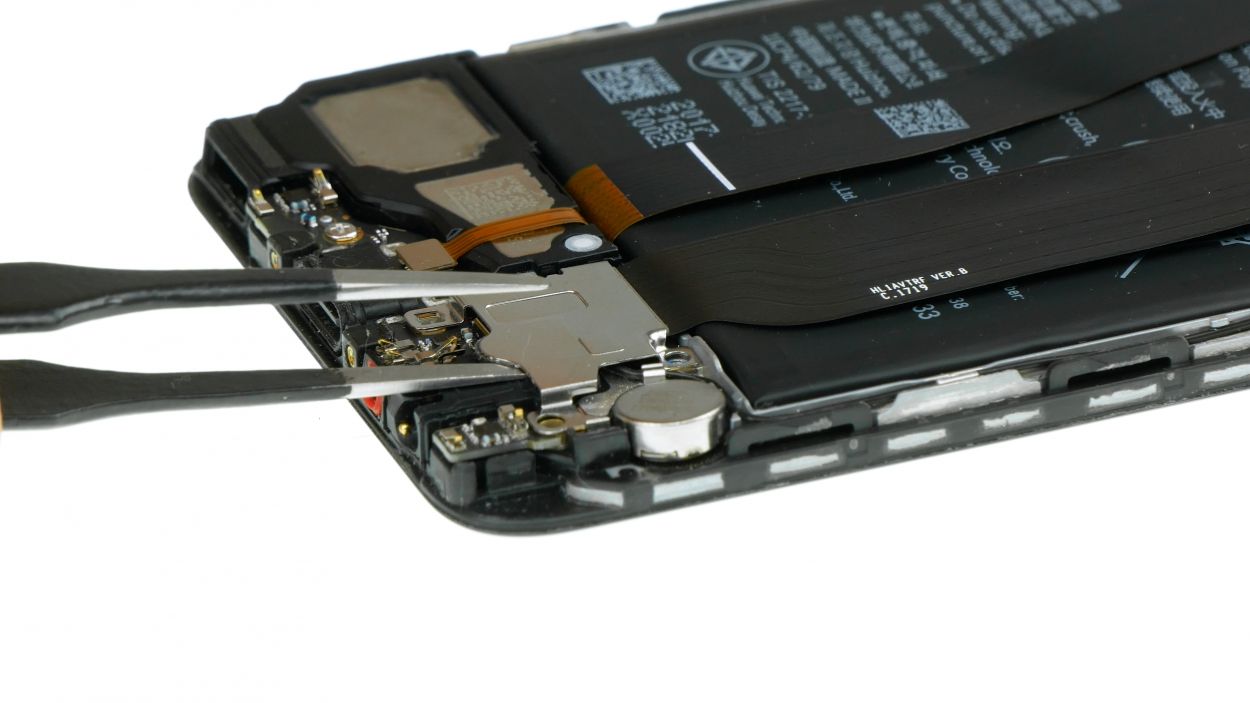
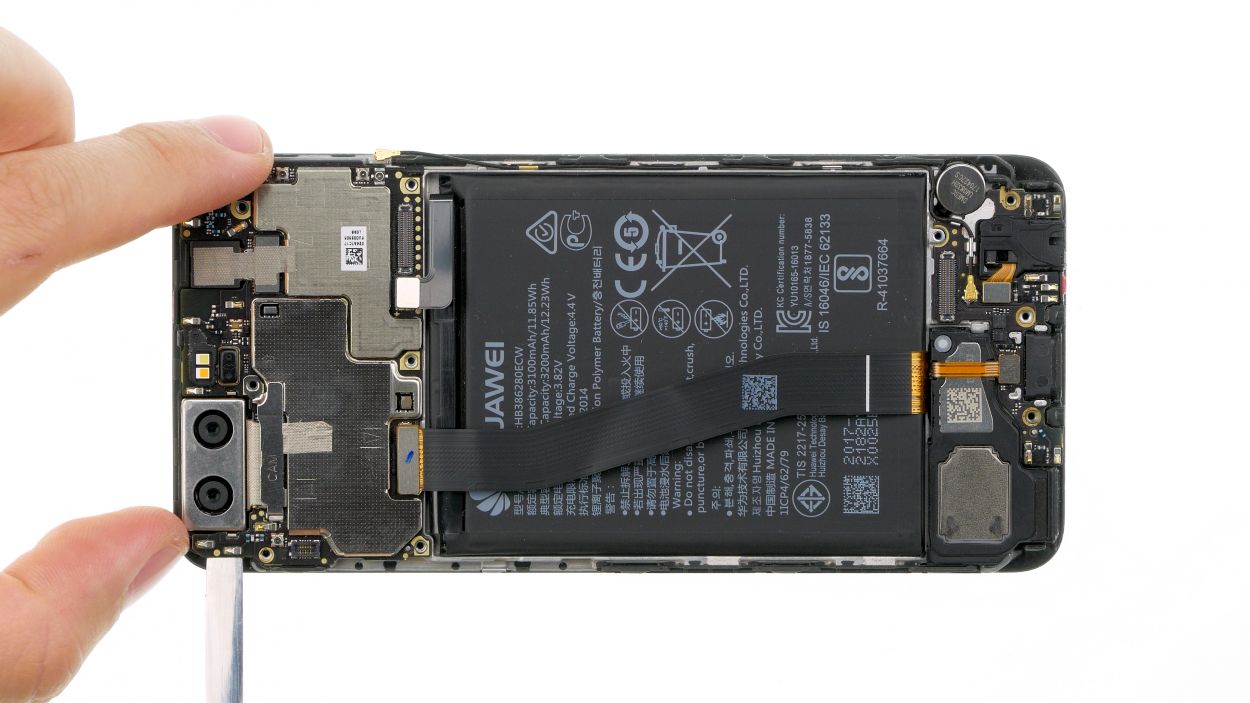
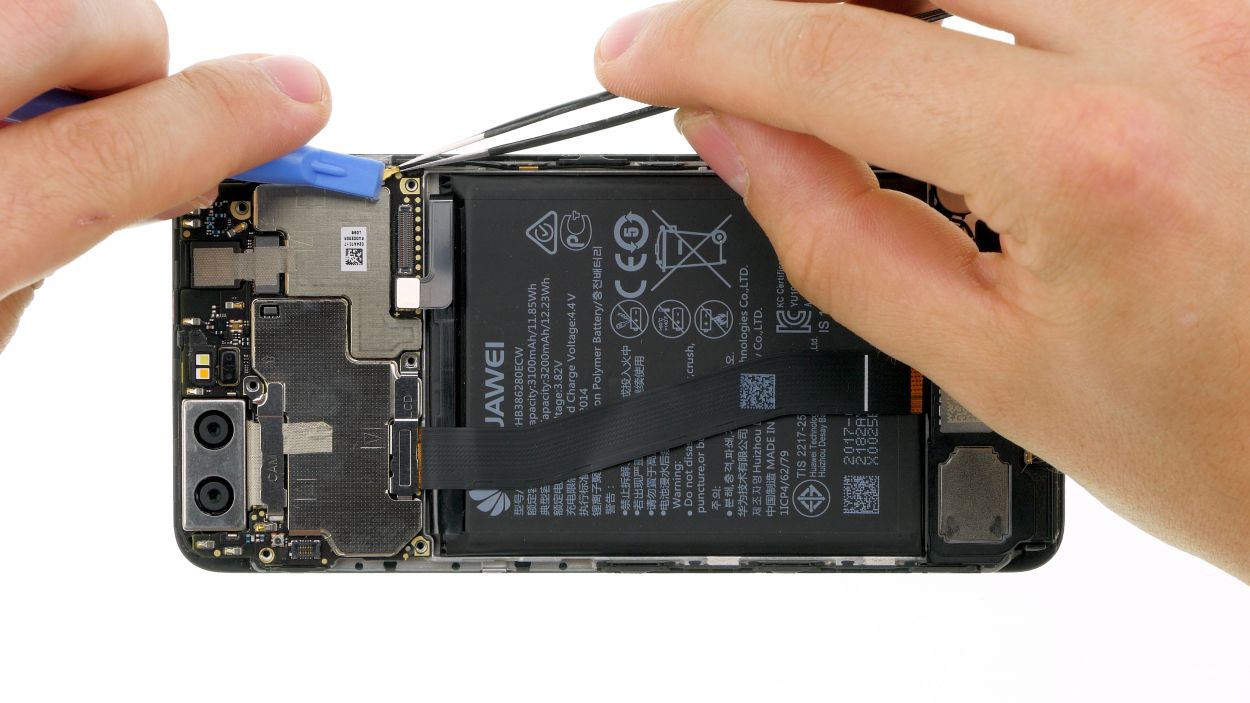
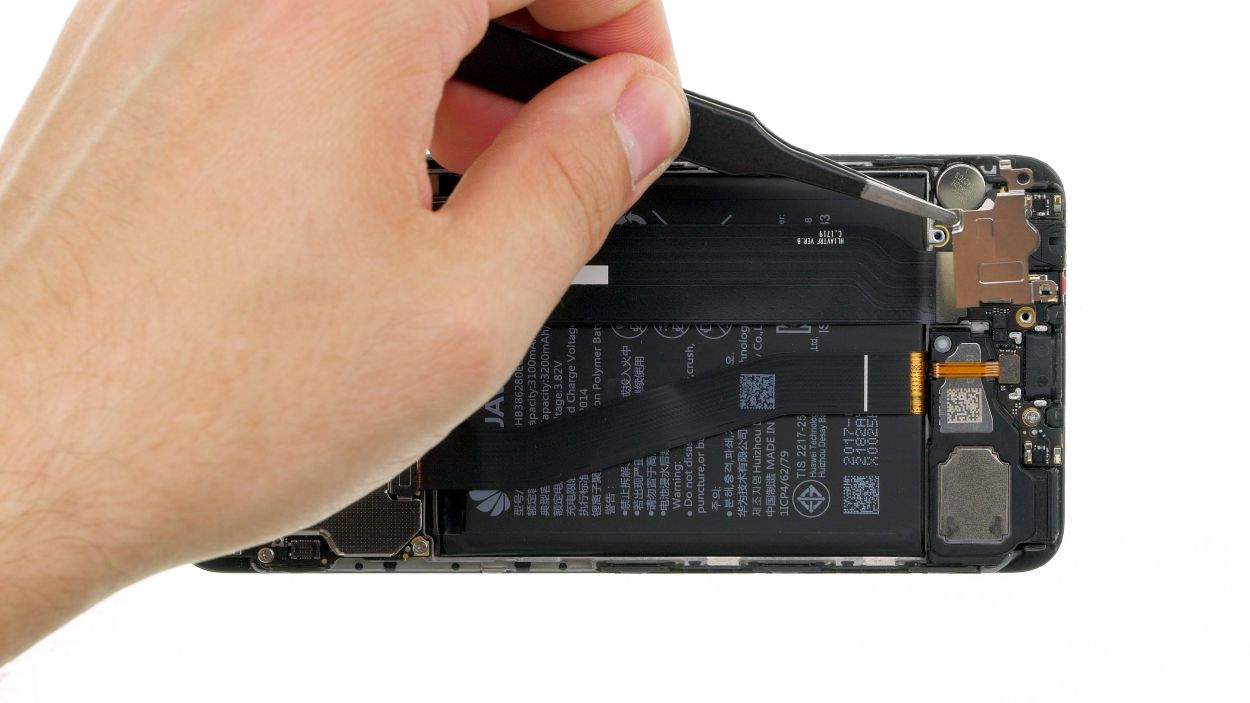
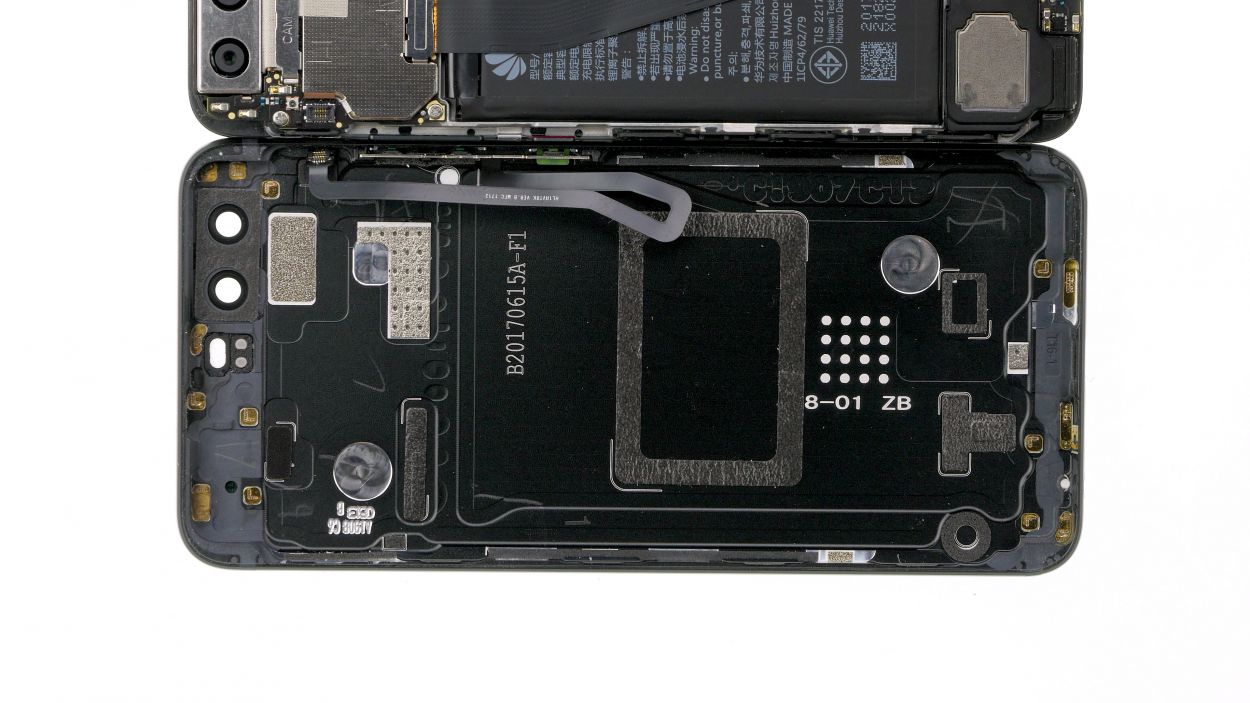
Step 5

1 × 2,5 mm Phillips
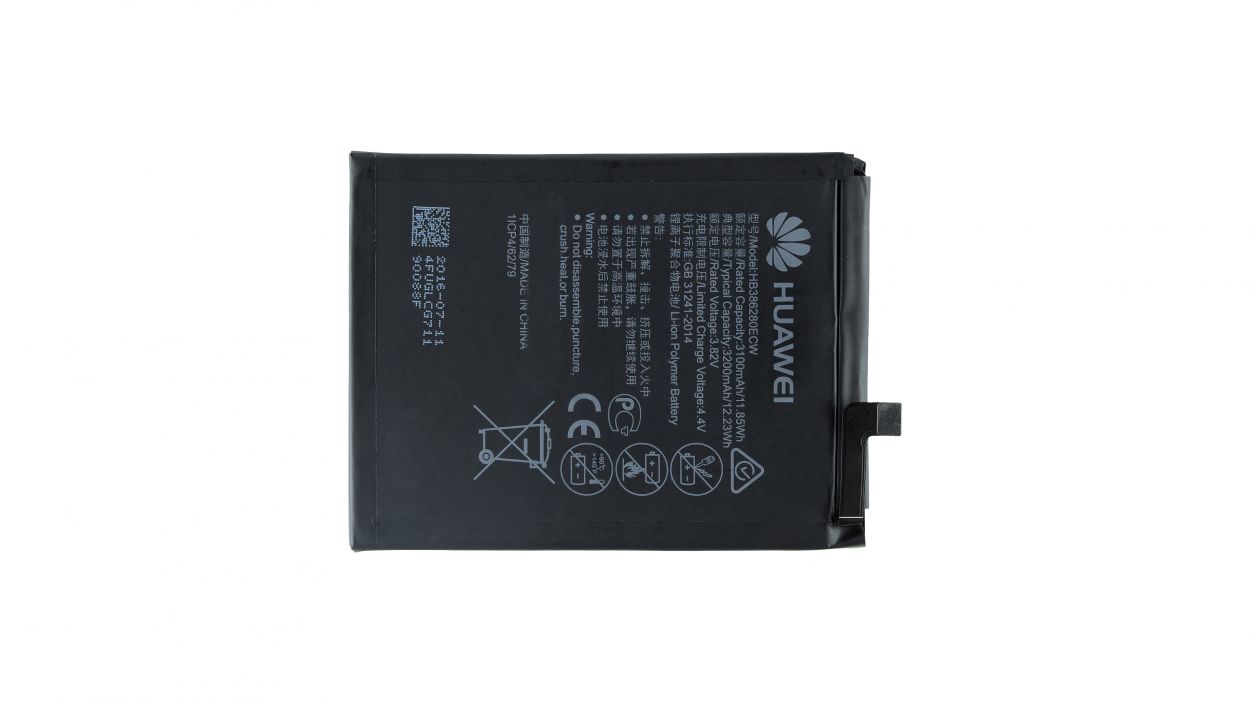
Battery Connector
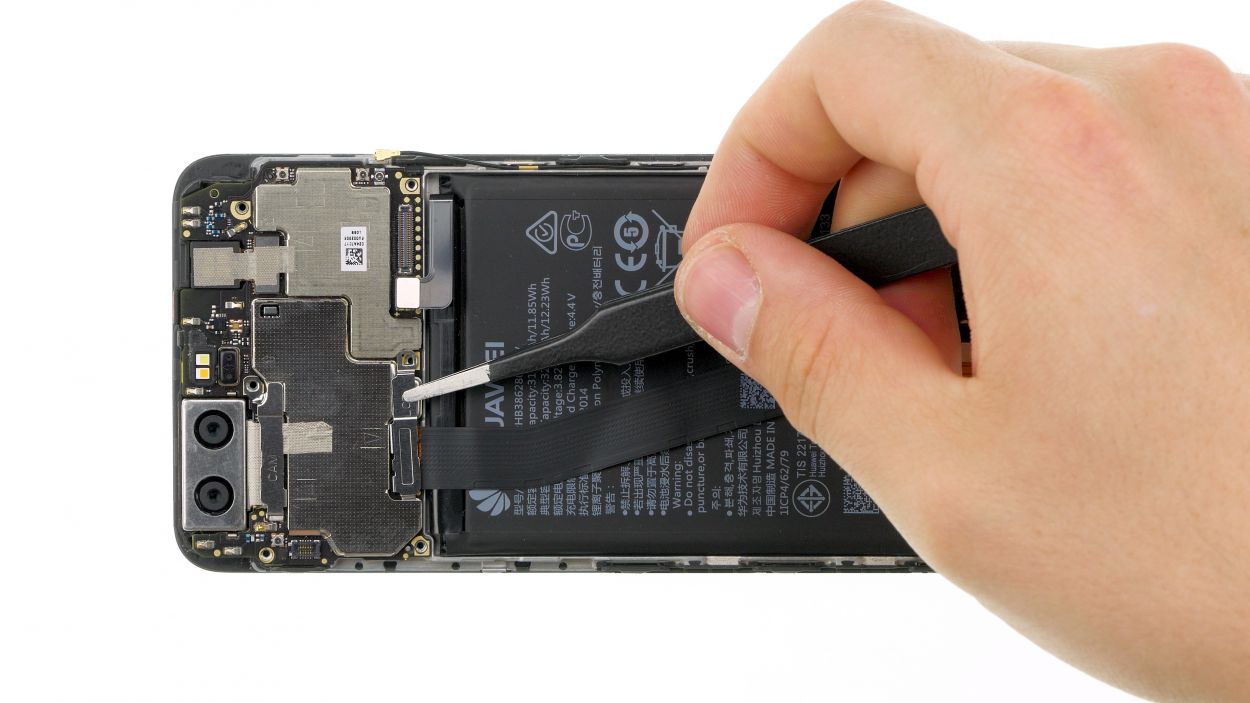
– Let’s get started by taking off the bracket that’s cozying up to the battery connector. You’ll find a screw on one side and a little tab on the other, so just give it a gentle nudge.
– Now, grab a plastic tool and carefully unplug that connector. You’ve got this!
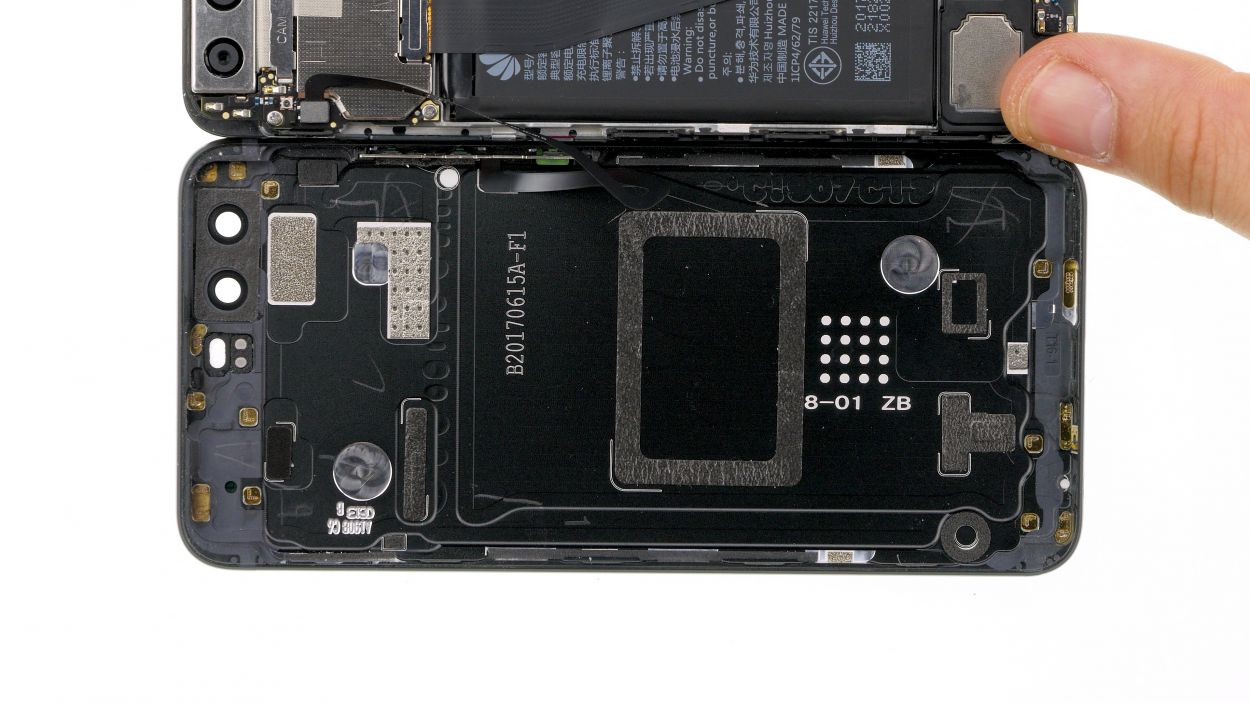
Step 6


4 × 2,5 mm Phillips
– First, take out those highlighted screws like a pro!
– Next, gently lift the cover off. It’s got a few sneaky hooks holding it in place, so just be careful as you do this.
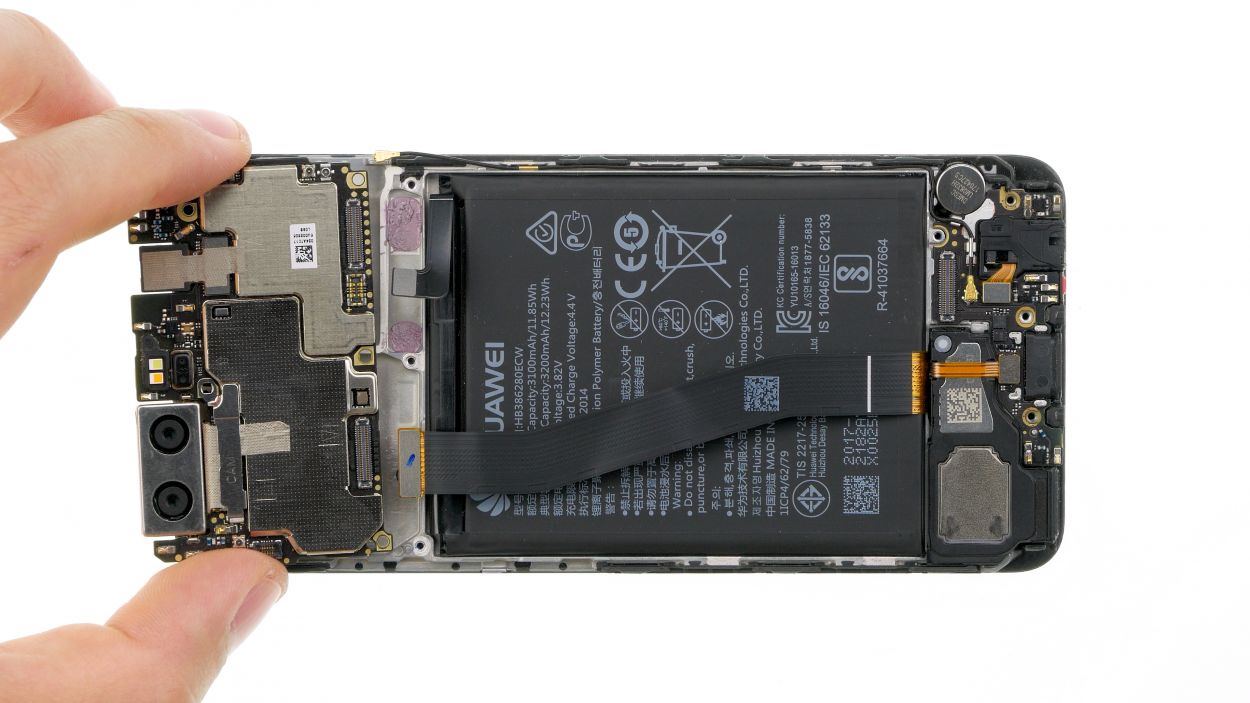
Step 7
5 × 2,5 mm Phillips
Antenna Cable
Display Connector
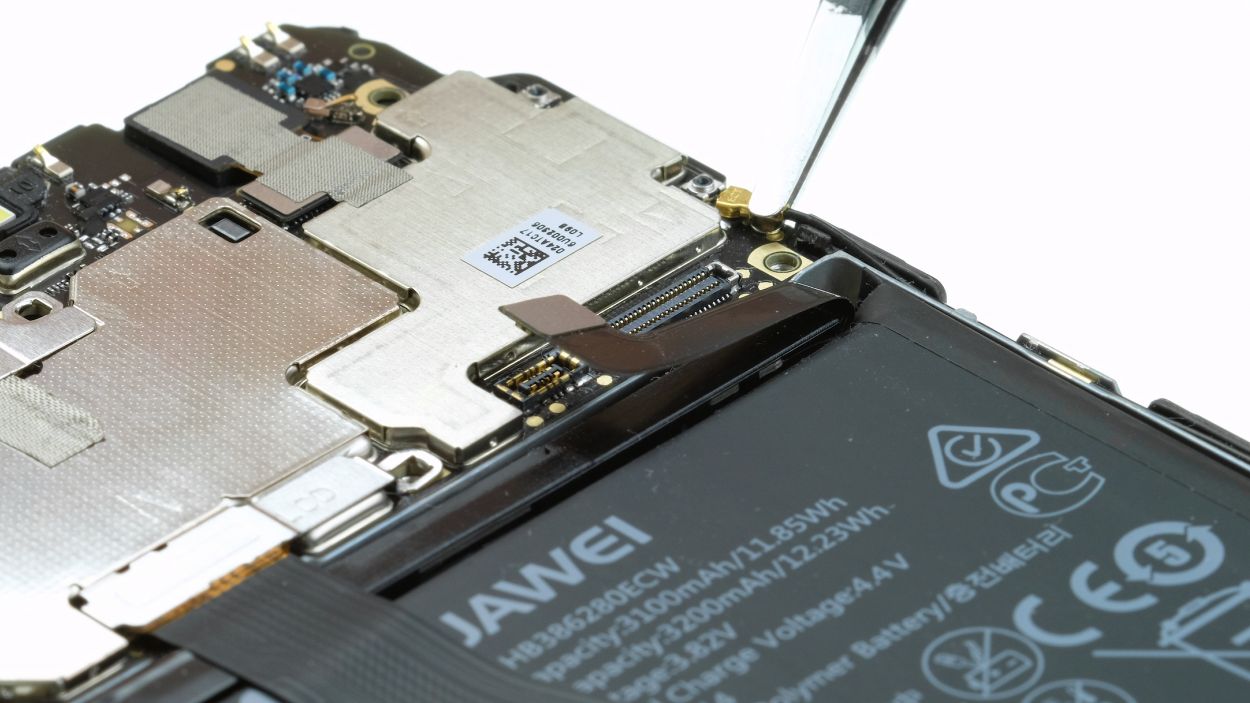
Hey there, just a friendly reminder to treat that mainboard socket with care—let’s keep it safe and sound!
– Time to unplug the highlighted connector 1!
– Keep an eye out for that screw with the white moisture indicator on top; it’s a keeper for later.
– Next up, let’s tackle those Phillips screws and get them out of the way.
– Now, gently disconnect the large connector from the mainboard and carefully remove the cable.
– With a little twist of the tweezers, disconnect the upper end of the small antenna cable.
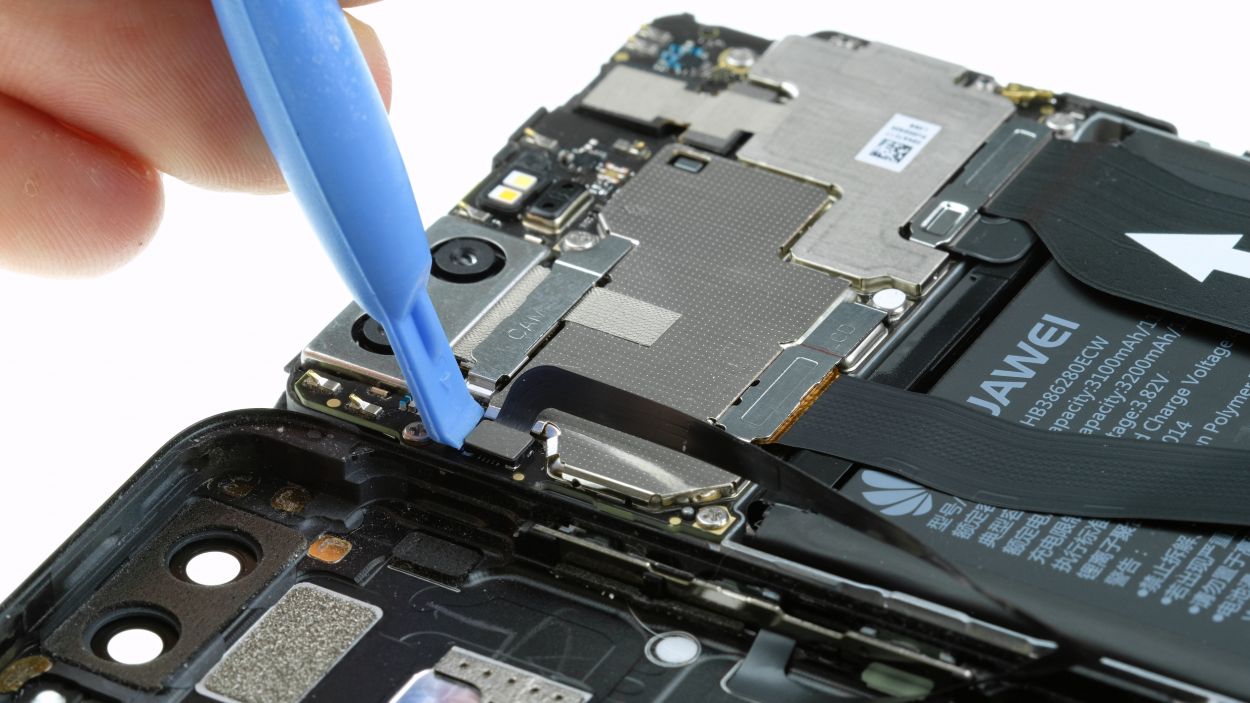
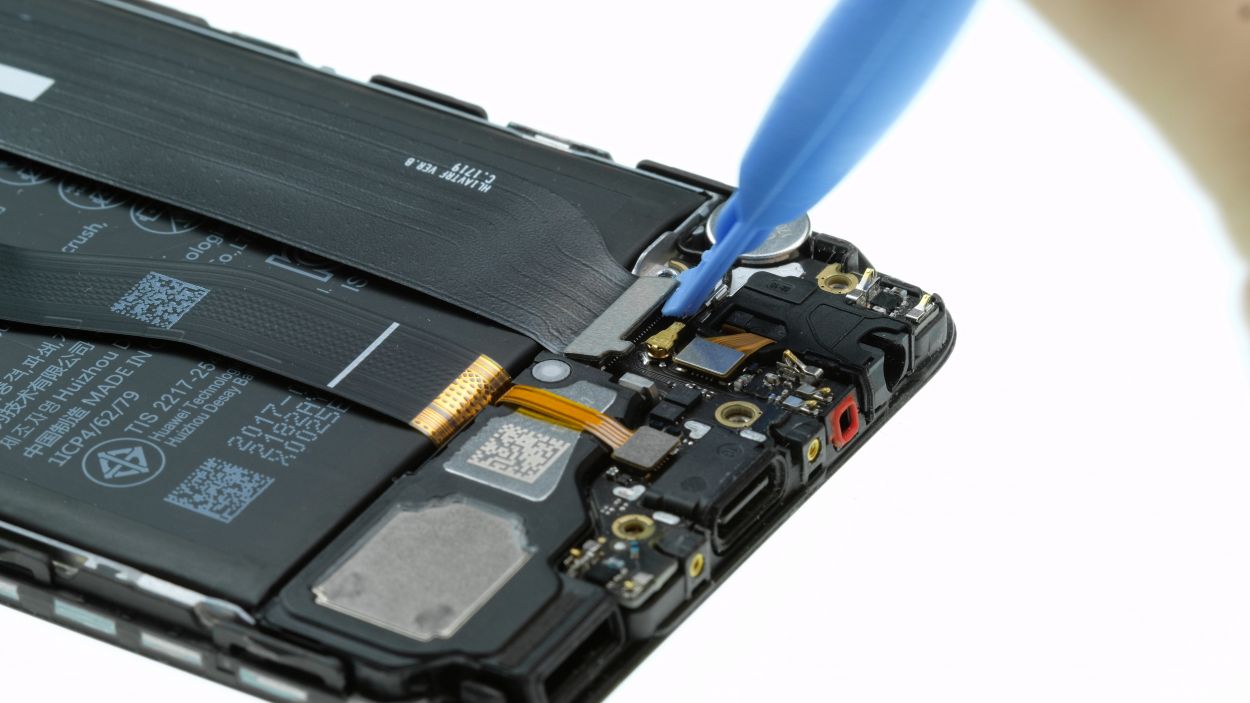
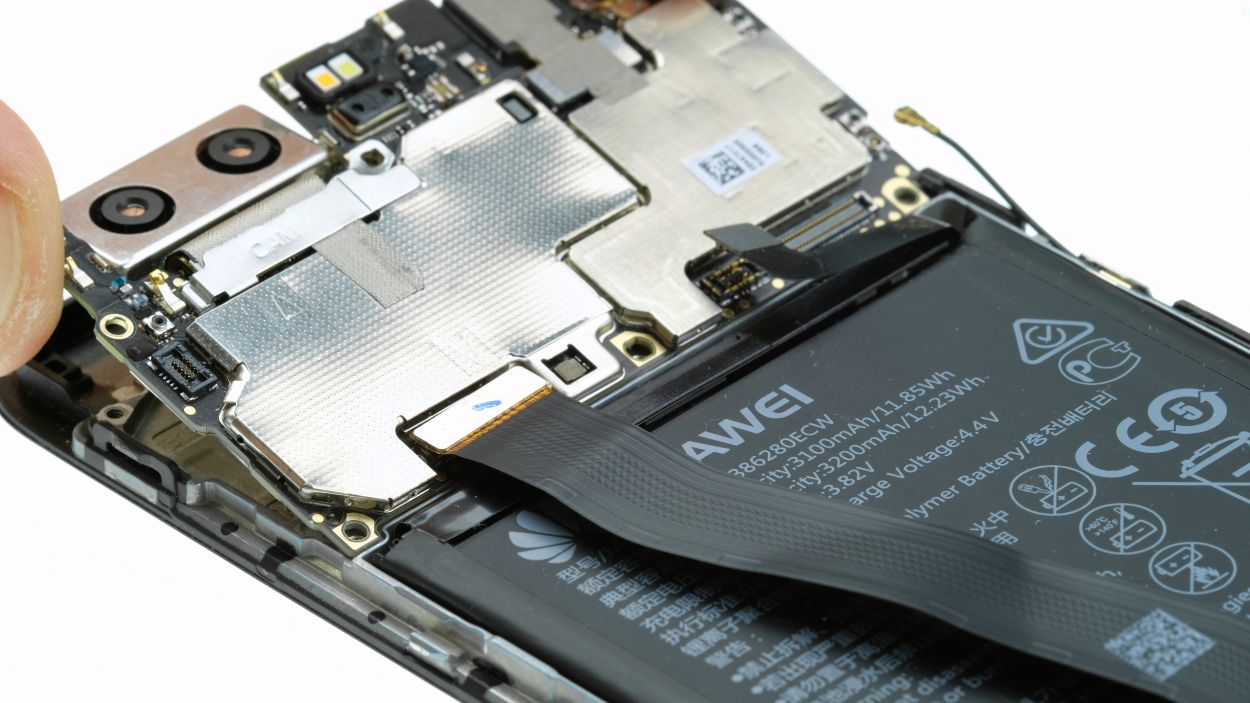
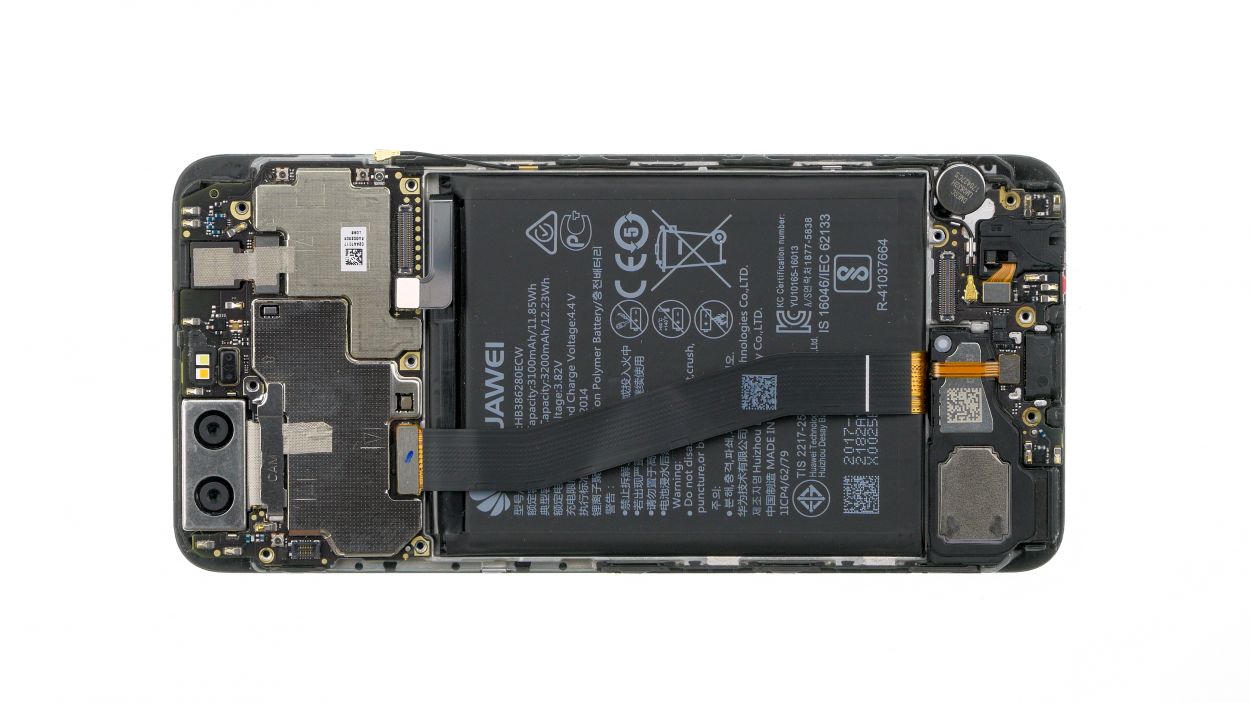
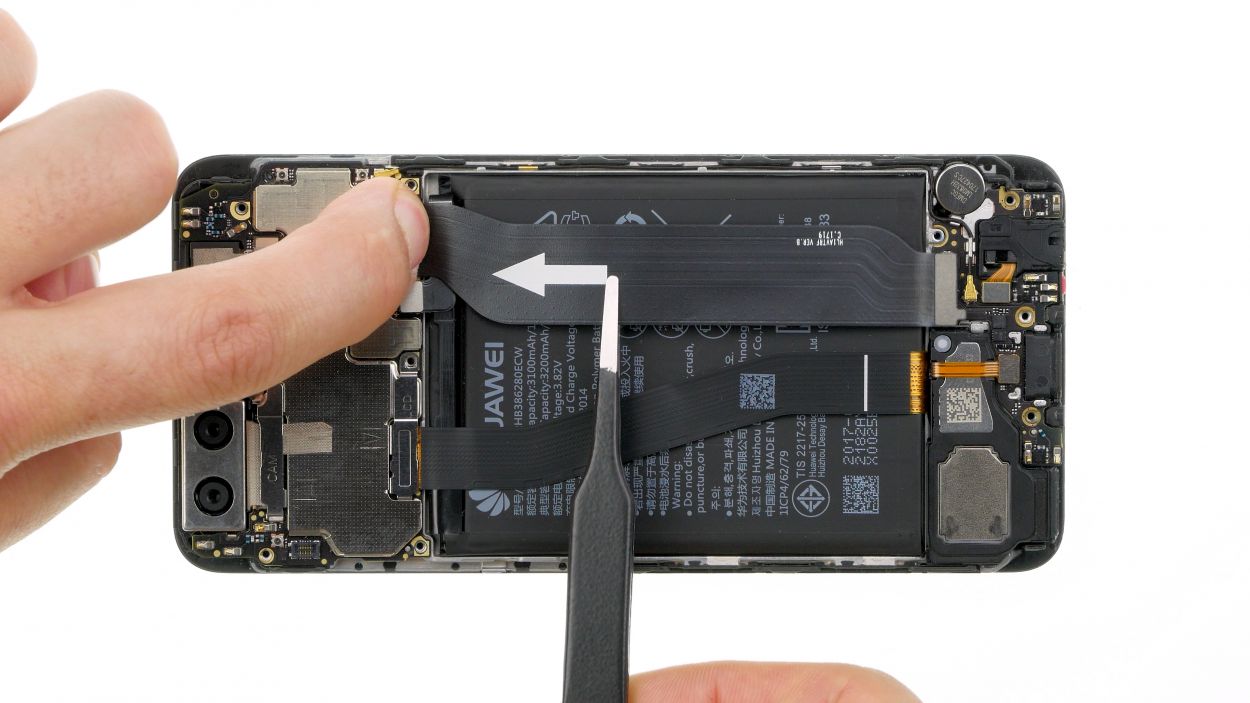
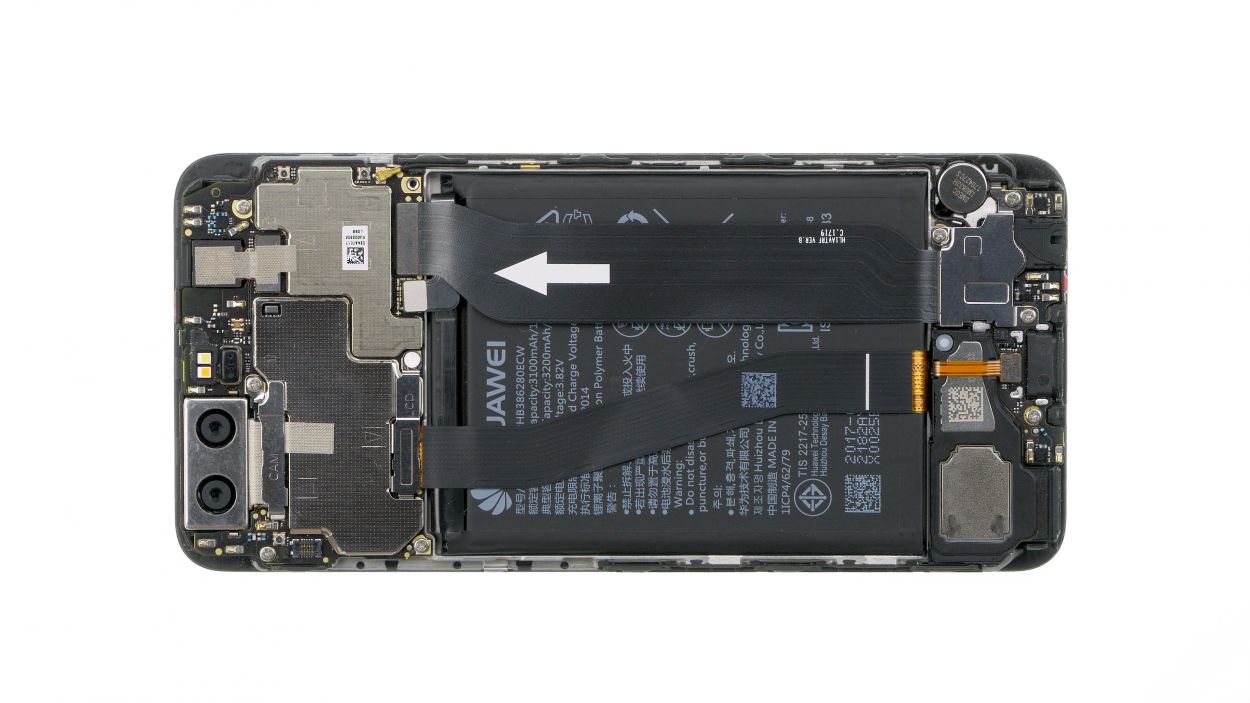
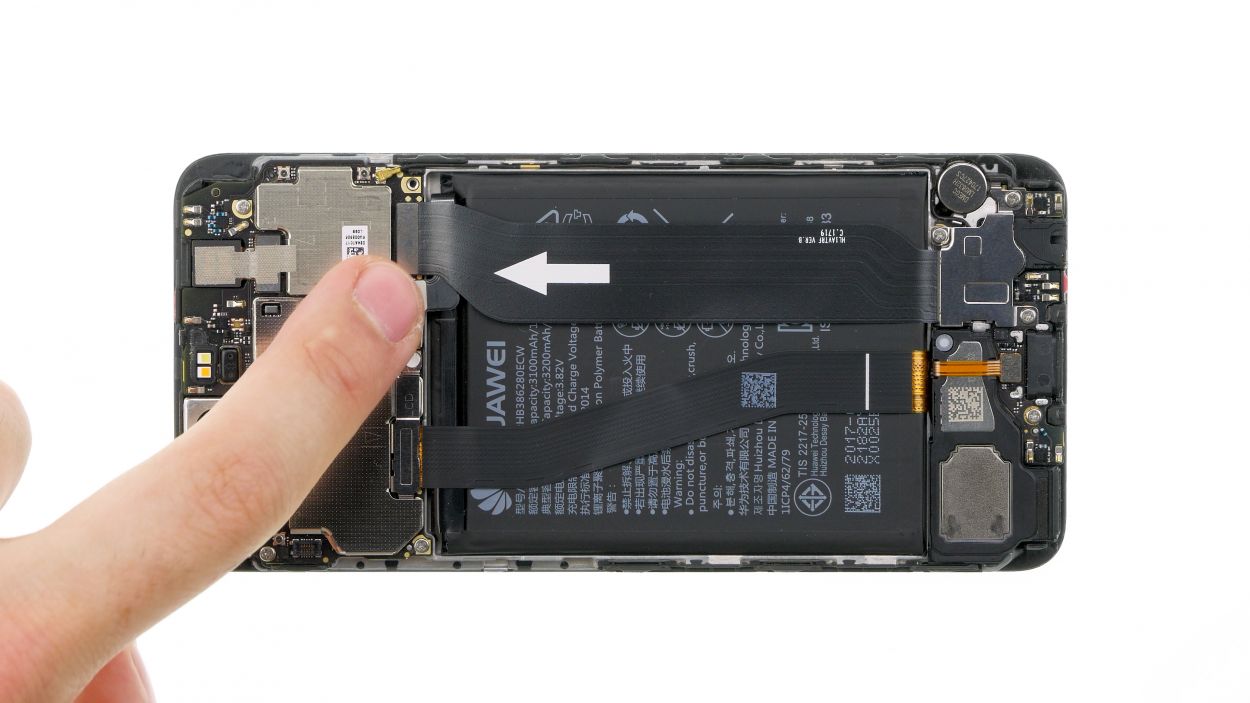
Step 8
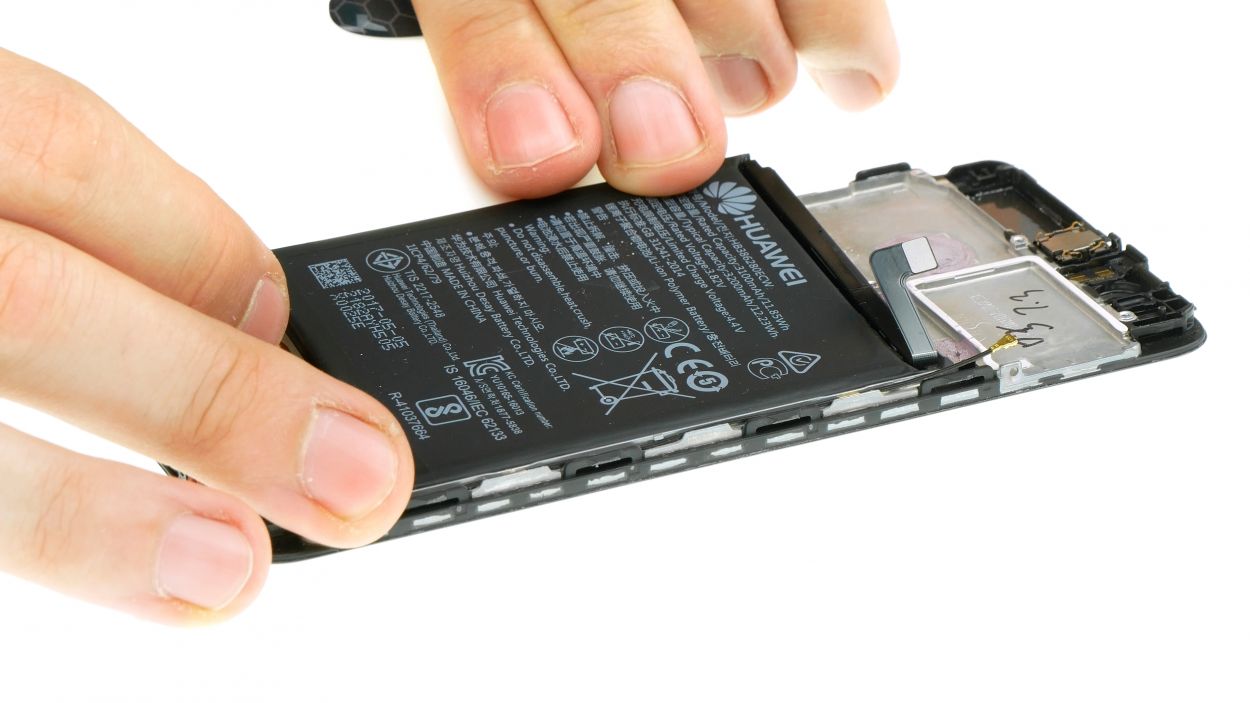

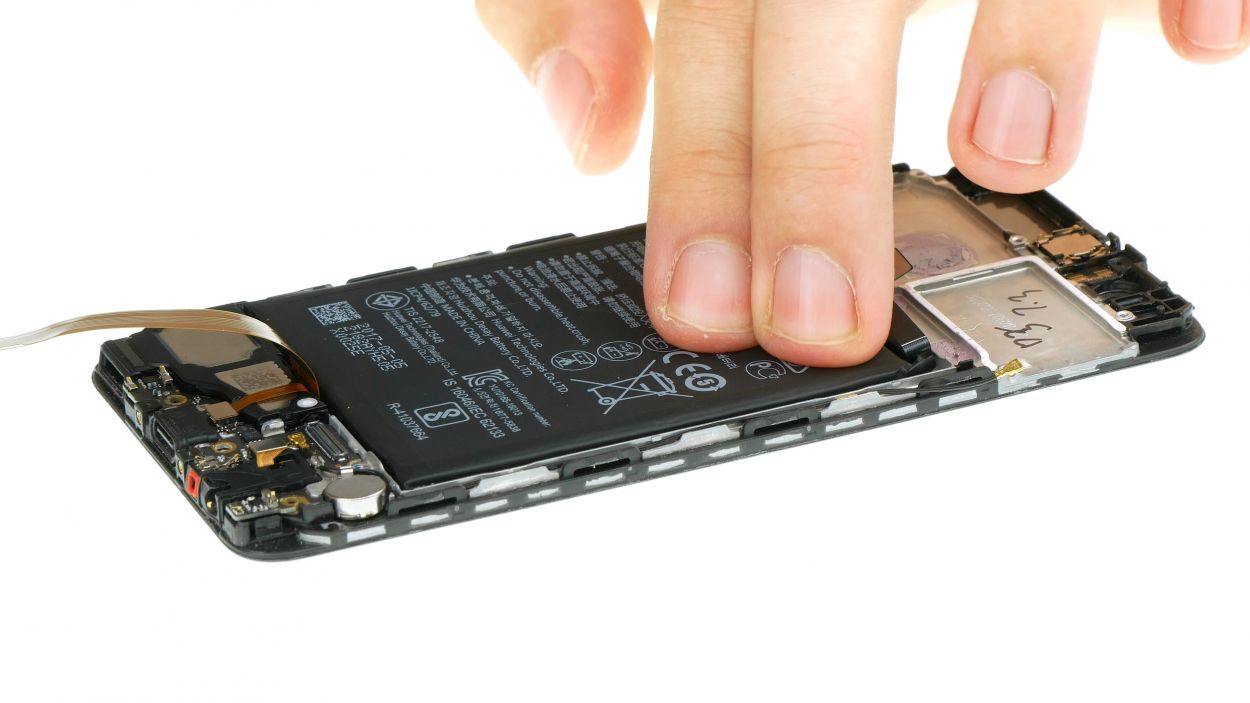
Handle the battery with care—no bending or scratching the case, please! We want your device to shine like new.
– The battery is snugly glued to the case with two adhesive strips. One of these strips has a pull tab just waiting to be freed. Gently peel back the tab and give it a slow, steady pull to remove the strip. Make sure to pull it out flatly to avoid any ripping mishaps.
– Now it’s time to slide in a flat tool, like the iPlastix, from the side you just released.
– If you need help, you can always schedule a repair.
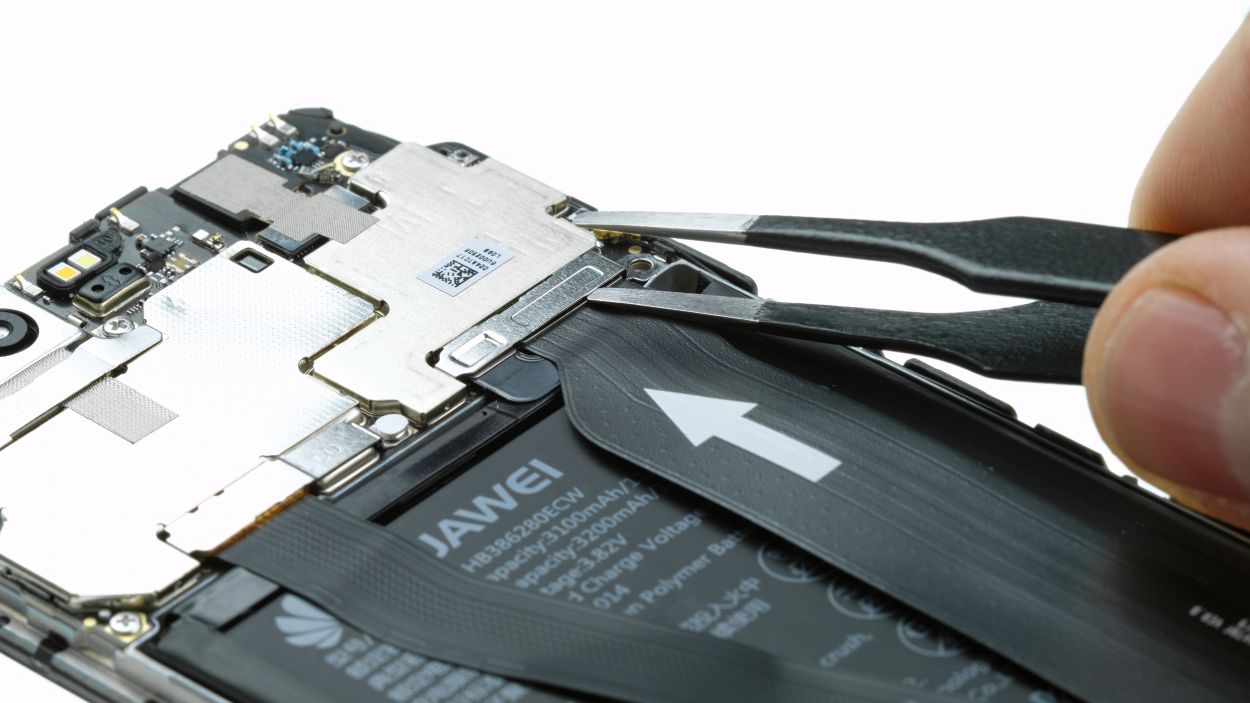
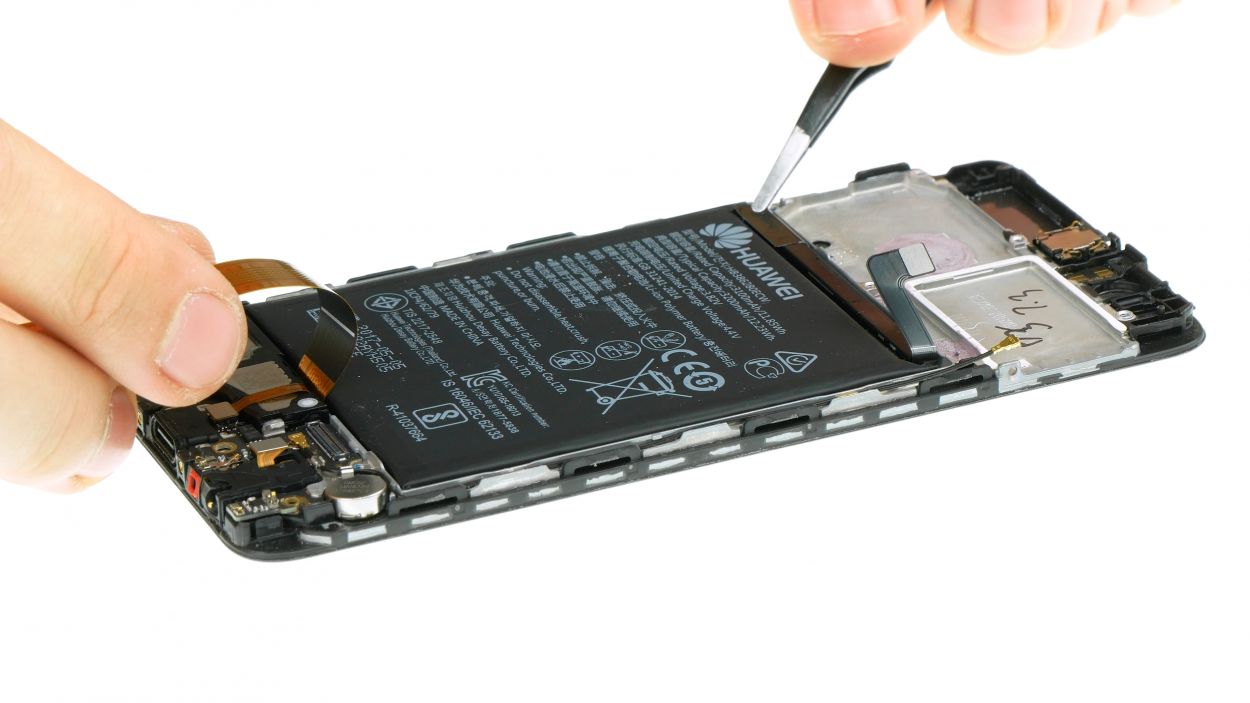
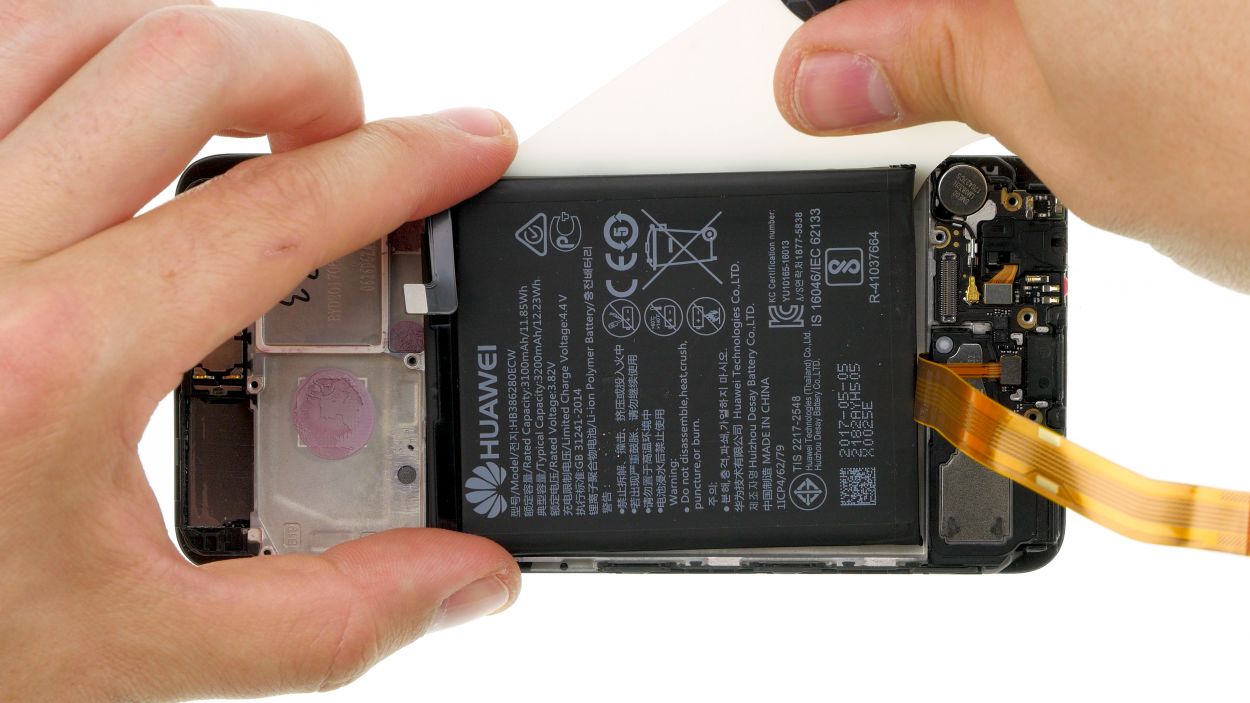
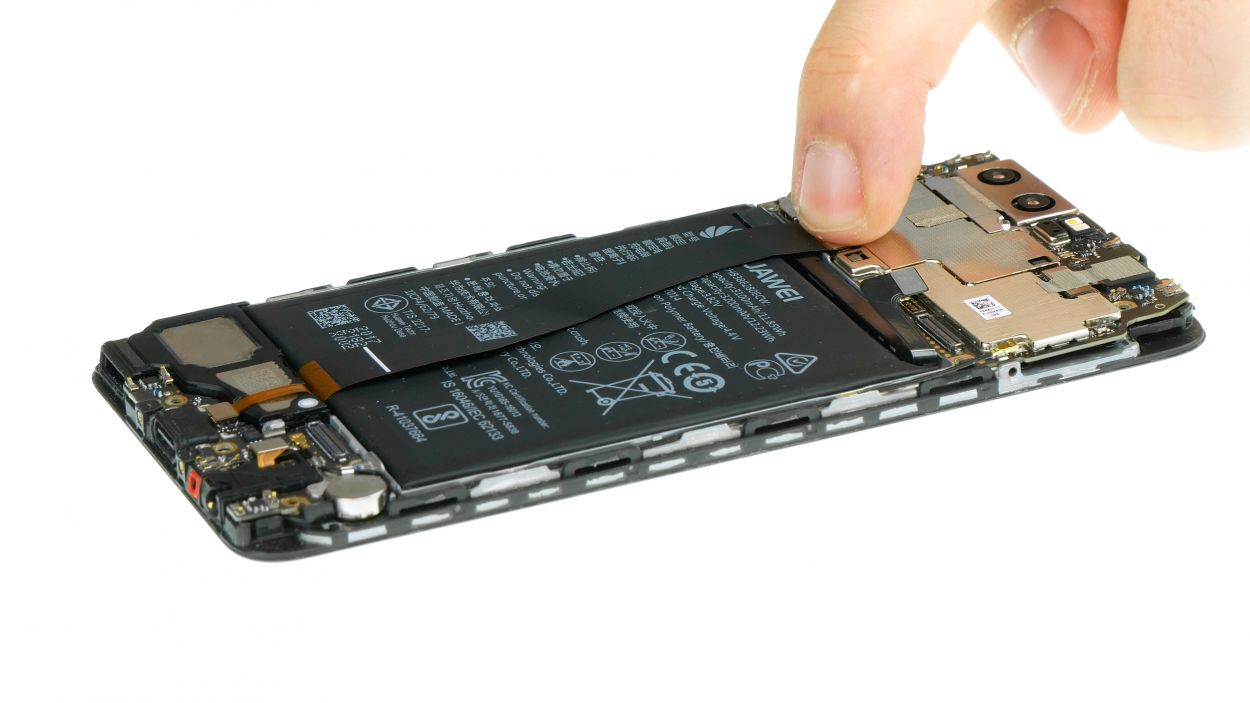
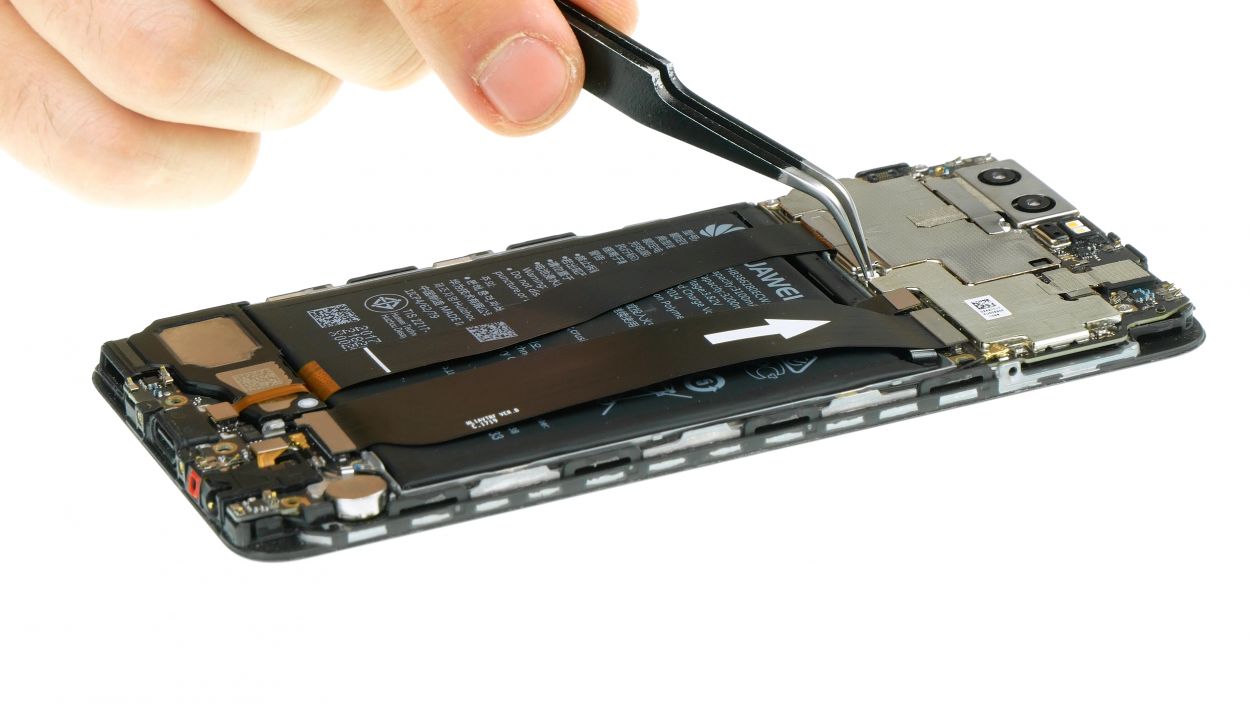
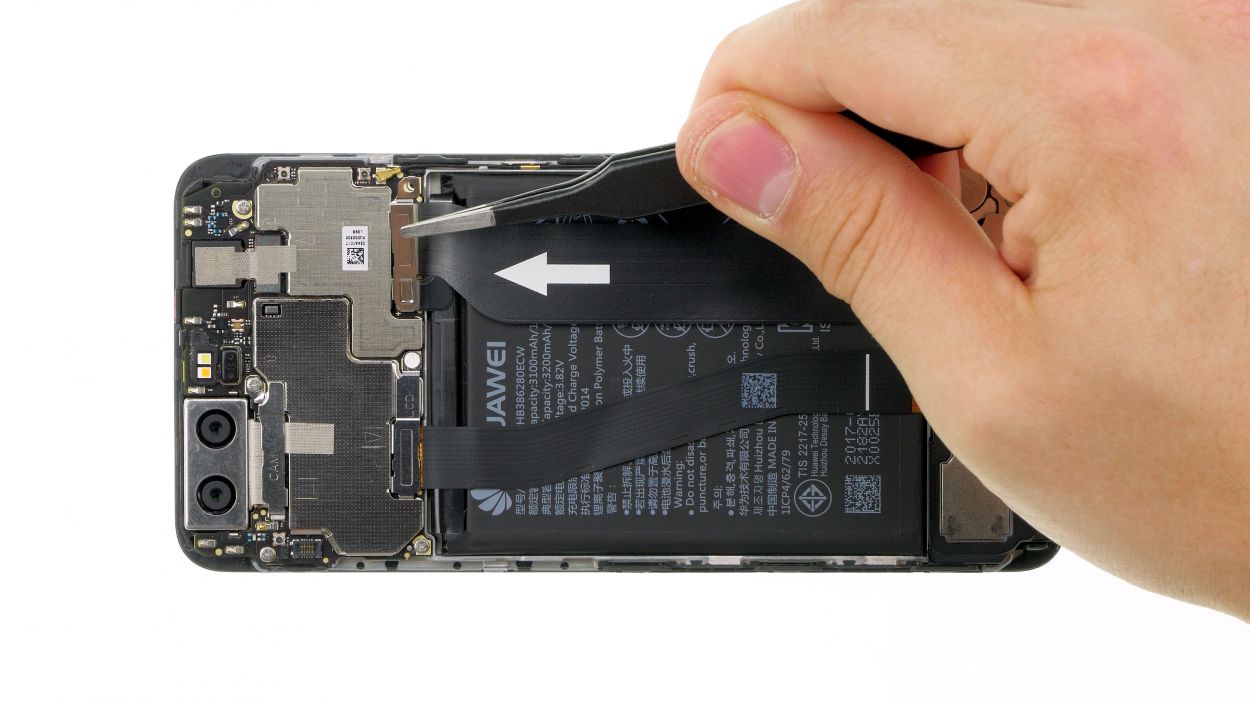
Step 9

Getting that battery out again might be a bit tricky since there’s no handy adhesive tab to pull on. But don’t sweat it! Just take your time and you’ll get it done. And remember, if you need help, you can always schedule a repair.
Got some adhesive tapes from an iPhone 5s/5c/SE? Perfect! They work like a charm for securing the Huawei P10 battery. Just a heads up, if the strips are a tad too long, feel free to trim them down a bit. You’re doing great!
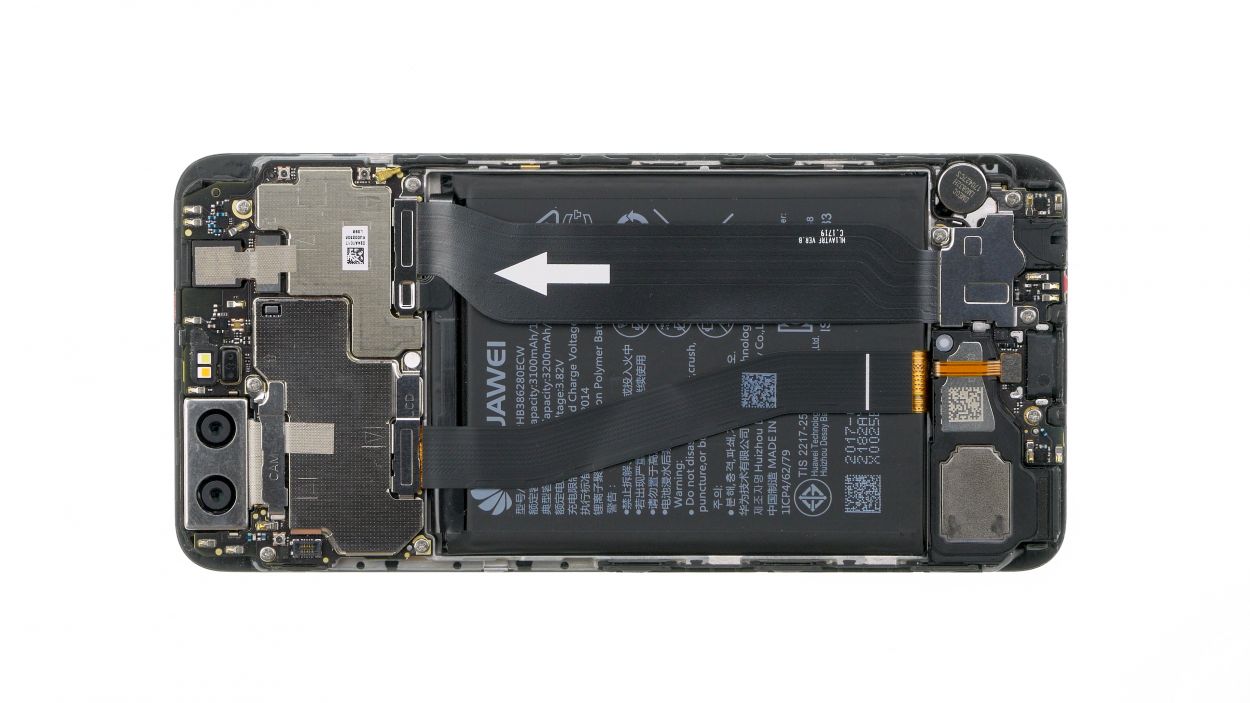
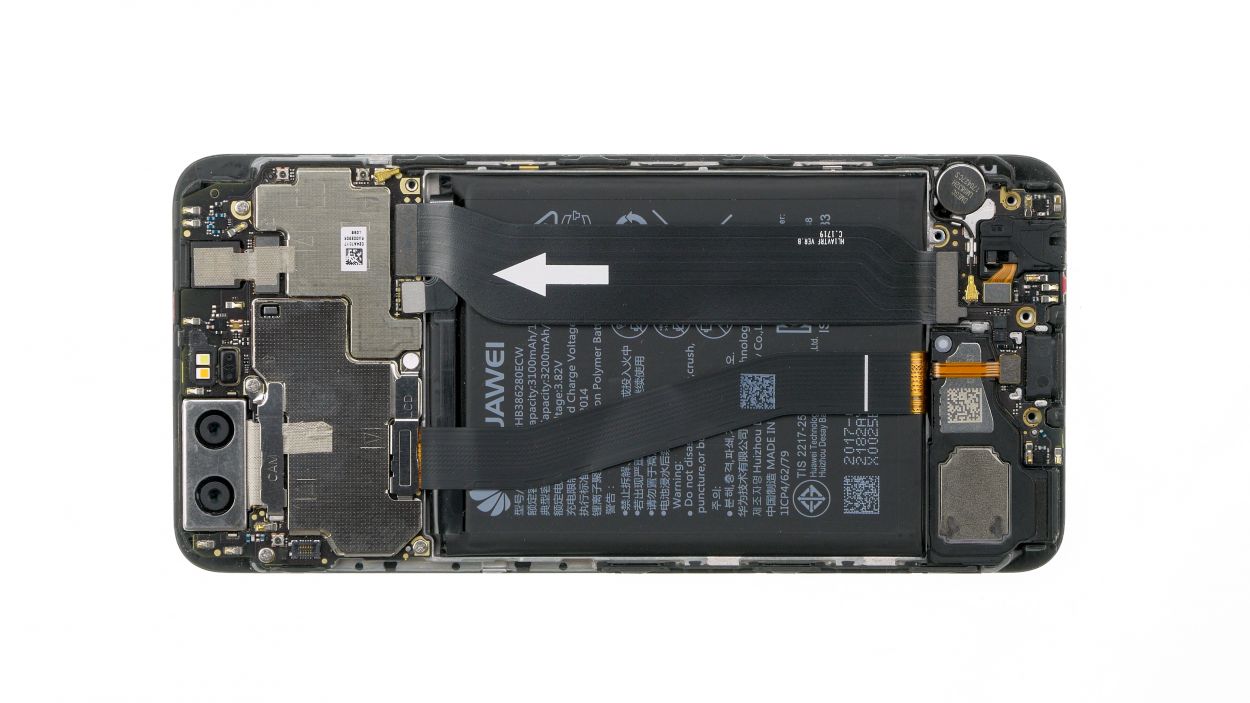
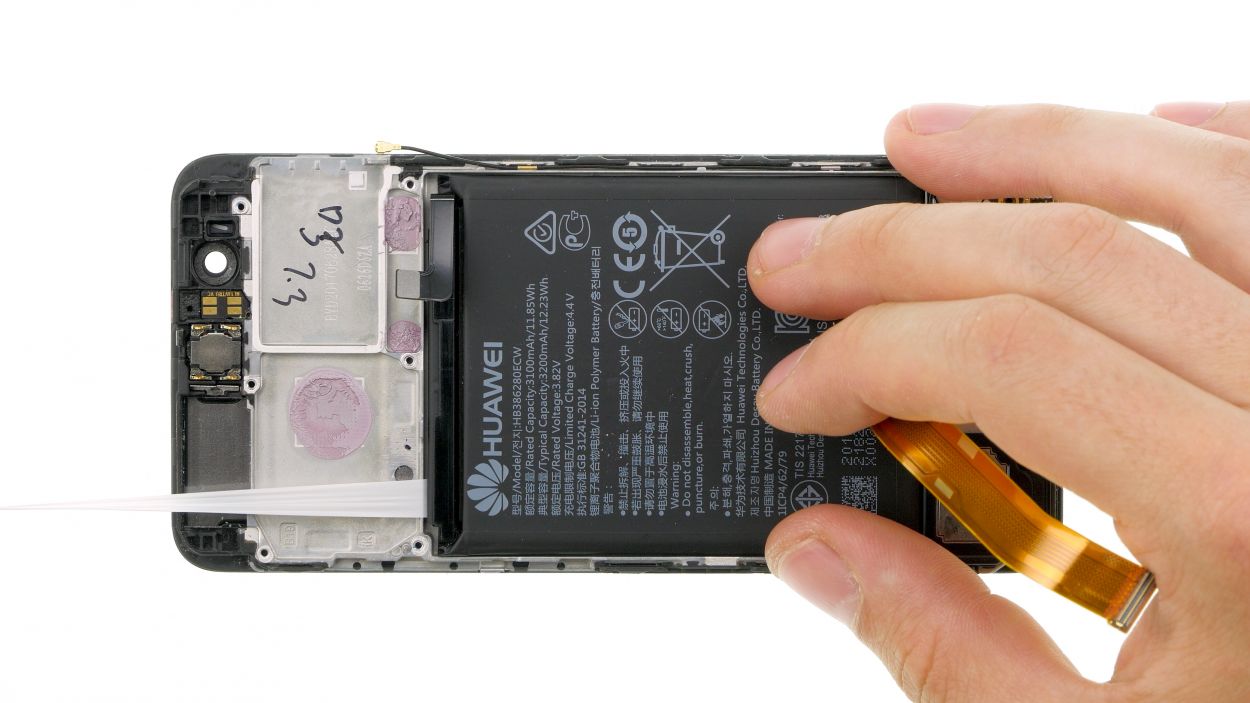
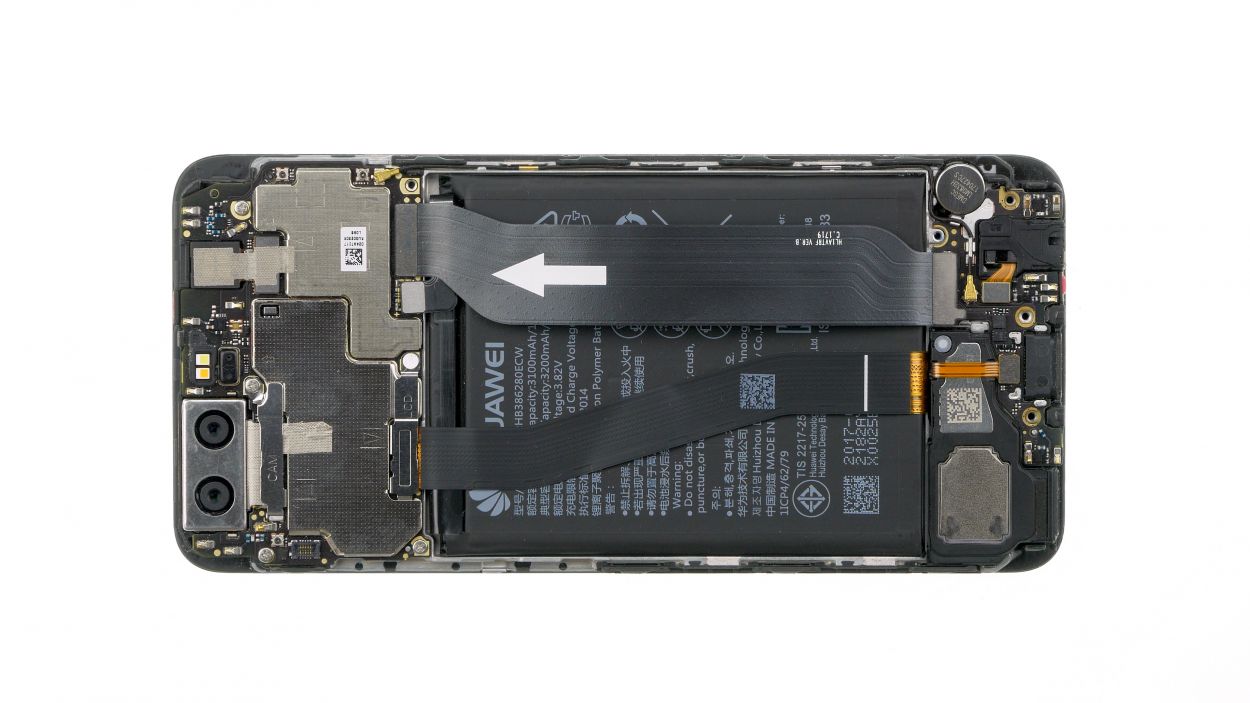
Step 10
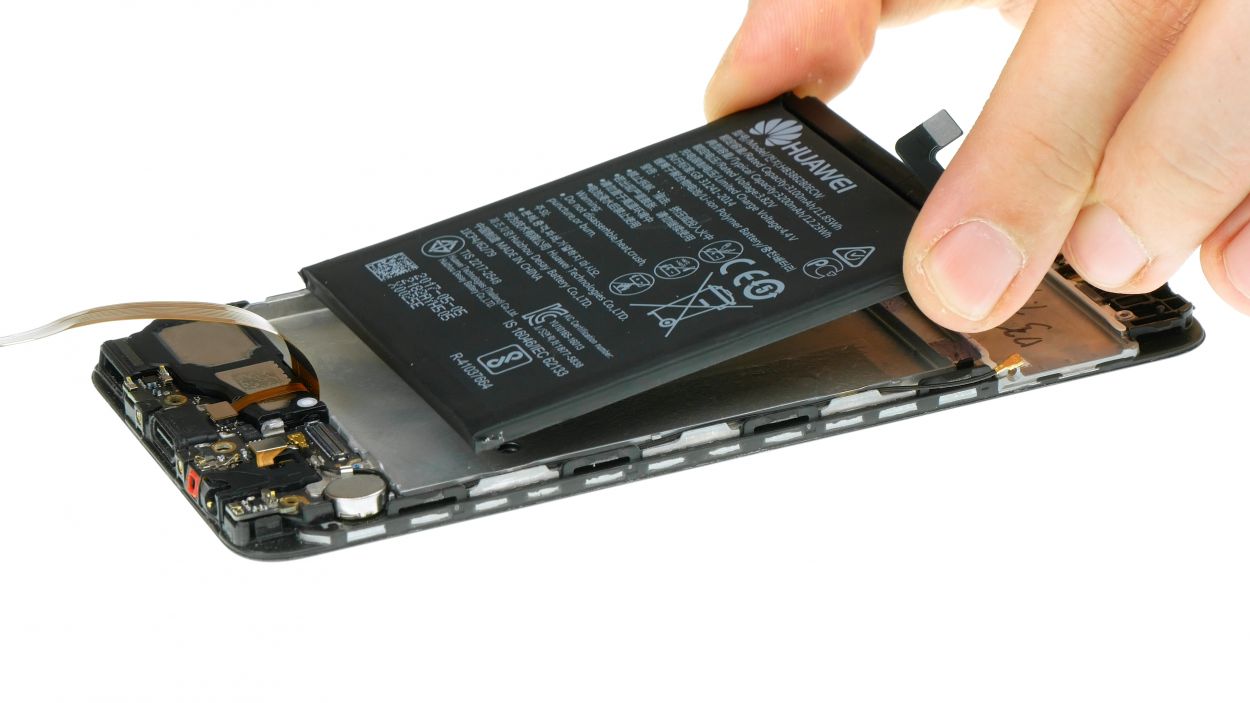
Make sure to leave some breathing room all around, and keep that connector comfy—no squeezing allowed!
– Slide the battery into the device and give it a gentle push until it clicks into place.
Step 11


6 × 2,5 mm Phillips
Antenna Cable
Display Connector
– Gently slide the mainboard back into its cozy spot in the device, making sure to press it down without squishing any cables underneath. We don’t want any cables feeling left out!
– Take a moment to check that the cameras are snugly in their places. They love a good fit!
– Next up, let’s connect that large connector to the mainboard. It’s like giving it a high five!
– Pop on the bracket and ensure that the tab clicks into place. It’s all about that satisfying snap!
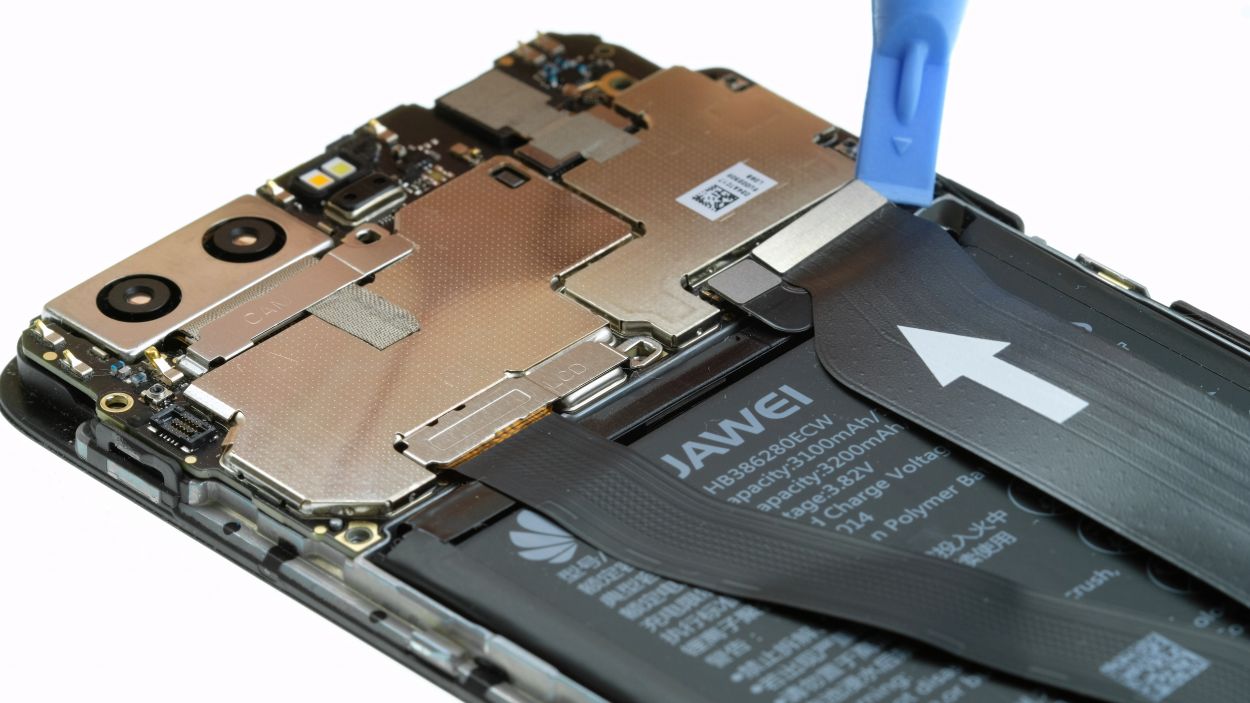
– Carefully position the antenna connector over its socket and give it a gentle press. It’ll feel right at home there.
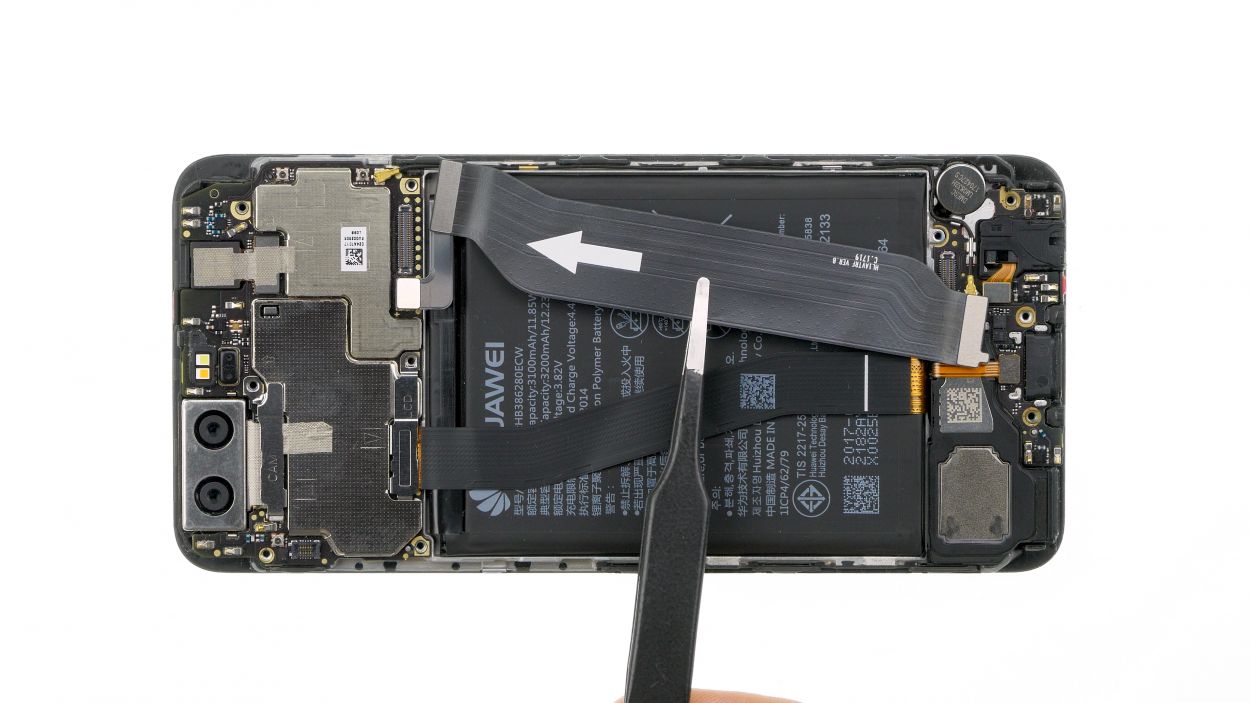
– Now, place the flex cable with the arrow pointing upwards over the battery. Remember, arrows always point the right way!
– Time to secure the mainboard with those trusty Phillips screws. Tighten them up, but don’t go overboard!
– If you can, reattach the moisture indicator back onto the bracket screw. It’s like putting a little hat back on!
Step 12

4 × 2,5 mm Phillips
Hey there! Just a friendly reminder to keep an eye out for that little screw for the USB board. It’s an important piece of the puzzle!
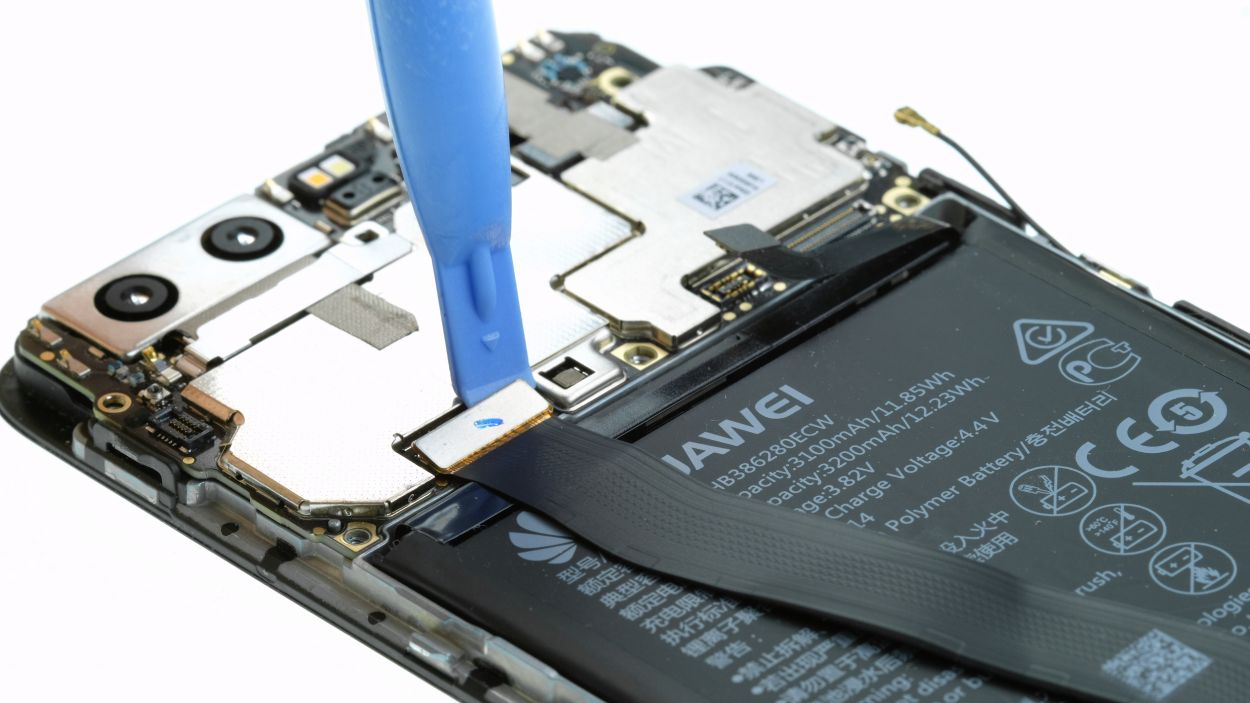
– First up, let’s get that wide flex cable connector snugly attached to the USB board. You’ve got this!
– Next, pop the connector cover onto the USB board and secure it with screws. Just ensure those metal tabs click into place at the top and bottom. You’re doing great!
Step 13

Battery Connector
1 × 2,5 mm Phillips
Step 14


Fingerprint connector
– Grab that rear case and place it right next to the display. Time to connect the flex cable to the mainboard!
– Next up, gently fold that display into the rear case and slide those tabs in at the top edge. You’ve got this!
– Now, let’s snap-fit the display into the case. Almost there!
Step 15
– Tighten up those two Pentalobe screws hanging out next to the USB port!
2 × 3,0 mm Pentalob
Let’s get this repair party started! To avoid stripping those tiny screws, use a Pentalobe PL1 screwdriver, because anything else might just strip ’em. We’re rooting for you to succeed, so check out the best screwdrivers here and get to it! If you need help, you can always schedule a repair.
Step 16
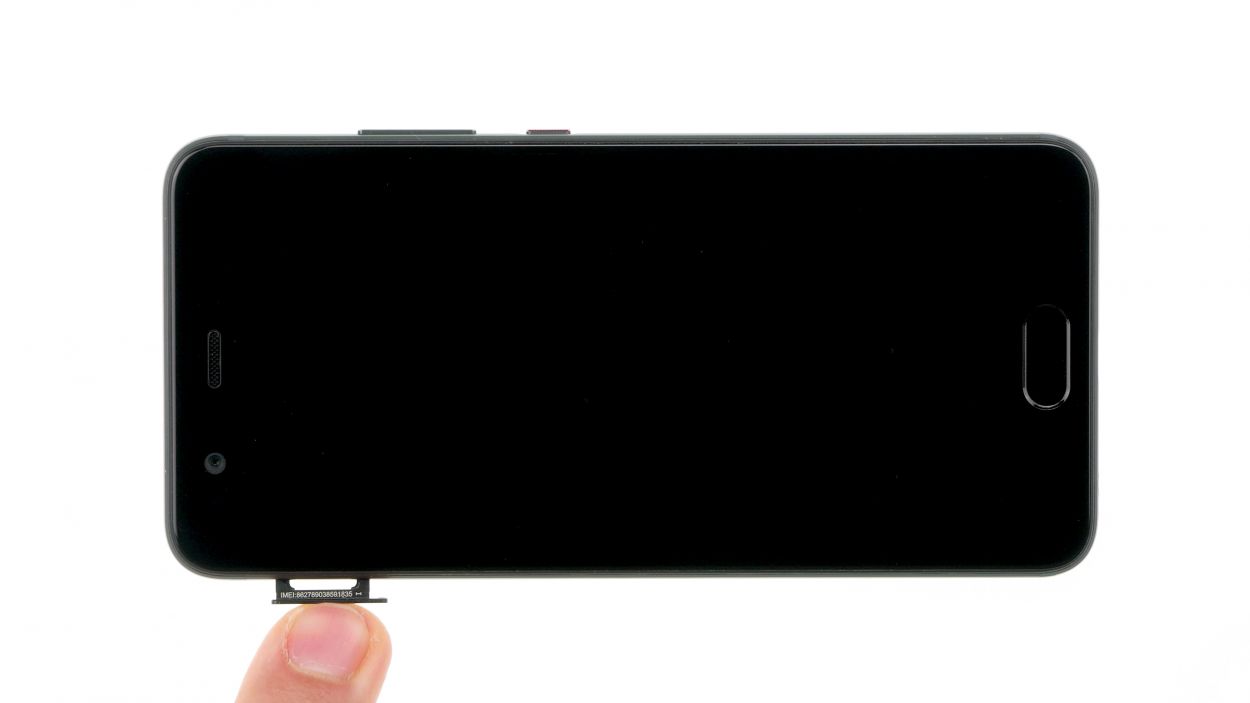
– Pop your SIM or SD cards back in and slide that SIM tray right where it belongs! You’re almost there!