DIY Guide to Replace iPhone 12 mini Screen
Duration: 60 min.
Steps: 24 Steps
Once you open your device, it is no longer 100 percent dust- and waterproof (IP68).
If you’re ready to give your iPhone 12 mini a fresh look, replacing the display is the way to go! In this easy-to-follow photo guide, we’ll walk you through each step to make it a breeze.
Step 1
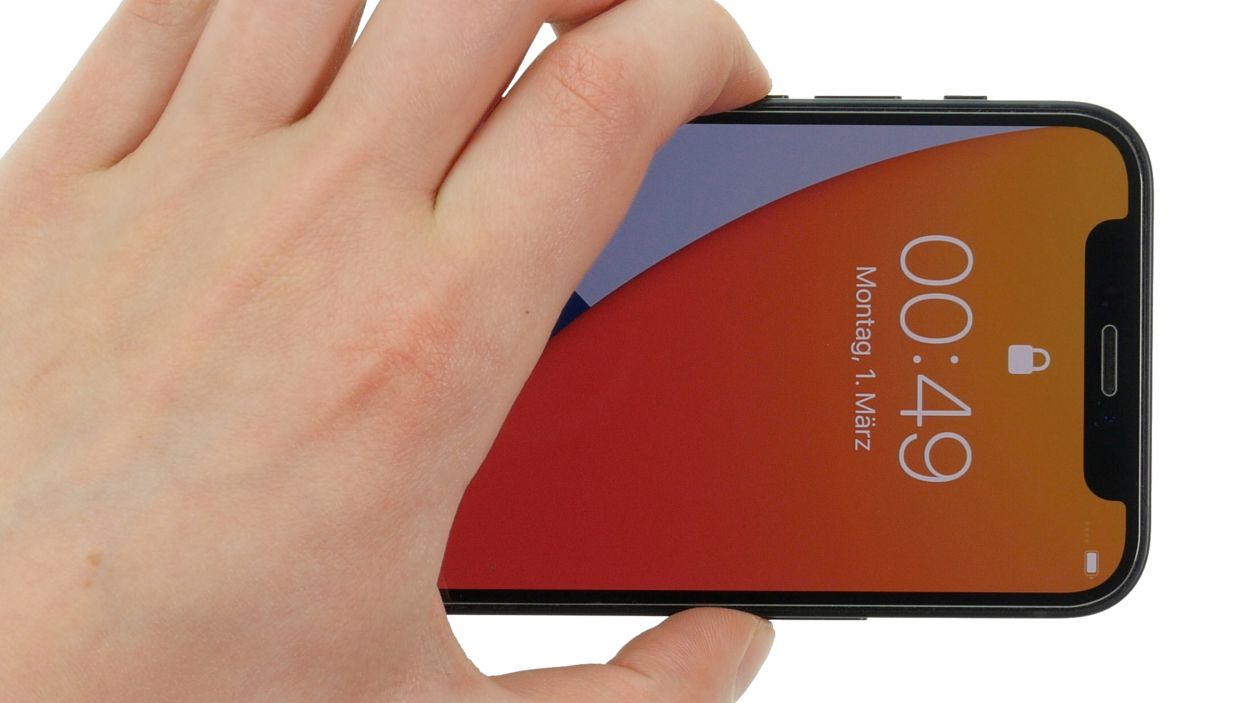

Before you kick off your repair journey, why not check out our handy checklist? It’ll help you test the basic functions of your iPhone 12 mini. That way, you can celebrate your success after the repair!
– To power down your iPhone, simply press and hold the side button along with the volume down button at the same time for a few seconds. It’s like a quick dance move!
– Once you see the slider appear, give it a gentle swipe from left to right, and voilà! Your phone will be off in just a few seconds.
Step 2

2 × 6.7 mm Pentalobe
Stay organized and keep your screws in check during the repair process! A trusty old sewing box can do the trick, but if you want to level up, our top-notch magnetic pad ensures nothing goes astray. It’s all about keeping your workspace tidy and your screws happy!
– Give those two Pentalobe screws a little twist with your trusty Pentalobe screwdriver.
– Once they’re loosened, toss them onto your magnetic pad to keep them safe and sound.
Step 3

– Warm up the edge of the display by gliding your hot air tool along it like you’re giving it a gentle massage. Make sure to keep it moving for an even heat-up!
Watch out for those fingers! After heating, make sure the display is warm enough to touch, but not too hot to handle. Keep it cozy!
The display edge is really stuck down tight, so let’s warm things up a bit before we dive in! Grab your hot air device, whether it’s a heat gun or even a trusty hair dryer, and give that edge a good heat-up. We want it cozy enough to work with, but not too hot to handle!
Tools Used
Step 4
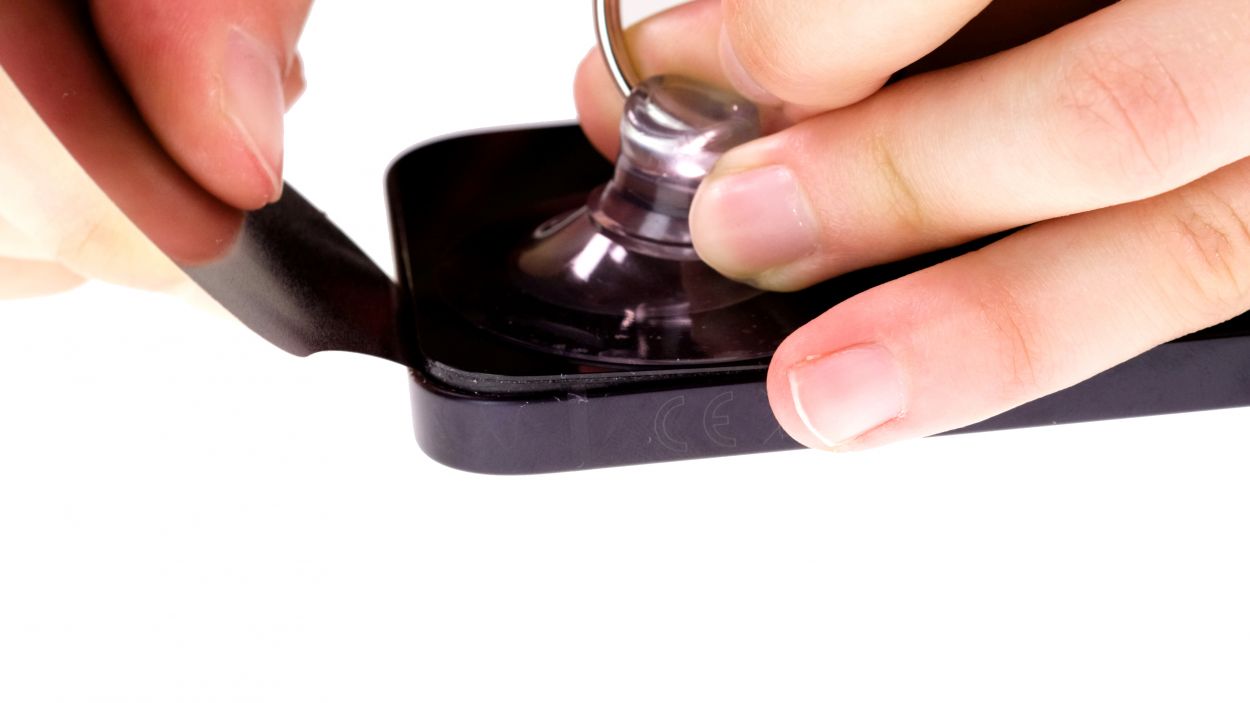
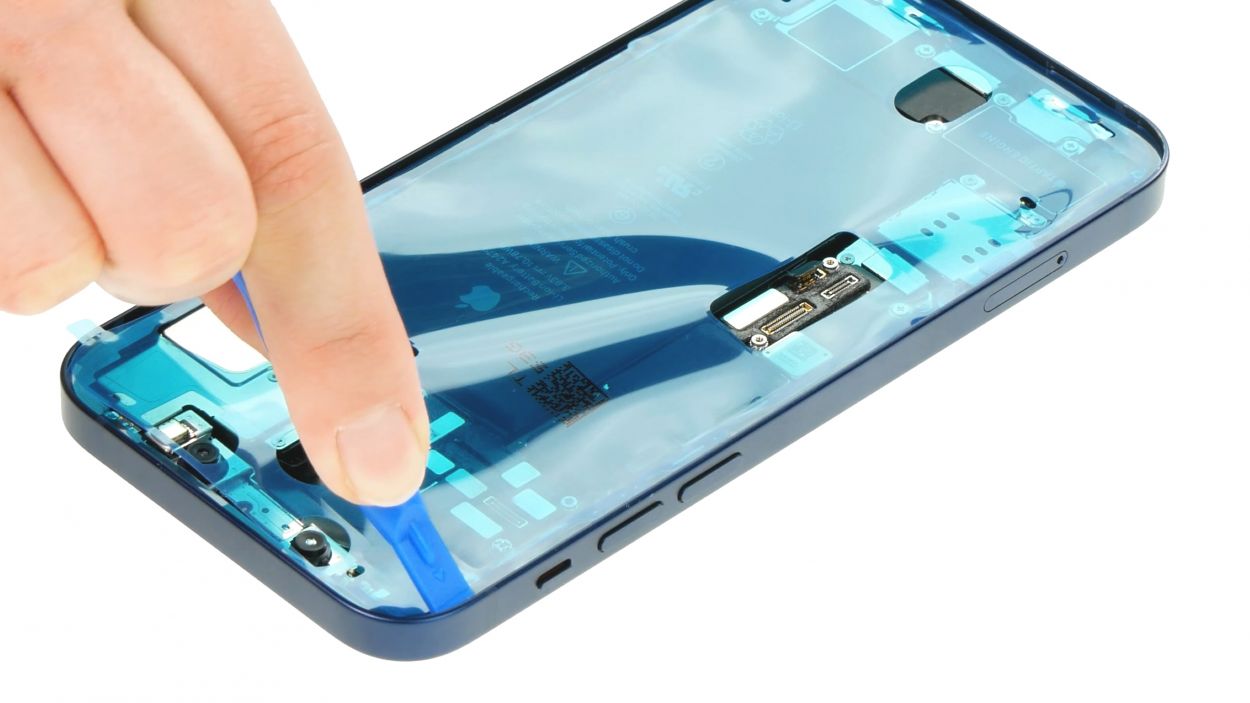
To create a snug little space between the display’s edge and the case, grab yourself a flat, steady tool. The iFlex is our top pick for this job, thanks to its sharp edges that slide in like a charm!
– Grab a suction cup and attach it to the lower edge of the display, then gently pull it upwards. As you do that, slide the iFlex tool between the display’s edge and the case. You’re doing great!
– Now, take a flat pick and slide it into a spot you’ve already loosened. This will help keep the glue from sticking again. You’re on the right track!
Tools Used
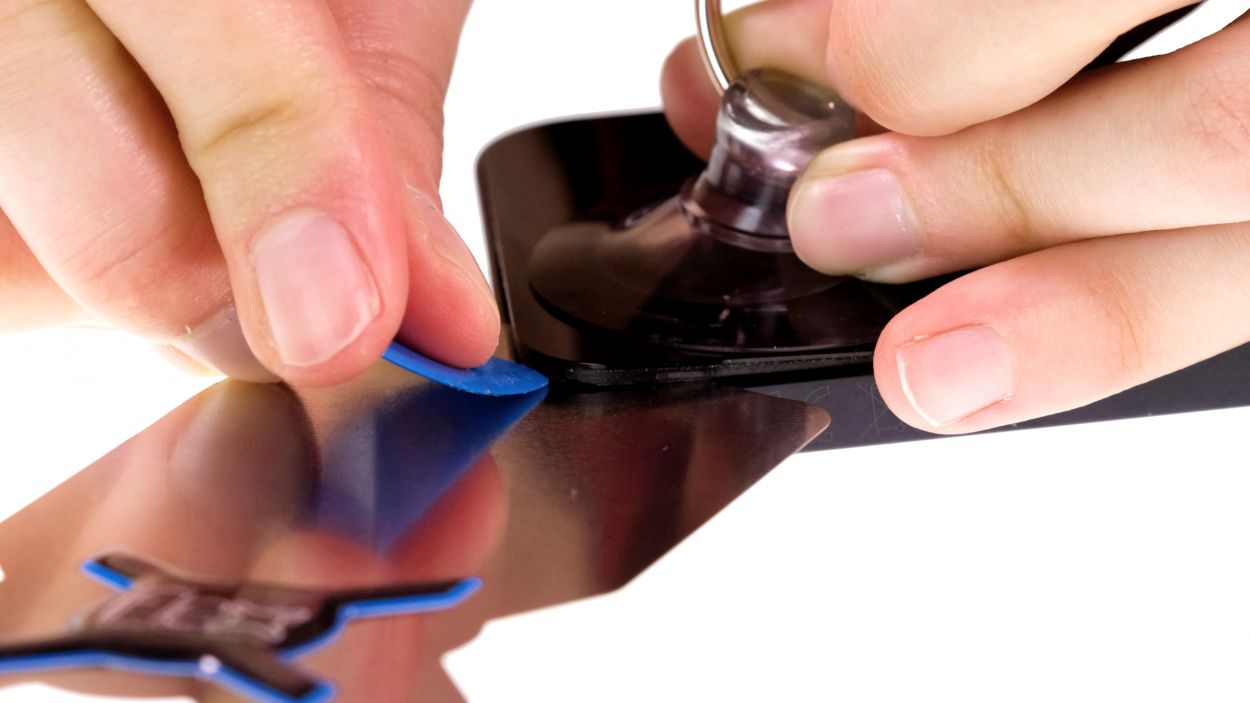
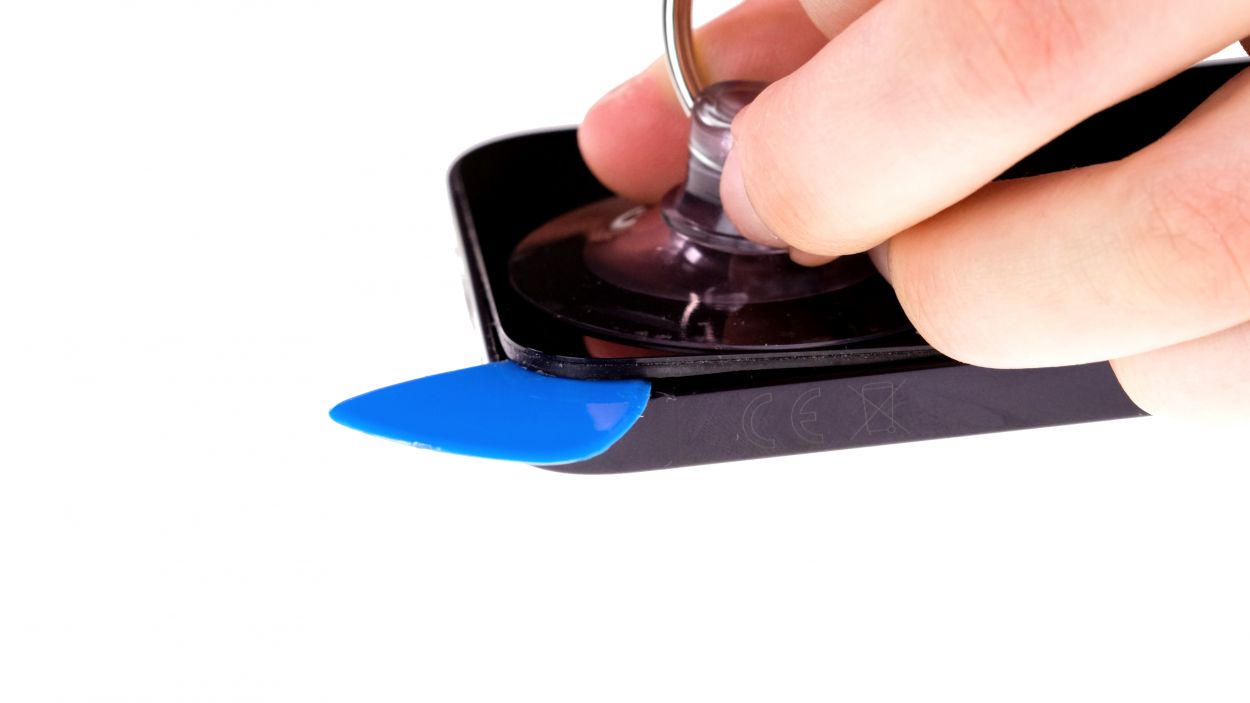
Step 5


To keep your iPhone’s case looking sharp while you’re detaching the display, it’s best to switch to a plastic tool as soon as you can. Our go-to recommendation? The hard plastic pick! It’s gentle on the edges but tough on the task at hand.
– Run the hard plastic pick all the way around the display edge, giving it a little nudge upwards at the same time. This will help free those stubborn display lugs from their cozy home in the casing’s frame!
Tools Used
Step 6


Keep that screen folding under 180° while those delicate cables are still connected! If you go beyond, you might just give them a tearful goodbye.
– Once the display has gracefully exited its cozy spot, it’s time to bid farewell to those plastic picks. They’ve done their job!
– Now, gently unfold the display towards the volume buttons. Just lean it against something sturdy so those delicate flex cables don’t get too stretched out. You’ve got this!
Step 7

1 × 1.0 mm Y-Type
5 × 1.2 mm Y-Type
– Unscrew the six Y-type screws from the two cover plates using your handy Y-type screwdriver. It’s like a little treasure hunt for screws!
– Then, pop them onto the magnetic pad to keep them safe and sound. You’re doing awesome!
Step 8


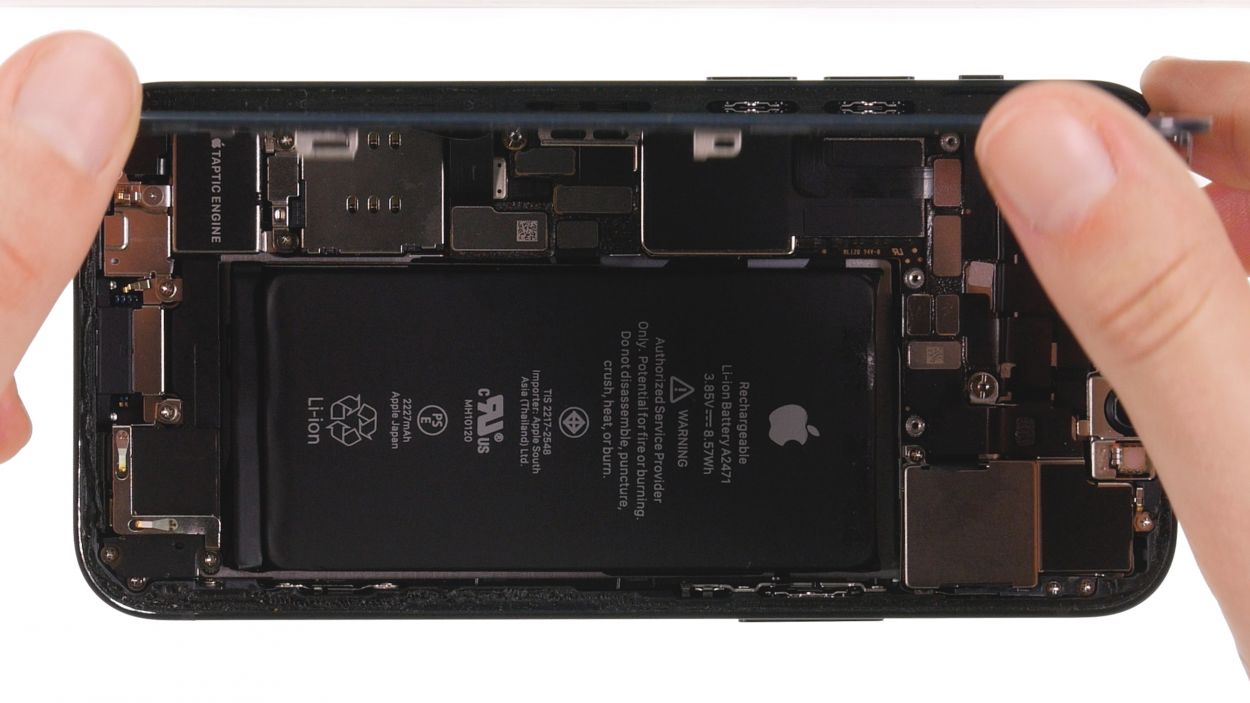
– Using your trusty tweezers, carefully lift off the two cover plates from your device. You’re doing great!
– Now, make sure to place those cover plates along with their respective screws on your magnetic pad. It’s the perfect spot for them!
Tools Used
Step 9


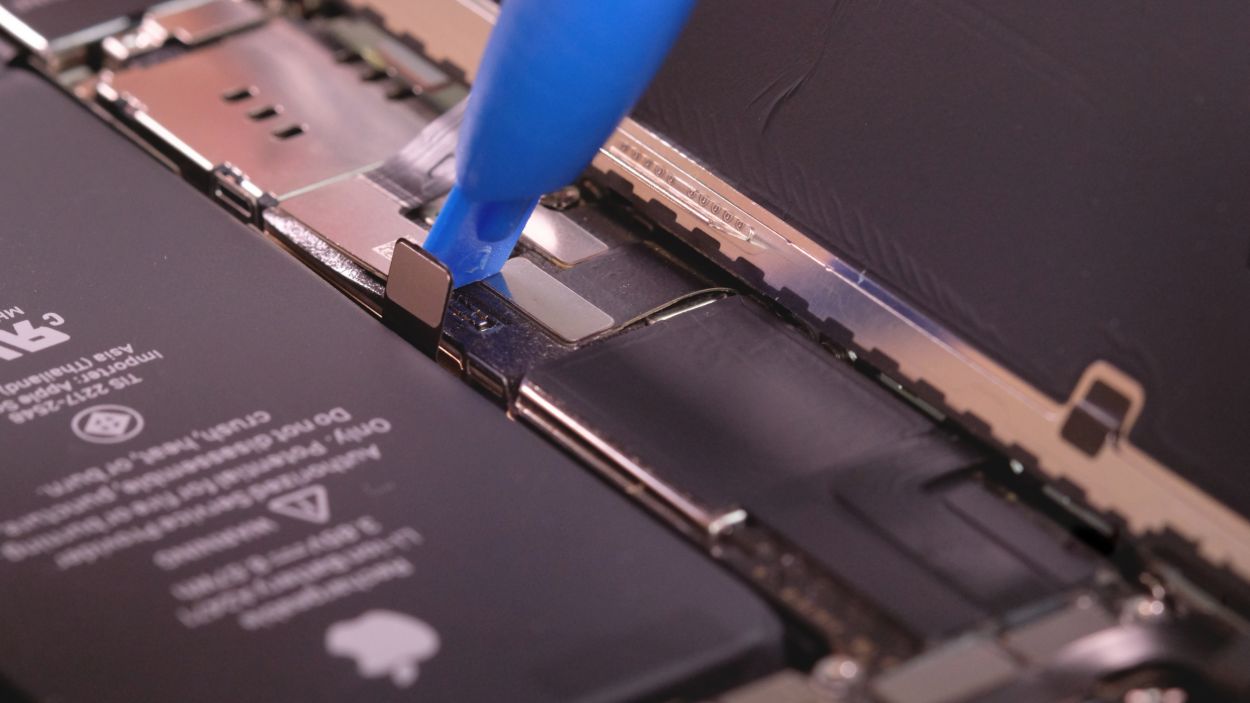
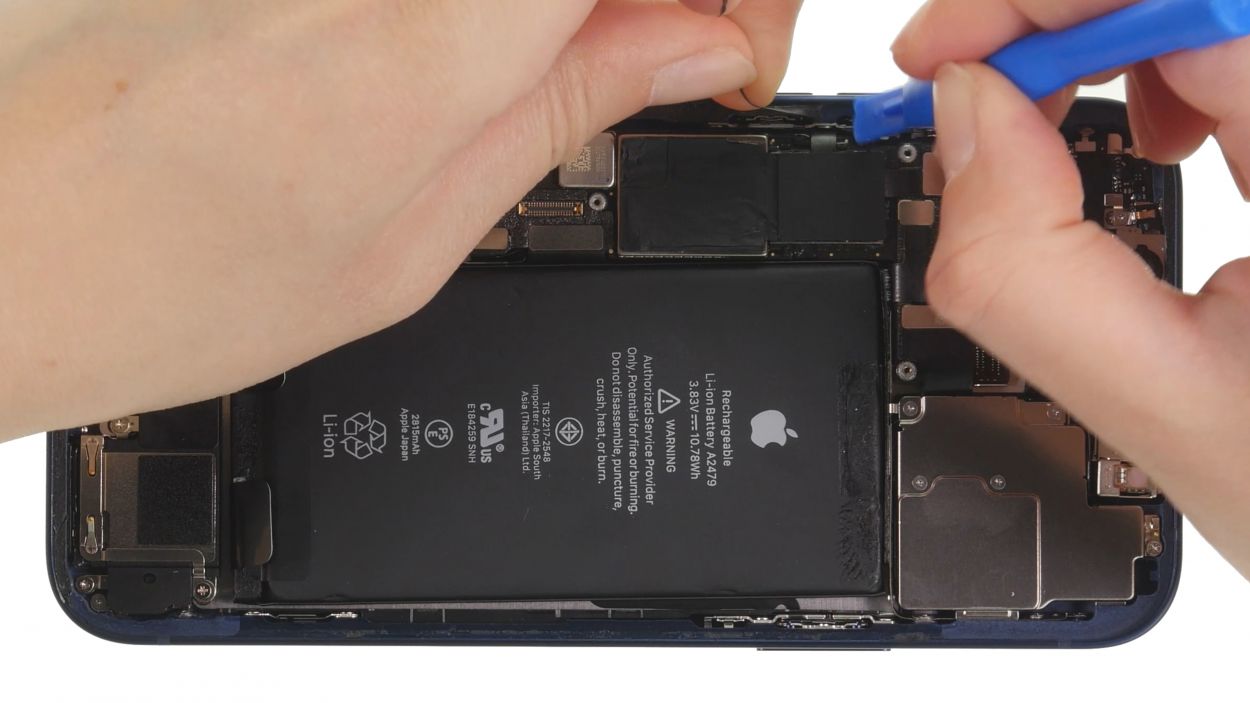
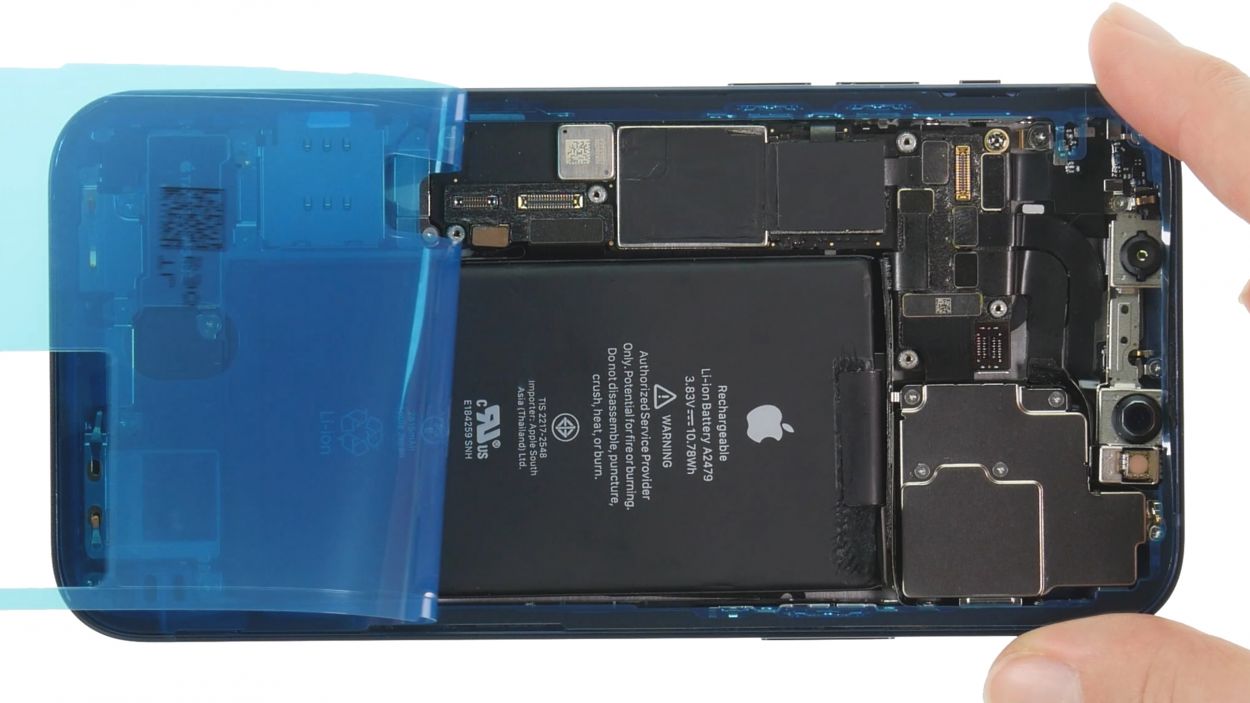
Make sure to disconnect the battery connector as soon as you can to steer clear of any short circuit shenanigans!
– Gently slide a plastic lever tool underneath the battery connector to gracefully separate it from the board. A plastic spudger works wonders for this task!
Tools Used
Step 10


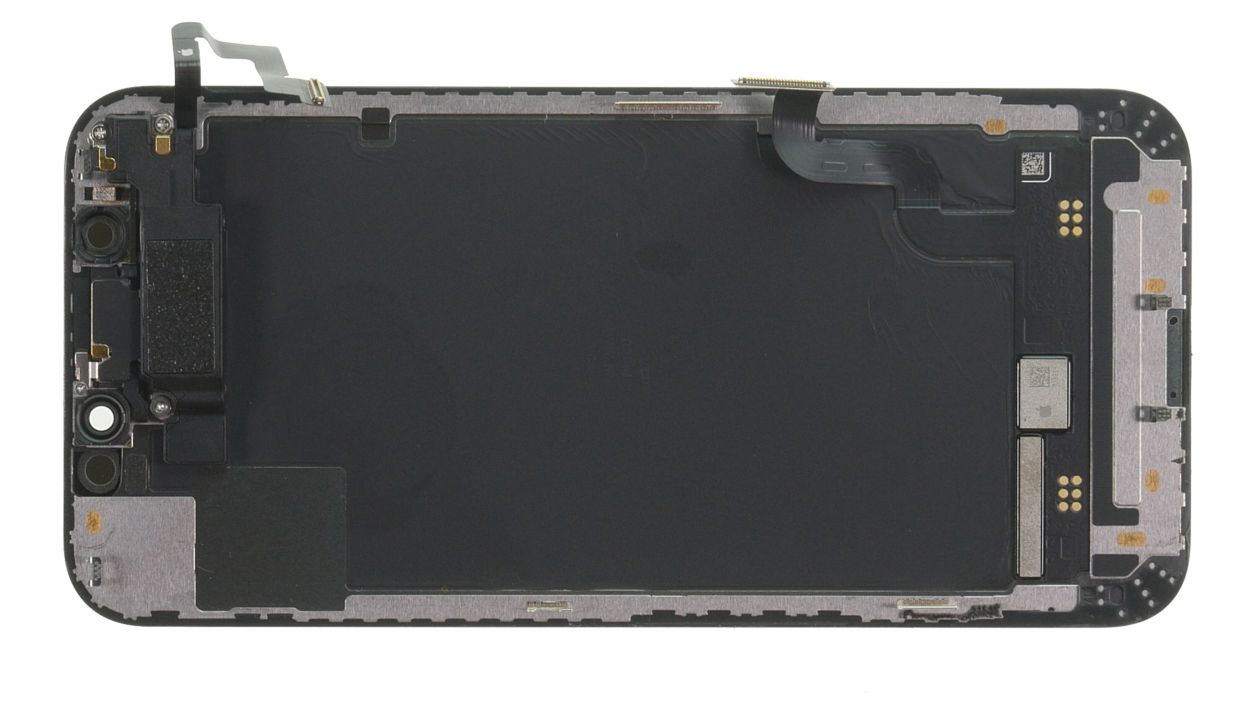
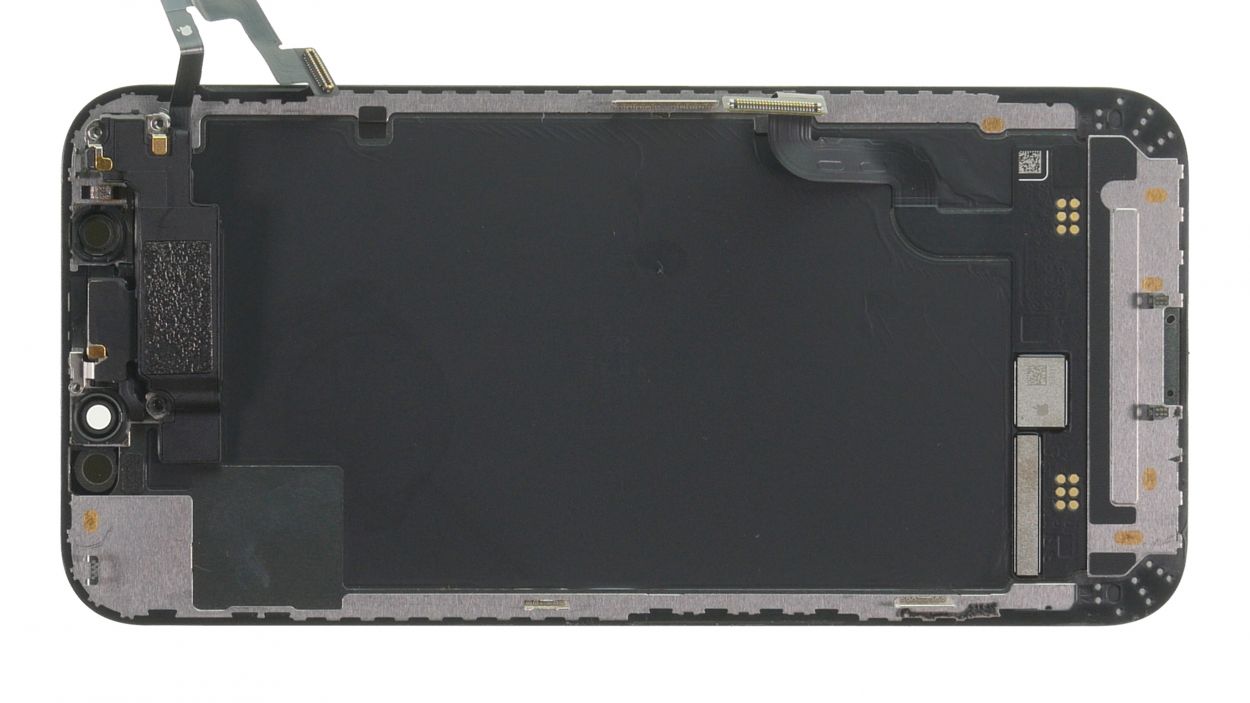
Your iPhone 12 mini is equipped with two display connectors, and one of them is responsible for linking the earpiece to the logic board. Let’s keep things connected and running smoothly!
– Slide the spudger gently beneath each of the two display connectors, one at a time, and carefully lift them off the logic board. You’ve got this!
Tools Used

Step 12
2 × 1.6 mm Phillips
1 × 1.0 mm Y-Type
1 × 1.8 mm Y-Type
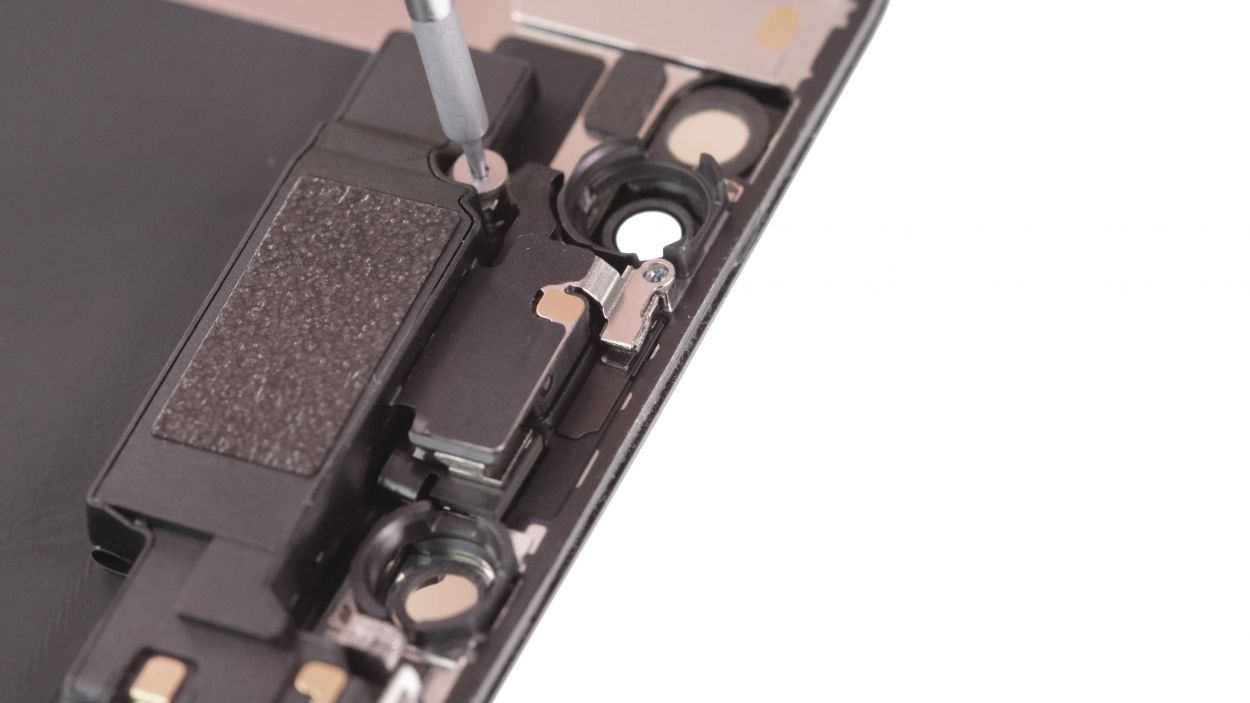
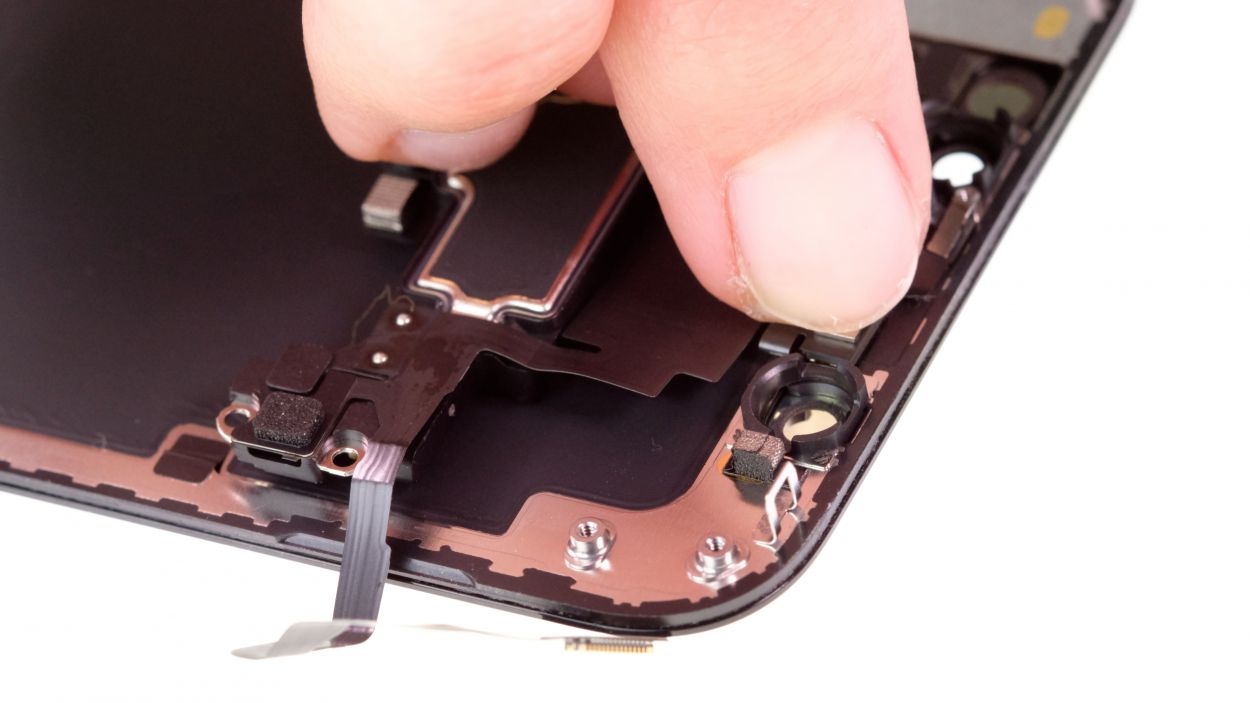
Various sensors are integrated on the earpiece via a flex cable. The entire unit is attached to the display’s inside.
– Give those four screws a little twist to loosen them up, securing the earpiece like a pro.
– Once they’re all loosened, let them chill on the magnetic pad. They deserve a cozy spot!
Step 13
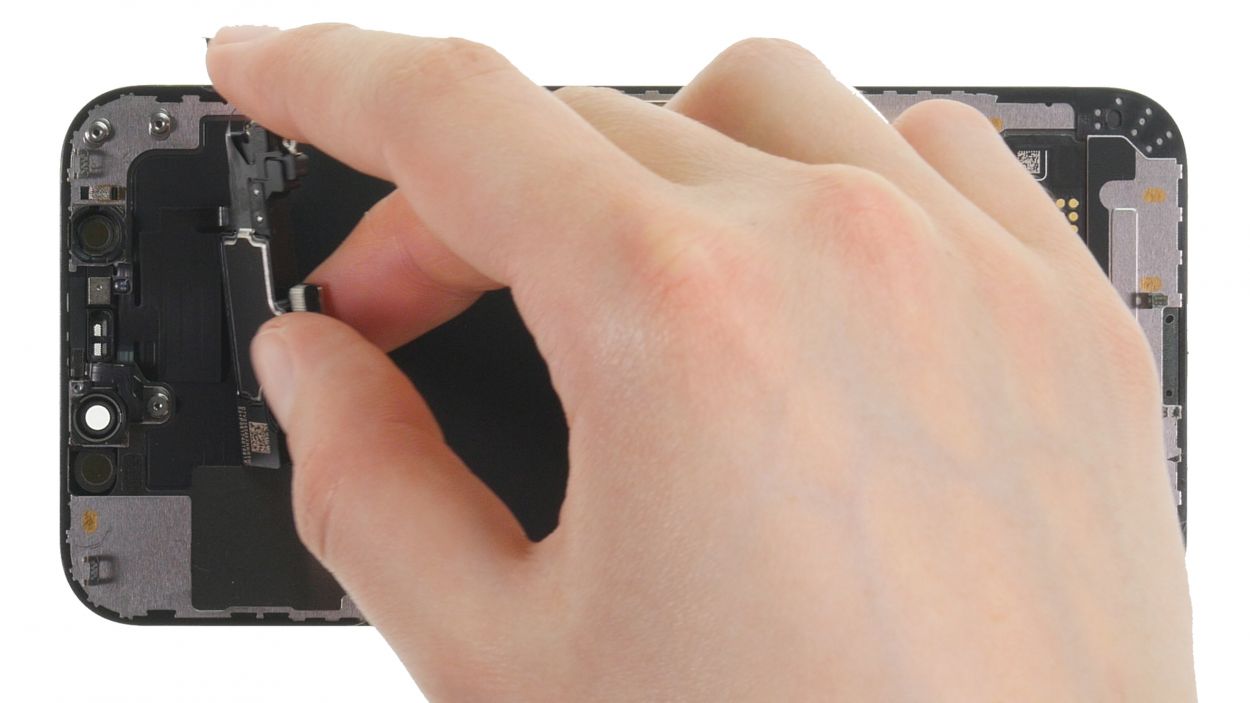
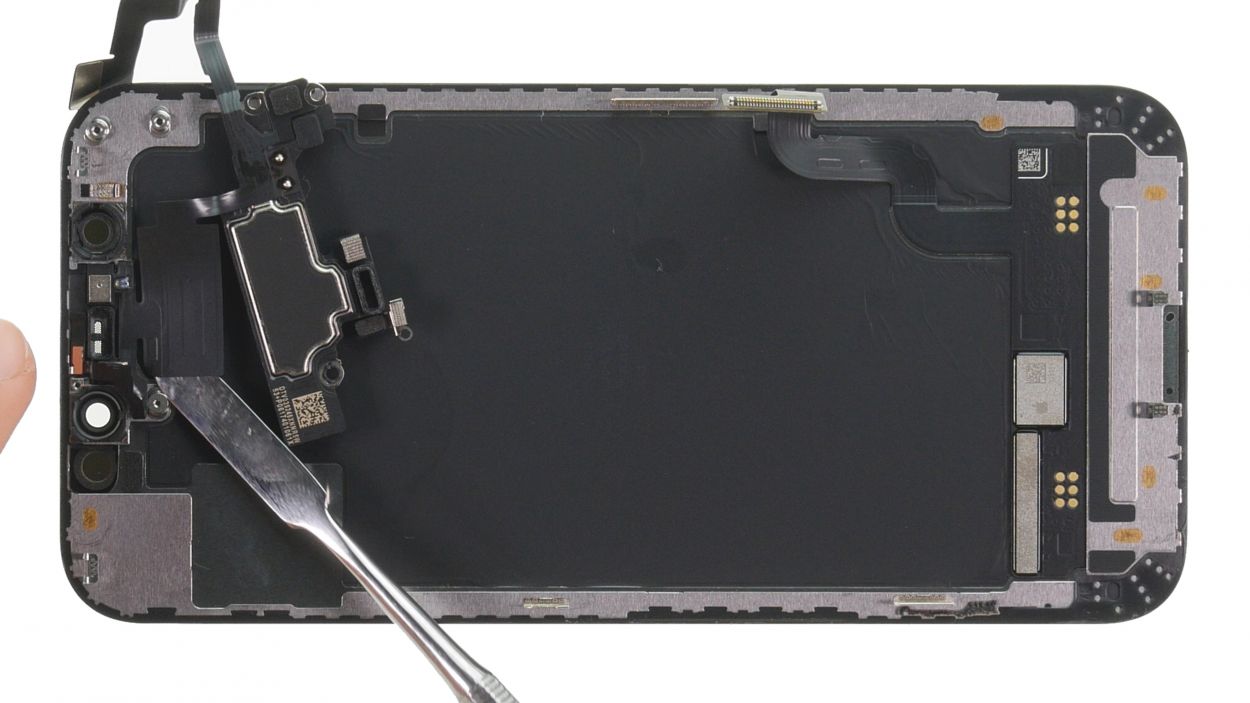
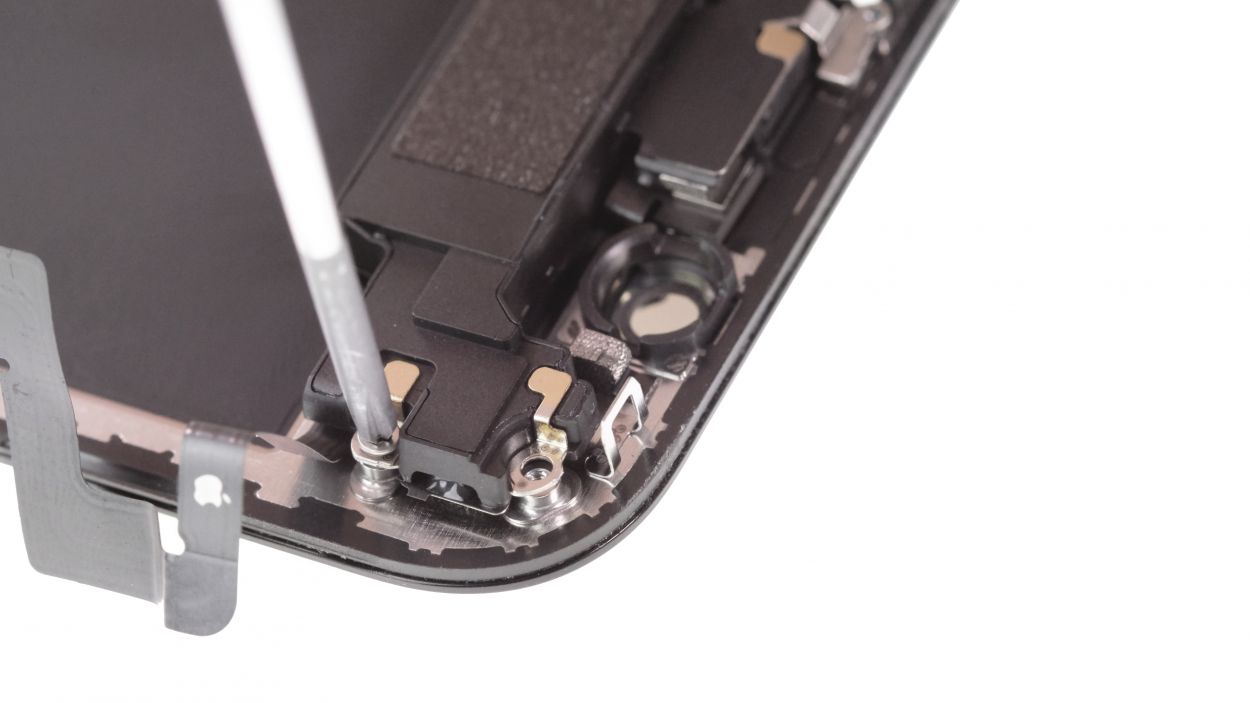
Handle those delicate sensors with care! They’re a bit shy and can get hurt easily.
– Give that earpiece a little flip to get things started!
– Next, gently slide a sturdy flat tool under those sensors to pop them out of their snug little homes. A steel spatula works wonders here!
– Now, take that freed sensor cable along with the earpiece and set it on the magnetic pad with the screws. You’re ready to transfer this component to the new display!
Tools Used
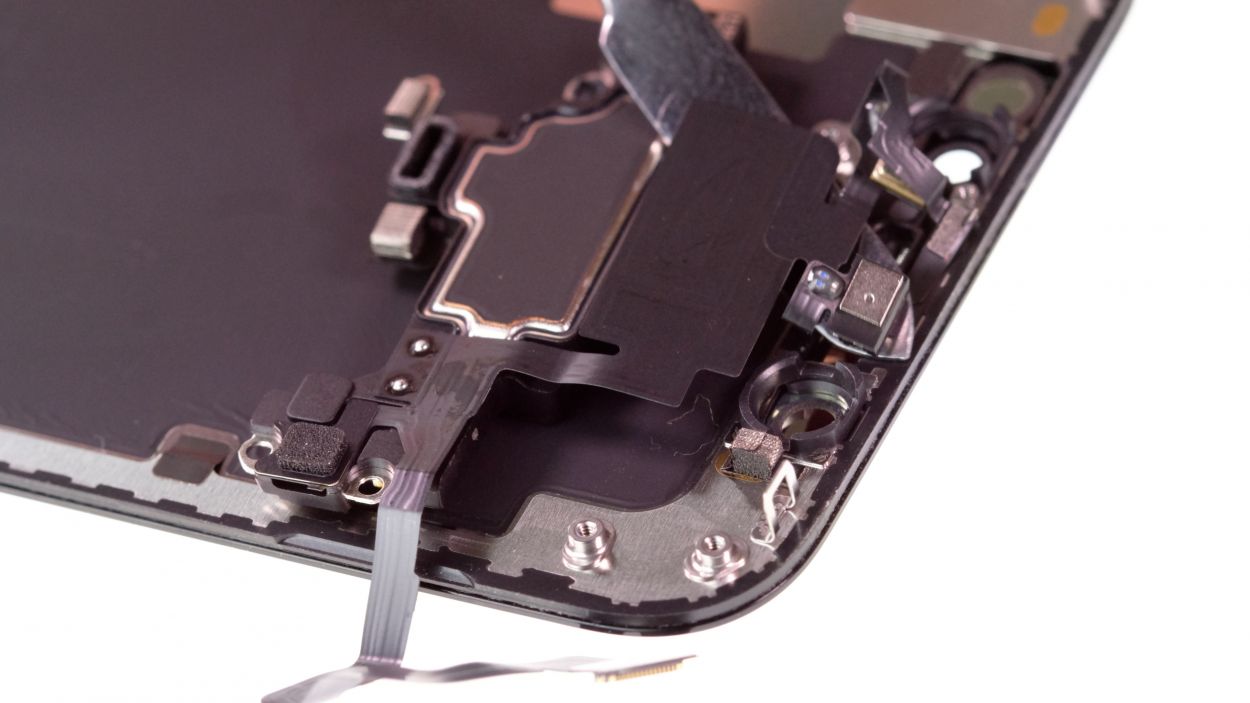
Step 14
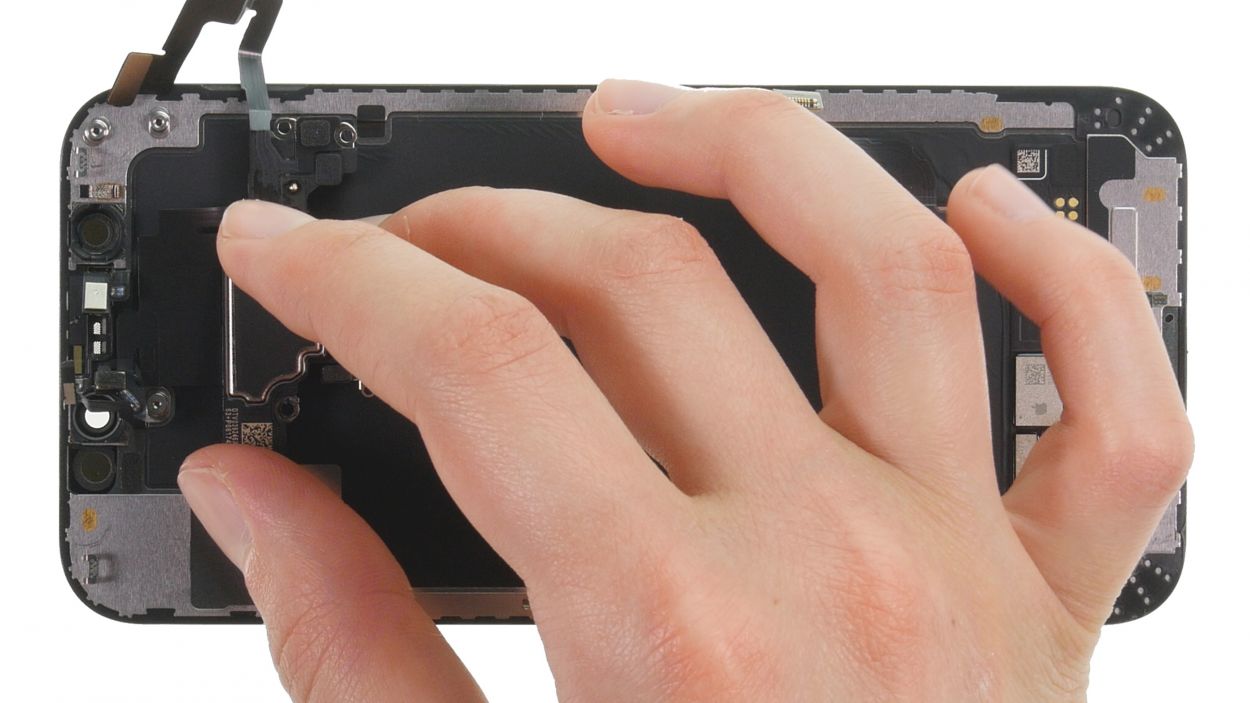
After you’ve peeled away all those protective films and seals from your shiny new display, it’s time to slide your old sensor cable, along with the earpiece, right into place. You’re almost there!
– Nestle the unfolded earpiece back into its cozy spot like it never left!
– Next, give those sensors a gentle push back into their snug little guides at the top edge of the display. You’re doing awesome!
Step 15
2 × 1.6 mm Phillips
1 × 1.0 mm Y-Type
1 × 1.8 mm Y-Type
Keep those screws sorted, my friend! Using a screw that’s too long might just lead to a case of the ouchies for your device.
– Tighten up the earpiece by giving those two Phillips and Y-type screws a little twist. You’re nailing it!

Step 17

– Gently place the display back onto the casing unit. Lean it against something sturdy to keep it steady while you work your magic.
Step 18


– Carefully connect the display connectors by pressing them onto the board one at a time. Listen for that satisfying click – it’s like music to your ears!
Step 19


Hey there! It’s best to connect the battery connector at the very end of your repair adventure to dodge any potential short circuit mishaps. Stay safe and keep that device happy!
– Gently press the battery connector onto the logic board. You’ll hear and feel it click into place, like a perfect puzzle piece fitting just right!
Step 20
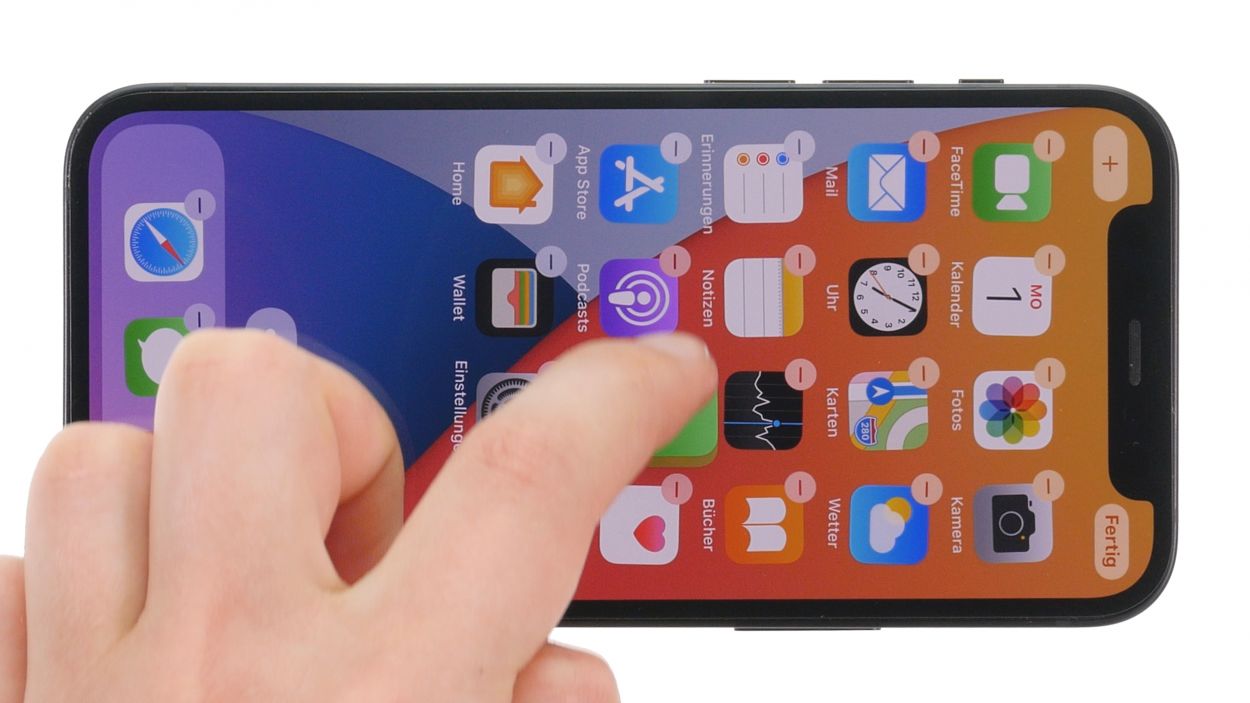
Give your iPhone 12 mini a little flip to check it out after the repair! Just remember, don’t press it down into the case just yet. This way, if anything needs a quick fix, you can easily pop it open again. You’re doing great!
– Fire up your iPhone and give that screen a little test drive by dragging an app across it. Make sure the touch is responding like it should everywhere!
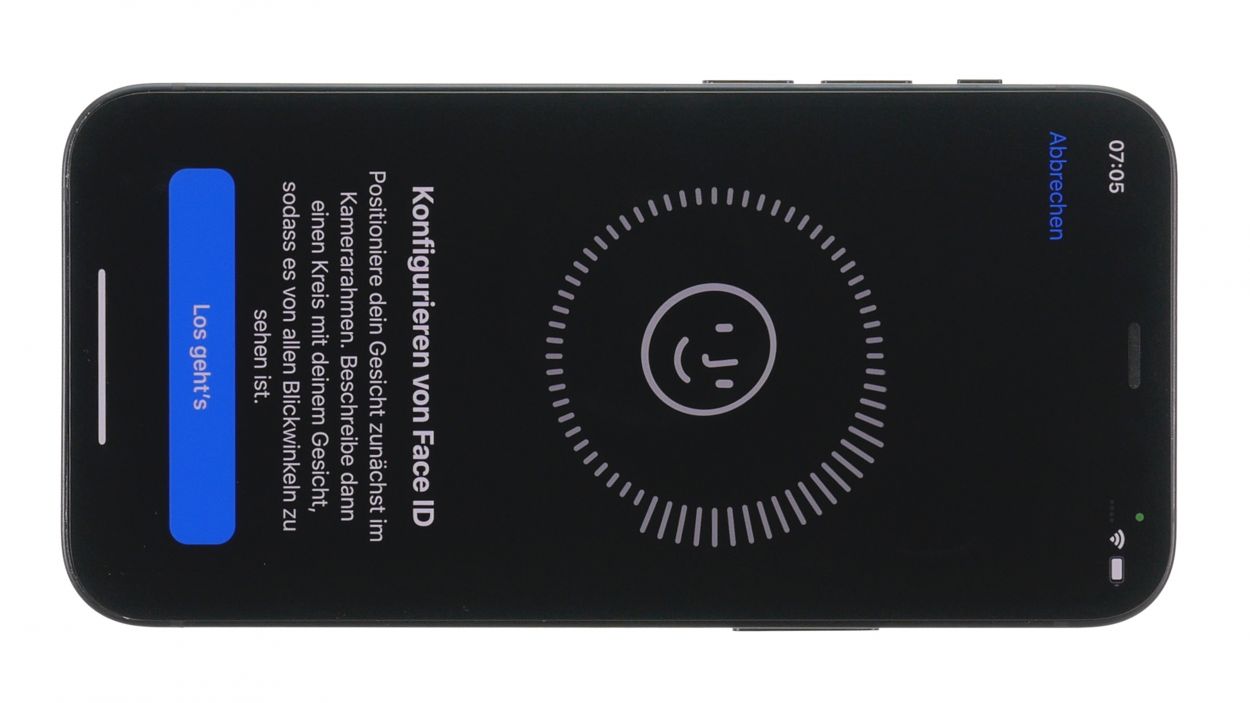
– Next, check if Face ID is still on point after taking over the earpiece by heading over to the Face ID settings.
– And don’t forget to give those other components a quick once-over to see if they’re still functioning. You can always refer to our handy checklist as a trusty guide!
Step 21


– After you’ve completed your test run, gently swing that display back open like you’re unveiling a masterpiece!
– Now, carefully position the two cover plates over the battery and display connectors. Use the screw holes as your trusty guide. You’re almost there!
Tools Used
Step 22

1 × 1.0 mm Y-Type
5 × 1.2 mm Y-Type
– Now, grab those two plates and fasten them back onto the logic board with your trusty Y-type screws. It’s like putting the finishing touches on a masterpiece!
Tools Used
Step 23


To make sure your display and case unit are best buddies again after you pop that display back in, give the edge a little love with some hot air. Once it’s feeling cozy, you can weigh down your iPhone with a couple of books for about half an hour, or if you’re feeling fancy, clamp it down. You’re on the right track!
– Gently flip that display over and give it a nice, firm press into the case unit. You’re almost at the finish line!
