DIY Guide to Replace iPhone 16 Plus Earpiece Speaker
Duration: 45 minutes
Steps: 37 Steps
Ready to give your iPhone 16 Plus a little TLC? If your top speaker is sounding more like a whisper than a concert, especially during calls, it might be time for a new earpiece speaker. Grab some replacement back glass adhesive to get started. And if you’ve got a 5G mmWave antenna (only in US models, of course), make sure you have some replacement adhesive or thin, double-sided tape handy too. If you need help, you can always schedule a repair.
Step 1


Let that battery run down to below 25%! A fully charged lithium-ion battery can be a bit of a drama queen when it comes to safety. So, give it a break and keep things chill.
– First things first, unplug all those cables from your phone. Give it some space!
– Now, press and hold the power button along with either of the volume buttons, and slide to turn off your phone. Easy peasy!
Step 2


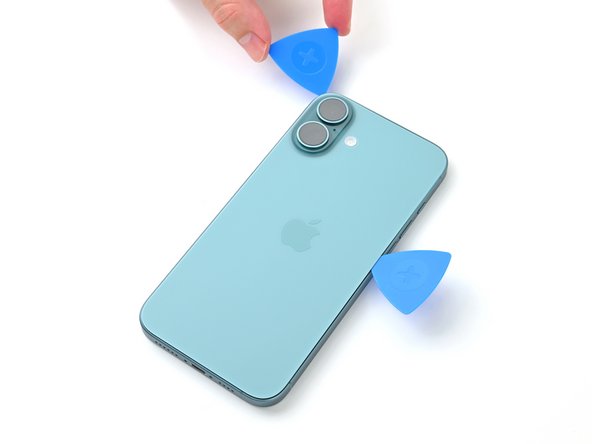
Find a smooth spot near the bottom edge that’s just right for a suction cup to grip.
– If your screen or back glass is looking like a jigsaw puzzle, grab some packing tape and lay down overlapping strips over the glass. This will keep you safe and make the disassembly process a breeze!
Tools Used

Step 3
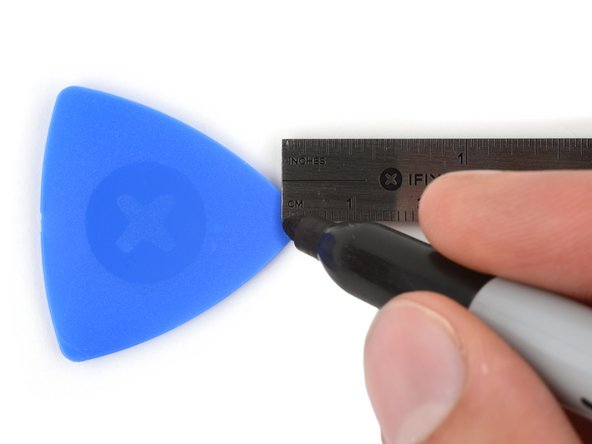

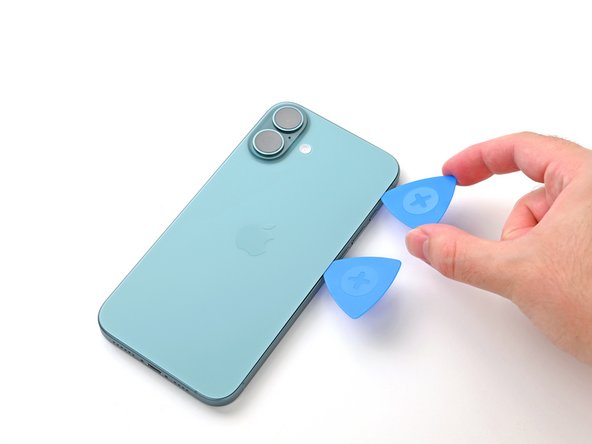
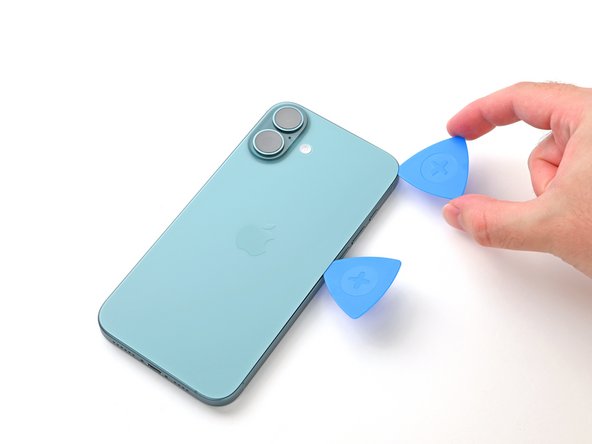
Be careful! If you push that opening pick in too deep, it might just cause some trouble for your device. So, let’s take a moment to mark your pick and keep everything safe and sound.
Feel free to add a little flair by marking the other corners of the pick with various measurements too.
Another fun idea: tape a coin about 3 mm from the tip of your pick. It’s a clever way to keep your depth in check!
– Take your trusty opening pick and measure about 3 mm from the tip. Give it a little mark with a permanent marker so you know where to aim.
Step 4
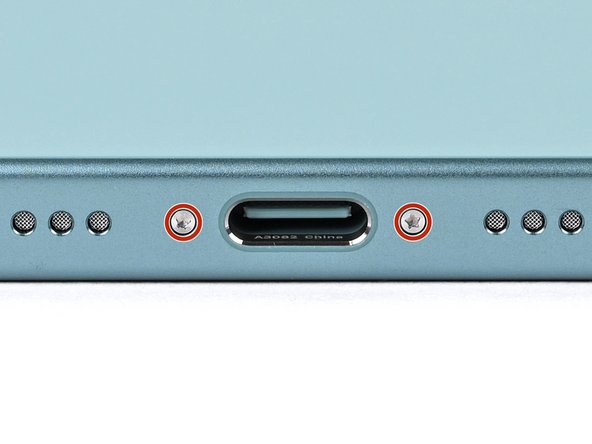

– Grab your trusty P2 pentalobe driver and let’s get to work! Carefully unscrew the two screws, each measuring 7.7 mm, located on either side of the USB-C port. You’ve got this!
Step 5


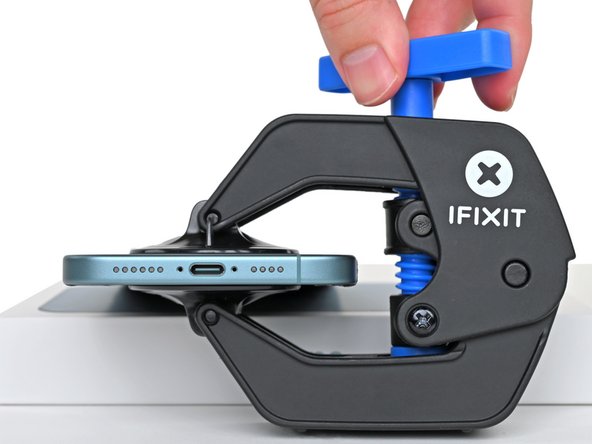
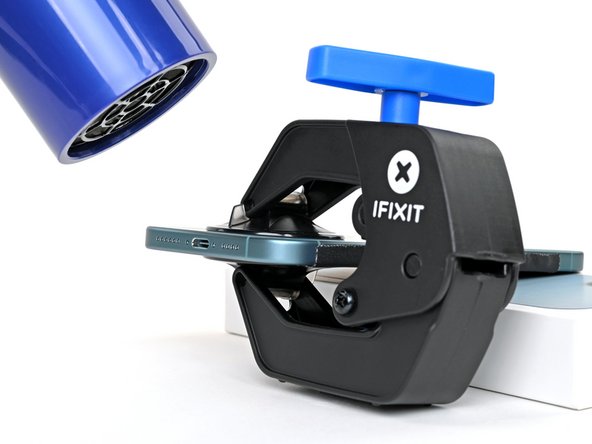
In the next five steps, we’ll show you how to use the Anti-Clamp. It’s our handy tool to make the opening process smoother. If you aren’t using the Anti-Clamp, skip down four steps for an alternate method.
The Anti-Clamp uses suction to grip both the screen and the back glass. If you’re only opening the back glass, make sure to secure the screen with tape.
For full instructions on using the Anti-Clamp, check out this guide.
Be sure the tape secures only the screen, not the back glass.
– Snip off two strips of tape, place them along the long sides of your phone, and fold them over the screen to keep everything nice and snug.
Step 6


If your phone’s surface feels a bit too slick for the Anti-Clamp to grip, just slap some tape on it to make things a bit more grippy!
– Give that Anti-Clamp’s blue handle a little tug backward to unlock those arms and get ready for action!
– With the back glass facing up, gently slide those arms over the right edge of your phone. Make sure one suction cup finds a home on the back glass while the other snuggles up on the screen. Aim to center those cups near the bottom edge for best results.
– Support your phone like a pro, keeping it nice and level between the Anti-Clamp’s arms—using a small box works wonders.
– Now, it’s time to squeeze those cups together to create some serious suction magic!
Step 7


If tape is playing hard to get, just give those suction cups a little warmth to help them stick like they mean it.
– Give that blue handle a gentle tug forward to lock those arms in place.
– Now, twist that handle a full circle (360 degrees) or until you see those cups start to stretch out.
– As the cups expand, keep an eye on their vertical alignment. If they seem to be slipping, no worries! Just take off the Anti-Clamp and use some tape to help those cups stick.
Step 8

Keep your cool—don’t overheat the phone! The battery is sensitive to high temperatures. If you need help, you can always schedule a repair.
Feeling a little crafty? Grab a hair dryer or a heat gun and give the bottom edge of that back glass a warm hug until it’s nice and toasty. Just be careful not to get too carried away!
If you don’t see a gap pop up after a minute, no worries! Just add a bit more heat and give the handle a cheeky quarter turn. Let that Anti-Clamp work its magic, and keep repeating the process until you get the results you’re looking for.
– Warm up your iOpener and gently press it against the bottom edge of the back glass for about two minutes.
– Take a moment—up to a minute should do—to let the adhesive loosen up and create a little space between the back glass and the frame.
Tools Used


Step 9


– Slide the pointy end of your trusty opening pick into that sneaky gap.
– Give a gentle tug to the Anti-Clamp by using those handy pull tabs on the suction cups.
– Feel free to skip the next two steps and keep rocking on!
Step 10


Keep an eye on the temperature while you’re working—going too hot can put your battery at risk. Let’s keep it cool!
Another option is to grab a hair dryer or heat gun and gently warm up the bottom edge of the back glass until it feels nice and toasty to the touch.
– Warm up your trusty iOpener and give that back glass a cozy two-minute hug at the bottom edge. You’ve got this!
Tools Used
Step 11


– Start by placing a suction handle on the bottom edge of the back glass, right above the USB-C port.
– Give that handle a solid pull—just enough to create a little gap between the back glass and the frame.
– Now, slide the tip of an opening pick into that gap you’ve just made.
Tools Used

Step 12

While you’re slicing through that adhesive to free the back glass, keep an eye out for these areas:
– Be aware of the fragile cable that connects the back glass to the phone, located right next to the volume up button. It’s best to keep your pick away from this area to avoid any accidental snips.
– There are several spring contacts hanging out around the edges of the phone. Make sure to watch your pick depth closely in each step to prevent bending these little guys.
Step 13


Hey there! Just a friendly reminder: when you’re working on the bottom edge, keep that pick to 5 mm or less to steer clear of any spring contact mishaps. You’ve got this!
– Gently glide your pick back and forth along the bottom edge to break free that sticky adhesive.
– Keep your pick snugly in the bottom right corner to stop that adhesive from making a comeback!
Step 14


Grab your trusty hair dryer or heat gun and warm up that back glass until it’s nice and toasty!
– Pop a heated iOpener onto the right edge of the back glass for a couple of minutes.
Tools Used
Step 15


Keep your pick to a maximum of 5 mm along the right edge—let’s avoid any accidental spring contact or ribbon cable drama!
Steer clear of slicing near the volume buttons; we wouldn’t want to mess with the wireless charging or flash cable, would we?
– Gently glide your pick around the bottom right corner and then slide it halfway up the right edge, stopping when you hit that satisfying hard stop at the clip holding the back glass in place.
– Keep that pick in there to stop the adhesive from getting all clingy again!
Step 16

Grab that hair dryer or heat gun and give it a little love! Heat it up until it’s nice and toasty to the touch.
– Warm up a heated iOpener and cozy it up to the left edge of the back glass for a solid two minutes.
Tools Used
Step 17

Just a heads-up: Keep your pick no more than 5mm deep along the left edge so you don’t mess with the spring contact. If you need help, you can always schedule a repair
As you glide through, you’ll notice the delightful little metal clips popping free—it’s like a gentle high-five from your device!
– Place another pick at the bottom edge.
– Glide it around the bottom left corner and along the left edge to break the adhesive and release the metal clips.
– Leave the pick at the top left corner to keep the adhesive from sealing again.
Step 18


Fire up your hair dryer or heat gun and heat it until it’s nice and toasty to the touch. If you need help, you can always schedule a repair
– Warm up your trusty iOpener and place it on the top edge of the back glass, making sure to angle it just right to cover those volume buttons too. Let it work its magic for two minutes.
Tools Used
Step 19

Keep that pick at a cool 3 mm or less along the top edge—it’s a tight squeeze, but we want to avoid any unnecessary spring contact drama!
You’ll hear and feel those satisfying clicks as the top two clips pop loose. If you need help, you can always schedule a repair.
– Gently glide your opening pick along the top edge and around the top right corner until you reach the volume up button to loosen that sticky adhesive.
Step 20


Hold your horses before yanking off that back glass—it’s still connected by a delicate ribbon cable! Take a deep breath and follow the next few steps to gently detach it like a pro.
If the back glass isn’t swinging open as smoothly as you’d like, take a breather and avoid forcing it—just go back around the edges with your pick to see if you missed any adhesive spots or clips hanging on for dear life.
You might find it easier to give the back glass a gentle lift before swinging it open to help those clips fully let go.
– Swing that back glass open gently towards the volume buttons like you’re opening a treasure chest.
– Prop up the back glass with a clean, sturdy item, like a small box, to give the cable a break and keep it happy.
– Now, it’s time to say goodbye to those opening picks!
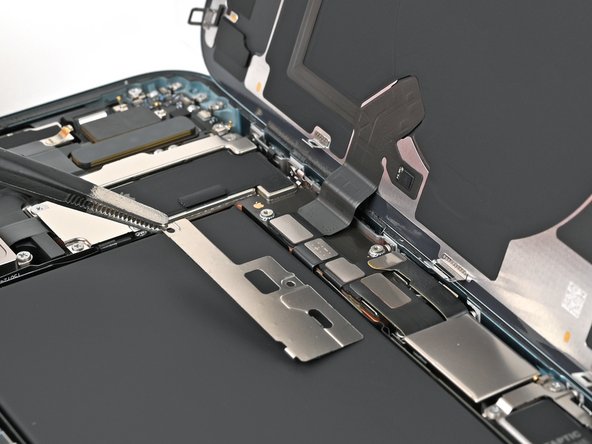
Step 21

– Grab your tri-point Y000 driver and let’s get those two 1.3 mm screws out of the way that are holding the middle connector cover. You’ve got this!
Step 22

Handle this step with care and keep that battery pristine. No dents, no punctures, just smooth sailing. If you need help, you can always schedule a repair
– Grab those blunt-nose tweezers or just your trusty fingers and give that cover a gentle slide to the left edge of the phone, popping it free from its snug little spot on the logic board.
– Now, go ahead and remove the cover.
– When it’s time to put it all back together, line up those hooks with their homes on the logic board. Then, just press the cover down and slide it to the right to lock everything back into place.
Tools Used

Step 23


– Grab your trusty spudger and gently lift up the battery press connector to disconnect it. Easy peasy!
– When it’s time to put everything back together, make sure to position the connector just right over its socket. Use your fingertip or the flat end of your spudger to press down lightly—start on one side, then shift to the other—until you hear that satisfying click. No need to muscle it in; if it’s being stubborn, just adjust and give it another go. You’ve got this!
Tools Used

Step 24


– Grab your trusty spudger and gently lift up the wireless charging coil press connector to disconnect it. You’re doing great!
Tools Used
Step 25

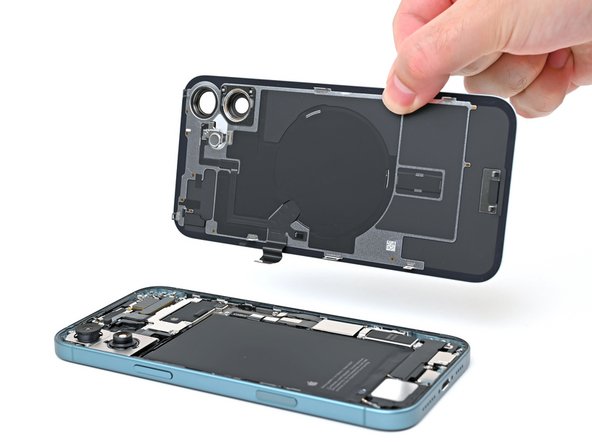
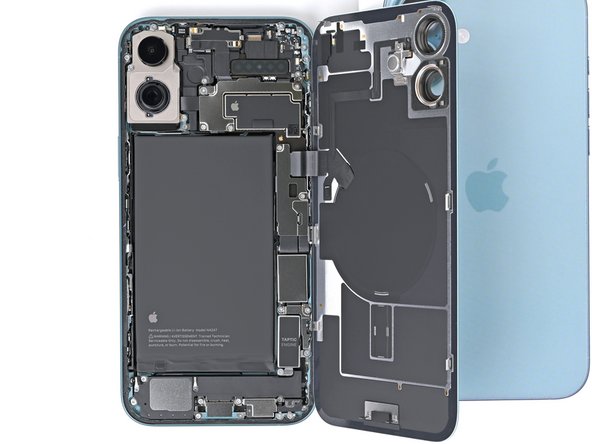
– Carefully pry the back glass off the frame and set it aside – you’re one step closer to a fixed phone!
– During reassembly, take a moment to test your handiwork. Reattach the battery and back glass temporarily (don’t worry about the adhesive just yet), power on your phone, and make sure everything is working as it should. Then, power it back down, disconnect the battery, and keep moving forward.
– Use our handy guide on reapplying adhesive and installing your back glass to finish the job. If you need help, you can always schedule a repair.
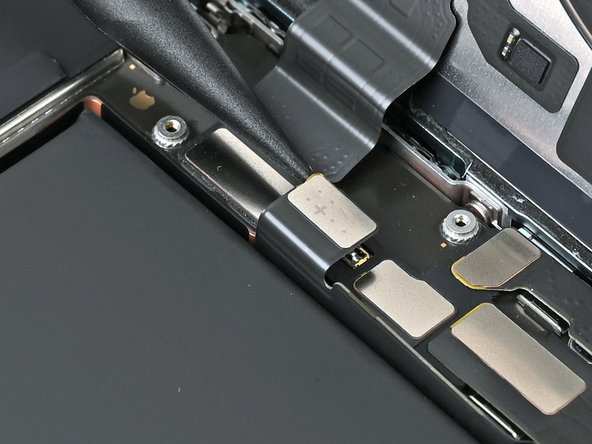
Step 26


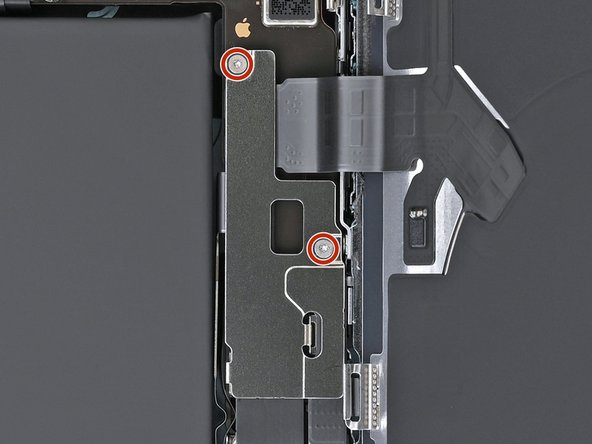
– Pop off those four screws holding the upper connector cover in place:
– Two 1.4 mm-long Phillips screws
– One 3.5 mm-long Phillips screw
– One 1.0 mm-long tri-point Y000 screw
Step 27


– Grab your tweezers or use your fingers to pop off that upper connector cover.
Tools Used
Step 28

– Grab your trusty spudger and gently pry up the 5G mmWave antenna press connector to disconnect it. You’ve got this!
Tools Used
Step 29

For a little extra traction, feel free to twist the adhesive around the tweezers’ tip while you gently pull. It’s a neat little trick to keep things steady!
– Grab that stretch-release adhesive pull-tab with your trusty tweezers—it’s hanging out on the right edge of the 5G mmWave antenna, just waiting for you!
– Now, gently pull the stretch-release adhesive strip out at a low angle. Take your time; let it stretch and un-stick from under the antenna. Patience is key here!
– If the adhesive strip decides to break free, no worries! Just retrieve the rogue piece with your tweezers and keep on pulling. You’ve got this!
Tools Used
Step 30


– Carefully lift the 5G mmWave antenna away from the earpiece speaker and take it out.
Step 31

If your new part doesn’t come with adhesive, grab a 4 mm x 16 mm strip of thin, double-sided tape to keep that antenna snugly attached to the earpiece speaker. You’ve got this!
– While putting things back together:
– Gently peel off the old adhesive from the top of the earpiece speaker and back of the antenna using tweezers or your fingers.
– Carefully slide the new antenna underneath the front camera cables and make sure its cable sits in the channel above the logic board.
– Connect the antenna press connector and press the antenna onto the earpiece speaker to stick it in place.
Tools Used
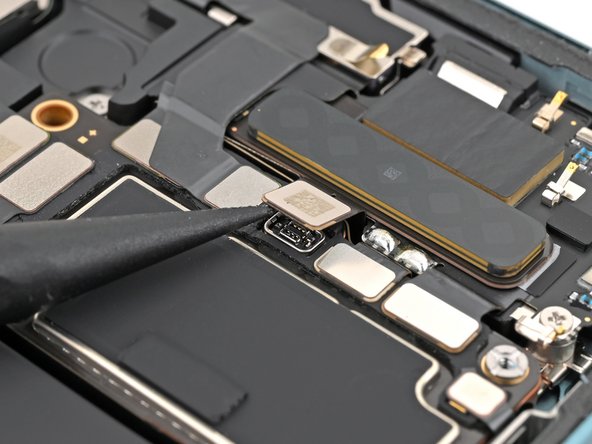
Step 32

– Grab your trusty spudger and gently wiggle it to lift and disconnect the earpiece speaker press connector. You’ve got this!
Tools Used
Step 33

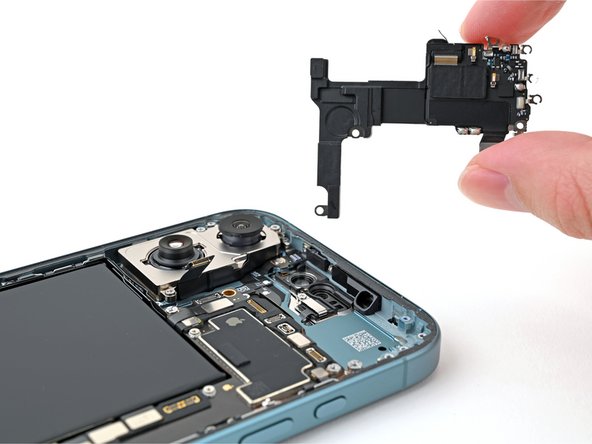
– Grab your trusty Phillips screwdriver and let’s get those seven screws out of the way to free the earpiece speaker! Here’s the scoop on what you’ll need:
– One 2.1 mm-long screw,
– One 2.0 mm-long screw,
– Two 1.7 mm-long screws,
– Three 1.35 mm-long screws.
Step 34

The second press connector is chillin’ right under the first one.
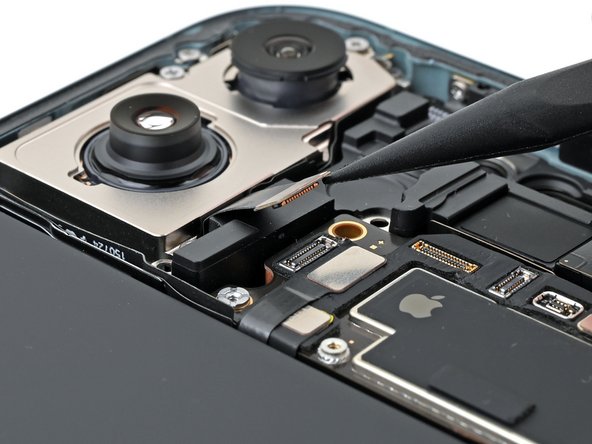
– Take the sharp end of a spudger to carefully pop up and disconnect the two front camera connectors. Easy peasy! If you need help, you can always schedule a repair.
Tools Used
Step 35


Handle with care! The spring contacts on the back of the camera assembly are delicate little things. Give them the respect they deserve!
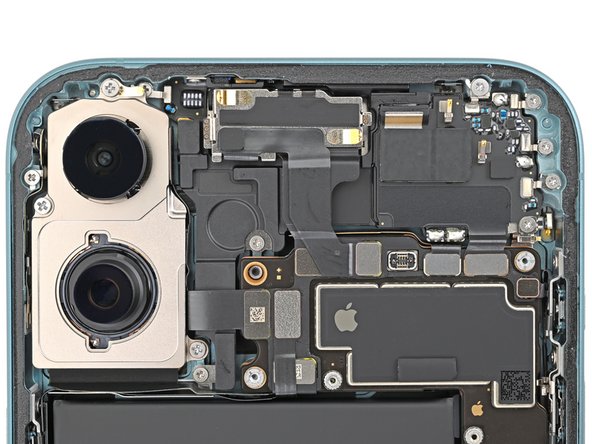
– Go ahead and take out the front camera assembly. You’ve got this!
Step 36

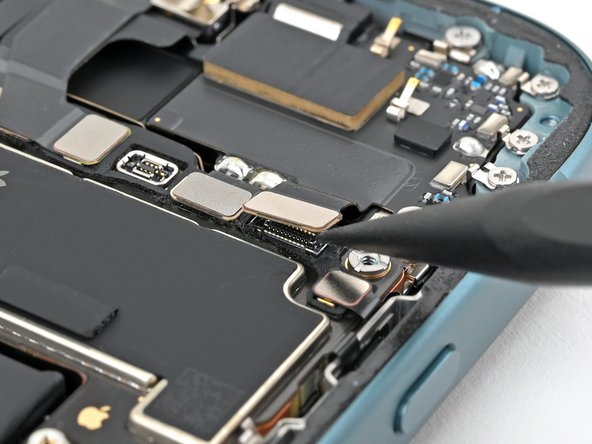
– Gently use the tip of a spudger to pop up and disconnect the rear camera press connector, located on the left side of the logic board.
Tools Used
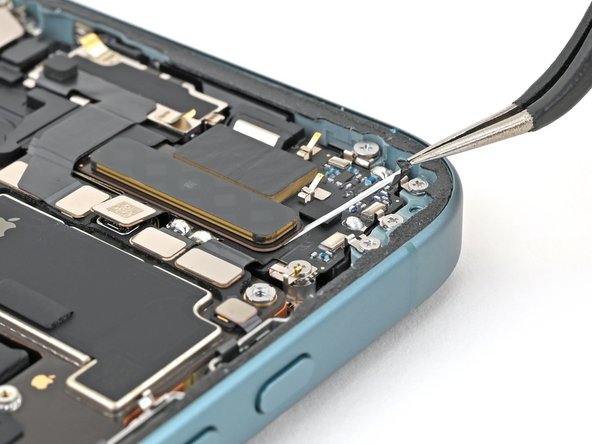
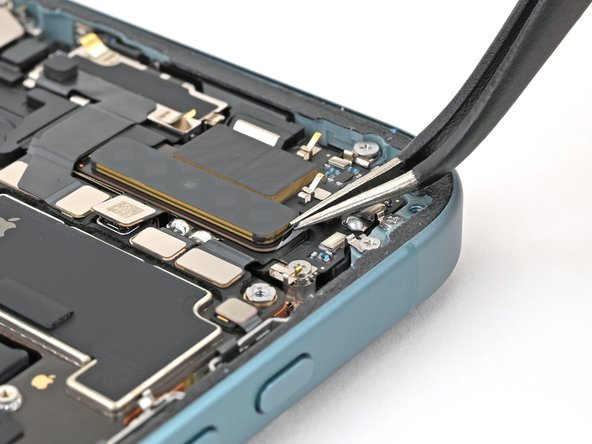
Step 37

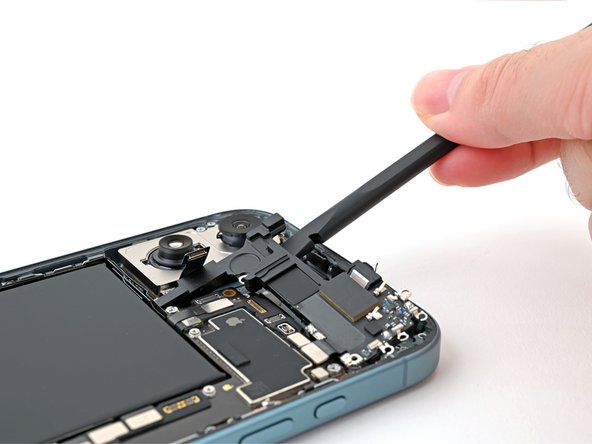
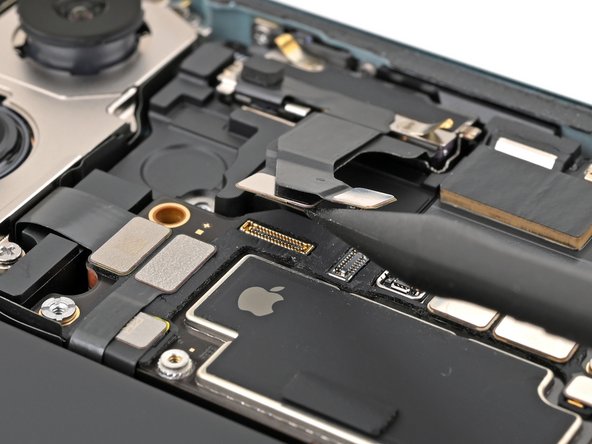
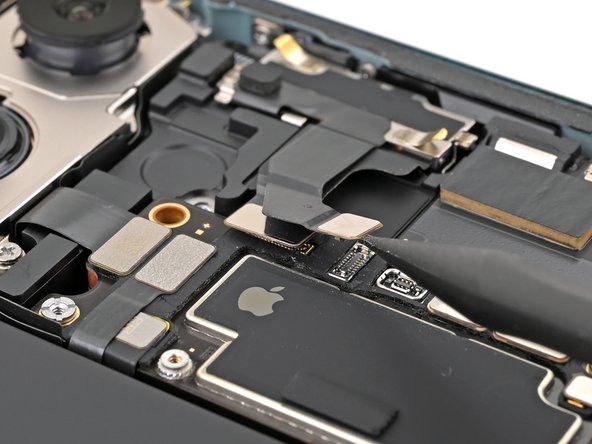
– Slide the flat end of your trusty spudger under the top edge of the earpiece speaker, right by the front camera cutout. You got this!
– Gently pry up the earpiece speaker to pop it away from its snug little square home in the top edge of the frame.
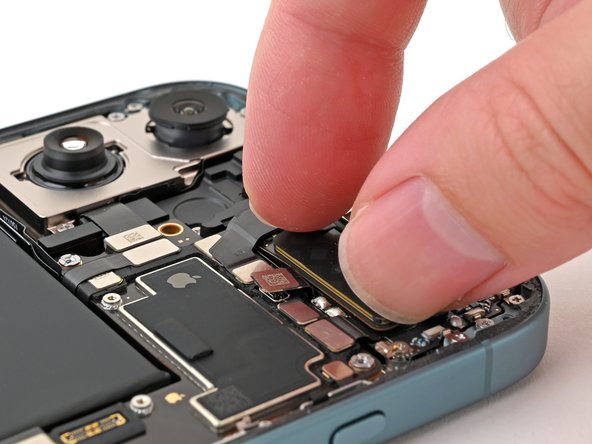
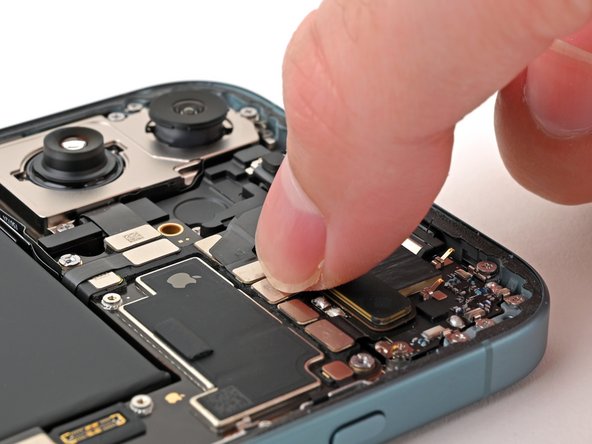
– Carefully lift out the earpiece speaker and give it a little wave goodbye.
– When it’s time to put everything back together, angle the top edge of the earpiece speaker into its cutout and then press it down flat against the frame. Easy peasy!
Tools Used
