DIY Guide to Replace iPhone 5s Lightning Connector
Duration: 60 min.
Steps: 20 Steps
In this guide, we’ll walk you through the process of swapping out your iPhone 5s’ faulty Lightning connector all by yourself! If your computer is playing hard to get and won’t recognize your iPhone, or if your phone refuses to charge, it’s time for a little DIY magic. You might also want to tackle this repair if your headphone jack is feeling a bit loose or if your headset’s remote control is on strike. And let’s not forget, if your friends are having a tough time hearing you on calls because your microphone is acting up, it’s definitely time to replace that Lightning connector. Let’s get started!
Step 1
– Grab your trusty pentalobe screwdriver to crack open that iPhone 5s lid!
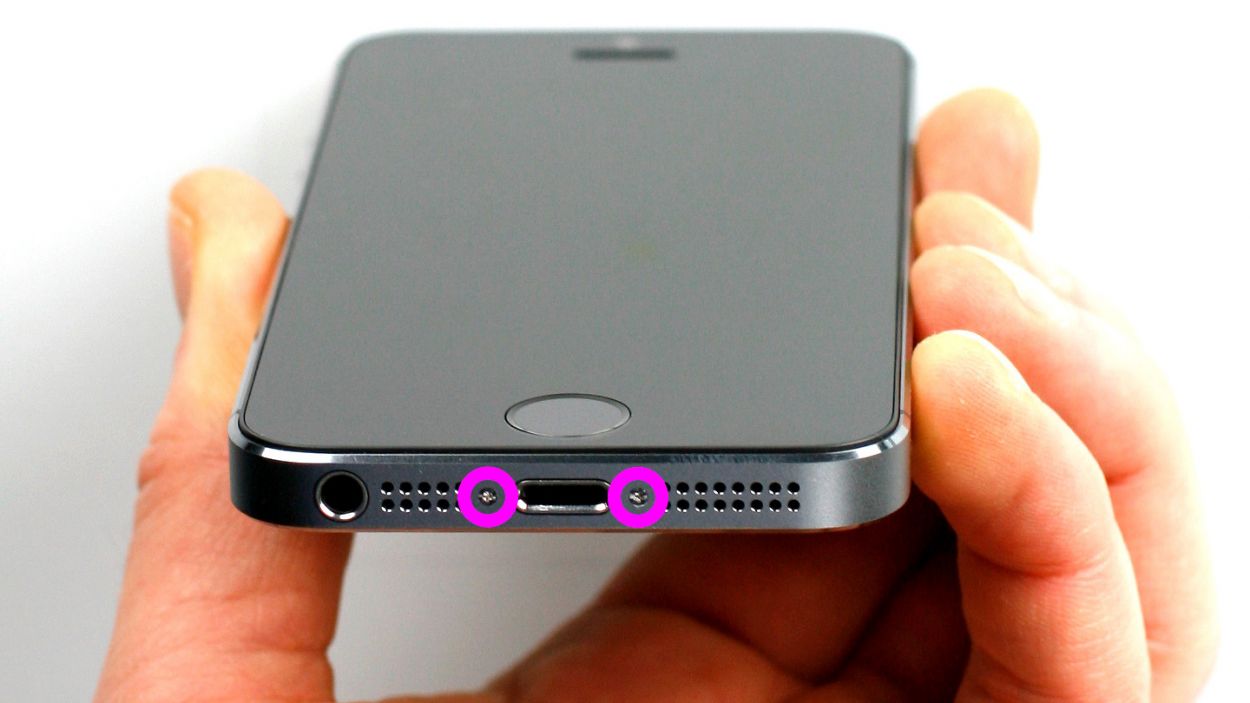
– Time to tackle those two pentalobe screws at the bottom, one on the right and one on the left of the Lightning connector. Don’t forget to stash them away safely in your organizer tray for later—2 x 4.0 mm pentalobe screws are waiting for their moment!
Step 2


Hey there, keep that display lift under two centimeters! If you go too high, you might accidentally turn the Home button cable into a torn piece of confetti.
– Place your iPhone 5s on a soft, clean surface to keep that back looking pristine!
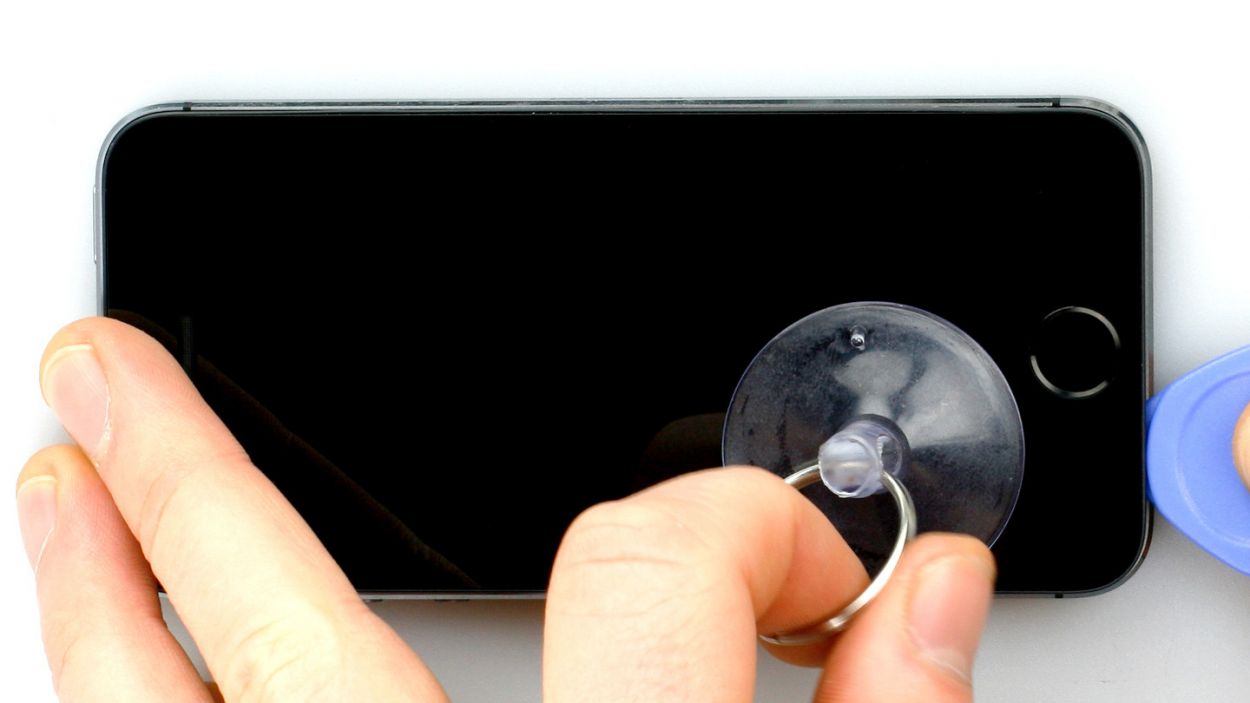
– To lift the front panel, grab a suction cup and a hard plastic pick. If your screen is sporting some serious cracks, cover it up with packing tape to keep things tidy.
– Position the suction cup over the Home button (if you can) or right next to it (check out figure 1). While you gently pull up on the screen with the suction cup, slide the hard plastic pick between the aluminum frame and the display frame, pressing down on the aluminum frame. Use the pick to help lift the screen (see figure 2). It might take a few tries, but you’ve got this!
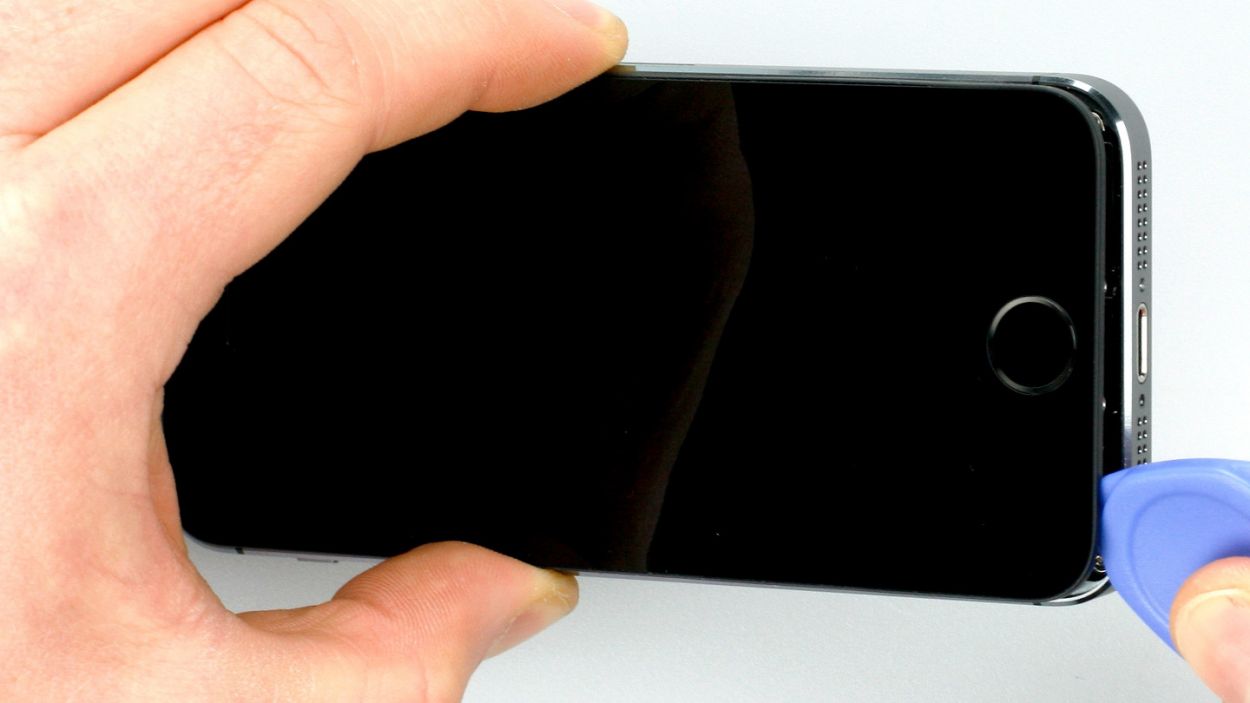
– Once you’ve managed to lift the screen a few millimeters (see figure 3), carefully work your way around the edges until it’s loosened on both sides (see figure 4).
Step 3

– Get ready to jazz it up by removing the snazzy silver cover over the Home button connector. Just slide the spudger below the cover and lift it out with flair (check out figure 1).
– Now it’s time to disconnect the contact from the connector. Get groovy and gently pull it off using the laboratory spatula or spudger.
– Once the cable is disconnected, you’re all set to lift the display at the Home button. Remember, the LCD/touchscreen cables are still partying with the logic board (see next step). Let’s keep the tech groove going!
Step 4
– Time to ditch those boring old Phillips screws from the silver cover (see figure 1). Chuck the screws in the same compartment of your organizer tray. Lift that cover like a boss to remove it.1 x 1.7 mm Phillips screws (not magnetic)2 x 1.2 mm Phillips screws1 x 1.7 mm Phillips screw
– Get ready to disco with those three connectors (see figure 2). Be super careful. Slide the pointed tip of the spudger just below the contact and lift it up. Get ready to groove with the Touchscreen, LCD, Front camera/sensor/earpiece/ambient microphone
Step 5
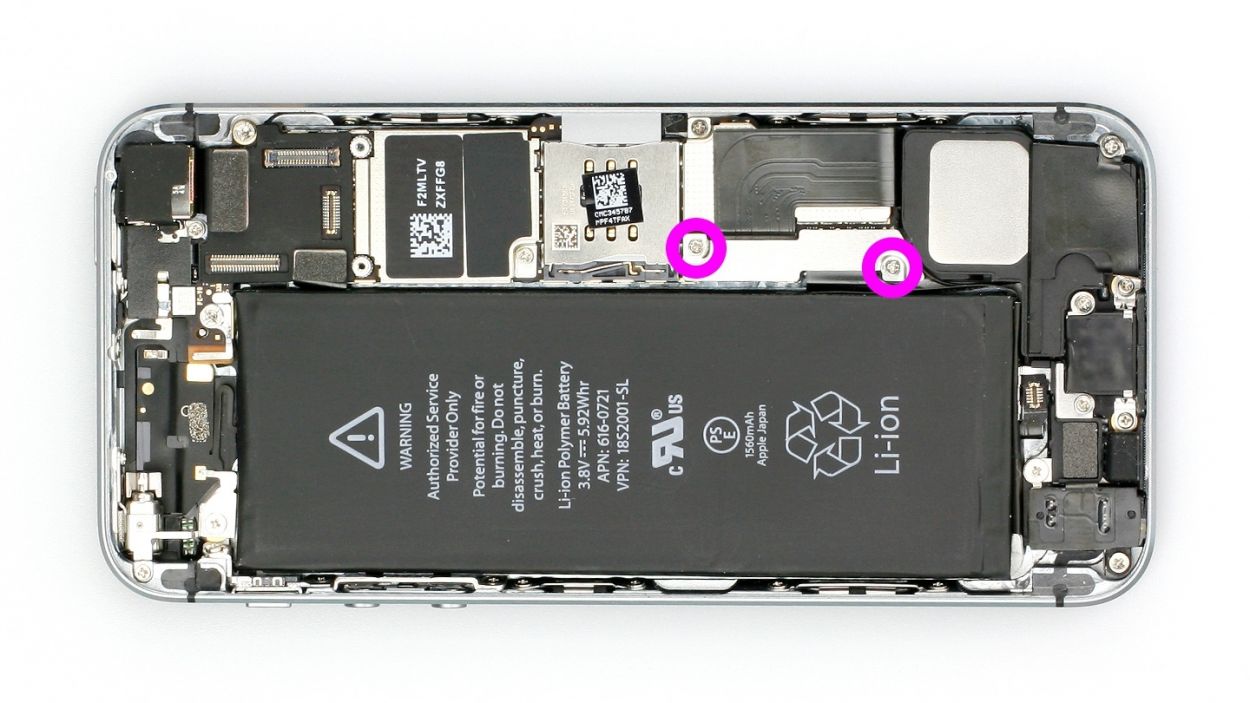

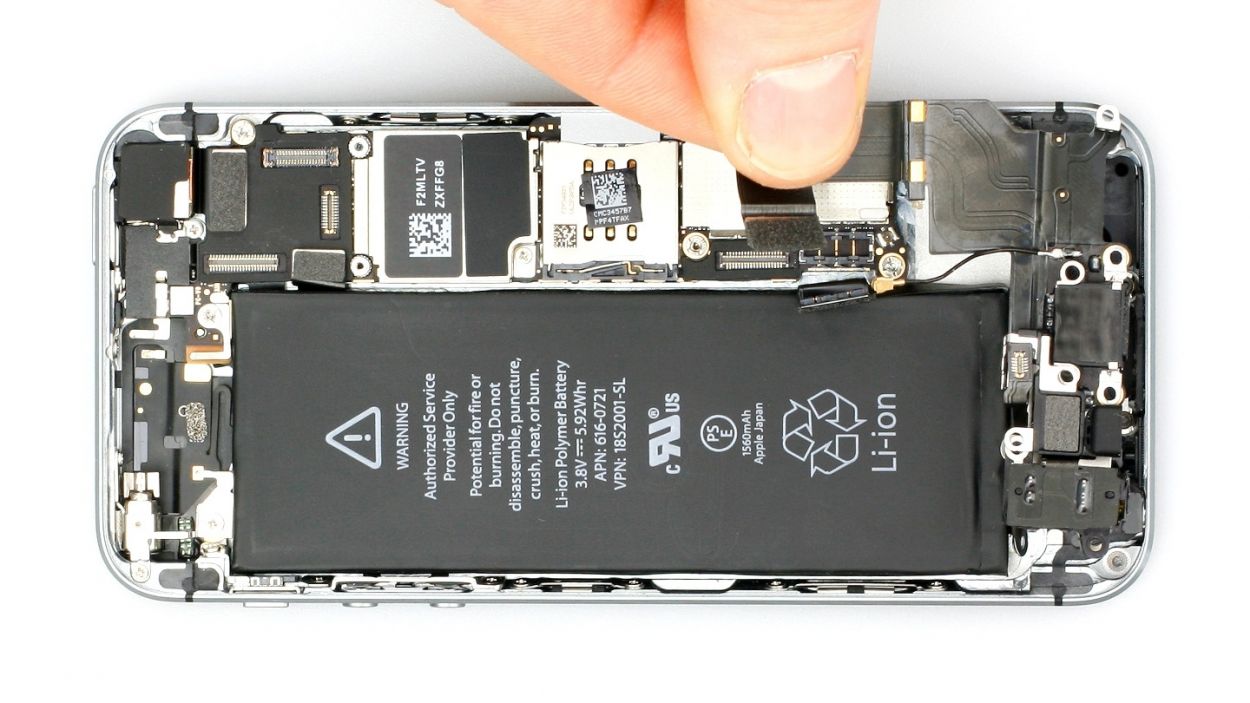
– Grab your Phillips screwdriver and get ready to tackle those pesky screws on the battery connector (check out figure 1 for a visual!). Once you’ve got those out, use your trusty spudger to gently lift the cover (see figure 2). And hey, don’t forget to toss all those little parts into the same compartment of your organizer tray—let’s keep things tidy! You’ll be dealing with 2 x 1.6 mm Phillips screws here.
– Now, let’s carefully lift that battery connector! Just slide the pointed tip of your spudger right below the connector (see figure 3). If you’re in a pinch and don’t have a spudger handy, your fingernail can do the trick too!
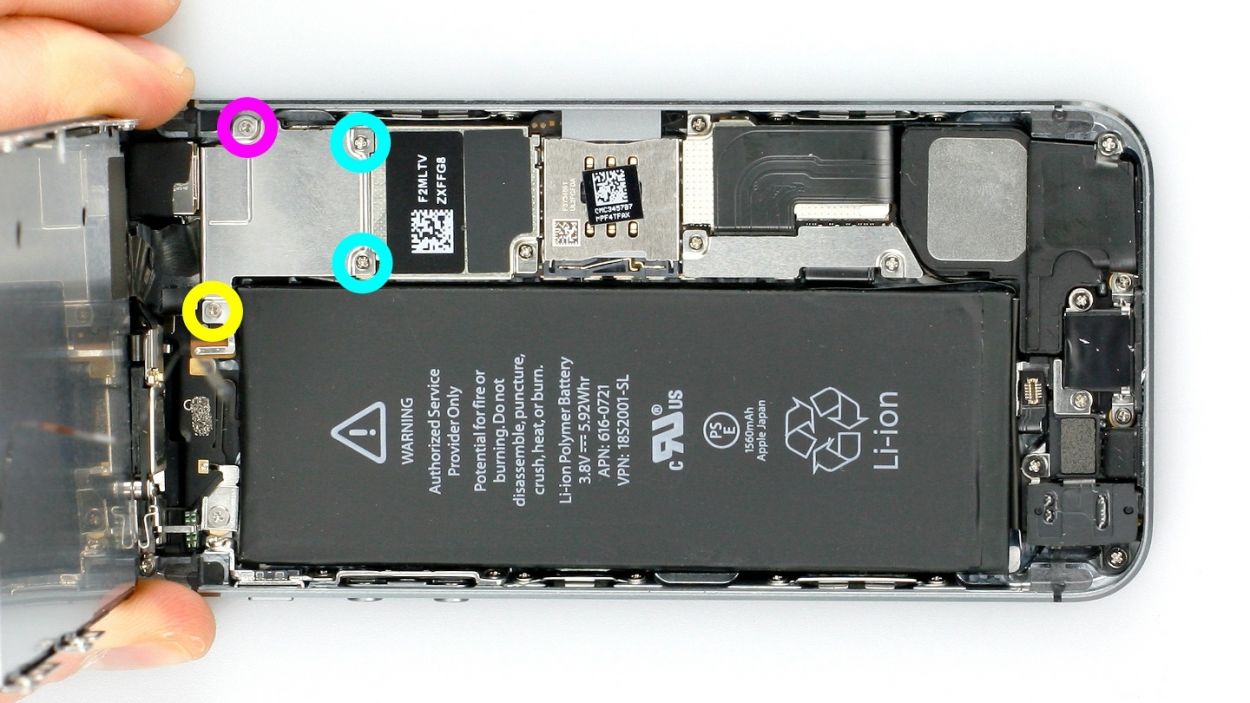
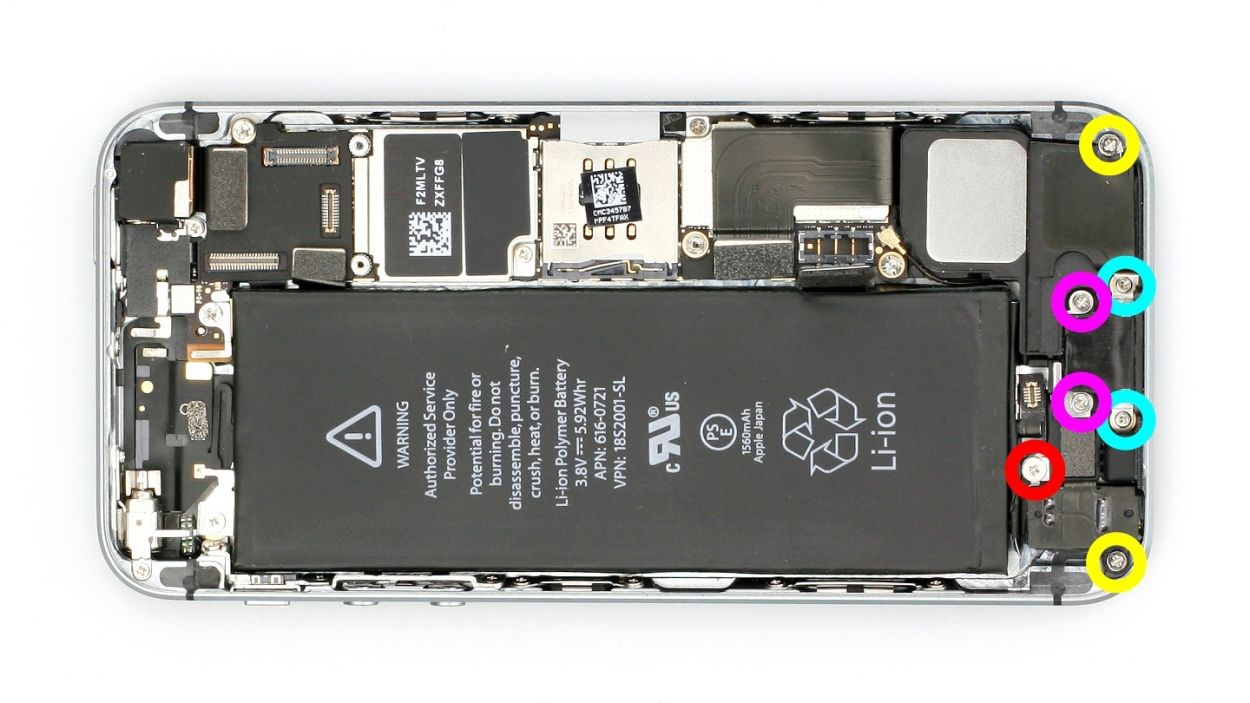
Step 6

– It’s time to remove those seven Phillips screws like a pro! Make sure to toss each screw into separate compartments of your organizer tray so you know exactly where they are when you’re ready to put everything back together. Here’s what you’re dealing with: 1 x 3.0 mm Phillips screw (smooth head), 2 x 3.5 mm Phillips screws, 2 x 1.3 mm Phillips screws, and 2 x 2.9 mm Phillips screws. Happy unscrewing!
Step 7
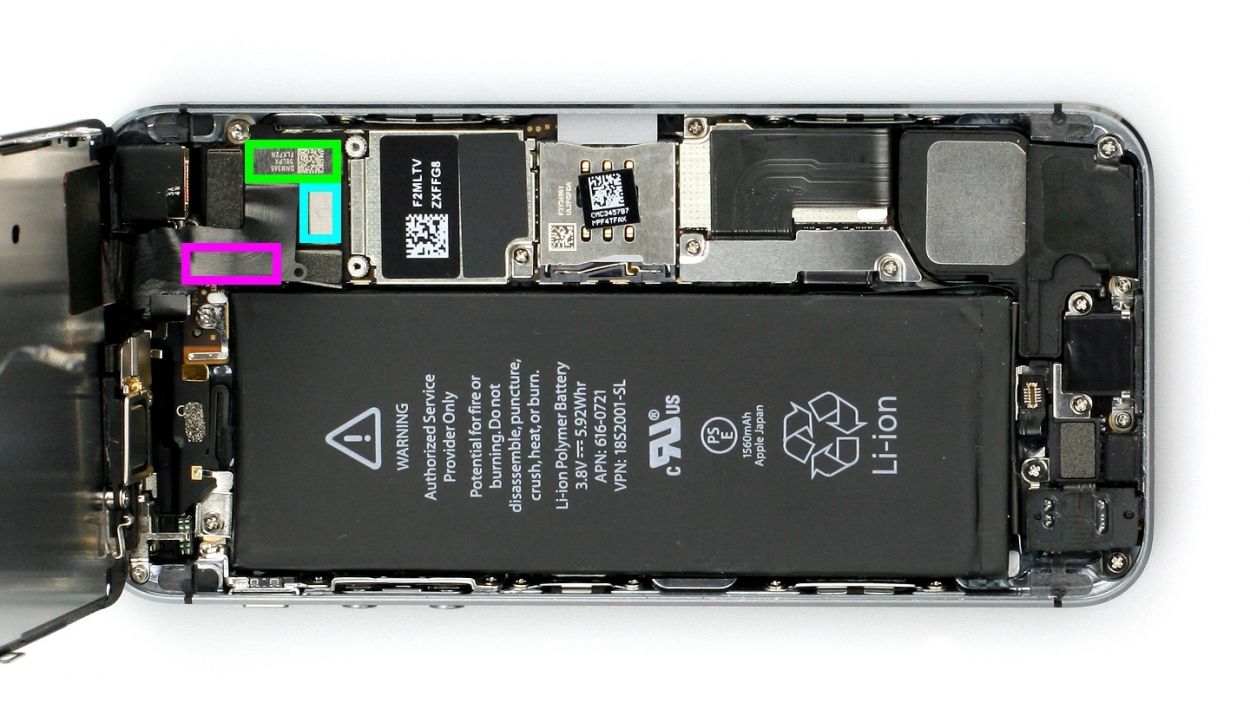
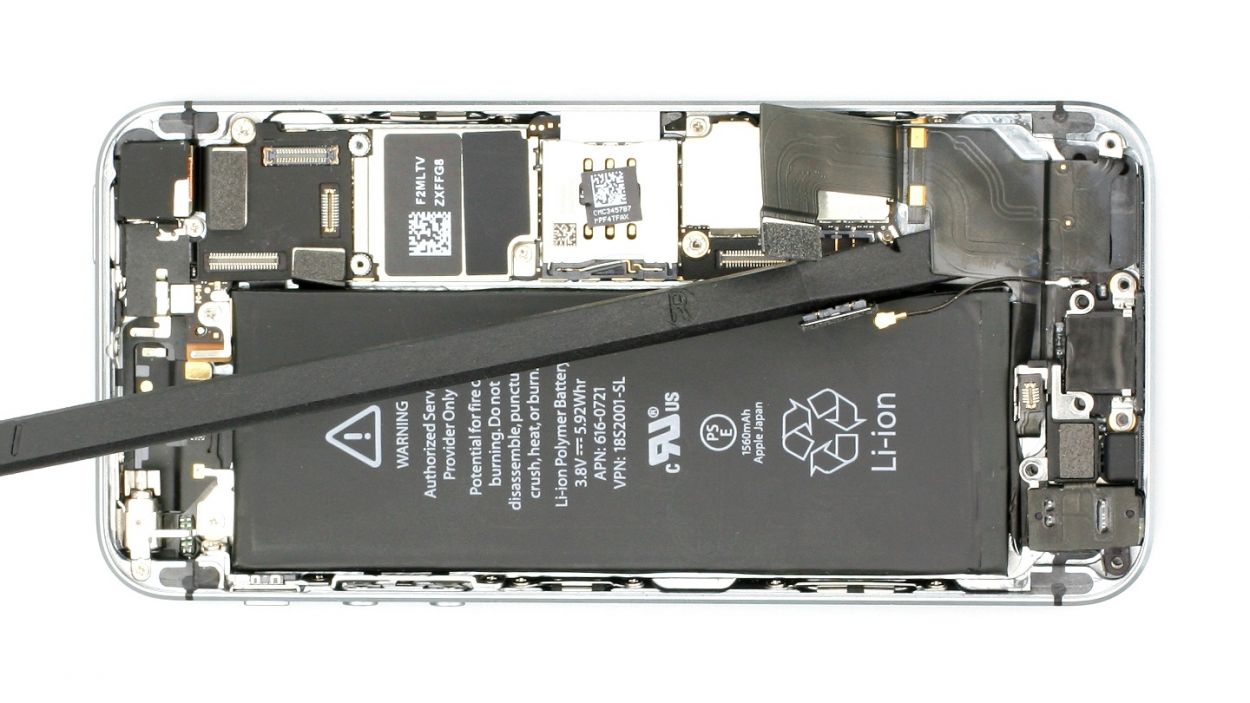
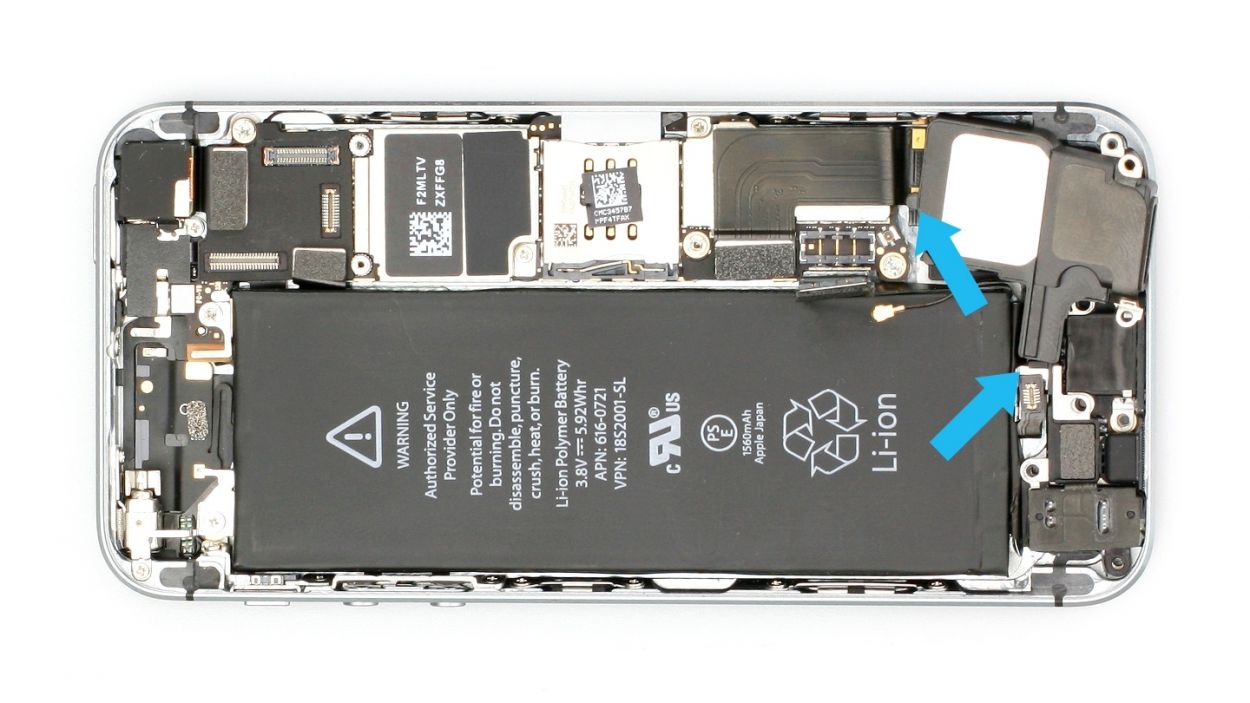
– Gently pry off the antenna cable with your trusty laboratory spatula. You’ve got this!
Step 8


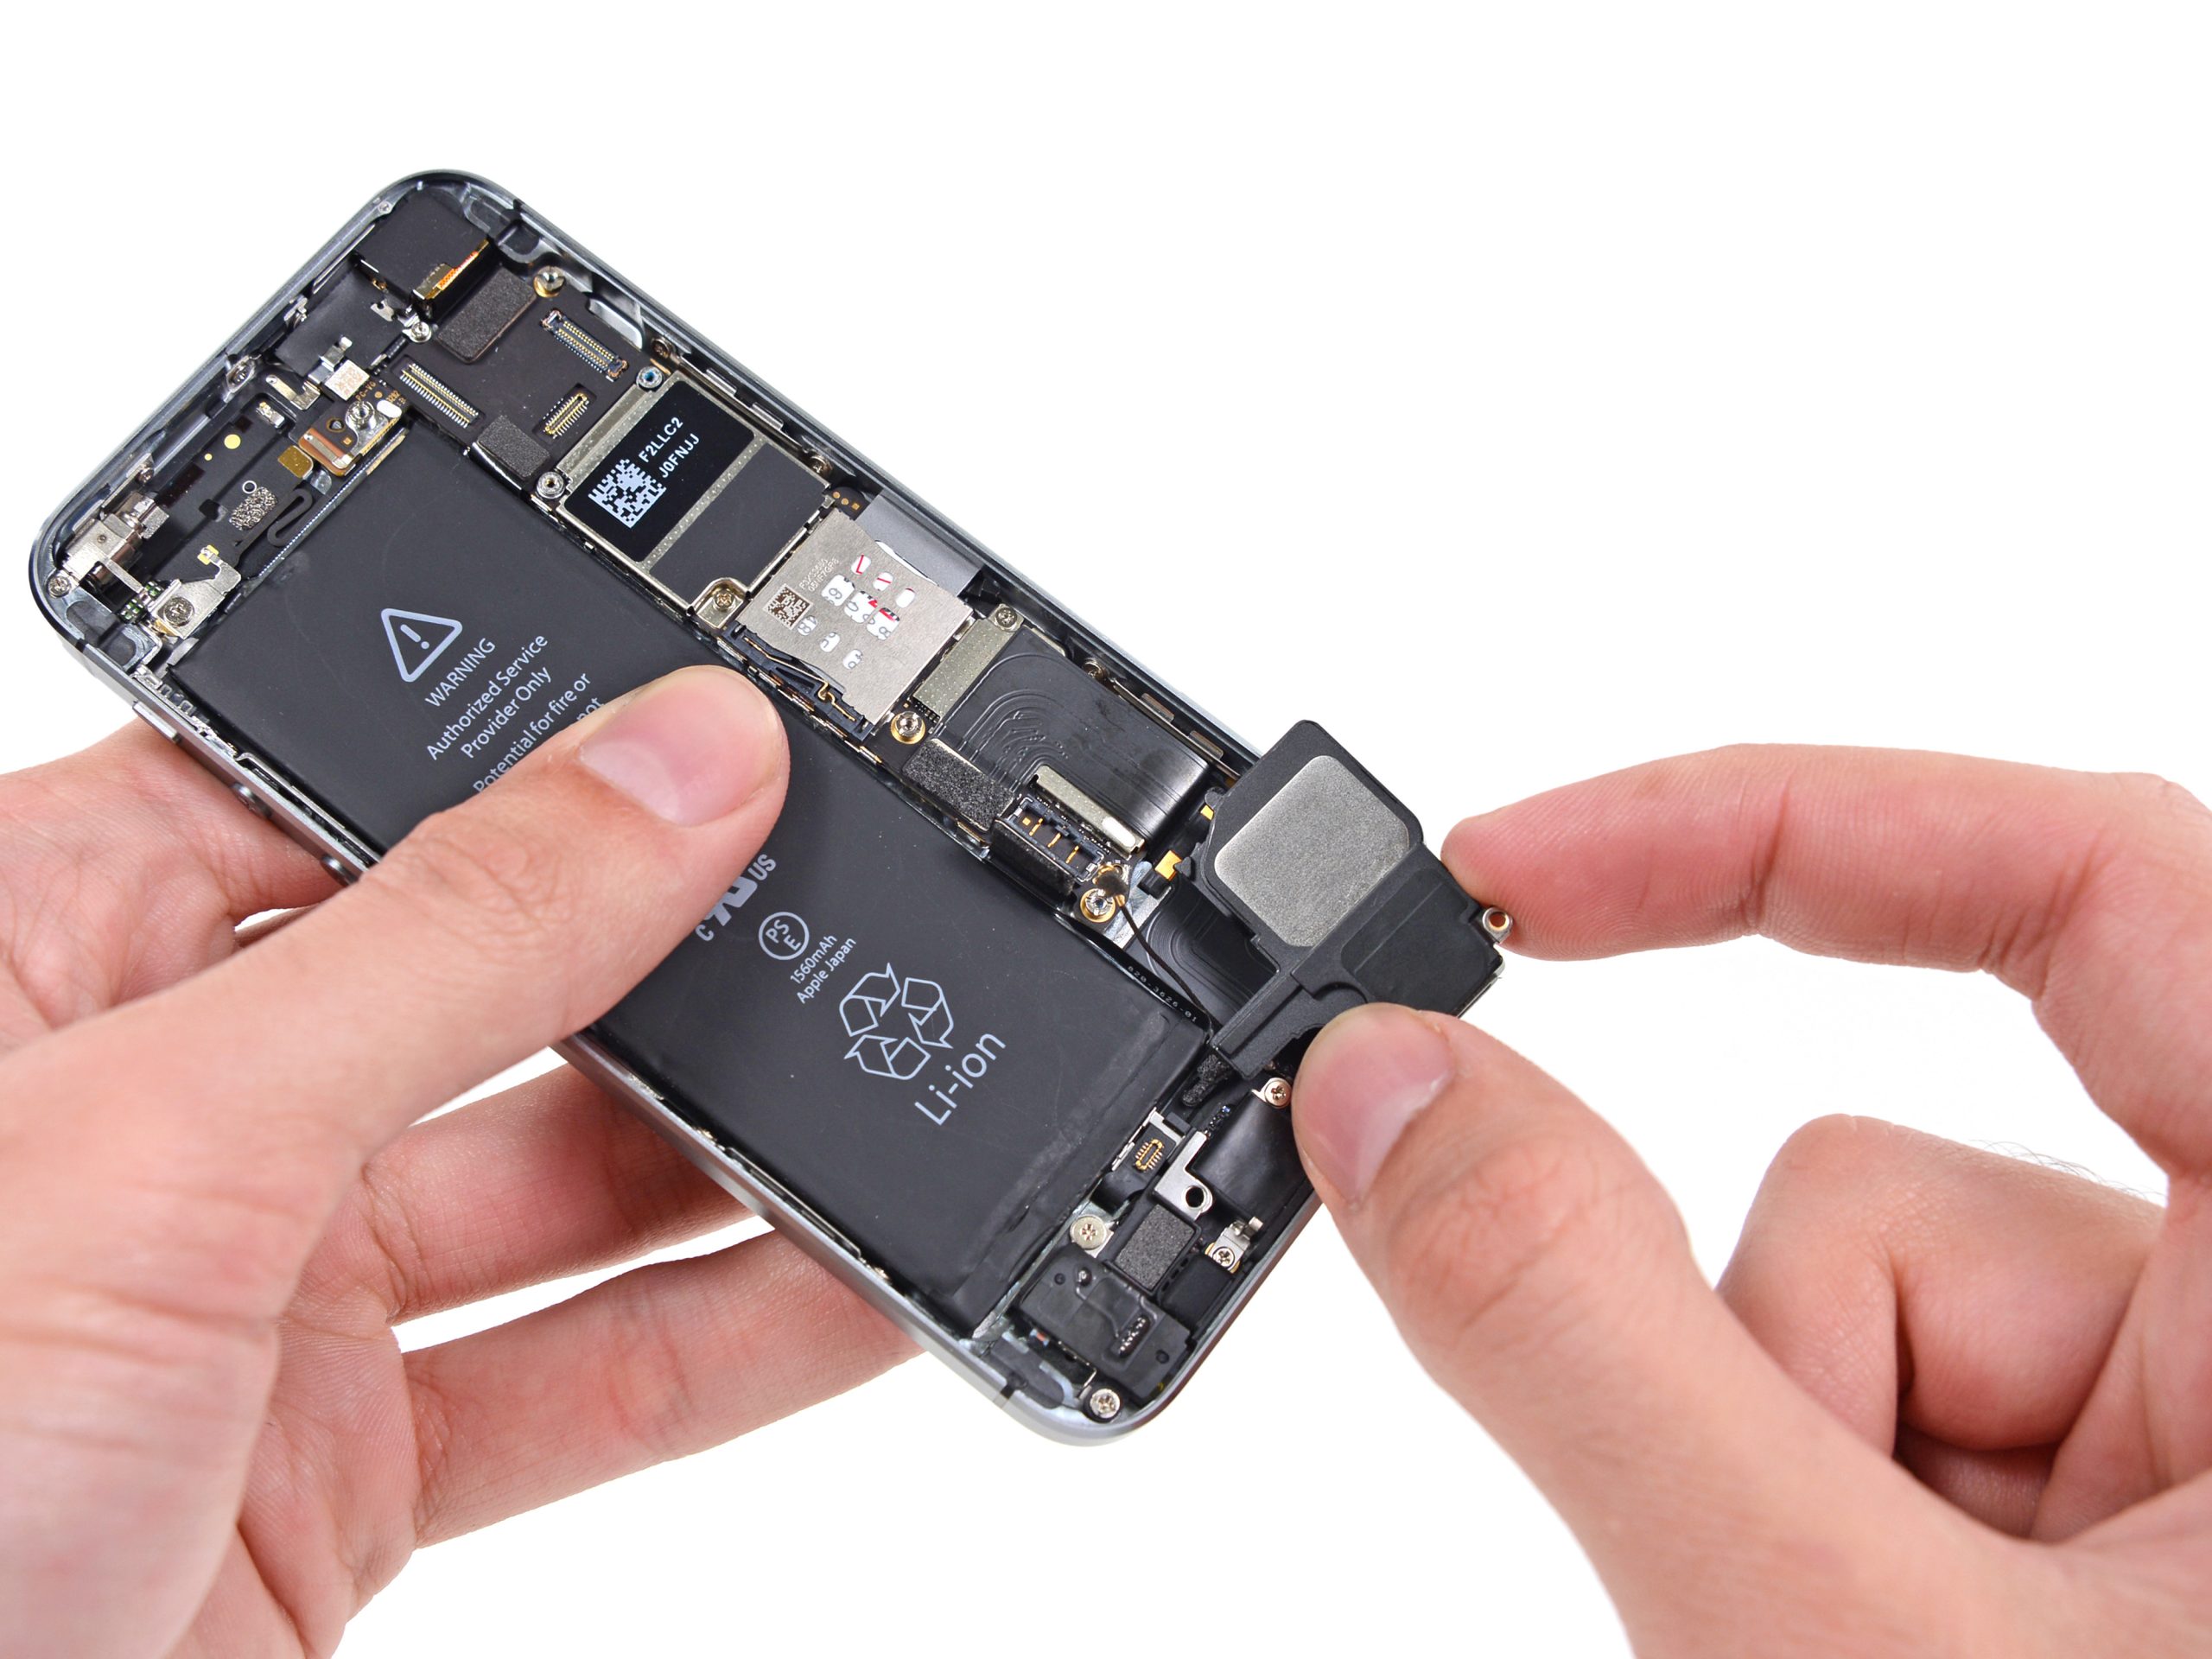
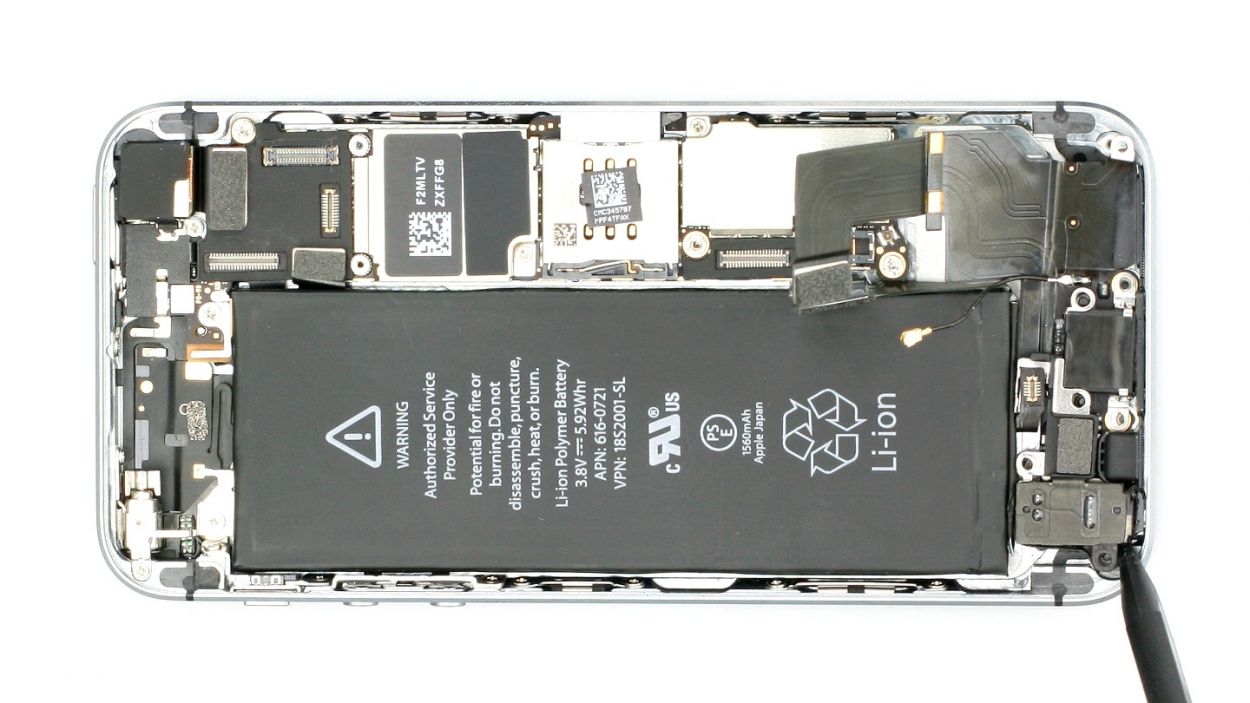
– Lift that speaker up, just like it’s shown in figure 1!
– You’ll notice a little bit of the speaker is hiding under the logic board. Just give it a gentle twist to one side to free it (check out figure 2).
– Now, simply take it out by hand and you’re golden!
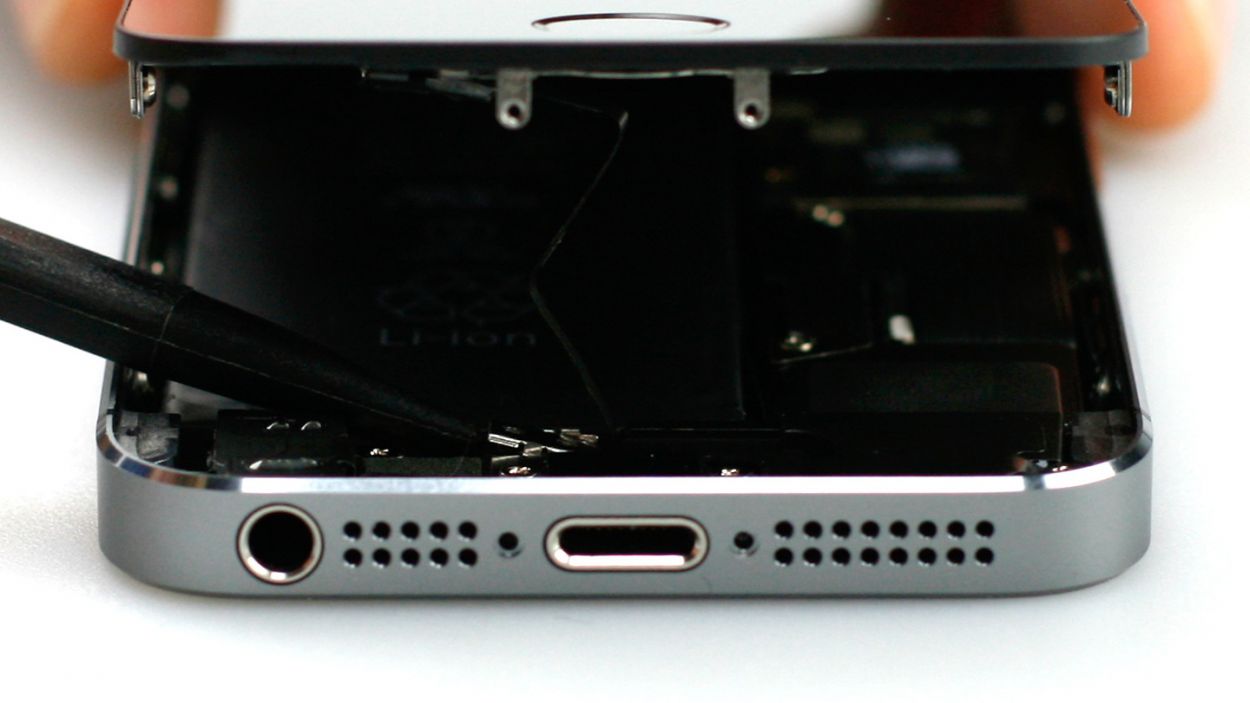
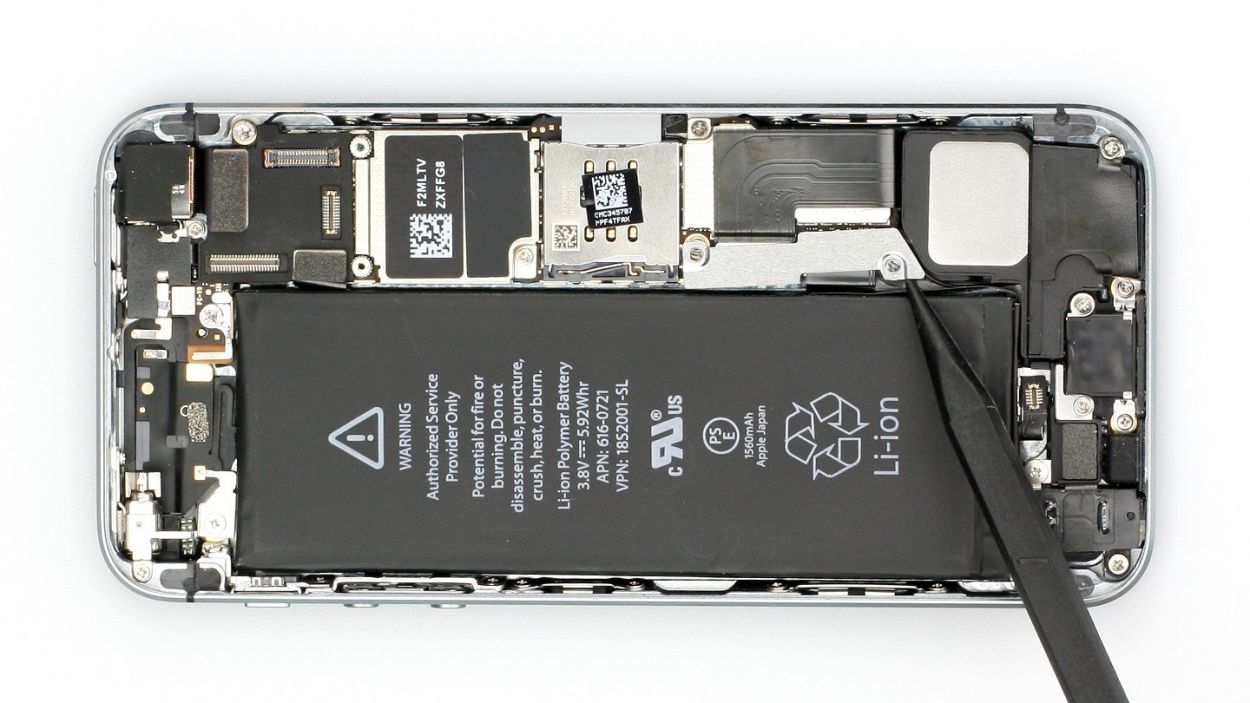
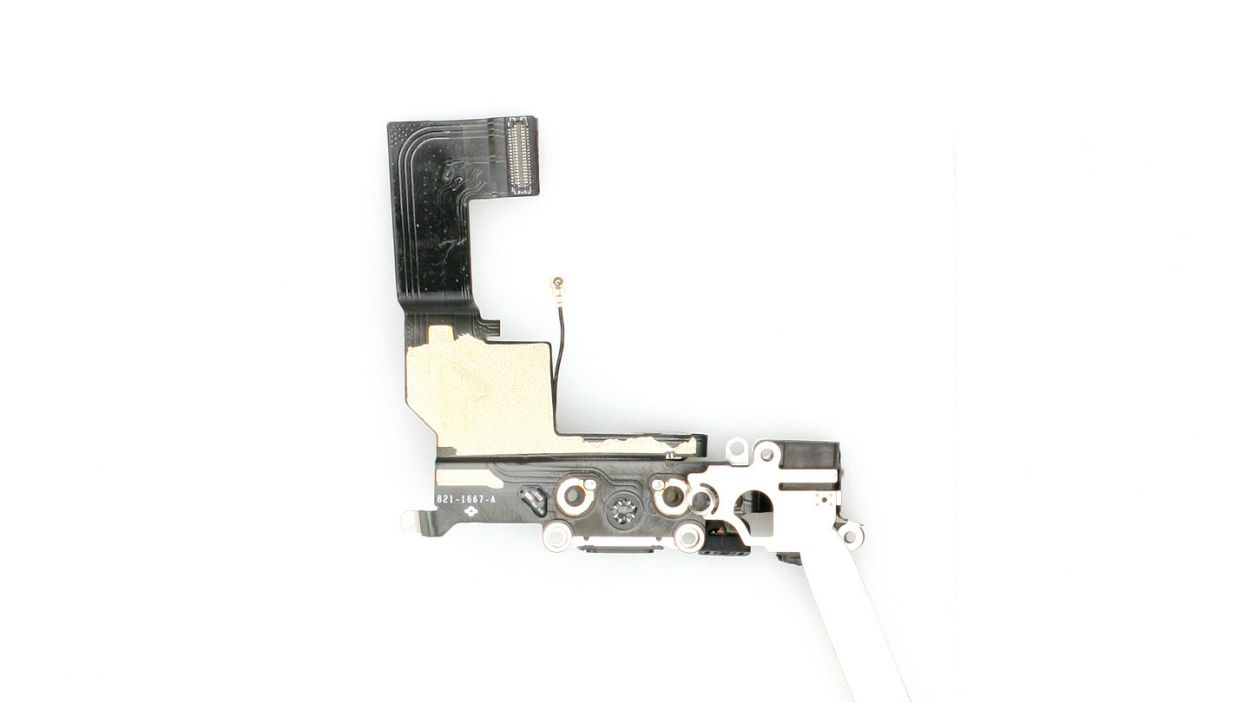
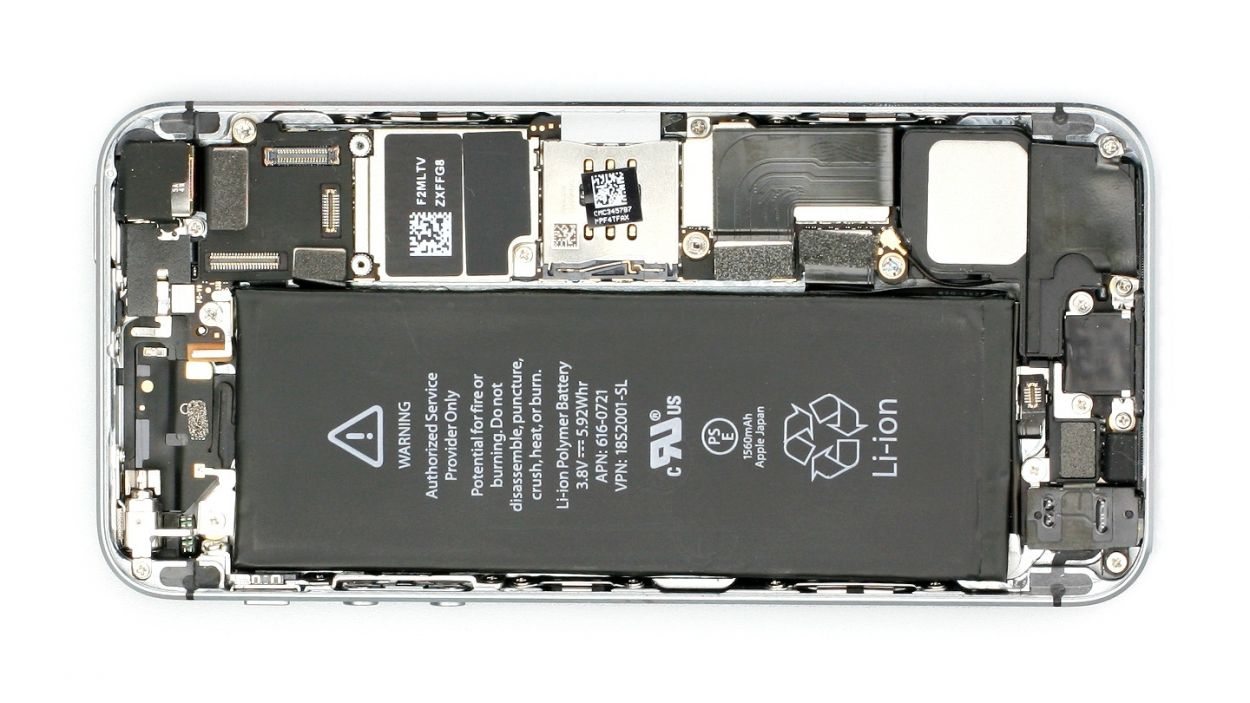
Step 9
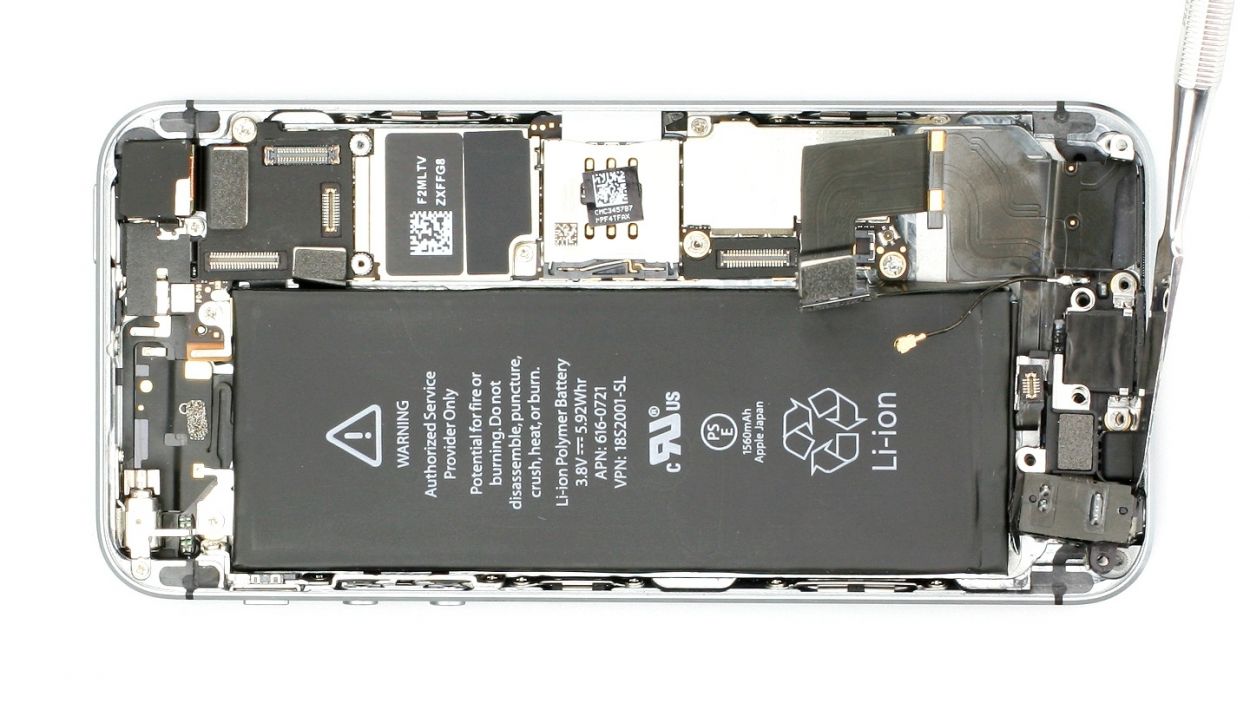
– Time to disco with the Lightning connector’s ribbon cable! Slide that spudger under like a smooth operator slightly below the contact, then lift it up with pizzazz. Finally, give that cable a gentle fold over like a pro.
Step 10
– Get ready to rock and roll by temporarily linking up the fresh Lightning connector.
– Next up, briefly hook up the battery and the display.
– Fire up your iPhone and make sure to test out the headphone jack (including the remote control of the headphones) and the microphone. Also, double-check if your PC gives your iPhone the recognition it deserves!
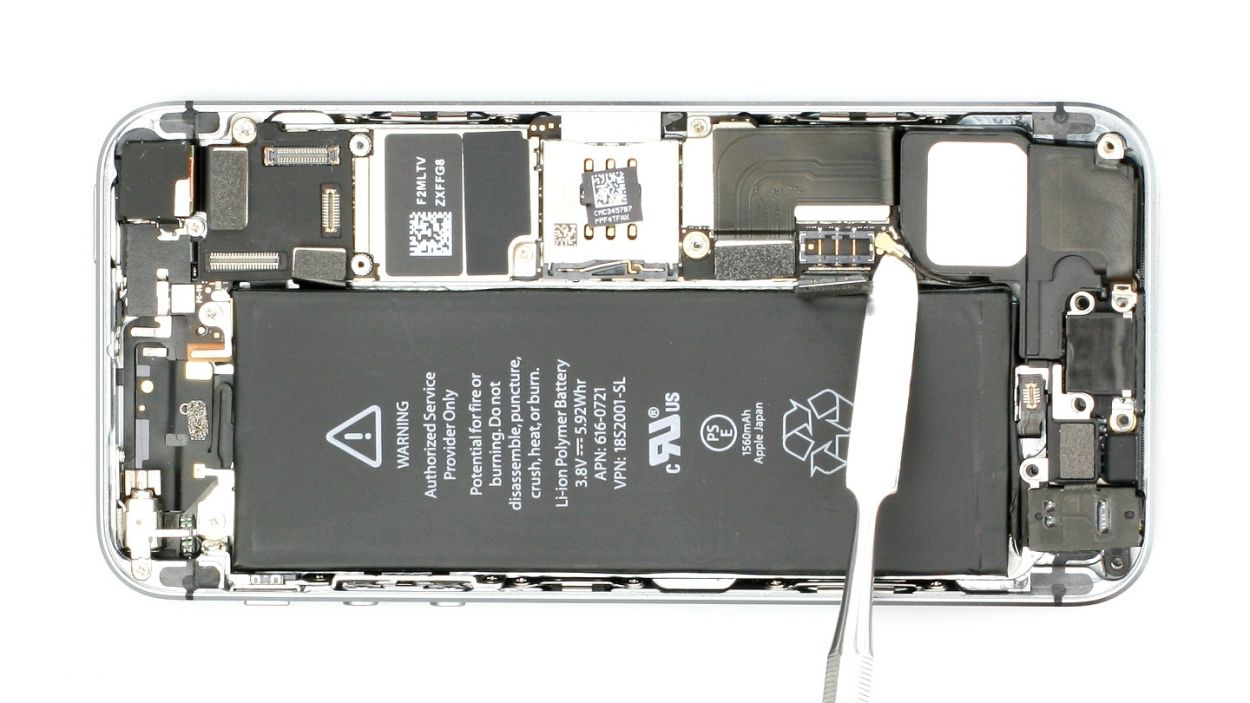
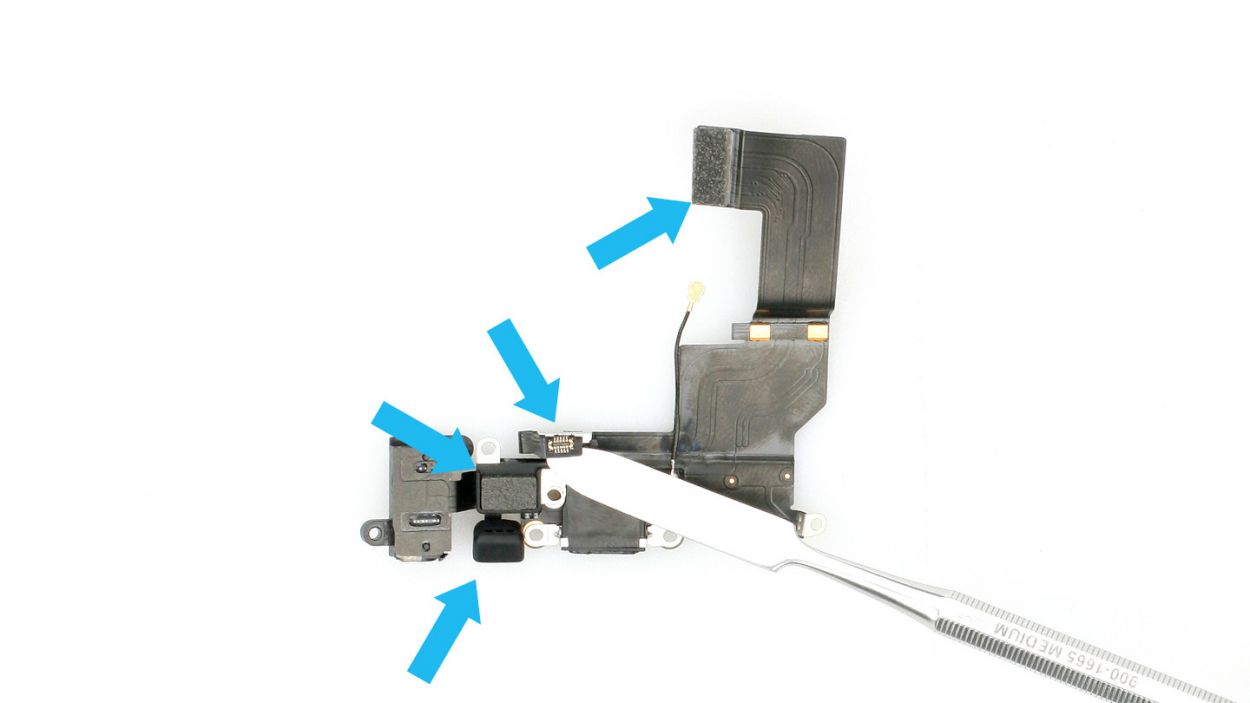
Step 11
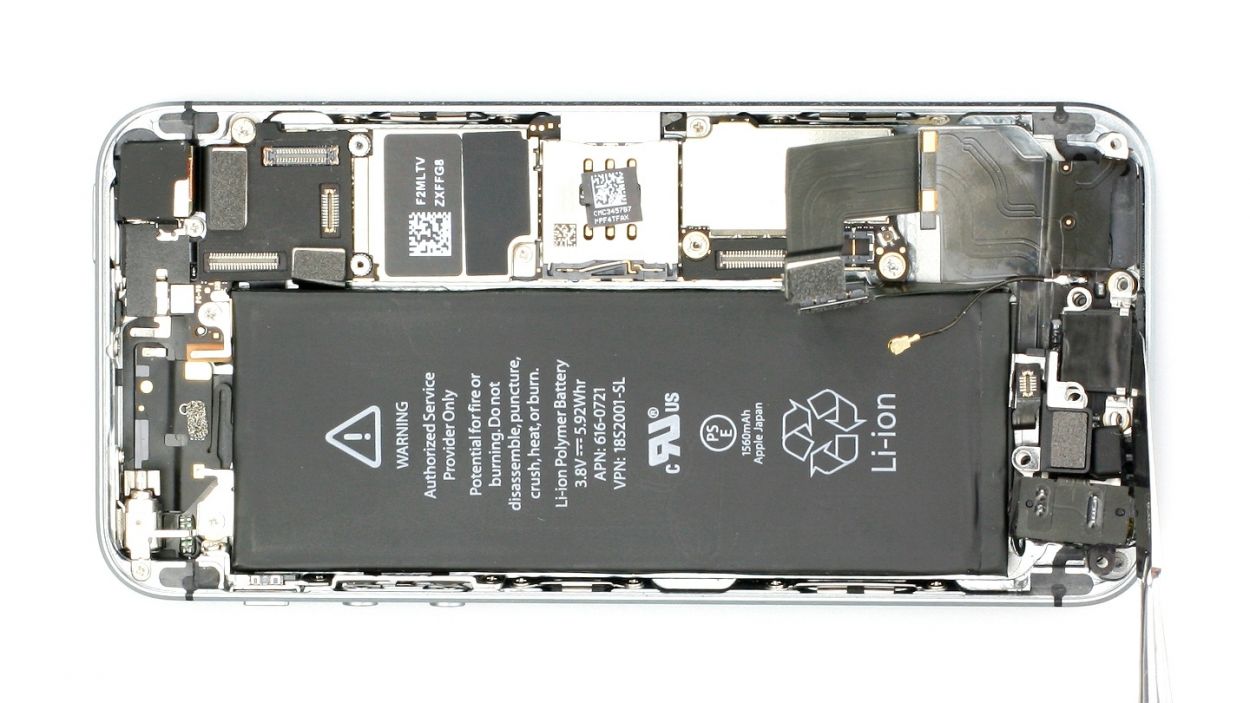

– Gently slide the cool laboratory spatula beneath the ribbon cable and smoothly detach it from its base. Remember, the cable is only stuck at the spot where the speaker used to hang out.
– Time to use the spatula or spudger to liberate the headphone jack (see figure 2), the microphone (see figure 3), and the Lightning connector (see figure 4) with style.
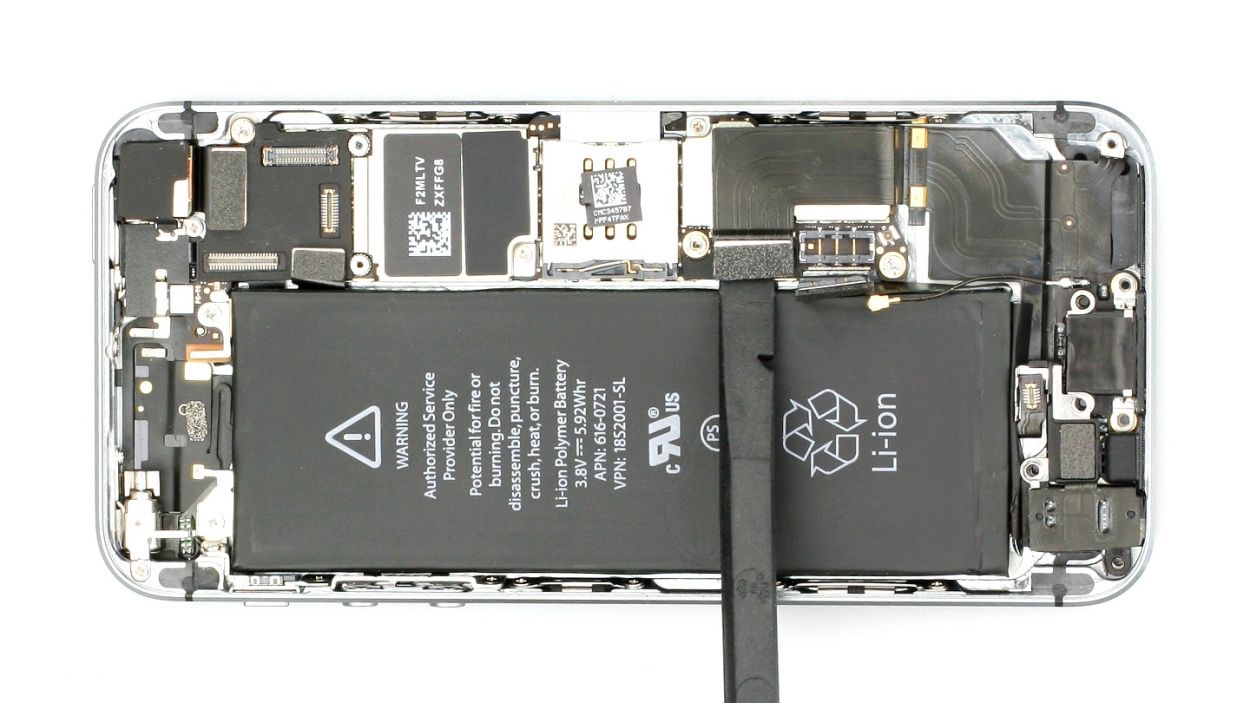
– Now, with a steady hand, delicately extract the ribbon cable using your fingers (see figure 5). You’ve got this!
Step 12
– Time to grab some cool stuff from the old connector! Make sure to snag the following items: the metallic frame for the audio port (check out figure 1), the metal frame for the Home button connector (figure 2), the microphone’s rubber seal, and that handy soft sticker!
– Metal frame for the audio port (see figure 1)
– Metal frame for the Home button connector (see figure 2)
– Microphone’s rubber seal
– Soft sticker
Step 13

– Time to jazz up the scene by slipping in that Lightning connector (check out figure 1).
– Gently nudge the microphone’s rubber seal’s nipple into the tiny black groove and make sure the Lightning connector and audio jack snugly fit against the frame (see figure 2). Now reconnect the ribbon cable with a touch of style!
Step 14

– Twist that speaker to its rightful side, just like it used to be! Don’t forget to check that it’s snugly seated (figure 1).
– Now, let’s get those Phillips screws back in action! Here’s your lineup: 1 x 3.0 mm Phillips screw (smooth head), 2 x 3.5 mm Phillips screws, 2 x 1.3 mm Phillips screws, and 2 x 2.9 mm Phillips screws (figure 2).
– Reconnect the antenna cable (figure 3) and the ribbon cable. You’ve got this!
Step 15

– It’s time to reattach that battery connector and give it the warm welcome it deserves (check out figure 1)!
– After that, let’s snugly cover it up and secure it in place with those charming little screws (see figure 2). You’ll need 2 x 1.6 mm Phillips screws for this final touch!
Step 16


If the connectors aren’t linked up just right, you might spot some funky stripes on the display, or parts of the touchscreen could throw a little tantrum and stop working.
– Reattach those connectors (check out figure 1). Sometimes, the touchscreen connector decides to take a little break when you’re connecting the LCD connector. Say hello to the Touchscreen, LCD, Front camera/sensor, earpiece, and ambient microphone!
– Ready to rock? Power up your iPhone right after those connectors are snugly in place. Test out the LCD, touchscreen, proximity sensor, front camera, and earpiece. If things aren’t clicking right, you might see some funky stripes on the display or have parts of the touchscreen throwing a little tantrum.
– Time to add some flair by putting on the cover and screwing it down (see figure 2). You’ll need 1 x 1.7 mm Phillips screw (not magnetic), 2 x 1.2 mm Phillips screws, and 1 x 1.7 mm Phillips screw (magnetic).
Step 17


– This step is a bit tricky. Grab your tweezers or spudger to line up the cable set’s connector, then use the spudger to gently press the connector into place (see figure 1).
– Once the connector is in place, cover it with the silver cover. Tweezers make it easier to position the cover (see figure 2). Use the spudger to press the cover on until it clicks into place (see figure 3).
Step 19

– Alright, it’s time to get those two pentalobe screws at the bottom of the enclosure all snugged in! Just grab your pentalobe screwdriver and give them a twist—2 x 4.0 mm pentalobe screws are ready to do their job!
Step 20

When you pop that battery out, your iPhone might just decide to throw a little tantrum and reset the clock to a totally random 1:00 a.m. on 1/1/1970! So, make sure to set the time right, or else connecting to the cellular network could turn into a wild goose chase.
– Link up your iPhone with iTunes or hop onto a WLAN network and chill for a bit until the time gets sorted.
– Pop out the SIM tray along with the SIM card, then slide it back in like a pro.
– Turn on airplane mode for a moment, then switch it off again. Easy peasy!