DIY Guide to Replace iPhone 6 Battery Step-by-Step
Duration: 30 min.
Steps: 15 Steps
Ready to give your iPhone 6 a little TLC? In just 30 minutes, you can swap out that tired battery all by yourself! If your battery isn’t holding a charge like it used to, or if your phone crashes during heavy use, it’s time for a change. Even if your iPhone won’t charge to 100% or refuses to turn on, this guide will help you get back in action. By tackling this repair yourself, you’re not just saving some cash, but you’re also doing your part for the planet! We’re here to guide you through each step with clear instructions and helpful illustrations. If you hit a snag or have any tips to share, feel free to drop a comment below. We’re excited to help you out!
Step 1
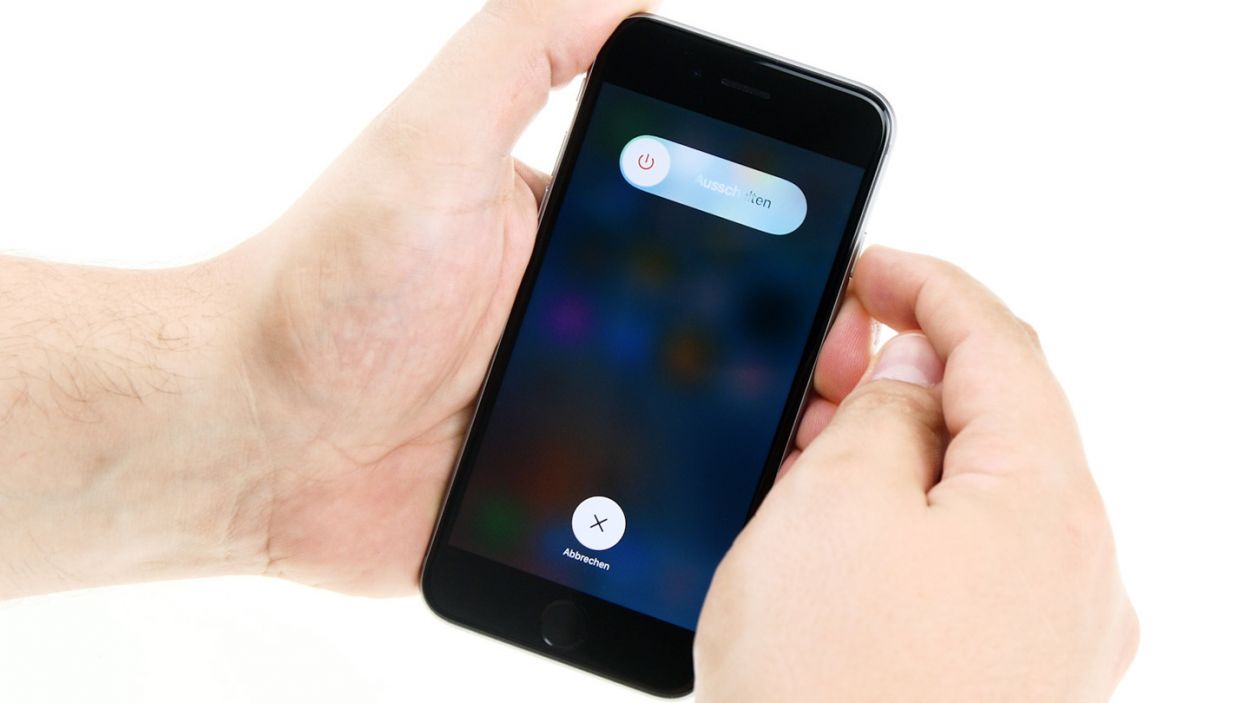

– First things first, let’s power down your iPhone 6 completely to keep it safe during the repair process.
– Press and hold the standby button for about three seconds until you see that handy slider pop up.
– Swipe that slider to shut down your iPhone entirely. This might take around ten seconds, so hang tight!
Step 2
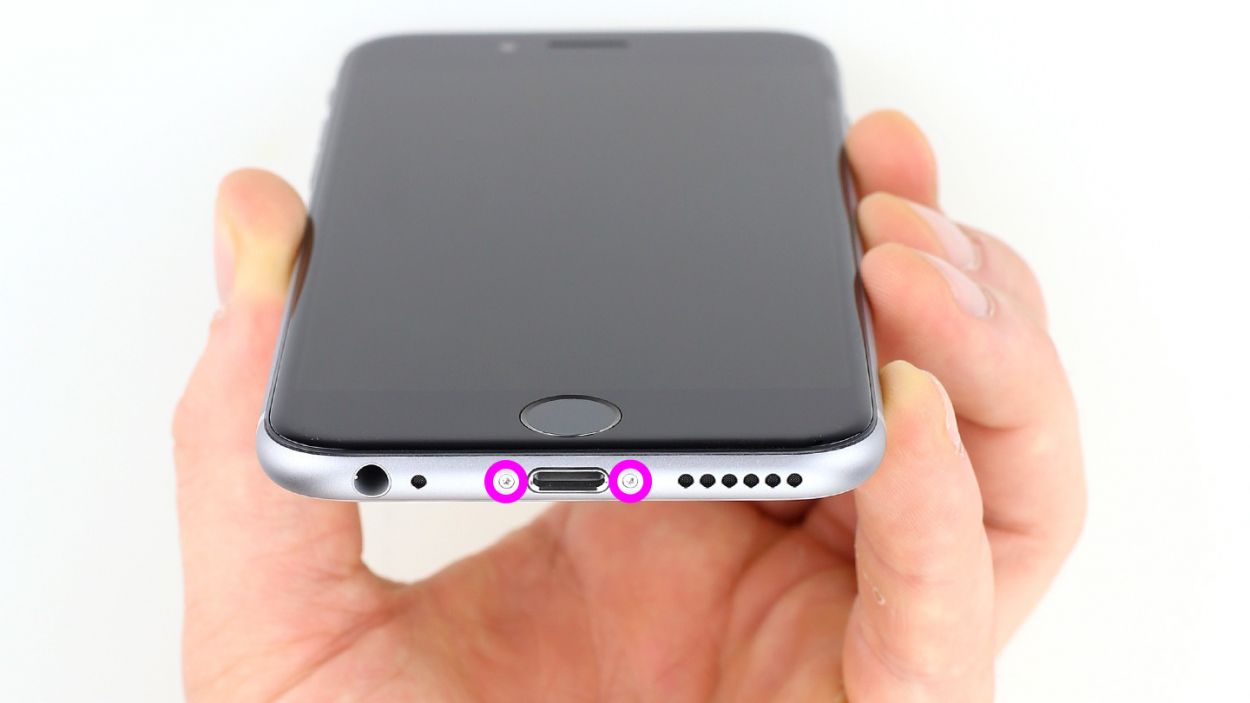
– Ready to dive into your iPhone 6? Grab that pentalobe screwdriver – it’s showtime!
– On the lower side of your device, you’ll spot two Pentalobe screws waving at you from either side of the Lightning connector. Time to bid them farewell! Carefully remove them and stash them in one section of your magnetic pad – we wouldn’t want them to go on a solo adventure! (That’s 2 x 3.8 mm pentalobe screws, in case you were wondering.)
Step 3


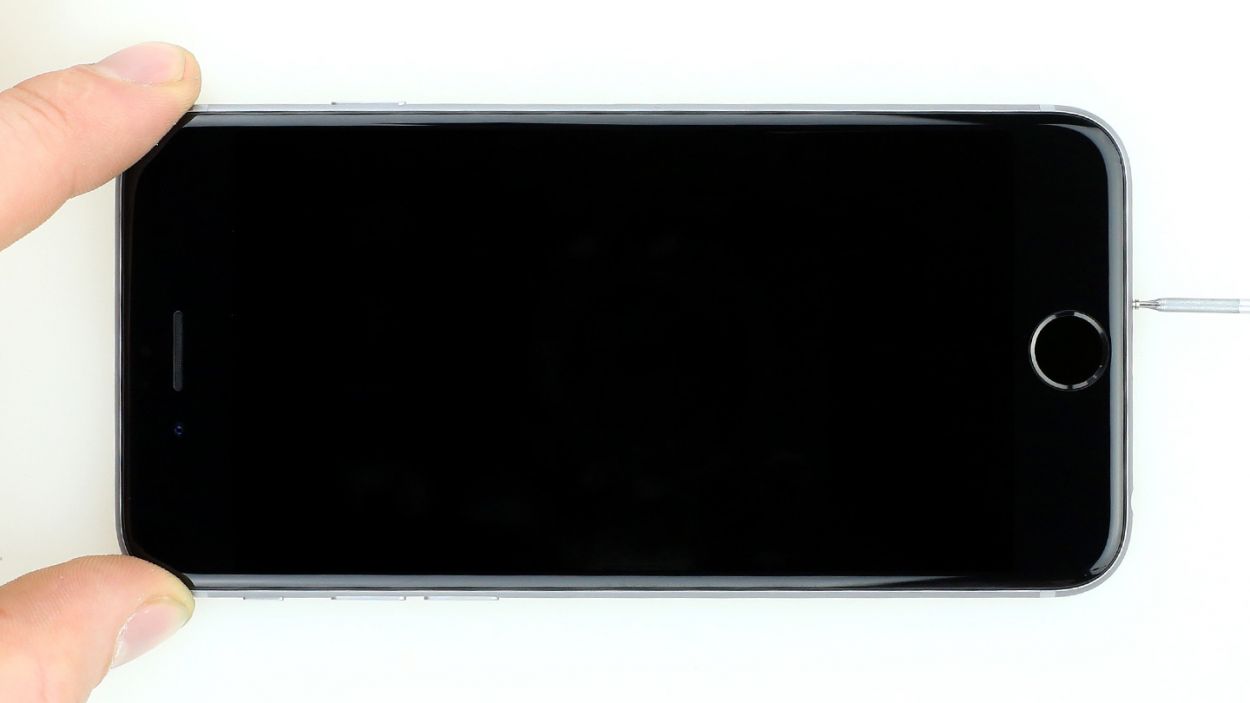
– Start by placing your iPhone 6 on a soft, clean surface to keep that back cover scratch-free.
– Grab a suction cup and a sturdy plastic plectrum to gently lift the front screen of your iPhone 6. If your screen is looking a bit like a spider web, don’t forget to tape it up first to shield yourself from those pesky glass shards.
– Position the suction cup on the display, ideally right above the Home button, or just next to it (check out figure 1). Use the suction cup’s ring to lift the screen while you slide the plectrum between the aluminum and display frame, pushing the aluminum frame downwards. This will help you lift the screen with the plectrum (see figure 2). Patience is key here—you might need a few tries!
– Once you’ve got the display lifted a bit, carefully work your way around the edges until both long sides are free (see figure 3).
Step 4
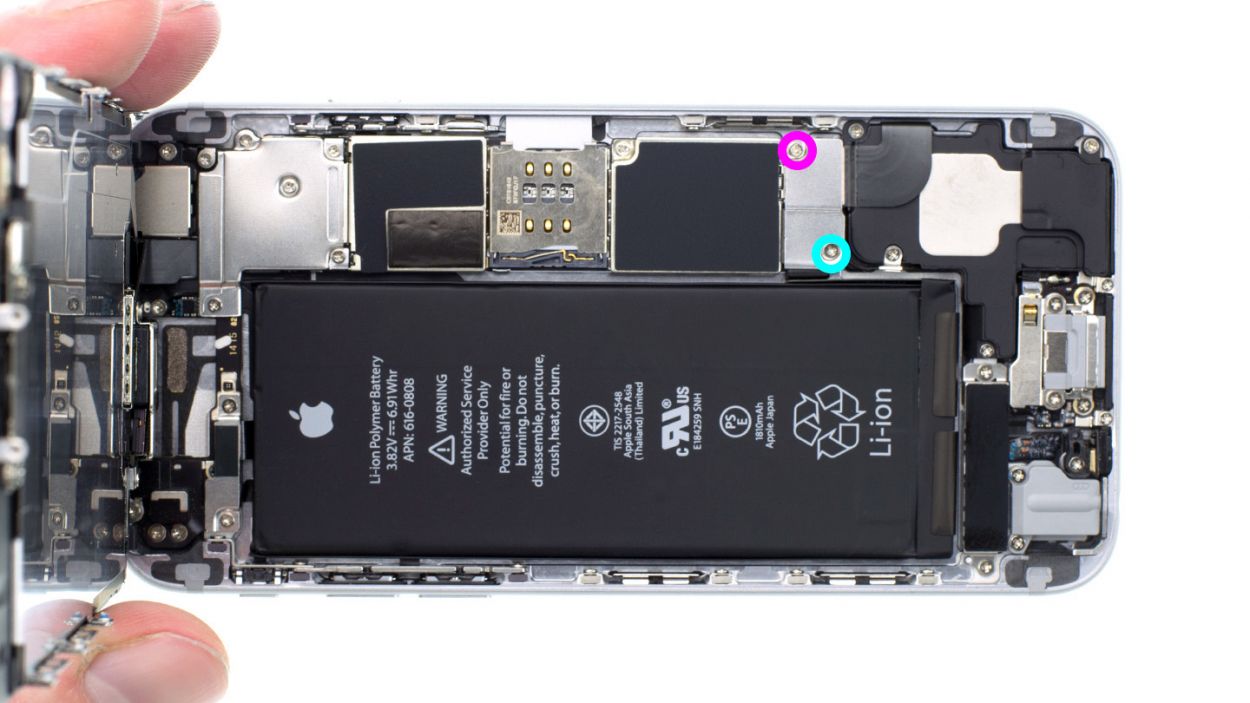


– Grab your trusty Phillips screwdriver and let’s tackle those Phillips screws holding the battery connector in place (check out figure 1 for a visual!). Once you’ve got them out, gently lift off the cover (figure 2) and make sure to keep all those little parts together in one container. You’ll need 1 x 3.2 mm Phillips screw and 1 x 2.3 mm Phillips screw for this step.
– Now, let’s delicately disconnect the battery connector. Use the sharp end of your ESD spudger to gently slide underneath the plug (figure 3). No spudger? No problem! Your fingernail can do the trick too—just be gentle!
Step 5
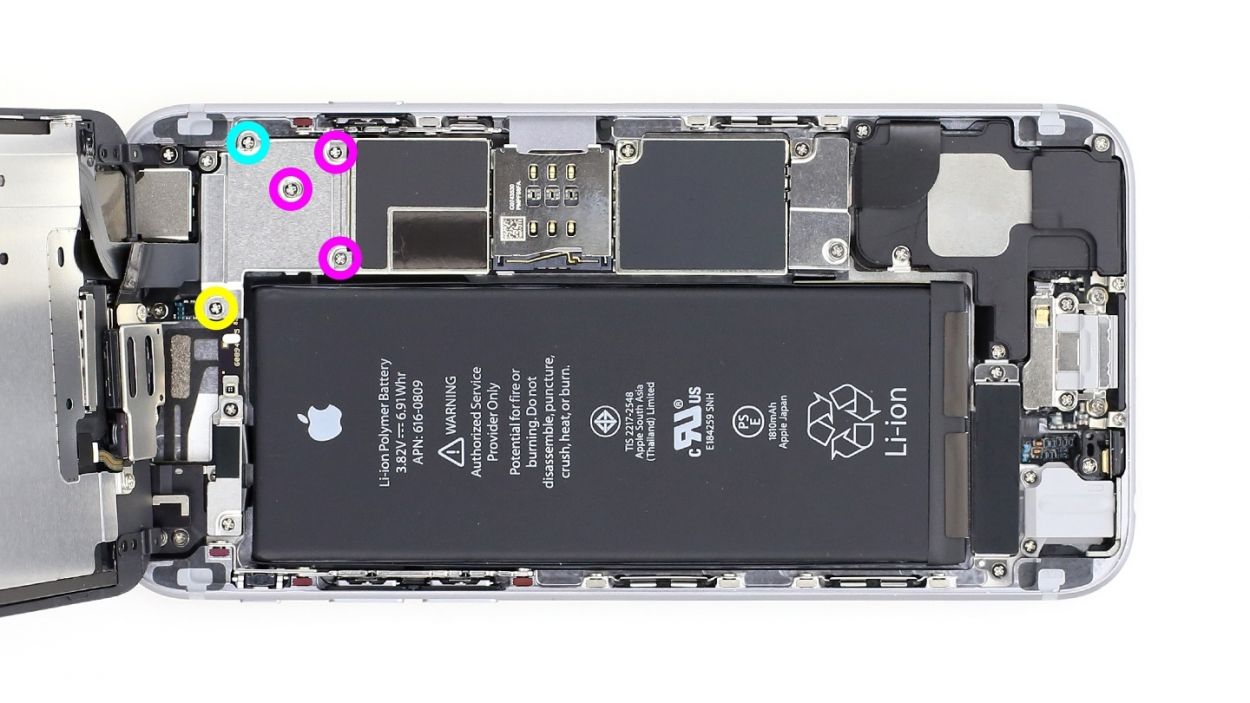

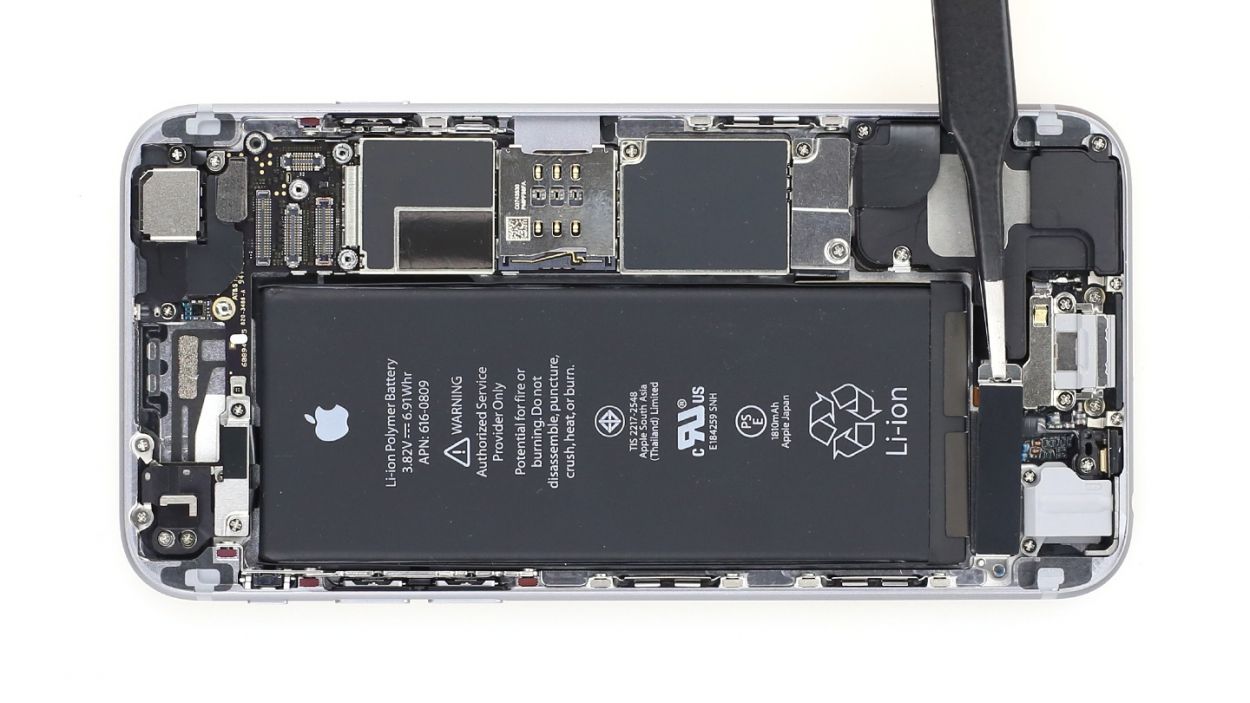
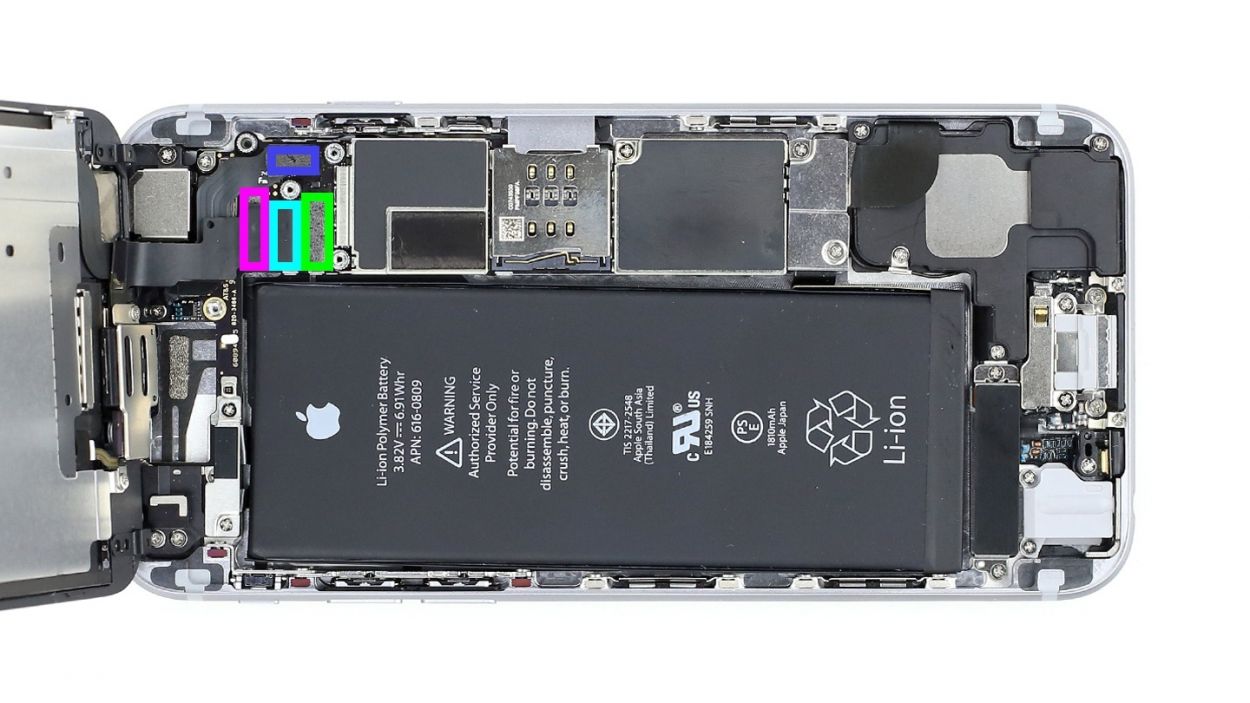
– Alright, let’s tackle that silver cover! It’s held in place by five Phillips screws. Go ahead and remove them (check out figure 1 for a visual guide) and stash those little guys in one section of your magnetic pad—no screw left behind! Once you’ve done that, you can gently lift off the cover. You’ll need: 1 x 3.1 mm Phillips screw, 3 x 1.3 mm Phillips screws, and 1 x 1.8 mm Phillips screw.
– Now, take a peek at those four overlapping connectors (see picture 2). Time to loosen them up, but do it with care! Start by gently sliding the pointed side of your spudger under each contact and lift it up. You’ve got this! The connectors to focus on are: Front camera/sensor/earpiece/ambient microphone, Touch ID cable, LCD, and Touchscreen.
Step 6


– Pull out the two screws that fix the vibration motor (see figure 1).2 x 1.5 mm Phillips screw
– Now you can take out the vibration motor (see figure 2).
Step 7
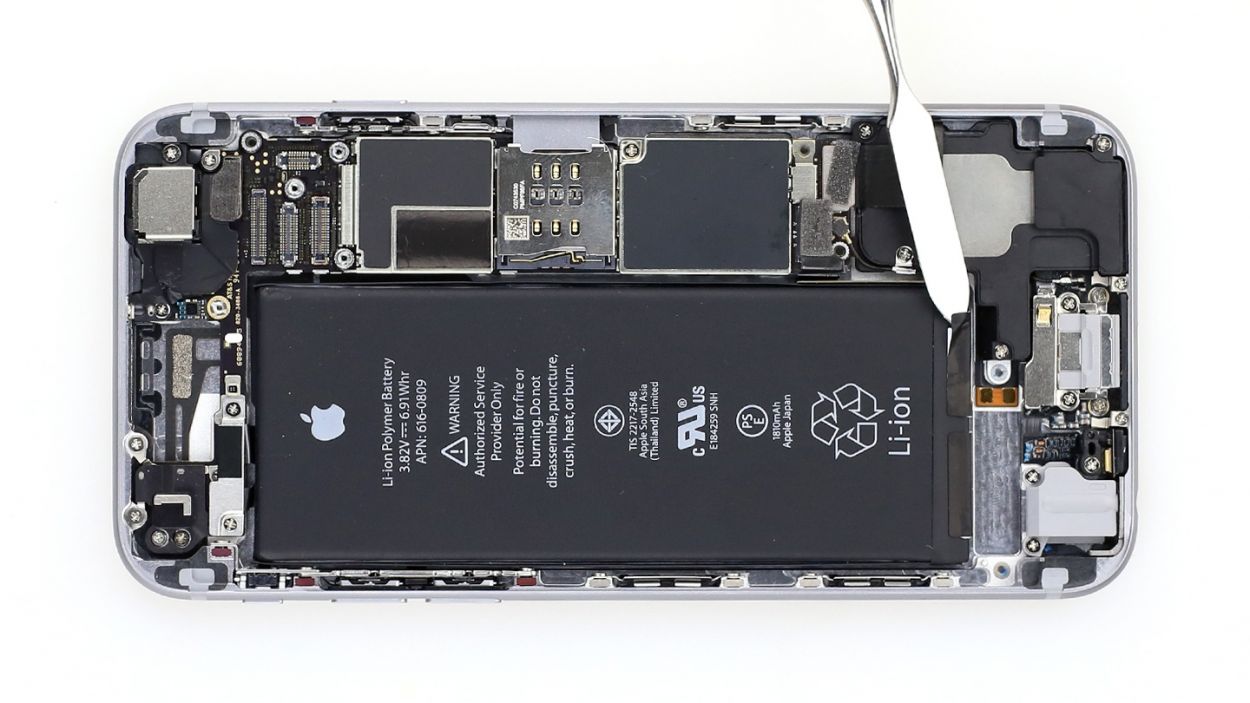

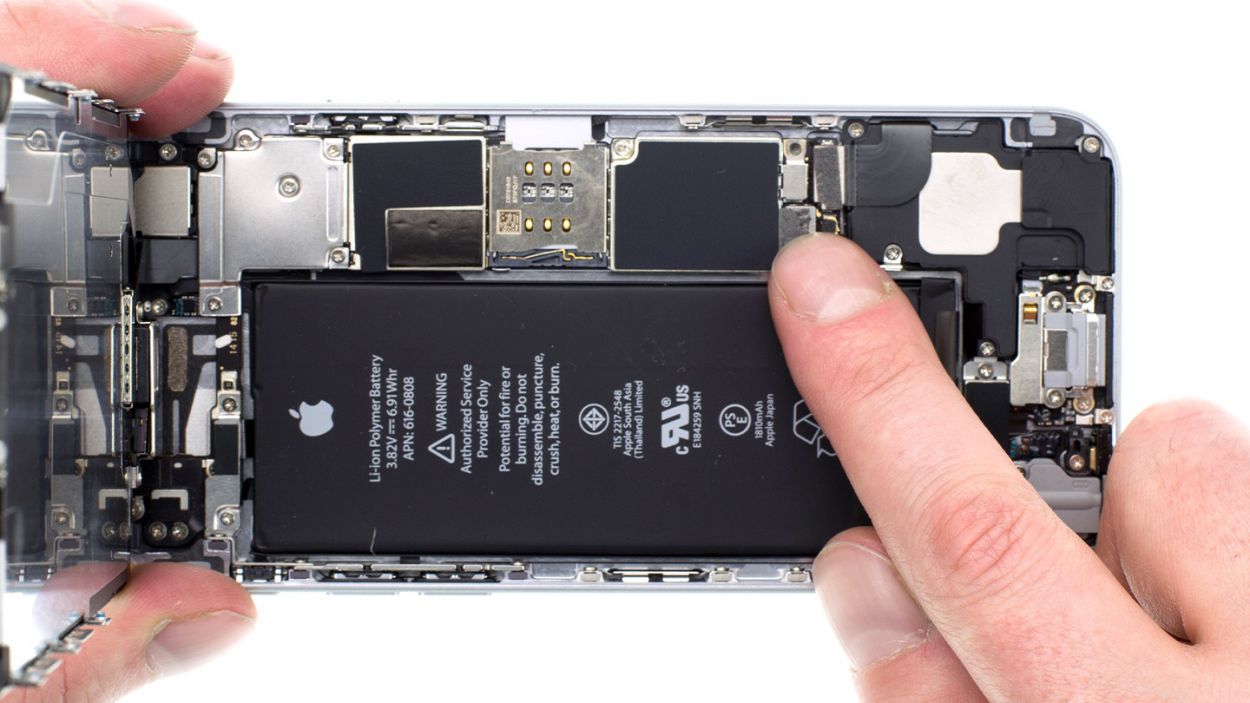
– The battery’s snugly fit thanks to two adhesive strips. Time to whip out your trusty spatula and gently pry those black ends loose from the battery (check out figure 1 for a visual!).
– Now, let’s get those adhesive strips off! Take your time and keep them nice and flat, staying level with the iPhone (see figures 2 and 3 for guidance).
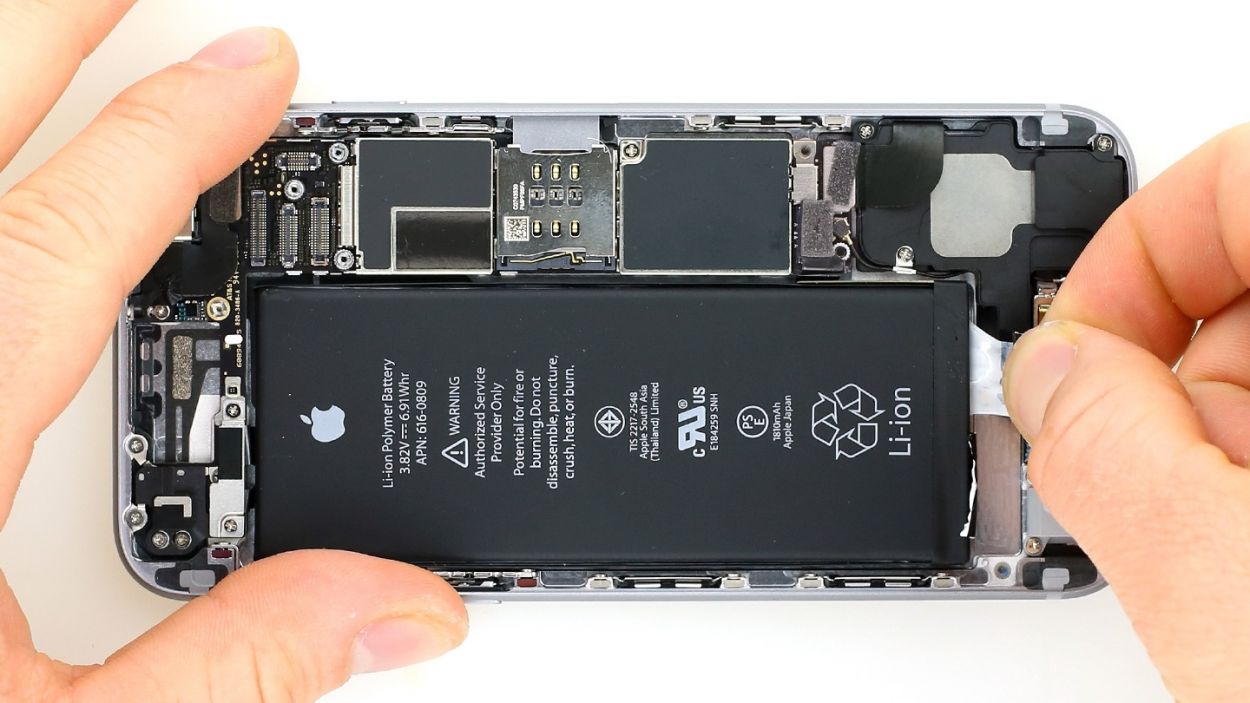
– Alright, you’re ready—let’s take that battery out of the iPhone 6!
Step 8
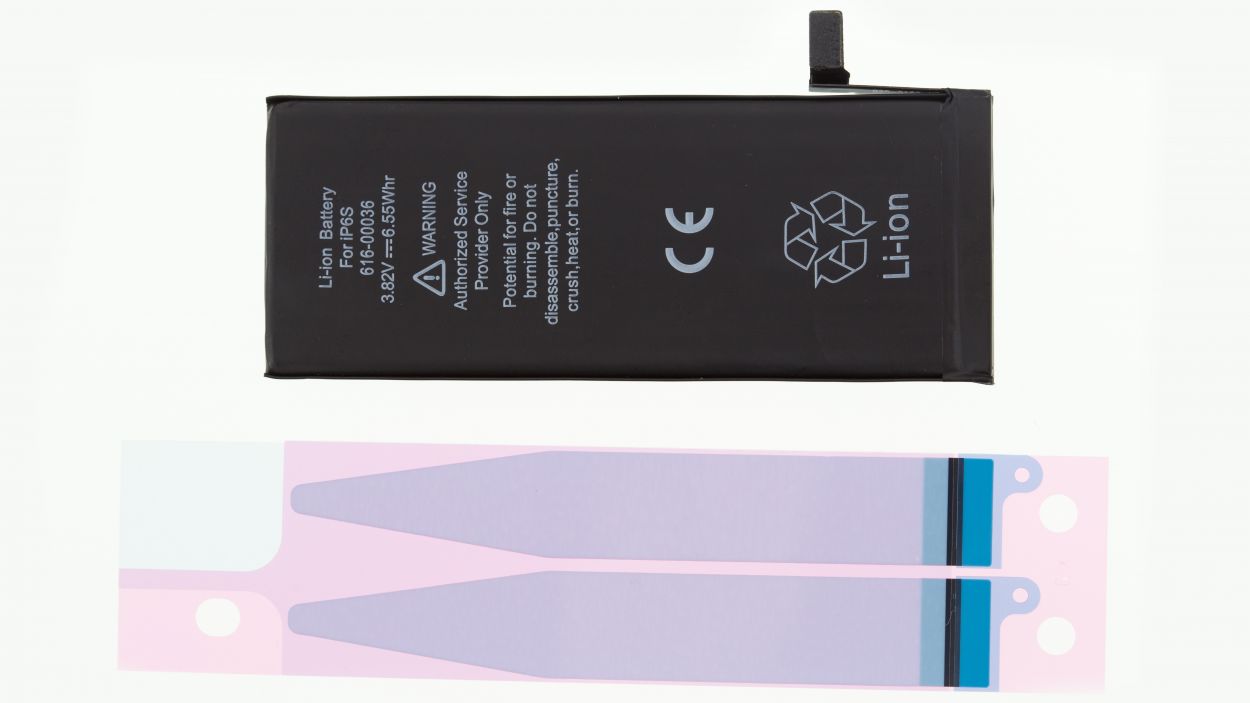
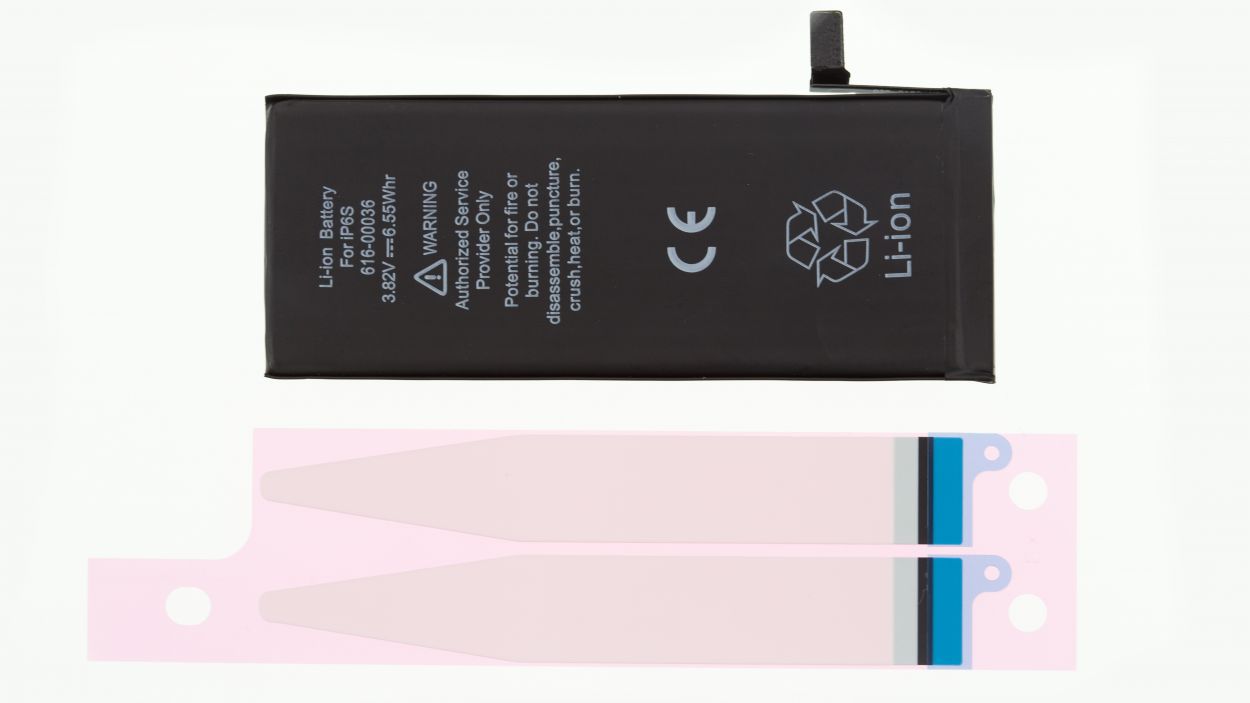
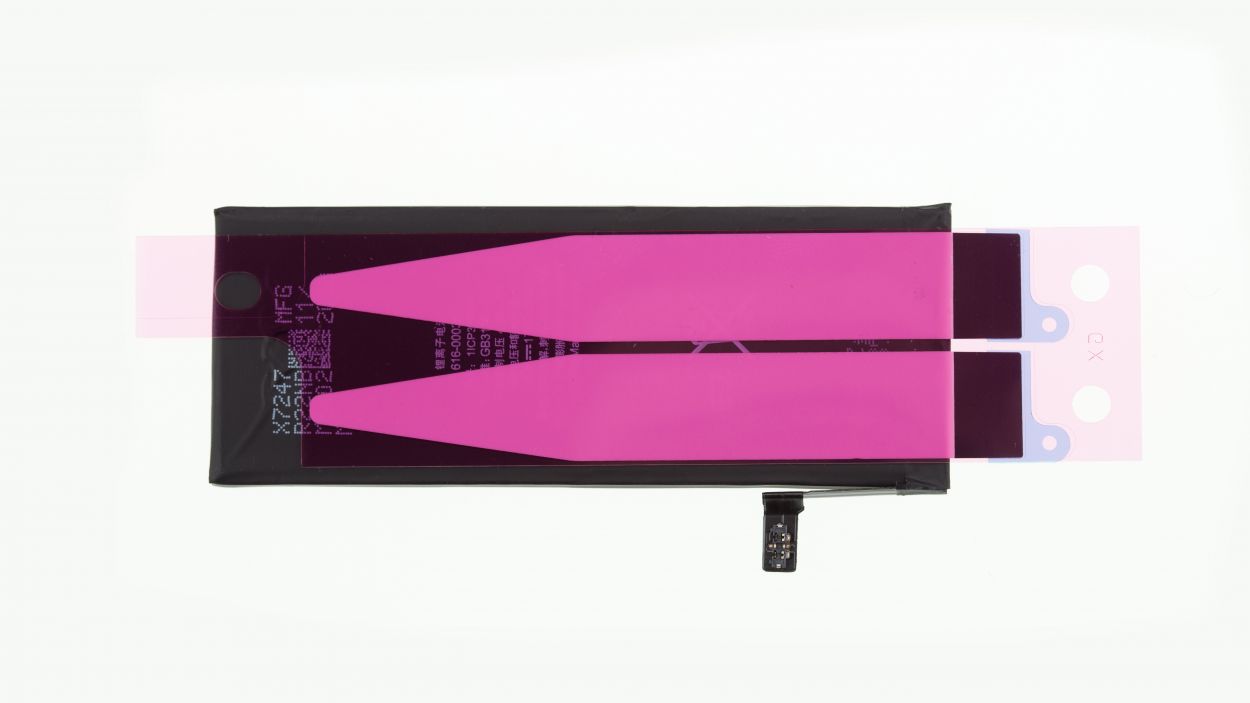
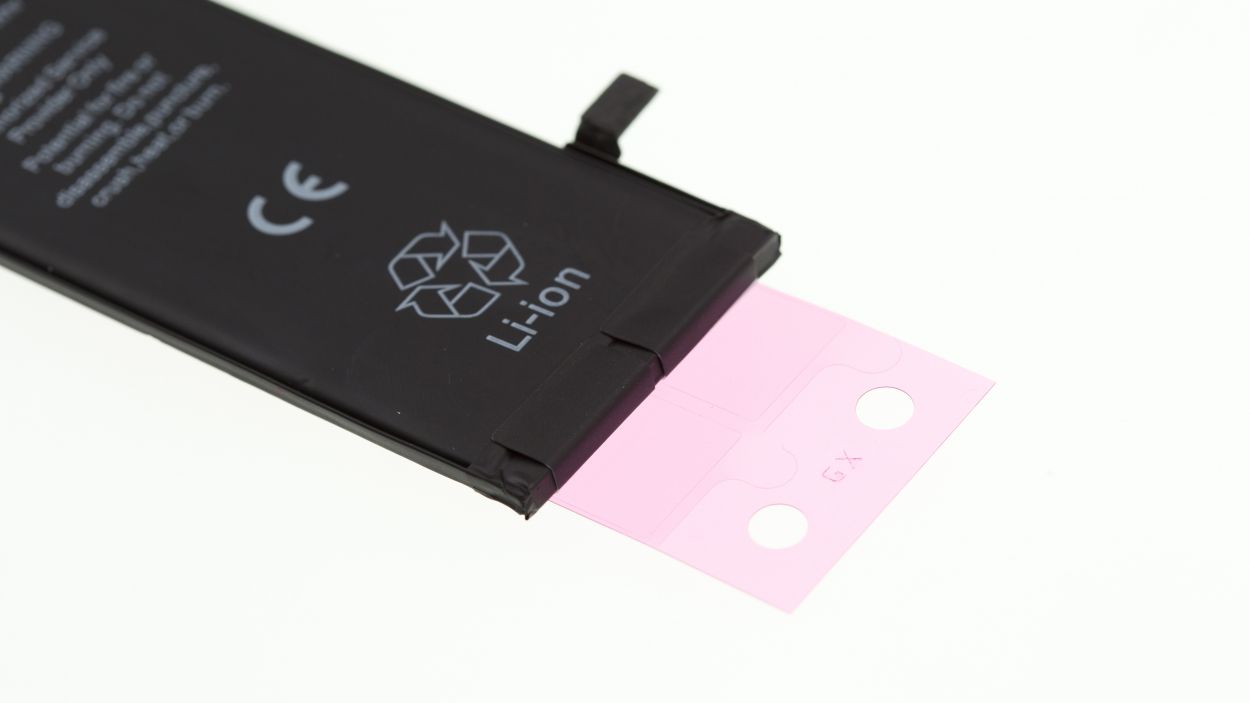
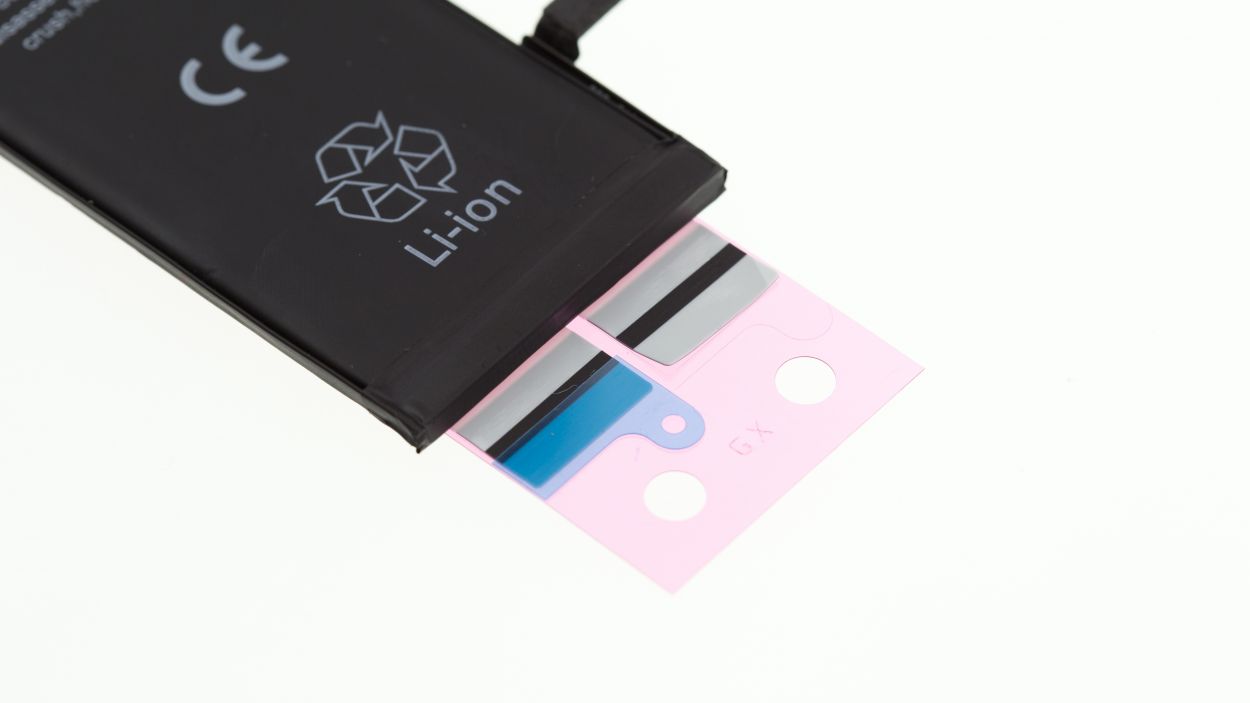
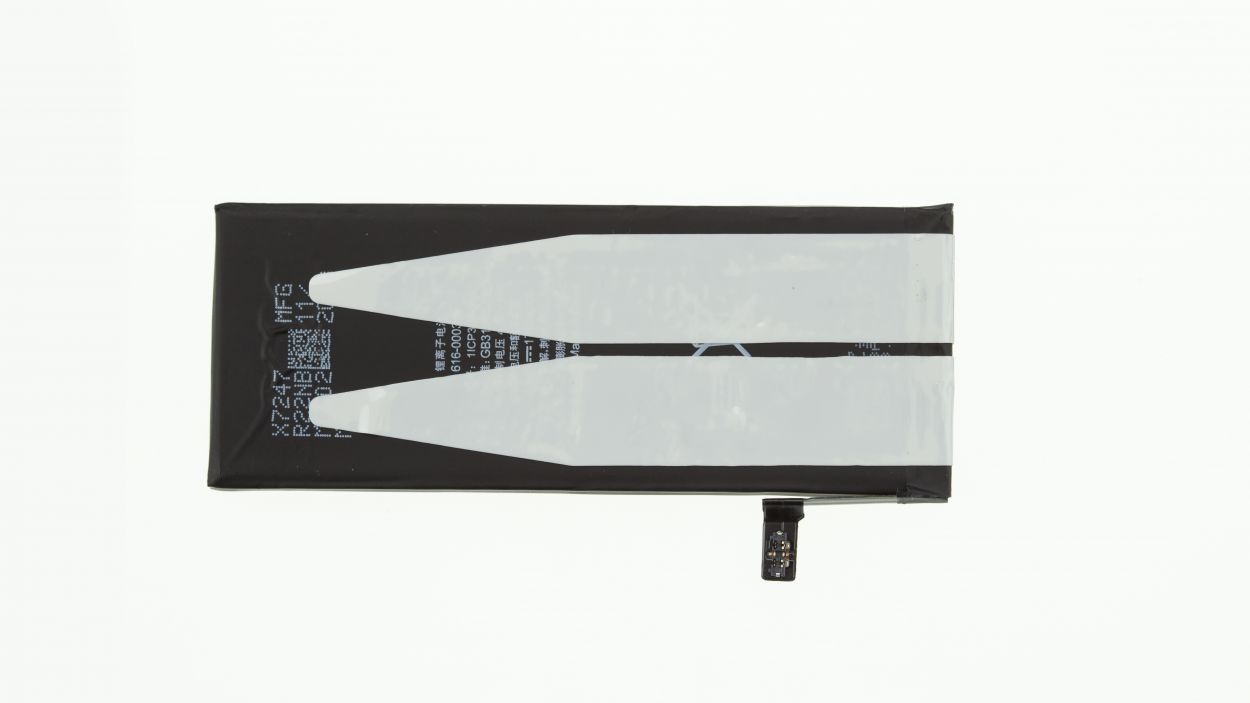
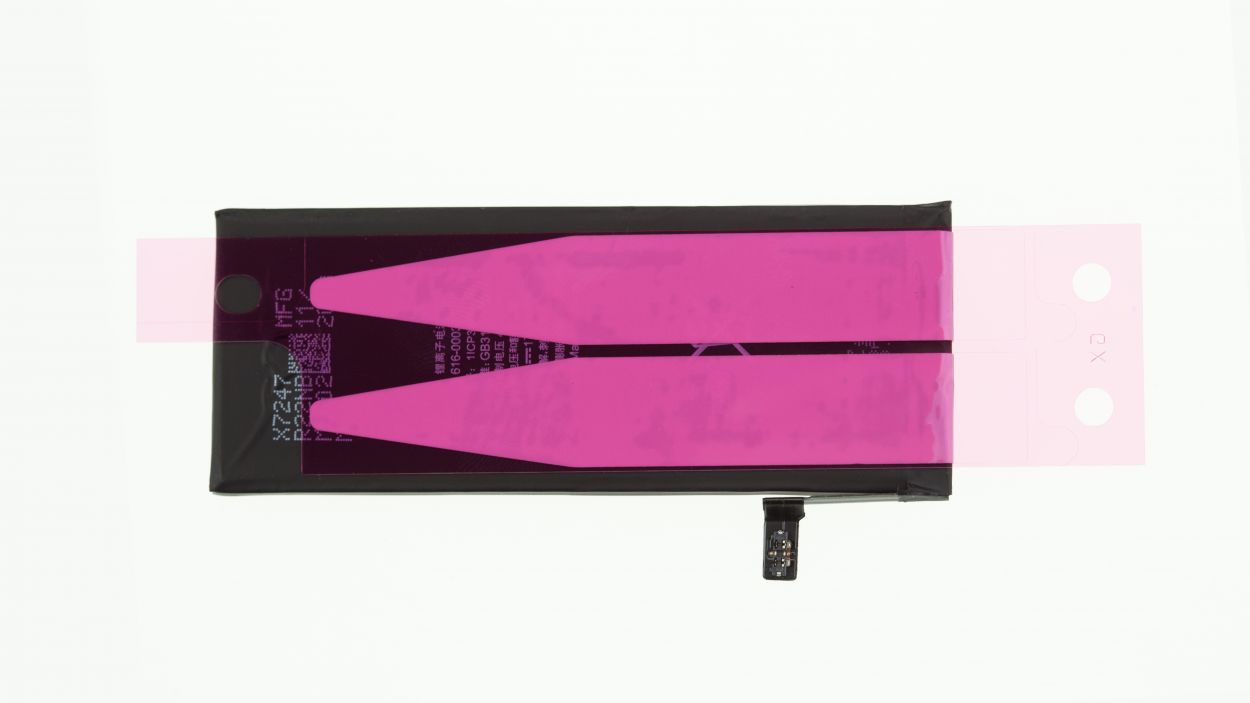
– Hey there! To ensure your new battery snuggles in perfectly inside your iPhone, let’s add some fresh adhesive tape to the bottom of it.
– First things first, peel off the blue protective film. You got this!
– Now, stick that adhesive tape to the back of the battery, just make sure no tabs are overlapping—you’re doing great!
– Next up, it’s time to take off the little blue films from those black tabs and attach them to the edge of the battery.
– Finally, remove the last remaining protective film. Boom! Your battery is now all set for the next step!
Step 9

– Let’s get those new adhesive strips ready to keep your battery snug as a bug in a rug!
– Pop that battery into your iPhone, but hold off on connecting it just yet to steer clear of any short circuit surprises.
Step 10

– Put the vibration motor back in its original place (see figure 1).
– Fix the component with the appropriate screws (see figure 2).2 x 1.5 mm Phillips screw
Step 11

If your display is showing streaks or the touchscreen is acting a bit moody, it’s likely that the connectors aren’t snugly connected. Let’s get those connections sorted out!
– Let’s get that LCD connector attached (check out figure 1 for guidance). It might take a few tries, so don’t sweat it if you don’t nail it on the first go. Just remember to be super gentle—no bending those plugs! Your mission includes connecting the Front camera/sensor/earpiece/ambient microphone, Touch ID cable, LCD, and Touchscreen.
– Once you’ve got those connectors snug and secure, it’s time to power up your iPhone 6! Give it a whirl with some functional tests to check if your LCD, touch screen, proximity sensor, front camera, and earcup are all in good shape. If you spot some streaks on the display or if the touchscreen seems a bit moody, that’s your cue—let’s check those connections again!
– Next, place the cover back on those connectors and secure it using the five screws (see figure 2). You’ll need 1 x 3.1 mm Phillips screw, 3 x 1.3 mm Phillips screws, and 1 x 1.8 mm Phillips screw for this. You’re almost there!
Step 12


– Alright, let’s reconnect that battery and get everything powered up again!
– Time to slide that shiny silver cover back into place and fasten it down with the screws. You’ll need 1 x 3.2 mm Phillips screw and 1 x 2.3 mm Phillips screw for this part.
Step 13

– You’re almost done! Gently place the display back into the housing. Just watch out for those cables—no one wants a pinched wire! Ensure that the top edge of the screen clicks in securely.
– Now, with a careful nudge, push your screen toward the home button to snug it perfectly into the frame.
Step 14

– Alright, it’s time to wrap things up! Grab those last two Pentalobe screws and pop them into the lower side of your iPhone 6. Just a friendly reminder, that’s 2 x 3.8 mm pentalobe screws we’re talking about. You’re almost there!
Step 15

Hey there! Since the battery took a little vacation from your iPhone 6, it might have forgotten the right time and is now stuck on “1:00 am 1/1/1970”. This little hiccup could mess with your cellular connection, so let’s get that time sorted out!
– Since the battery took a little break from your iPhone 6, it might have lost track of time and is now stuck at “1:00 am 1/1/1970”. This could throw a wrench in your cellular connection, so let’s get that time back on track!

