DIY Guide to Replace iPhone 6 Plus Vibration Motor
Duration: 30 min.
Steps: 13 Steps
Ready to bring the buzz back to your iPhone 6 Plus? In this guide, we’ll walk you through the steps to swap out that pesky, faulty vibration motor. If your phone isn’t vibrating or just giving you a faint buzz, it’s time for a little TLC. Let’s get started!
Step 1
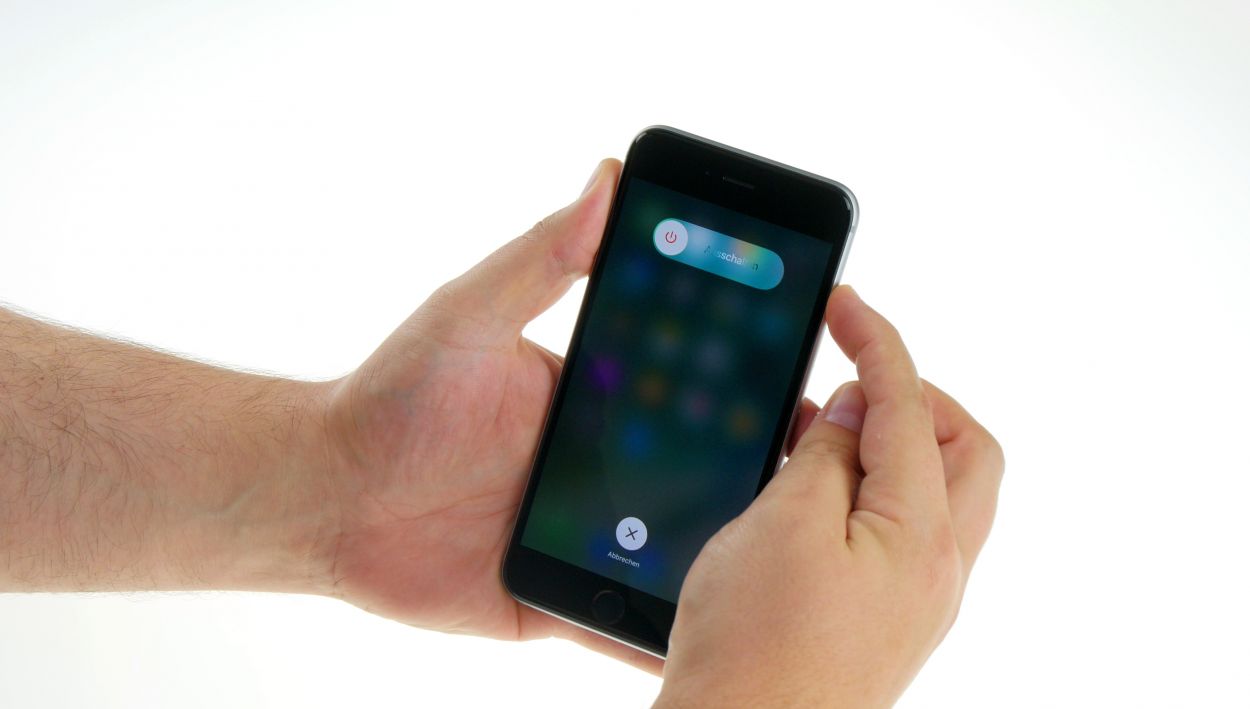

– First things first, let’s power down your iPhone completely to keep it safe during the repair. Just press that standby button for about three seconds until the slider pops up.
– Now, give that slider a swipe from left to right. Your iPhone will take about ten seconds to shut down completely, and then you’ll be all set to dive into the repair!
Step 2
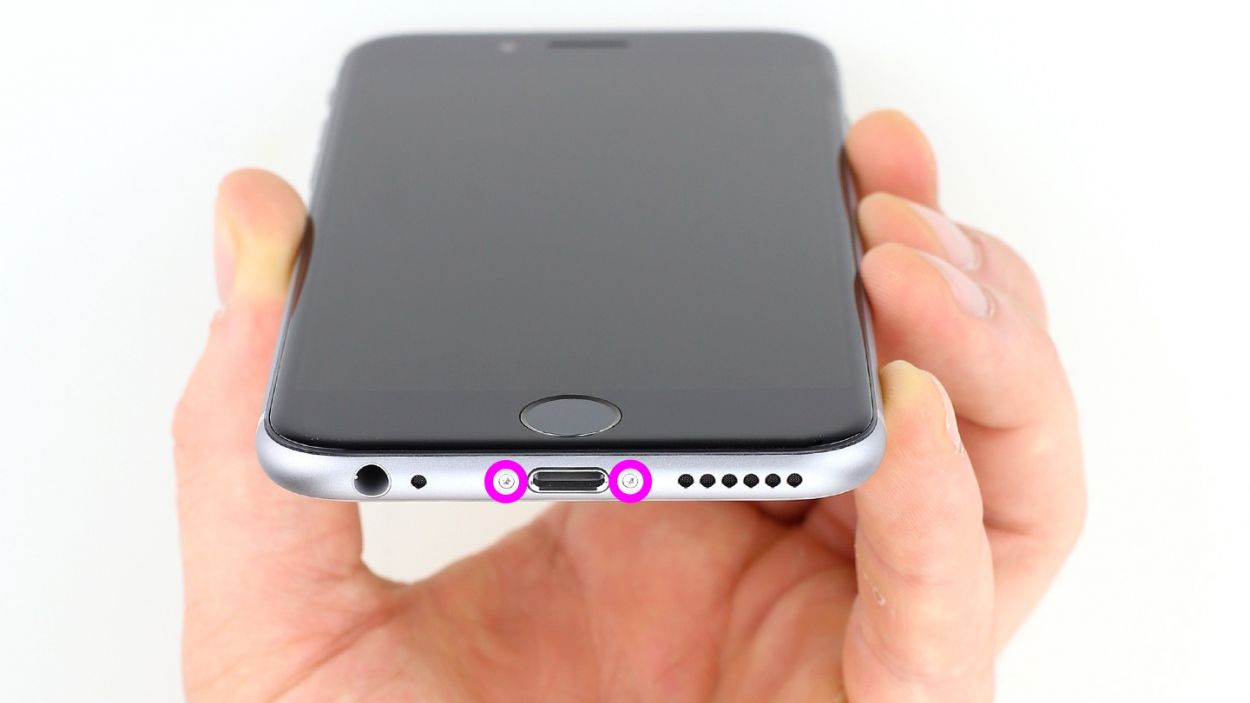
– Grab your trusty pentalobe screwdriver to get that iPhone 6 Plus open!
– Next up, let’s tackle those two pentalobe screws chilling at the bottom of the enclosure. They’re hanging out right next to the Lightning connector—one on each side. Make sure to keep those screws safe in the same container. You’ll need 2 x 3.8 mm pentalobe screws for this little adventure!
Step 3
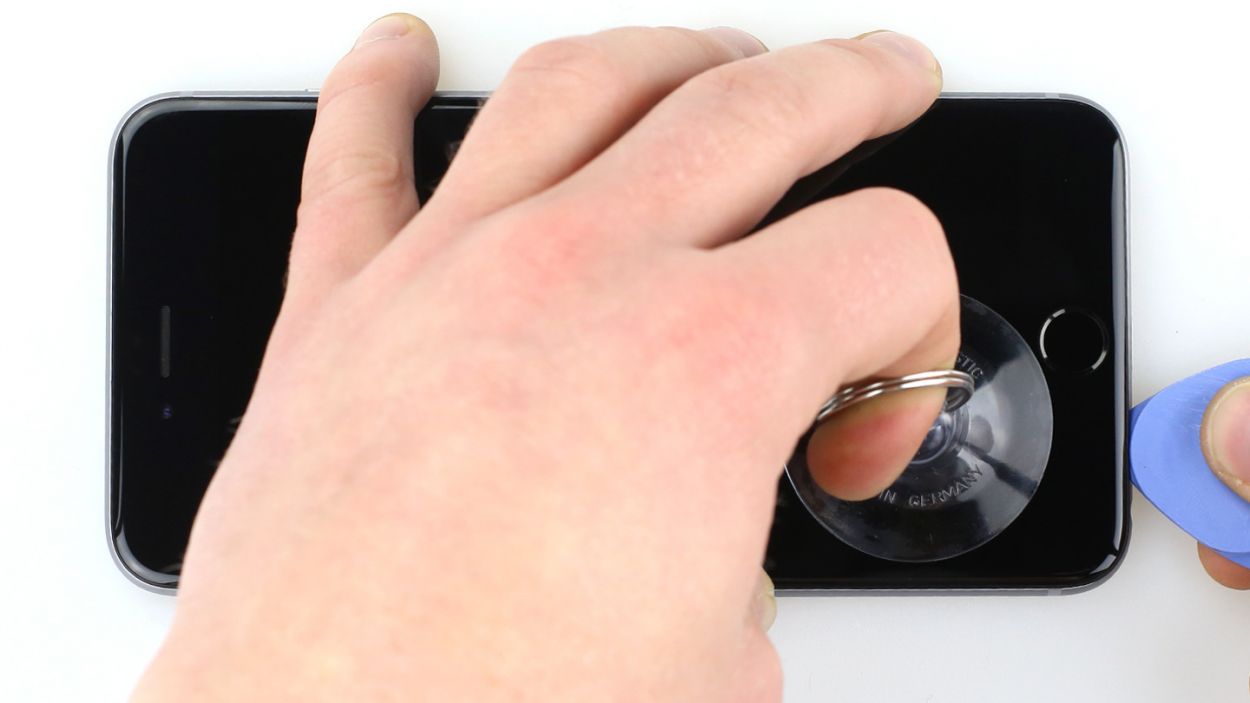


– Put your iPhone 6 Plus on a soft, clean surface to avoid scratching the back.
– To lift the front panel, you need a suction cup and a hard plastic pick. If the screen is severely cracked, cover all of it with packing tape before you continue.
– Place the suction cup over the Home button (if possible) or next to it (see figure 1). While lifting the screen with the suction cup, insert the hard plastic pick between the aluminum frame and the display frame and press down the aluminum frame. Also use the hard plastic pick to raise the screen (see figure 2). This usually takes several attempts.
– As soon as you can lift the screen a few millimeters, you have to carefully work your way around the outside until it’s loosened on both sides (see figure 3).
Step 4

– Use a Phillips screwdriver to remove the Phillips screws on the battery connector (see figure 1). Then lift the cover (see figure 2). Put all the parts in the same container.1 x 3.2 mm Phillips screw1 x 2.3 mm Phillips screw
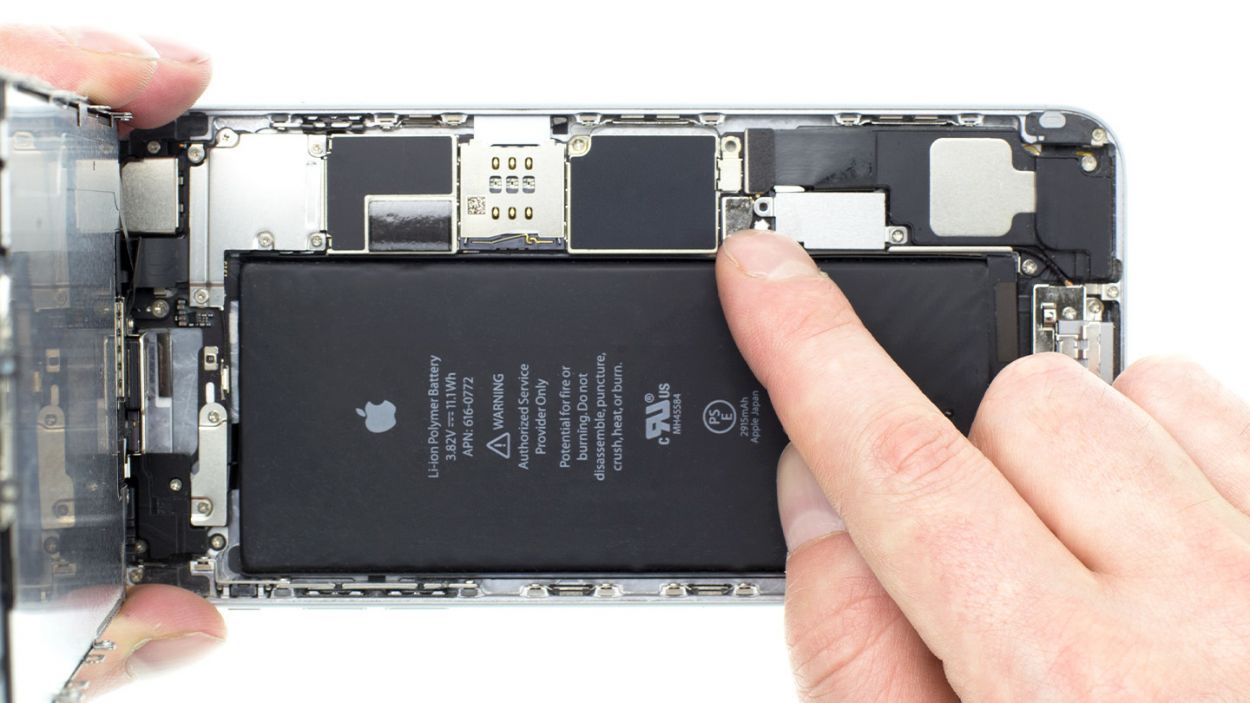
– Now carefully lift the battery connector by inserting the pointed tip of the ESD spudger slightly below the connector (see figure 3). If you don’t have a spudger, you can also try using your fingernail.
Step 5

– First remove the five Phillips screws from the silver cover (see figure 1). Put the screws in the same container. Then lift the cover to remove it.1 x 1.6 mm Phillips screw3 x 1.2 mm Phillips screw1 x 2.9 mm Phillips screw
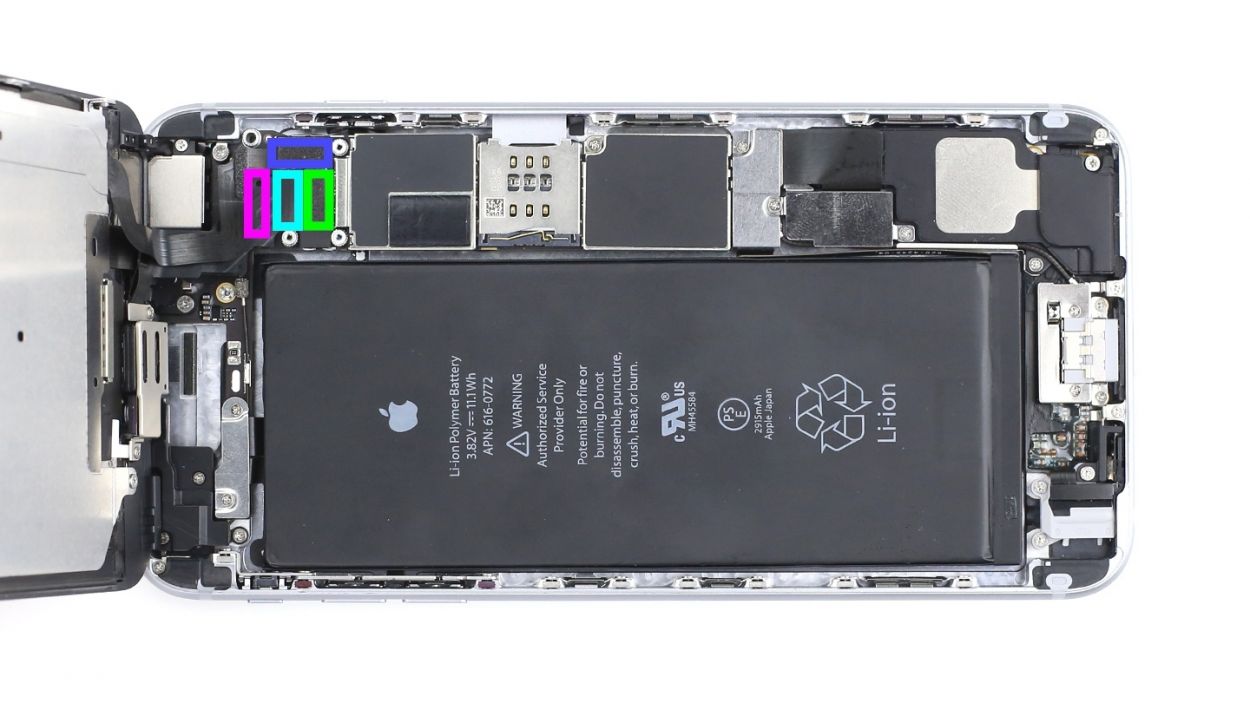
– Disconnect the following four overlapping connectors (see figure 2) in the order shown below. Be very careful. Place the pointed tip of the spudger very slightly below the contact and lift it up.Front camera/sensor/earpiece/ambient microphoneTouch ID cableLCDTouchscreen
Step 6
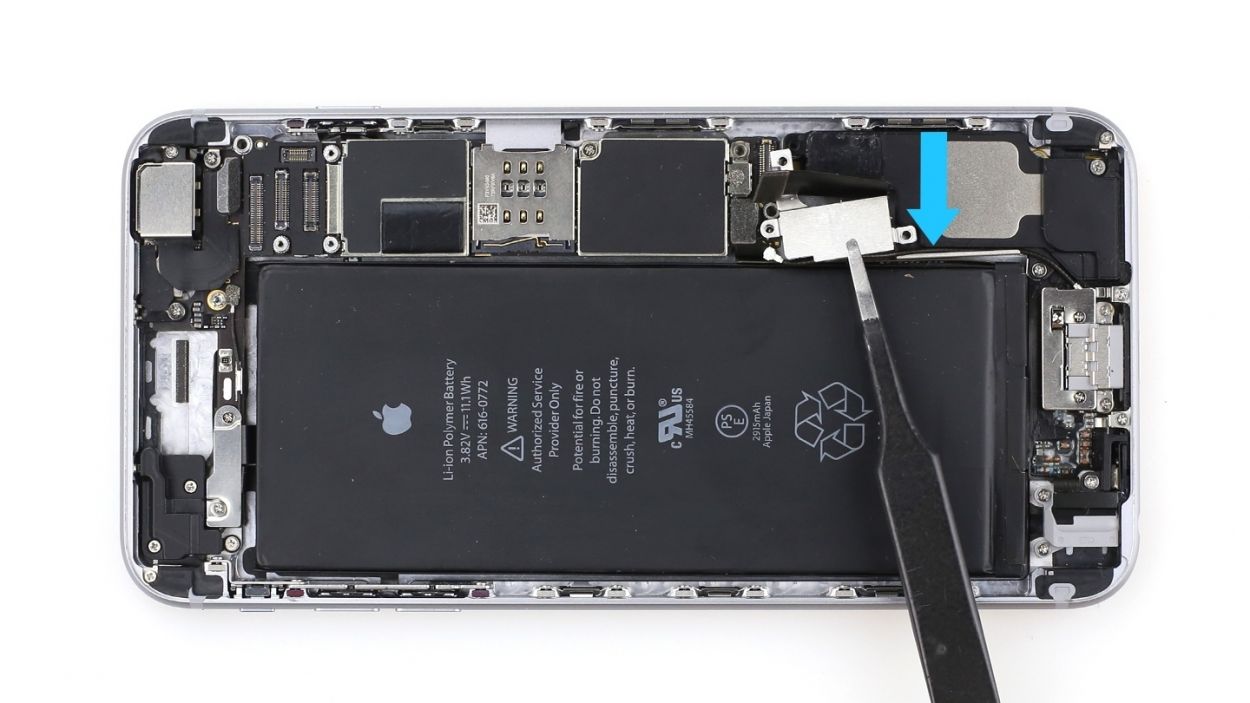
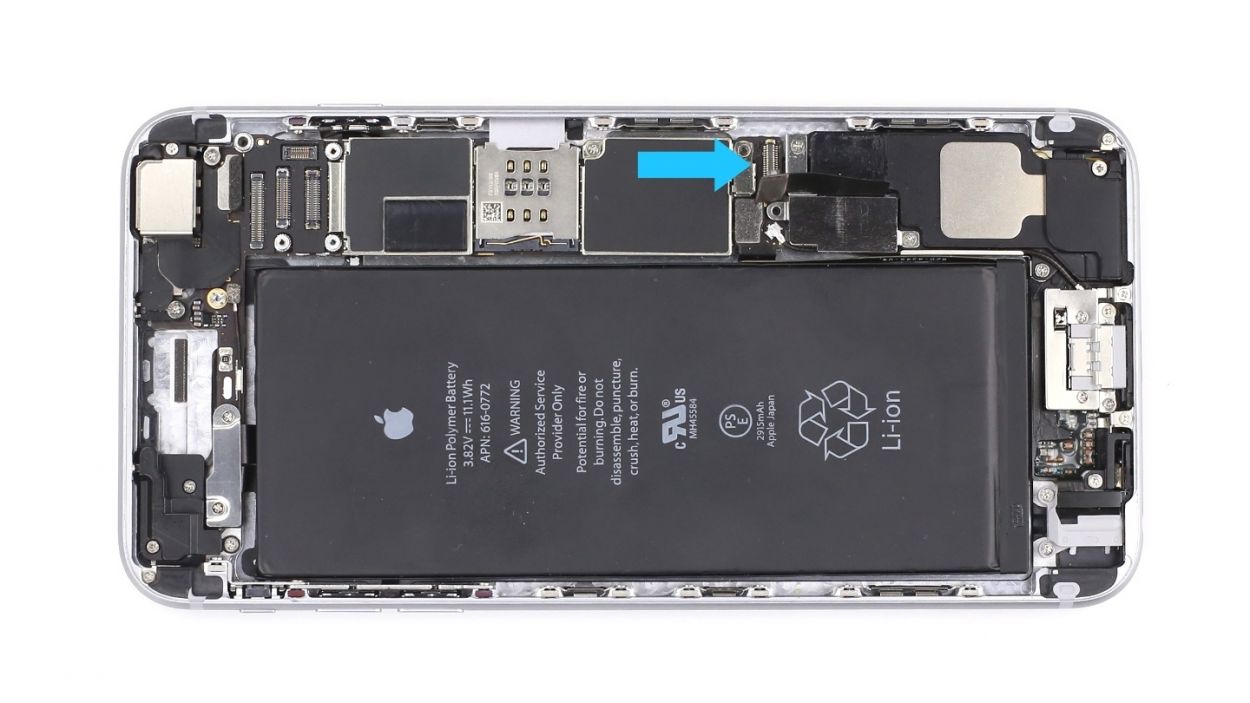
– Using the spudger, gently detach the lower oblong connector for the Lightning connector (check out figure 1 for a visual aid!).
Step 7
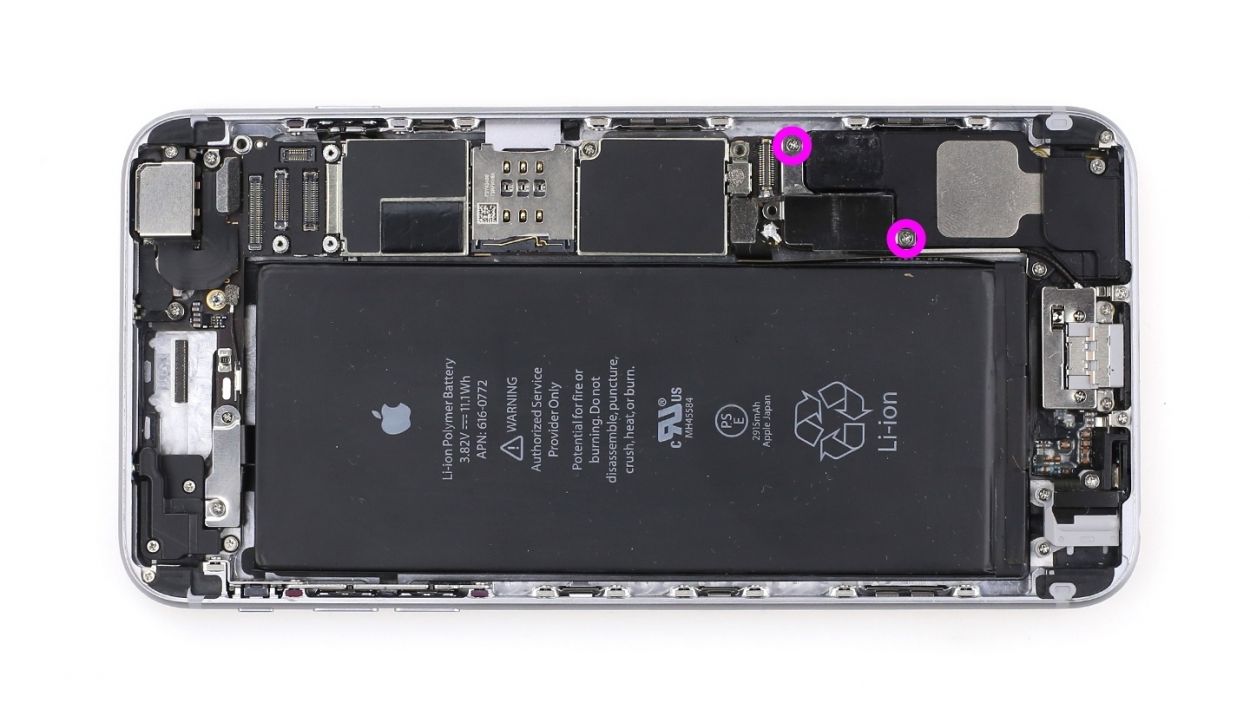


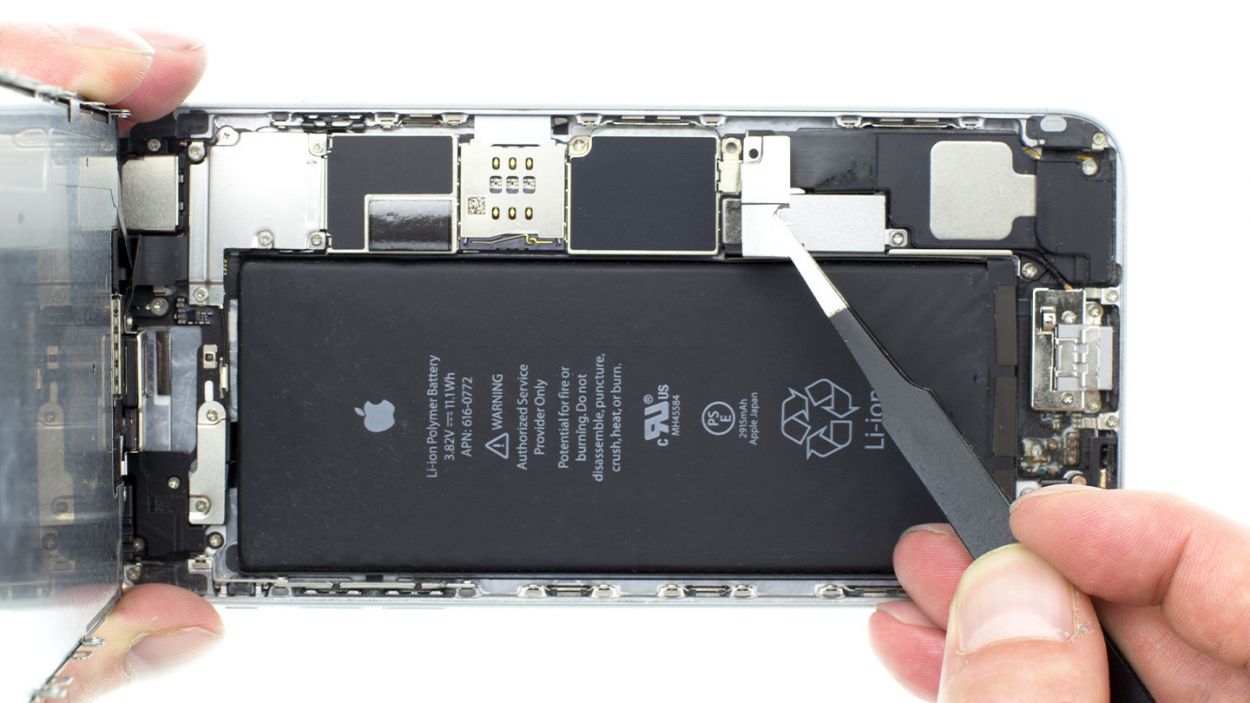
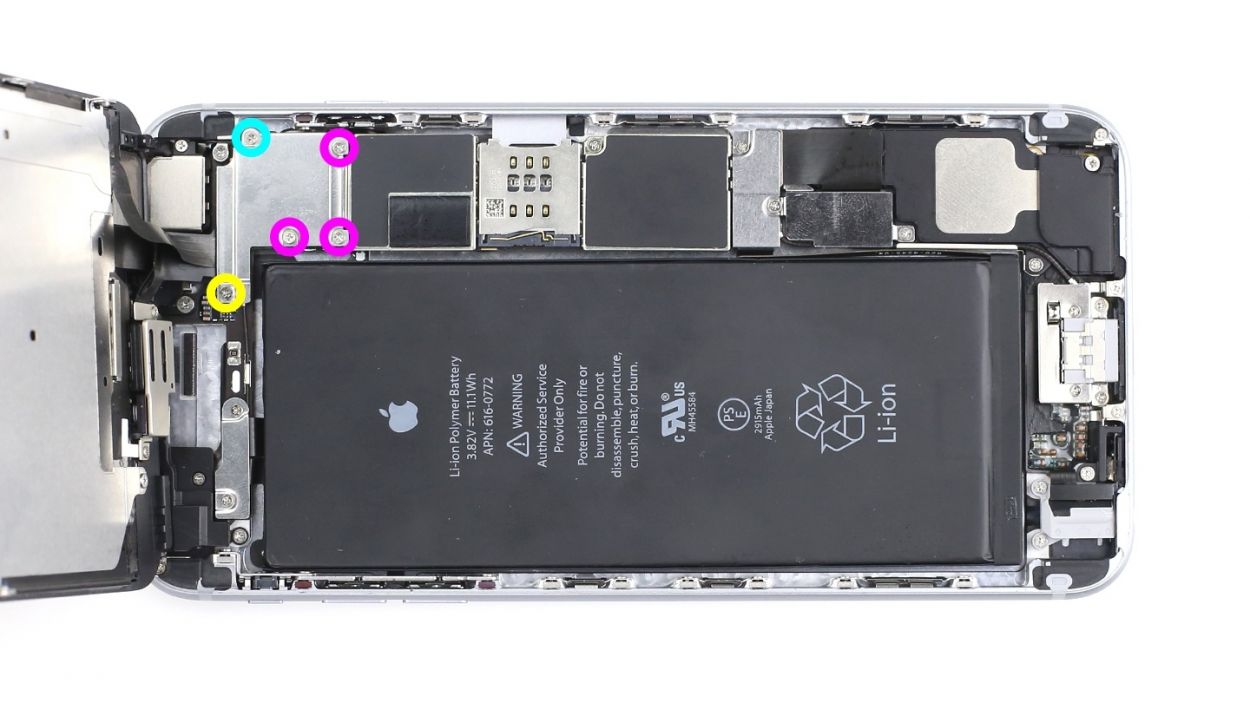
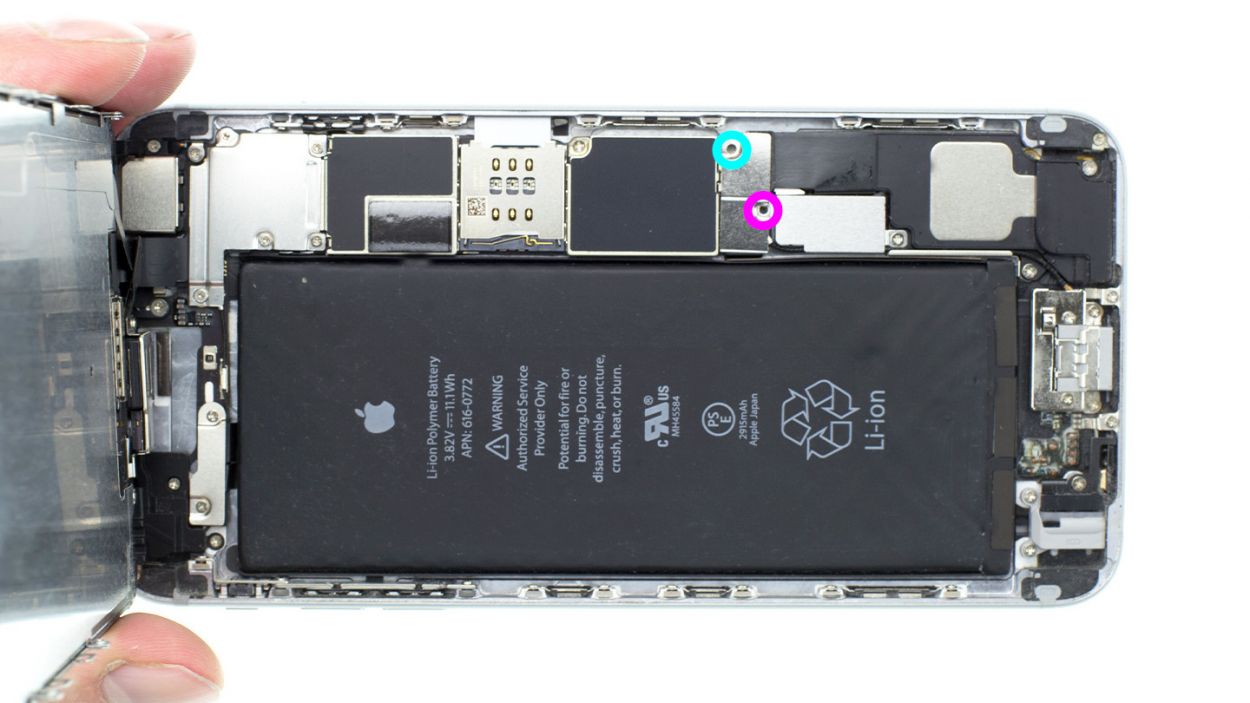
– Remove the two screws that hold the vibration motor in place (see figure 1).2 x 2.3 mm Phillips screw
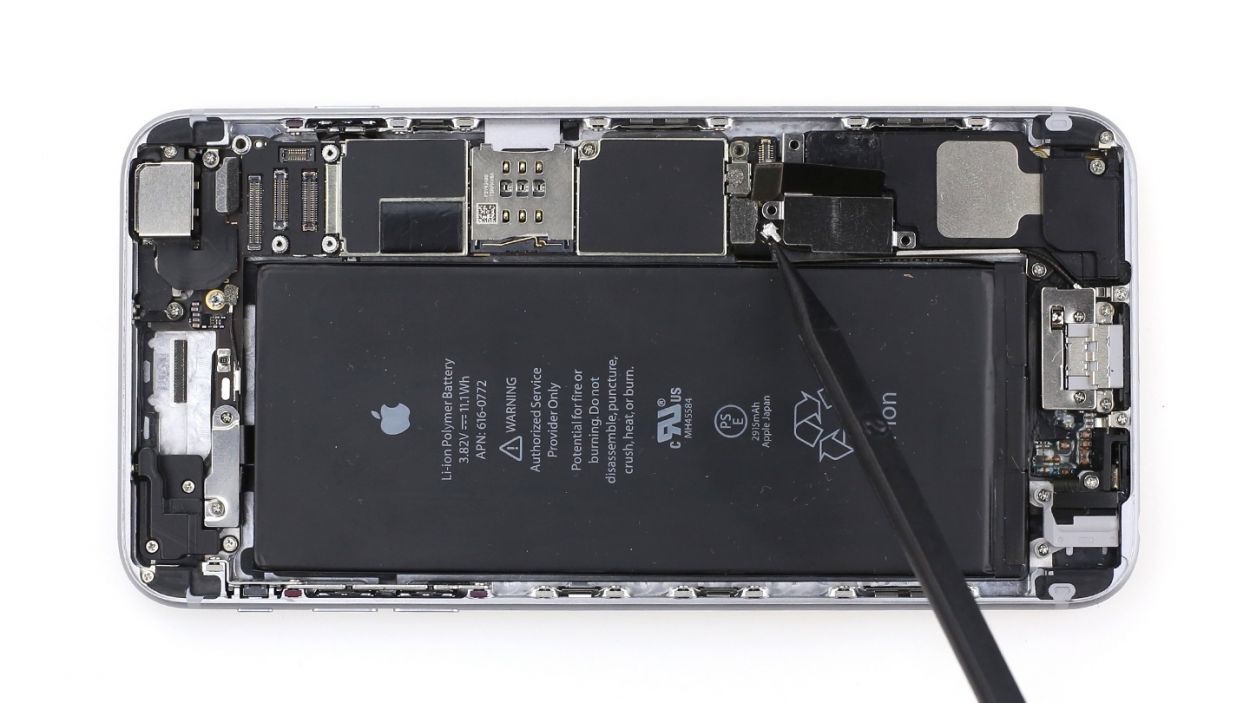
– Carefully disconnect the little antenna connector using the spudger (see figures 2 and 3).
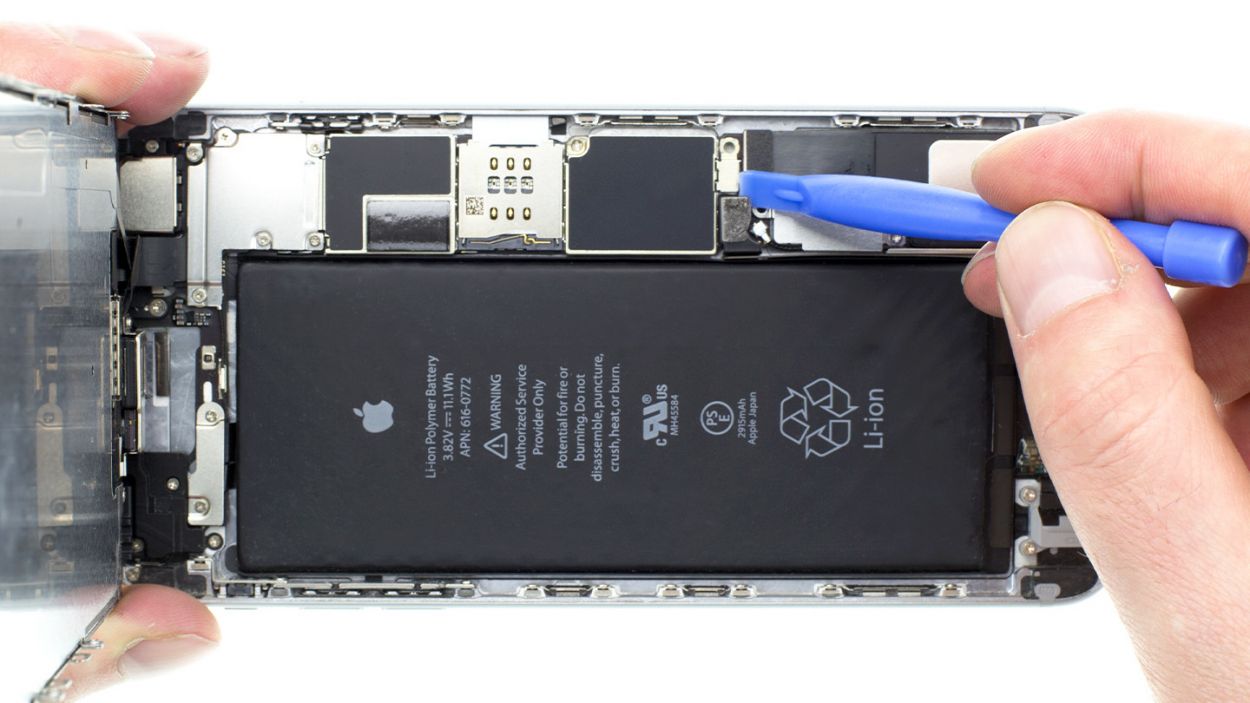
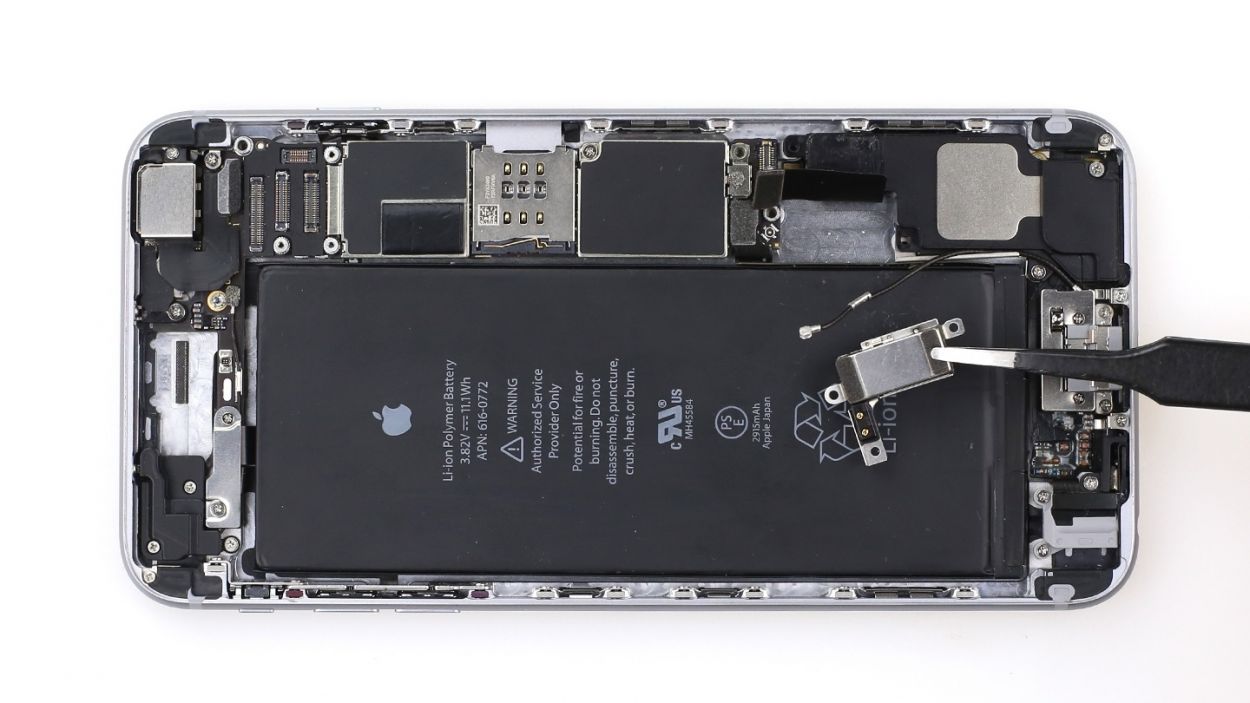
– Now carefully move the vibration motor to the side. Pay close attention to the antenna cable routed in the little silver rail along the speaker (see figure 4).
– Now turn the vibration motor so you’re looking at the bottom of it. Now you can remove the antenna cable from the little bracket (see figure 5).
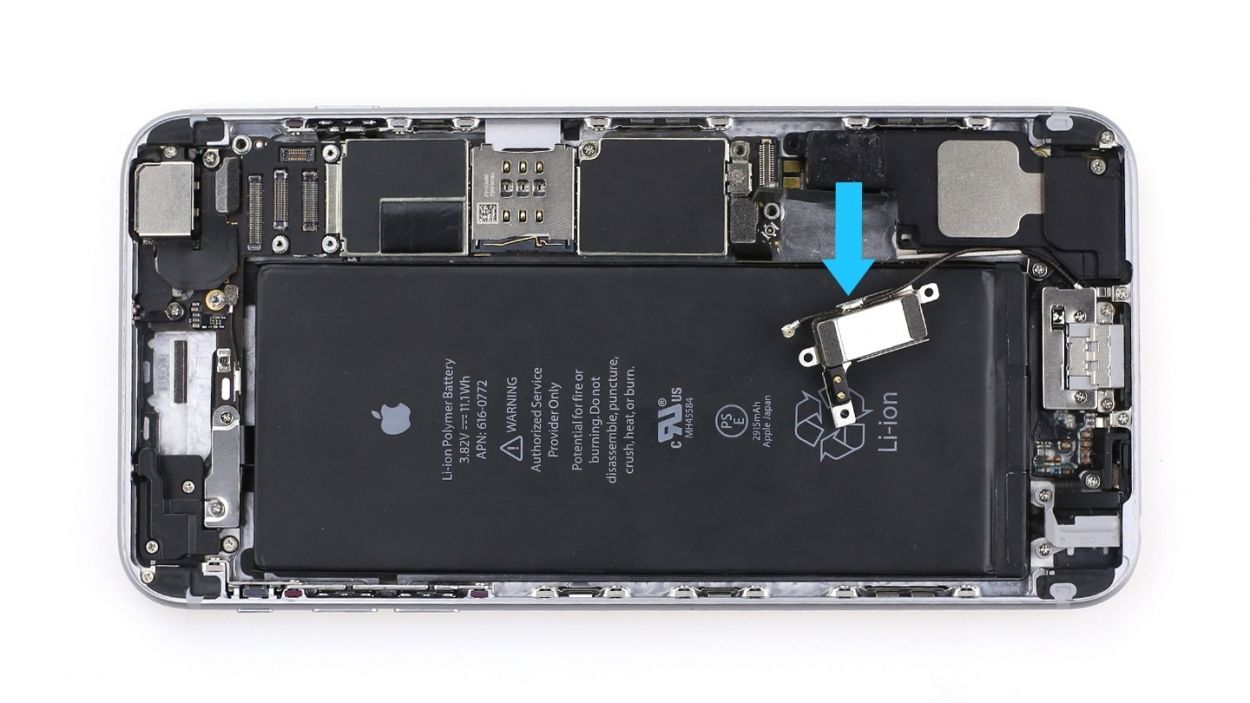
– Then you can remove the vibration motor.
Step 8

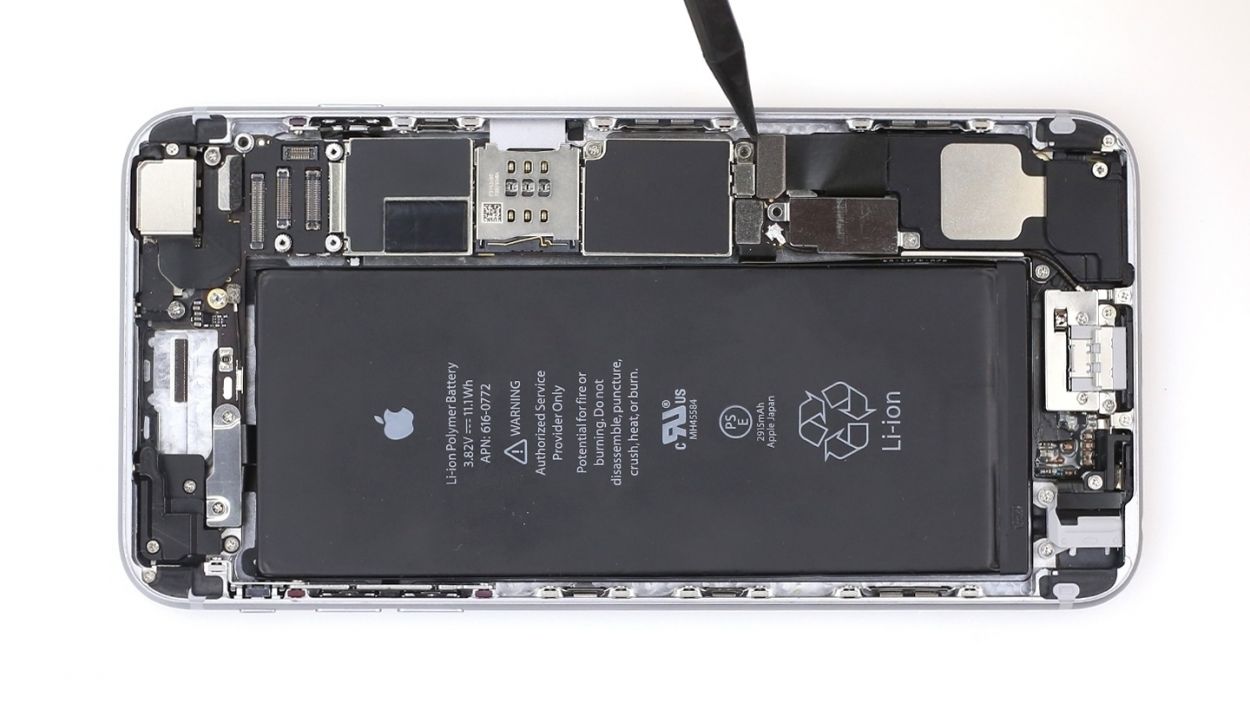
– Reconnect that antenna cable to the vibration motor like a pro (check out figure 1 for reference).
– Position the vibration motor back where it belongs, and ensure that the antenna cable is snugly fitted in the rail next to the speaker (just like in figure 2).
– It’s time to plug that antenna connector back in (see figure 3 for guidance).
– Secure the vibration motor in place once more with those trusty screws (see figure 4). You’ll need 2 x 2.3 mm Phillips screws for this step.
Step 9
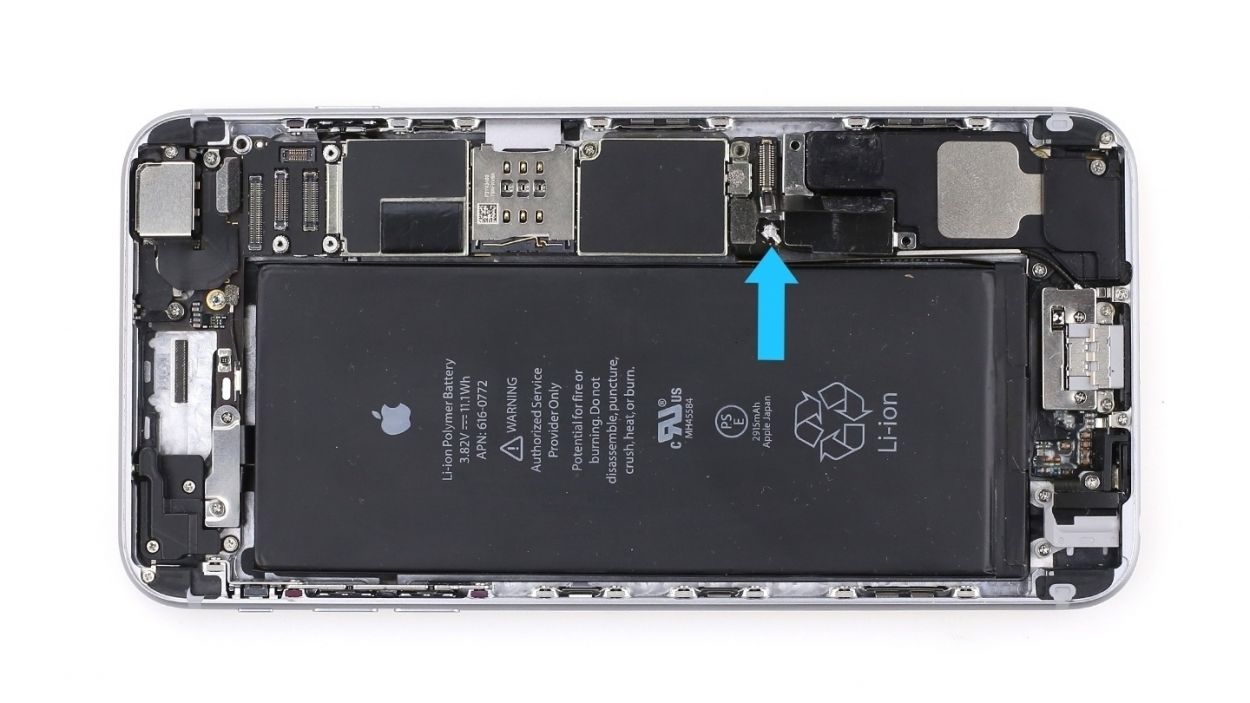
– Now let’s get that Lightning connector back in action! Just reconnect it like a boss (check out figure 1 for a little visual help).
Step 10

If those connectors are feeling a little shy and don’t connect just right, you might see some funky stripes on your display or find that parts of the touchscreen are playing hard to get. Let’s make sure they’re snug and happy!
– Reattach the connectors (see figure 1). Connecting the LCD connector generally takes a few tries. Be very careful to avoid bending the connector.Front camera/sensor/earpiece/ambient microphoneTouch ID cableLCDTouchscreen
– Start your iPhone as soon as the connectors are securely attached. Check the function of the LCD, touchscreen, proximity sensor, front camera and earpiece.If the connectors aren’t connected properly, stripes will appear on the display or parts of the touchscreen won’t work.
– Now attach the cover and screw it in place (see figure 2).1 x 1.6 mm Phillips screw3 x 1.2 mm Phillips screw1 x 2.9 mm Phillips screw
Step 11

– First, let’s get those fresh adhesive strips situated right below the battery. This will keep the battery snug as a bug and prevent it from moving around too much!
– Next up, gently place the battery back into your iPhone and connect the battery connector (check out figure 1 for a visual guide).
– Finally, pop on the silver cover and secure it with some screws (see figure 2 for reference). You’ll need 1 x 3.2 mm Phillips screw and 1 x 2.3 mm Phillips screw for this step!
Step 13

– Now it’s time to fasten those two pentalobe screws at the bottom of your enclosure. You’ll need 2 x 3.8 mm pentalobe screws for this step, so let’s get them in there and secure everything nicely!