DIY Guide to Replace iPhone 6 Speaker – Step-by-Step Tutorial
Duration: 30 min.
Steps: 14 Steps
Ready to take on the challenge of replacing your iPhone 6’s faulty speaker? We’ve got your back! If your tunes are playing a little too softly, or your ringtone is more of a whisper than a shout, it’s time to roll up those sleeves. Let’s get your sound back to its glory days!
Step 1
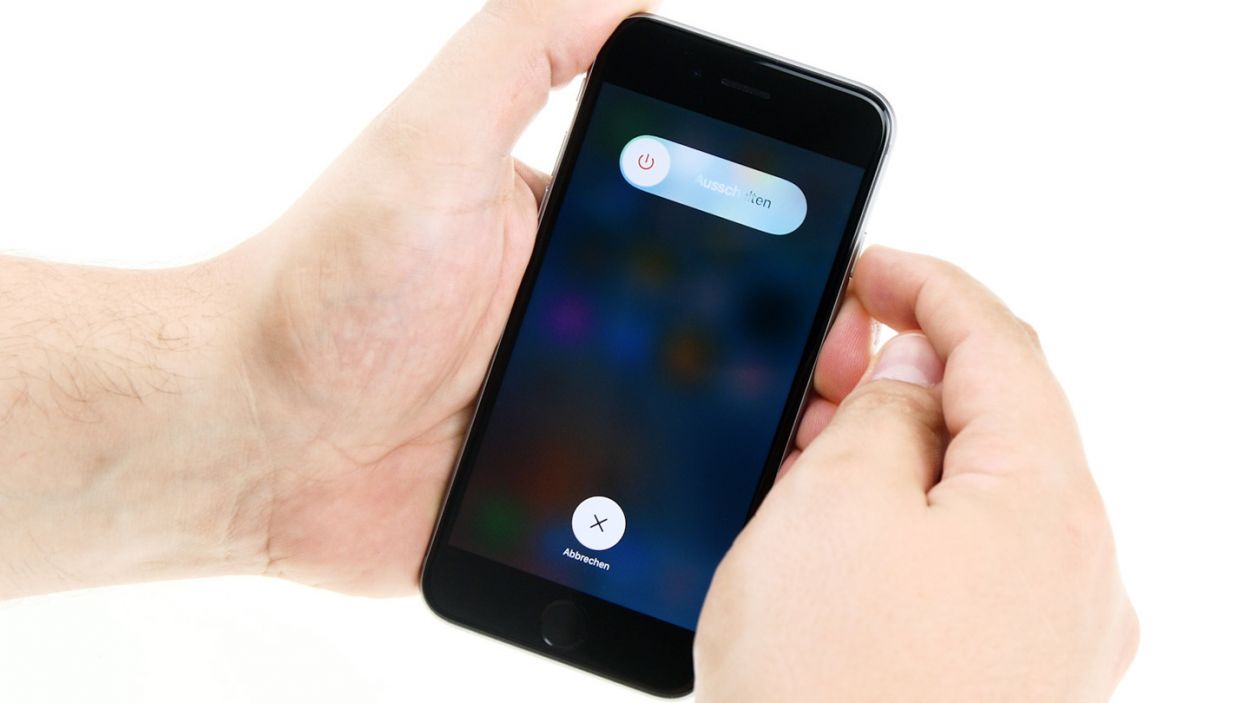
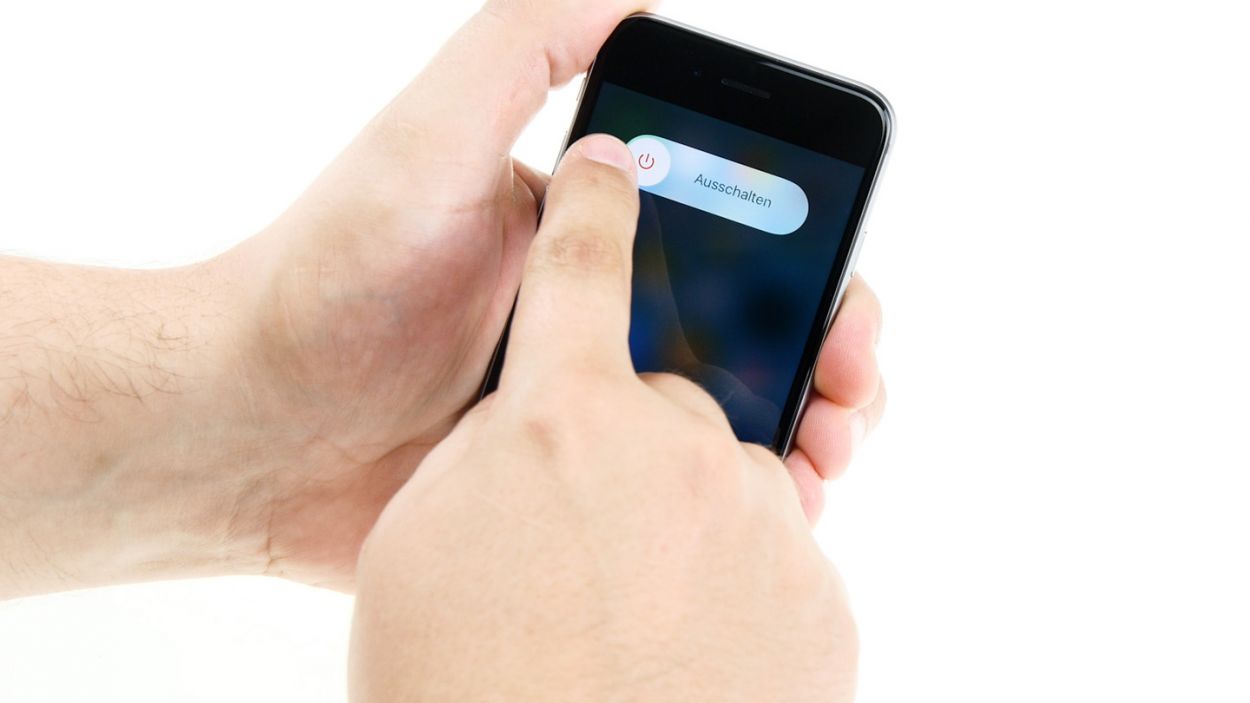
– Alright, champ! First things first, let’s power down your iPhone 6. It’s all about keeping things safe during this repair.
– Hold down that standby button for about three seconds – you’ll see a slider appear. It’s your cue!
– Slide to power off. This might take around ten seconds – just chill and let it do its thing.
Step 2
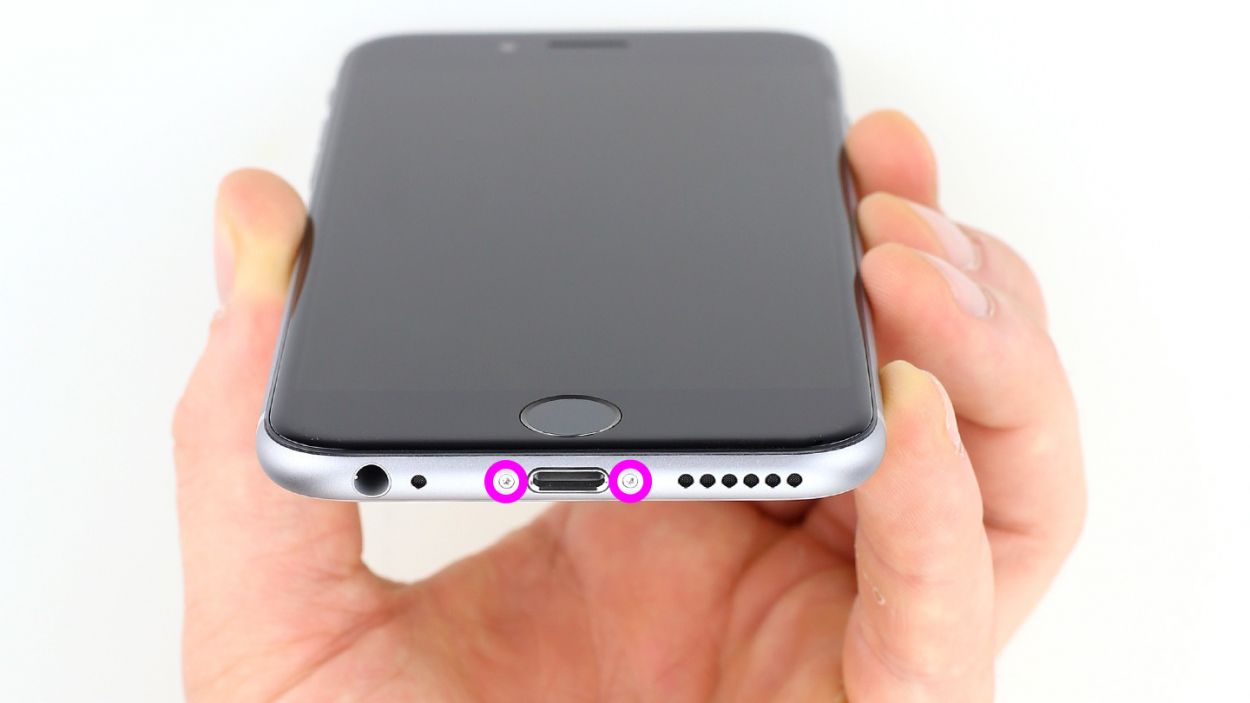
– Ready to unleash your inner phone whiz? Let’s get this iPhone 6 open! You’ll need your pentalobe screwdriver for this part.
– Spot those two teeny-tiny pentalobe screws down near the Lightning connector? Yep, those are the ones. Unscrew ’em and stick ’em on your magnetic pad. (Don’t lose those little guys!)
Step 3


– Alright, let’s get this iPhone 6 screen lifted! Gently lay your phone on a soft surface to avoid any scratches on the back.
– Grab your trusty suction cup and plastic plectrum. If your screen’s cracked, tape it up first to prevent any accidental glass adventures.
– Stick that suction cup on the display – ideally above the Home button, but next to it is cool too. Gently pull up on the cup while sliding the plectrum between the aluminum frame and display. You might need a few tries – patience, young Padawan!
– Once you’ve got a little lift, carefully work your way around the edges until both long sides are loosened. You’re doing great!
Step 4
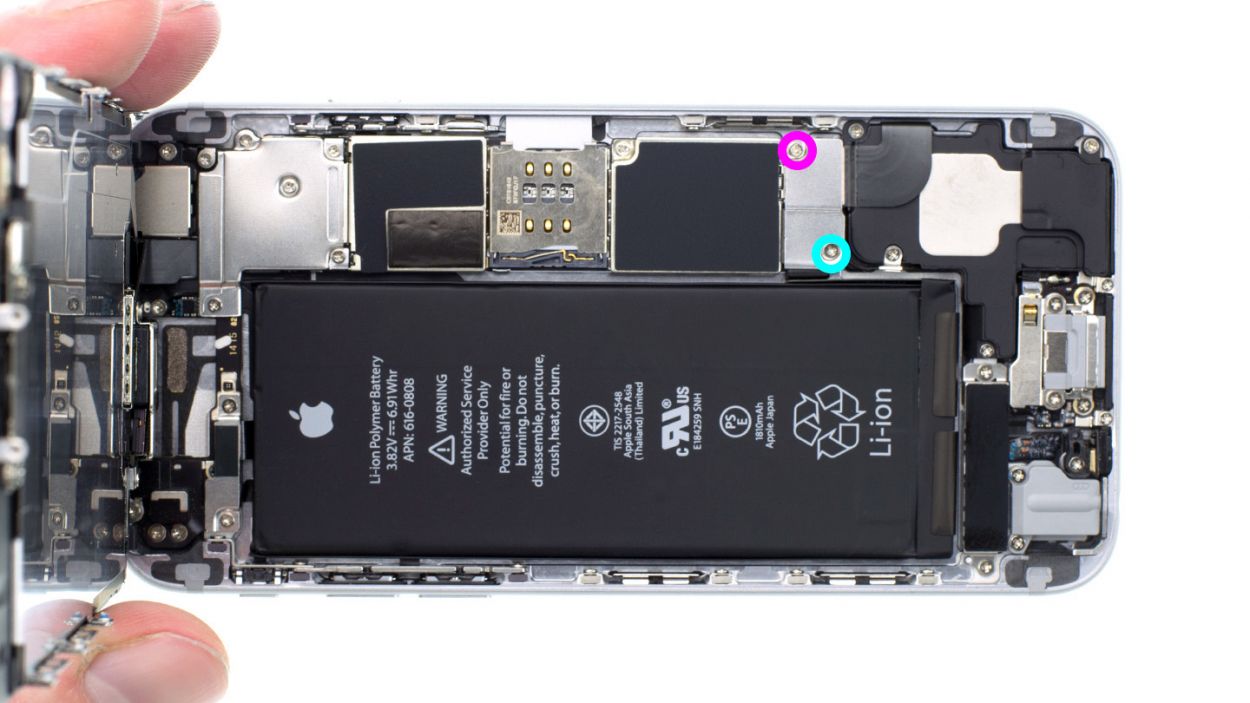


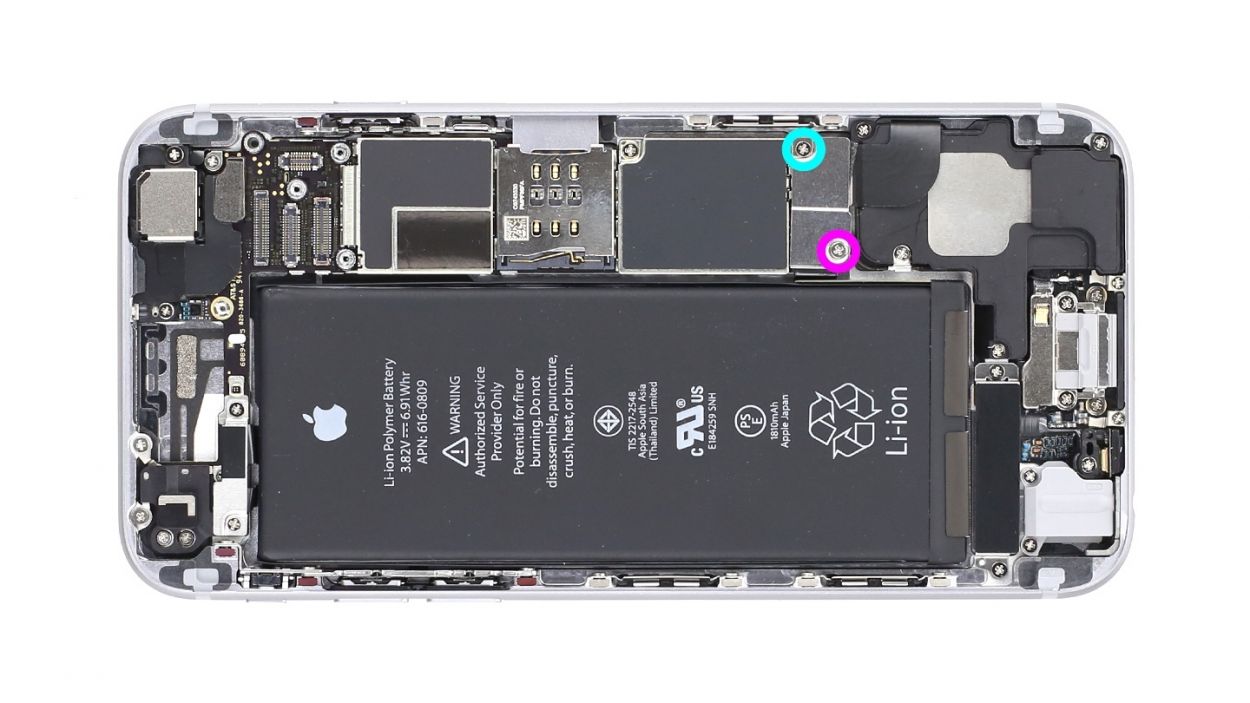
– Use a Phillips screwdriver to remove the Phillips screws that are attached to the battery connector (see figure 1). Take off the cover (see figure 2) and put all parts in the same container.1 x 3.2 mm Phillips screw1 x 2.3 mm Phillips screw
– Now carefully remove the battery connector. To do this, use the sharp end of the ESD spudger – go very gently under the plug (see figure 3). You do not have a spudger available? You can also try to remove the plug with your fingernail.
Step 5
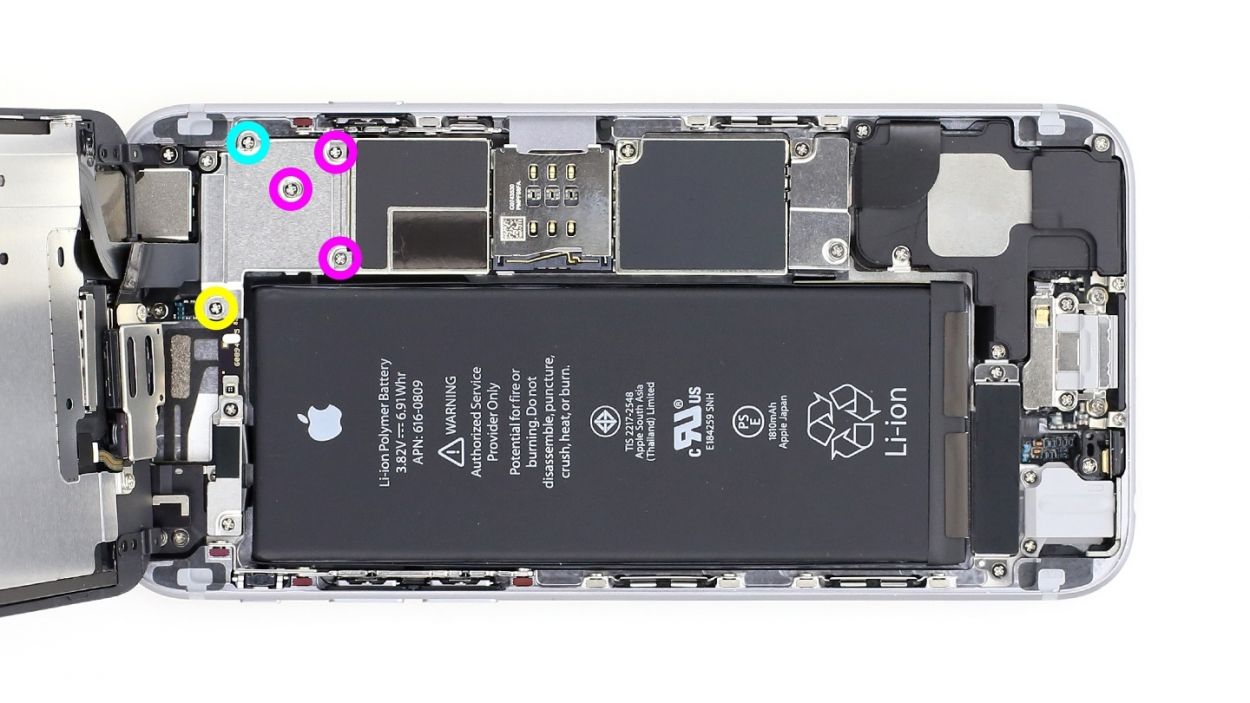

– Alright, cool cats, let’s tackle this silver cover! It’s held down by five Phillips screws – a mix of sizes, so keep them organized on your magnetic pad. (See figure 1). Once those screws are out, the cover comes right off. Piece of cake!
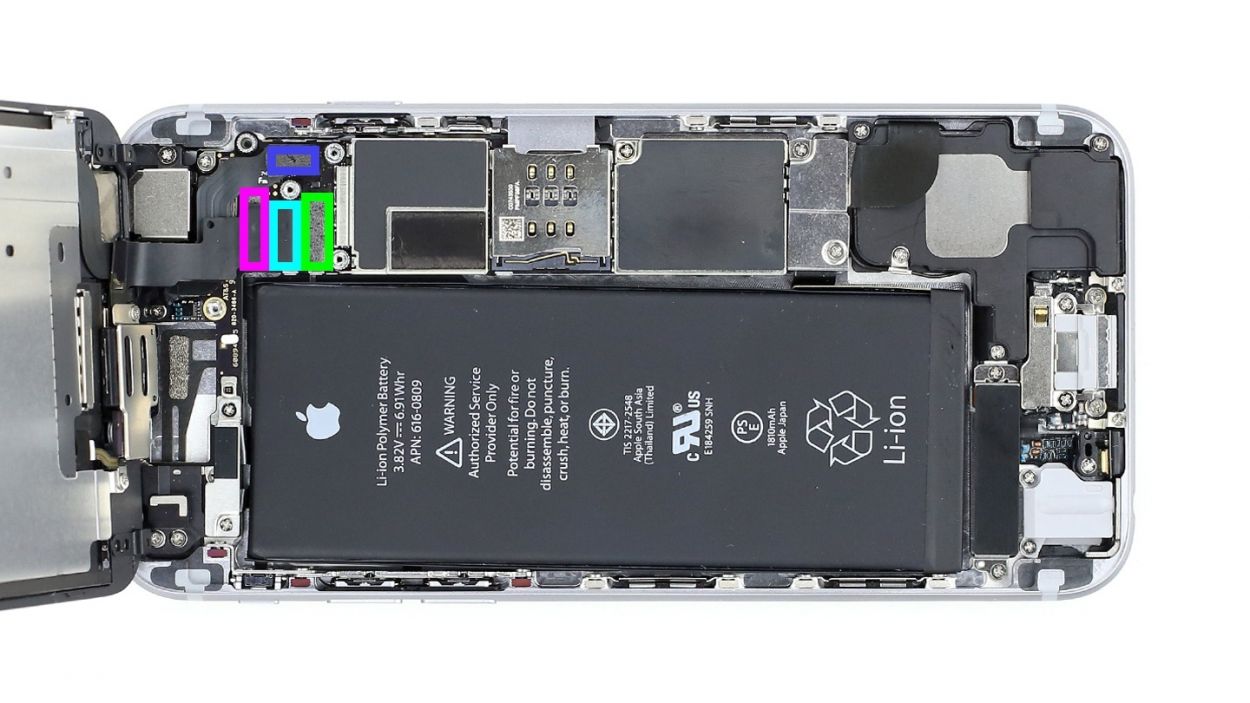
– Now, check out these four connectors (picture 2) – they’re stacked like a delicious layer cake! Use the pointed end of your spudger to gently lift each one, being super careful. Unplug them in the order shown: Front camera/sensor/earpiece/ambient microphone, then the Touch ID cable, the LCD, and finally, the touchscreen. You got this!
Step 6
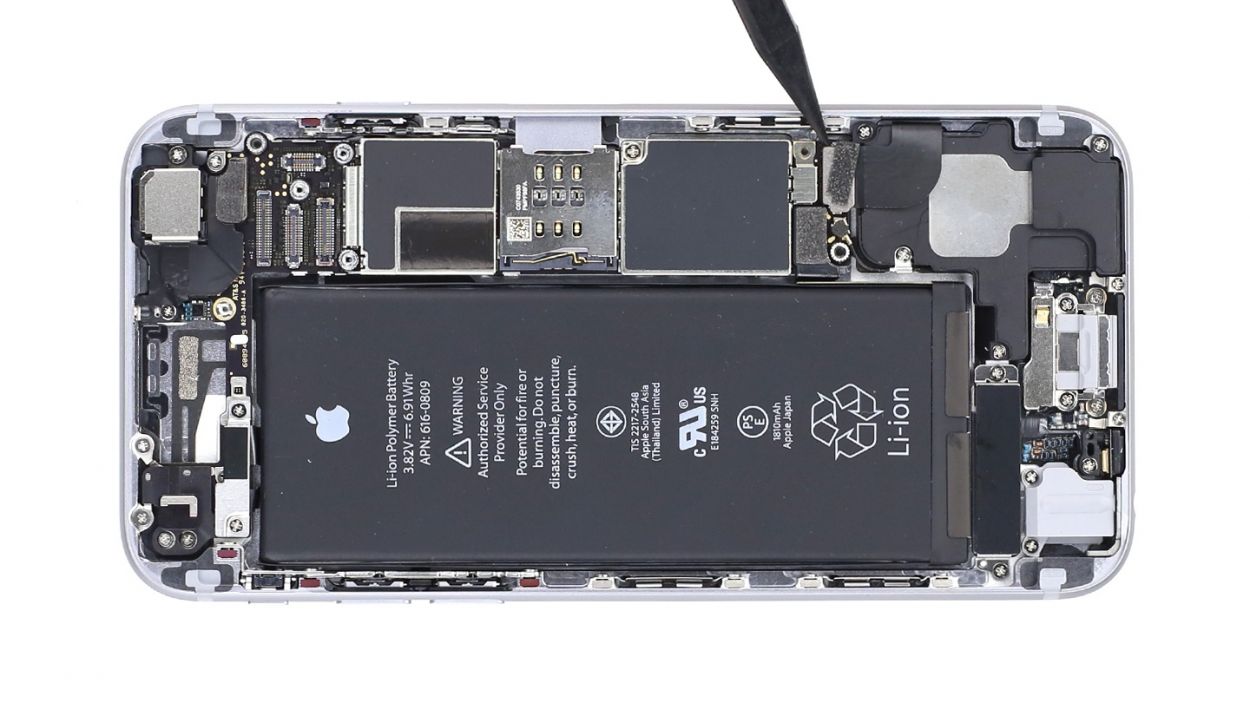
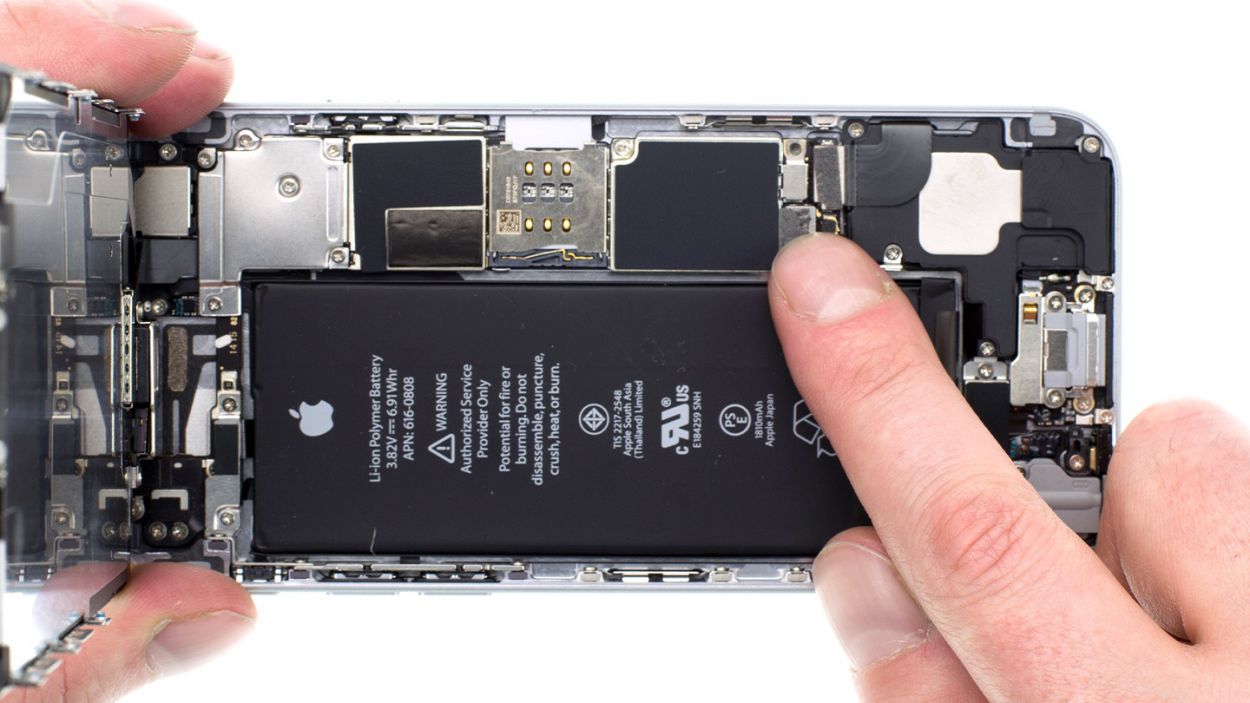
– Using the trusty spudger, gently detach the lower oblong connector for the Lightning connector. You’ve got this!
Step 7
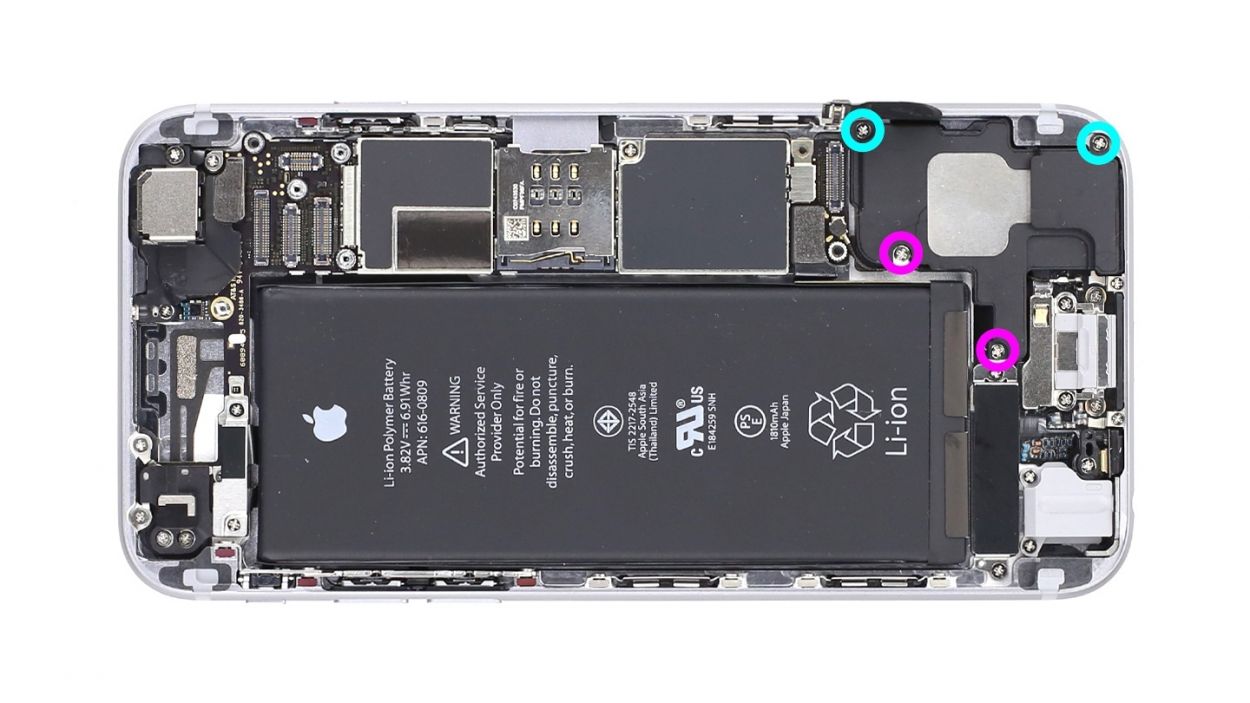


– Time to pop off the four Phillips screws that are holding the speaker hostage (check out figure 1 for help). Use different containers to keep track of these little guys – trust me, you’ll thank yourself later! You’ve got 2 x 2.9 mm Phillips screws and 2 x 2.3 mm Phillips screws here.
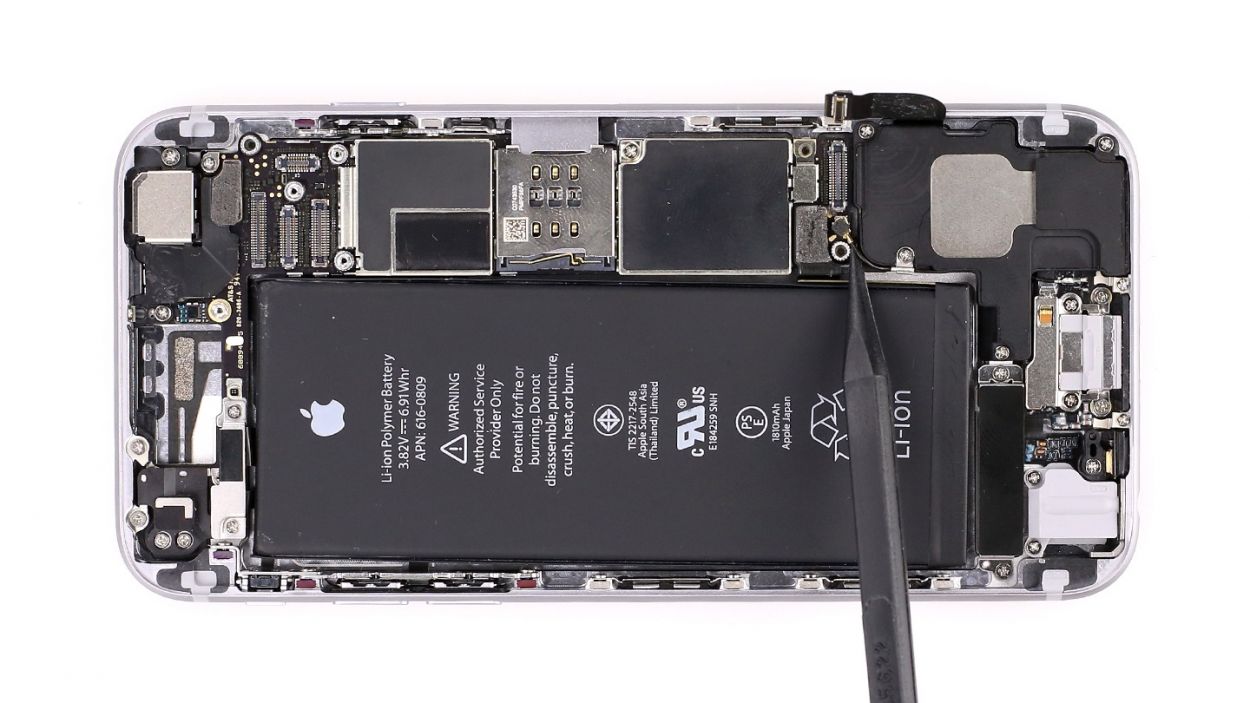
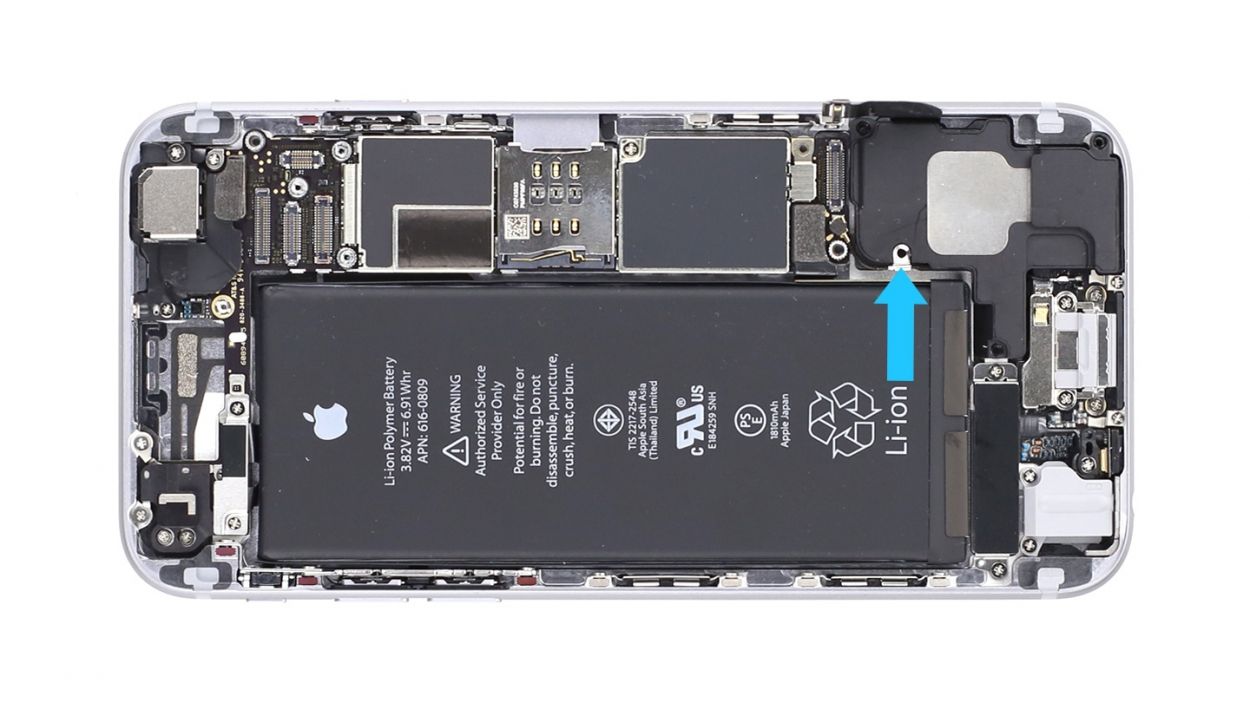
– Let’s gently release the small antenna connector with your trusty spudger (figure 2 is your guide). Just push that antenna cable right off the speaker (look at figure 3 to see how it’s done).
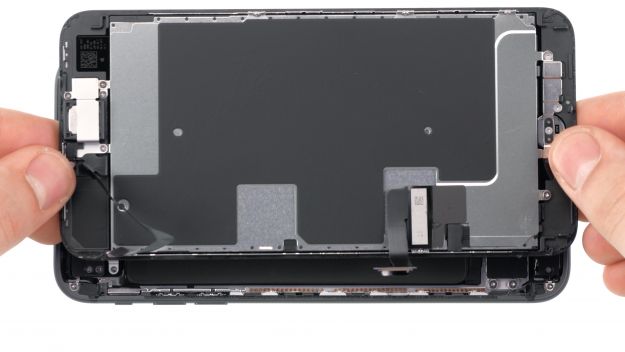
– And now for the grand finale! You can smoothly take out the speaker (figure 4). You’re doing awesome!
Step 8

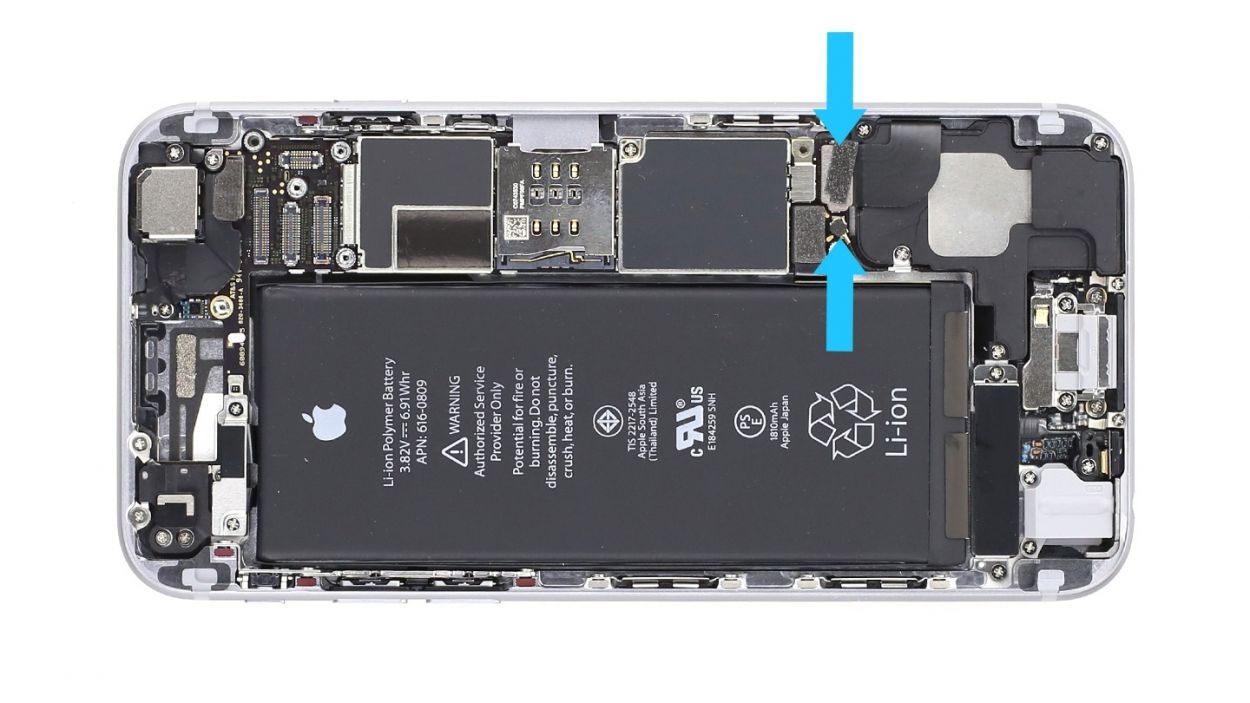
– Time to place that shiny new speaker right back where it belongs! Make sure it sits perfectly and that all those little cables are showing off their connectors. And don’t forget the antenna cable with the tiny metal ring – it needs to be attached just right (check out figure 1 for a visual guide). Once you’ve done that, let’s bring back those Phillips screws and fasten them like a pro (see figure 2)!
Step 9
– Now reconnect the little antenna cable and the connector for the Lightning connector in the appropriate positions.
Step 10

If you see streaks on the display or the touchscreen is partially not working, the connectors are not connected properly.
– Okay, cool beans! Let’s get those LCD connectors snug. (See figure 1). It might take a few tries, but don’t sweat it! Just be super gentle so you don’t bend anything. We’re talking about the Front camera/sensor/earpiece/ambient microphone, Touch ID cable, LCD, and Touchscreen connectors.
– Once everything’s connected, fire up your iPhone 6! Let’s do a quick sound check – test that LCD, touchscreen, proximity sensor, front camera, and earpiece. If you see any funky lines on the screen or the touchscreen is acting up, those connectors might need a little extra love.
– Now, pop that cover back on and secure it with those five screws. (See figure 2). You’ve got one 3.1 mm Phillips screw, three 1.3 mm Phillips screws, and one 1.8 mm Phillips screw – keep those little guys organized!
Step 11


– Alright, time to reconnect that battery! Let’s get your iPhone 6 powered up again.
– Now, slide that shiny silver cover back into place and secure it with those screws: 1 x 3.2 mm Phillips screw and 1 x 2.3 mm Phillips screw. You’ve got this!
Step 12

– You’re almost there! Gently slide the display back into its cozy home. Just watch out for those sneaky cables and make sure the top edge of the screen clicks in snugly.
– Now, give your screen a little nudge towards the home button to ensure it fits perfectly in the frame.
Step 13

– Take the last remaining Pentalobe screws and insert them into the lower side of the body.2 x 3.8 mm pentalobe screw
Step 14

Hey there! Since the battery took a little vacation from your iPhone 6, it might have forgotten the time and set itself to “1:00 am 1/1/1970”. No worries, though! Just a quick fix and you’ll be back in action. Just keep in mind that this could throw a wrench in your cellular connection, so let’s get that sorted out!
– Since your iPhone 6’s battery took a little break, it might have lost track of time and reset itself to “1:00 am 1/1/1970”. No biggie! Just a quick adjustment and you’ll be back on track. Just a heads up, this time mix-up could mess with your cellular connection, so let’s get that fixed up!