DIY Guide to Replace iPhone 6s FaceTime Camera
Duration: 30 min.
Steps: 13 Steps
Hey there! Ready to give your iPhone 6s a little love? Let’s get that front camera and sensor cable feeling brand new. Whether your selfies are getting fuzzy, your camera isn’t opening up, or your phone stays lit during calls, this guide has got you covered. And hey, if your mic is giving you the silent treatment during videos or FaceTime, a new cable will have you back to chatting it up in no time. If things get tricky, remember, you can always schedule a repair.
Step 1


– Power down your iPhone before we dive into the fix to avoid any unexpected surprises. Simply hold down the standby button for a cool three seconds until the ‘slide to power off’ prompt pops onto the screen.
– Give that slider a swift swipe from left to right. Sit back and relax, your iPhone will power down smoothly in about 10 seconds.
Step 2

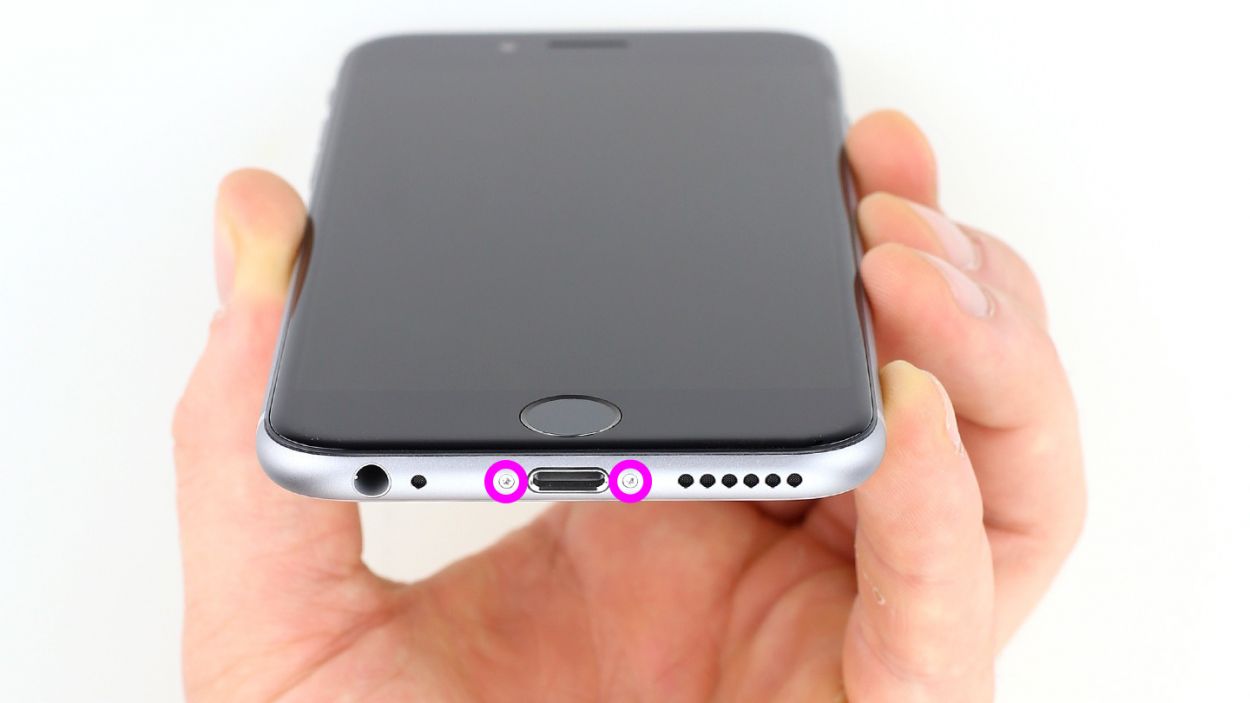
– Pop open your iPhone 6s with a pentalobe screwdriver. It’s like starting an exciting adventure!
– Unscrew the two pentalobe buddies sitting on either side of the lightning connector. Keep them safe and sound on a magnetic pad — sort them out just like they were chilling in your phone before. That’s 2 x 3.8 mm of tiny twirlers!
Step 3

If needed, warm up the outer edges of the display a few times. A little heat can work wonders!
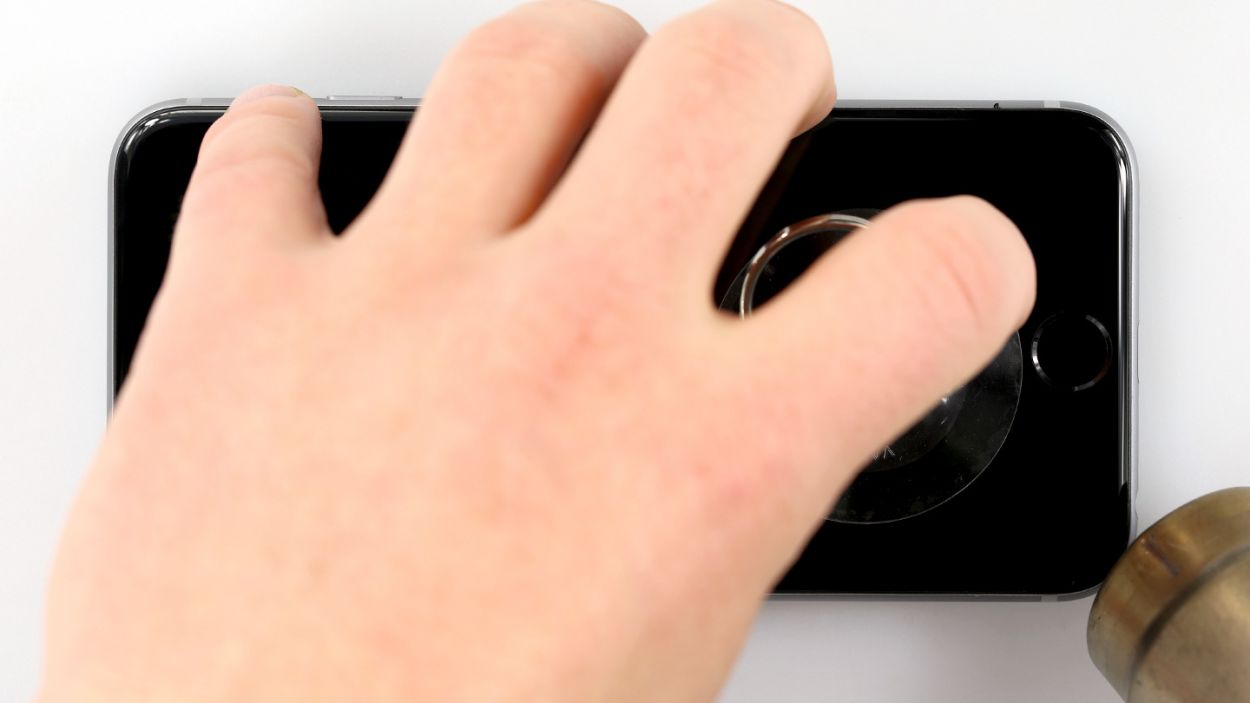
– Place your iPhone 6s on a cushy, clean surface to keep it scratch-free and happy.
– Grab a suction cup to gently pull up the front panel. You’ll need a sturdy plastic plectrum and a hot-air gun too. If your screen is looking rough, slap some adhesive tape over it to keep things tidy.
– The screen likes to stick to the frame just a bit. Warm up the outer edges of the display to about 60°C (140°F) with your hot-air gun to loosen things up.
– Pop the suction cup right over the home button, or cozy it up next to it. Lift the screen with the suction cup while wedging the plastic plectrum between the aluminum and display frames. Aim to gently push down on the aluminum frame as you nudge up the display. Patience, my friend — it might take a few tries.
– Once the screen lifts up just a millimeter or two, slide along the edges with care. If it’s playing hard to get, warm those edges again a few times.
Tools Used
- heat gun to heat parts that are glued on so they’re easier to remove.
In most cases, you can also use a hairdryer.” rel=”noopener”>Heat gun - Pick Set
- VAKUPLASTIC Suction Cup
Step 4
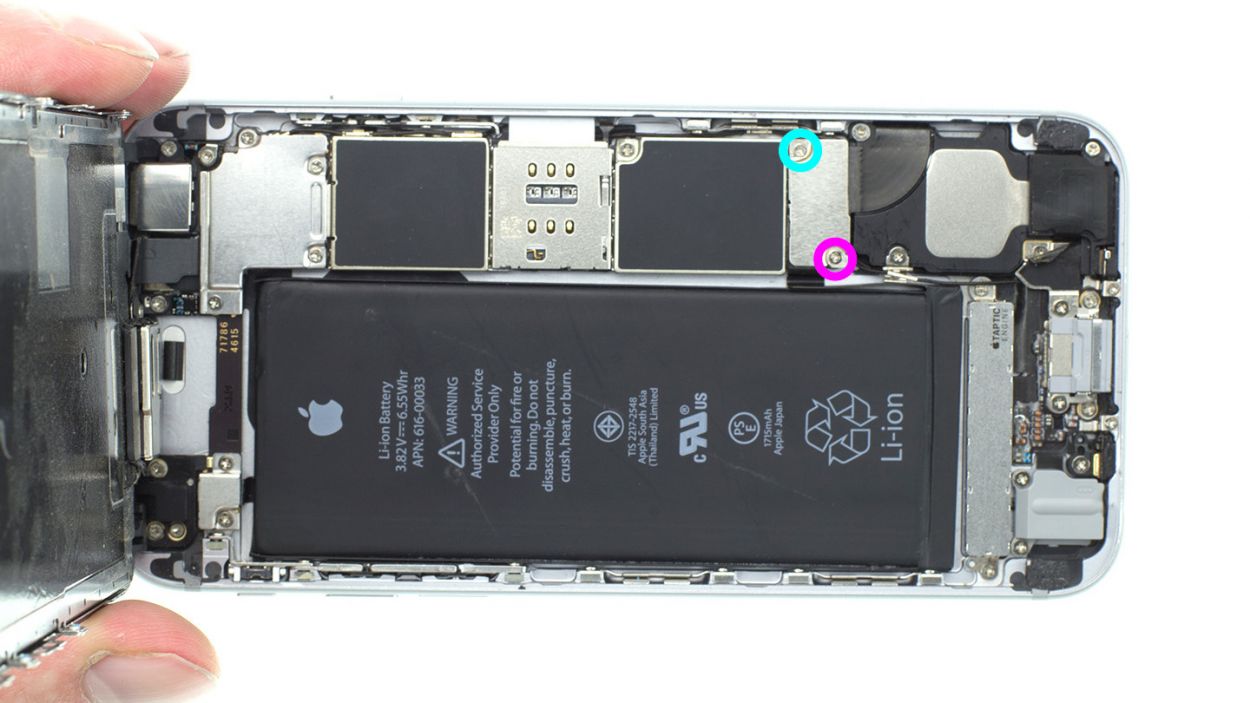

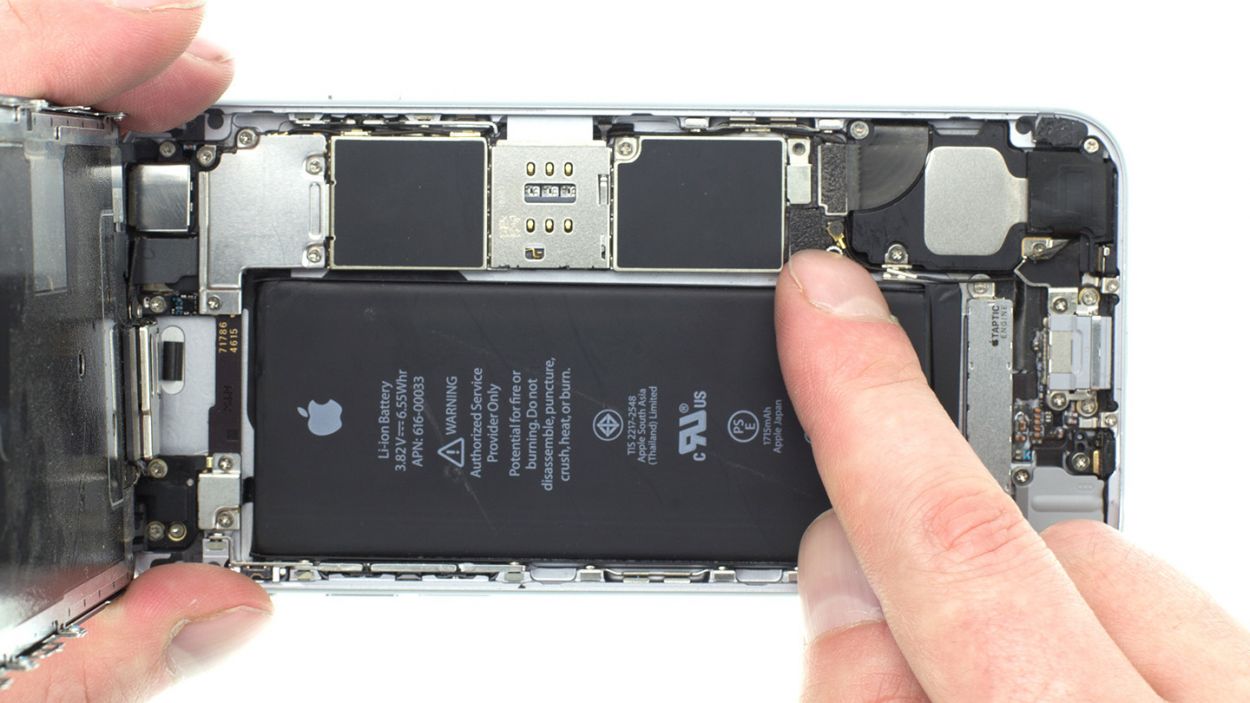
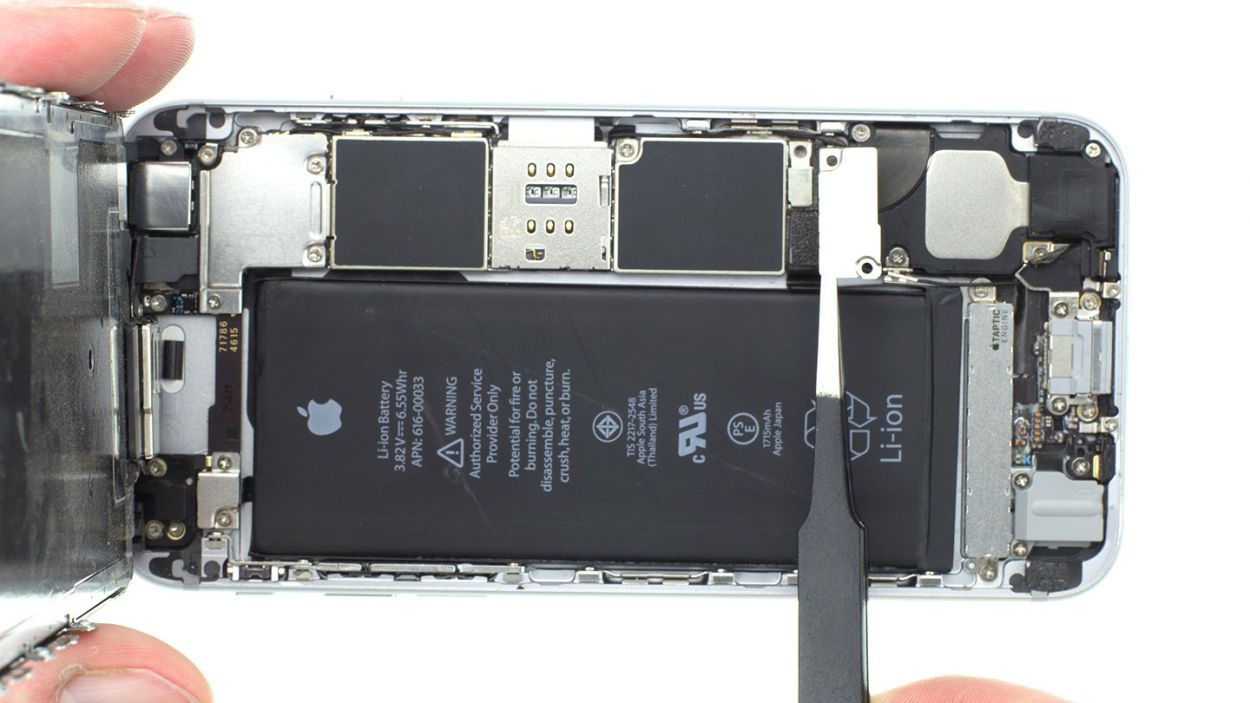
– Time to say goodbye to those Phillips screws and the plug cover holding your battery plug in place! Once you’ve removed them, toss those little guys onto a magnetic pad so they don’t play hide and seek later. You’ll need: 1 x 2.2 mm Phillips screw and 1 x 2.9 mm Phillips screw.
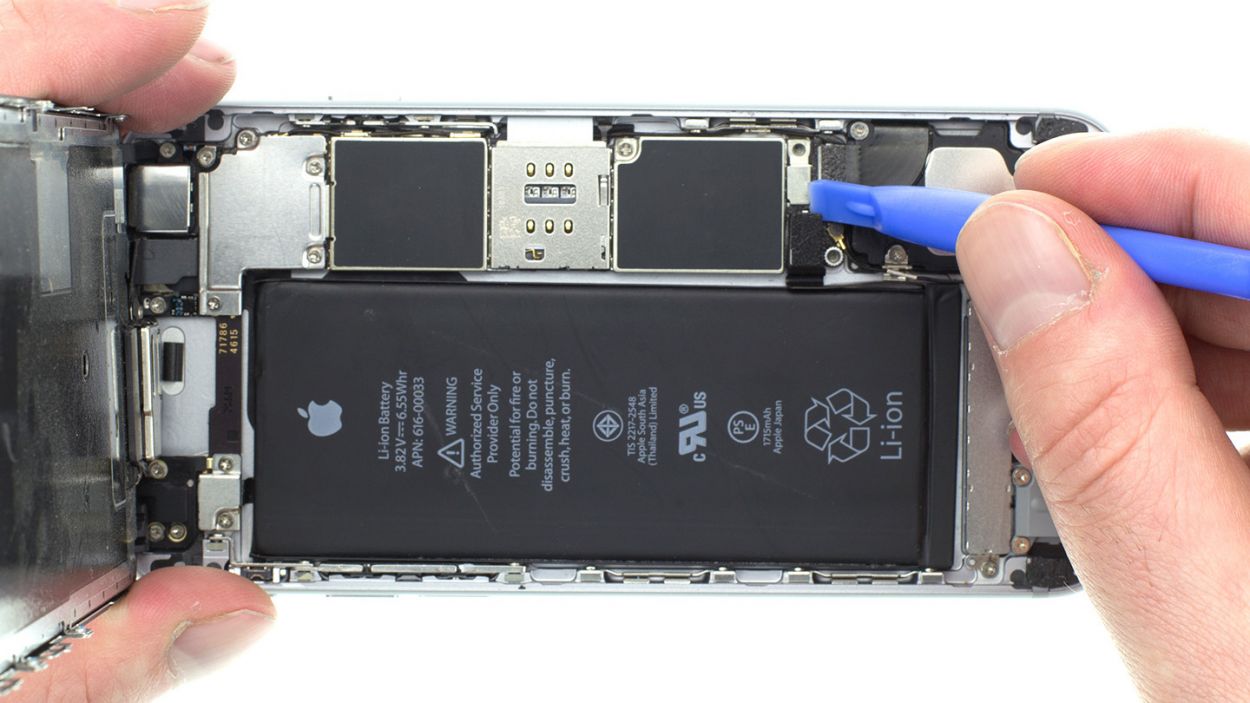
– Now for the fun part—gently wiggle that battery plug free! Use an ESD spudger to slide under the plug. If you don’t have one handy, your trusty fingernail can do the trick too. Just be careful, we’re not trying to start a nail salon here!
Step 5
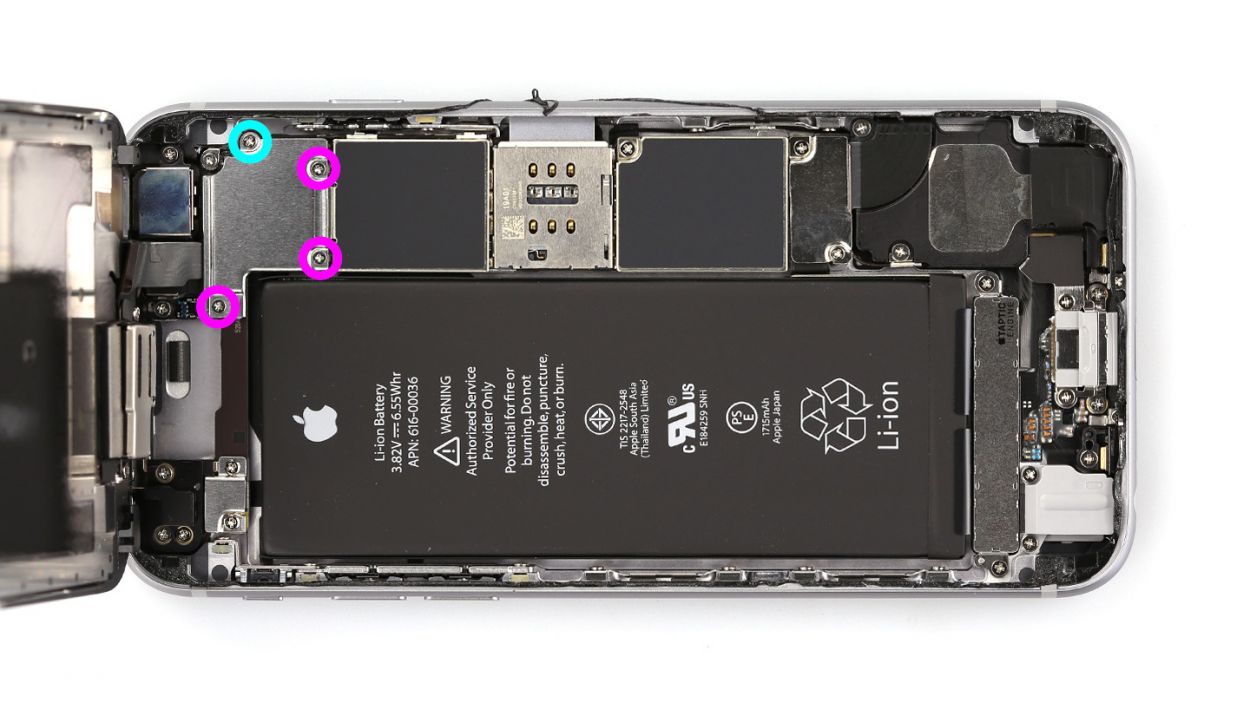

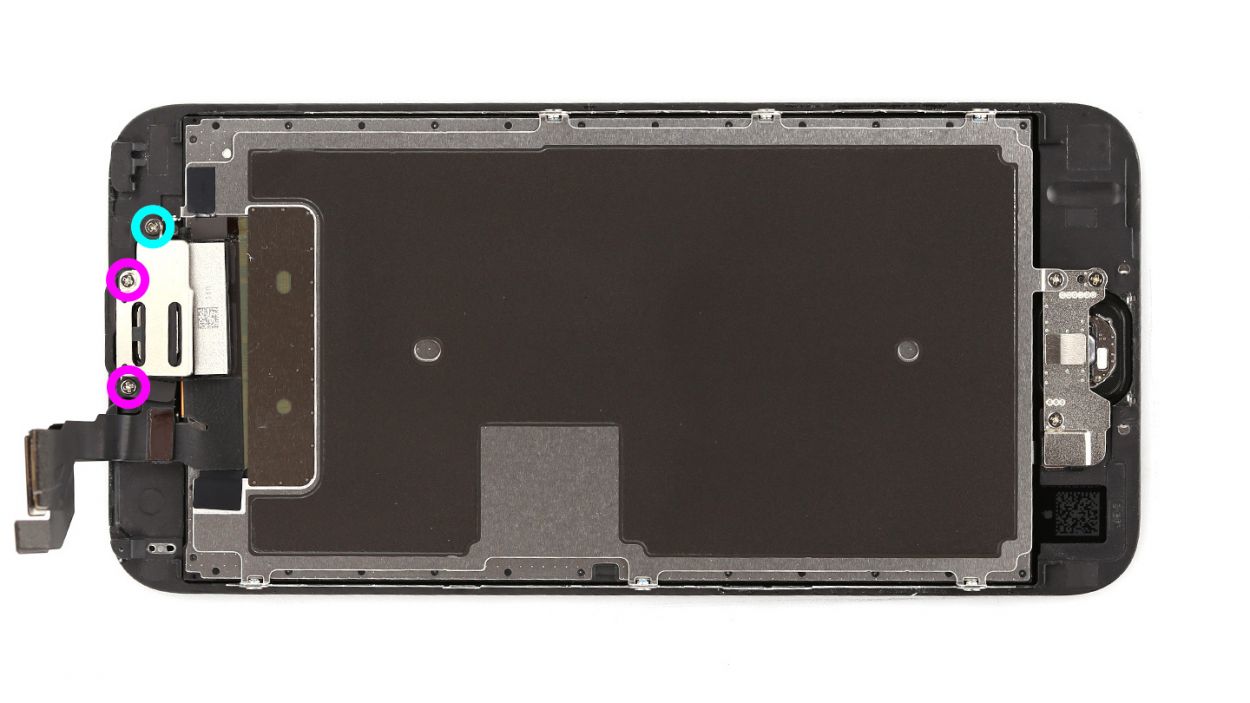
– Alrighty, let’s start by loosening up those four Phillips screws on the silver contact cover. Just whip out your screwdriver and gently unscrew. Remember to keep those screws safe with the cover on a magnetic pad—they’ll wait patiently for their turn to shine again. You’ve got three screws playing at 1.3 mm and one big boss at 2.9 mm.
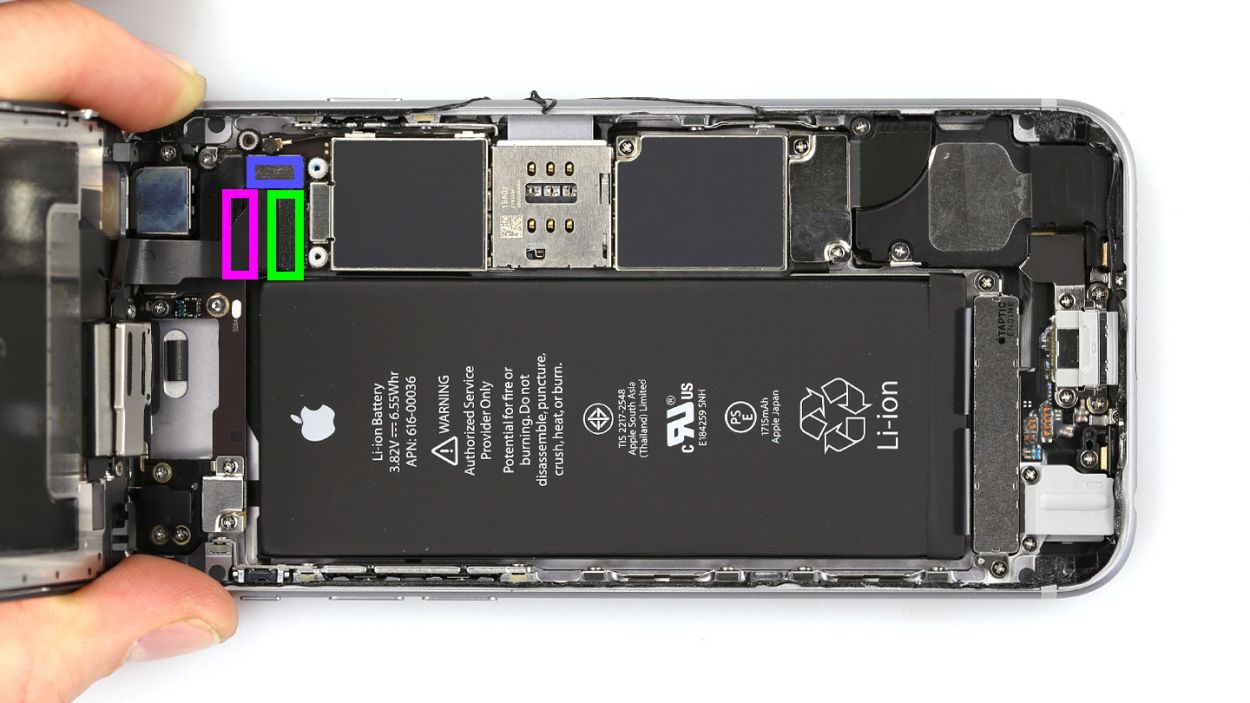
– Next up, let’s free some space by unhooking those three sneaky display connectors. They overlap like pancakes, so tackle them in the order shown. Gently wedge your spudger underneath each connector and give it a careful lift. Say hello to the front camera, sensor gang, and display as you go!
Step 6


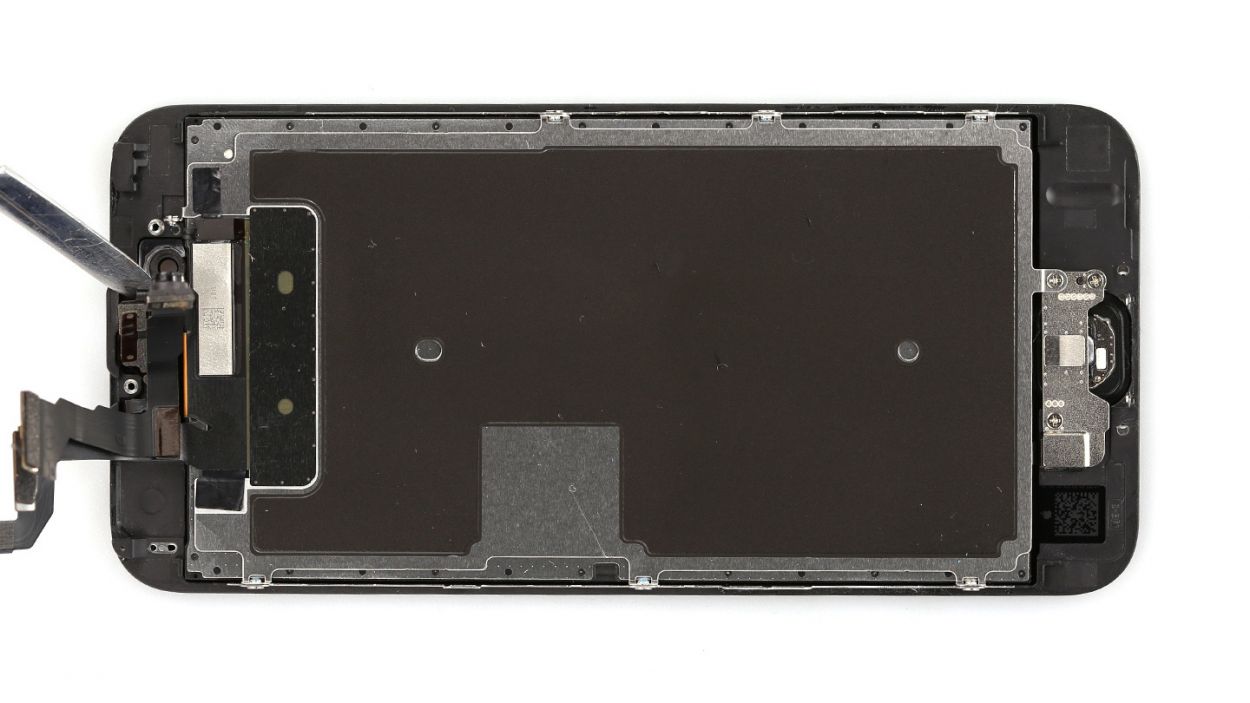
– First up, locate the earpiece at the top edge of the display. You’ll need to unscrew three Phillips screws from the earpiece cover—don’t forget to stash them on the magnetic pad so they don’t go wandering off! You’ll have 2 x 2.2 mm Phillips screws and 1 x 1.8 mm Phillips screw in your little collection.
– Next, gently peel away the earpiece cover, which is still clinging to the display back thanks to an adhesive strip. Make sure to keep it with the screws you just removed, so they can stay together like best buddies.
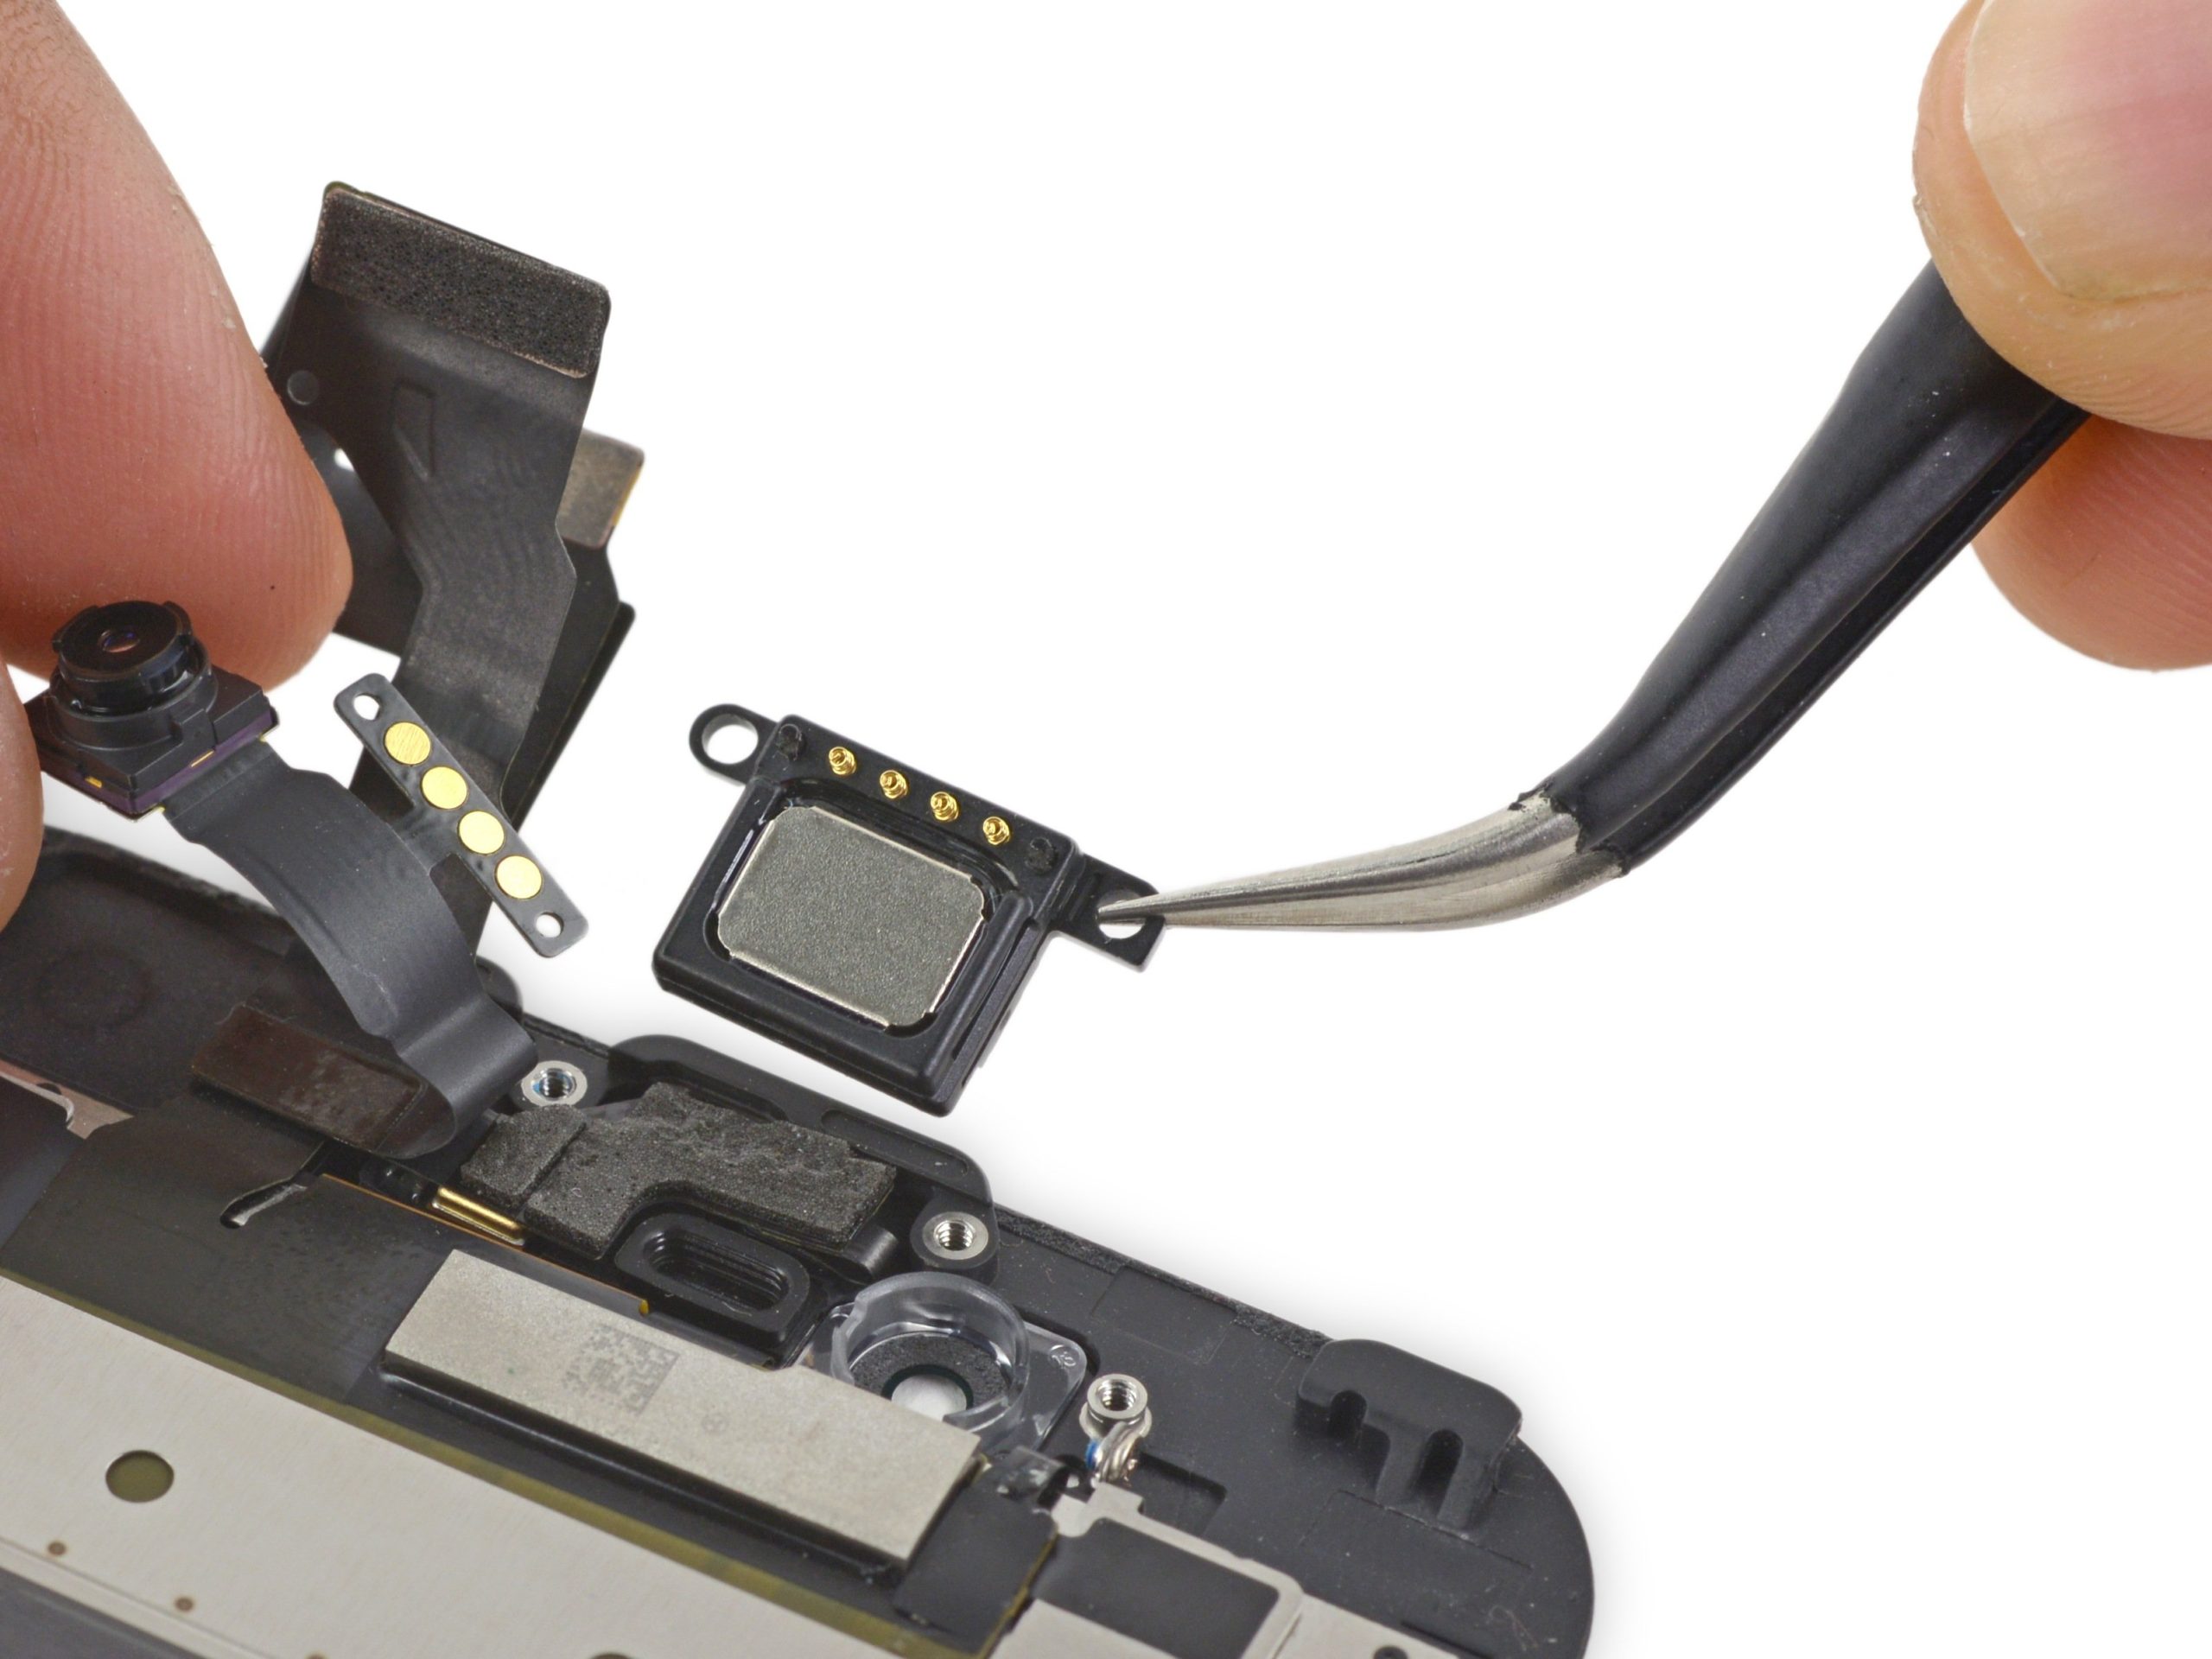
– Now, the earpiece is hiding right beneath the front camera’s ribbon cable. To get to it, just nudge the cable a bit to the side. You’re doing great!
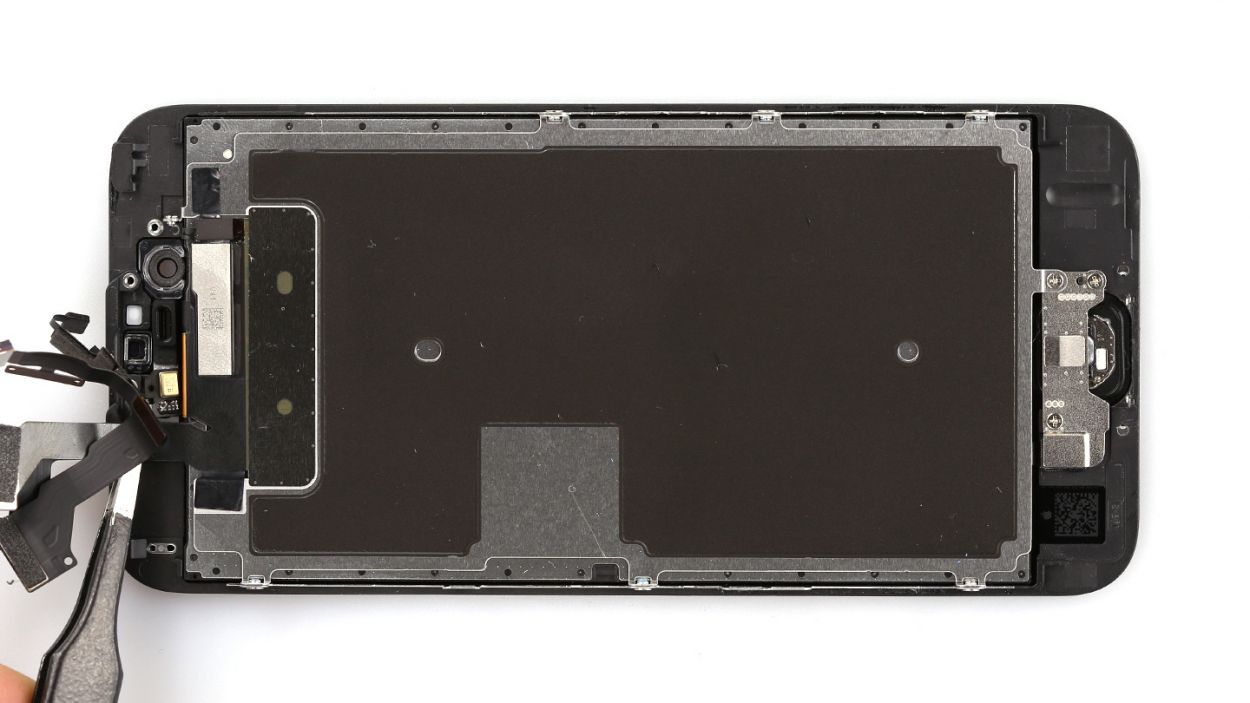
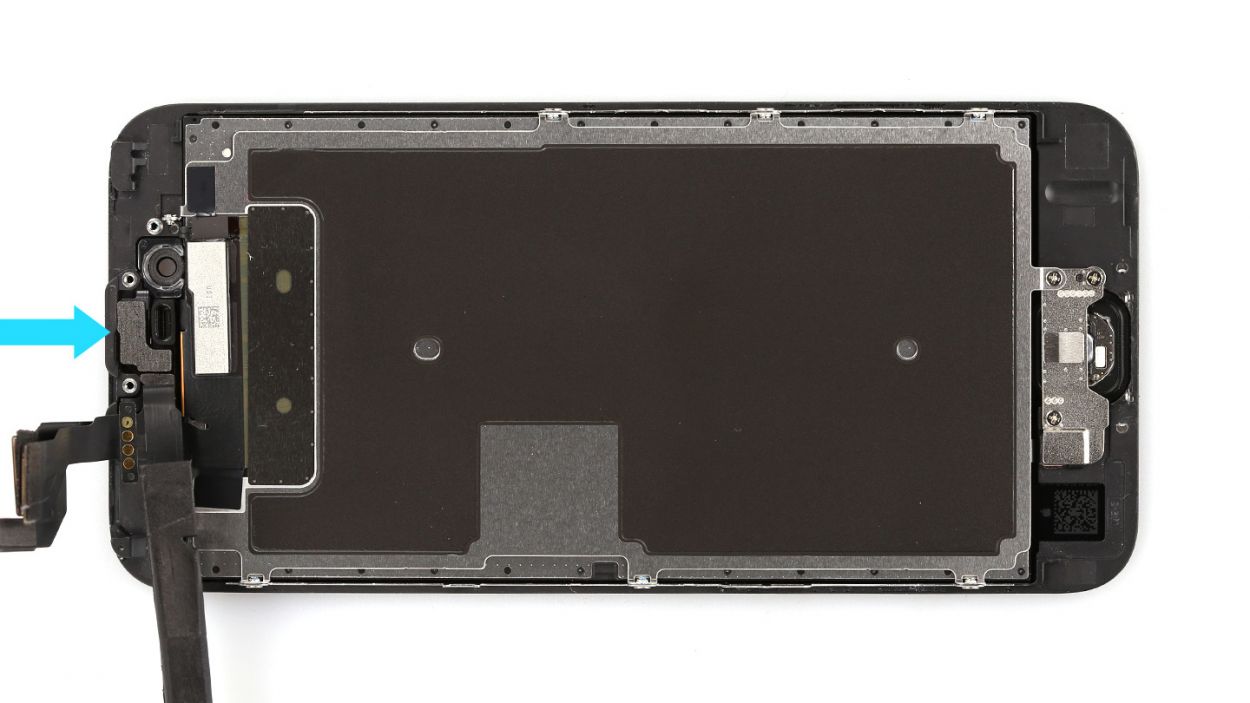
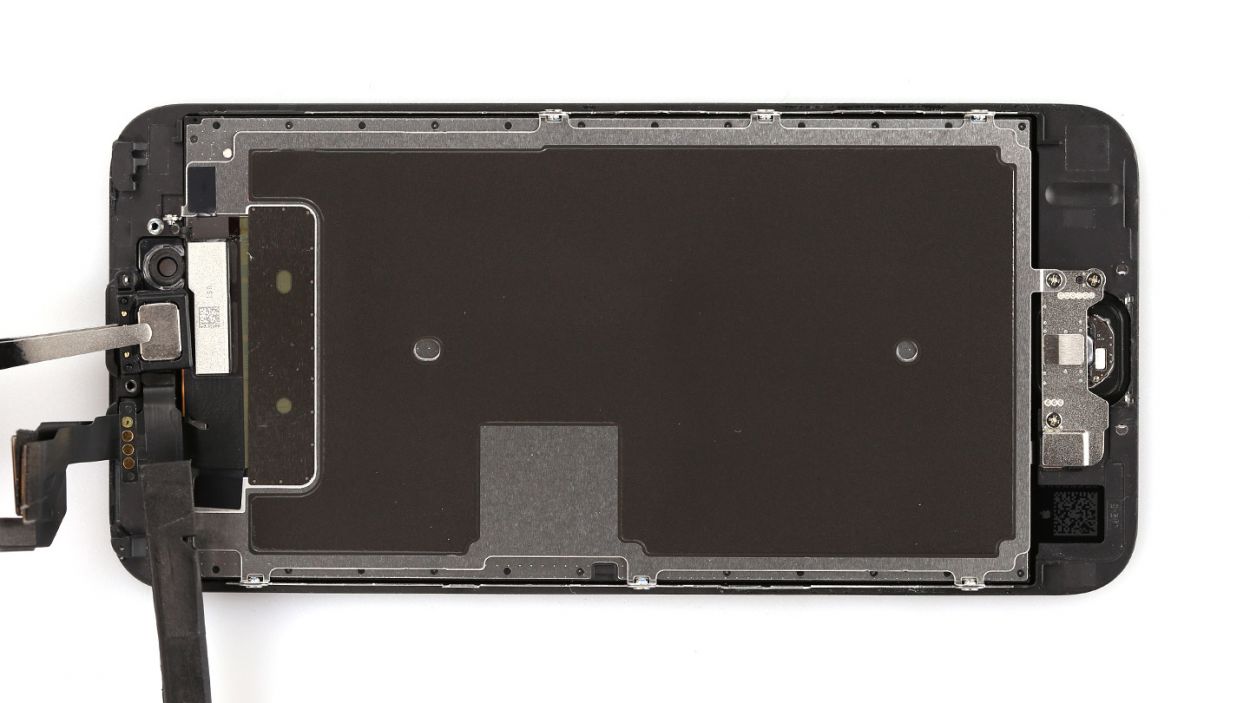
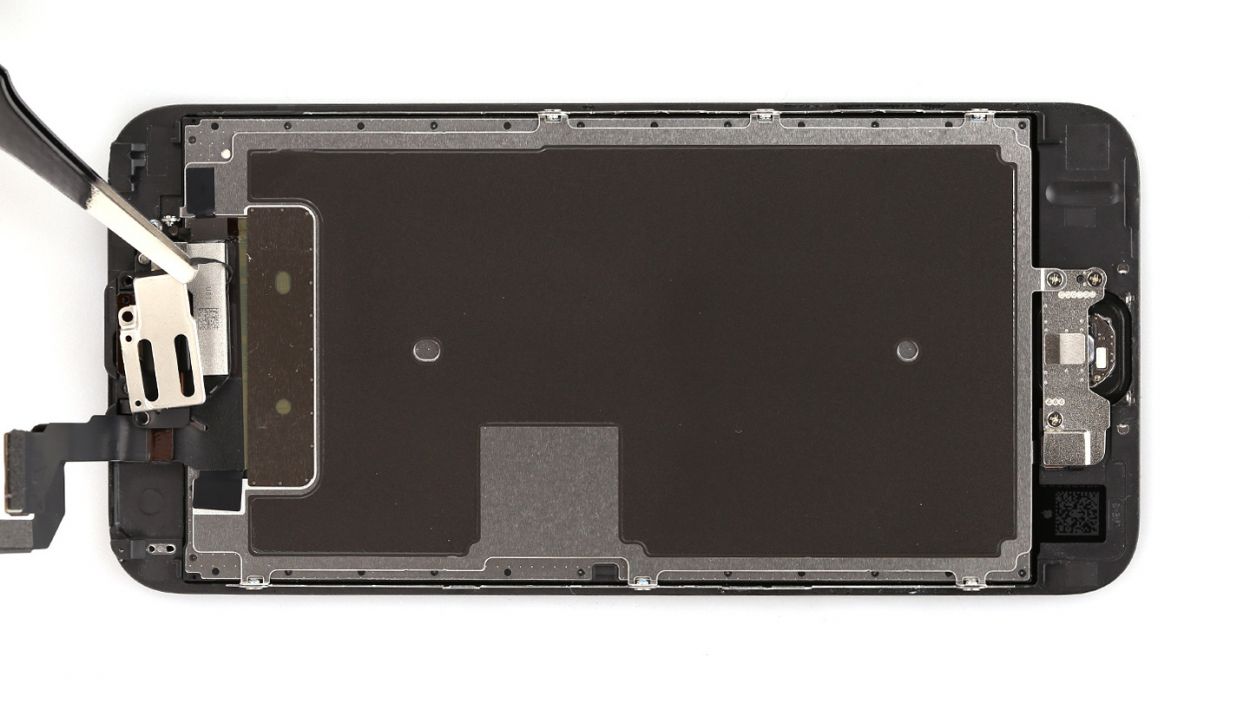
Step 7
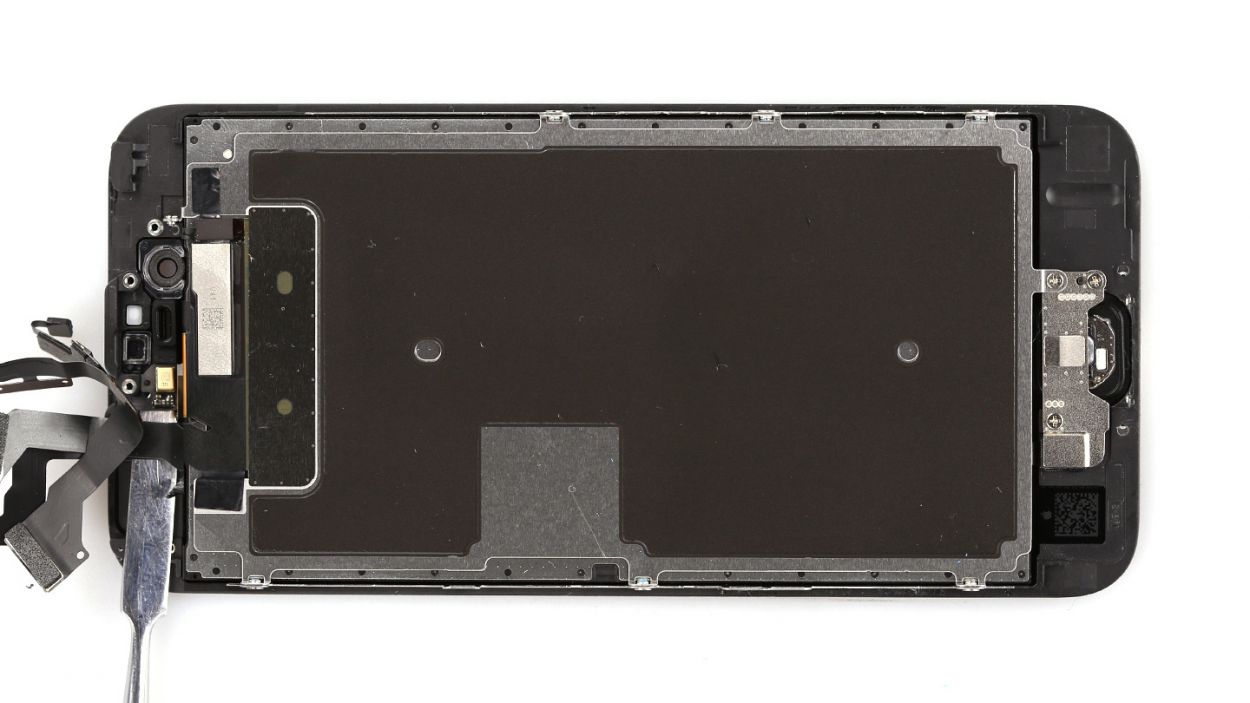

– First, gently lift the sensors out of their spots. Easy peasy!
– Next up, grab your trusty spudger or spatula and slide it under the ribbon cable where the ambient microphone hangs out. It’s just a little bit glued, so you should be able to pop it out without a hitch. Once you do that, the cable set will come right out!
Step 8
Be sure to position those sensors just right; otherwise, the proximity sensor might throw a little tantrum and not work as it should!
– To kick things off, pop that ambient microphone back into its rightful spot.
– Next up, carefully place each sensor into its designated bracket inside the display frame. It’s super important to get these sensors in just the right way; otherwise, the proximity sensor might throw a little tantrum and refuse to work properly!
Step 9
Hey there! Just a quick heads up: those screws you’re working with are not all created equal in length! Mix them up, and you might end up with one pushing against the display glass from inside, potentially causing some damage. So keep an eye on them!
– Carefully place the earpiece back in its cozy spot nestled between the FaceTime camera and the sensors. Once that’s done, pop that cover plate back on and secure the adhesive strip just like it was before. You’ve got this!
– Now, grab your trusty Phillips screwdriver and tighten those screws like a pro! Just be sure that front camera is nicely centered on the display; give it a little nudge if it needs some adjusting. You’ve got two 2.2 mm Phillips screws and one 1.8 mm Phillips screw waiting for you!
Step 10


Uh-oh! If those display connectors are feeling a bit shy and aren’t snugly connected, you might see some funky stripes or find parts of your touchscreen playing hard to get! Let’s get those connections sorted out!
– Let’s get those display connectors plugged in! It might take a few tries, so stay patient and be gentle—no bending those connectors! Don’t forget the front camera, sensor, earpiece, ambient microphone, and the Touch ID cable.
– Once everything’s connected, power up your iPhone! Make sure to check that the LCD, touchscreen, proximity sensor, front camera, and earpiece are all working smoothly. If the display connectors aren’t snug, you might see stripes or find parts of the touchscreen acting a bit funky!
– Now, it’s time to secure the connector cover back in place. Use those screws wisely: 3 x 1.3 mm Phillips screws and 1 x 2.9 mm Phillips screw, and make sure they’re nice and tight!
Step 11

– Time to connect that battery! Piece of cake.
– Now, pop on the silver cover plate and snug those screws in place. You’ll need: 1 x 2.9 mm Phillips screw and 1 x 2.2 mm Phillips screw. Easy peasy!
Step 12
– Gently fold down the display. Make sure the top edge, where the cables are, clicks nicely into place. Then, give the display a little nudge towards the home button – think of it as a friendly hug – until it sits perfectly in its frame.
Step 13
– Tighten up those two pentalobe screws at the bottom of the enclosure! We’re talking about 2 x 3.8 mm pentalobe screws here. You’ve got this!