DIY Guide to Replace iPhone 6s Screen Step-by-Step
Duration: 30 min.
Steps: 19 Steps
Step 1


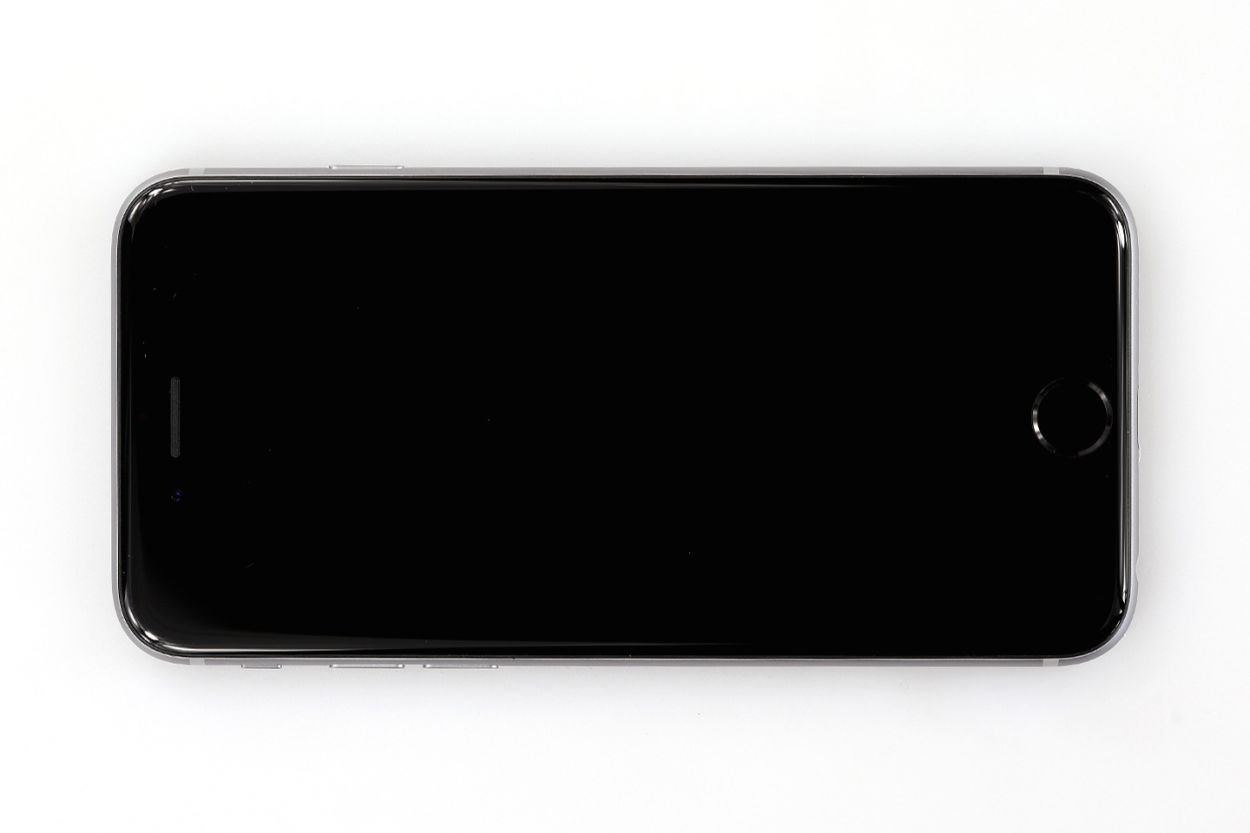
– Before diving into the fun of repairing, make sure to power down your iPhone. Just press that standby button for about three seconds until the slider pops up on the screen.
– Now, give that slider a gentle swipe from left to right. Your iPhone will gracefully shut down in about 10 seconds. Easy peasy!
Step 2

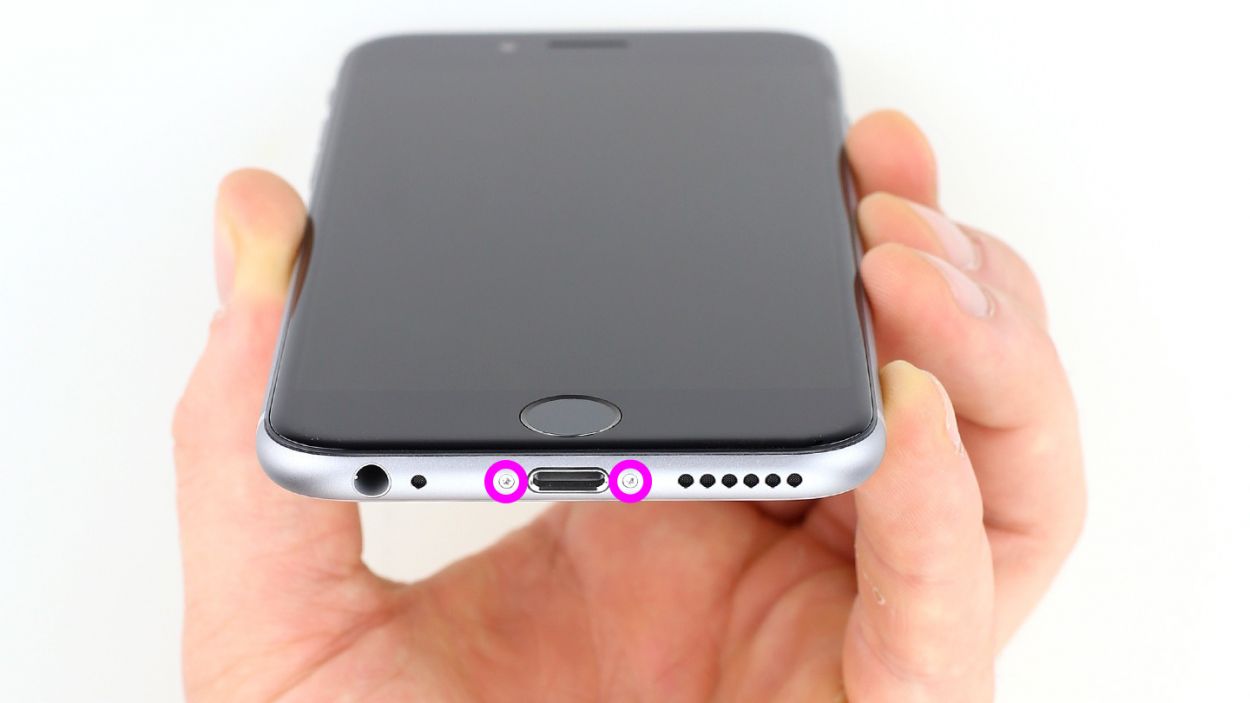
– To get into that iPhone 6s, grab yourself a pentalobe screwdriver—it’s the key to unlocking the fun!
– Next, let’s tackle those two pentalobe screws on either side of the lightning connector. A little tip: keep track of those screws by placing them on a magnetic pad, just like they were chilling in your phone before. You’ve got this! .2 x 3.8 mm pentalobe screw
Step 3
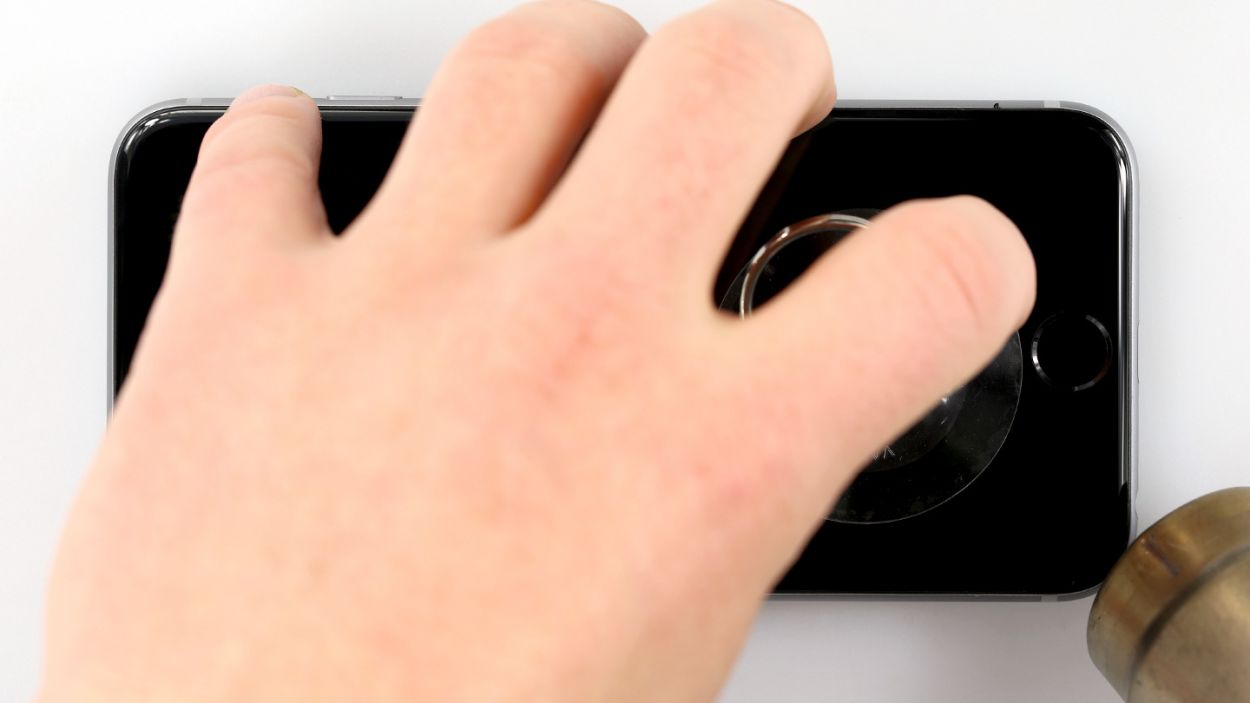

If needed, give the outer edges of the display a little warmth a few times.
– Set your iPhone 6s down on a soft, clean surface to keep that back looking pristine.
– Grab a suction cup to lift the front panel, a hard plastic plectrum, and a hot-air gun. If your screen is looking extra rough, consider wrapping it in adhesive tape first for some added protection.
– The screen is just a little stuck to the frame. Use that hot-air gun to warm up the outer edges of the display to around 60°C (140°F) for an easier lift.
– Place the suction cup over the home button or right beside it. While you gently pull up the screen with the suction cup, slide the hard plastic plectrum between the aluminum frame and the display frame. You might need to press down on the aluminum frame while pushing up with the plectrum. It may take a few tries, but you’ve got this!
– Once you can lift the screen a few millimeters, carefully slide along the outer edges until the display is loosened on both sides. If you need to, don’t hesitate to heat those outer edges a couple more times.
Tools Used
- heat gun to heat parts that are glued on so they’re easier to remove.
In most cases, you can also use a hairdryer.” rel=”noopener”>Heat gun - Pick Set
- VAKUPLASTIC Suction Cup
Step 4
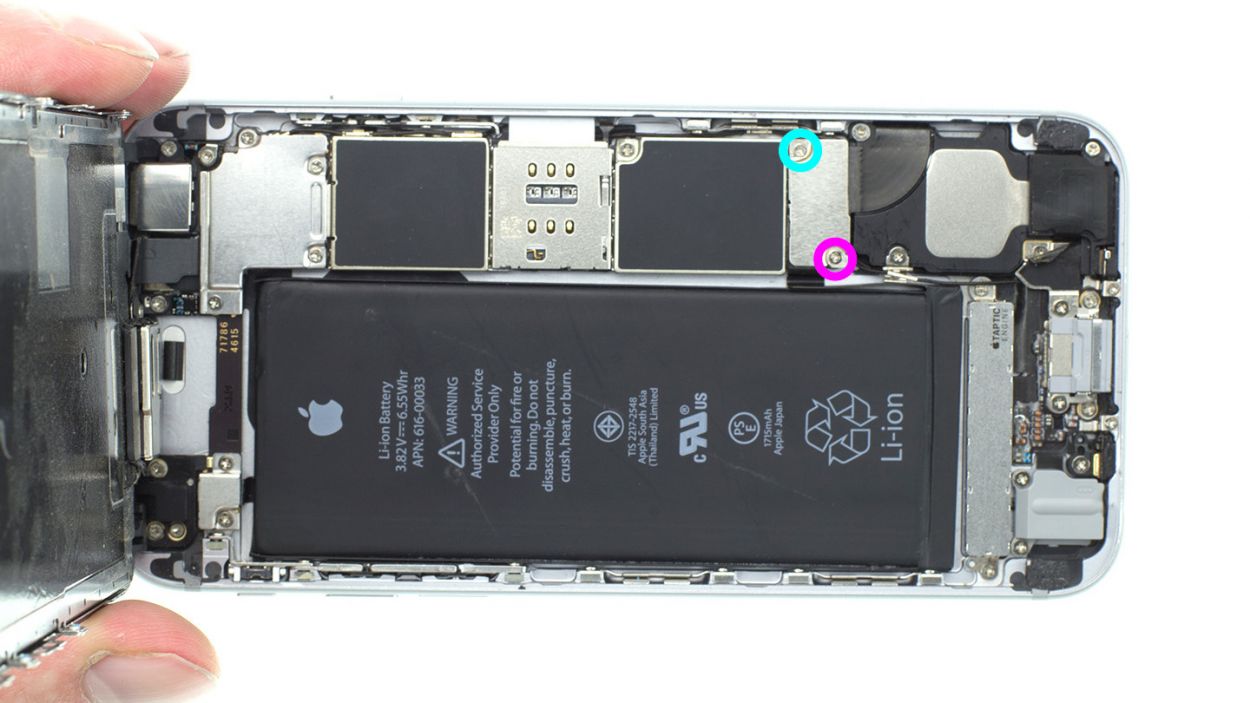

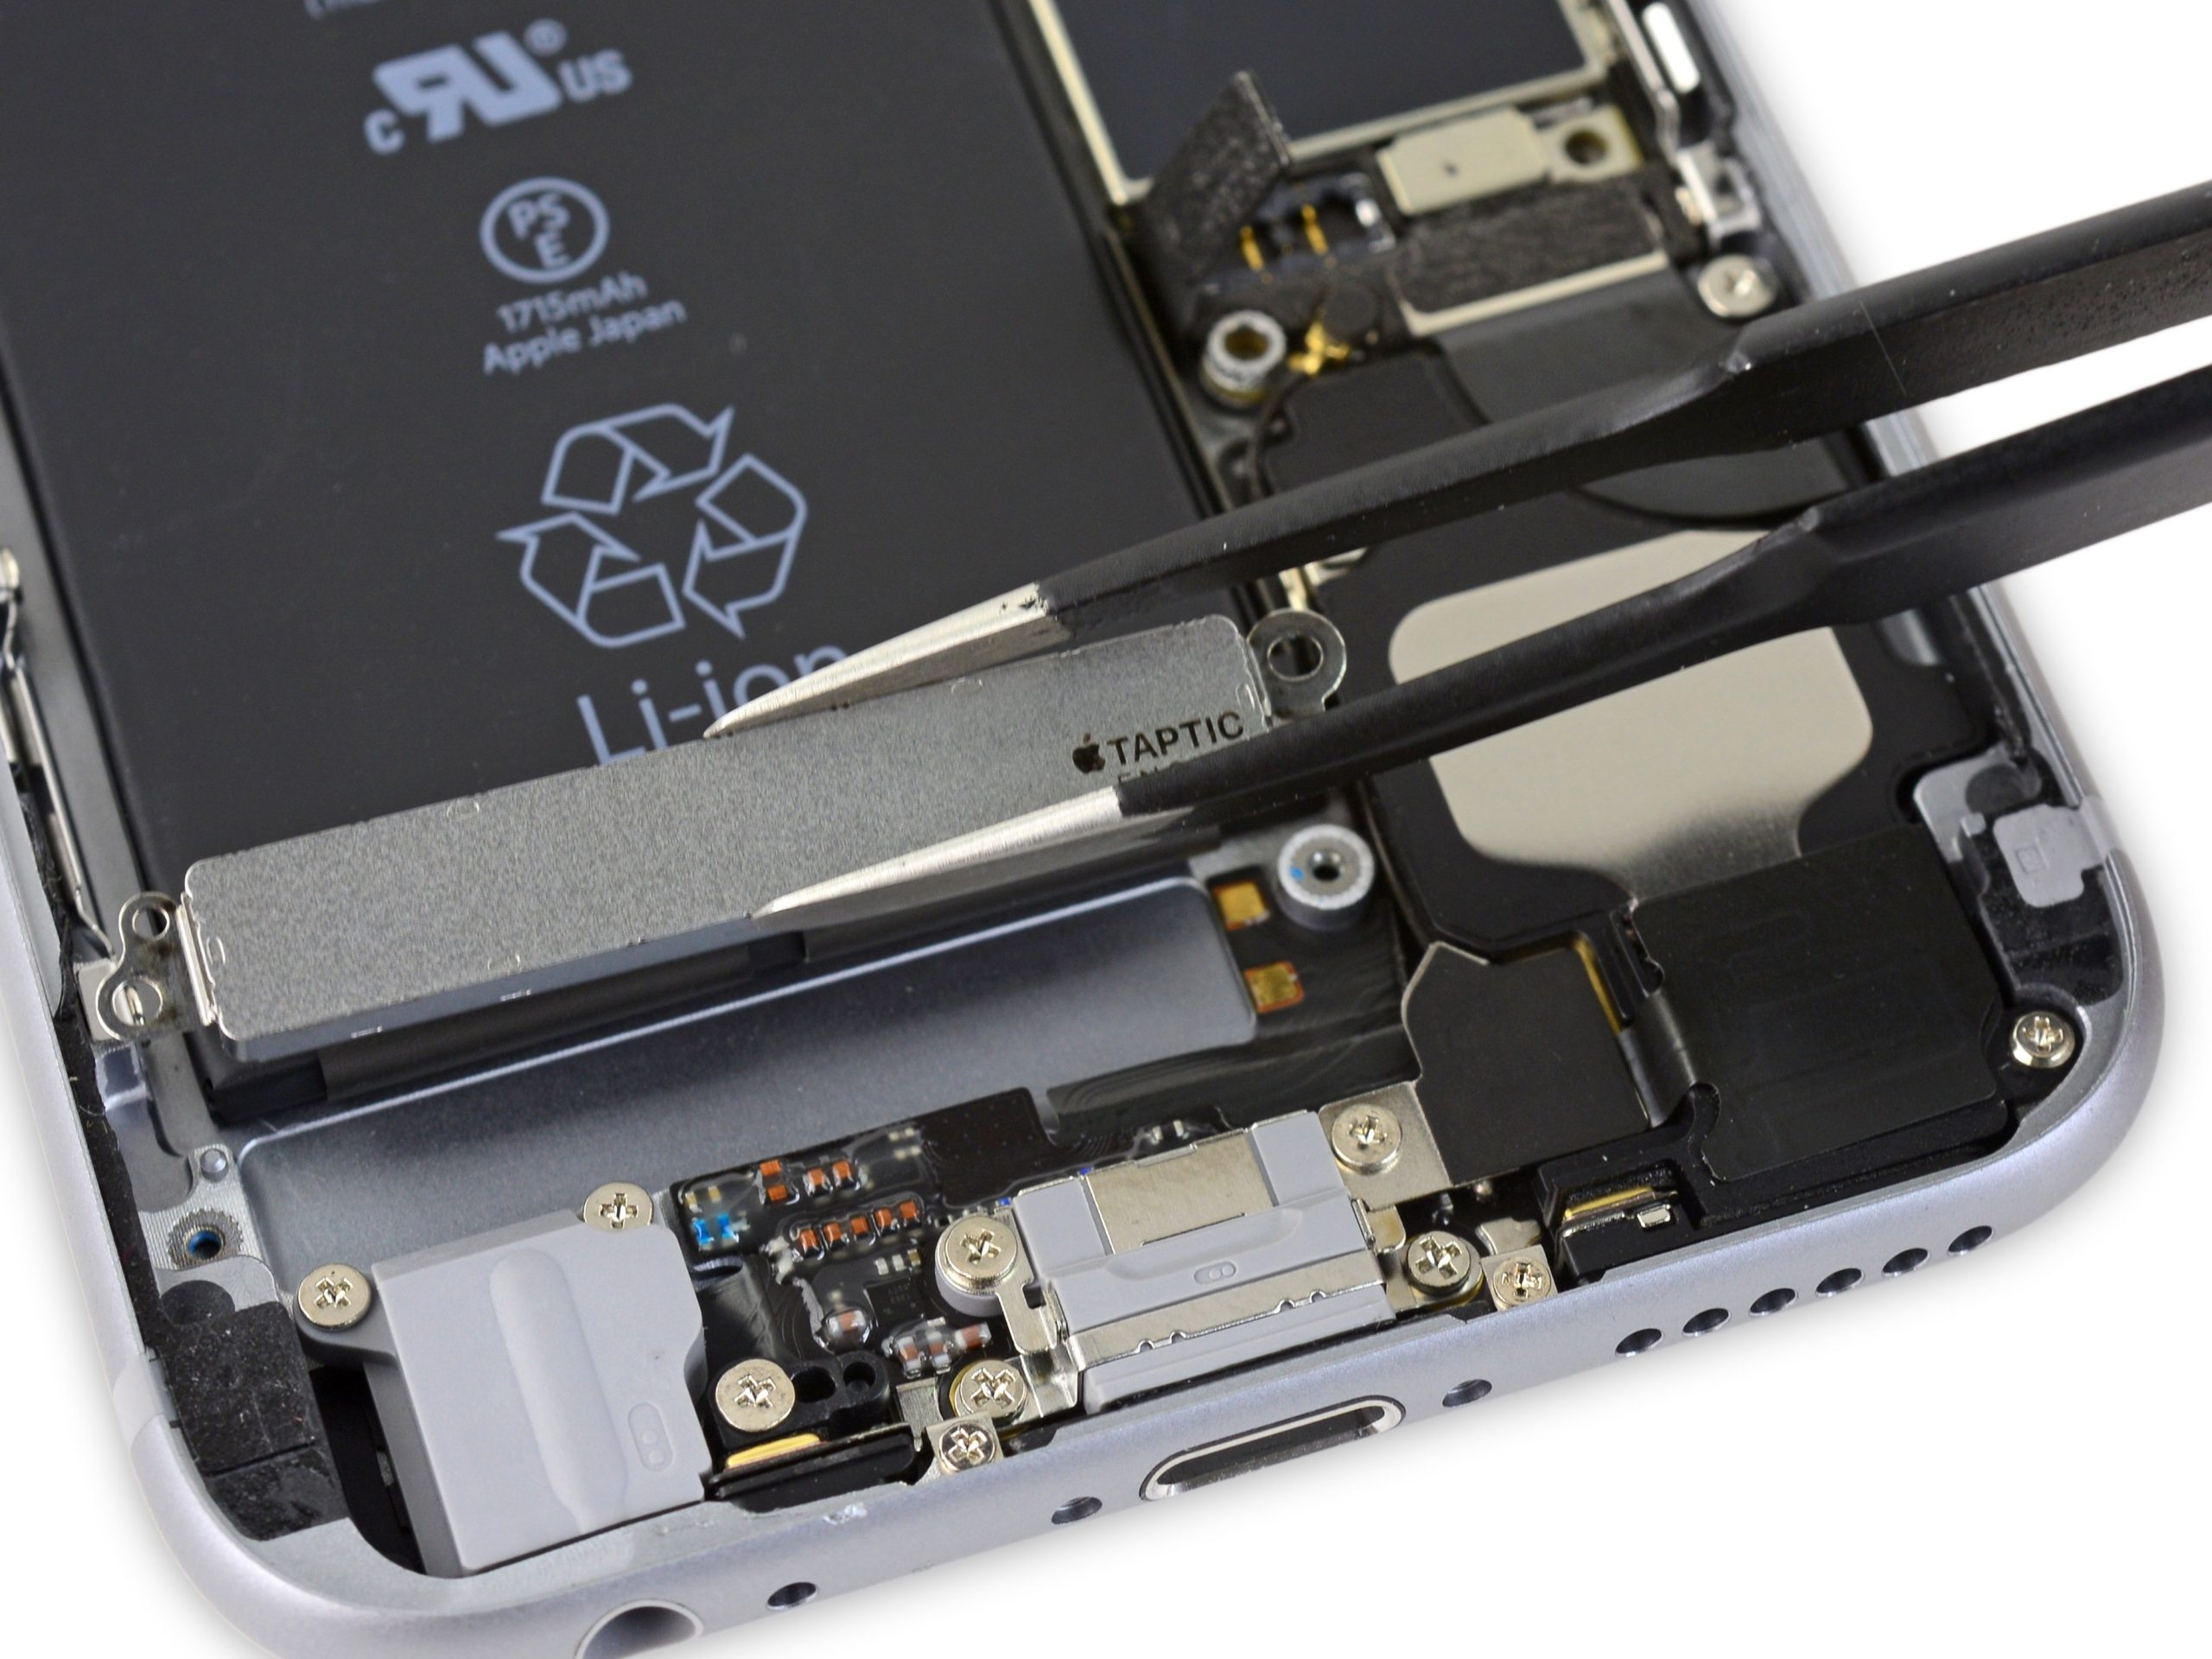
– First up, let’s tackle those Phillips screws and the plug cover that hold the battery plug in place. Make sure to toss those loose parts onto a magnetic pad to keep them safe and sound for later! You’ve got 1 x 2.2 mm Phillips screw and 1 x 2.9 mm Phillips screw hanging out there.
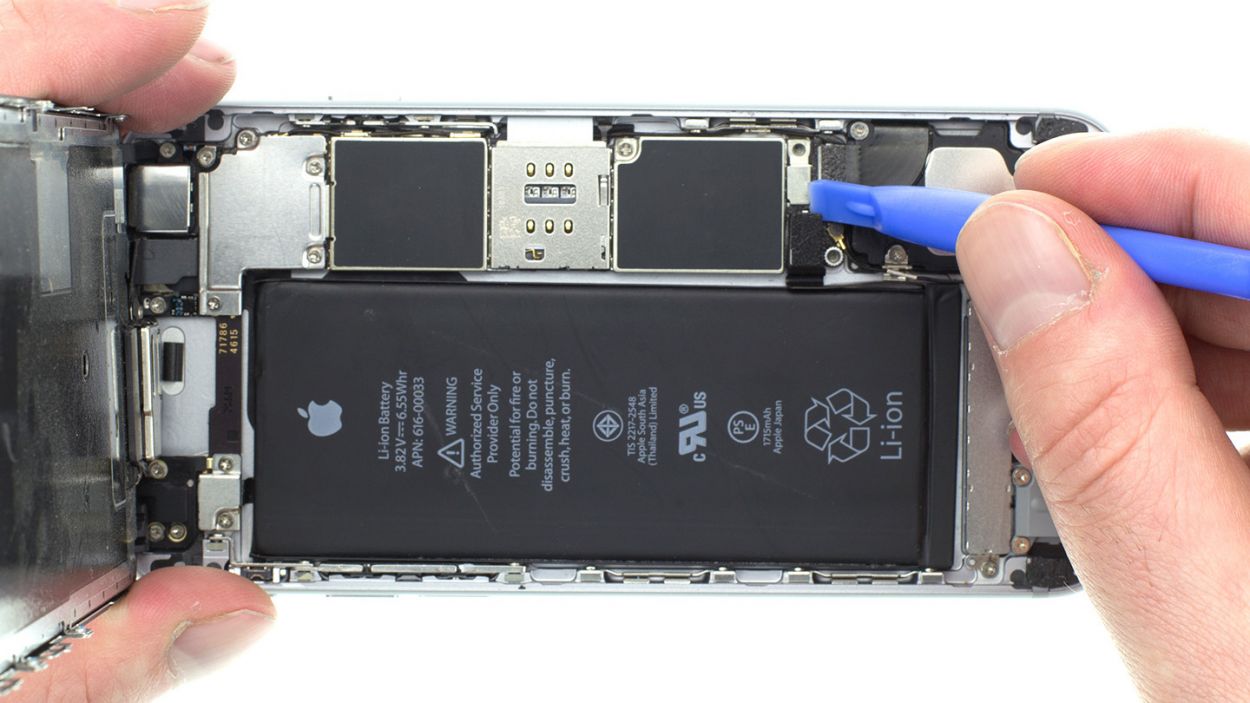
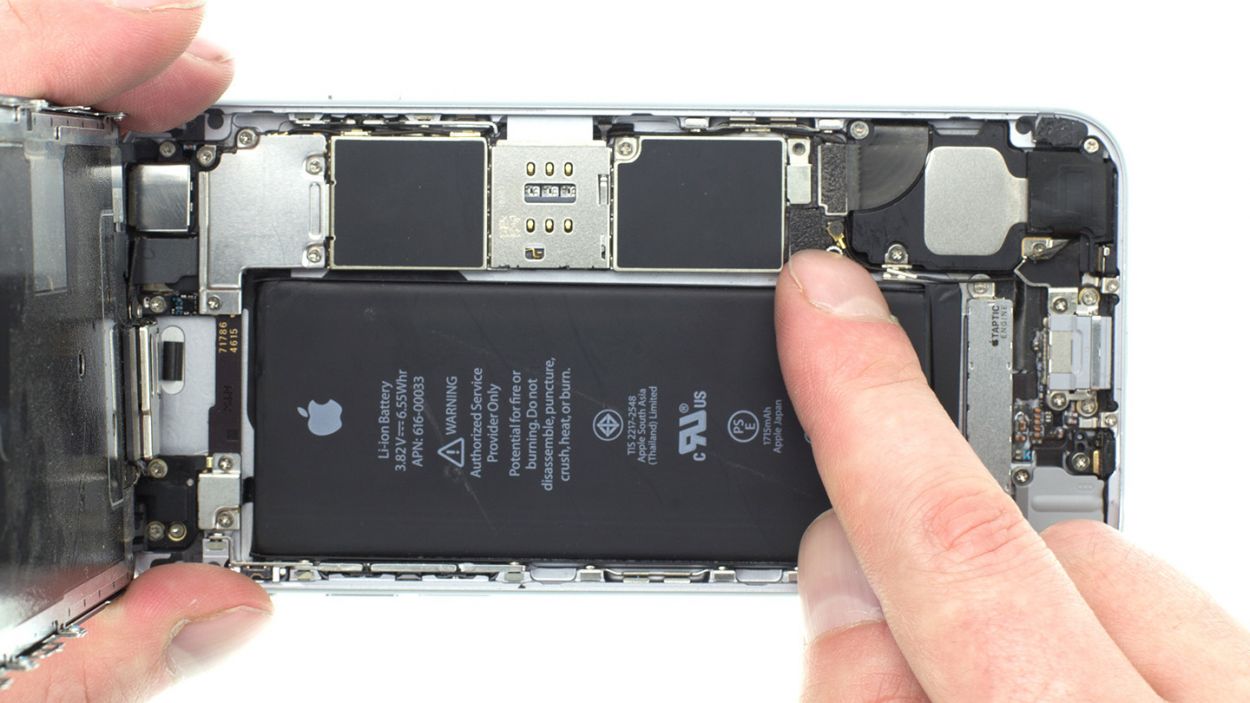
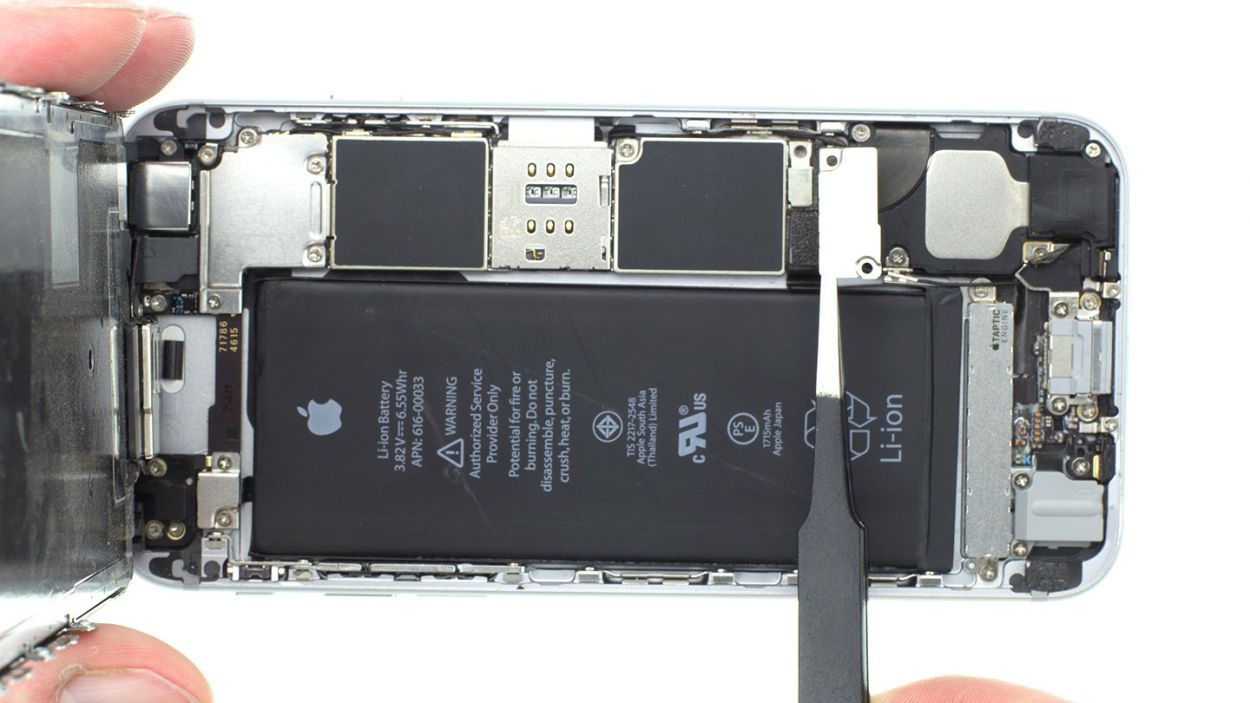
– Now, let’s gently coax that battery plug out! Use an ESD spudger to slide underneath the plug. No spudger? No worries! Your fingernail can do the trick too. Just be gentle!
Step 5

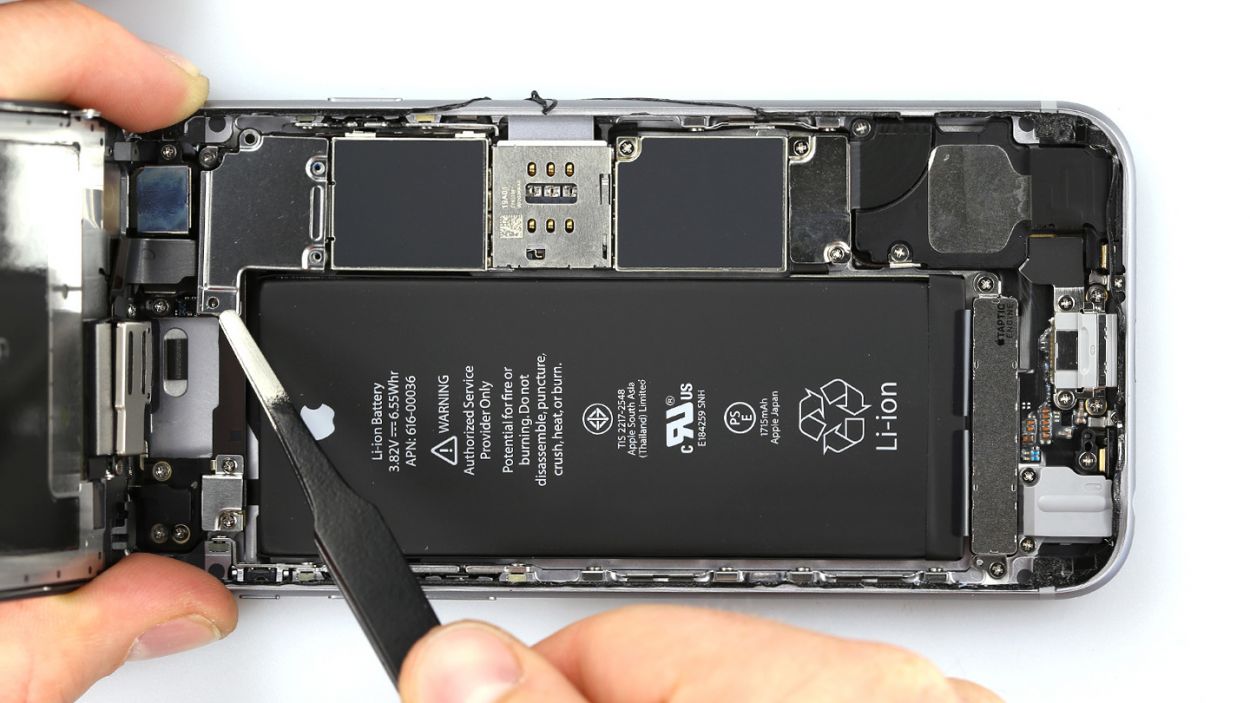
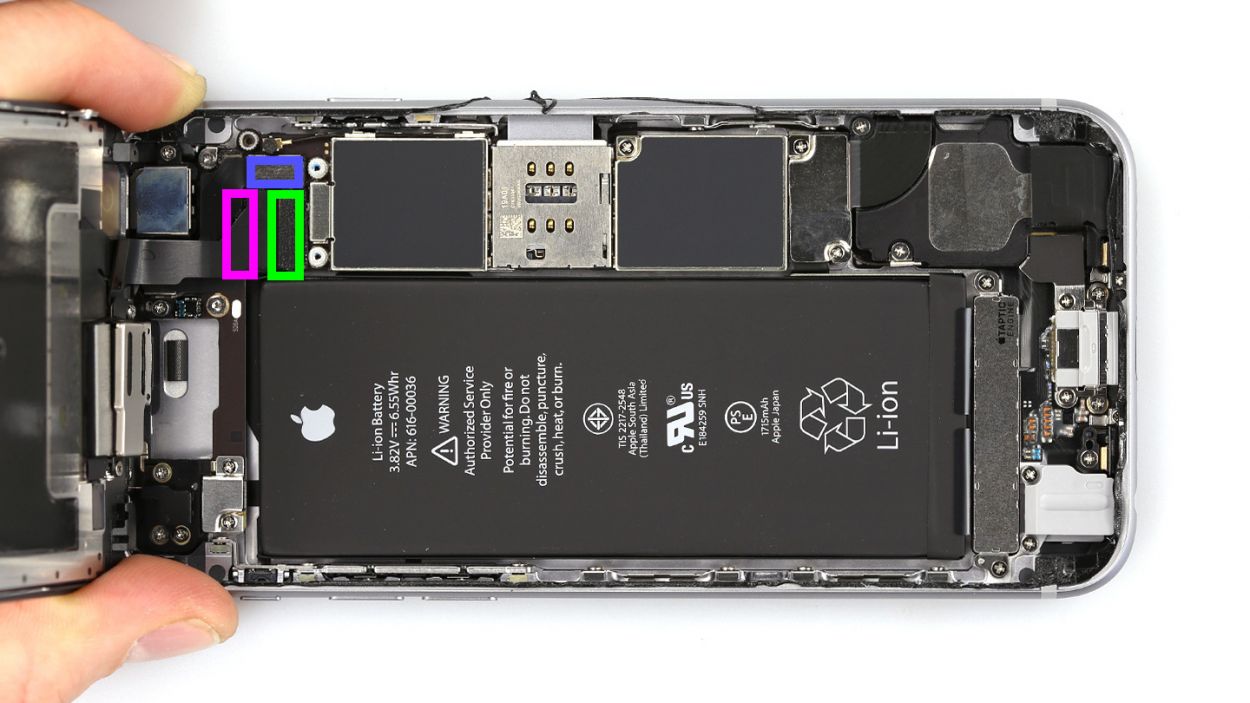
– Let’s kick things off by loosening those four Phillips screws holding the silver contact cover in place. Once you’ve got them all loosened, gather the screws and the cover on your trusty magnetic pad so they won’t go on a wild adventure without you. You’ve got 3 x 1.3 mm Phillips screws and 1 x 2.9 mm Phillips screw to keep track of!
– Next up, it’s time to release the three overlapping display connectors in the order shown below. Grab your spudger, slide it gently under each connector, and lift it with care. The connectors are: Front camera/sensor/earpiece/ambient microphone, Touch ID cable, and the Display.
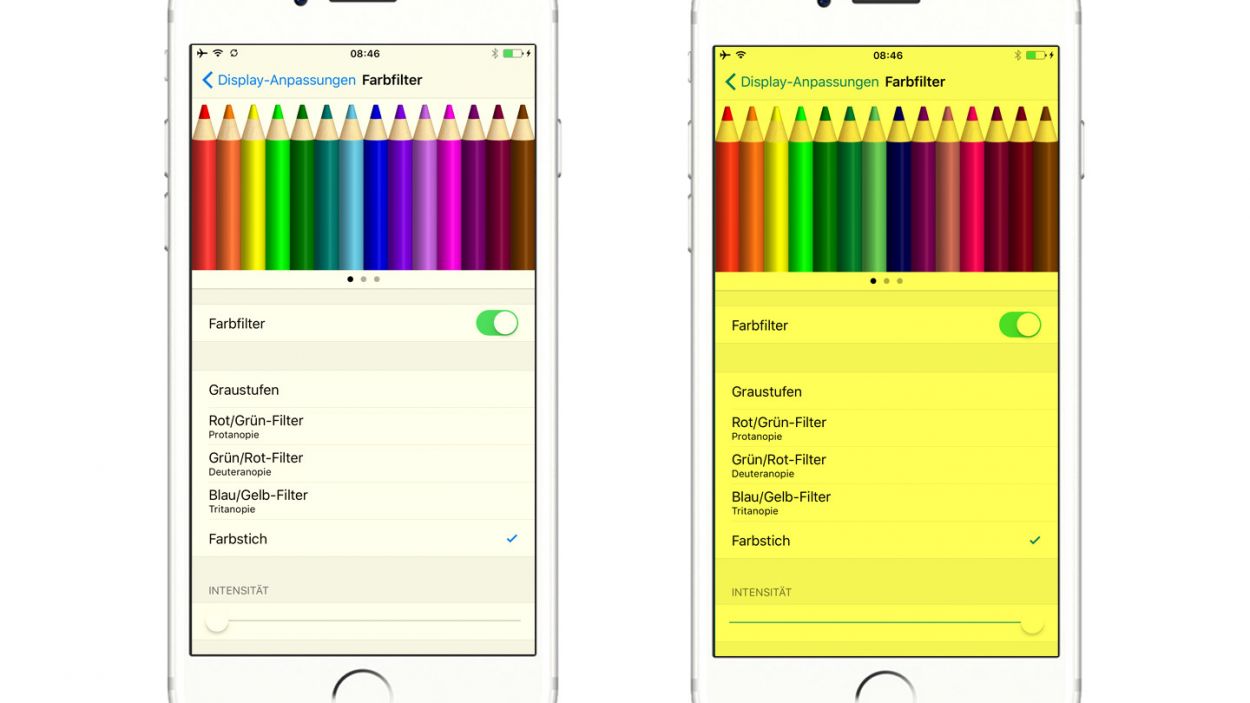
– Now let’s test that new display! Connect it provisionally. It might take a few tries to get that display cable in just right. Fire up your iPhone and check that the LCD and touchscreen are working like a charm. Make sure those display contacts are snugly seated on the connectors; if they’re not, you might end up with a black screen or some funky streaks. And if the display has a bit of a yellowish tint, don’t forget to check the last step of this guide!
– Once again, connect the new display provisionally. Connecting that display cable can be a bit tricky, but you’ve got this!
– Start up your iPhone and make sure everything is functioning beautifully with the LCD and touchscreen. Ensure those display contacts are firmly seated on the connectors; otherwise, you might face a black screen or some streaks.
– If you notice that the display looks a tad yellowish, remember to check the last step of this guide for some helpful tips!
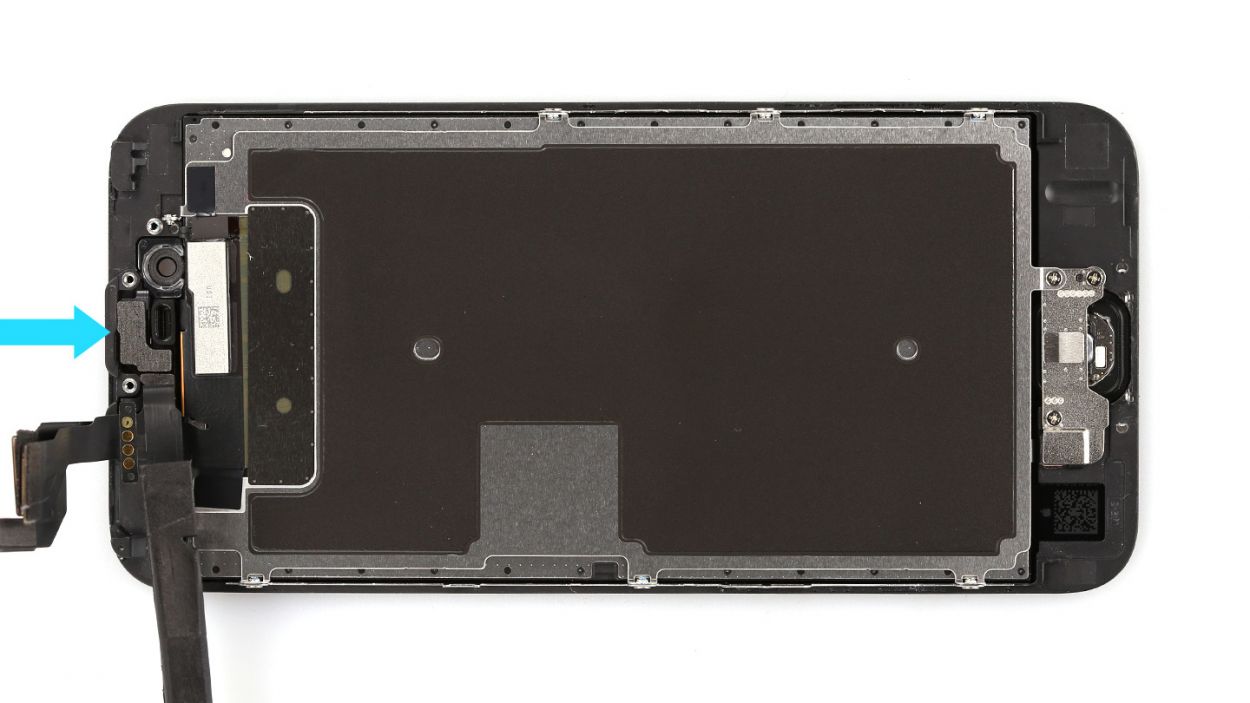
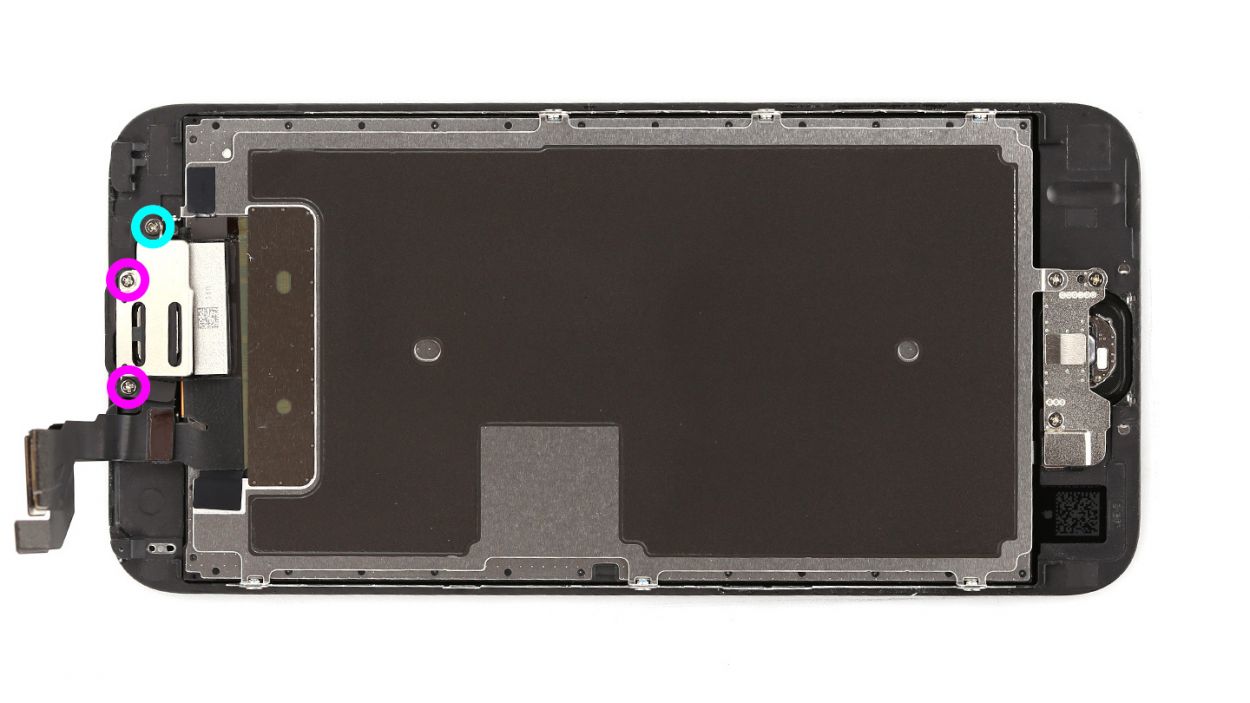
Step 6


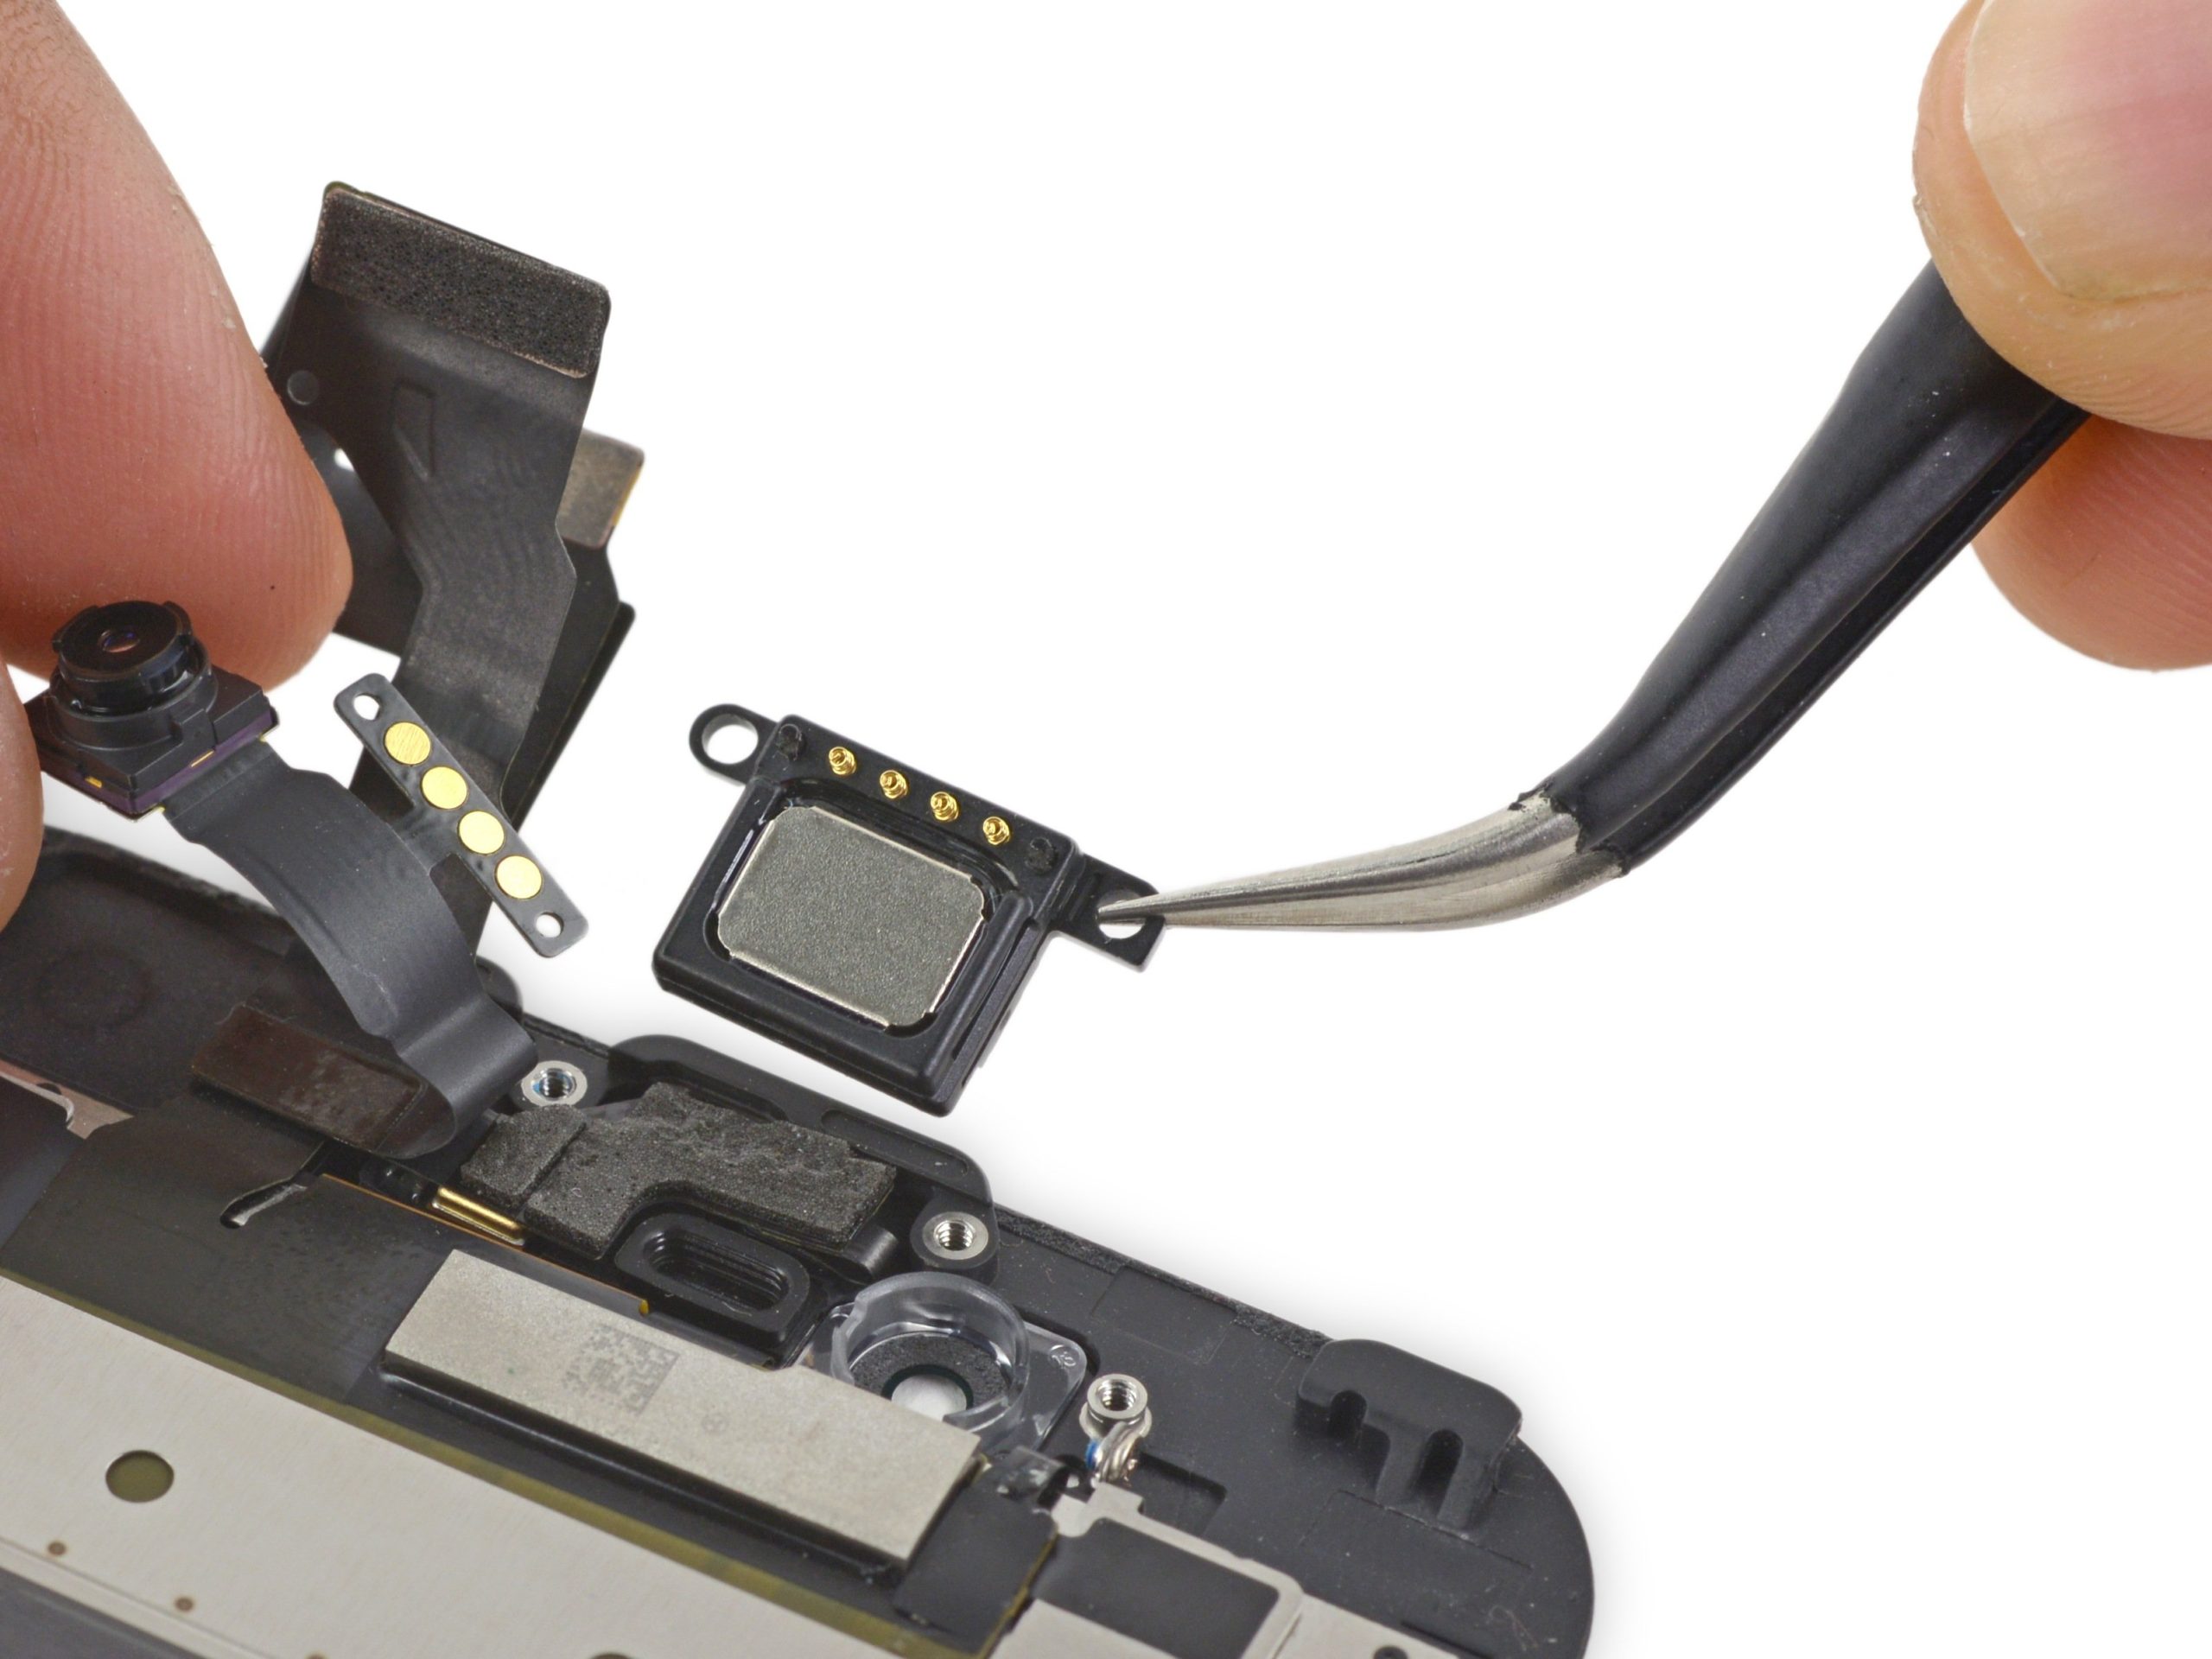
– You’ll spot the earpiece hanging out at the top edge of the display. Time to take off the three Phillips screws from the earpiece cover—just toss them onto your magnetic pad to keep them safe. We’re talking about 2 x 2.2 mm Phillips screws and 1 x 1.8 mm Phillips screw.
– Next, gently peel off the earpiece cover, which is still clinging to the display back with an adhesive strip. Make sure to add it to the pile with those screws you just removed. It’s all about teamwork!
– Now, the earpiece is hiding beneath the front camera’s ribbon cable. Just give that cable a little nudge to the side, and you’ll be able to pull it out without a hitch.
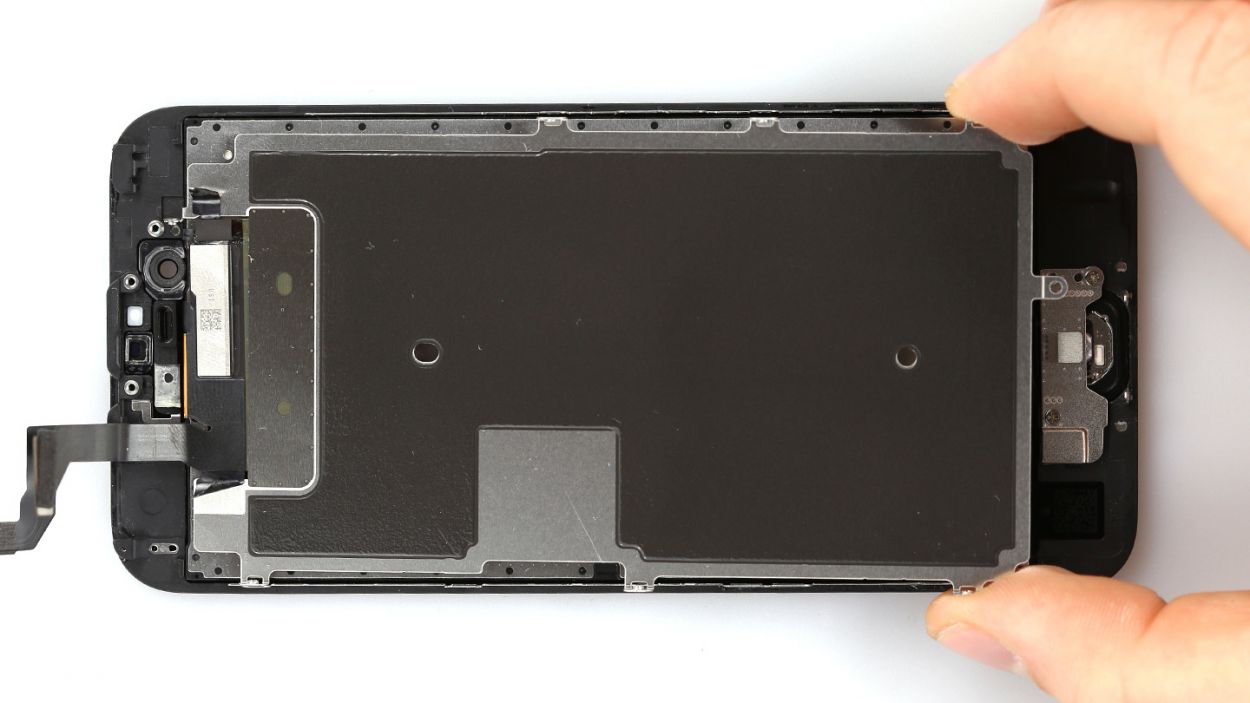
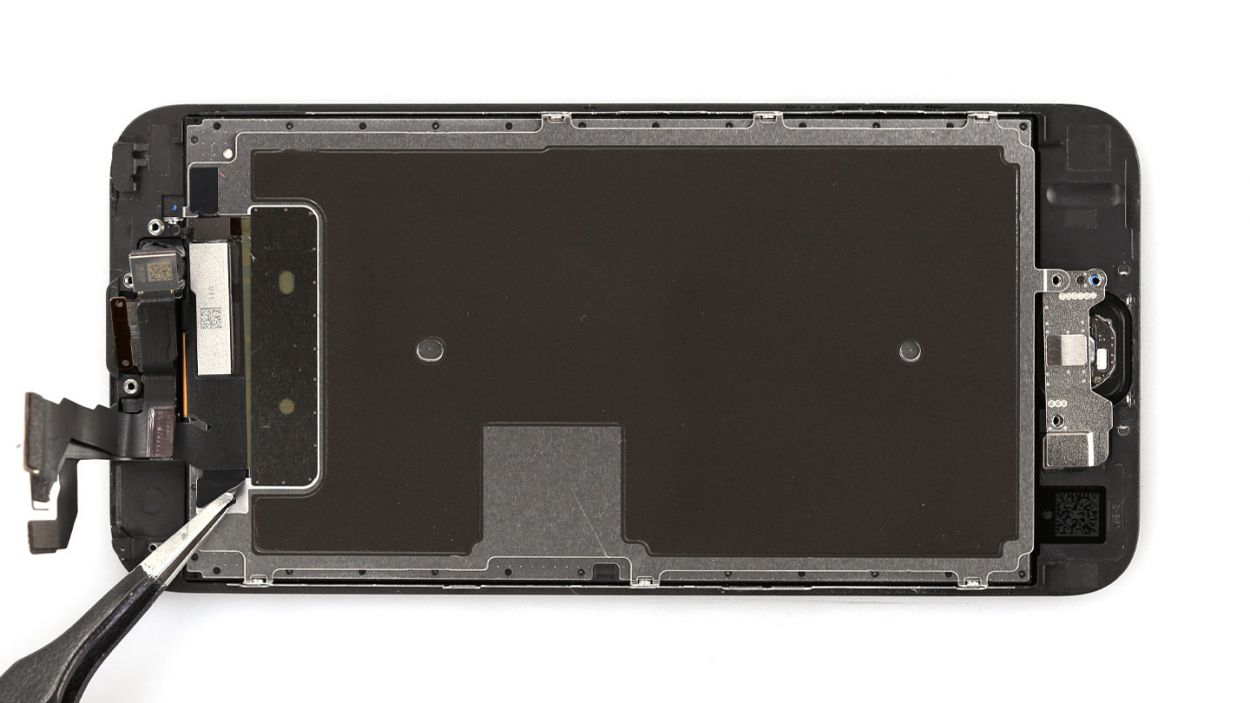
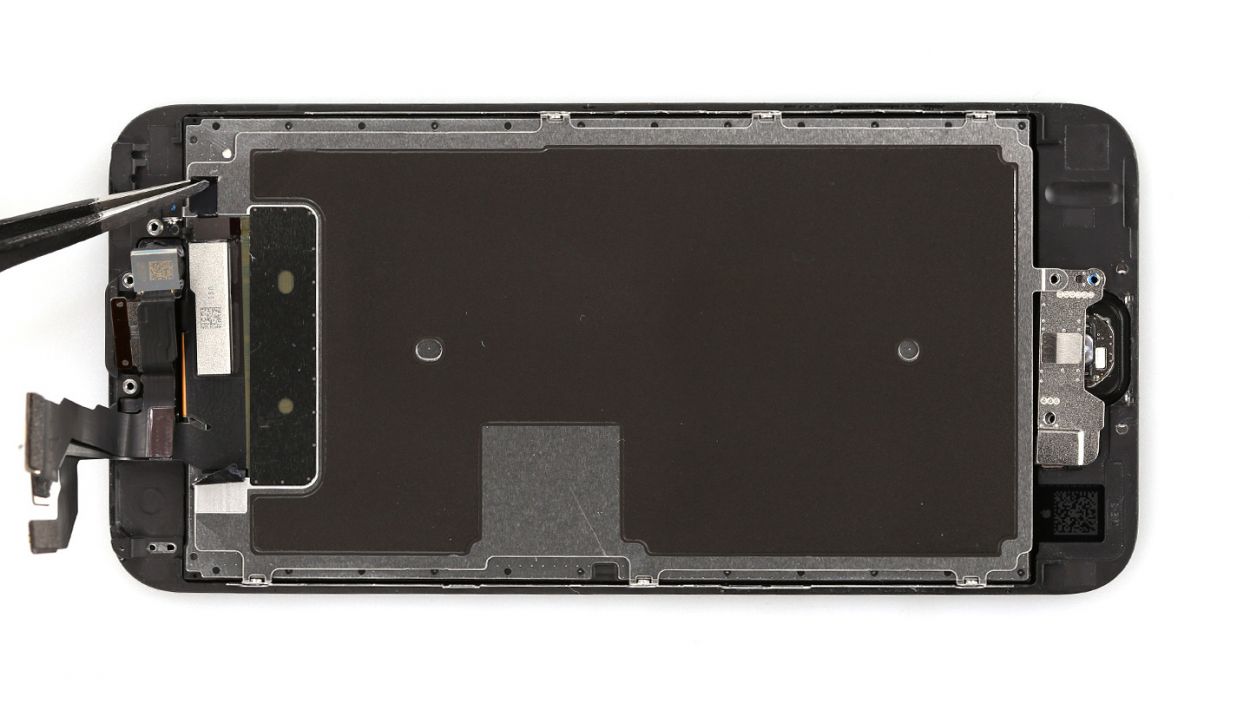
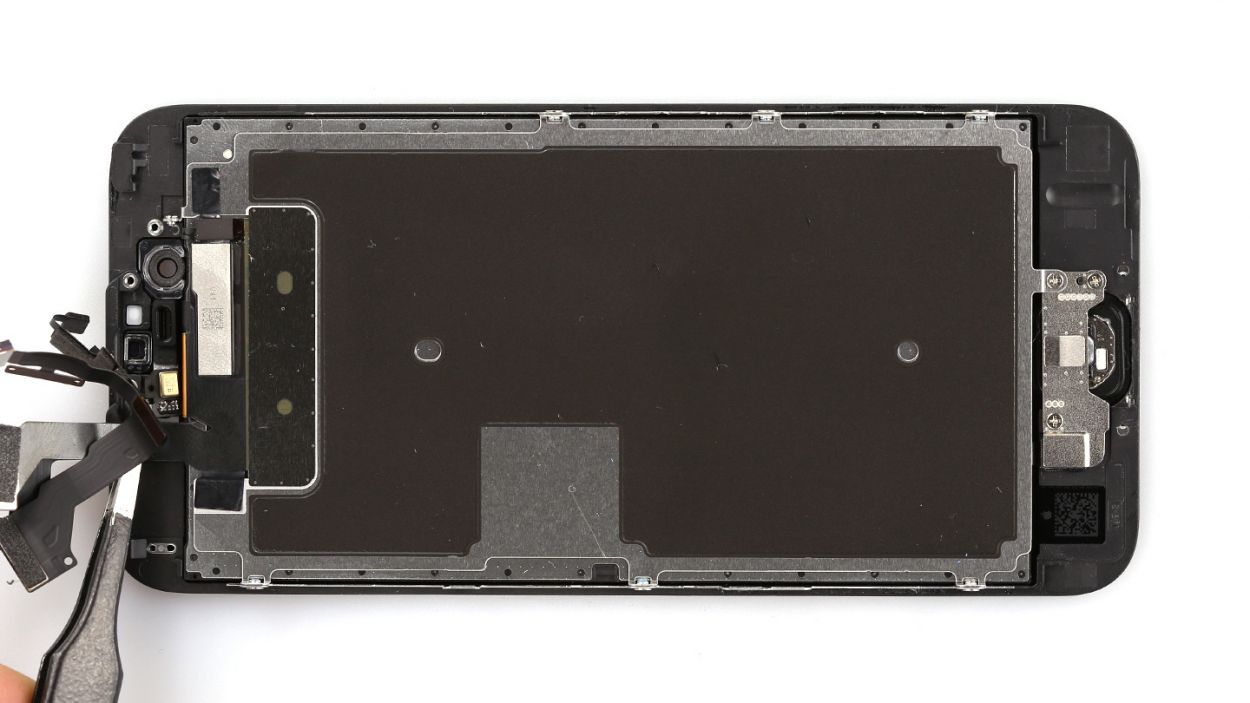
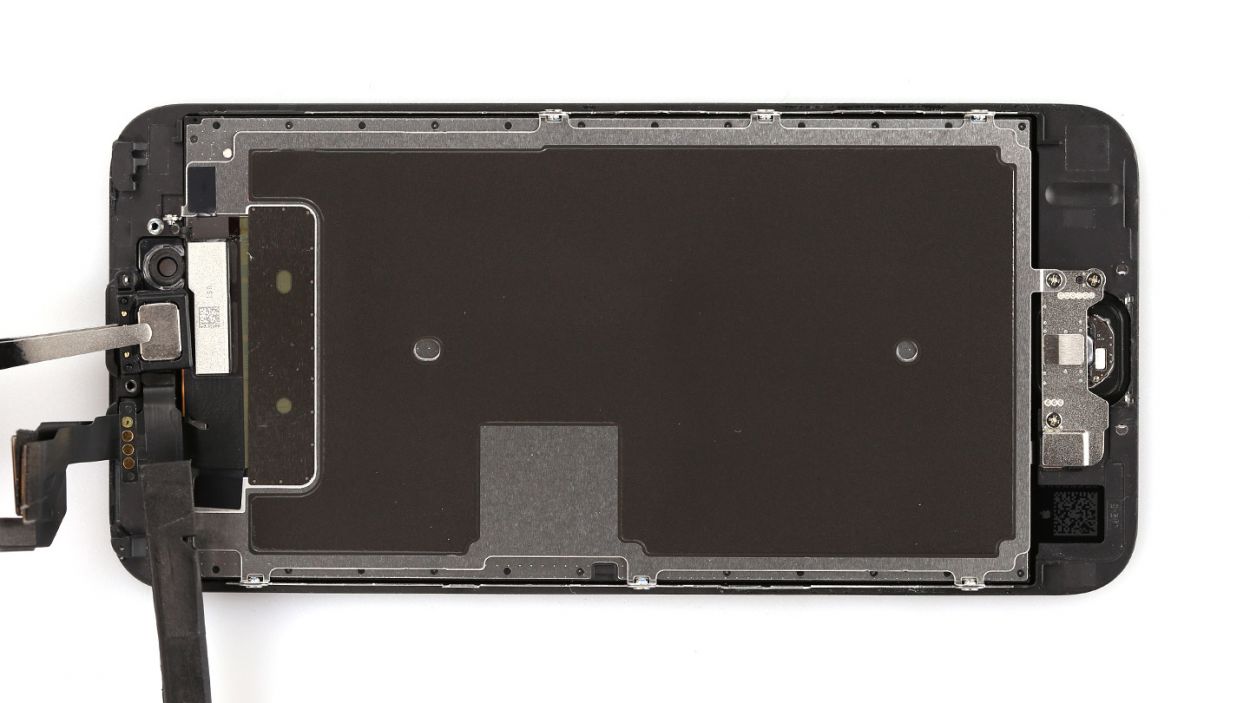
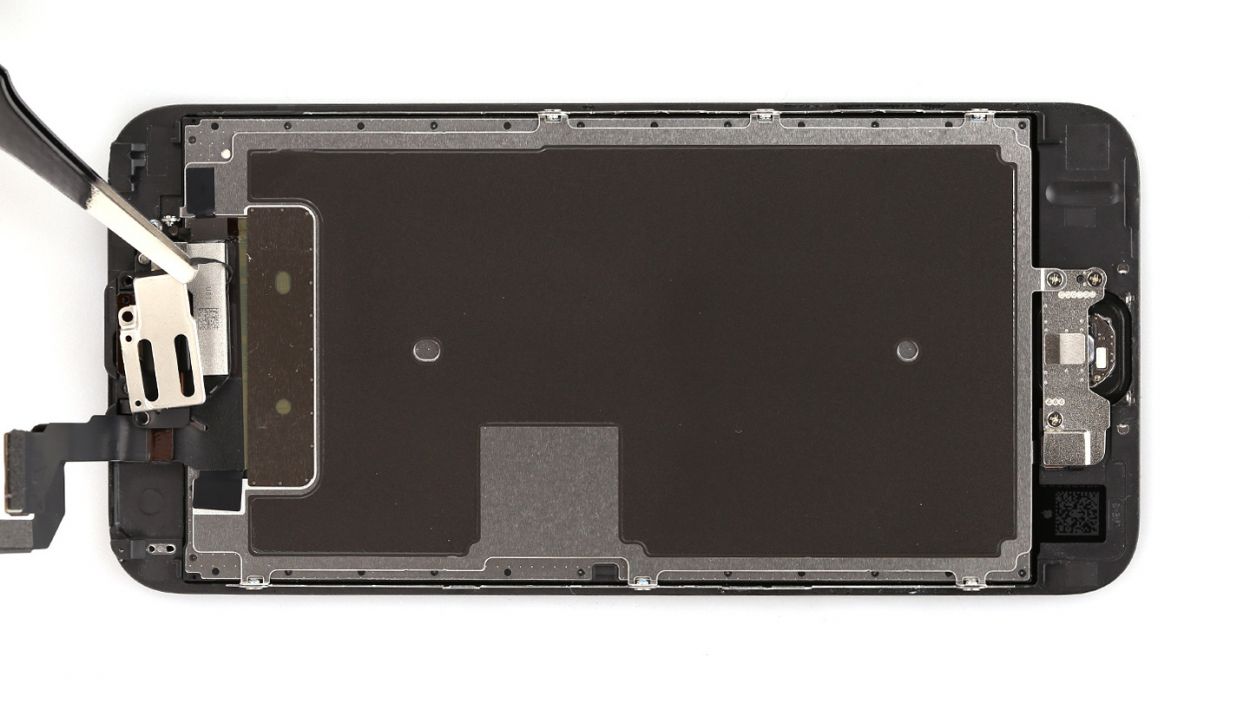
Step 7
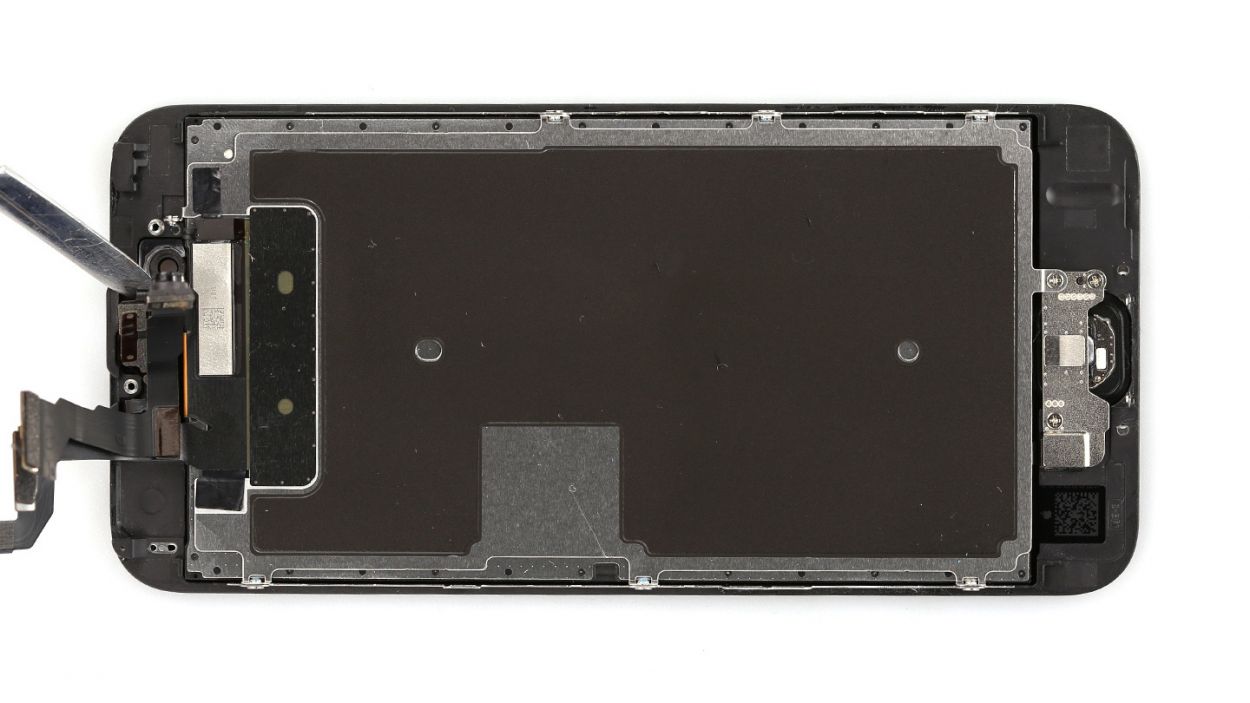
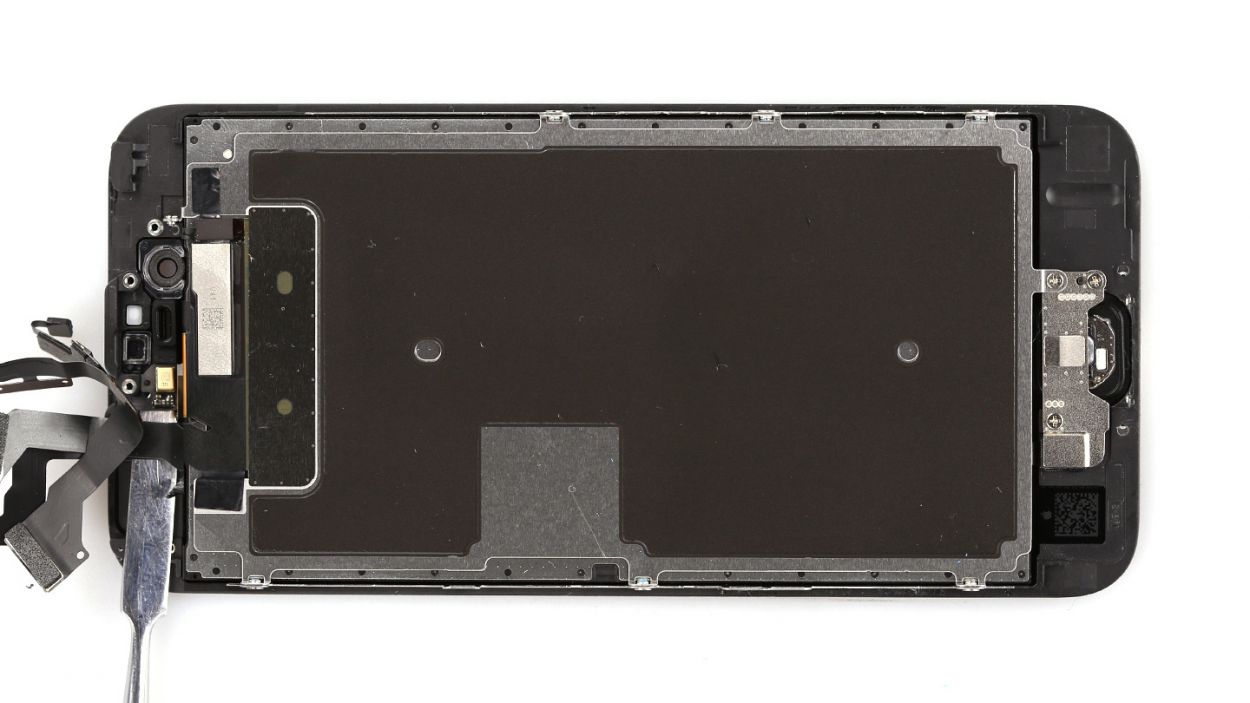

– First, gently lift those sensors up like you’re giving them a little hug!
– Next, slide your spudger or spatula under the ribbon cable right where the ambient microphone is chillin’. It’s only lightly glued, so you can easily lift out the whole cable set. You’re doing great!
Step 8
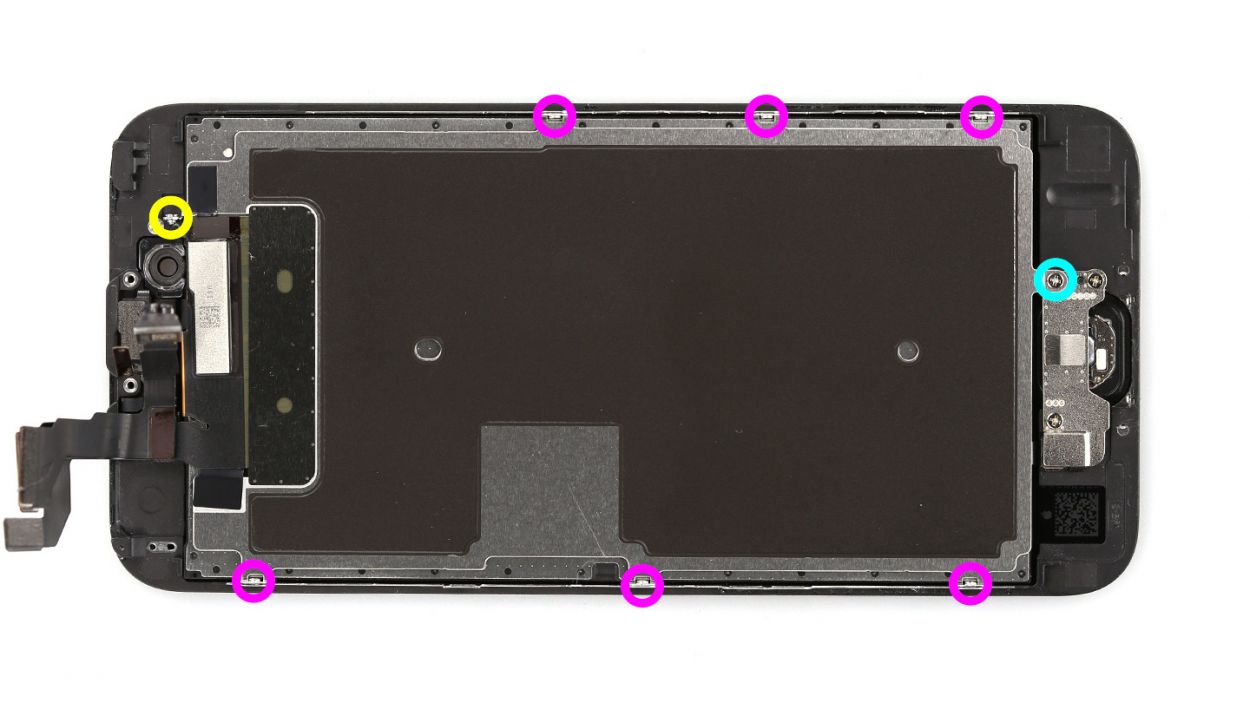


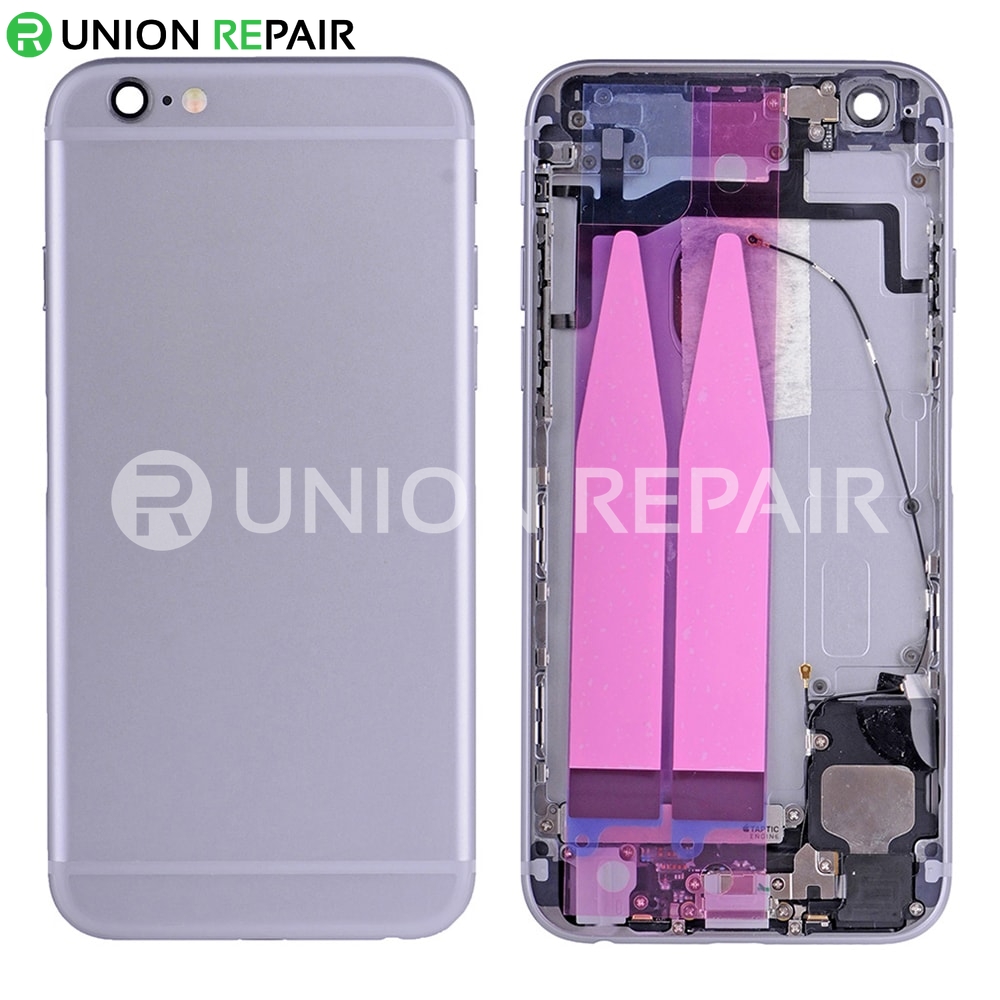
– Let’s kick things off by unscrewing those eight Phillips screws that are holding the rear panel in place (check out picture 1 for a visual!). You’ll need: 1 x 1.8 mm Phillips screw, 1 x 1.2 mm Phillips screw (the small one), and 6 x 1.2 mm Phillips screws.
– Now, gently peel away the adhesive+strips+iPhone+6s&crid=1TJIMMAJSUJUZ&sprefix=repair+tools%2Caps%2C165&linkCode=ll2&tag=salvationrepa-20&linkId=c486487cf454ce8edd6f5beefab4110f&language=en_US&ref_=as_li_ss_tl’>adhesive strips located at the left and right upper ends of the rear panel. You’re almost there!
– With that done, it’s time to lift off the rear panel (see picture 3). You got this!
Step 9


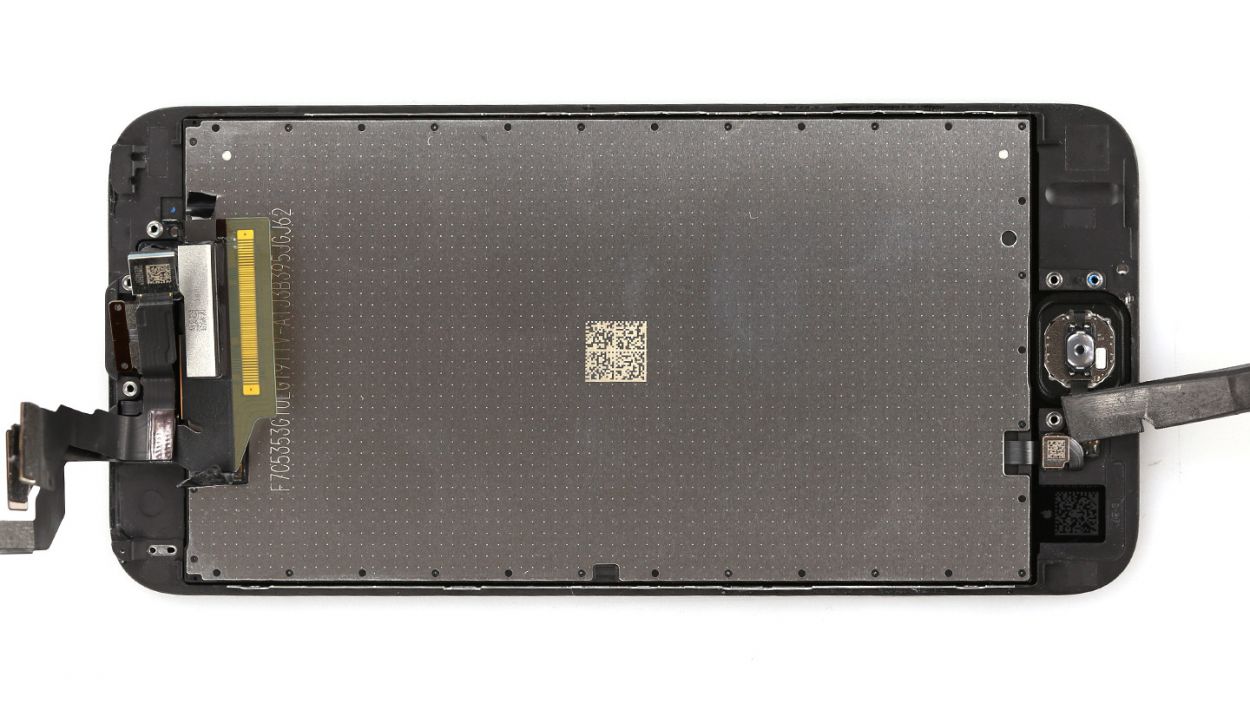
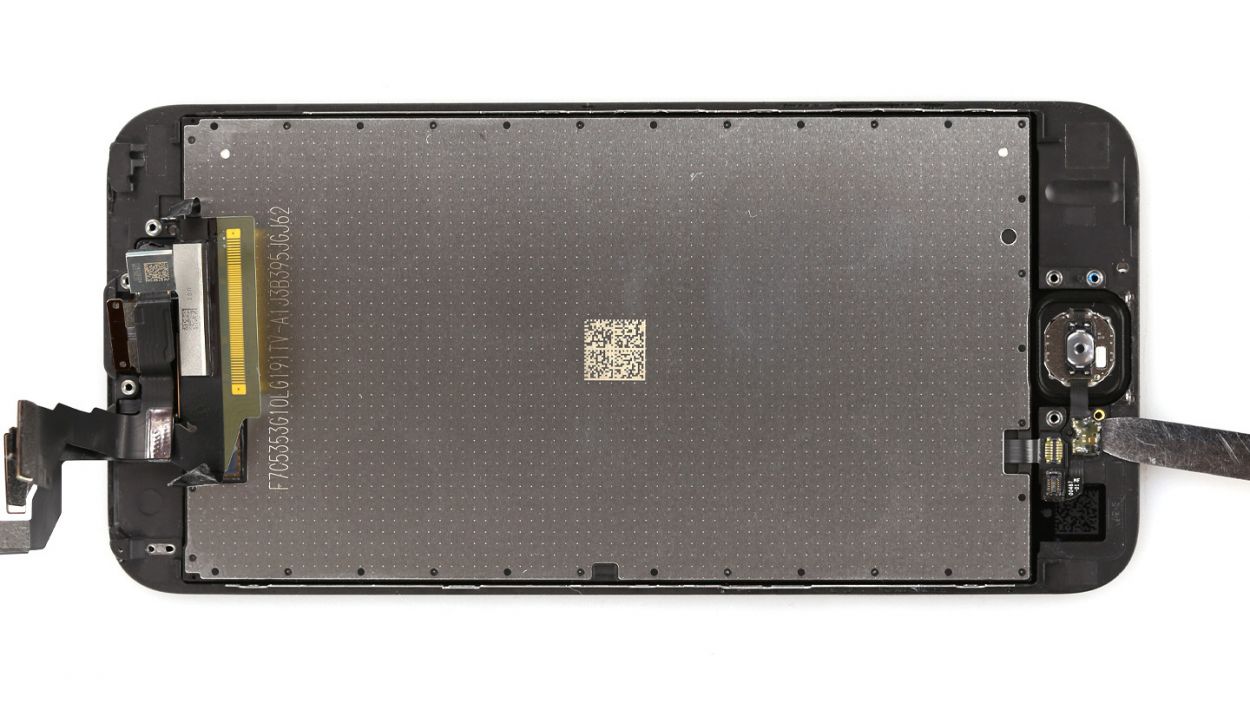
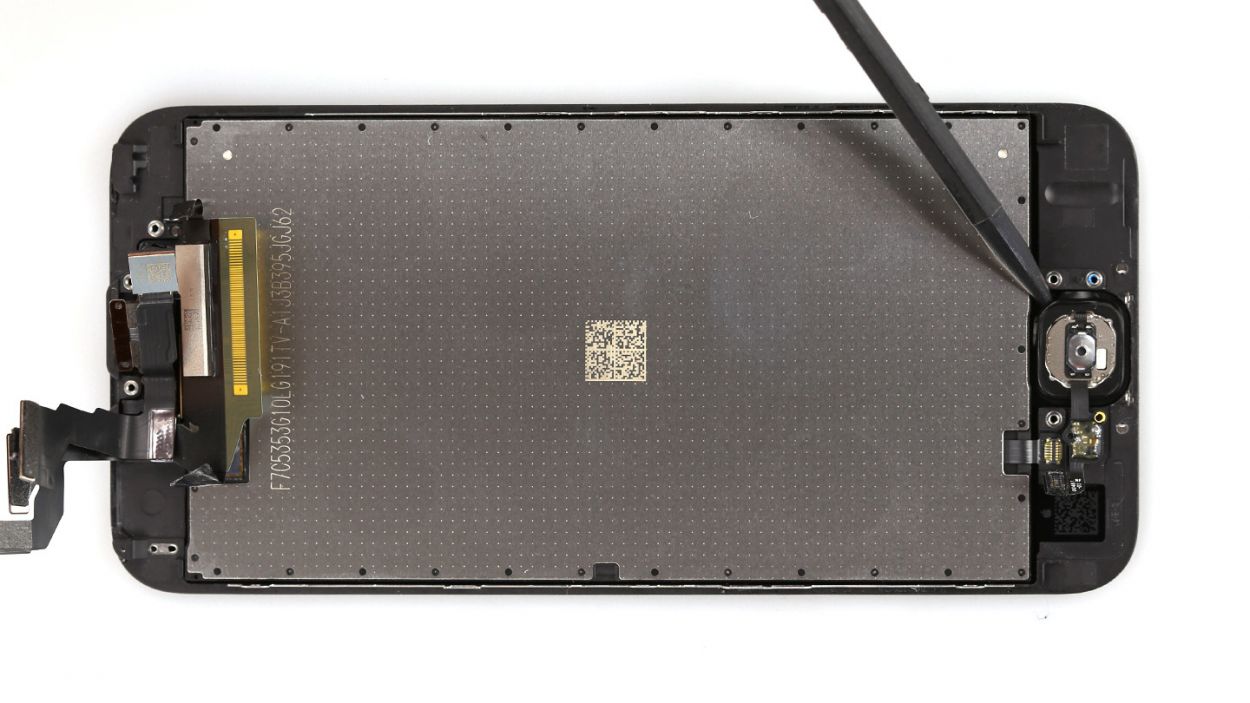
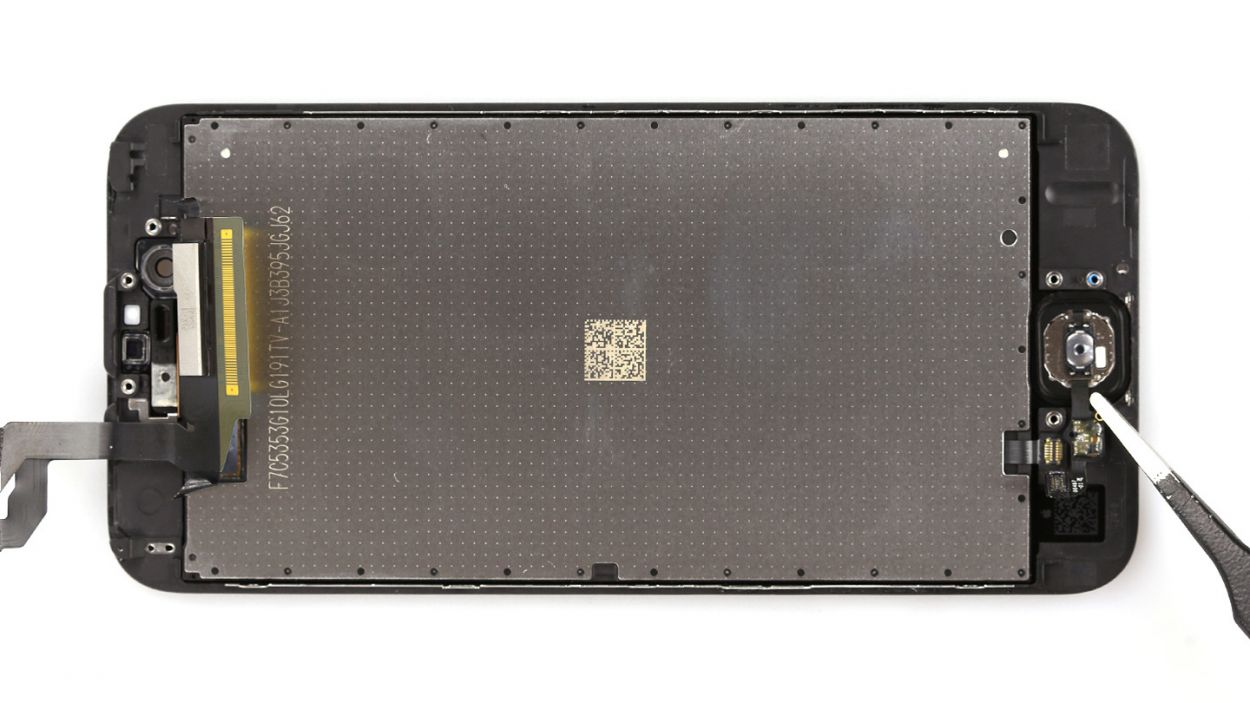
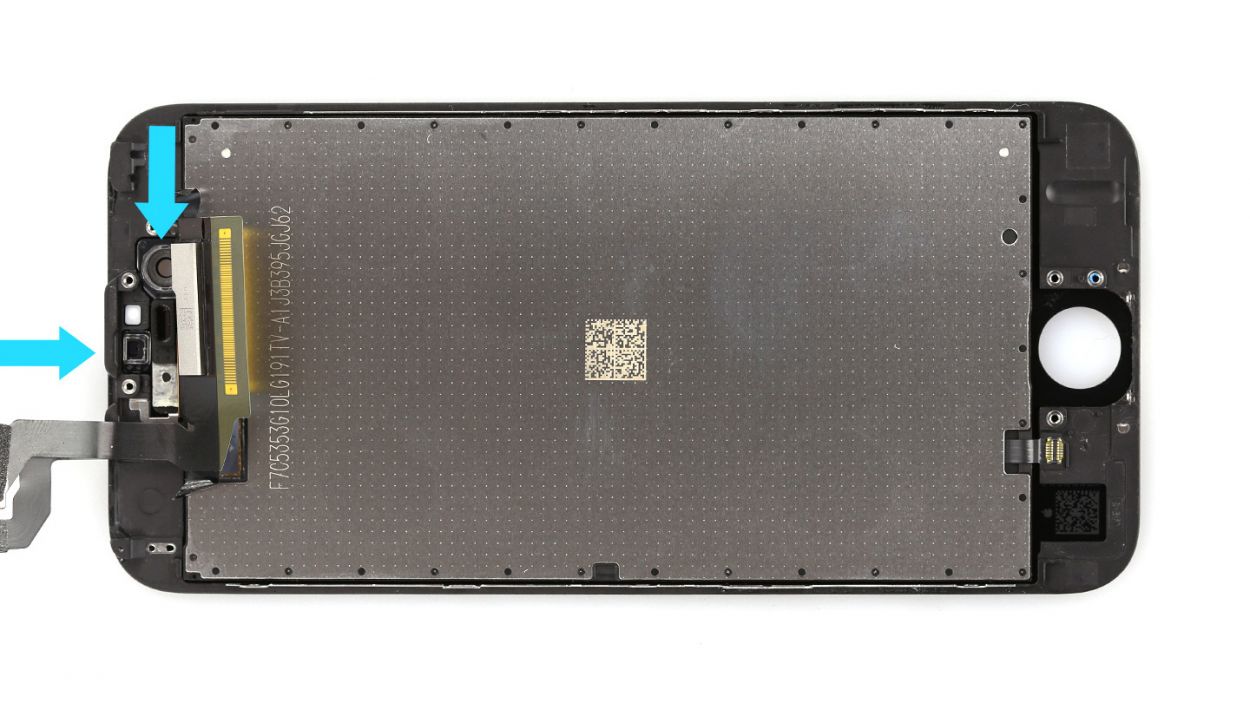
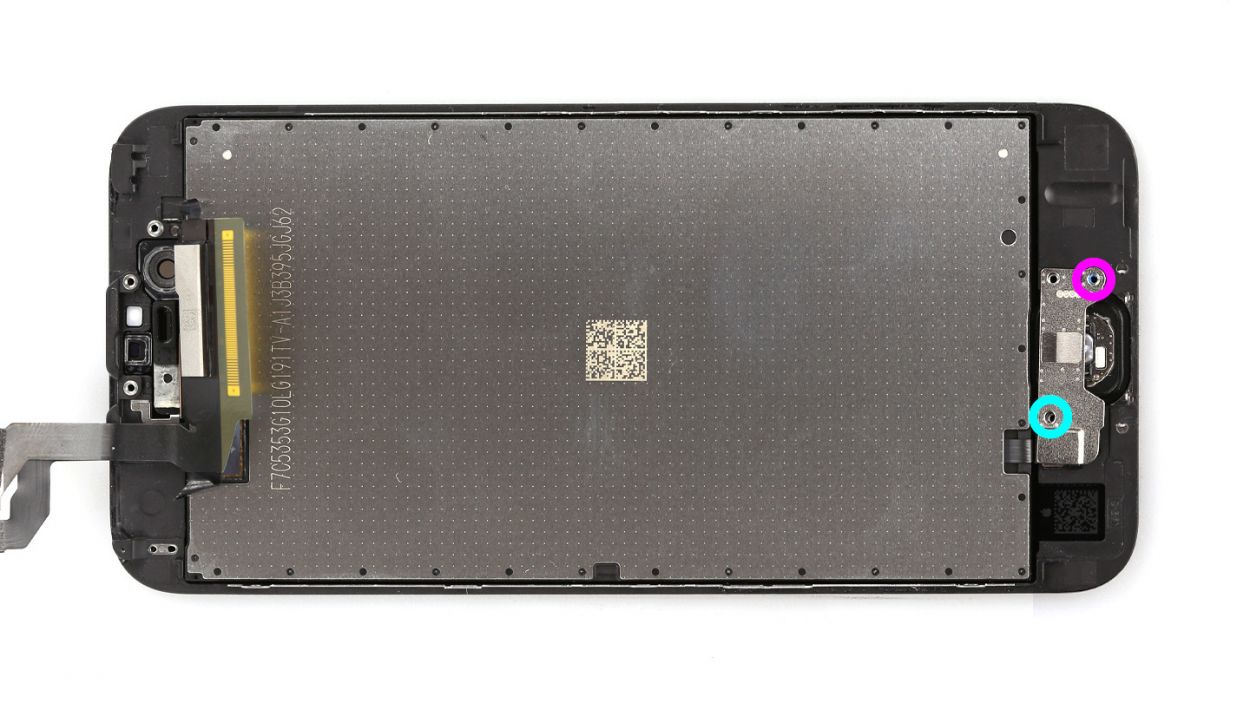
– Start by unscrewing those two Phillips screws. Once you’ve done that, gently remove the silver cover and place all the little pieces on your magnetic pad—let’s keep them safe and sound! You’ve got a 1 x 1.9 mm Phillips screw and a 1 x 1.7 mm Phillips screw to keep track of.
– To disconnect the home button cable, grab your trusty spudger and get to work!
– Carefully slide the flat end of the spudger under the stubbornly attached cable set to free it.
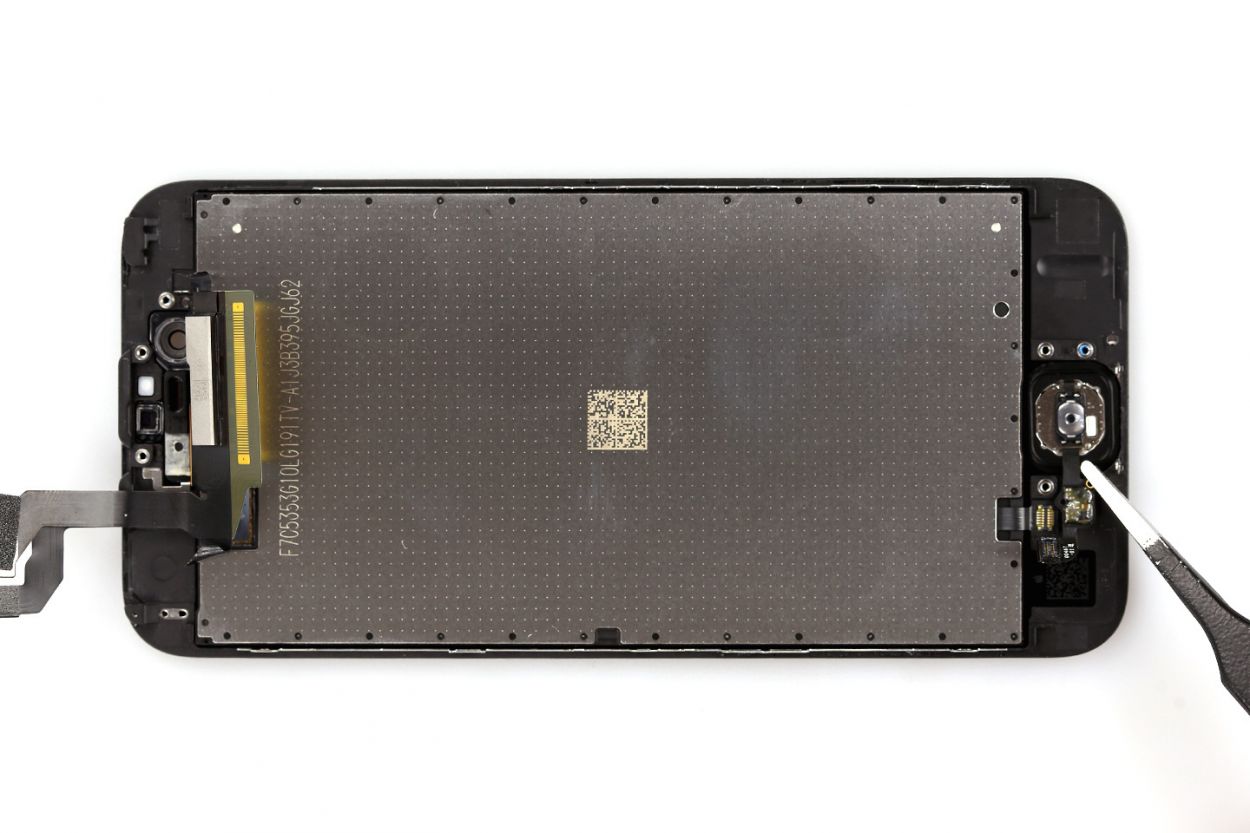
– The home button is stuck to the screen from the inside. Give it a gentle push inward from the front with your finger.
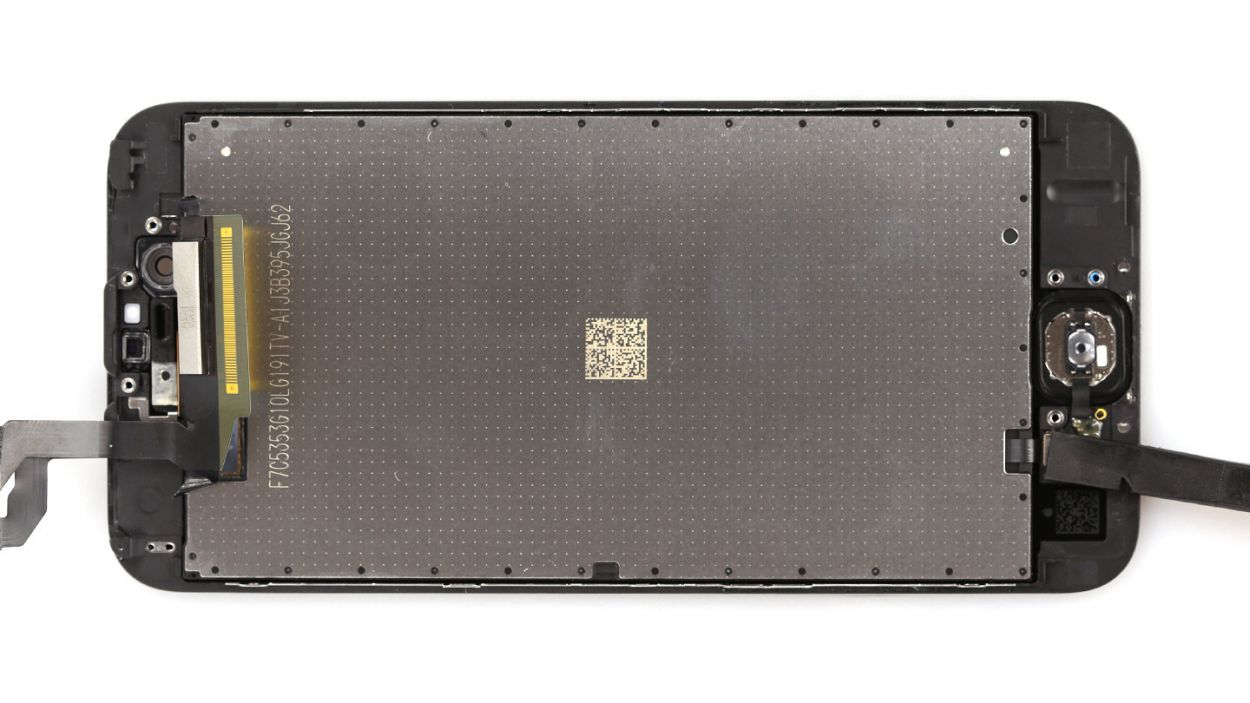
– Once you’ve successfully detached the cable set, you can lift it out with ease.
Step 10
– Not every display out there comes with the same bells and whistles! So, if your new screen is missing some features, you might need to snag a few parts from your old display before you install it. This includes the front camera bracket (which is just lightly glued in there) and the sensor bracket (also lightly glued).
– Front camera bracket (lightly glued in place)
– Sensor bracket (lightly glued in place)
Step 11
– Reattach the home button and connect those little connectors back together. They’ve missed each other!
– Now, pop that silver cover back on and give it a good twist to secure it. You’re almost there!
Step 12

– Place that shiny silver rear panel snugly on the back of your new display and screw it in nice and tight. Just a heads up: ensure that the 3D Touch cable is cozy underneath the rear panel.
– Now, let’s stick those adhesive+strips+iPhone+6s&crid=1TJIMMAJSUJUZ&sprefix=repair+tools%2Caps%2C165&linkCode=ll2&tag=salvationrepa-20&linkId=c486487cf454ce8edd6f5beefab4110f&language=en_US&ref_=as_li_ss_tl’>adhesive strips on the left and right upper corners of the rear panel. You’re doing great!
Step 13
Be sure to place those sensors just right! If they’re not in their happy place, the proximity sensor might throw a tantrum and refuse to work properly!
– First up, let’s get that ambient microphone snug in its original spot.
– Next, gently place each sensor into its designated bracket inside the display frame. Remember, putting them in the right spot is key, or the proximity sensor might throw a little fit and not work like it should!
Step 14
Heads up! The screws are not all the same length! Mixing them up could lead to a screw pressing against the display glass from the inside, and we definitely don’t want that kind of drama.
– Reposition the earpiece back where it belongs, snugly nestled between the FaceTime camera and the sensors. After that, pop the cover plate back on and stick the adhesive strip right where it was originally.
– Secure those Phillips screws in place. Just a little reminder: ensure the front camera is perfectly centered on the display. If it’s feeling a bit off, don’t hesitate to nudge it into place. You’ve got 2 x 2.2 mm Phillips screws and 1 x 1.8 mm Phillips screw to work with!
Step 15


Make sure those display connectors are snug as a bug! If they’re not properly connected, you might see some funky stripes or parts of the touchscreen just won’t play nice!
– First things first, let’s get those display connectors plugged in! It might take a few tries, so don’t worry if it feels like a game of Tetris. Just be gentle and avoid bending those connectors! We’re talking about the Front camera/sensor/earpiece/ambient microphone, Touch ID cable, and the Display.
– Once everything is snugly connected, fire up your iPhone! Check if the LCD, touchscreen, proximity sensor, front camera, and earpiece are all doing their thing. If those connectors aren’t seated properly, you might see some funky stripes or parts of the touchscreen not responding—yikes!
– Lastly, pop that connector cover back on and give it a good twist to secure it. You’ve got this! Remember, you’ll need 3 x 1.3 mm Phillips screws and 1 x 2.9 mm Phillips screw to keep everything in place.
Step 16

– First, connect that battery connector like a pro!
– Next, grab the silver cover plate, pop it on, and secure it with those screws. You’ve got this! Just remember: 1 x 2.9 mm Phillips screw and 1 x 2.2 mm Phillips screw are your pals here.
Step 17
– Gently fold down that display like you’re tucking in a cozy blanket. Make sure the top edge, where those pesky cables are connected, clicks into place just right. Now, with a little finesse, press down on the display towards the home button, sliding it along the edge until it fits snugly in the frame. You’re doing great!
Step 18
– Now, let’s snugly fasten those two pentalobe screws at the bottom of the enclosure. You’ve got this with those 2 x 3.8 mm pentalobe screws!
Step 19