DIY Guide to Replace iPhone 7 Display Step-by-Step
Duration: 60 min.
Steps: 23 Steps
Don’t worry! In this handy repair guide, we’ll walk you through the process of replacing your iPhone 7’s display step by step, all on your own! You can grab the perfect iPhone toolkit and a top-notch original replacement display for your iPhone 7 from our online store. Good luck with your repair adventure! Remember, you’ve got this! If you need more help, just schedule a repair with us!
Step 1
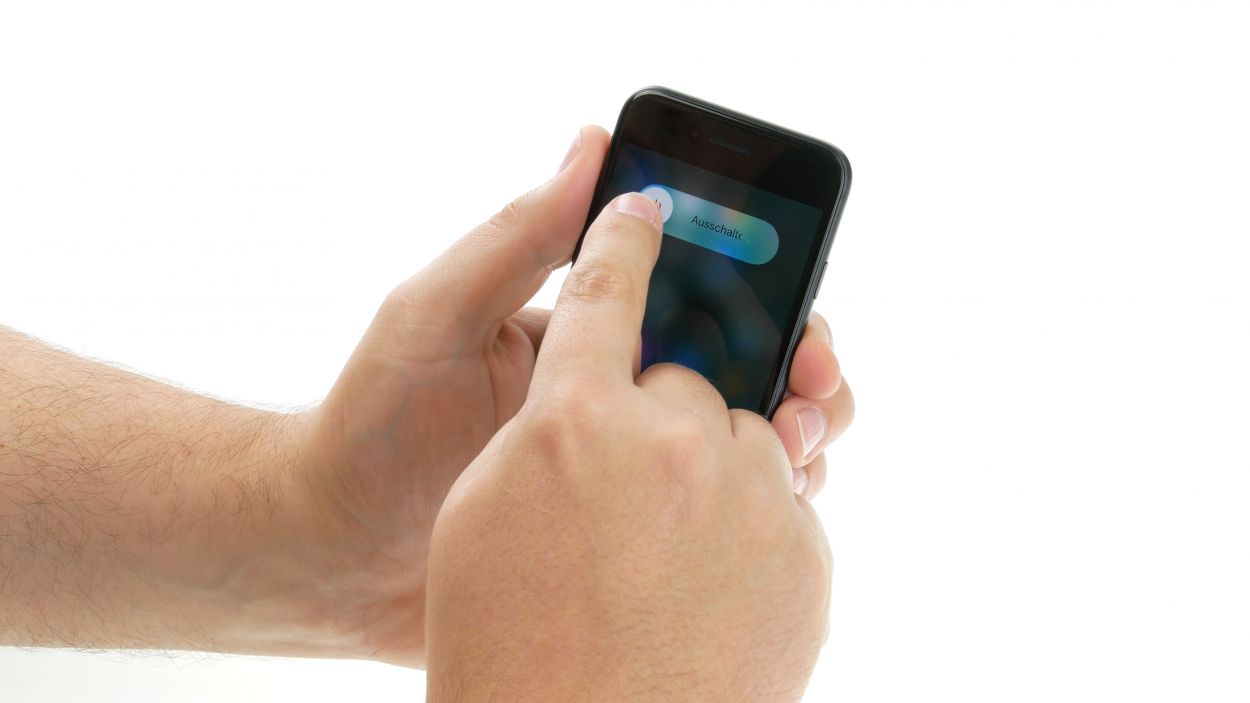
– To keep your device safe from pesky short circuits during your repair escapade, make sure to power it down completely first.
– Give that sleep/wake button a good press until the ‘Switch off’ slider pops up on your screen.
– Slide that slider from left to right like a pro.
– In about ten seconds, your iPhone will be completely off and ready for your repair magic!
Step 2
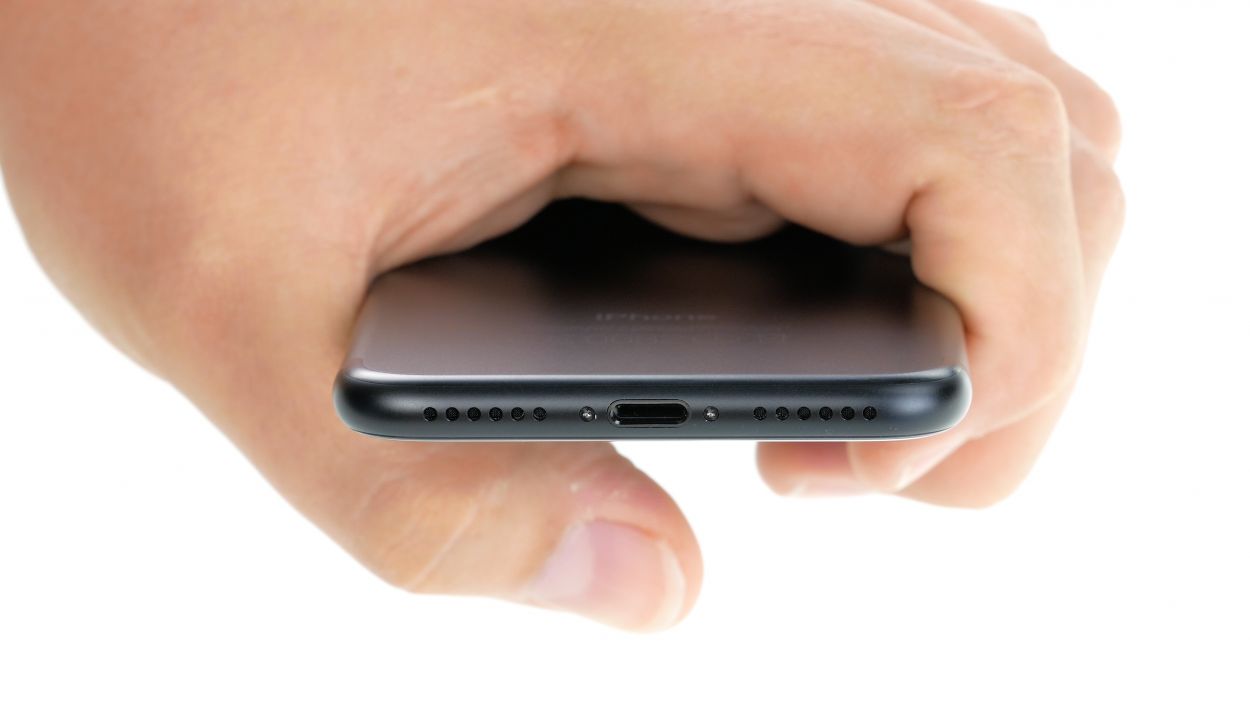
2 × 3,3 mm Pentalobe
To keep all those tiny screws and parts from playing hide and seek, we suggest using a screw storage solution. An old sewing box works wonders for this! Here at Salvation Repair, we love using a nifty magnetic mat to keep everything in check, allowing us to arrange the parts just like they were in your device.
– Grab your trusty Pentalobe screwdriver and tackle those two Pentalobe screws hanging out on either side of the Lightning connector. You’re almost there!
– Make sure to stash those little guys in a screw storage so they don’t decide to play hide and seek later.
Step 3
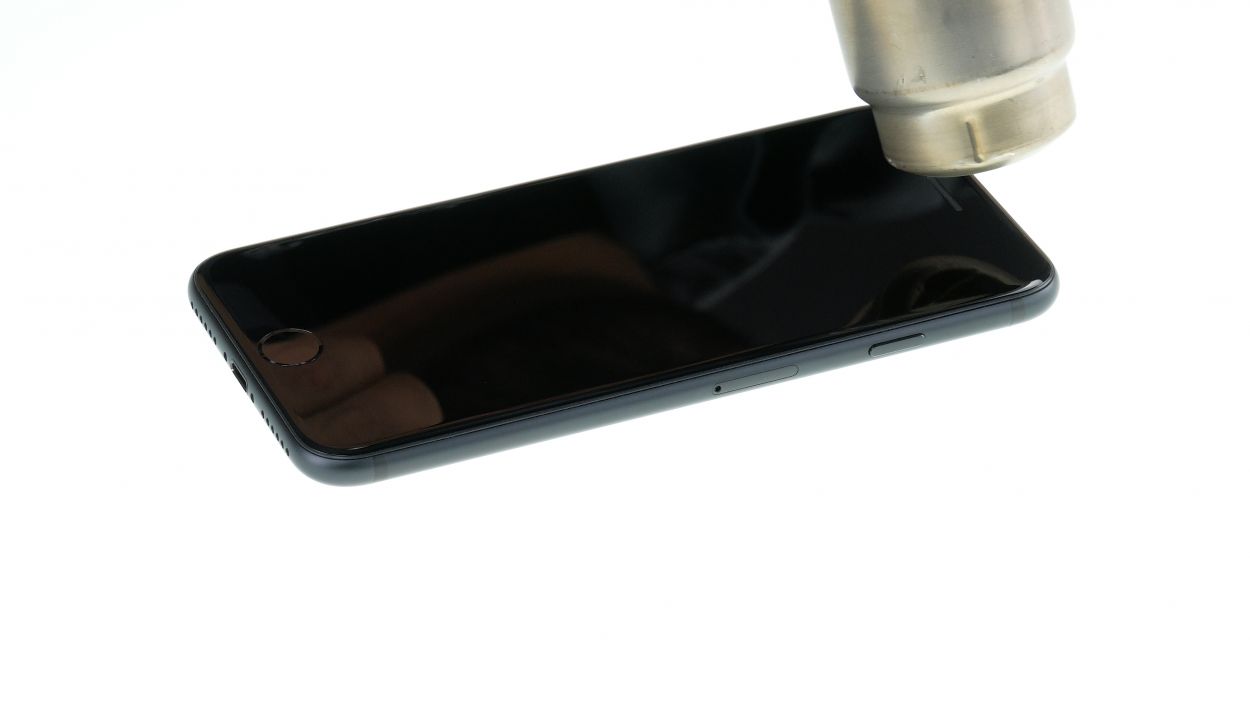
As a fun little guideline, warm up your device just enough so it’s cozy to touch—no finger burns allowed!
– Start by laying your iPhone 7 on a soft, clean surface to keep that back cover scratch-free.
– Grab your trusty heat tool—whether it’s a heat gun or a hairdryer—and gently wave it around the screen’s edge to warm up the adhesive. You’re doing great!
Tools Used
- heat gun to heat parts that are glued on so they’re easier to remove.
In most cases, you can also use a hairdryer.” rel=”noopener”>Heat gun
Step 4
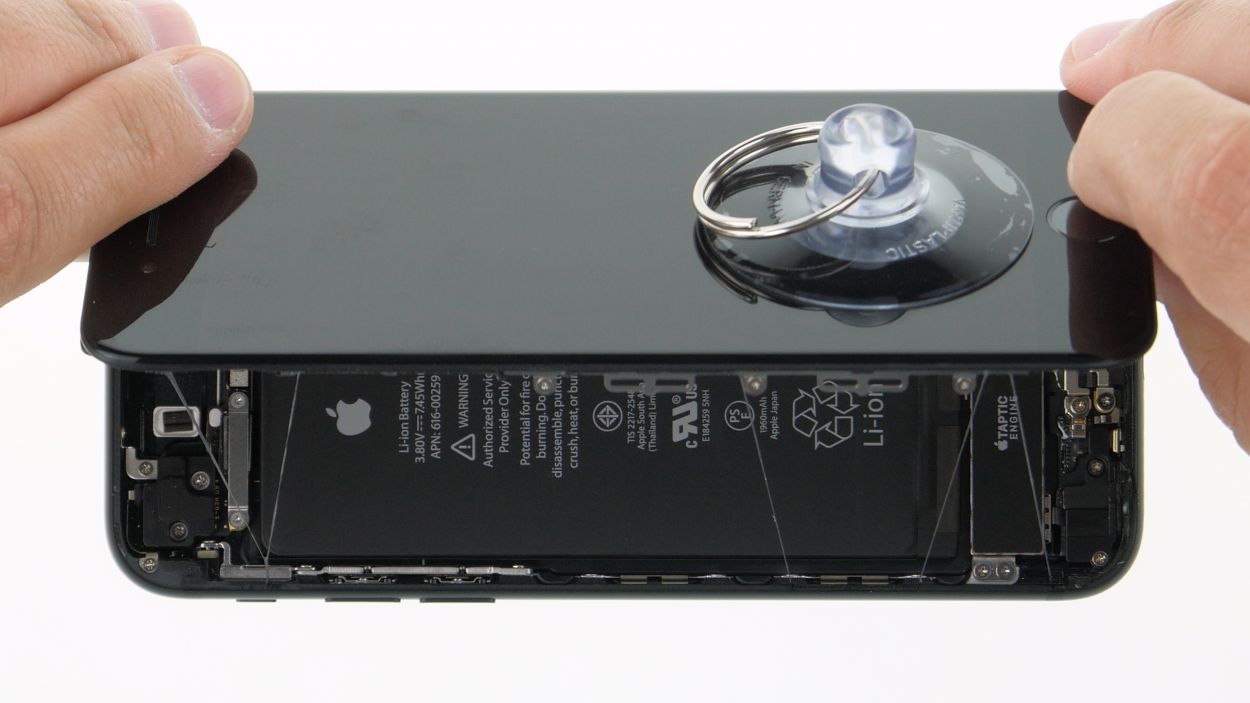
Opening your iPhone 7? Just a heads up: the warranty for dust, splash protection, and waterproofing takes a little vacation once you do!
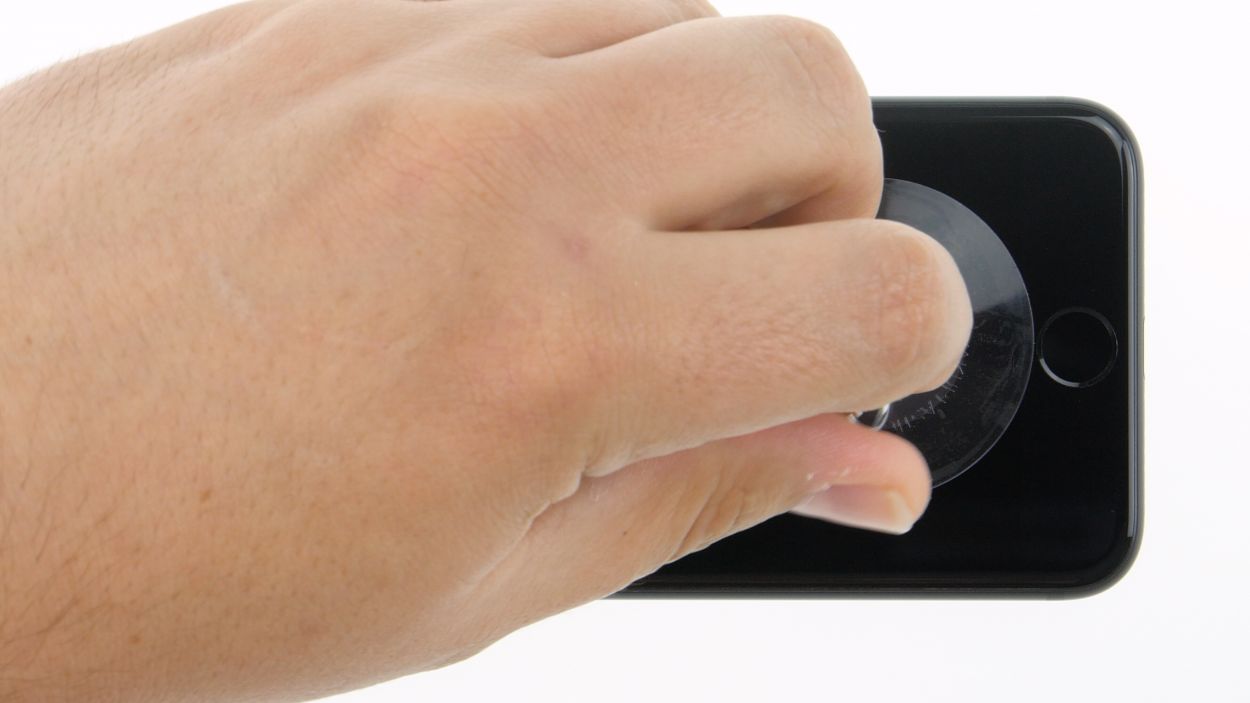
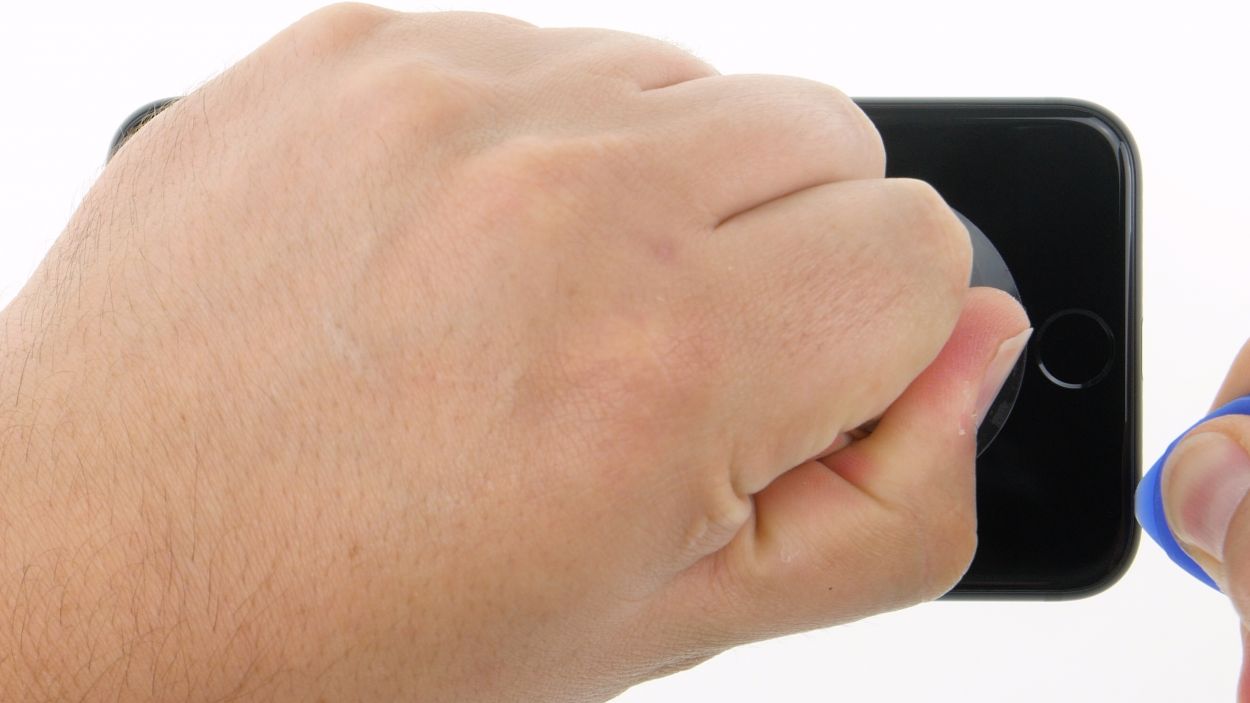
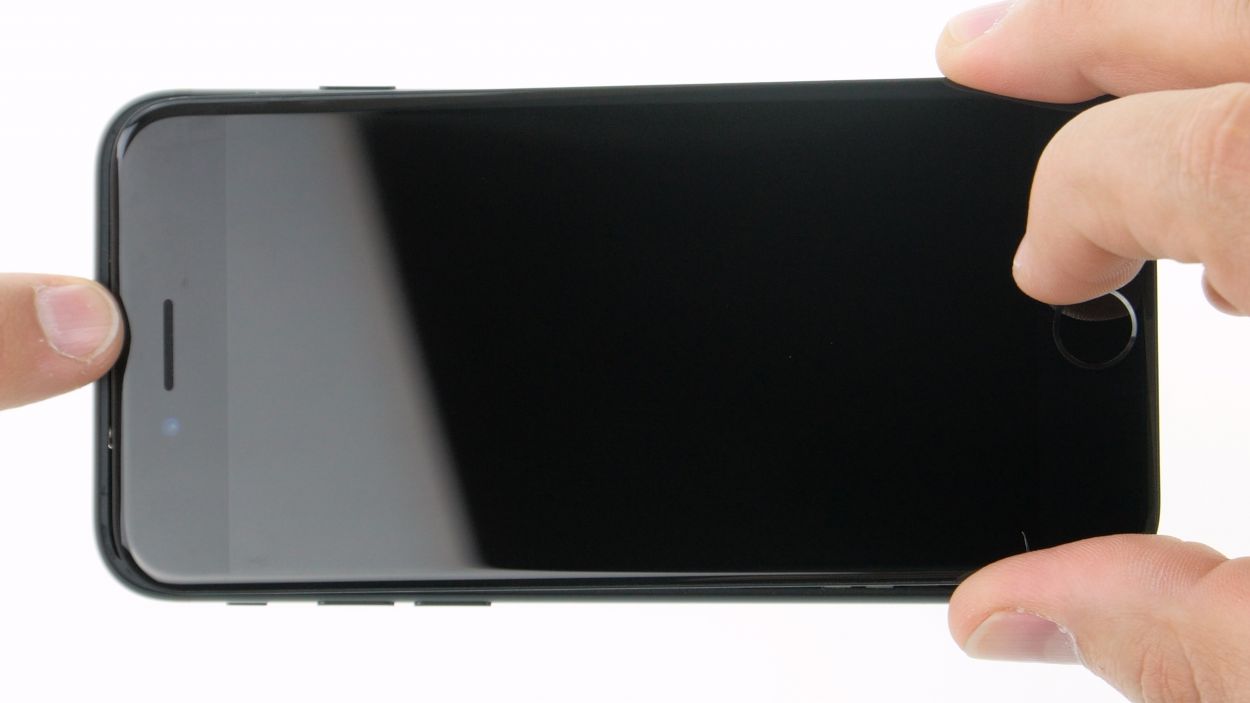
– Once you’ve warmed up the display edge nicely, grab a suction cup and pop it on the display right around the home button area.
– Give that suction cup a gentle pull upwards to create a slim gap between the aluminum frame and the display.
– While you’re at it, slide a flat and sturdy tool into that gap. A hard plastic plectrum works wonders here.
– Now, let’s make that gap a bit bigger by gently pushing down on the aluminum frame with your tool.
Tools Used
Step 5
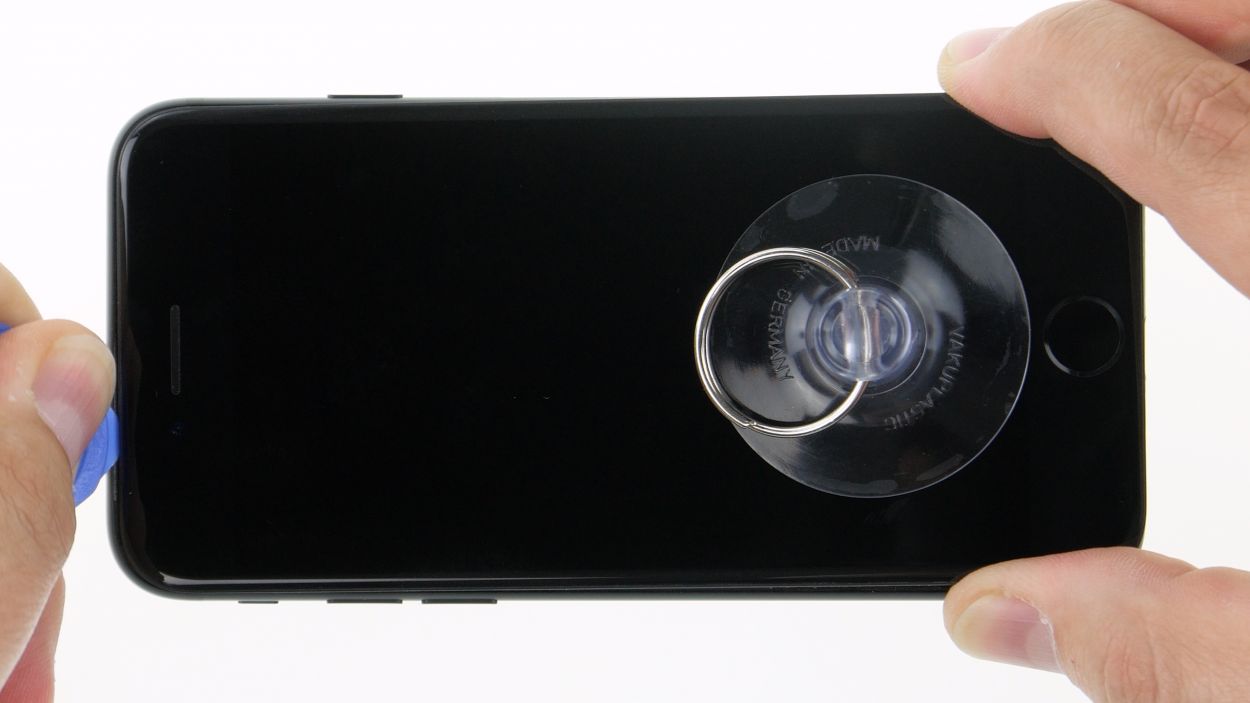
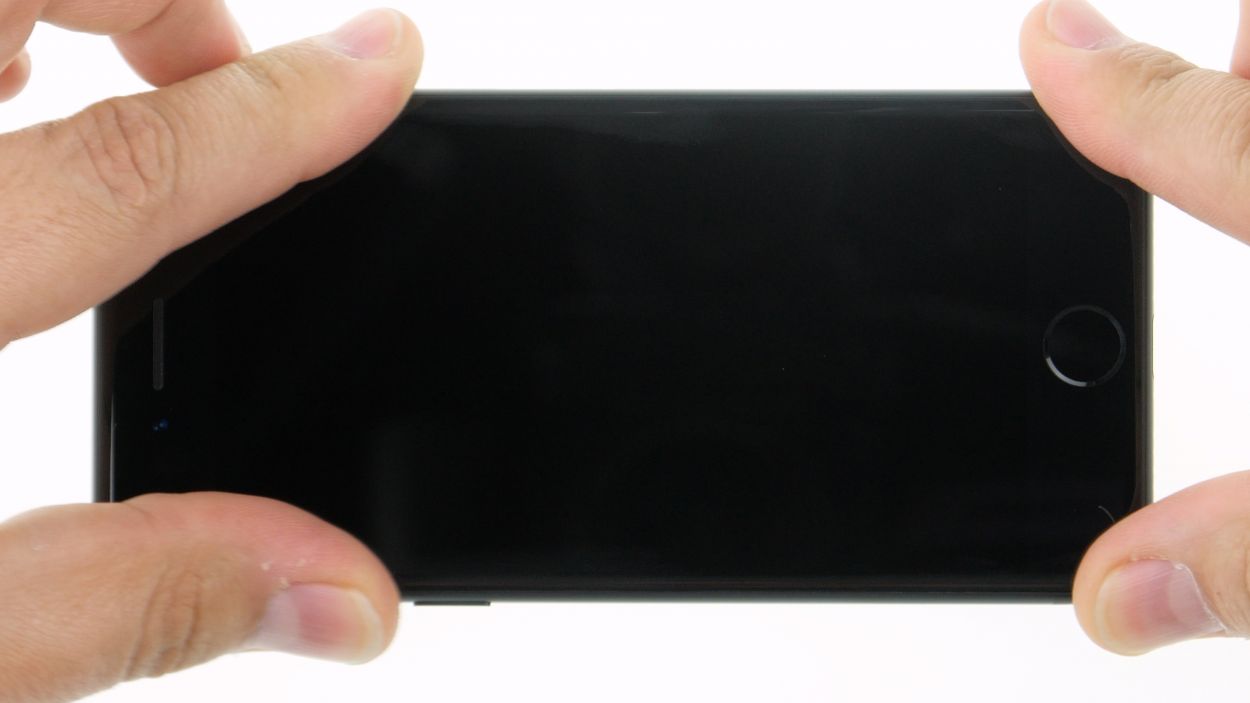
Hey there! Just a friendly reminder: when you’re inserting those picks near the sleep/wake button, keep it gentle. We want to avoid any mishaps with the display’s flex cable!
Keep that display cozy by continuing to warm its edges, and pop in those flat picks to keep the glue from getting too friendly again in the spots you’ve already loosened. You’re doing great!
Tools Used
- heat gun to heat parts that are glued on so they’re easier to remove.
In most cases, you can also use a hairdryer.” rel=”noopener”>Heat gun - Pick Set
- Flat Picks
Step 6

1 × 2,4 mm Y-Type
3 × 1,0 mm Y-Type
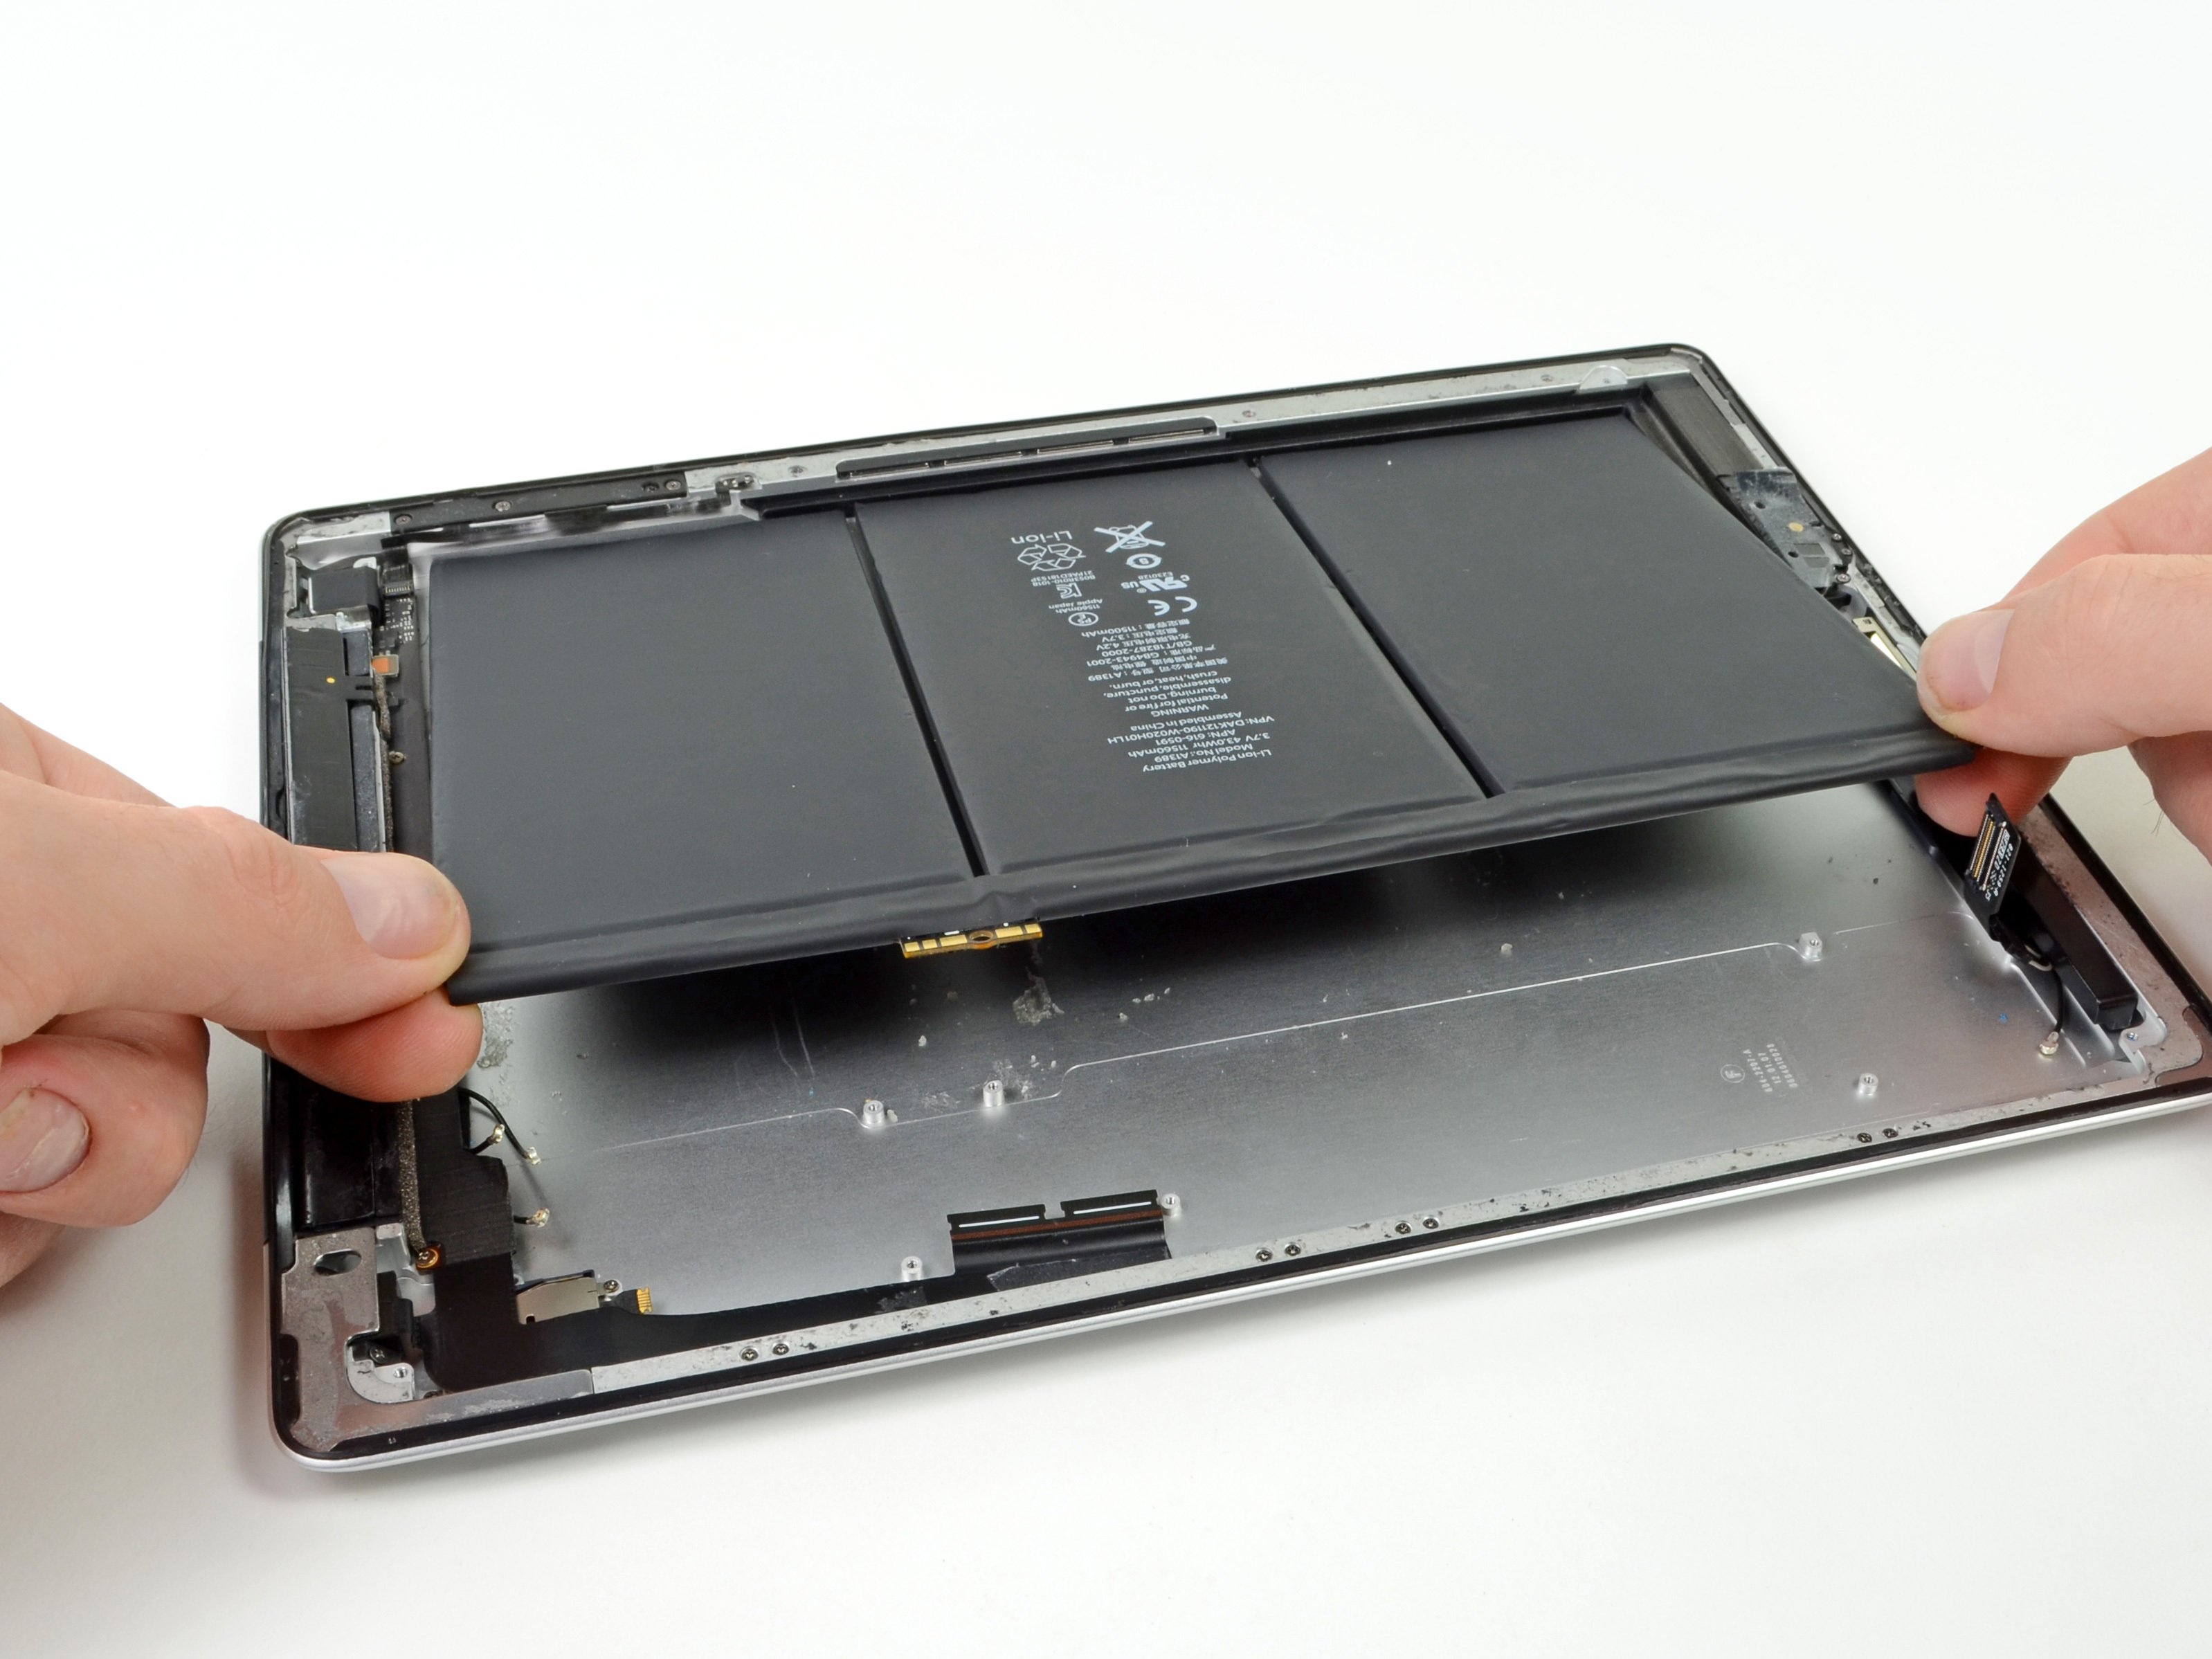
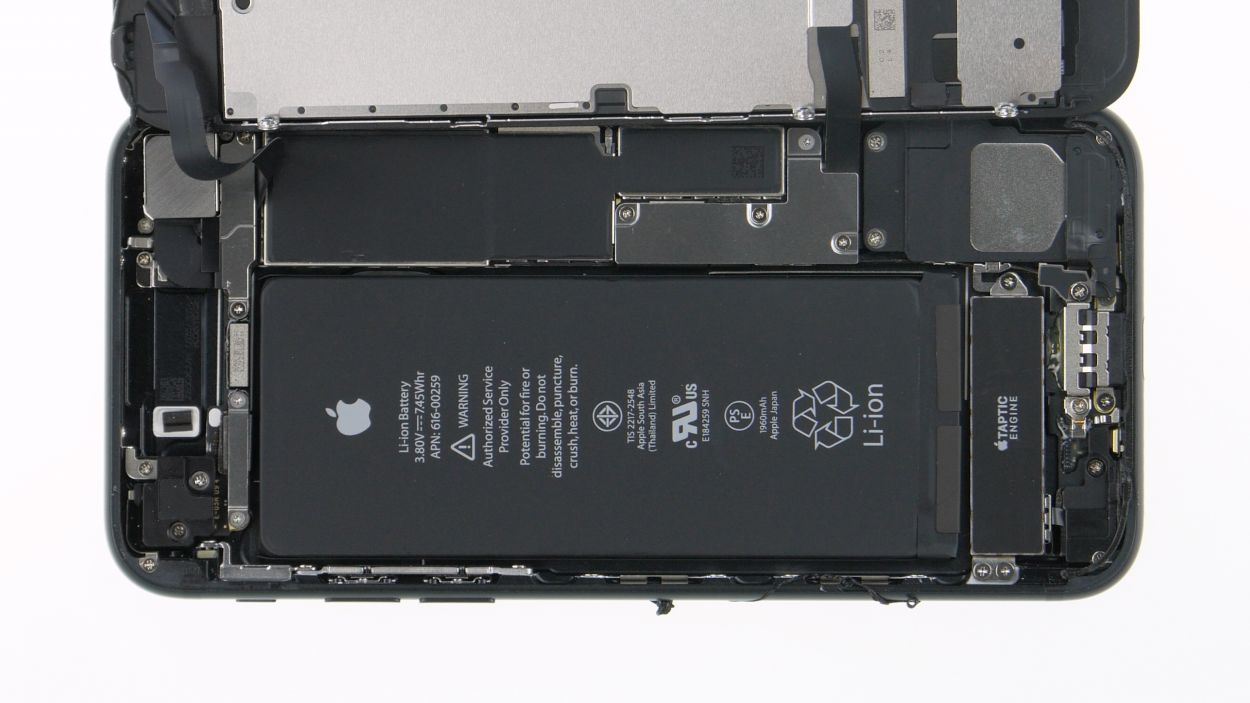
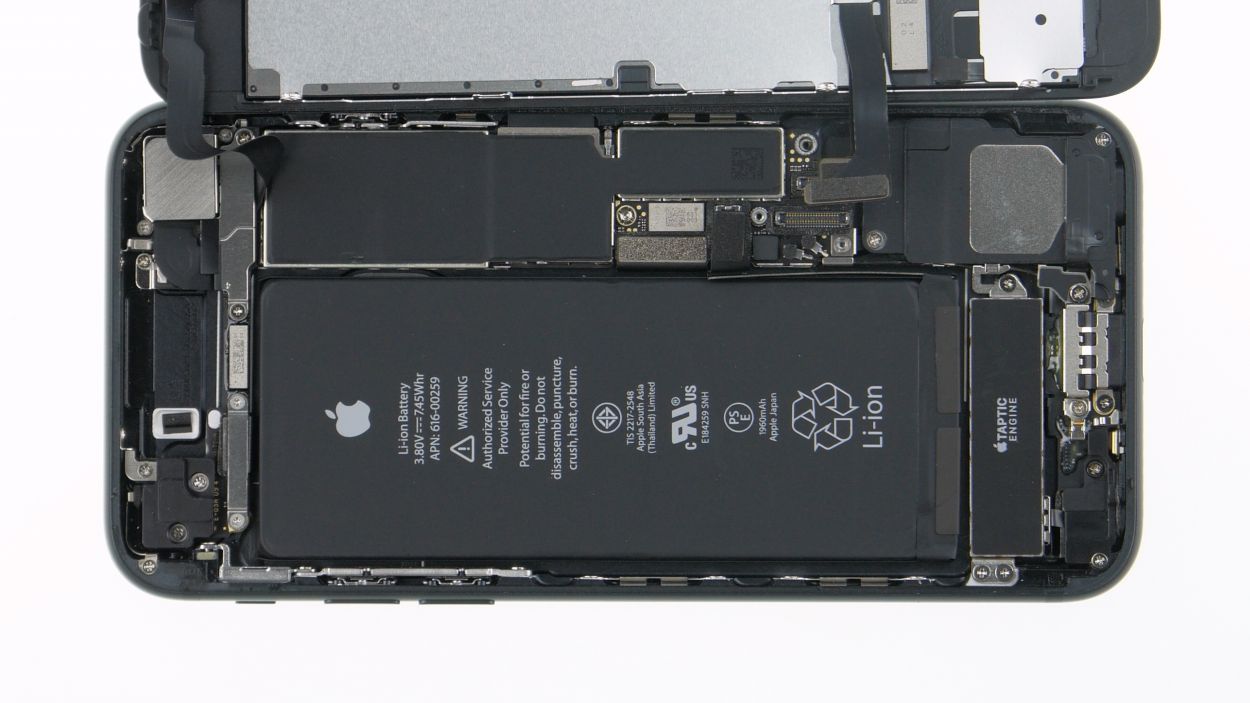
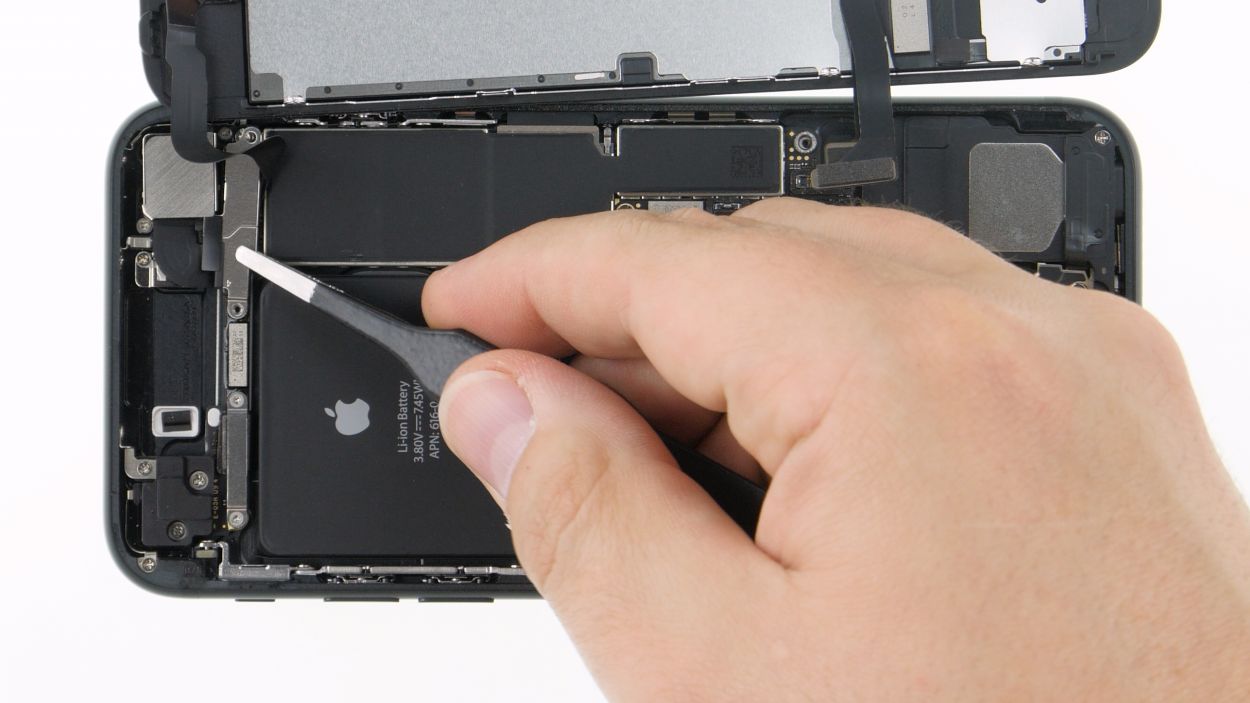
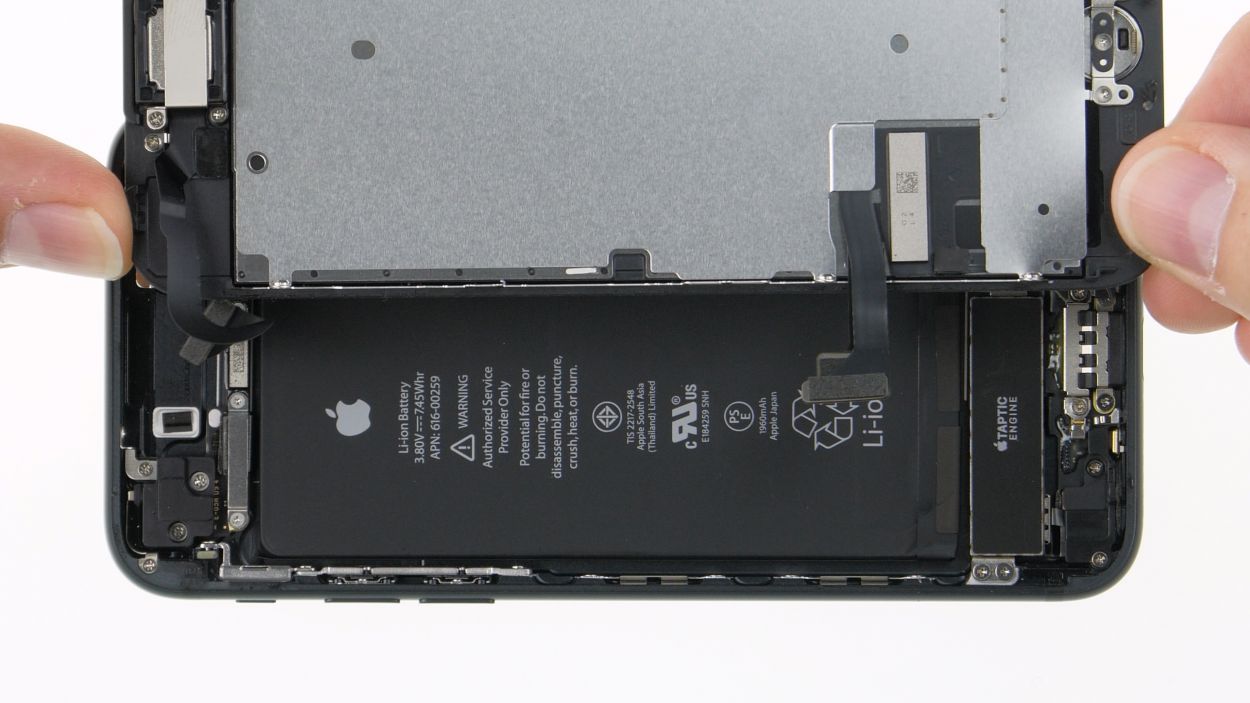
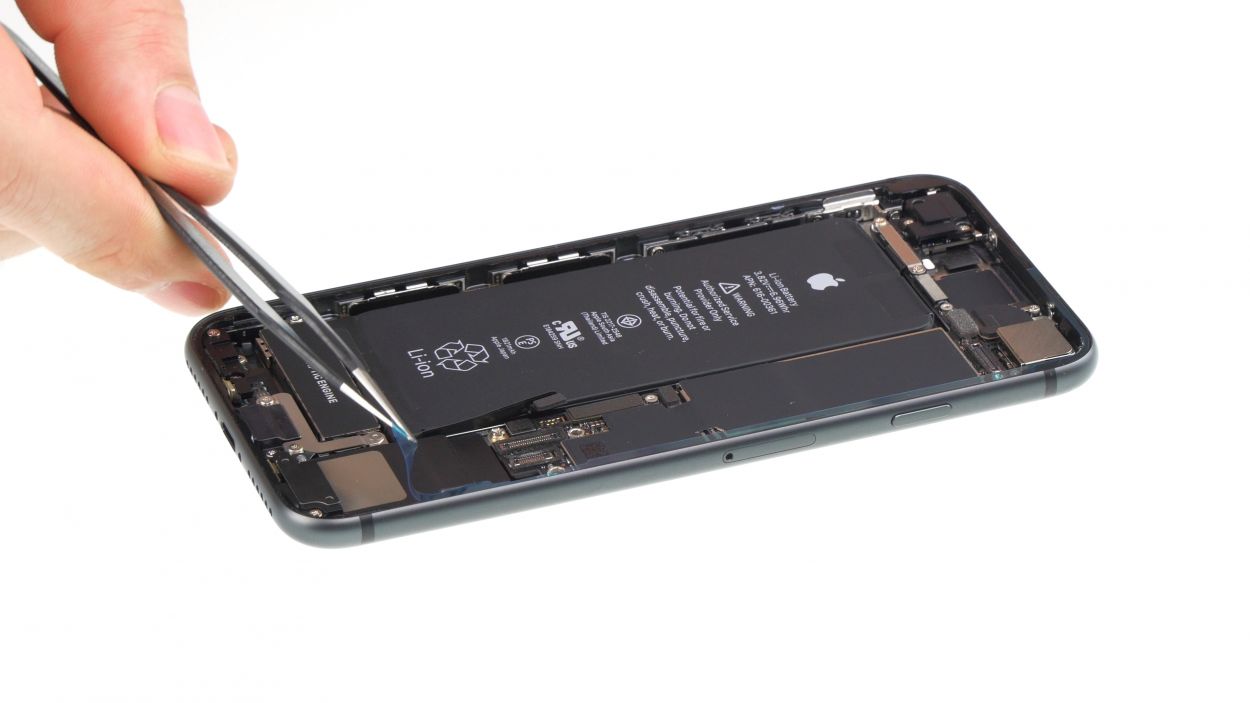
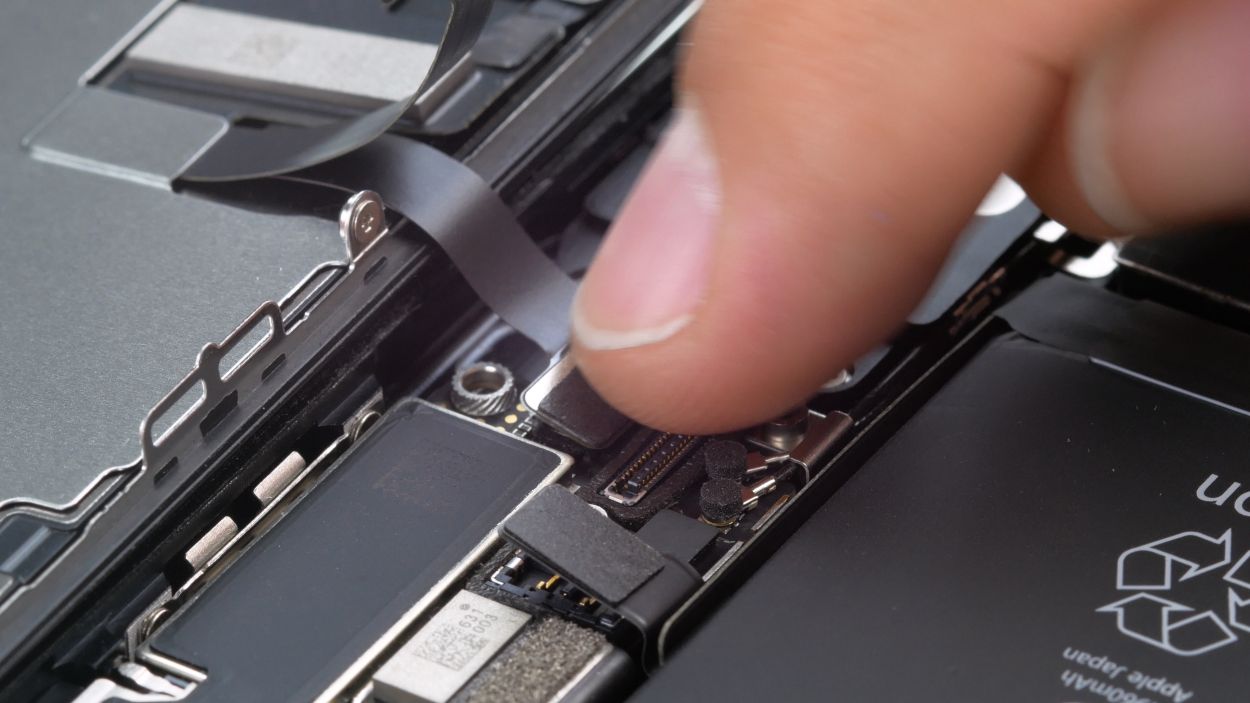
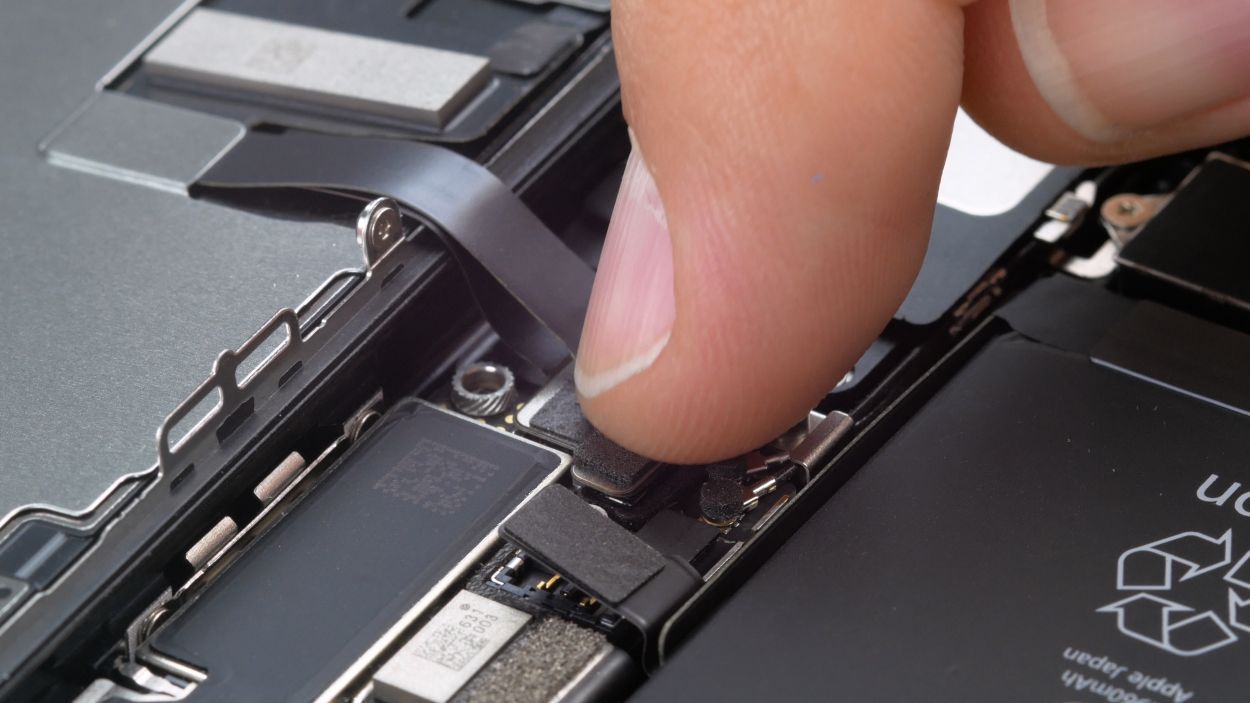
Battery connector
Loosen the battery connector at the start of your repair journey. This little step is your shield against potential short circuits and ensures your iPhone 7 stays off while you work your magic!
– Grab your Y-type screwdriver and loosen those four Y-type screws like a pro! Once they’re nice and loose, gently lift off the bracket plate that’s covering the battery connector. You’re doing awesome!
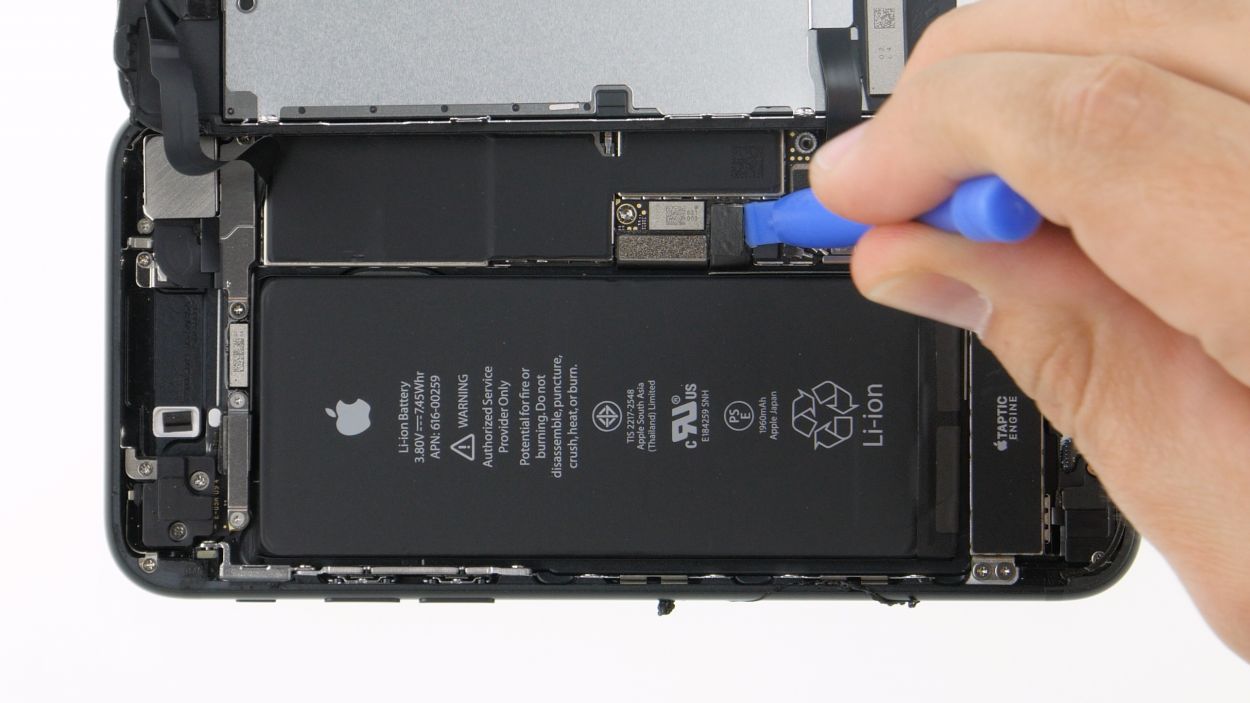
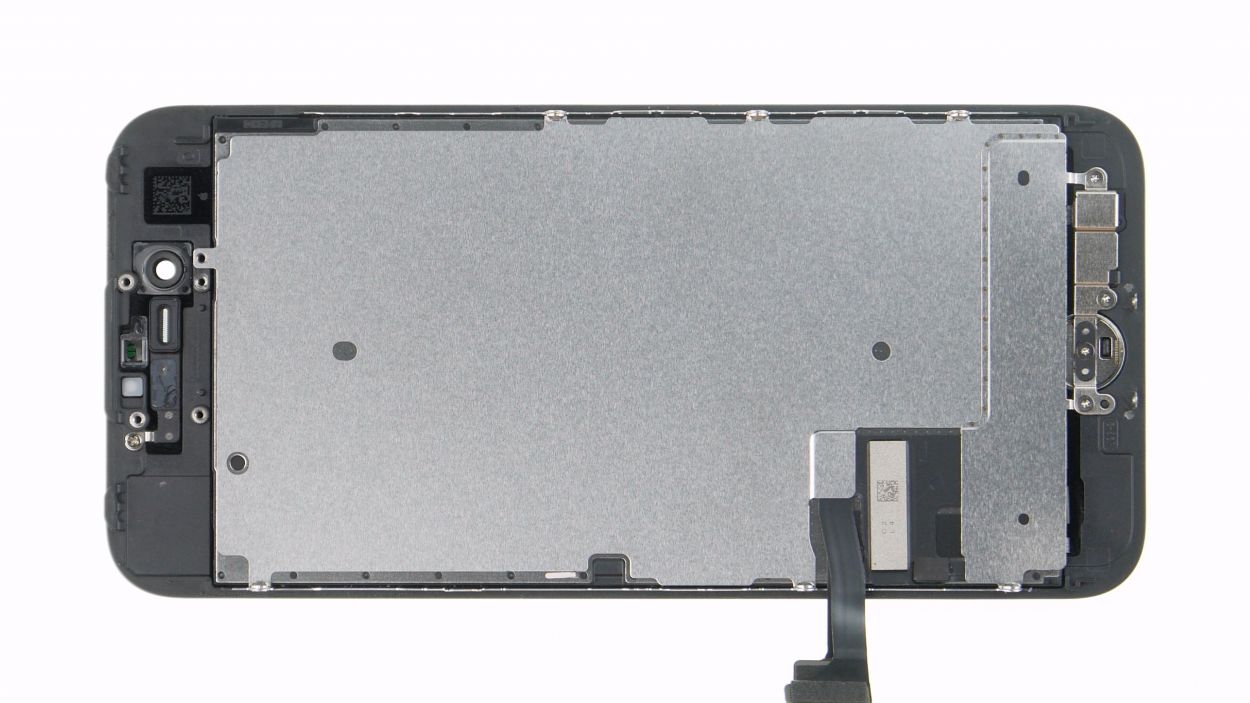
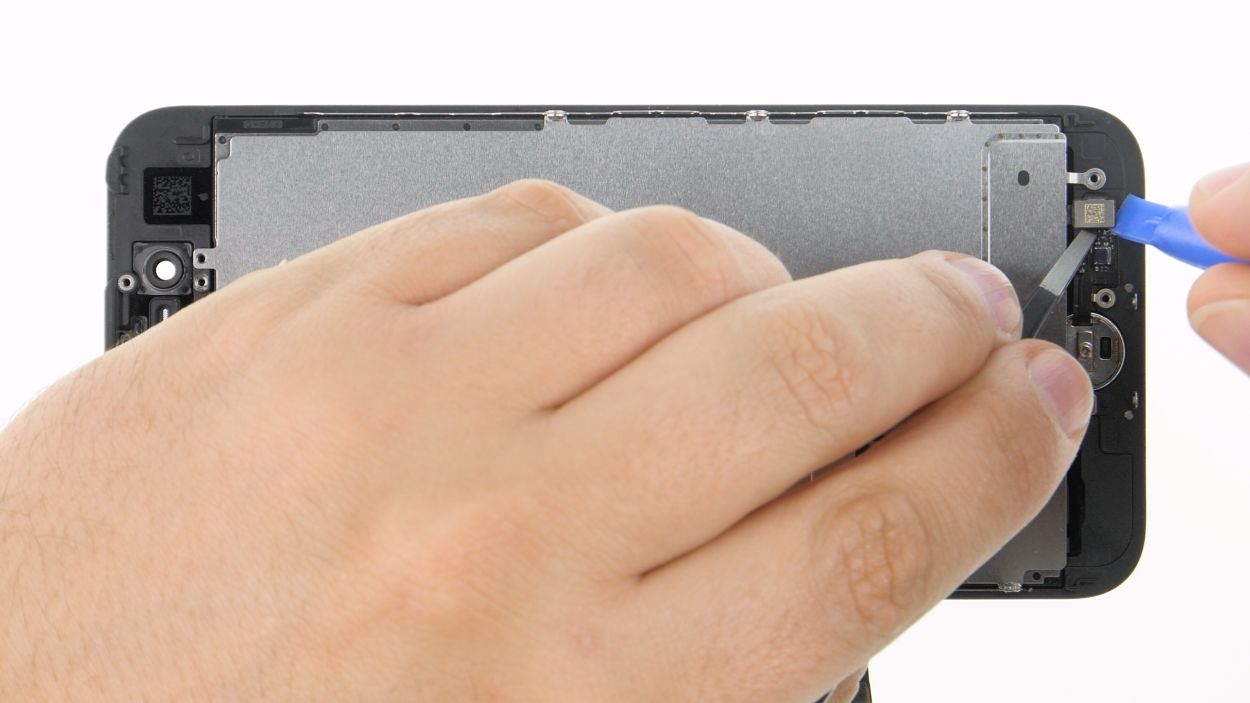
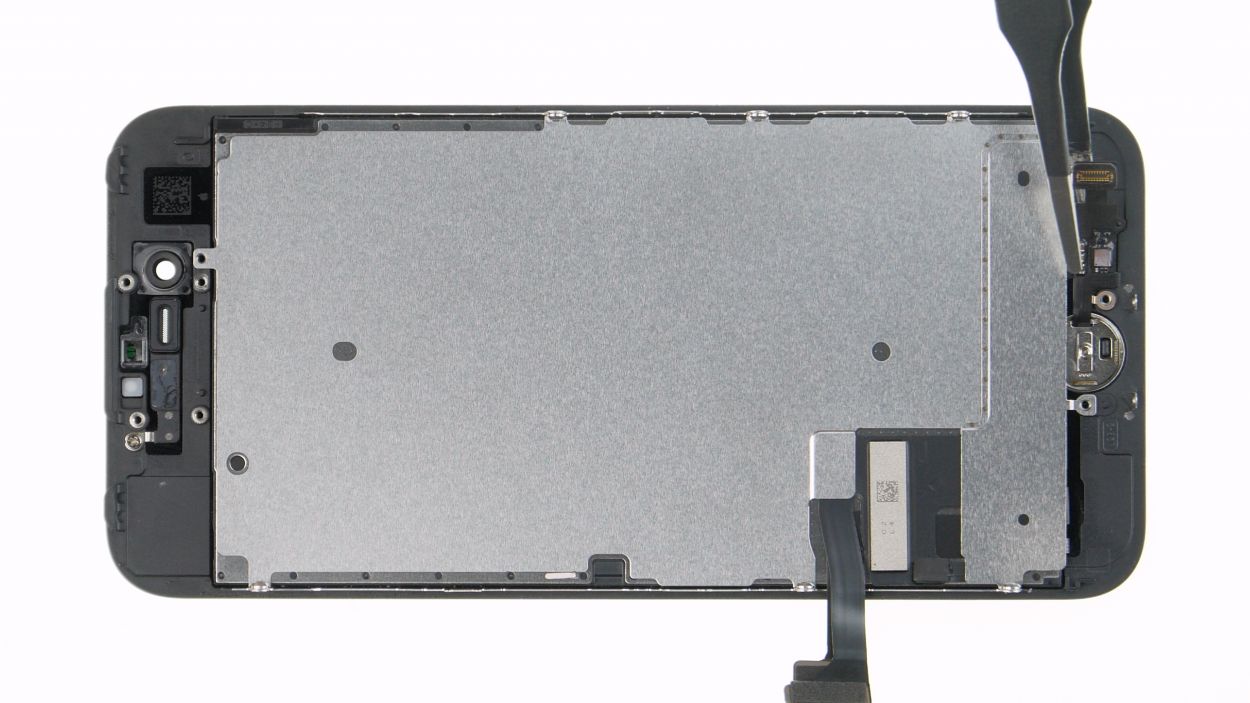
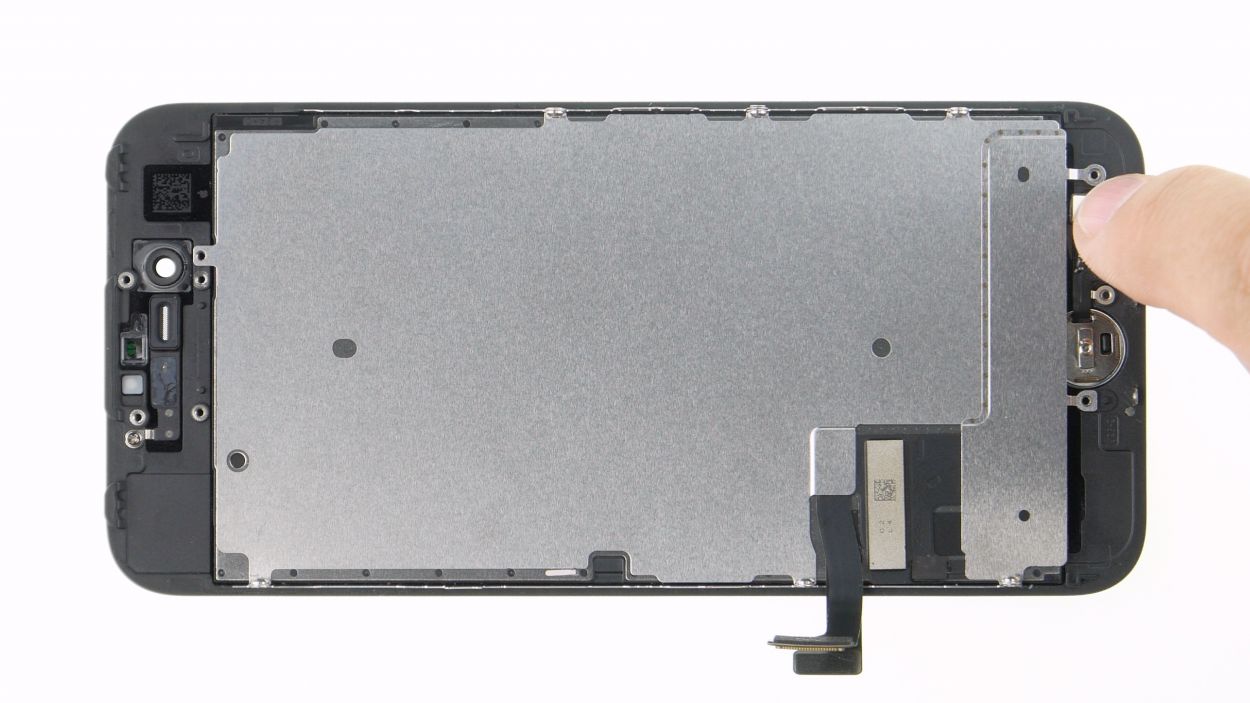
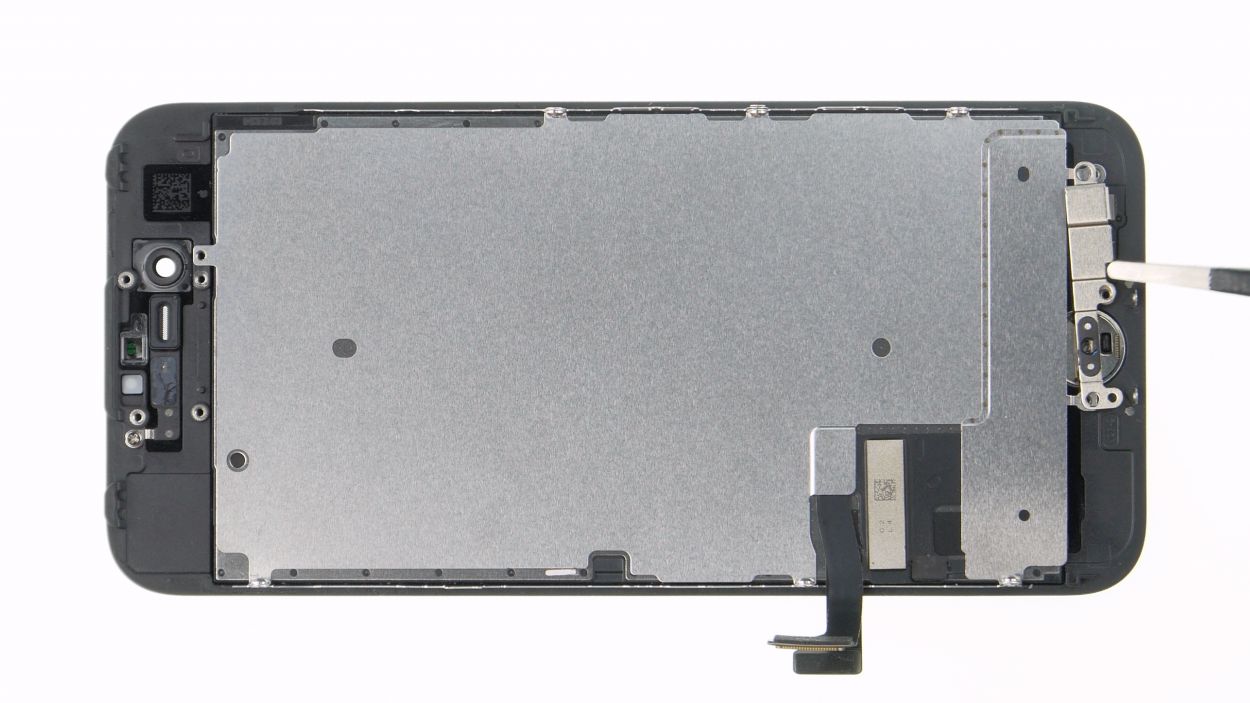
Step 7
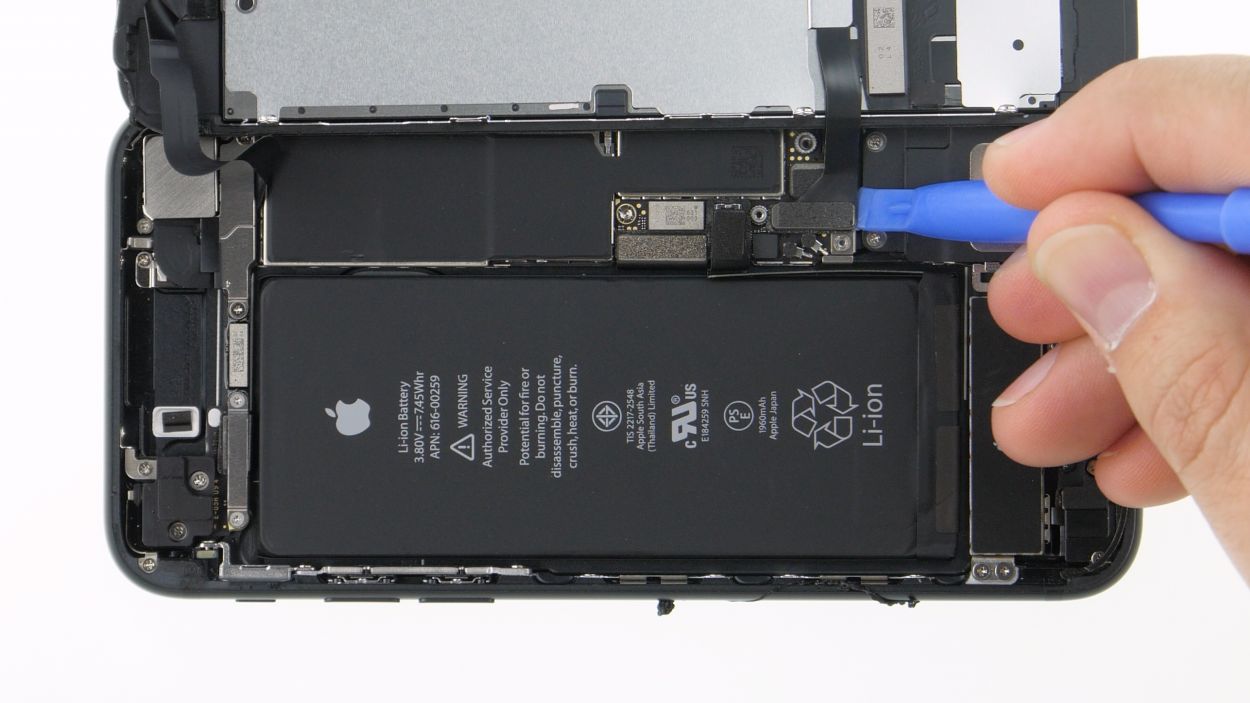
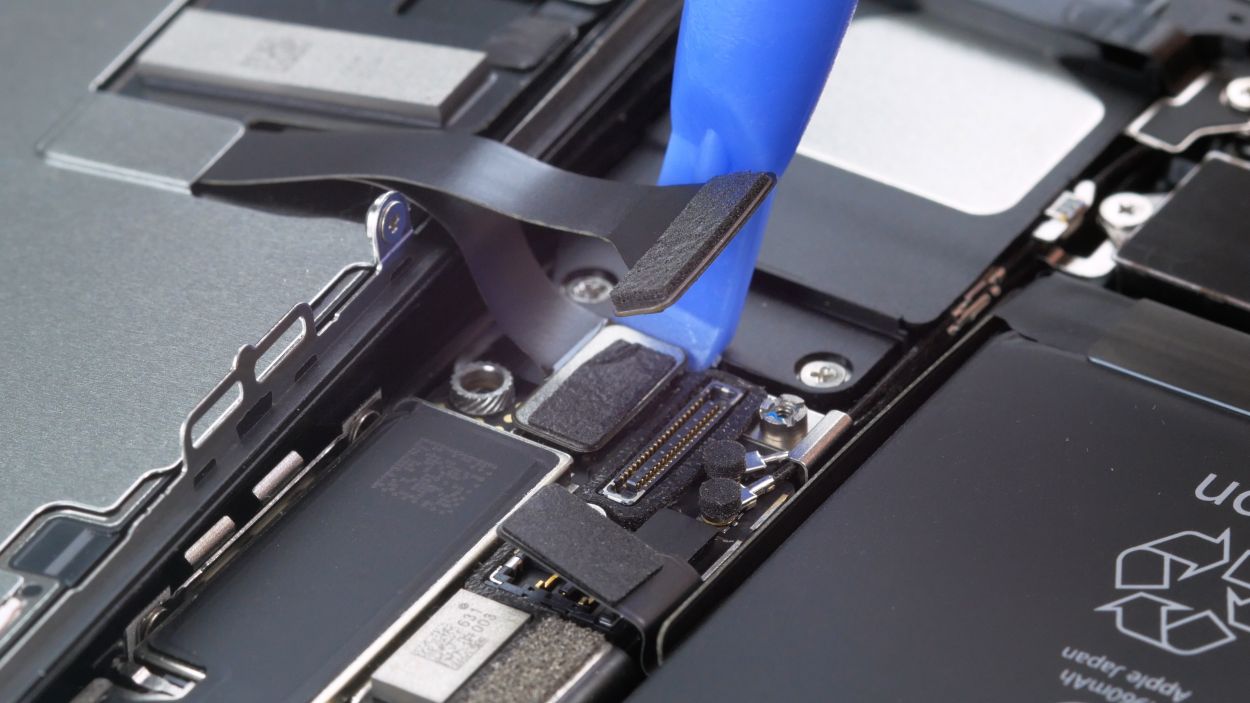
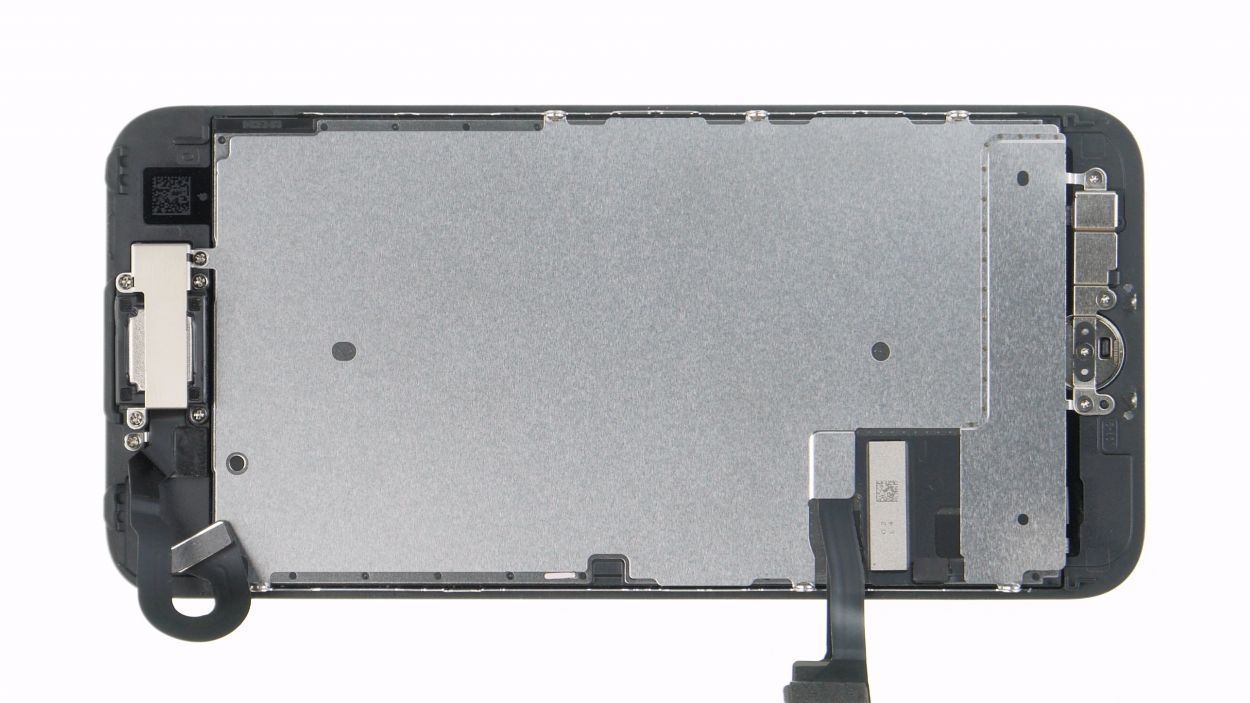
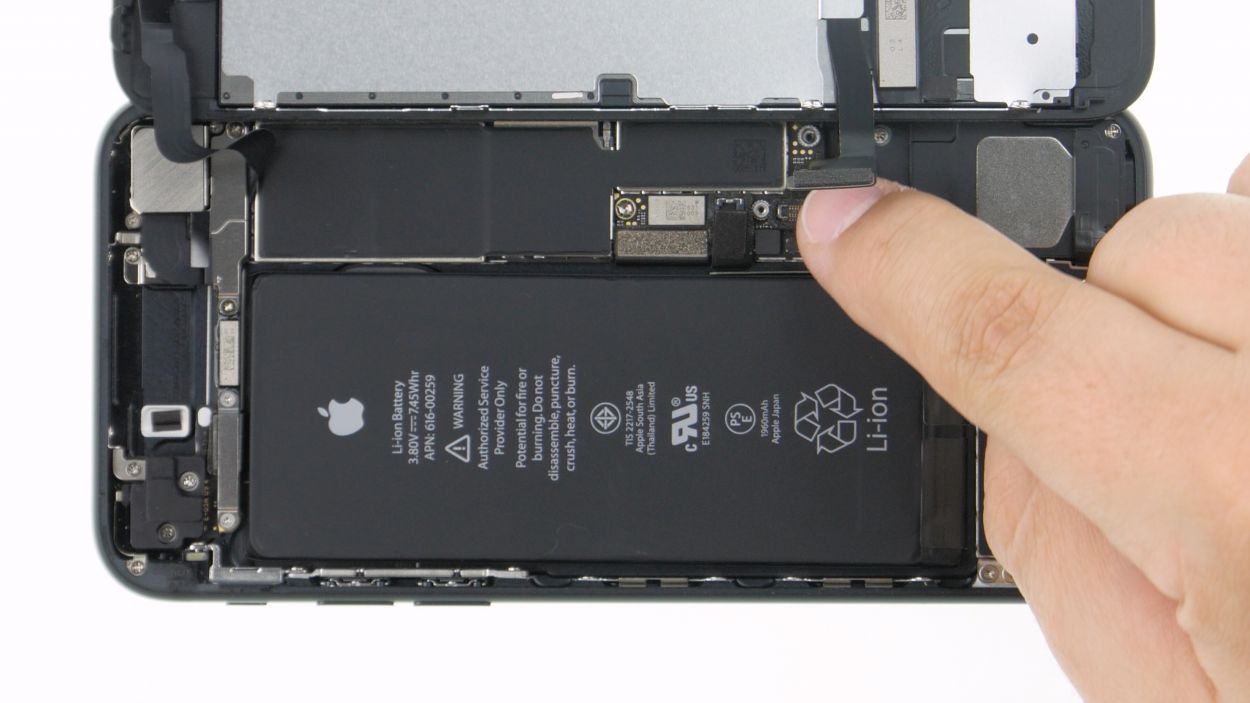
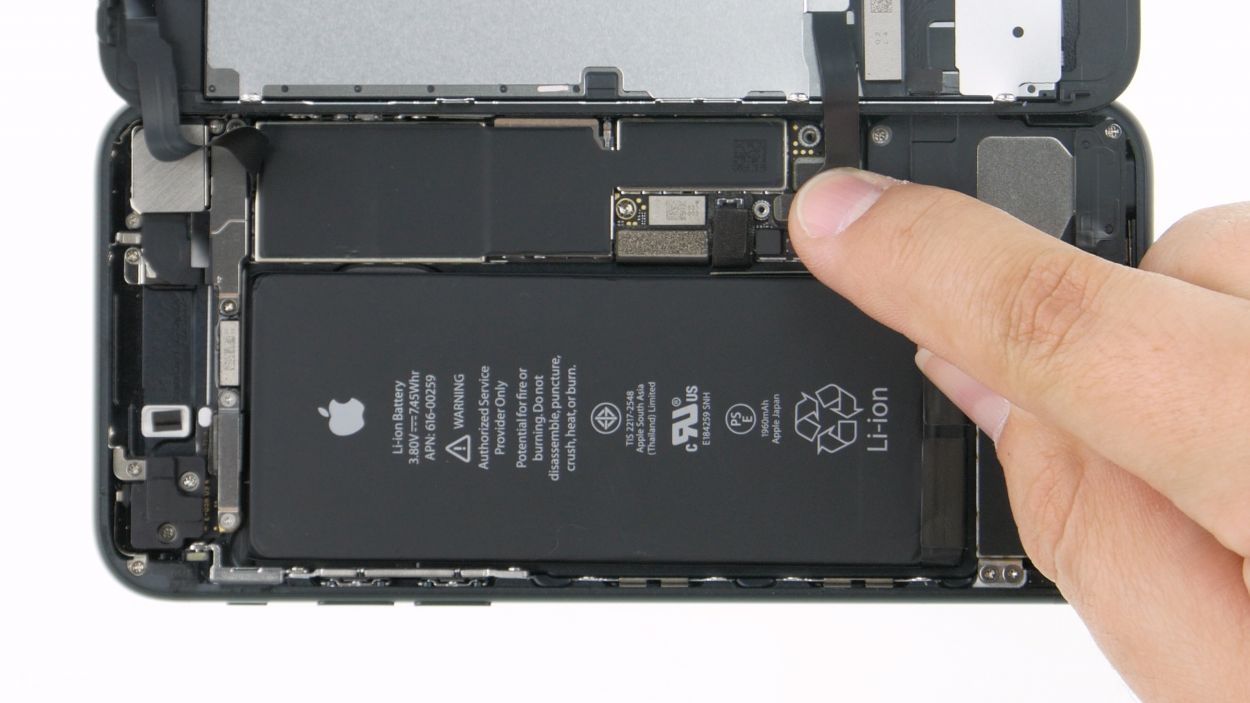
Display connector
Home button connector
When you’re popping off those display connectors, aim for the side without any tiny components lurking around. It’s a smart move to keep everything safe and sound!
– Now it’s time to gently pop apart those two display connectors (the display and the home button) just like you did before—using that handy plastic spudger of yours. You’re on a roll!
Tools Used
Step 8

2 × 1,2 mm Phillips
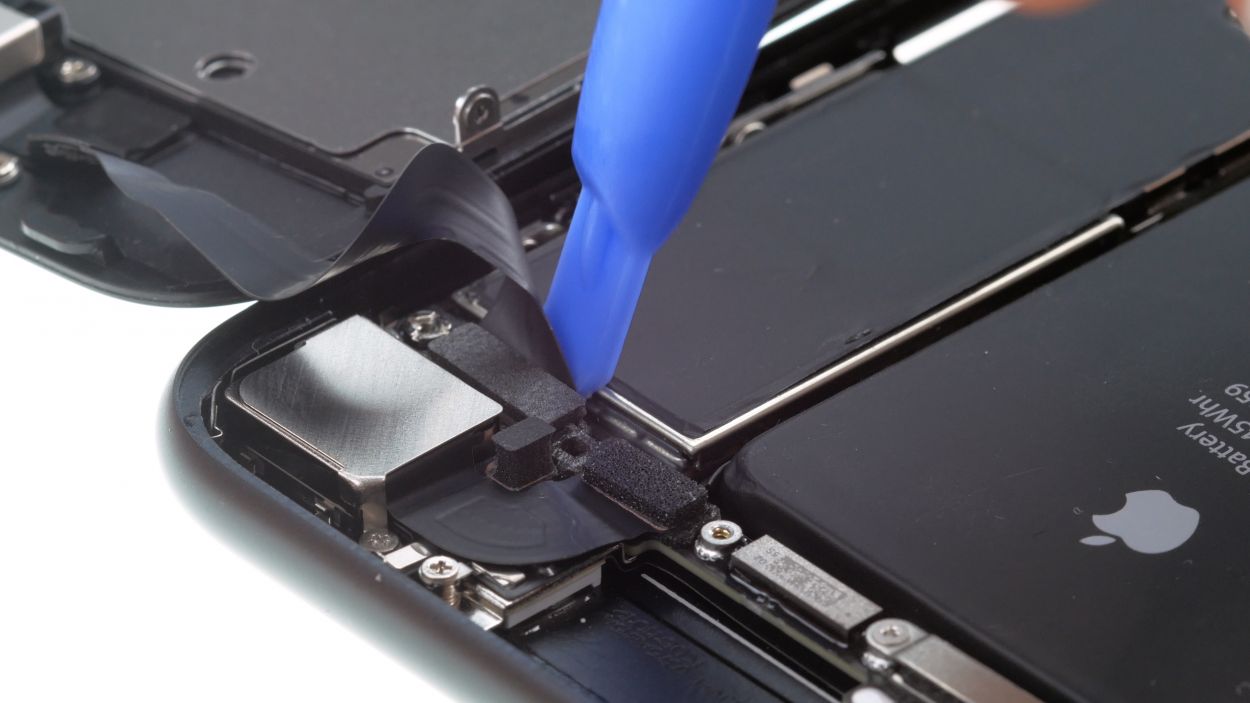
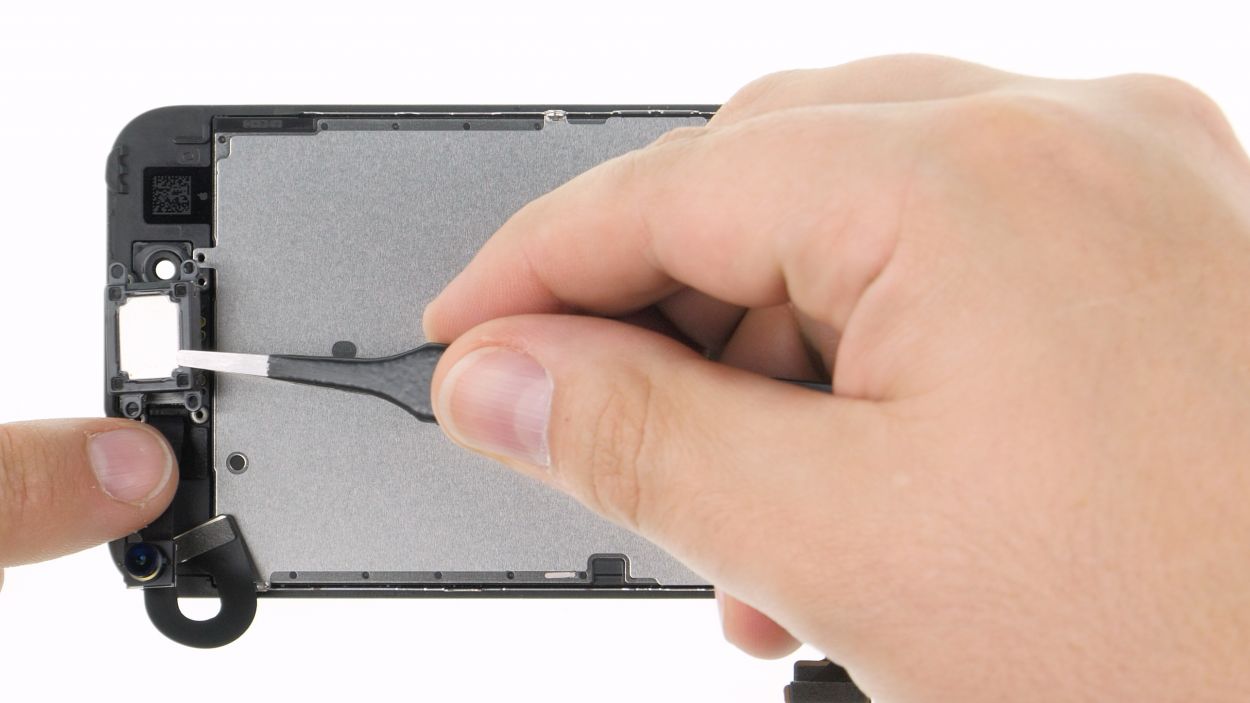
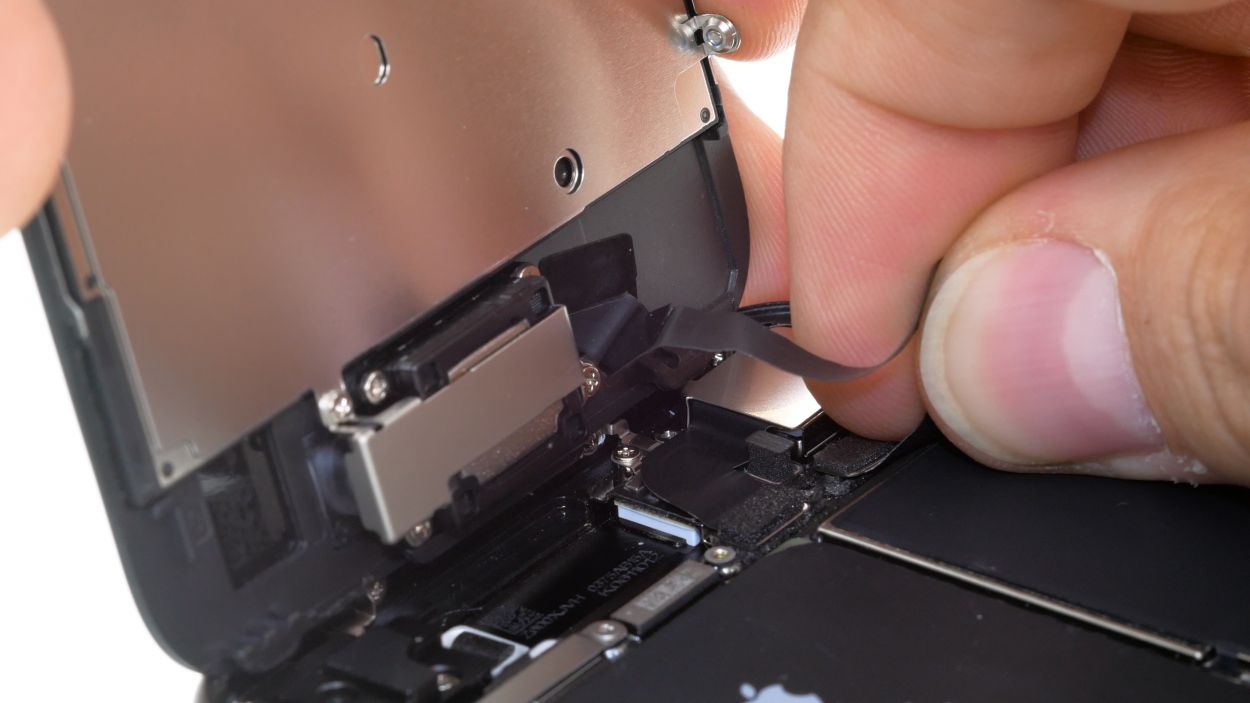
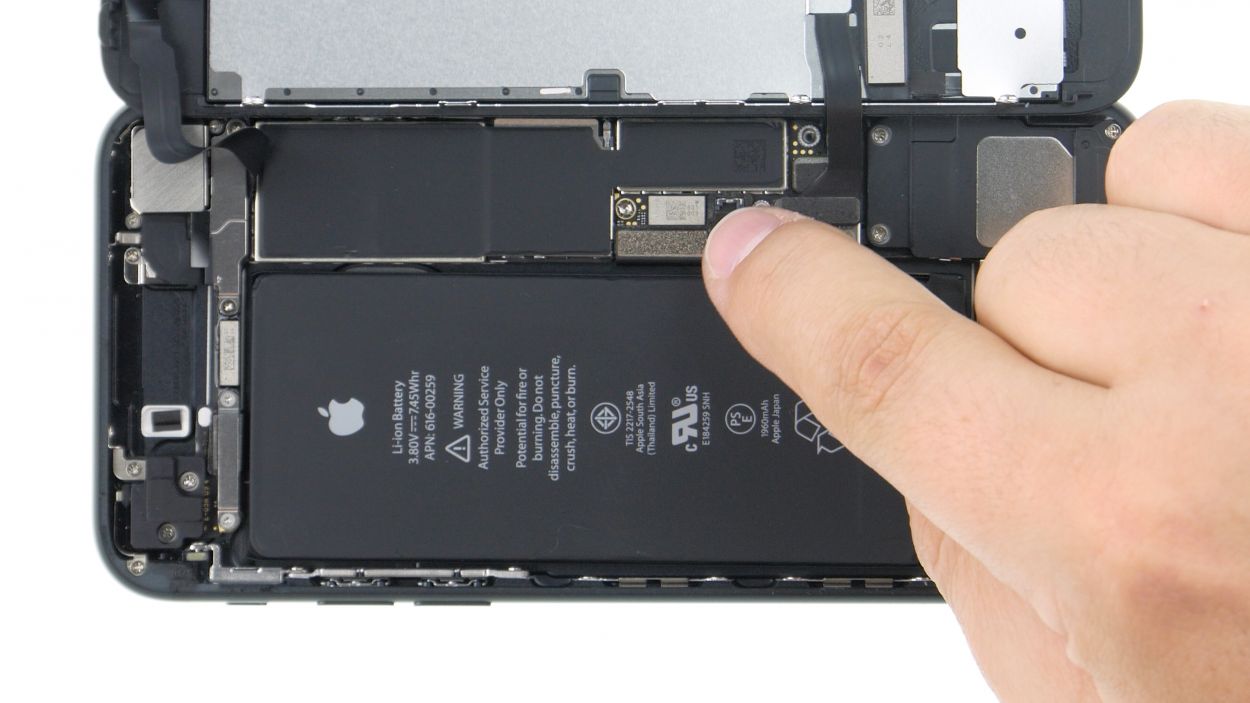
FaceTime connector
When you’re detaching the FaceTime connector, kick things off from the side that’s free of any tiny components. It’s a smart move to keep everything safe and sound!
– To get things rolling, let’s tackle those two Phillips screws that are keeping the bracket plate snugly over the FaceTime connector. Unscrew them and gently lift that plate out—you’re doing great!
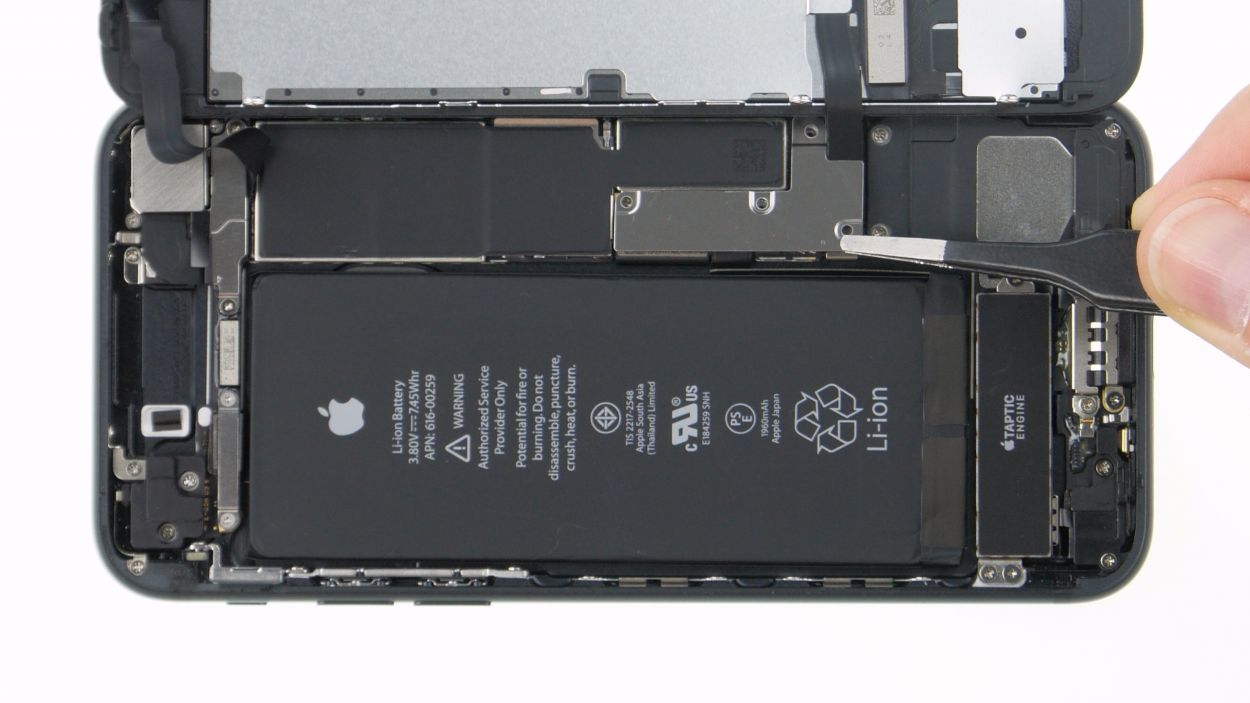
Step 9


1 × 1,7 mm Phillips-Schraube
2 × 2,6 mm Phillips-Schraube
1 × 1,9 mm Phillips-Schraube
1 × 2,3 mm Phillips-Schraube
Heads up! Those screws are like a quirky family—each one has its own length and personality. To keep your display safe during reassembly, make sure not to mix them up!
– Start by loosening the five Phillips screws that are keeping that bracket plate snug over the earpiece. You’ve got this!
– Once those screws are free, gently set the bracket plate aside and carefully bend the flex cable along with the FaceTime camera to the side. Easy peasy!
– Now, with everything out of the way, you can effortlessly lift out the earpiece. Well done!


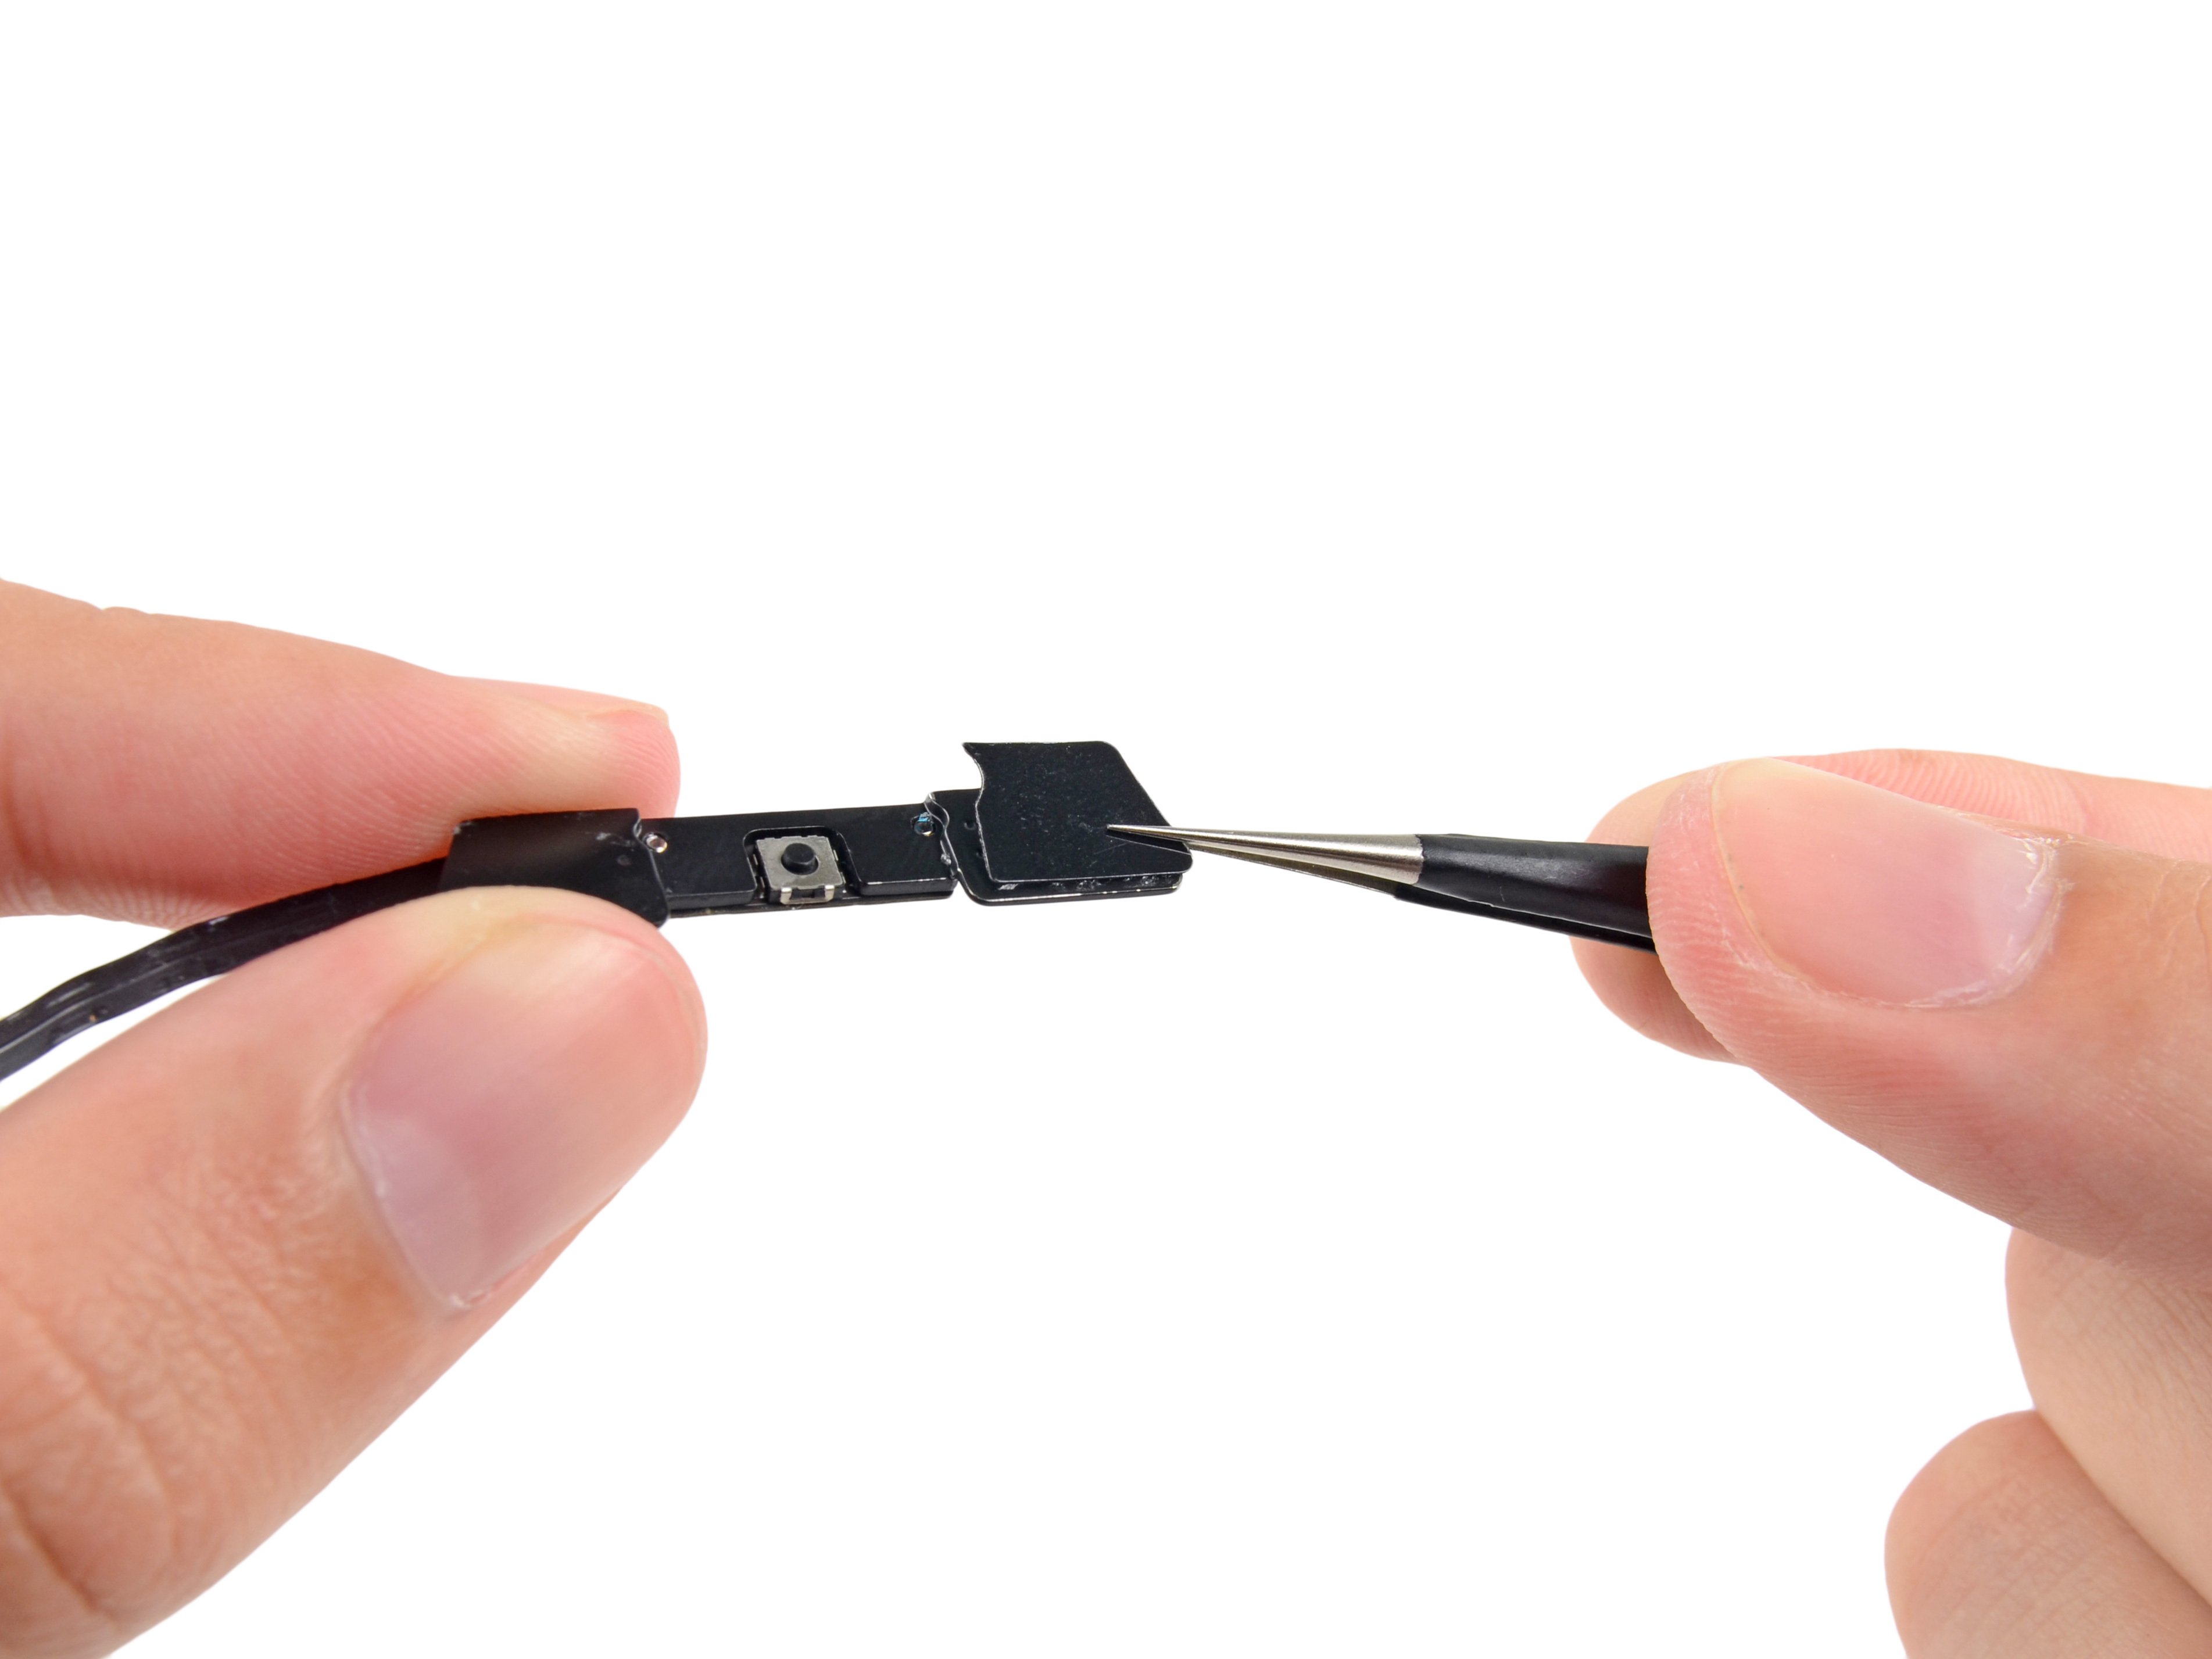
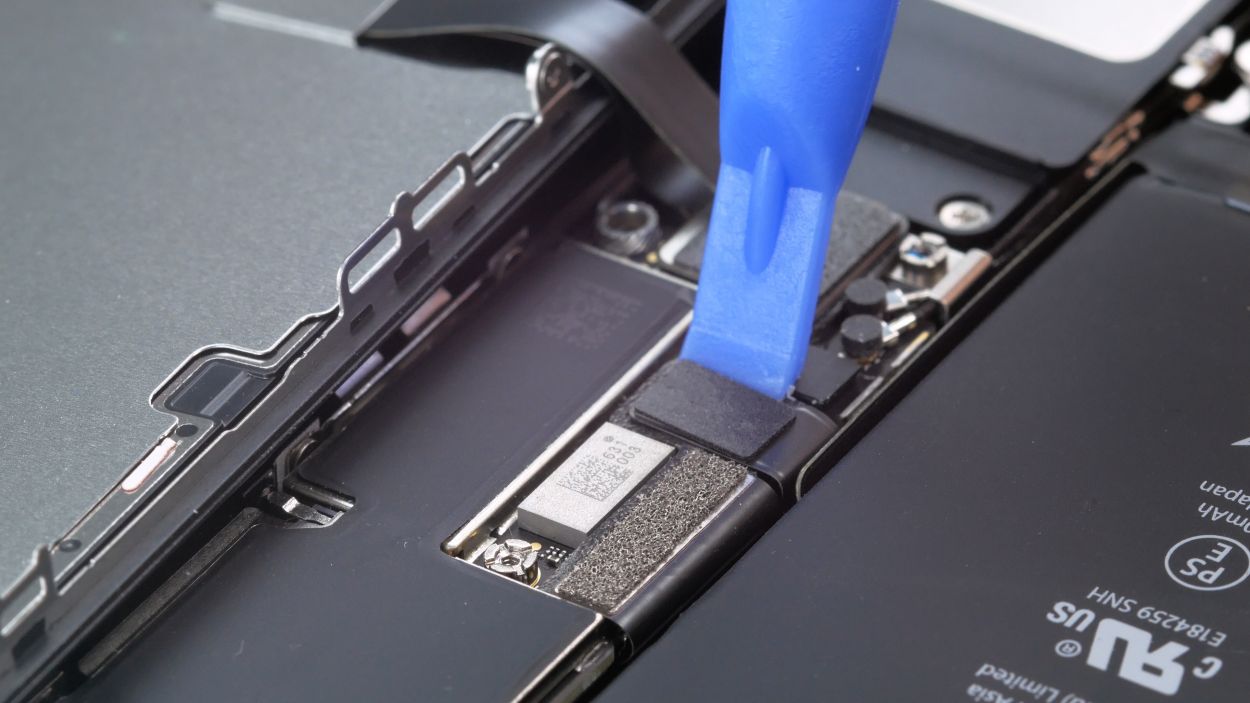
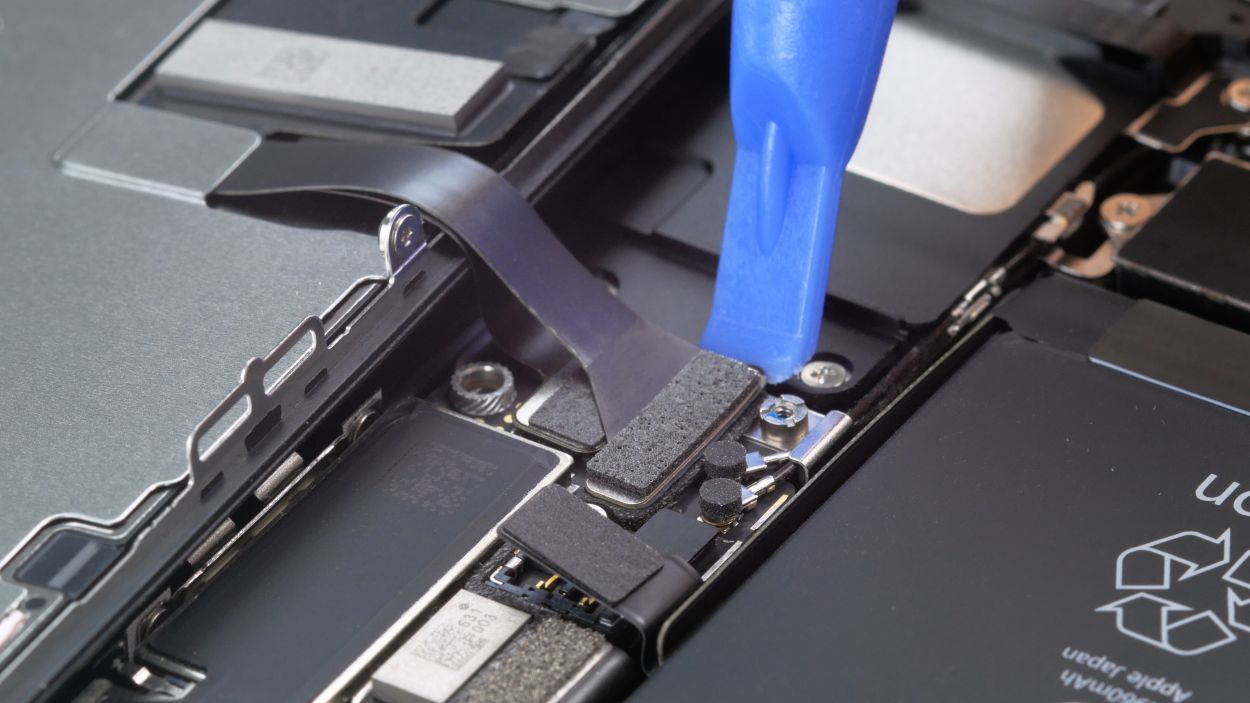
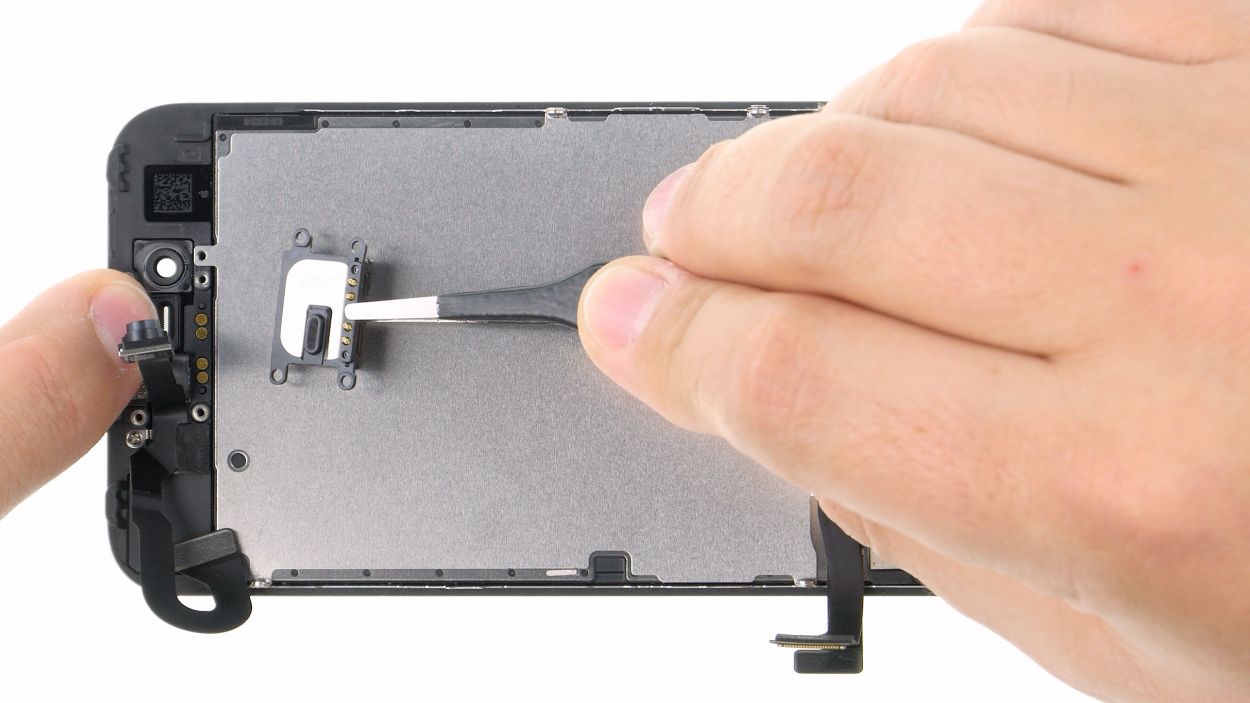
Step 11

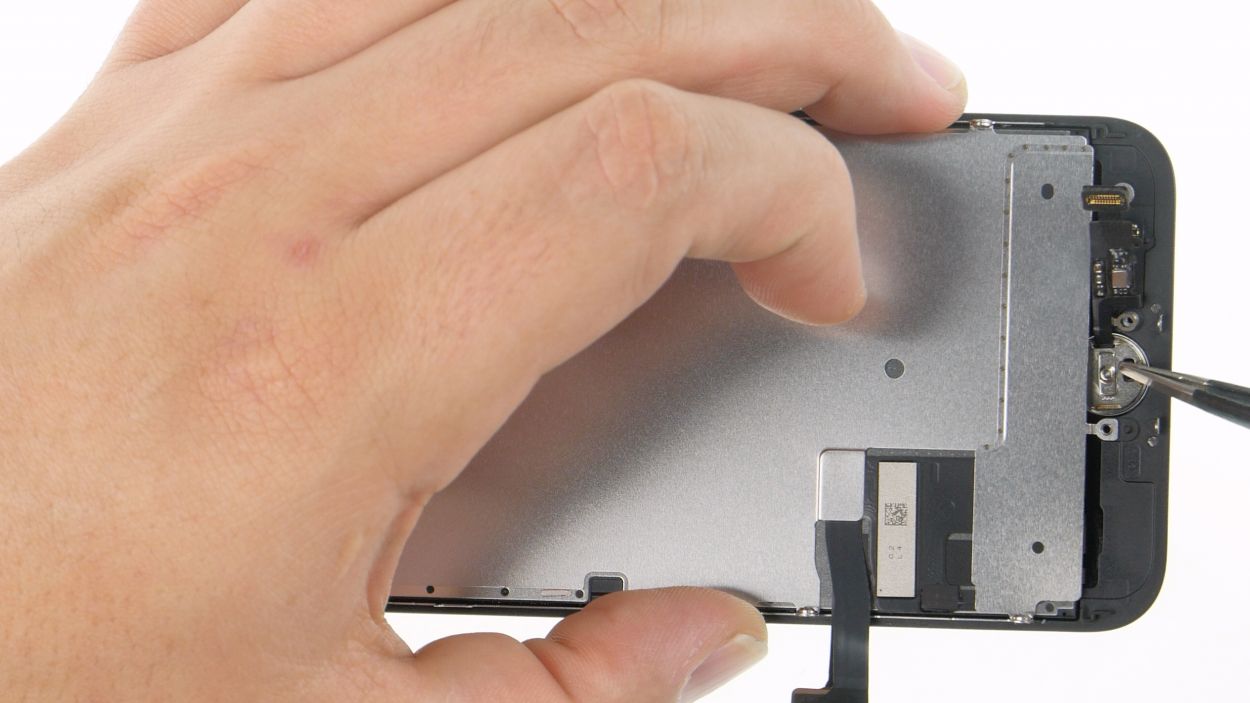
3 × 1,2 mm Y-Type
1 × 1,1 mm Y-Type
Home Button
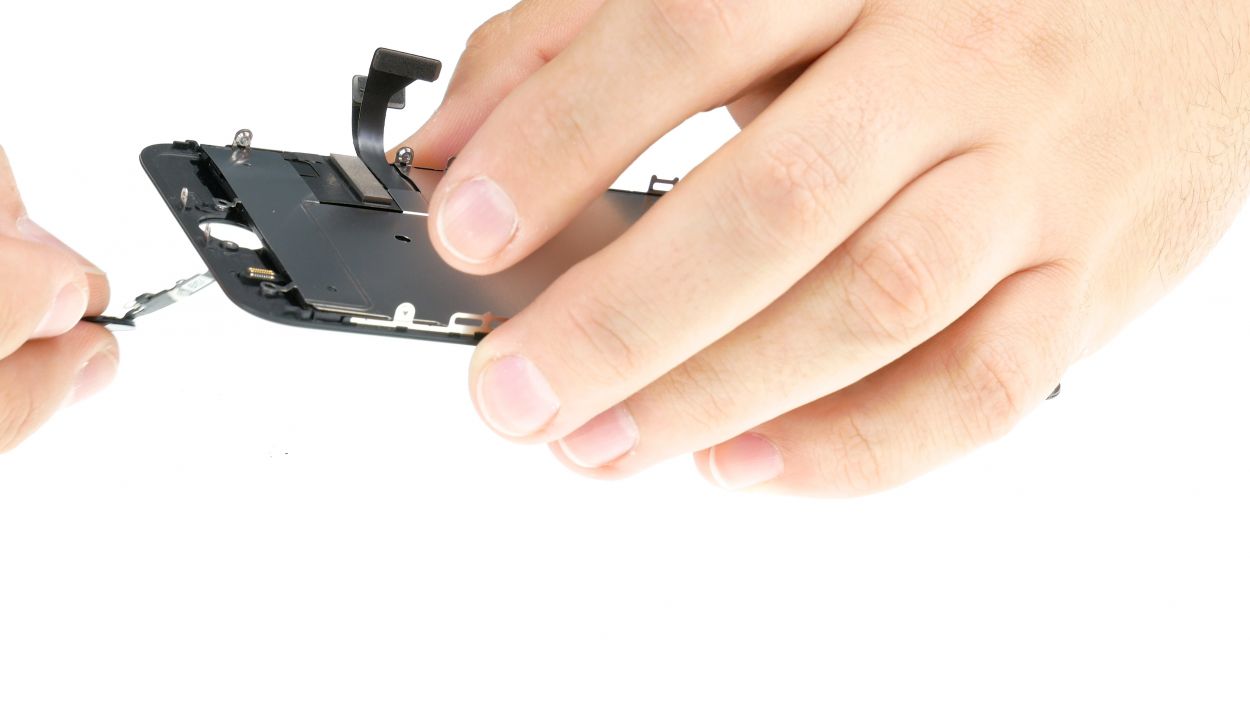
Hey there! Just a friendly reminder: when you’re removing that glued flex cable, treat it like a delicate flower. A tiny mishap could mean the home button goes on permanent vacation!
A little warmth goes a long way! Give that cable a quick blast of hot air to make loosening it a breeze.
– First, let’s get that bracket plate off by unscrewing those Y-type screws. You’re doing great!
– Now, gently use your plastic spudger to detach the home button connector. Just a heads up, the button is connected to another little buddy in the display unit, not directly to a board. Keep it cool!
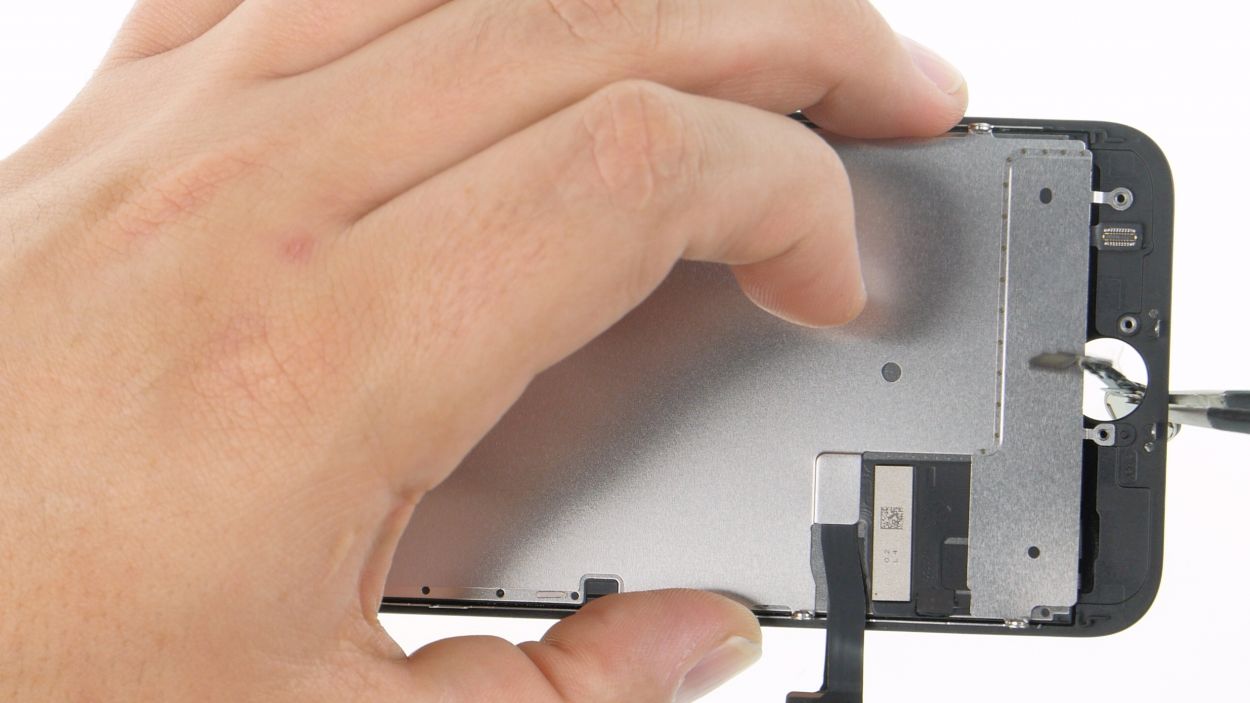
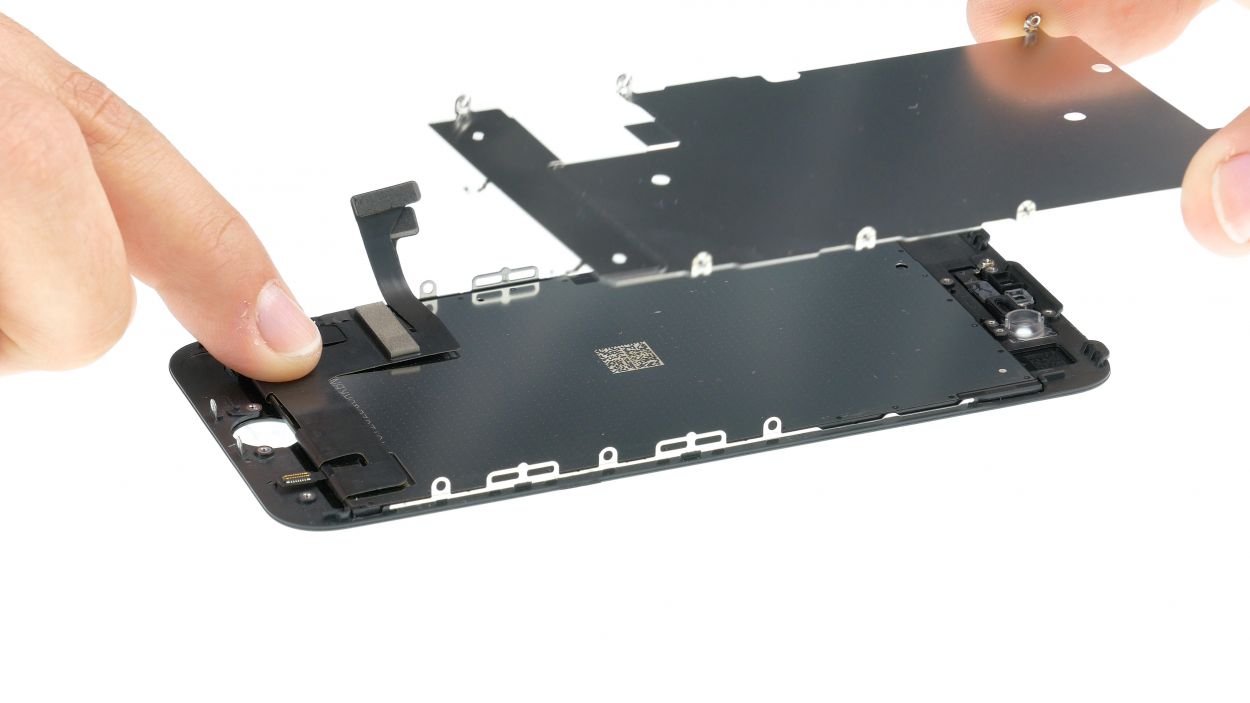
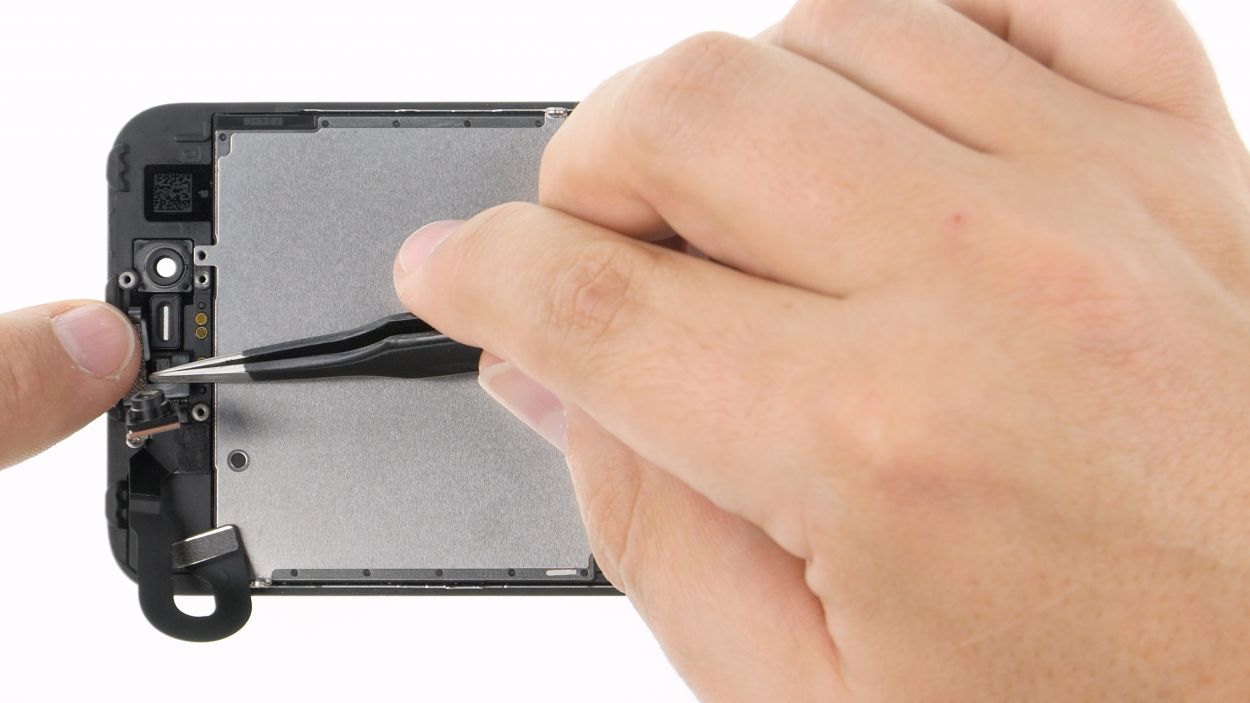
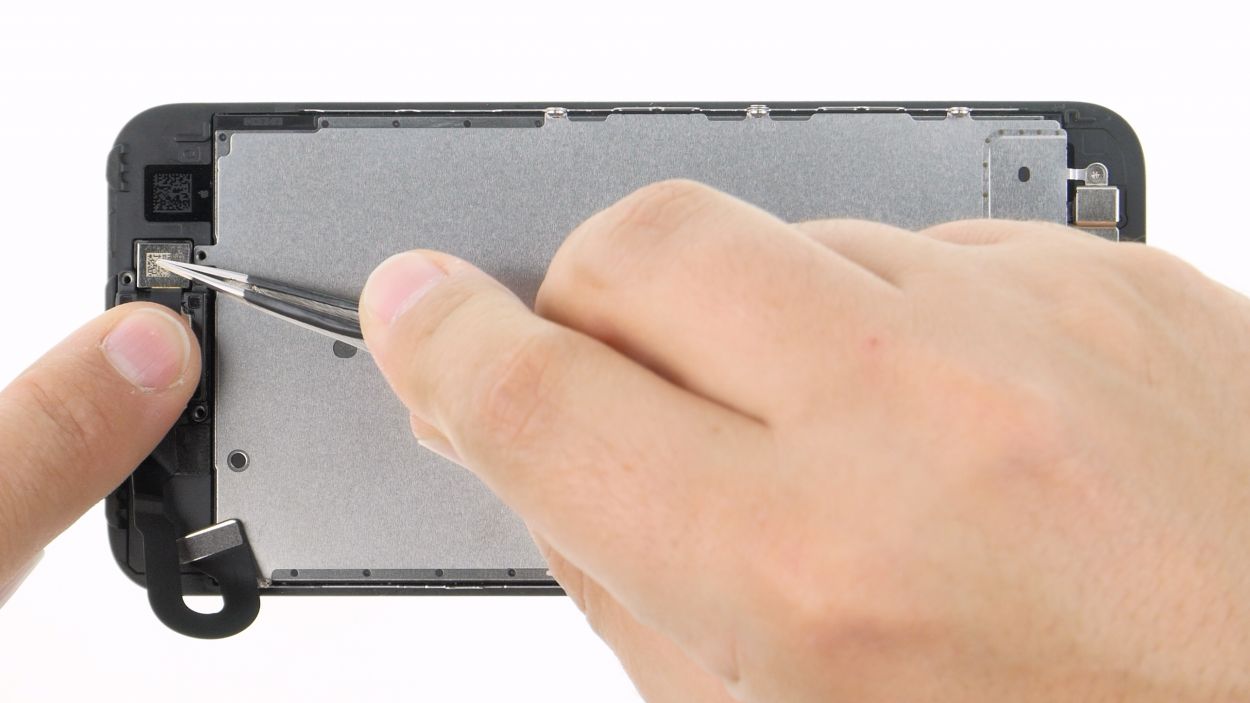
Step 12
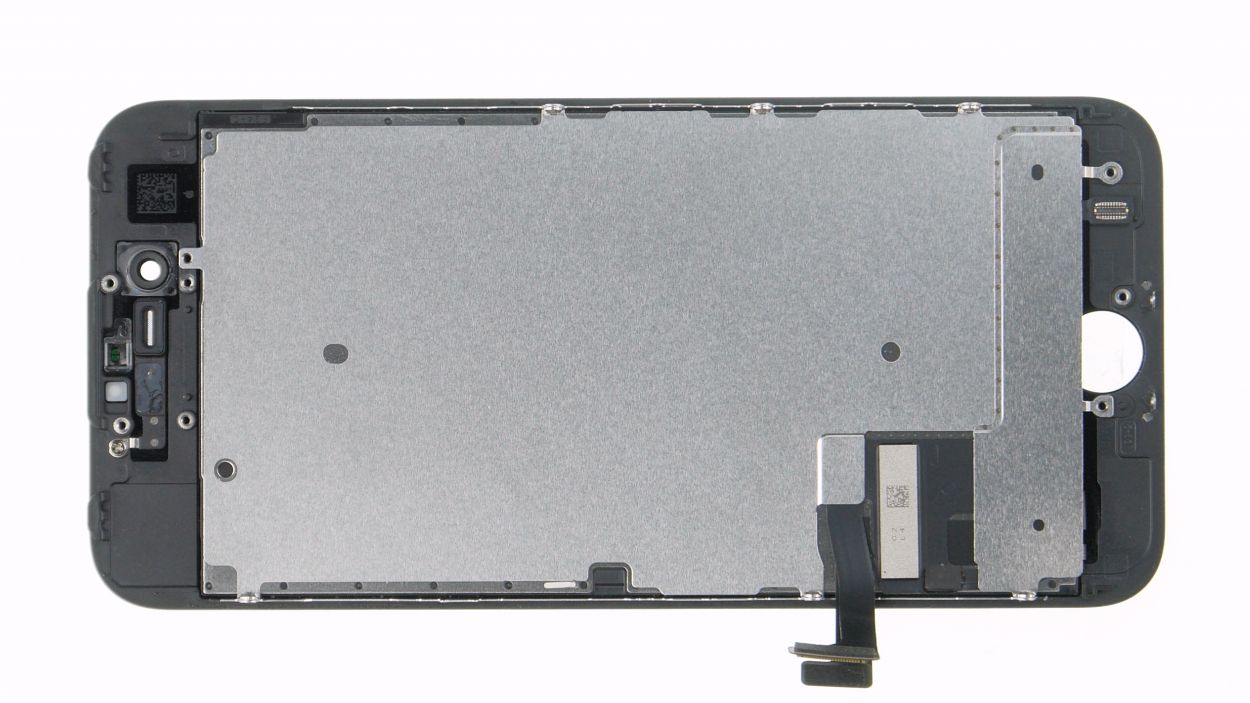
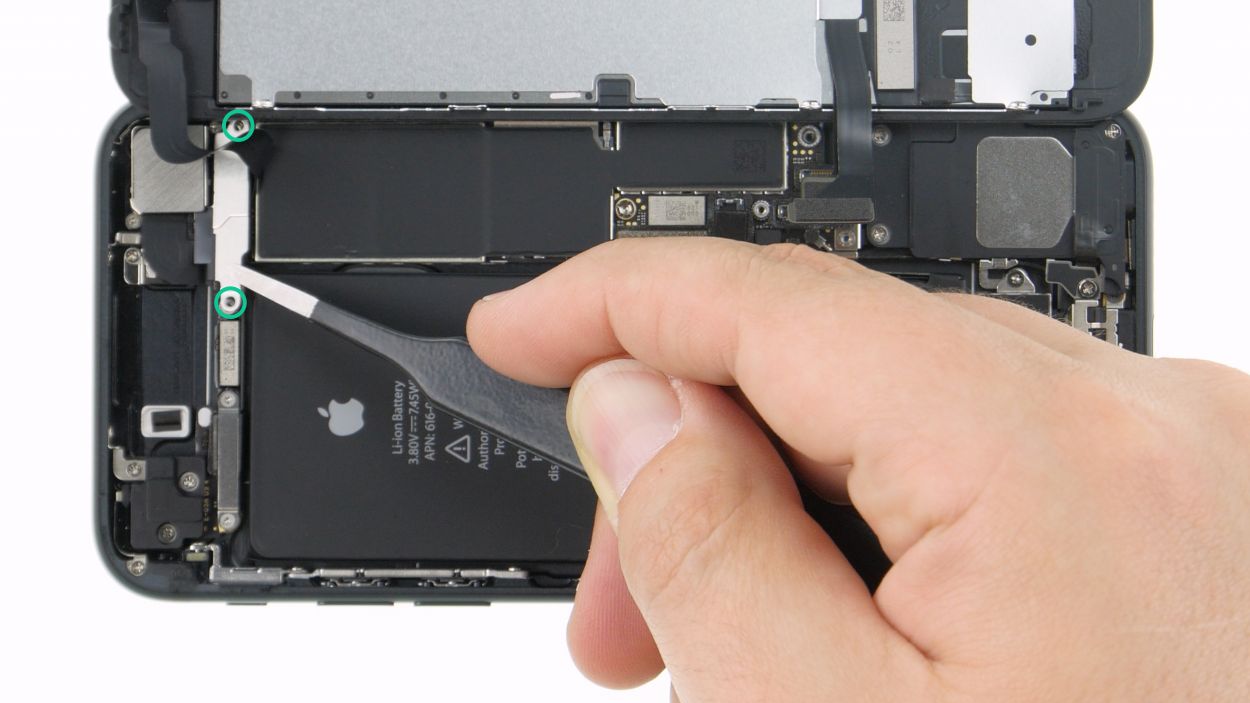
6 × 1,0 Y-Type
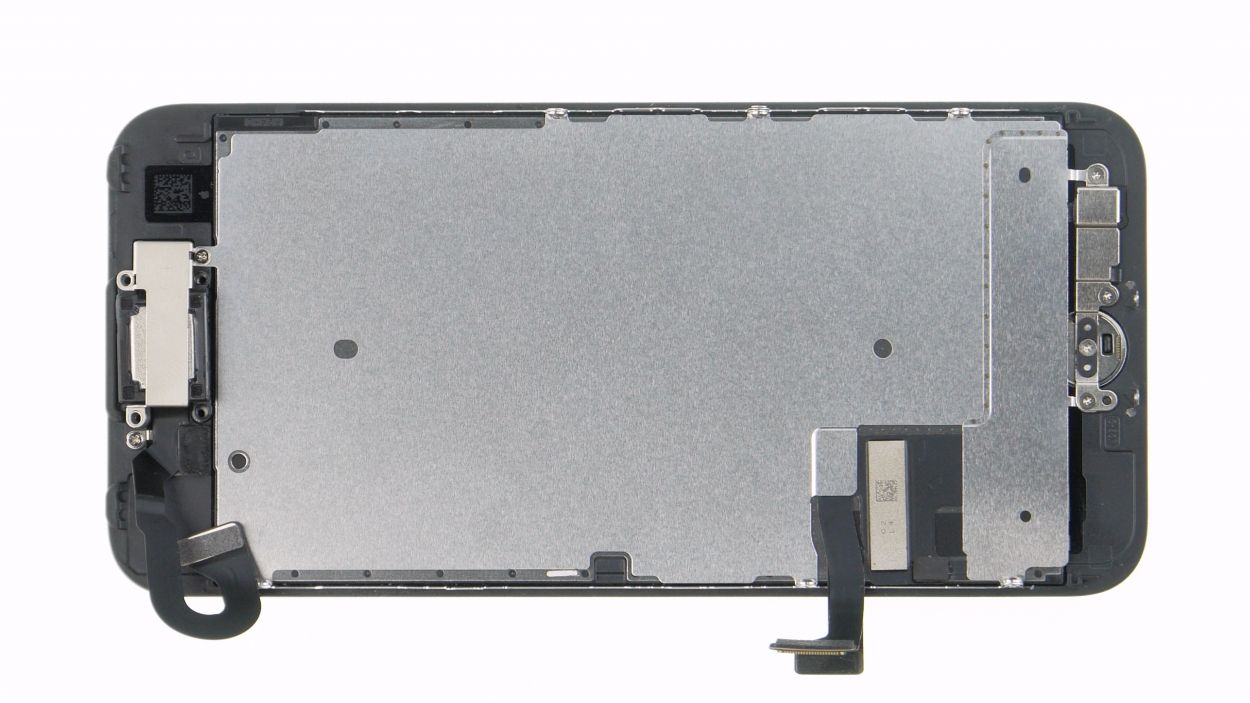
Glue under the metal cover
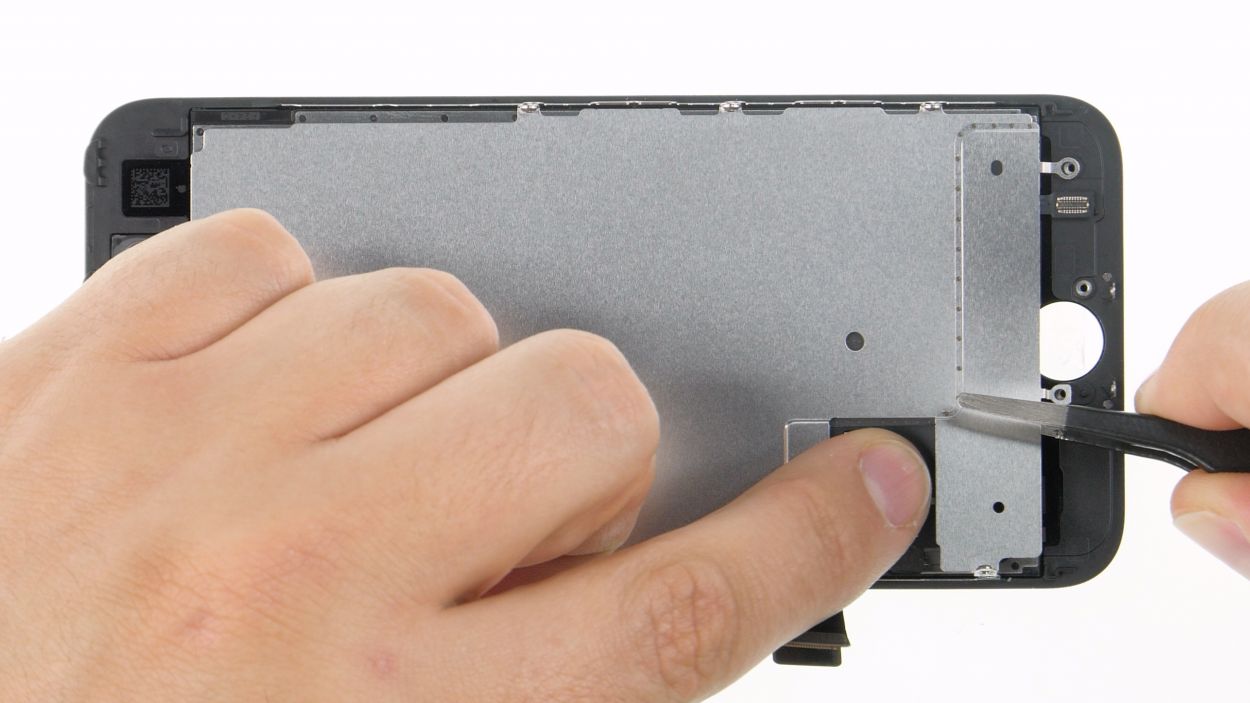
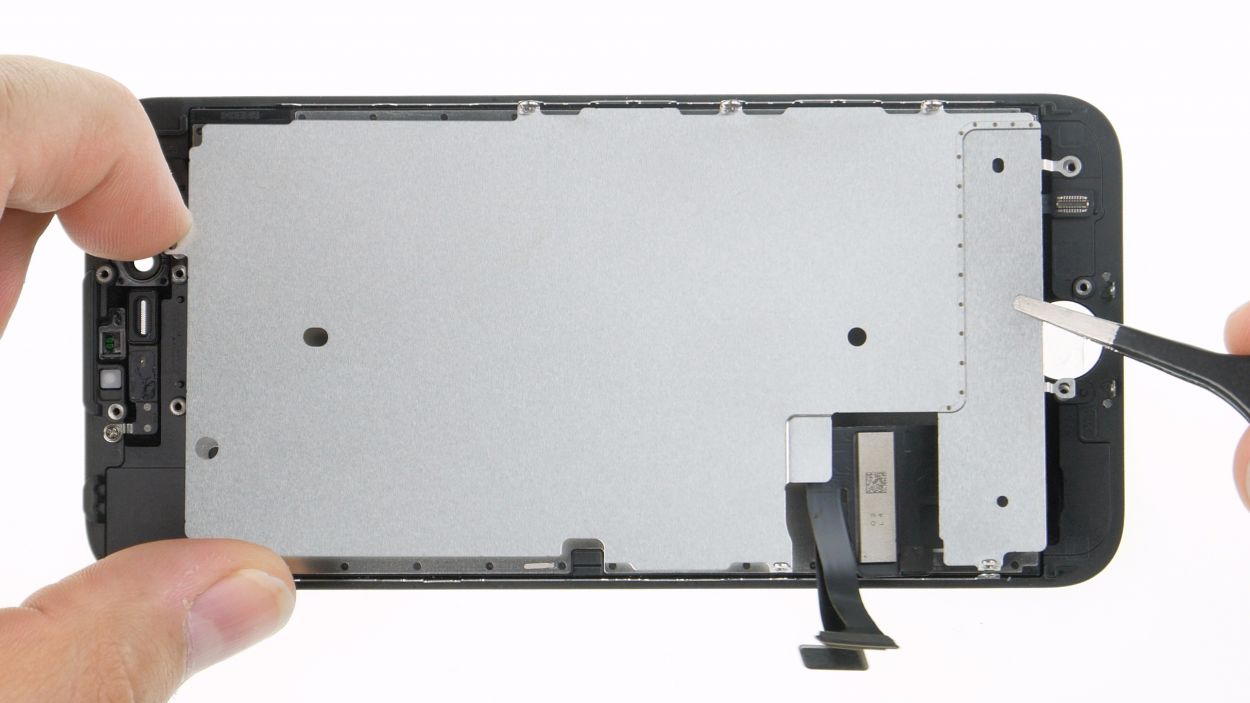
– Loosen those six Y-type screws to free the heat shield plate from the display’s cozy interior.
– With your trusty tweezers, gently slide under the lower edge of the plate to unhook it from the flex cable snuggled beneath.
– Now, gently lift out that freed heat shield from the display unit and celebrate your small victory!
Step 13
Step 14

6 × 1,0 mm Y-Type
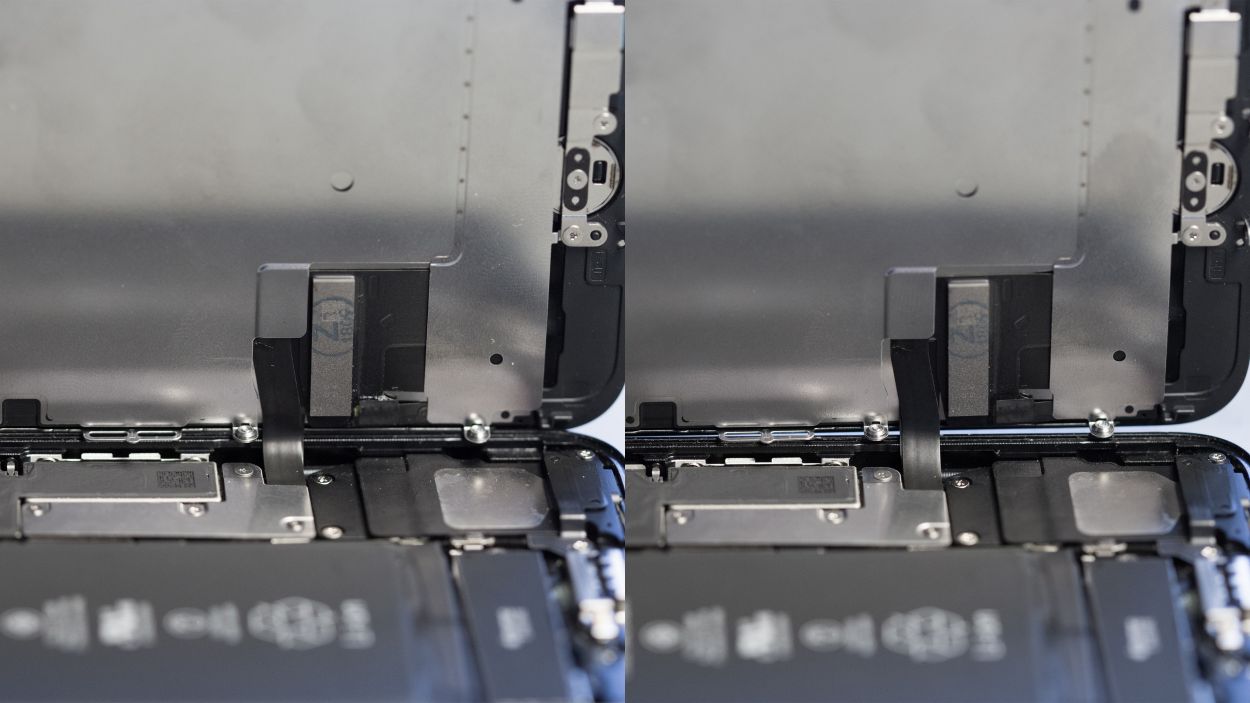
Correct position
Wrong position
When you’re putting that heat shield back in place, just make sure it’s snugly sitting over those screw holes. We want everything to fit just right!
– Gently lay that flex cable down flat on the display, making sure it fits just right.
Tools Used
Step 15
3 × 1,2 mm Y-Type
1 × 1,1 mm Y-Type
– Slide that home button into the display unit’s opening from the outside in. You’re making progress!
– Press down the button’s flex cable and reconnect the connector like a champ.
– Now, let’s get that silver bracket plate back on the button and tighten it up with those Y-type screws. You’re almost there!
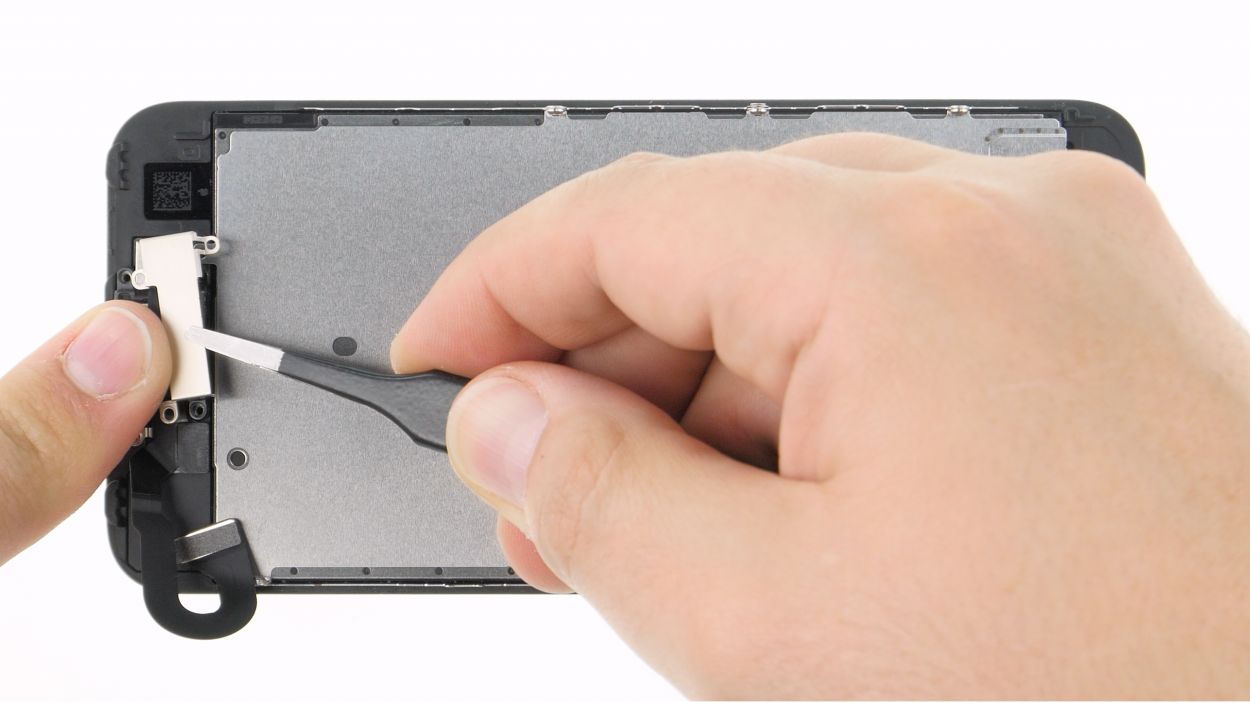
Step 16

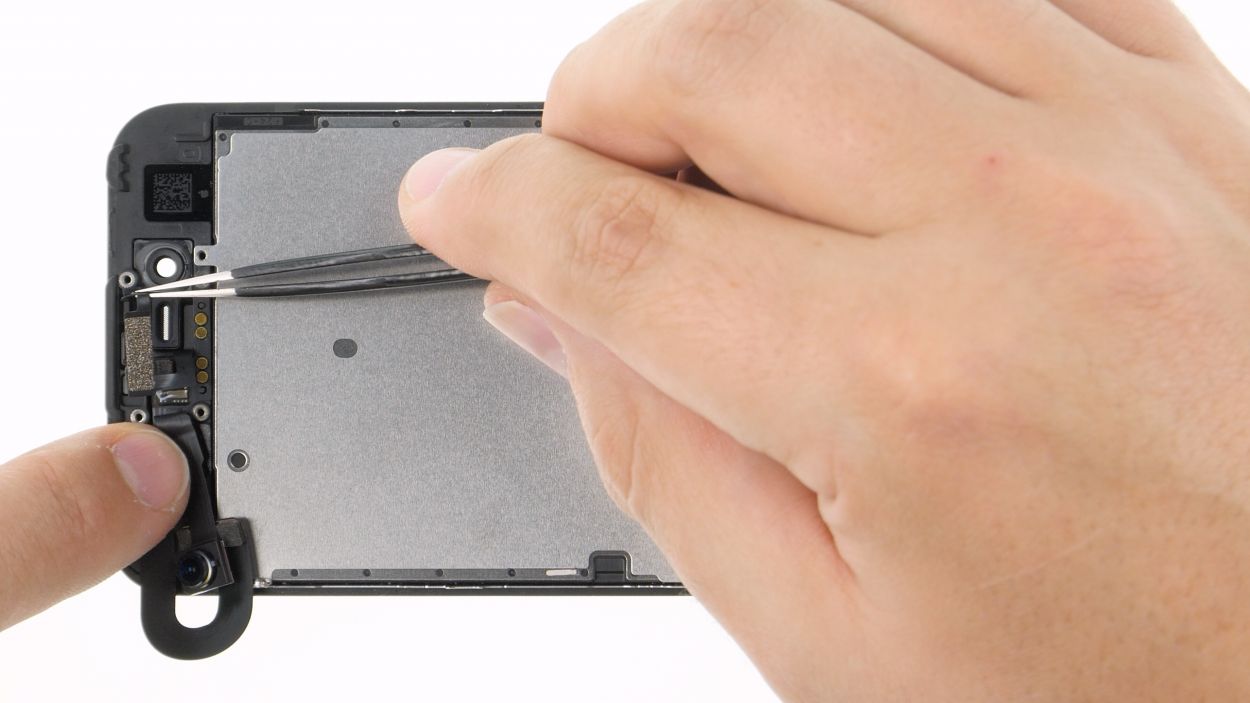
Hey there! Just a quick reminder: double-check that the microphone and sensors are snugly seated in their leads. If they’re not, they might decide to take a little break from working properly!
– Carefully tuck that FaceTime camera cable set back into its cozy spot at the top edge of the display and give it a gentle press down. You’re doing fantastic!
Tools Used
Step 17
1 × 1,7 mm Phillips-Schraube
2 × 2,6 mm Phillips-Schraube
1 × 2,3 mm Phillips-Schraube
1 × 1,9 mm Phillips-Schraube
Those nifty little golden contacts on the earpiece are your best buddies for perfect alignment! Just make sure they sit right above the golden contacts of the FaceTime cable set. You’re doing awesome!
– Carefully place the earpiece back in its cozy spot at the top edge of the display. It’s like tucking it into bed!
Step 18

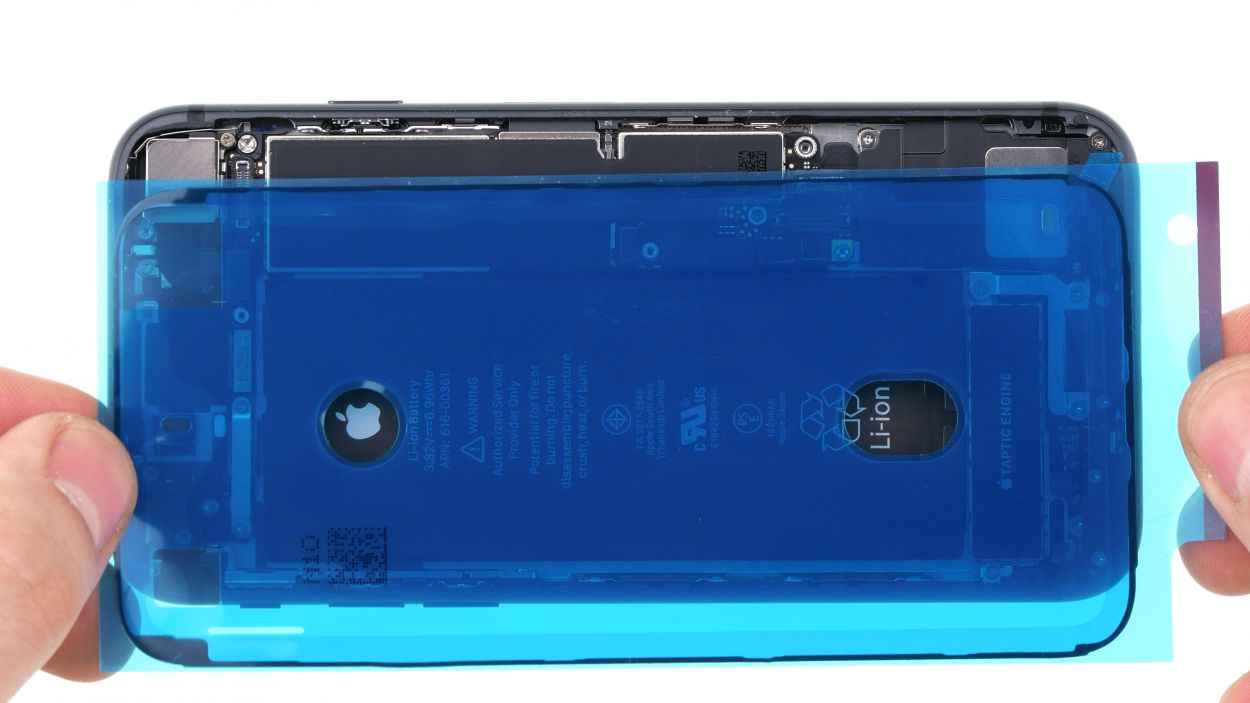
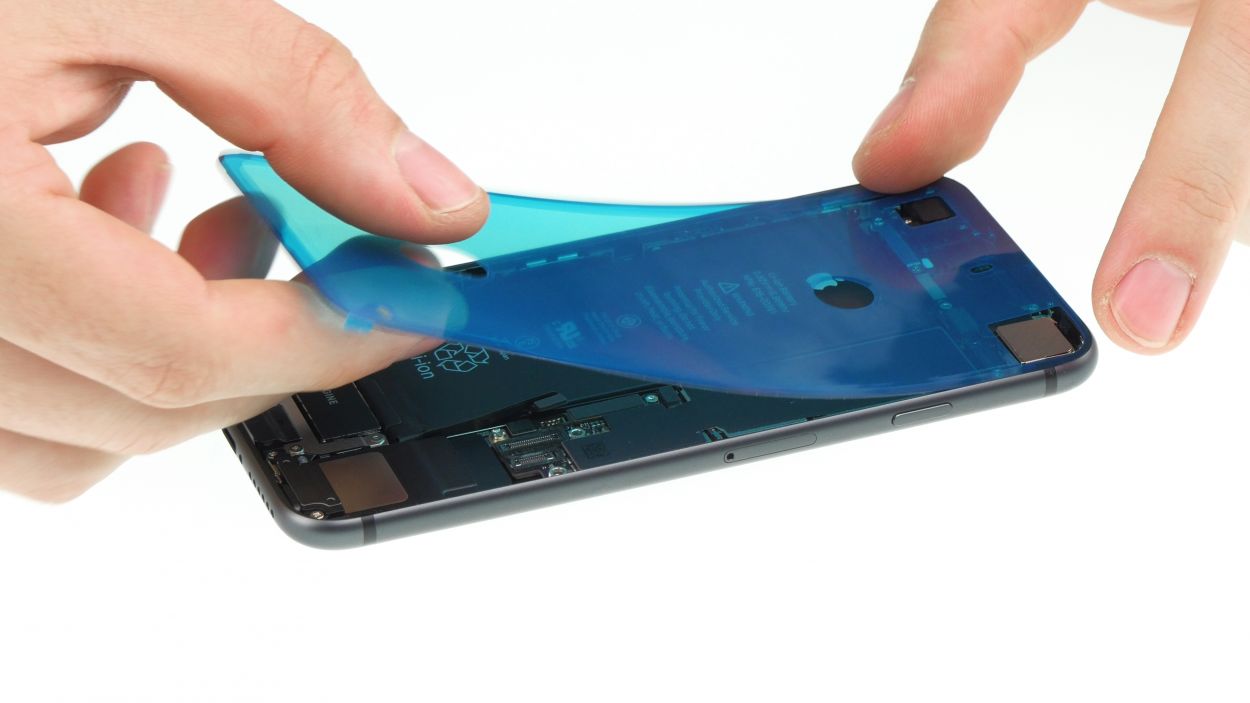
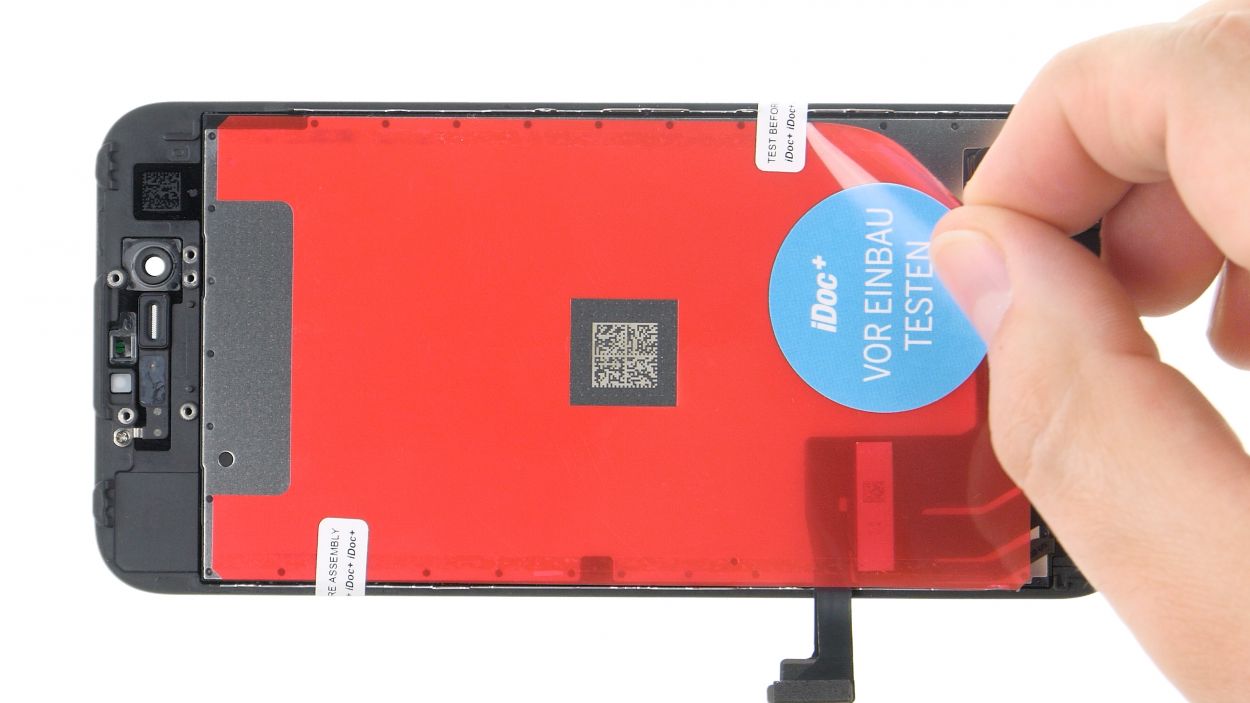
– Before you get all excited about your new adhesive frame, let’s make sure it plays nice! Start by clearing away any leftover adhesive residue from the back cover and display frame.
– Next, give that adhesive frame a test fit on the back cover to ensure everything lines up perfectly.
Tools Used
Step 19

FaceTime connector
2 × 1,2 mm Phillips
Just like when you’re unhooking the FaceTime connector, it’s a smart move to lean the display against something sturdy. This way, those flex cables won’t get too stretched out and cranky!
– To get that display unit snugly back onto the logic board, start by standing it upright at the top of the back cover. You’re doing great!
– Next, gently press the FaceTime camera connector with your finger until you hear that satisfying click. It’s like a little high-five for your hard work!
– Once you’ve got that connector all set, you can carefully lay the display down on the side of the back cover. Almost there!
Step 20
Display connector
Home button connector
– Reconnect the home button and display connector to the logic board, just like putting the final pieces of a puzzle together. You’re doing fantastic!
Step 22

– Gently set the display alongside the back cover frame and fold it over with care, like tucking in a cozy blanket.
– Slide the display toward the sleep/wake button, ensuring the lugs on the display fit snugly into the back cover—just like a puzzle piece!
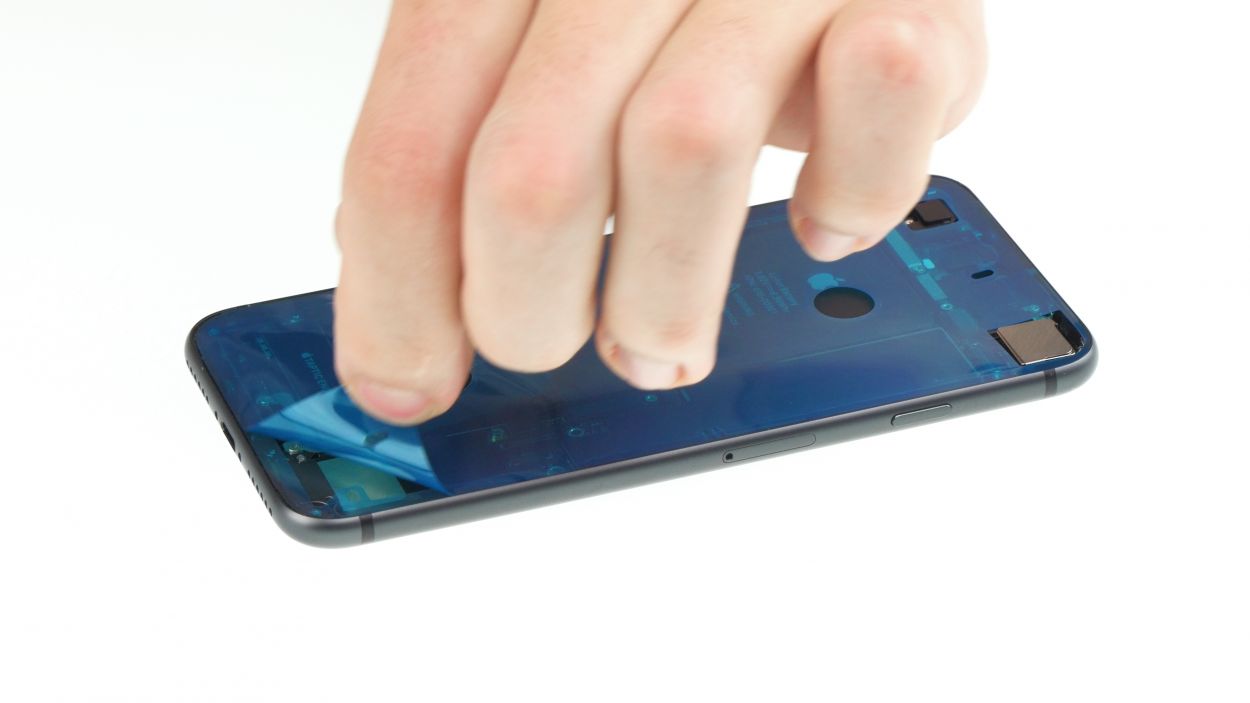
– Now, give the display a firm press down over its entire surface to secure it in place. You’re doing great!
Wrong position
Right position
Hey there, tech wizard! Just a quick reminder: that silver chip on the cable needs to be in the exact same spot as before (check out the photo!). If it gets a bit lost, you might see some funky discolorations and spots on your screen after you’re done. No worries though, just nudge that cable back into place and you’re good to go!
Step 23

2 × 3,3 mm Pentalobe
– Alright, let’s get those two Pentalobe screws back in place on either side of the Lightning connector. You’re almost at the finish line!
Tools Used