DIY Guide to Replace RAM in Asus A52F-XE2 Laptop
Duration: 45 minutes
Steps: 8 Steps
Heads up! Make sure to stay safe while tinkering with your device. If you run into any trouble or feel a little out of your depth, don’t hesitate to schedule a repair. We’ve got your back!
Ready to give your Asus A52F a little boost? This guide walks you through the simple steps to remove the RAM, perfect for swapping in some snazzy new memory. Let’s get that upgrade going!

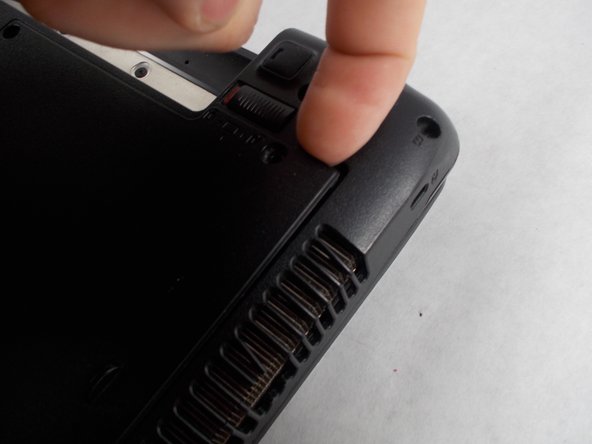
Step 2


– Press the left button to the side with a gentle nudge.
– With your other hand, slide the battery away from you, and it should pop right off.
Step 3


– Time to say goodbye to those five Phillips # 0 screws holding the back panel in place.
– Get ready to give that back panel a lift, it’s time for it to shine!
Tools Used

Step 4


– Gently slide the back panel off and take it away like a pro!
Step 5

– Gently nudge those metal retaining arms away from the heart of the RAM module.
Step 6


The RAM should now be proudly sticking up at a cool 30° angle.
– Gently grasp the top edge of the RAM and smoothly pull it out at its angle. You’ve got this!
Step 7

– Go ahead and repeat the removal process for the RAM hiding underneath. You’ve got this!
Step 8


RAM is a bit picky – it only fits one way!
– To pop in that shiny new RAM, just align the notch with the connector and give it a gentle slide in at a cool 30° angle.
– Then, press down firmly until you hear those metal clips on both sides give a satisfying click, locking everything in place.