DIY Guide to Replace Samsung Galaxy S20 Camera
Duration: 60 min.
Steps: 14 Steps
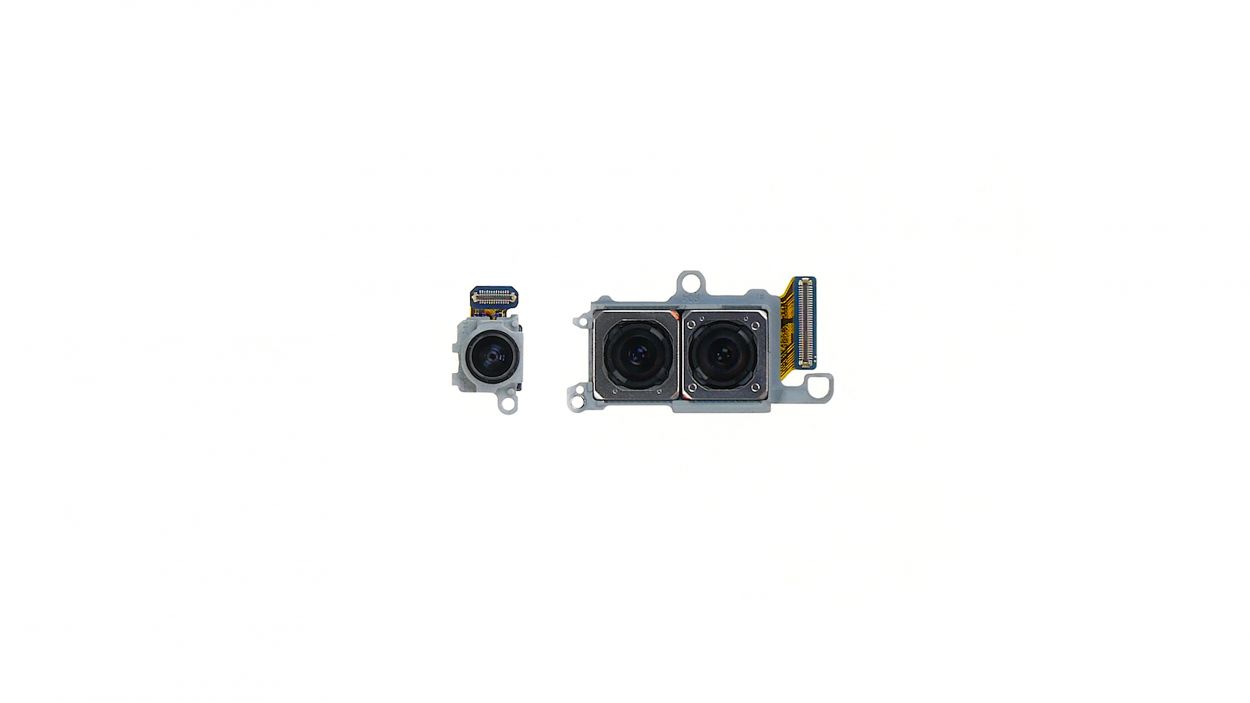
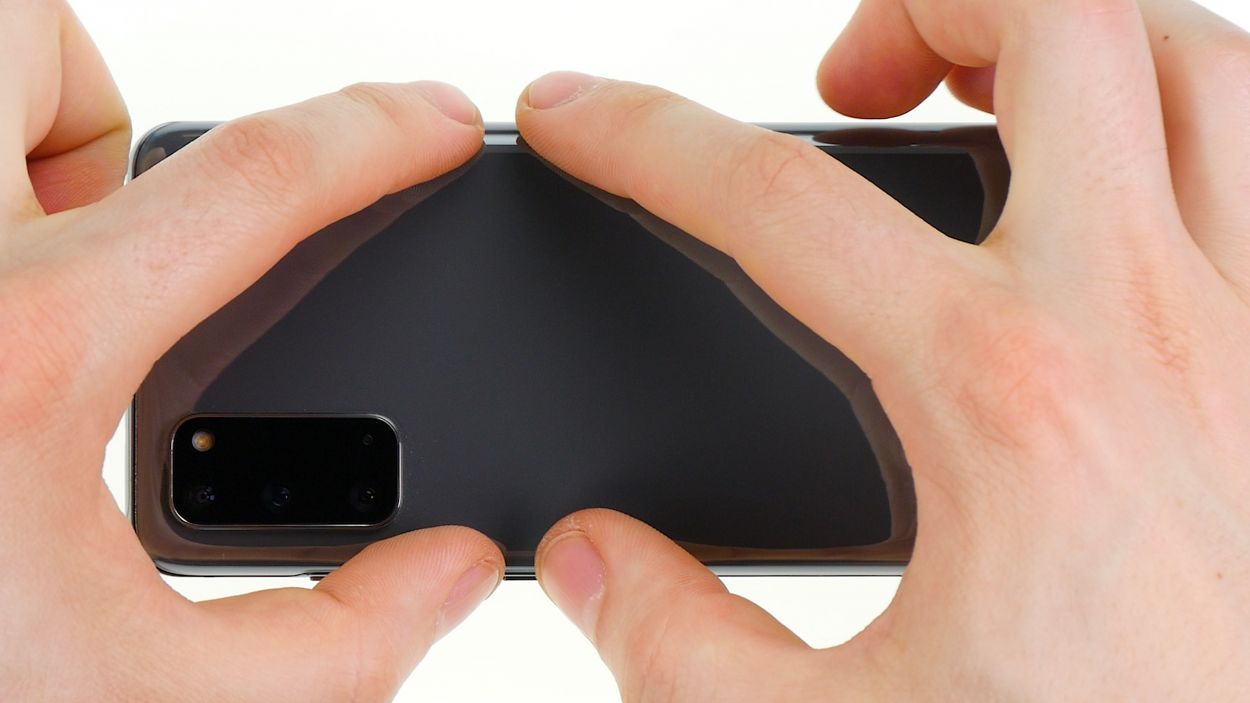
Ready to bring your Samsung Galaxy S20 back to life? These repair instructions will guide you through replacing the cameras so you can start snapping awesome photos again! We’ll walk you through each step, and if you hit a snag, our support team is just a shout away. The main camera has three lenses split into two modules: the telephoto and wide-angle lens are one unit, while the ultra-wide angle lens is separate. Make sure to figure out which part is on the fritz and needs swapping out. Good luck with the repair, and enjoy capturing those picture-perfect moments!
Step 1
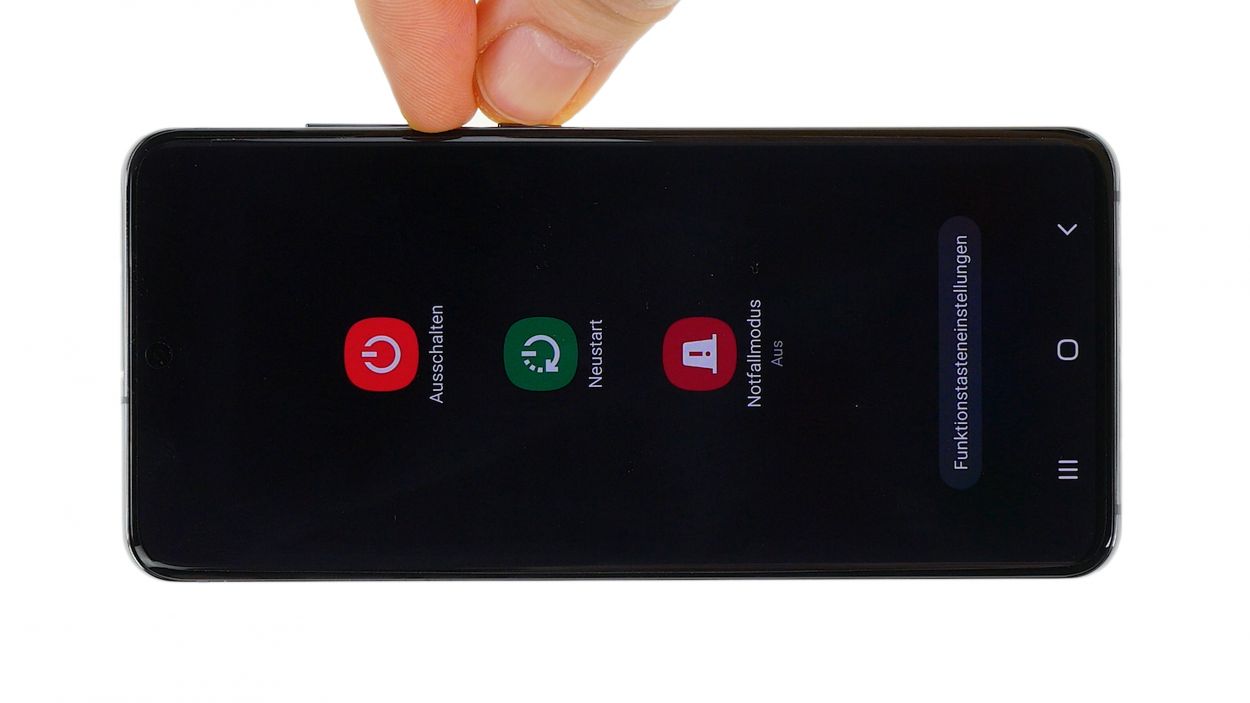

If your screen has taken a hit and is no longer responding, it’s time to power down your device. Start by disconnecting the battery to keep everything safe and sound. Remember, if you need help, you can always schedule a repair!
– First things first, power down your device to keep those pesky short circuits at bay while you work your magic.
Step 2
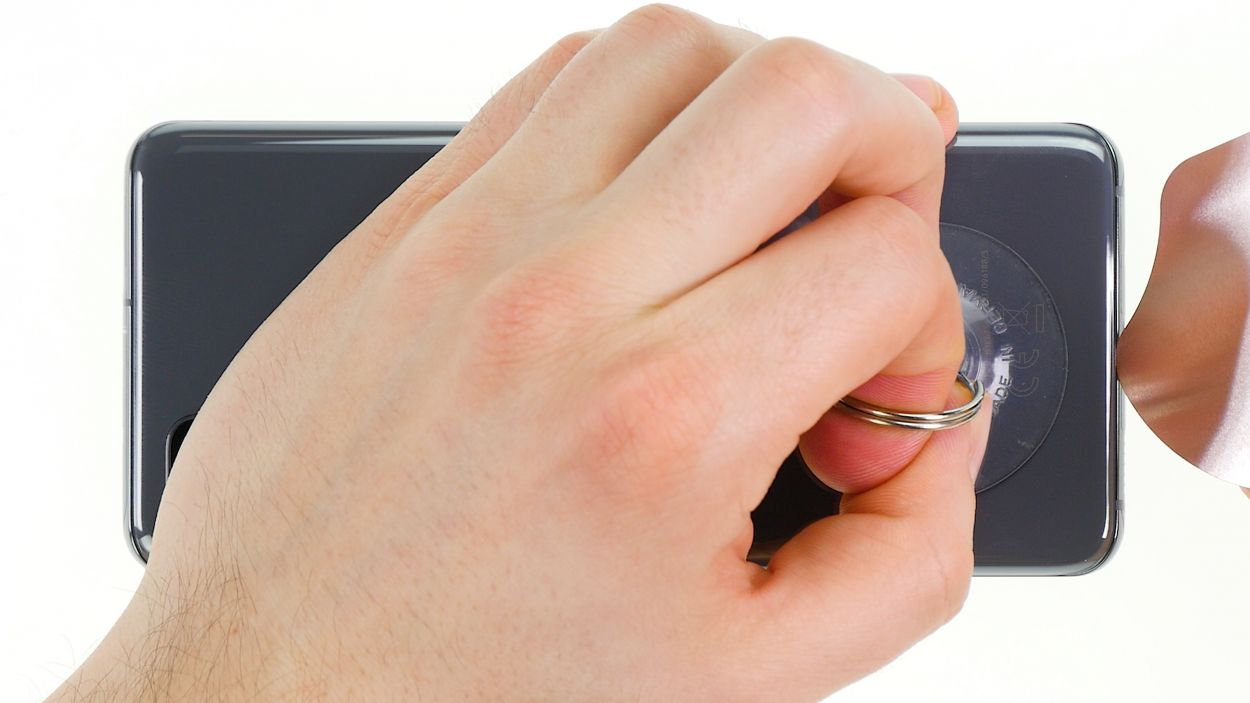


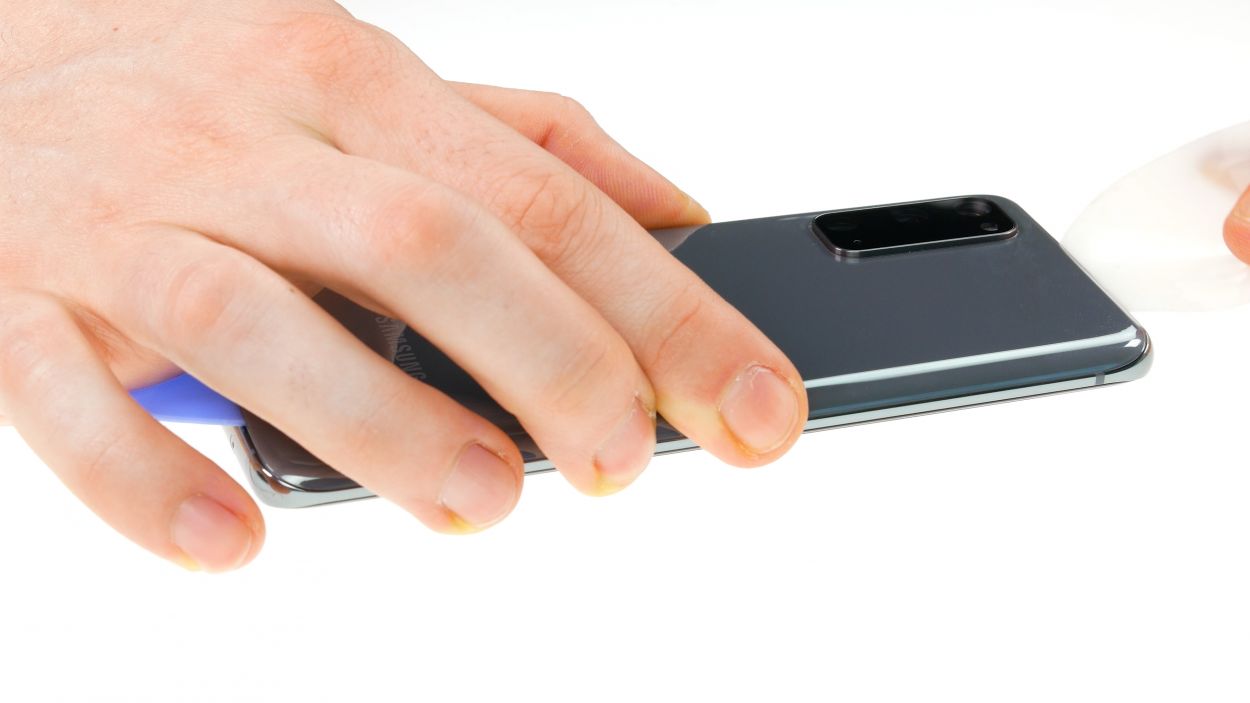
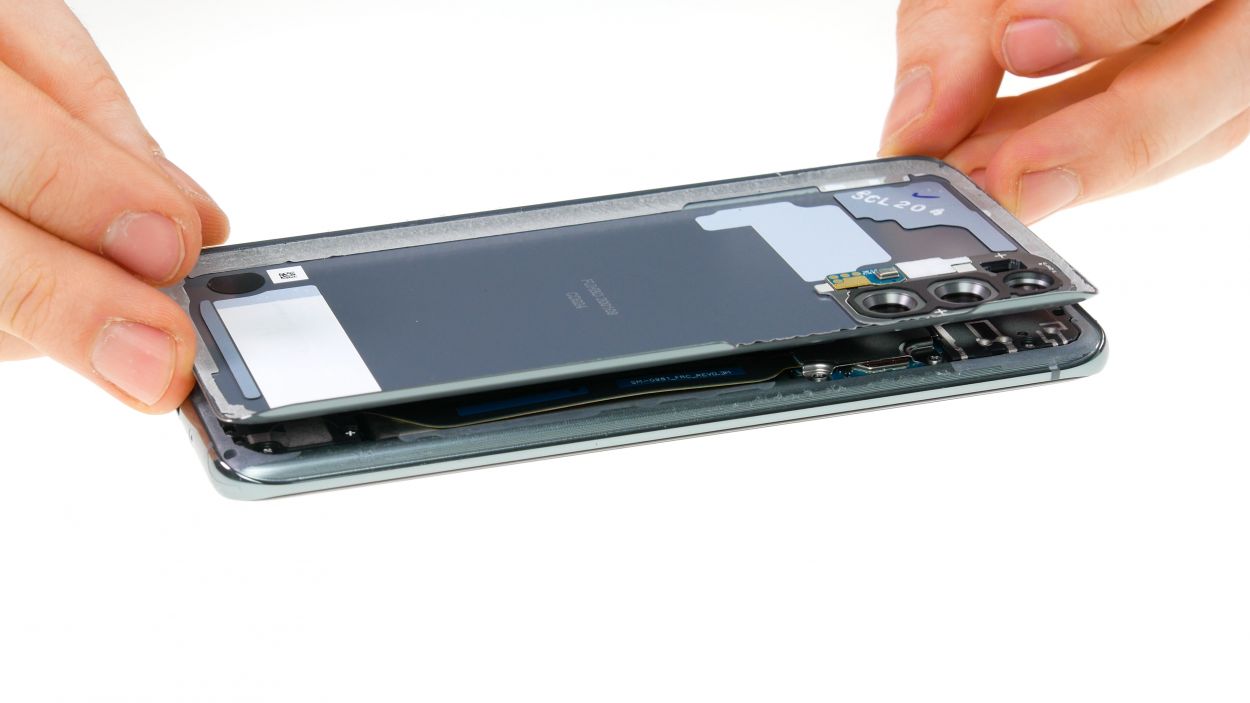
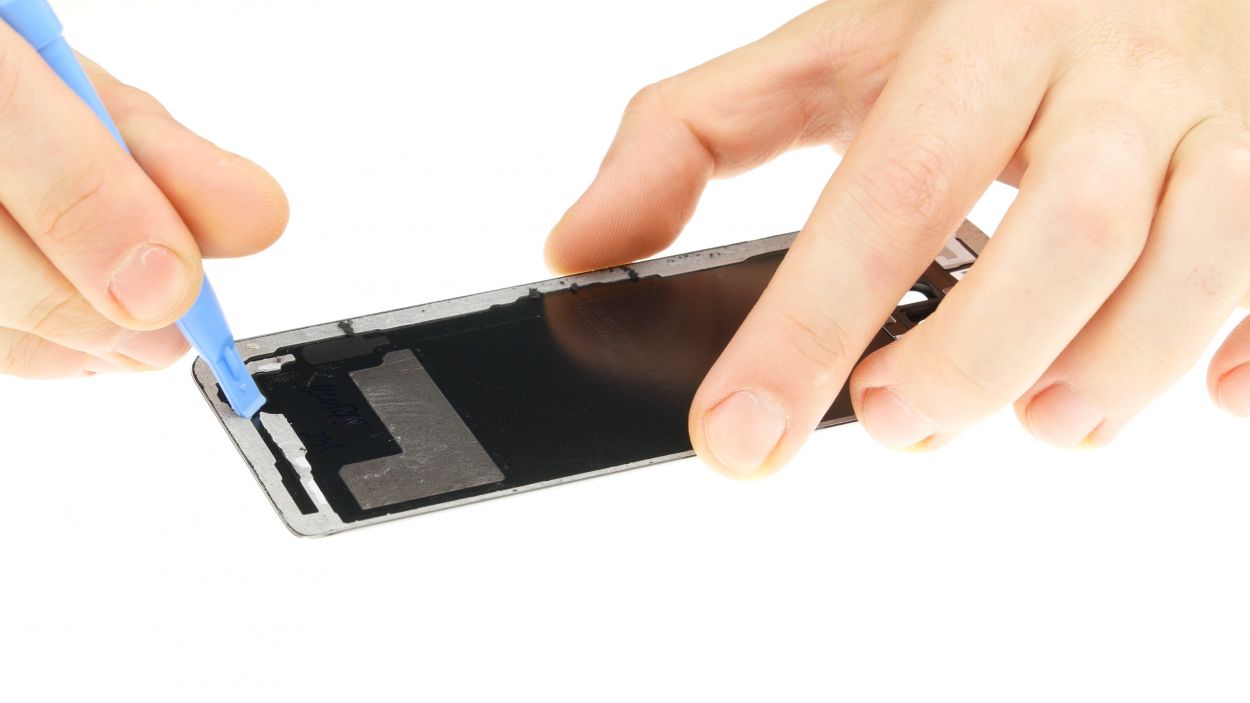
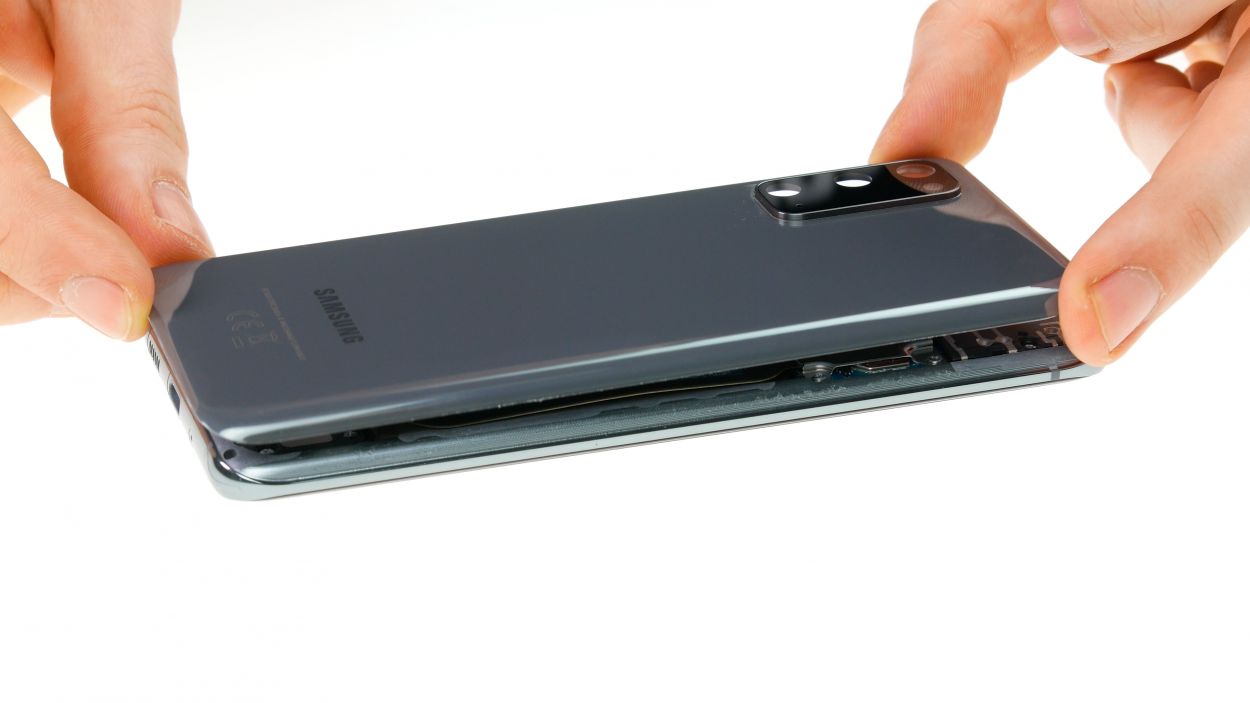
– Warm up the device’s frame with hot air until it reaches a cozy 60-80 degrees. This will help loosen the adhesive on the back cover, making it a breeze to take off.
– Grab a suction cup and stick it to the bottom of your device.
– Give that suction cup a gentle pull and slide your flat opening tool into the little gap you’ve created.
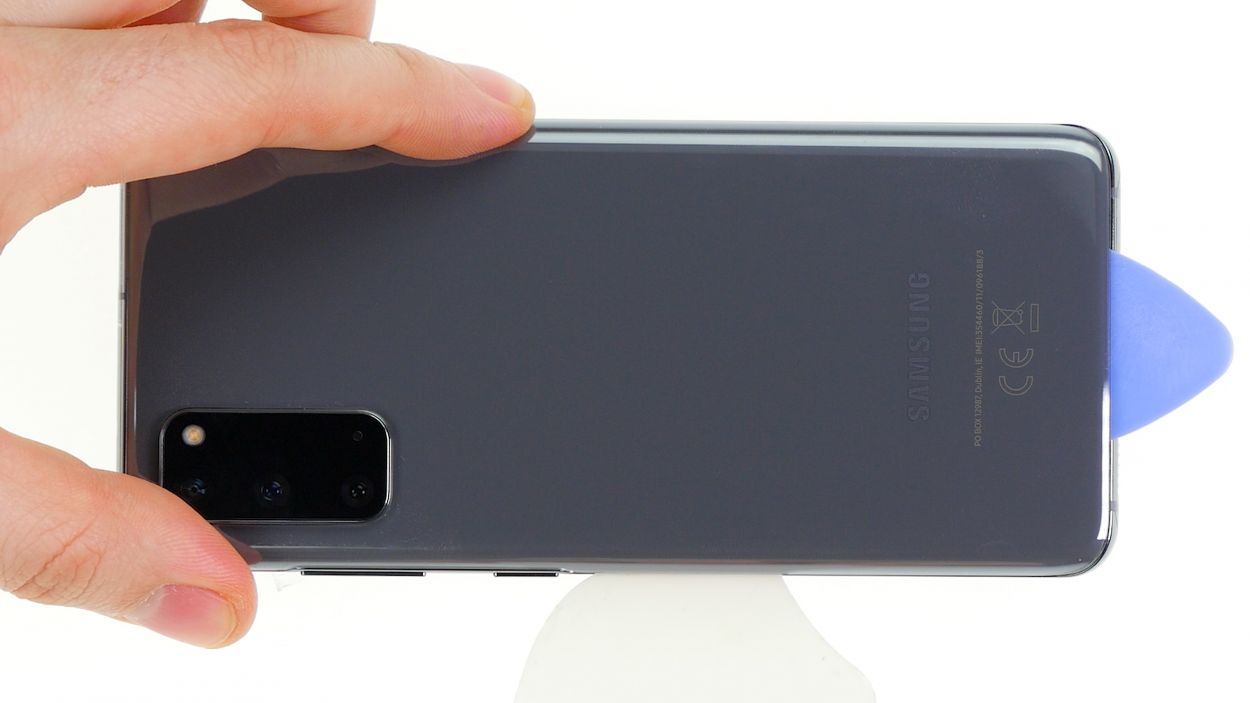
Give that tool a little warm-up every now and then, and take your time to work carefully—no one wants to end up with a shattered screen! Patience is key, so hang in there!
The iFlex opening tool is your trusty sidekick for tackling those pesky glued back covers. It’s crafted from thin, sturdy metal, making it perfect for the job! Once you’ve slipped it in, grab a plastic tool to finish the task—it’s gentle on your device and won’t leave any scratches on the frame or back cover. If you need help, you can always schedule a repair.
Tools Used
- Flat Picks
- screen and the frame. The practical iFlex is made of stainless steel and sits comfortably in the hand. This makes it the perfect assistant for every smartphone repair.” rel=”noopener nofollow”>iFlex Opening Tool
- iSclack evo Opening Tool
Step 3
5 × 4,0 mm Phillips
A magnetic pad is your new best buddy for keeping screws and tiny parts organized. It’s like having a personal assistant that never lets anything get lost!
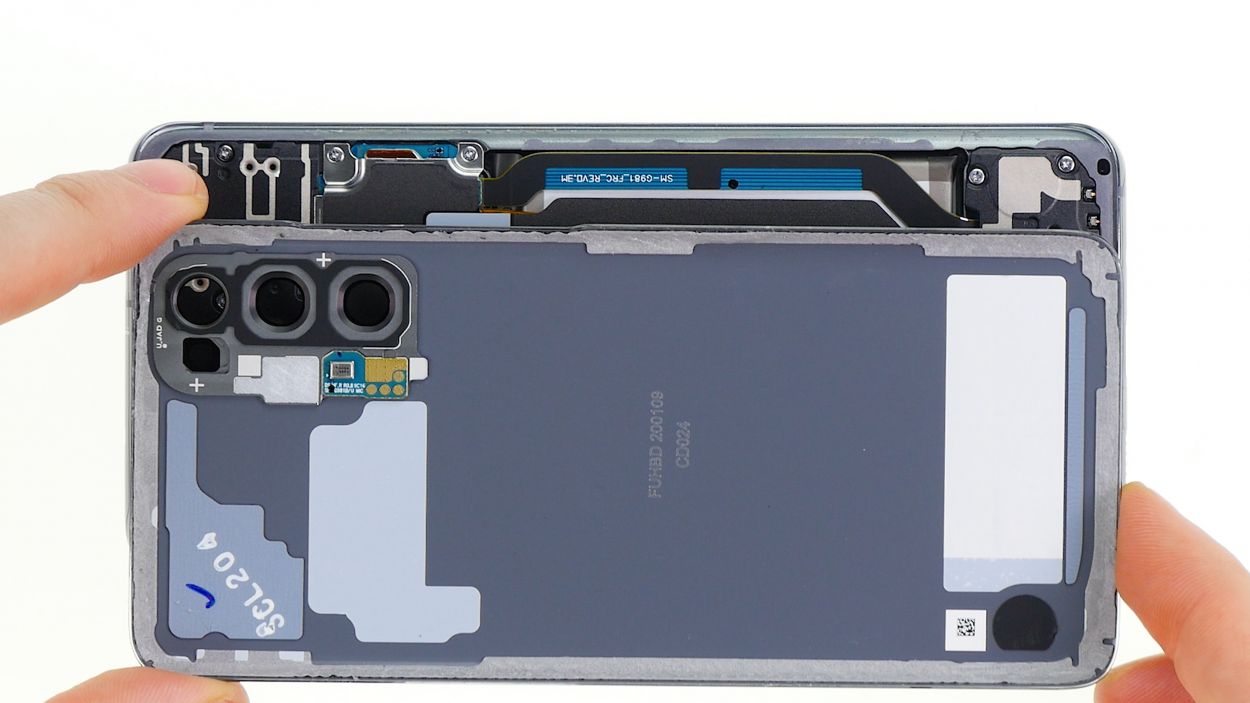
– Unscrew those Phillips screws of the same length from the charging coil, and let’s get this show on the road!
Step 4

Battery Connector
Hey there! Just a friendly reminder to keep an eye on those tiny components hanging out near the battery connector. Gently leverage from the opposite side to steer clear of any accidental damage. You’ve got this!
– Now go ahead and gently unplug that battery using a plastic spudger. You’ve got this!
Tools Used
Step 5
4 × 4,0 mm Phillips
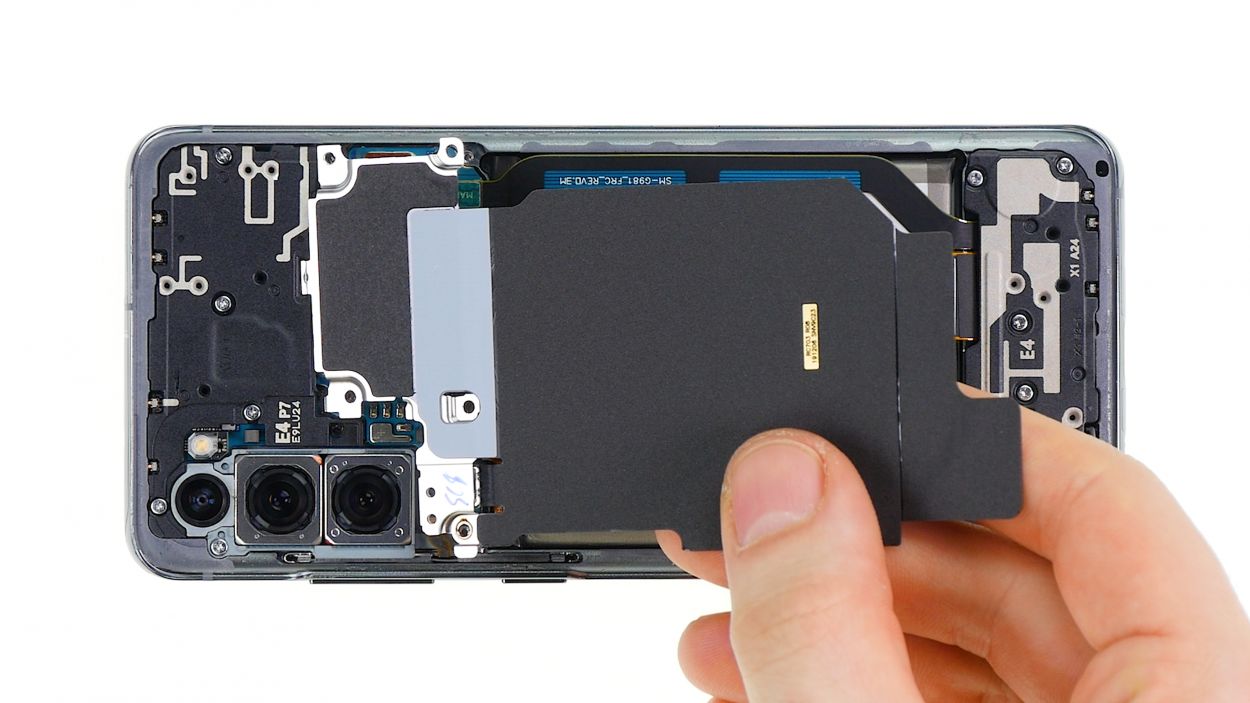
– Unscrew those four little screws holding the main board cover in place. You’ve got this!
– Gently lift the cover off and set it aside. Easy peasy!
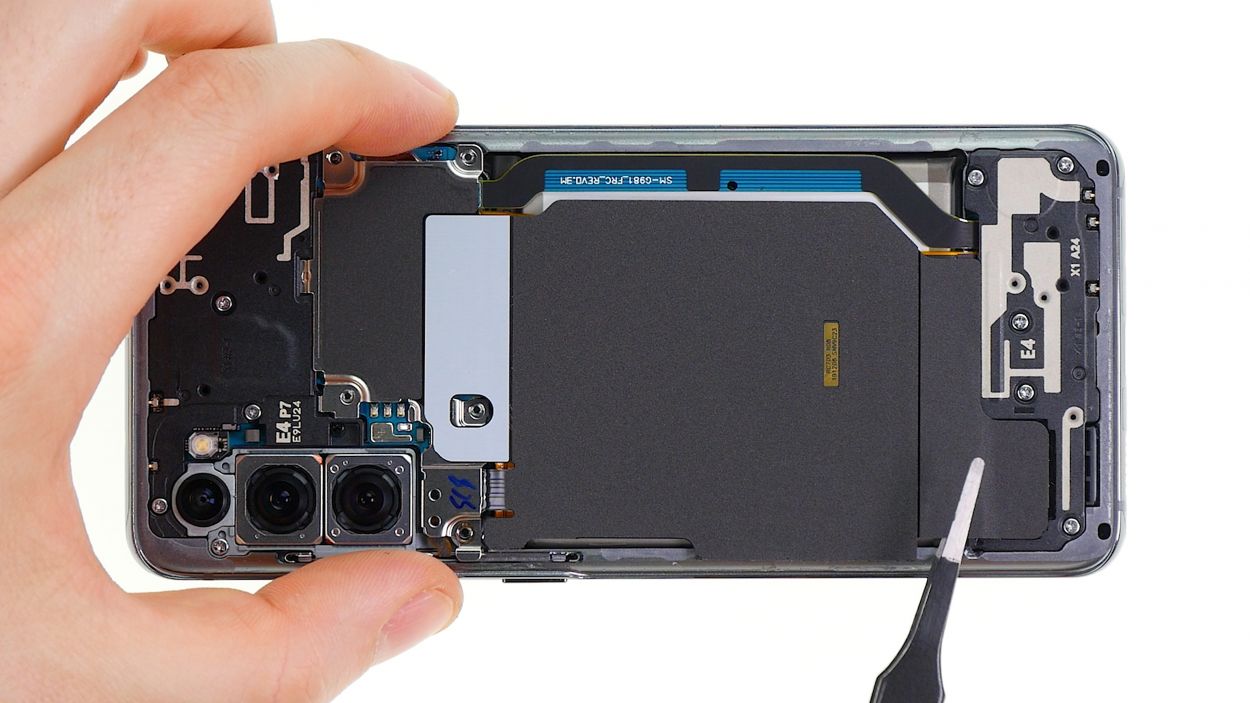
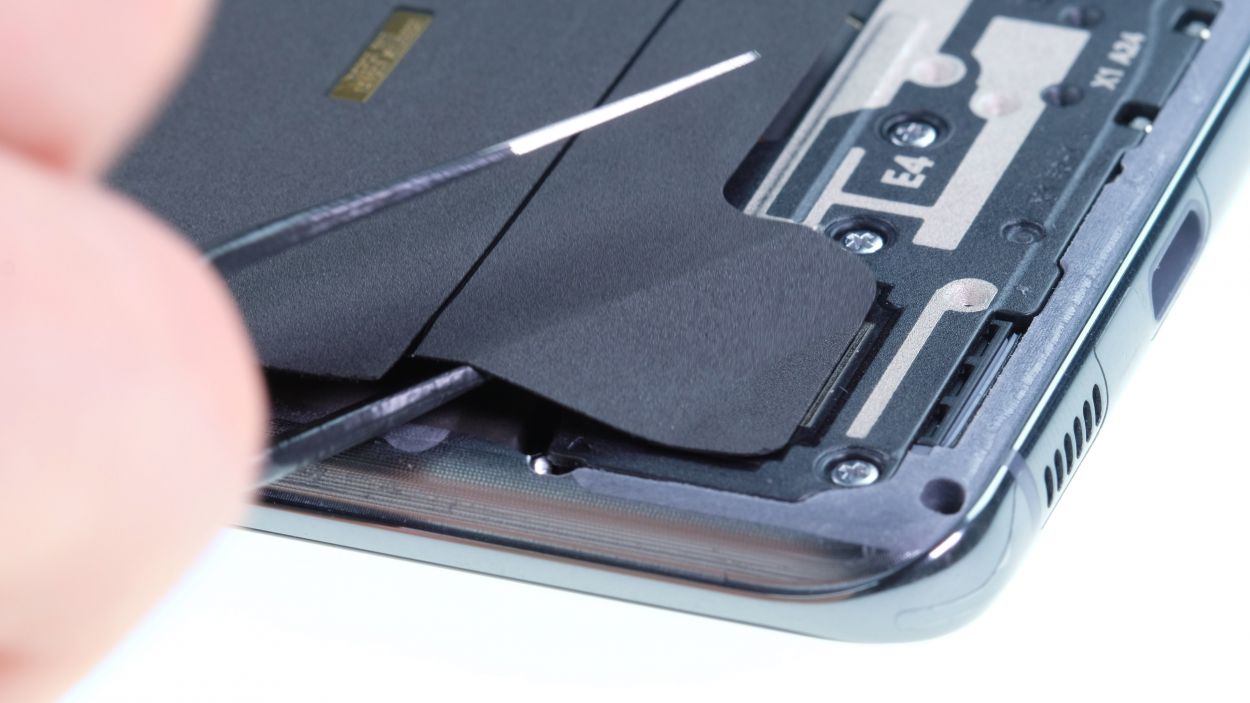
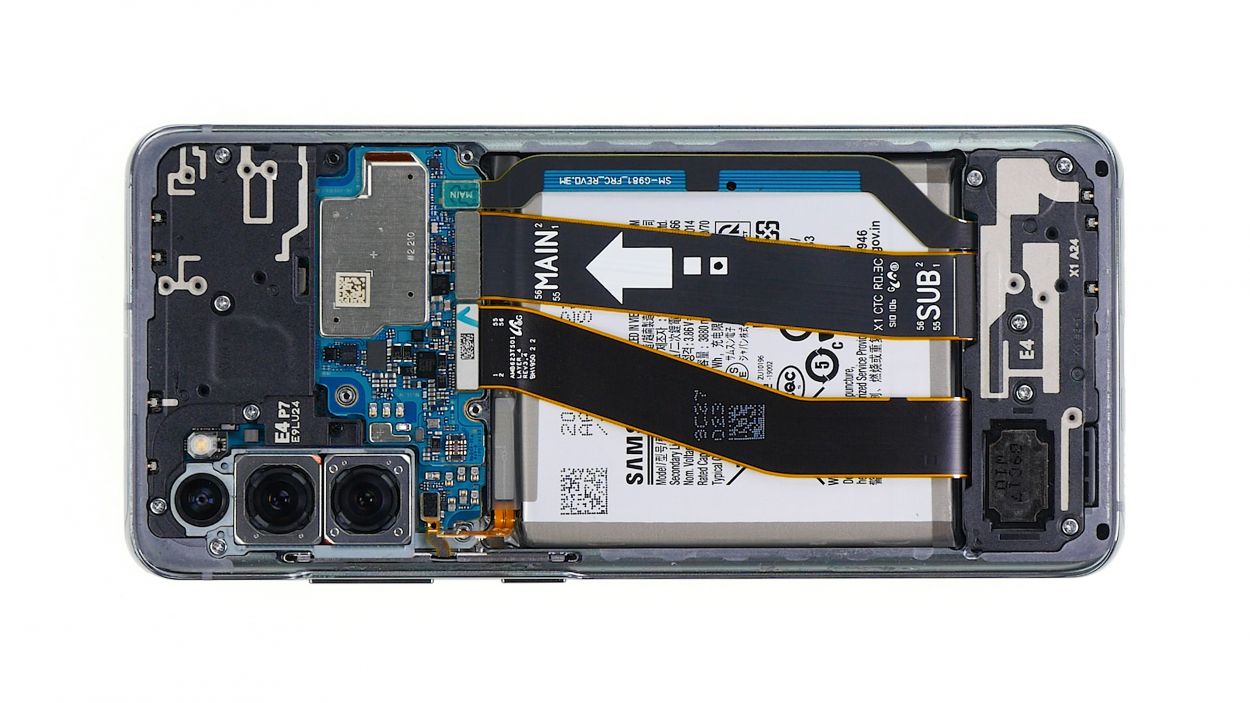
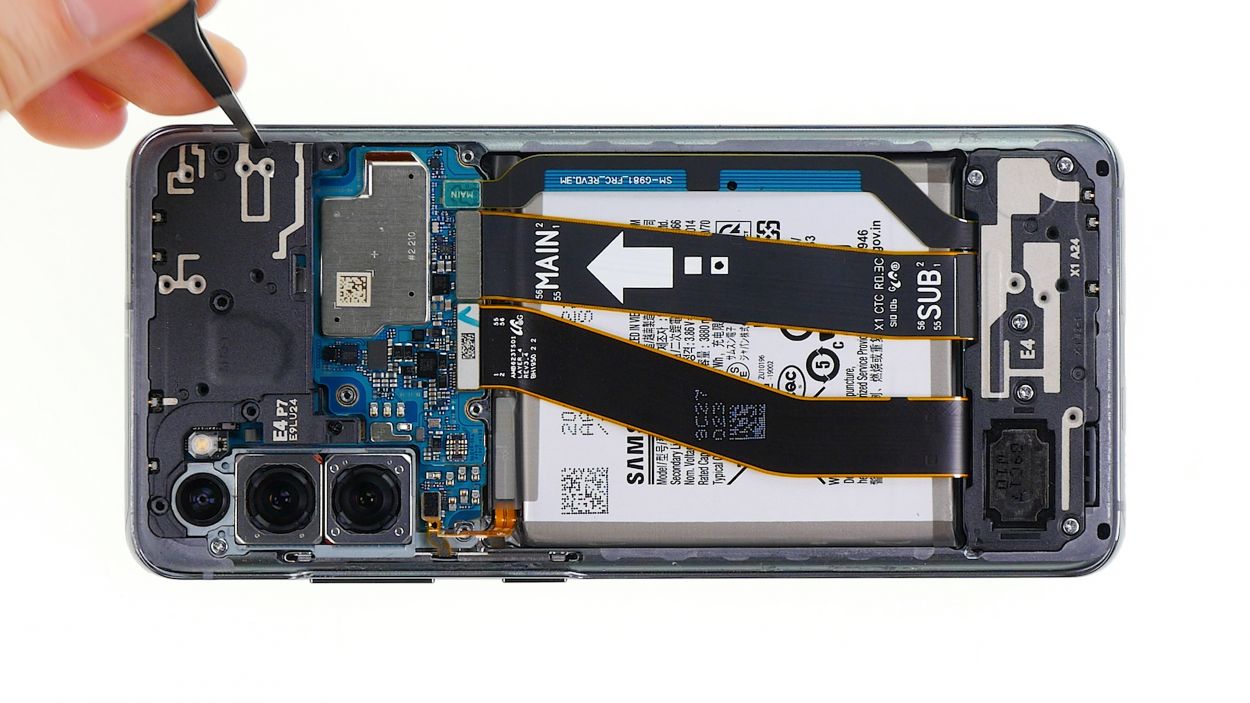
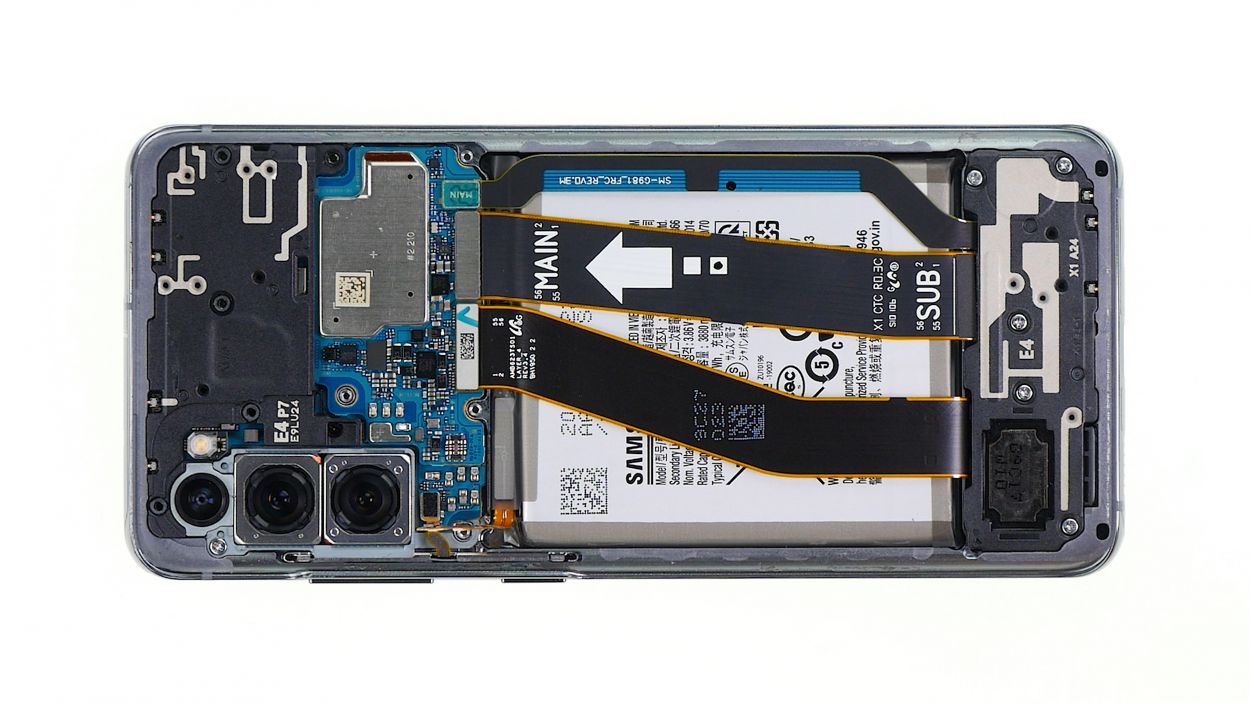
Step 6

1 × 4,0 mm Phillips
1 × 2,8 mm Phillips
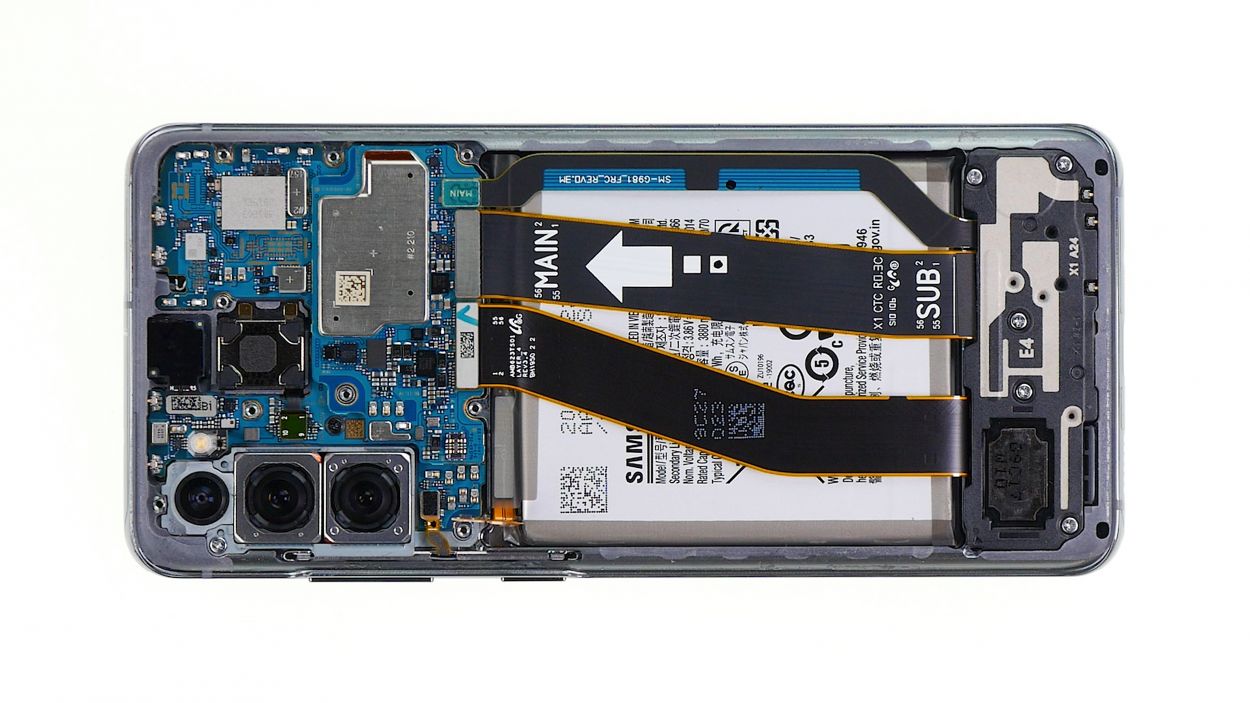
Handle that main board with care, folks! It’s a bit of a delicate flower and doesn’t take repairs too well.
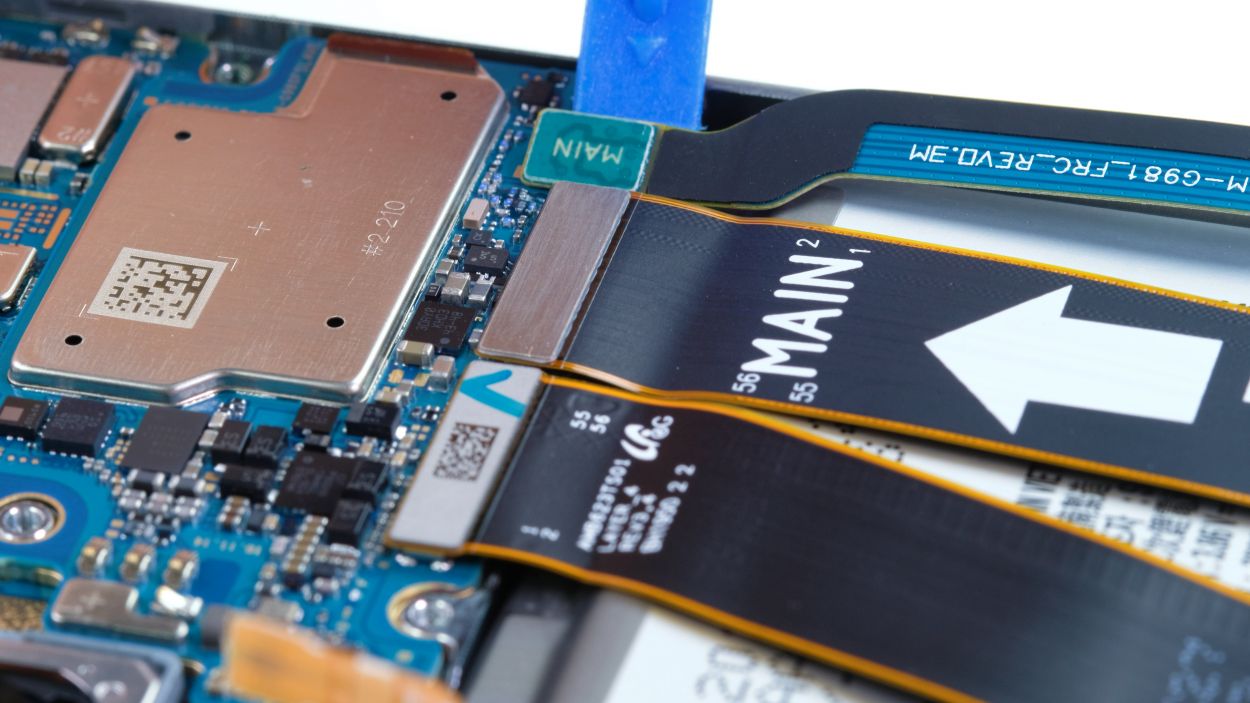
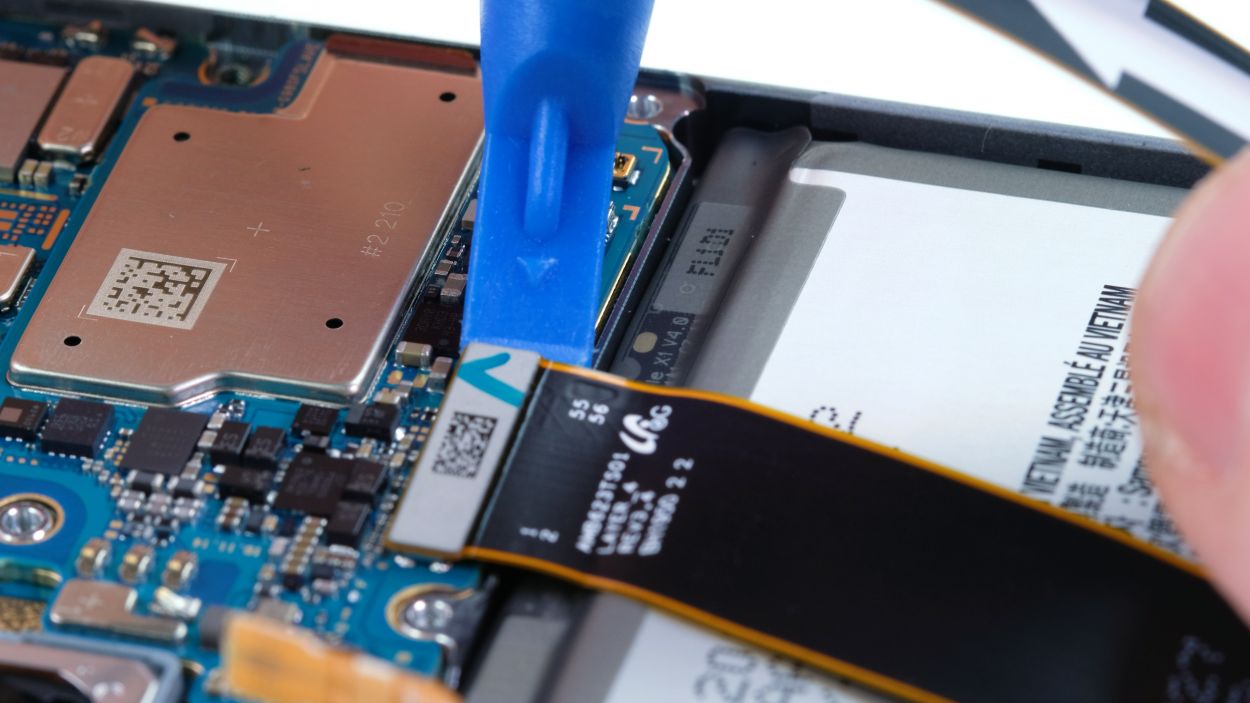
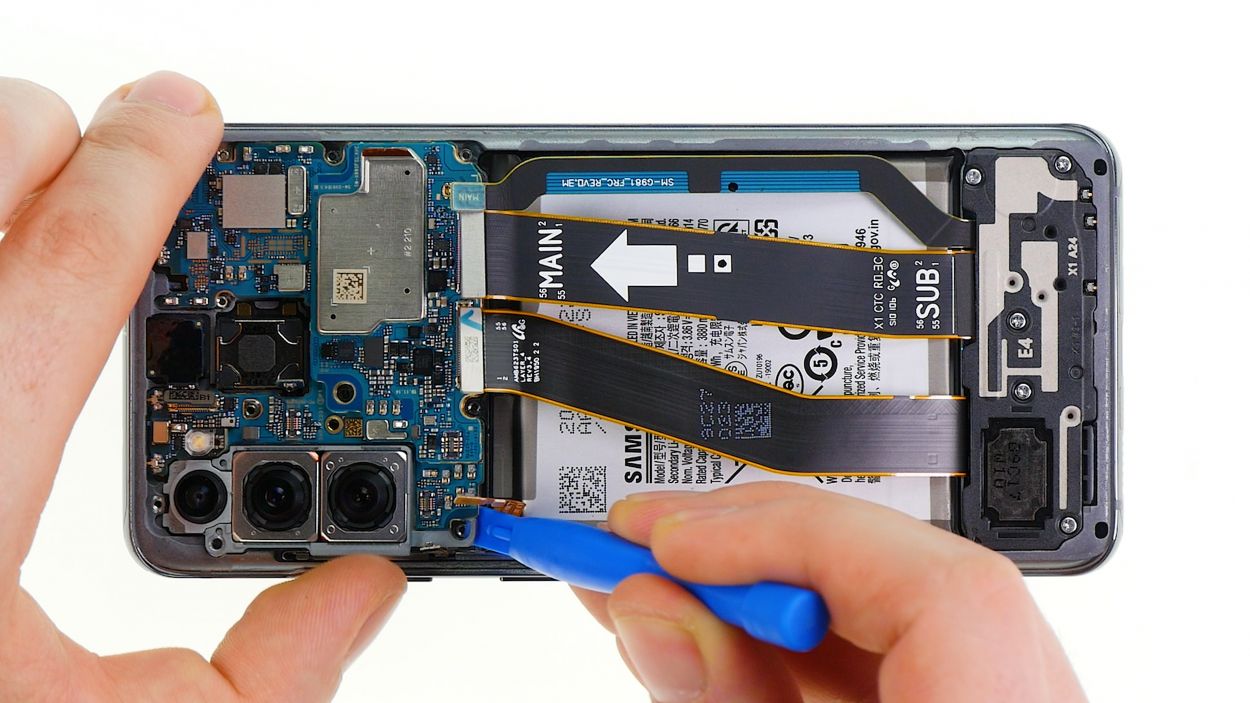
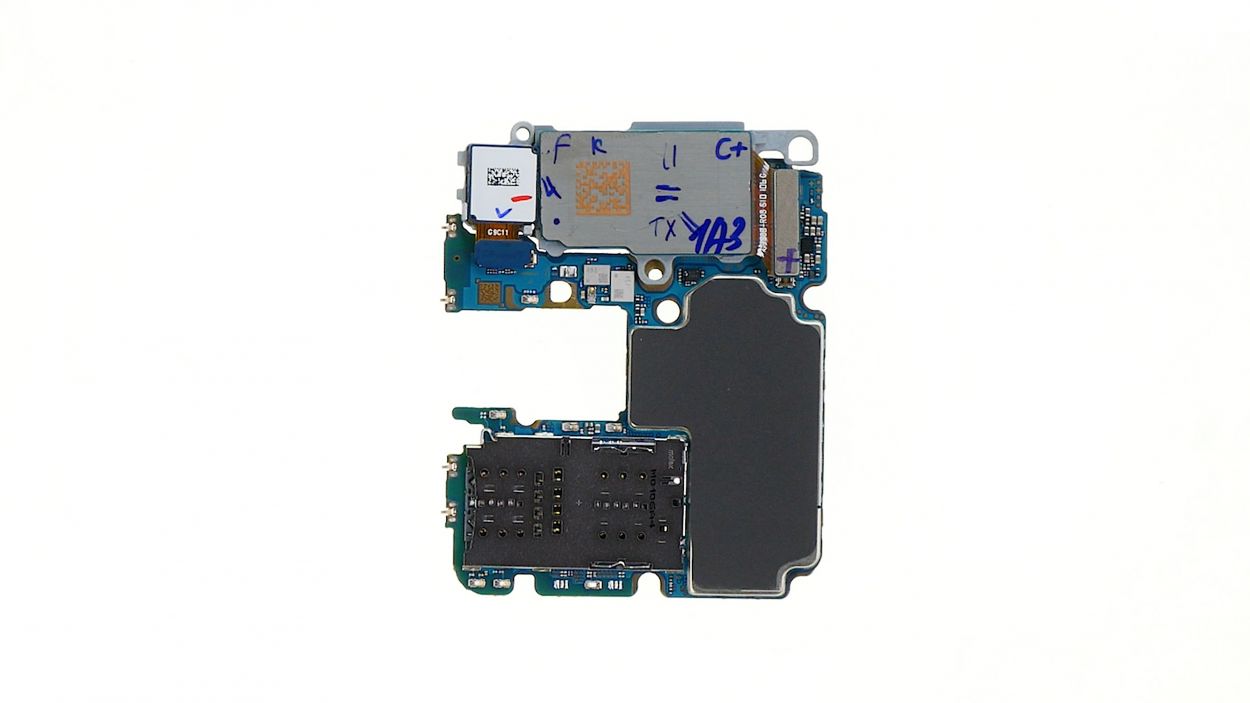
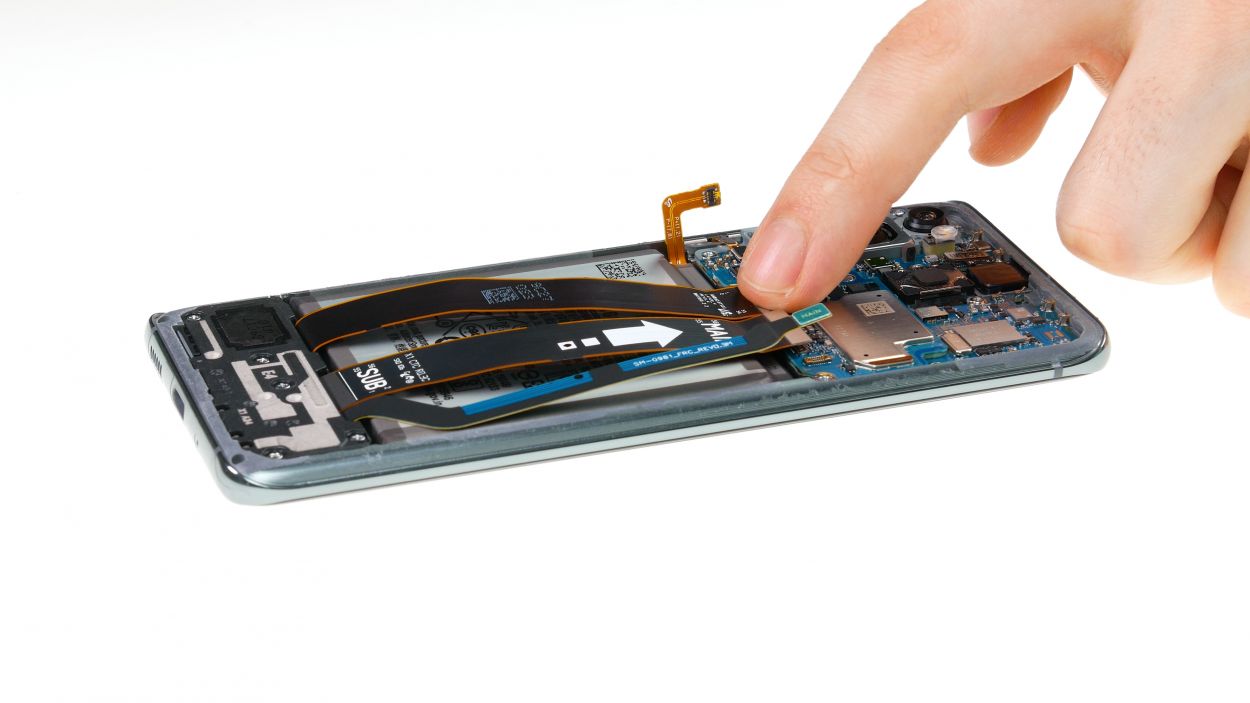
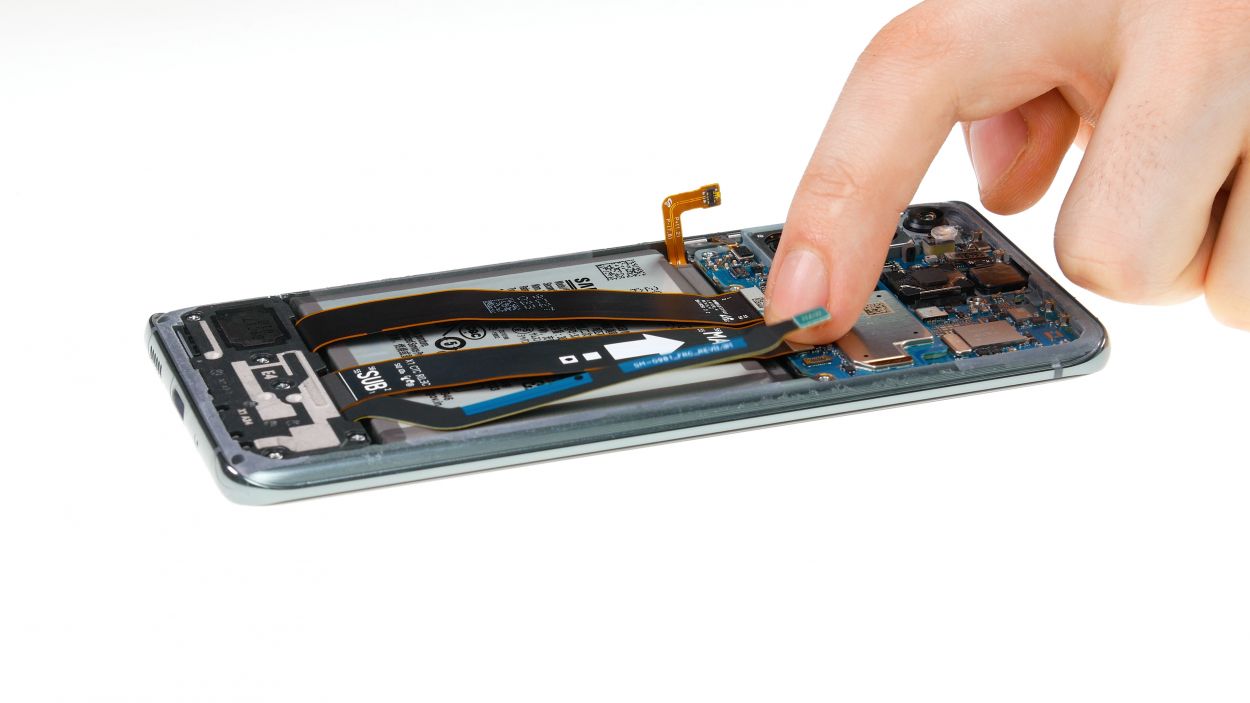
– Unplug those connectors from the motherboard with care—let’s keep those components safe and sound!
– Gently pry and give those contacts a little nudge to the side.
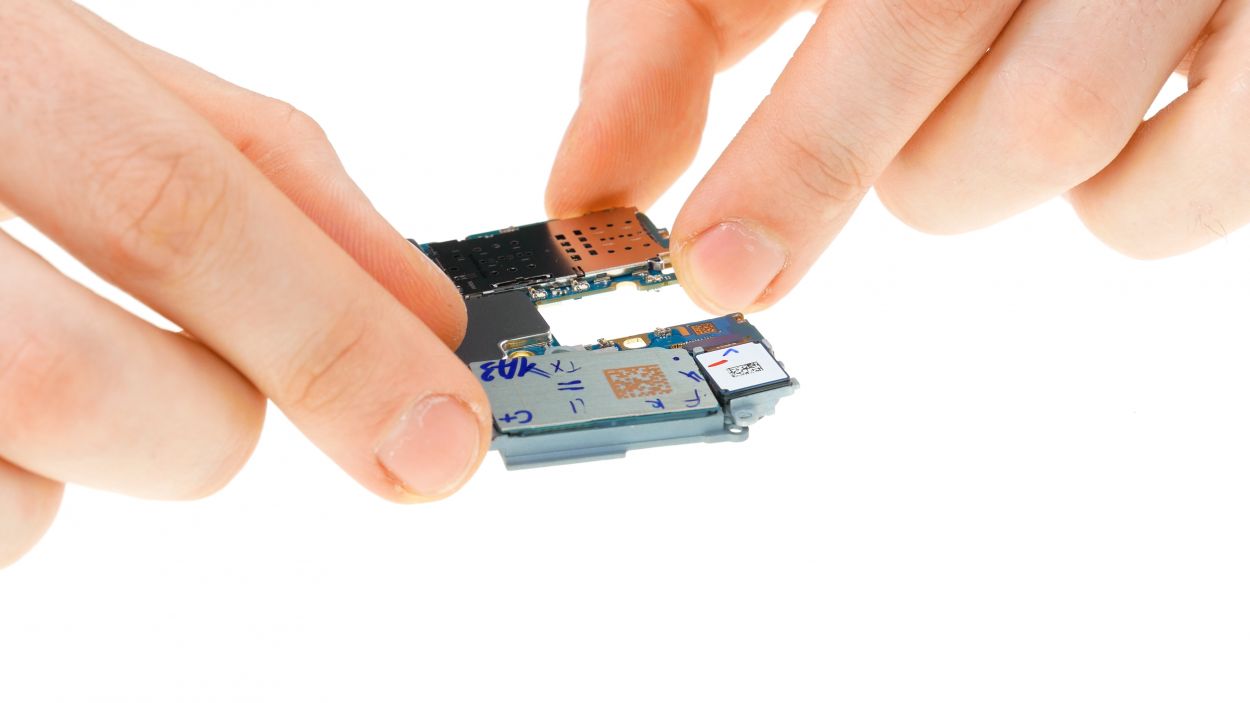
– Time to pop out the SIM holder! A SIM tool or a trusty paper clip will do the trick.
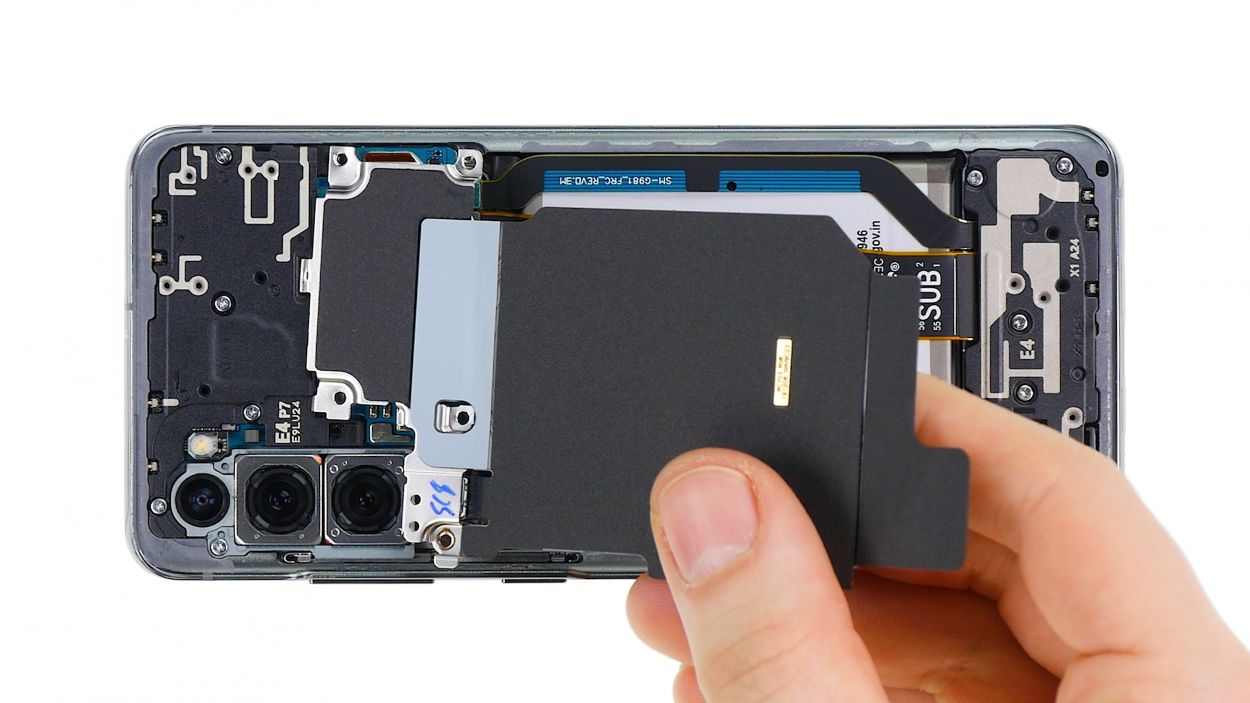
– Loosen the screws holding the board and cameras in place—let’s get things moving!
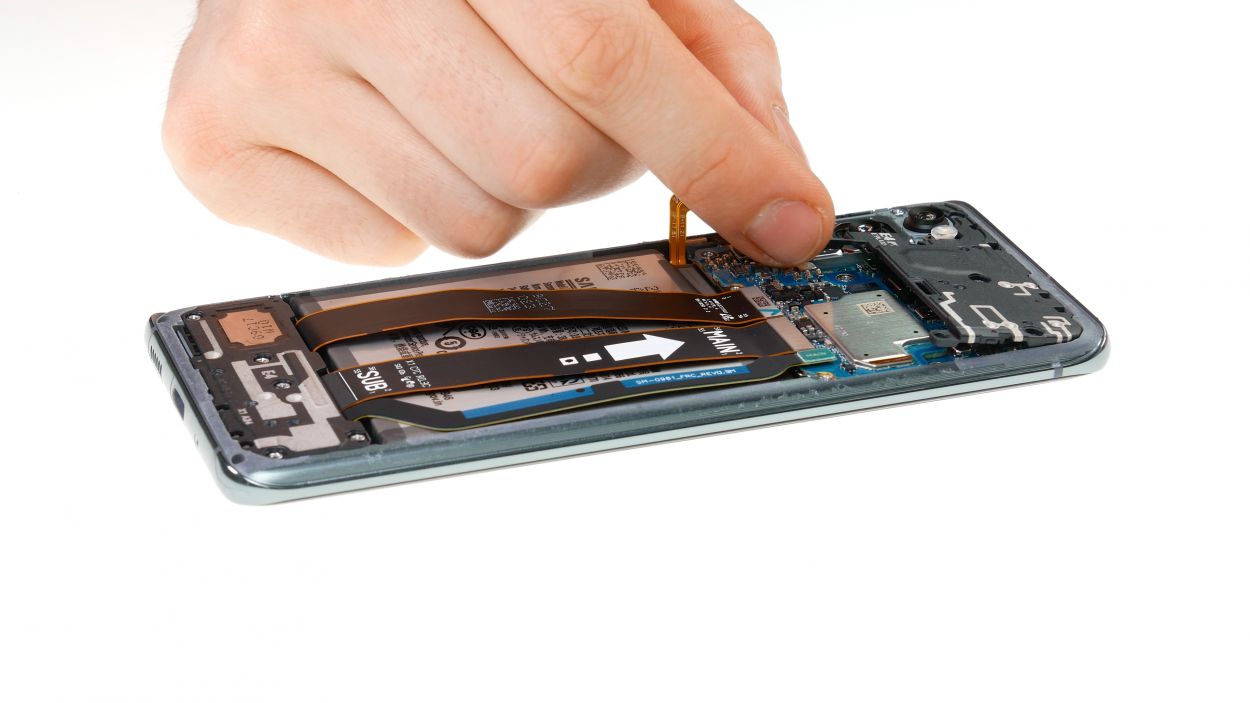
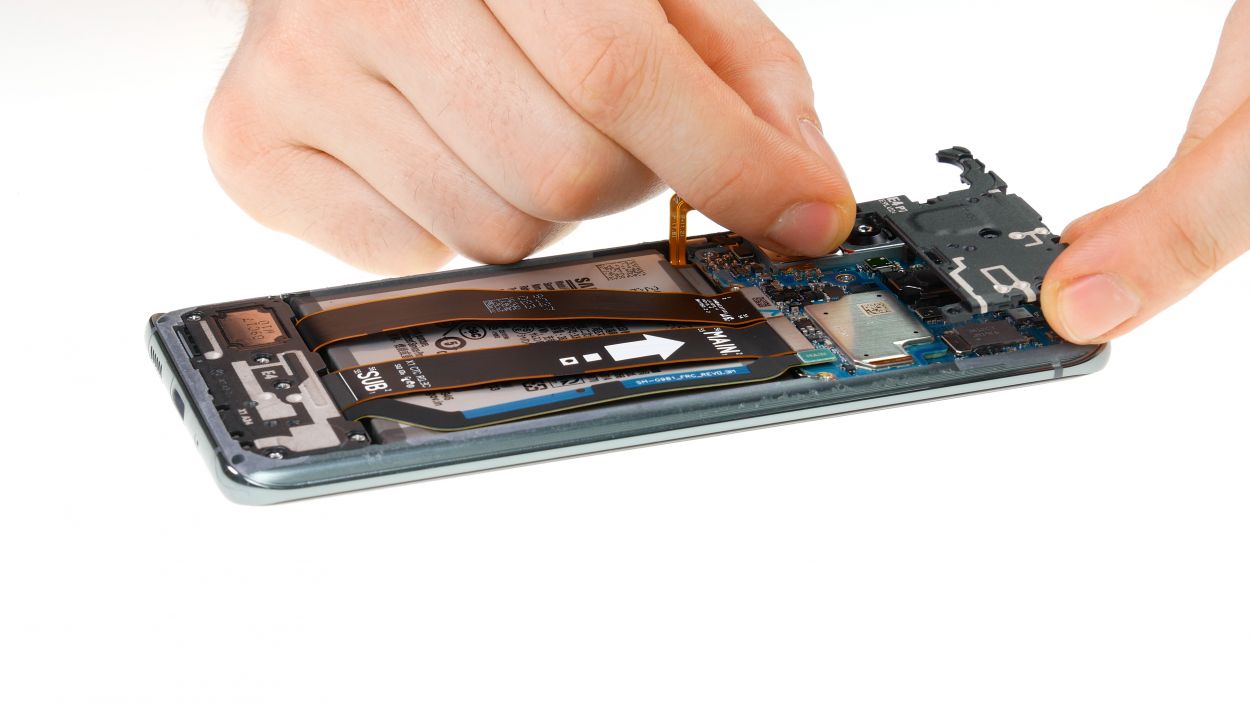
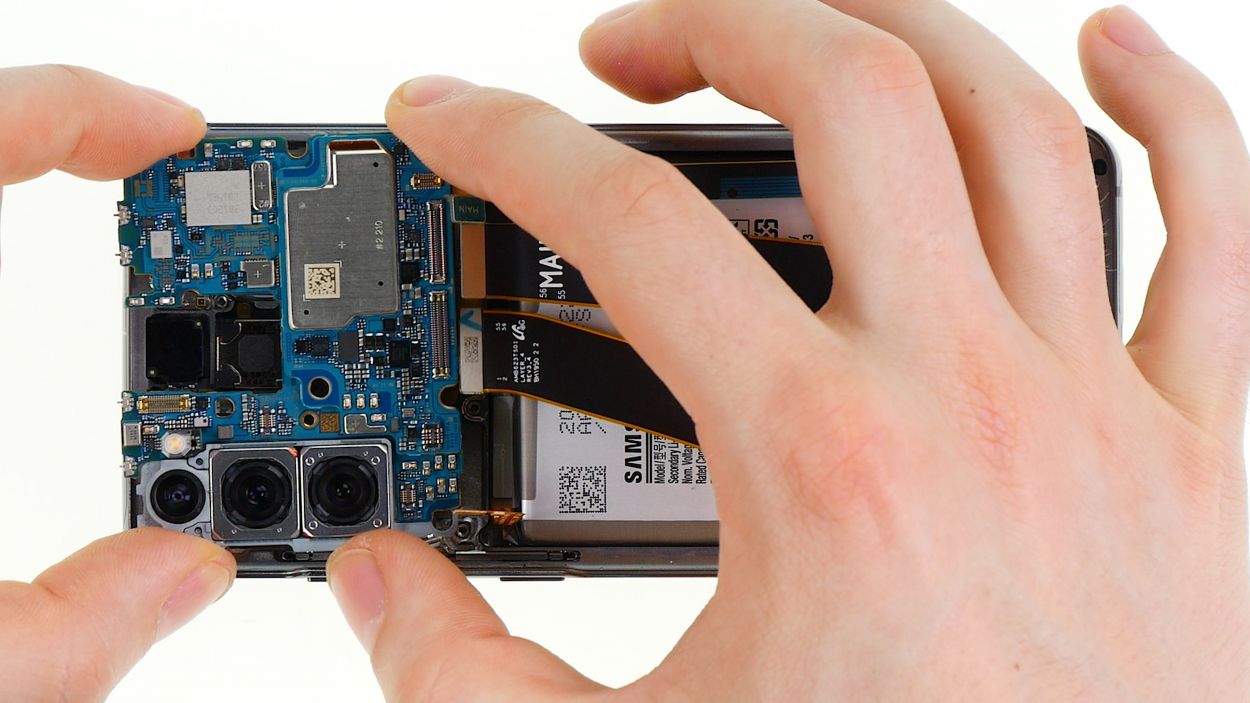
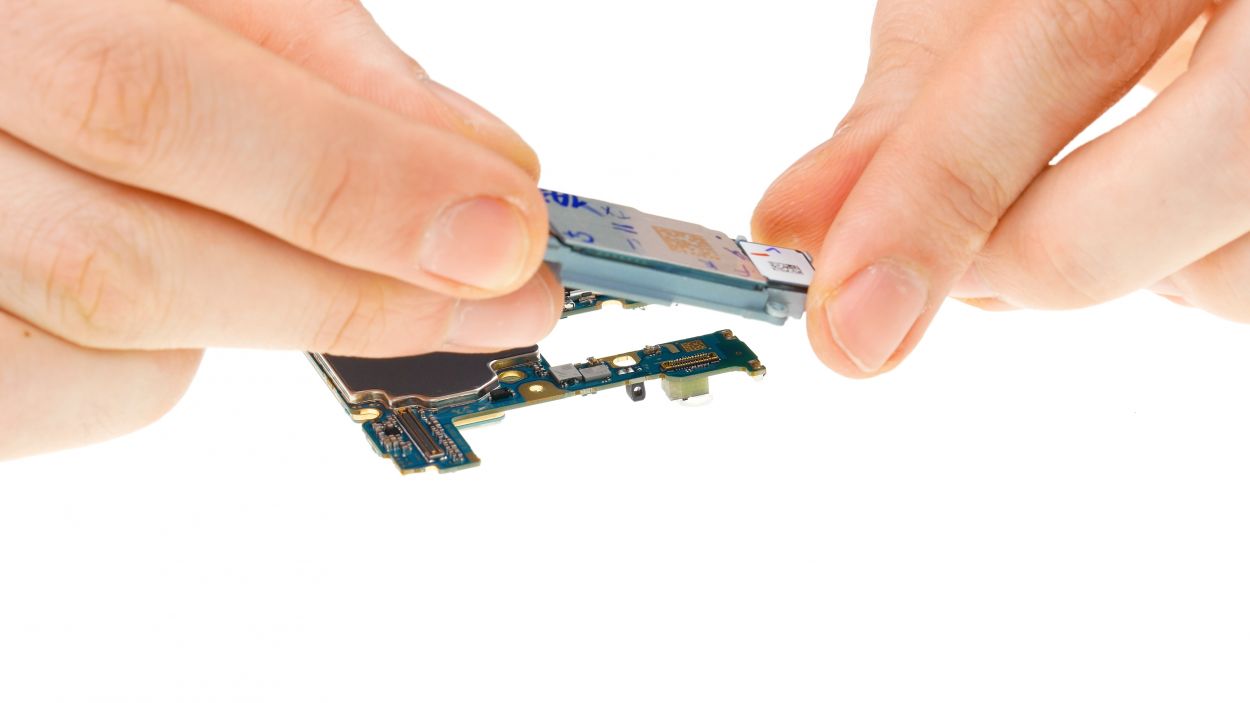
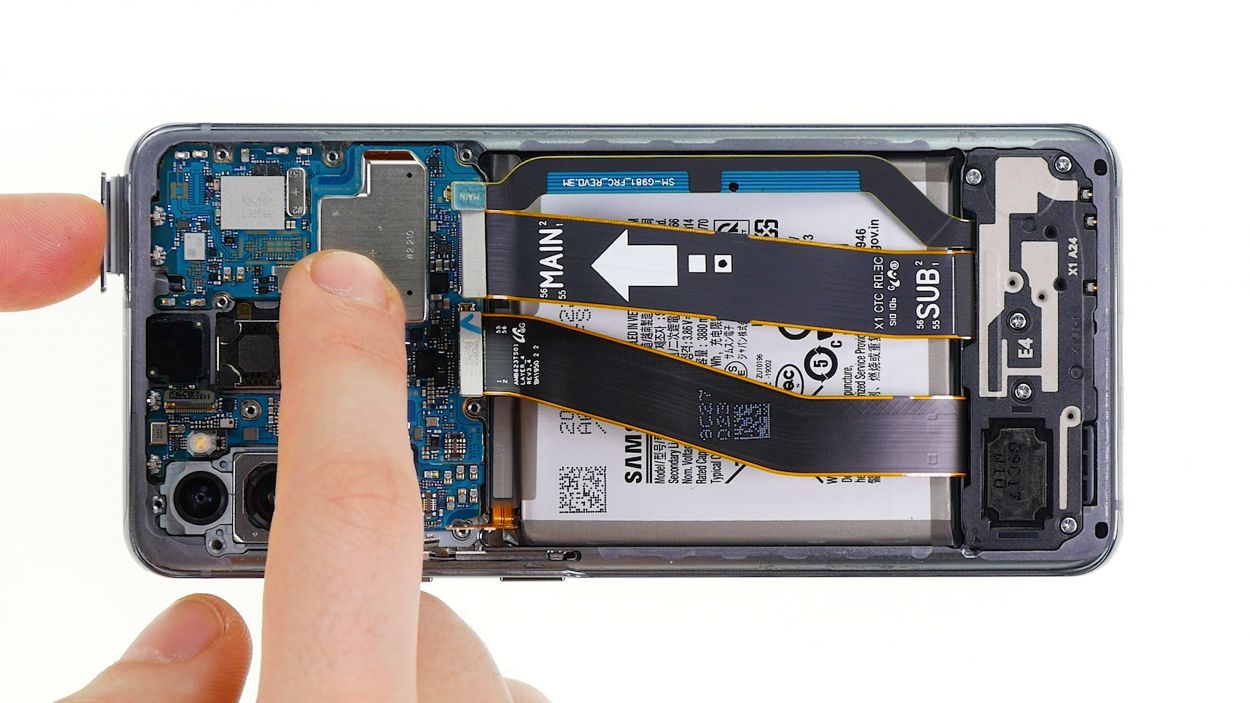
– With a gentle touch, lift one side and carefully remove the main board with both hands. Watch out for any cables or connectors that might want to tag along!
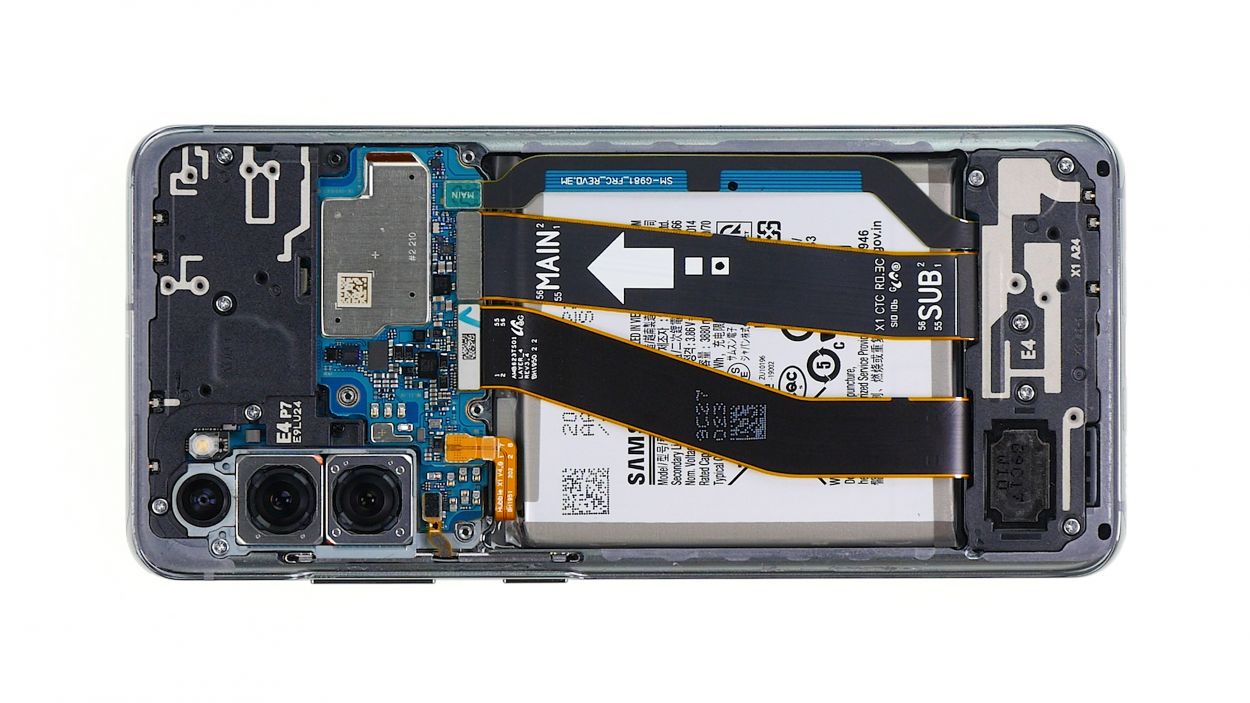
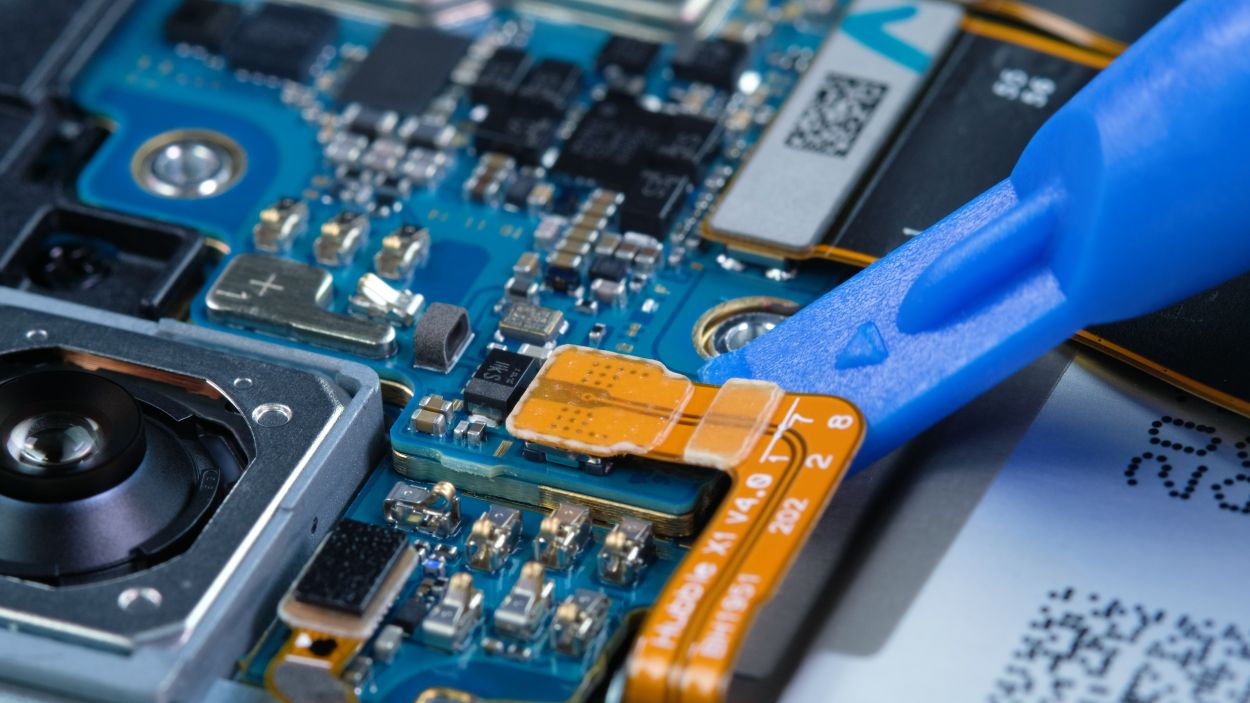
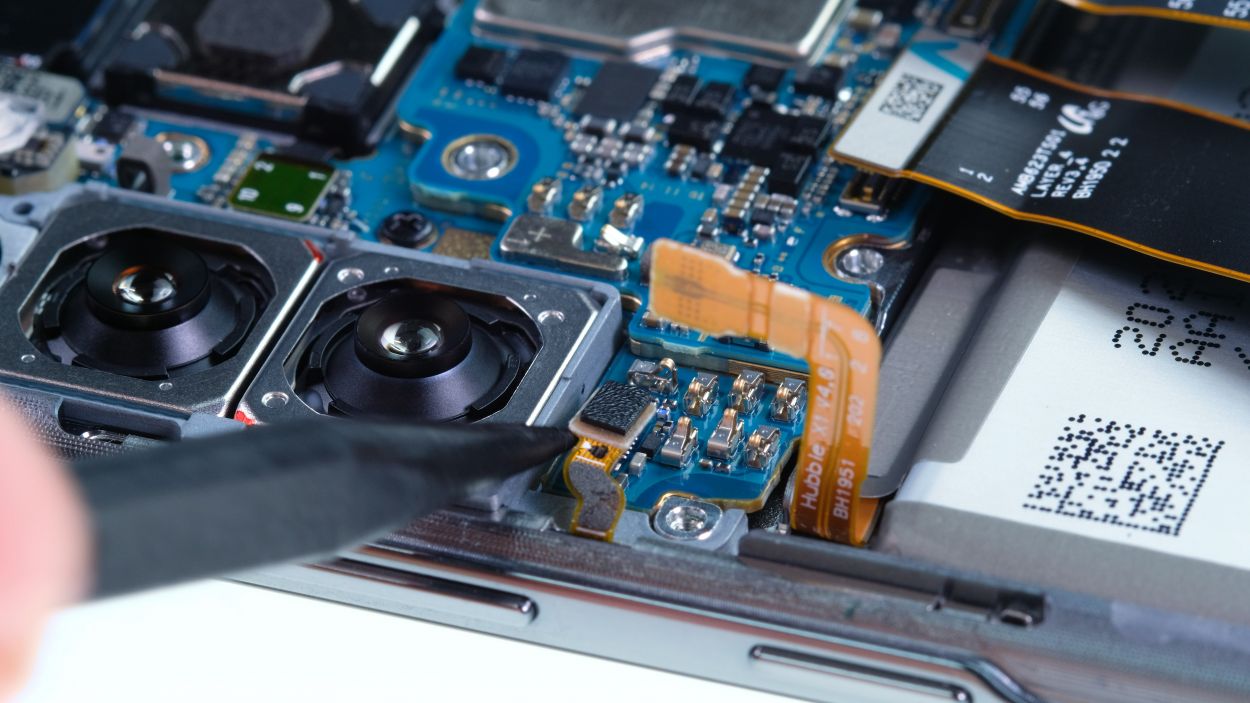
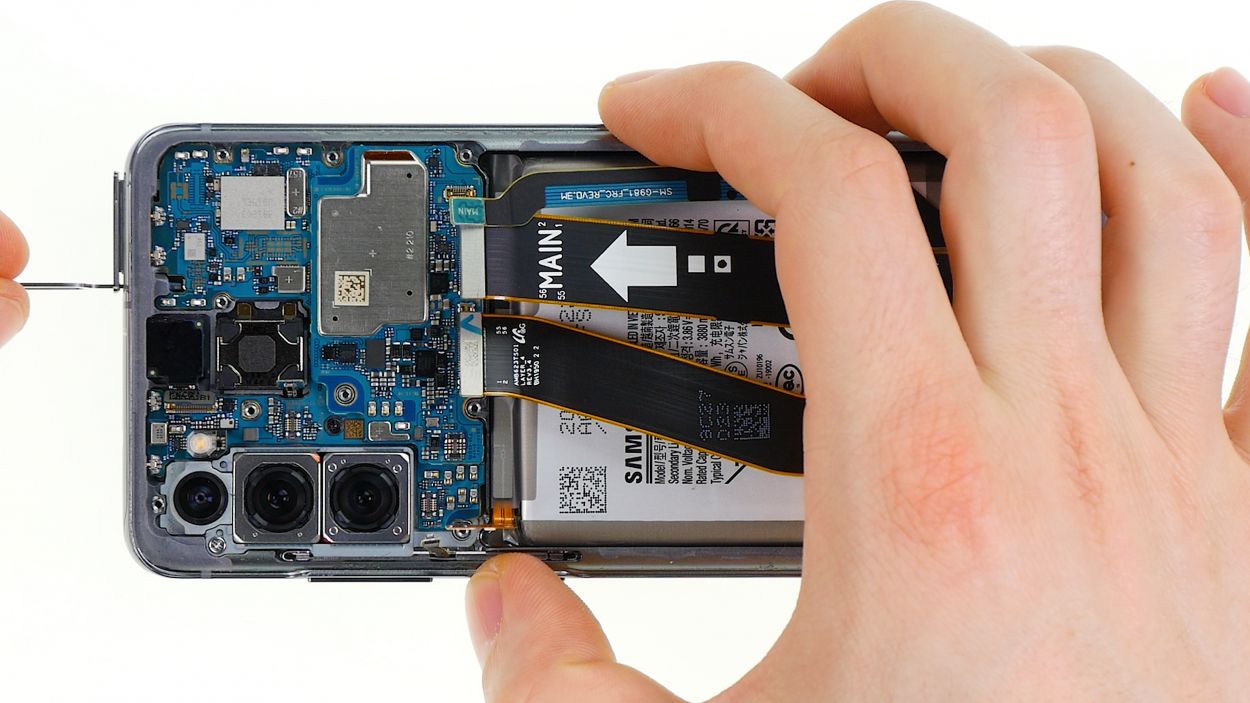
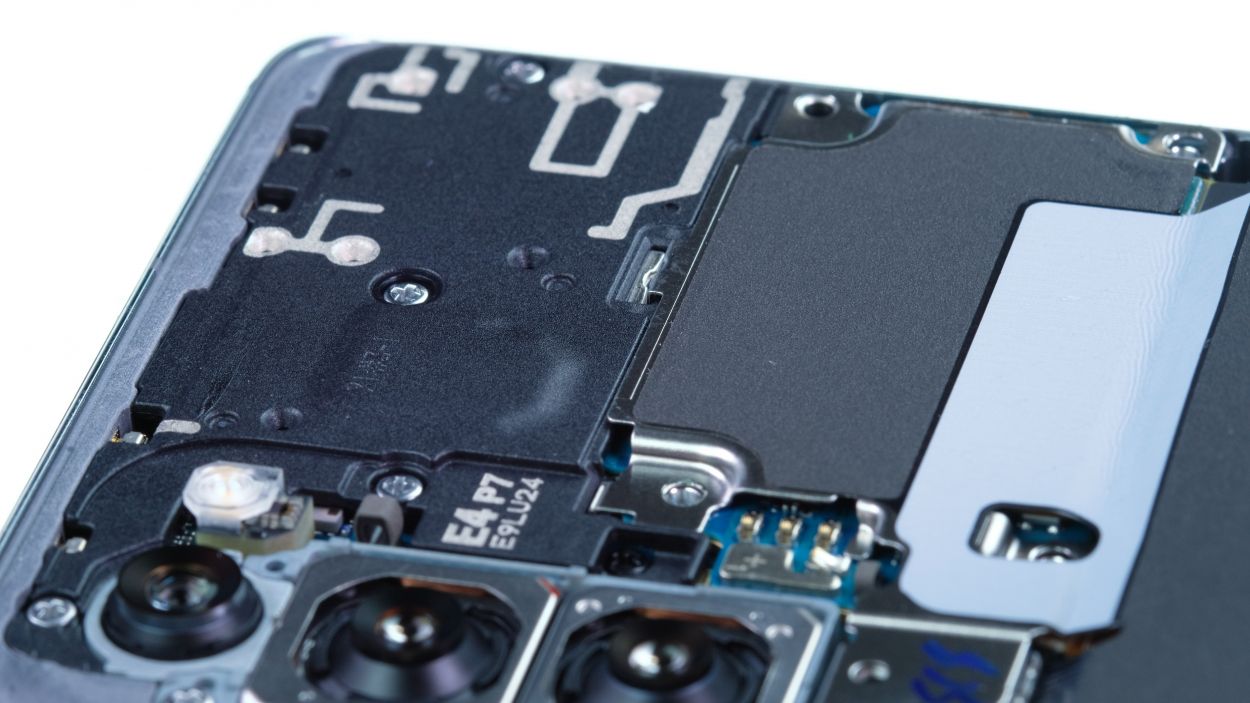
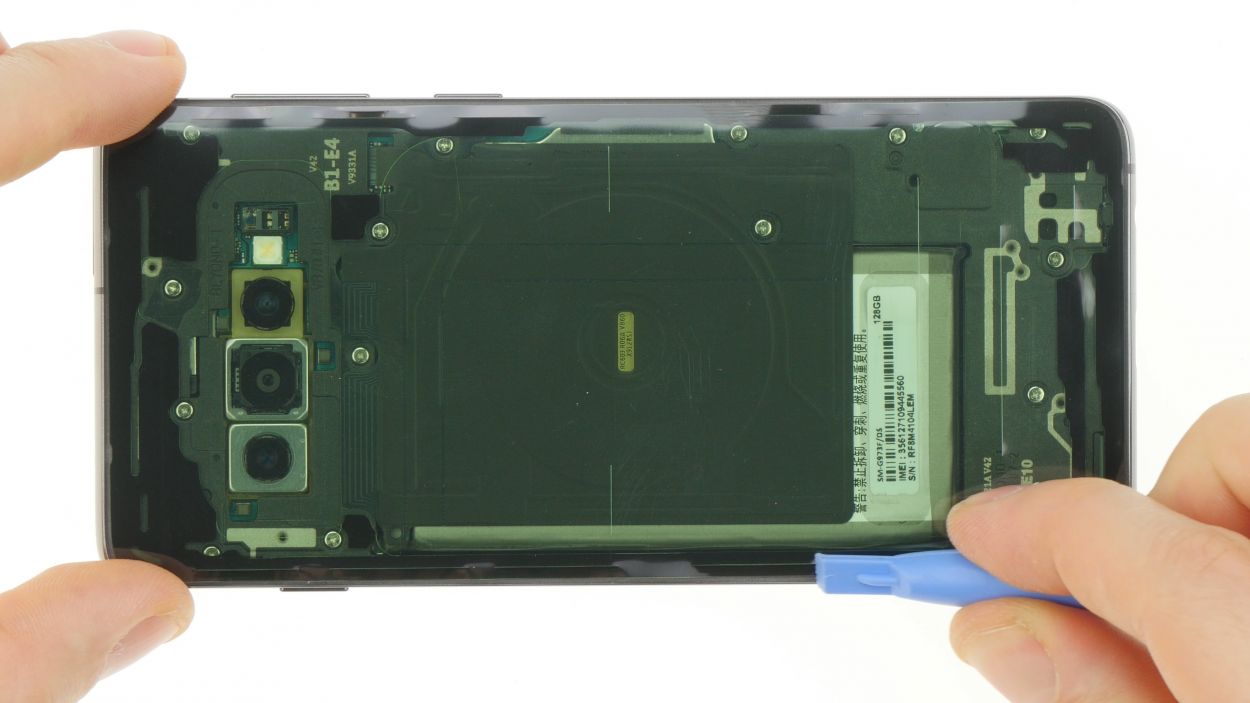
Step 7
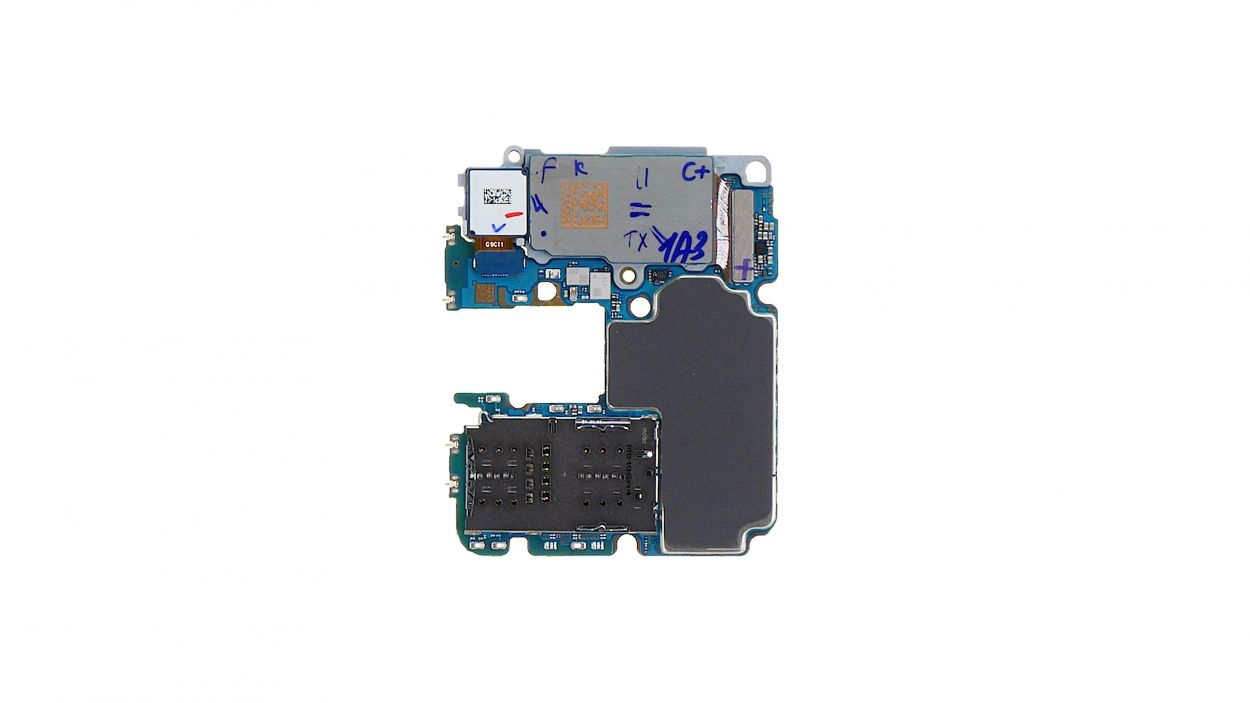

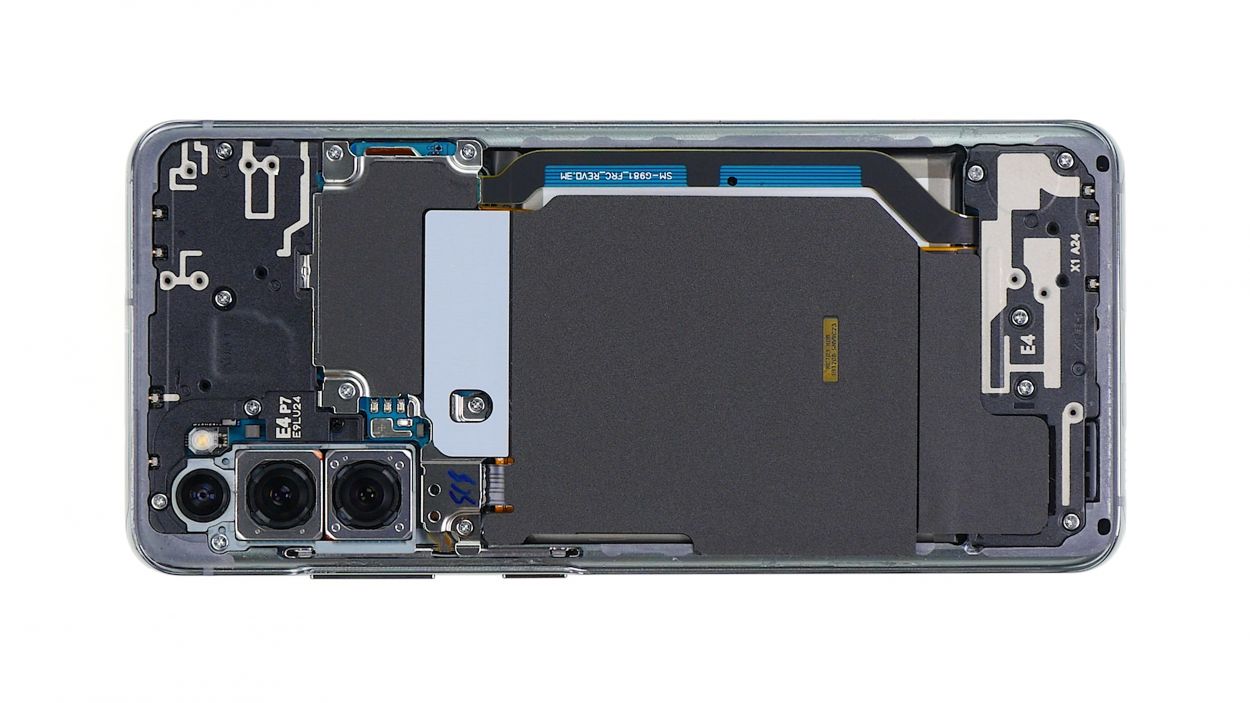
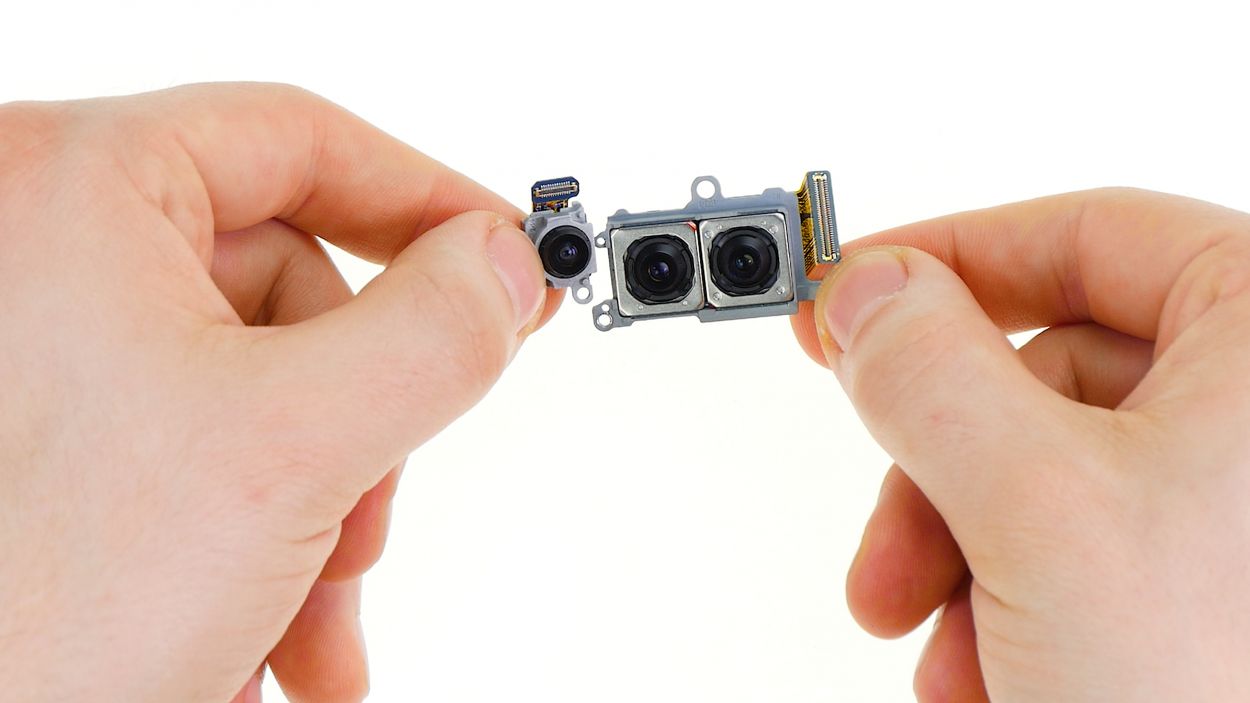
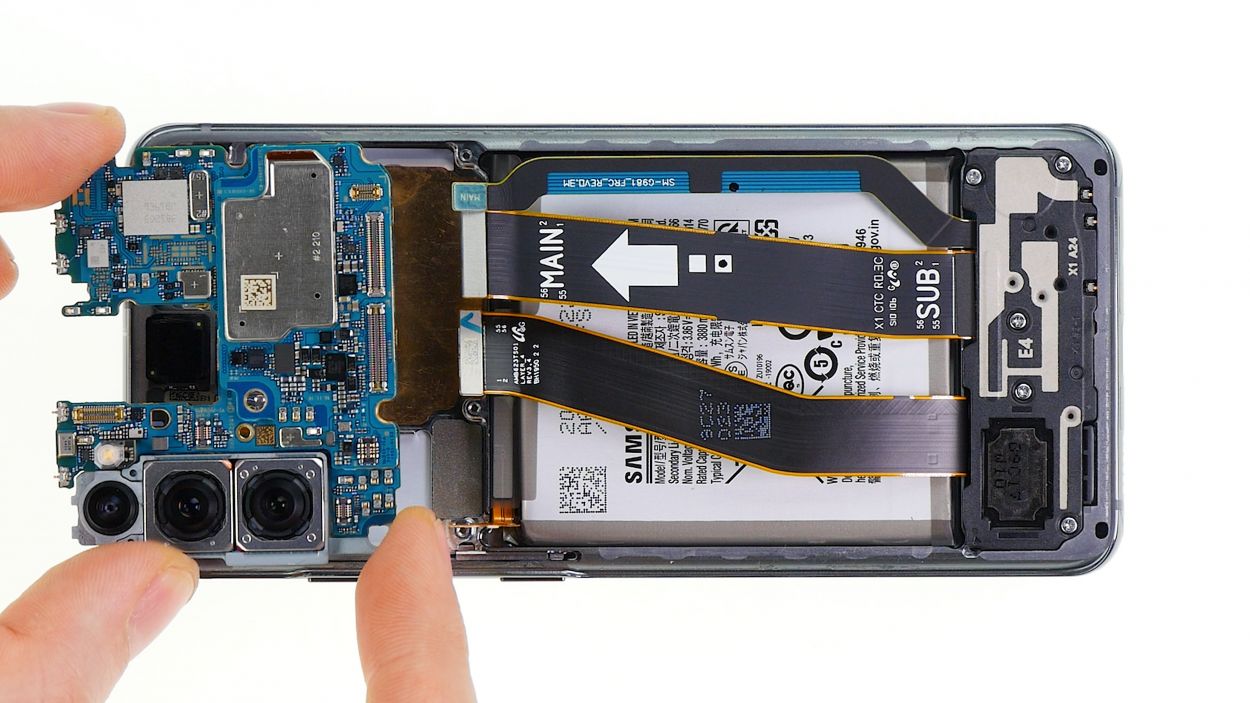
Camera Connector
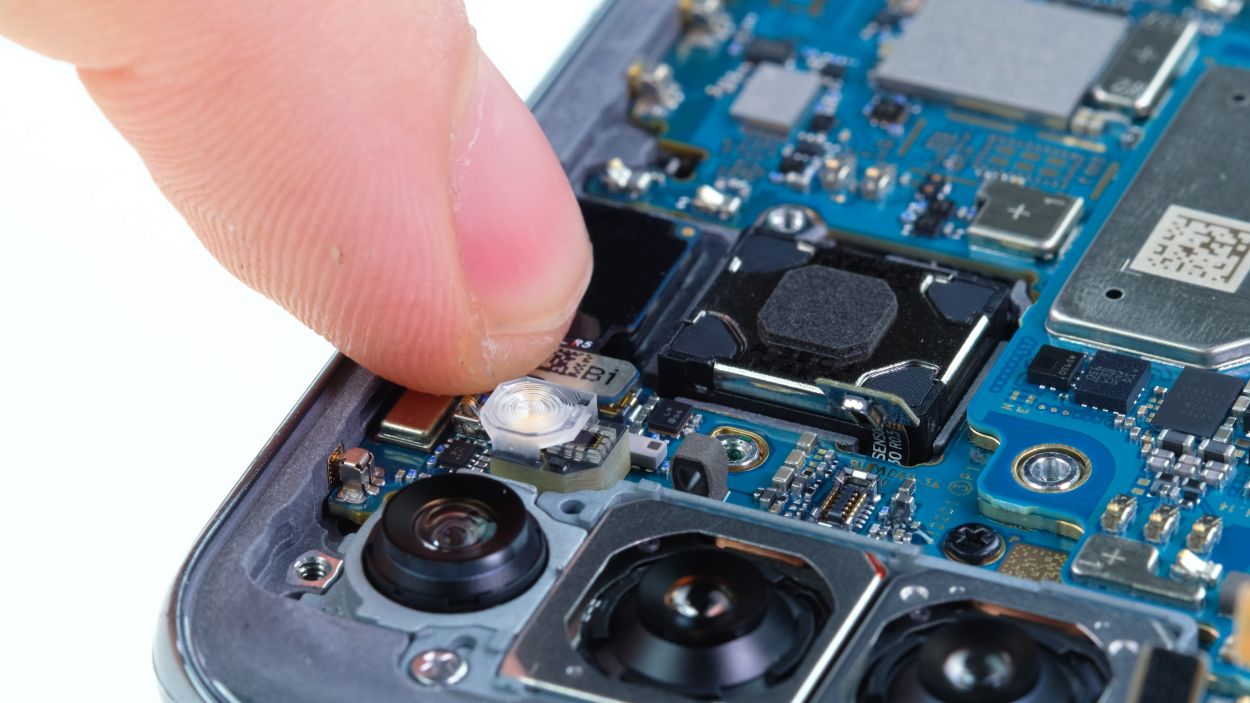
– Gently unplug the connectors for the two camera modules from the back of the mainboard. No need to rush, take your time!
– Once they’re disconnected, you can easily remove the cameras. And hey, they can be separated too!
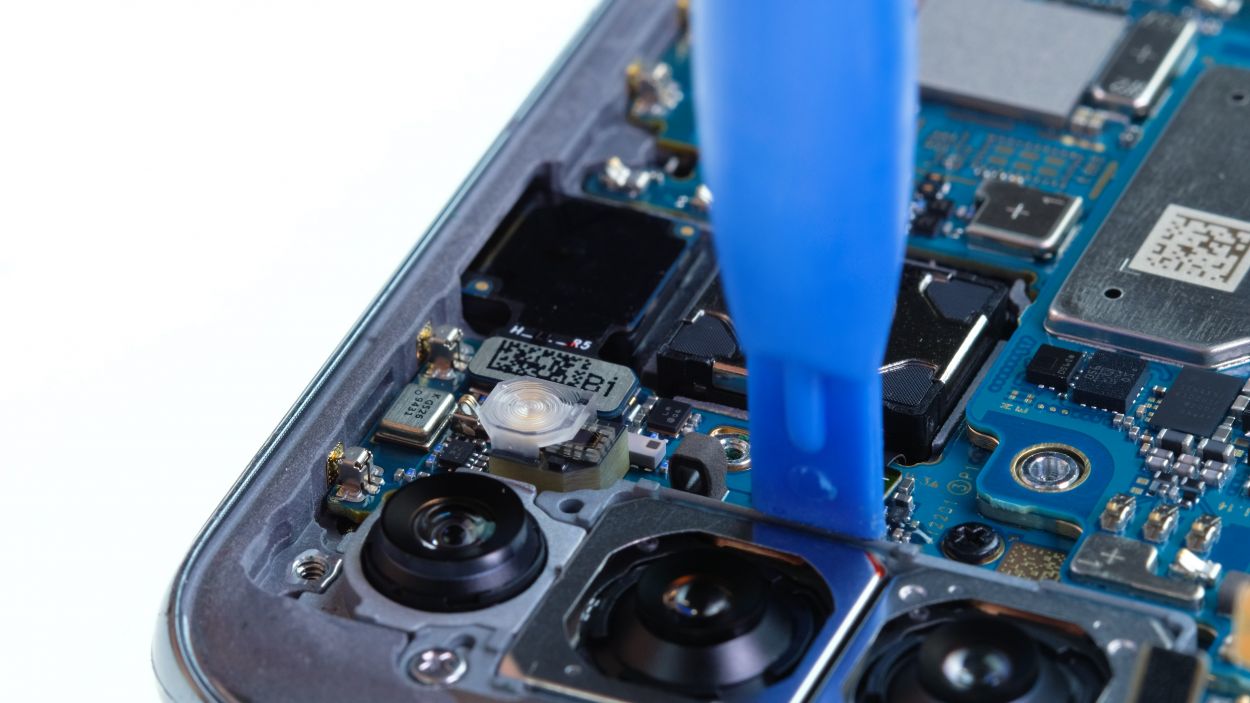
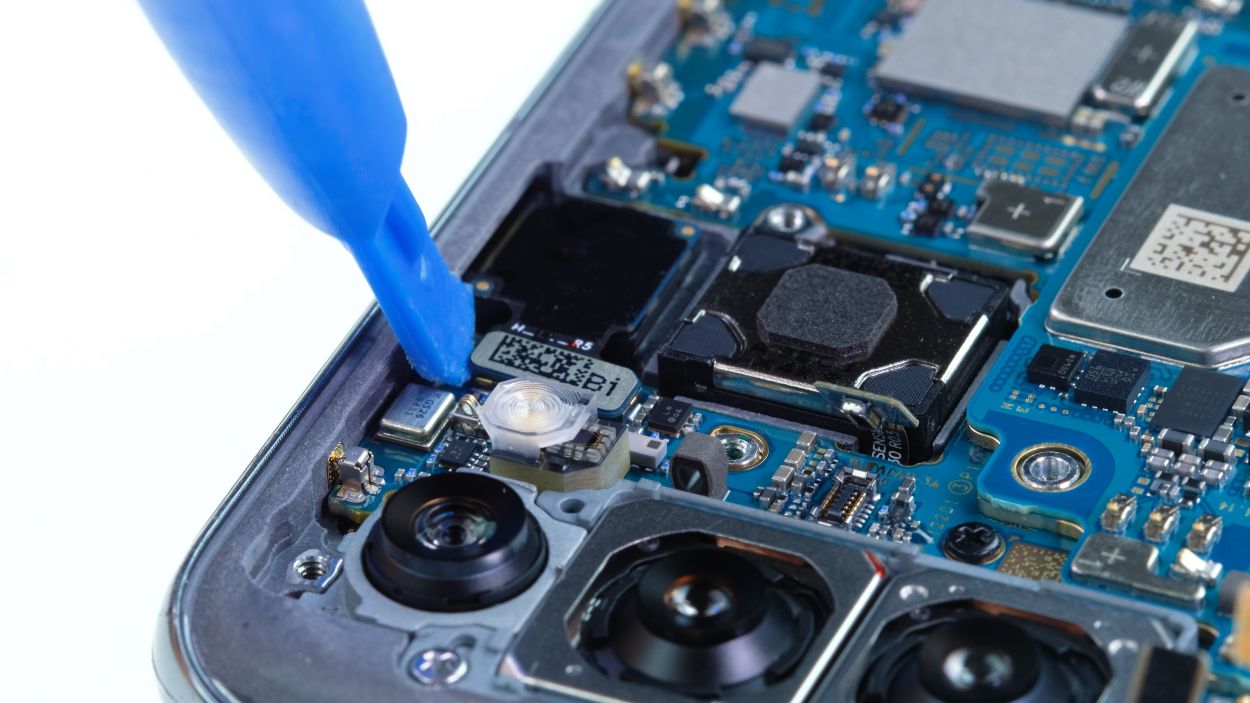
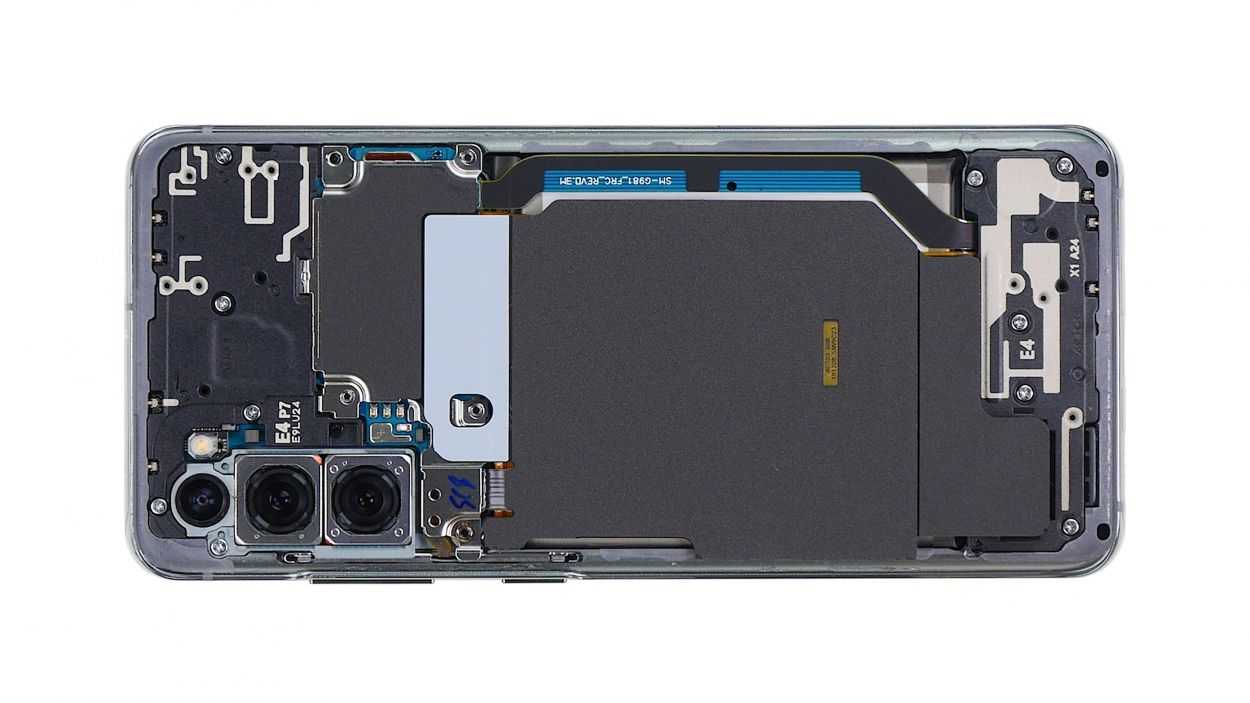
Step 8

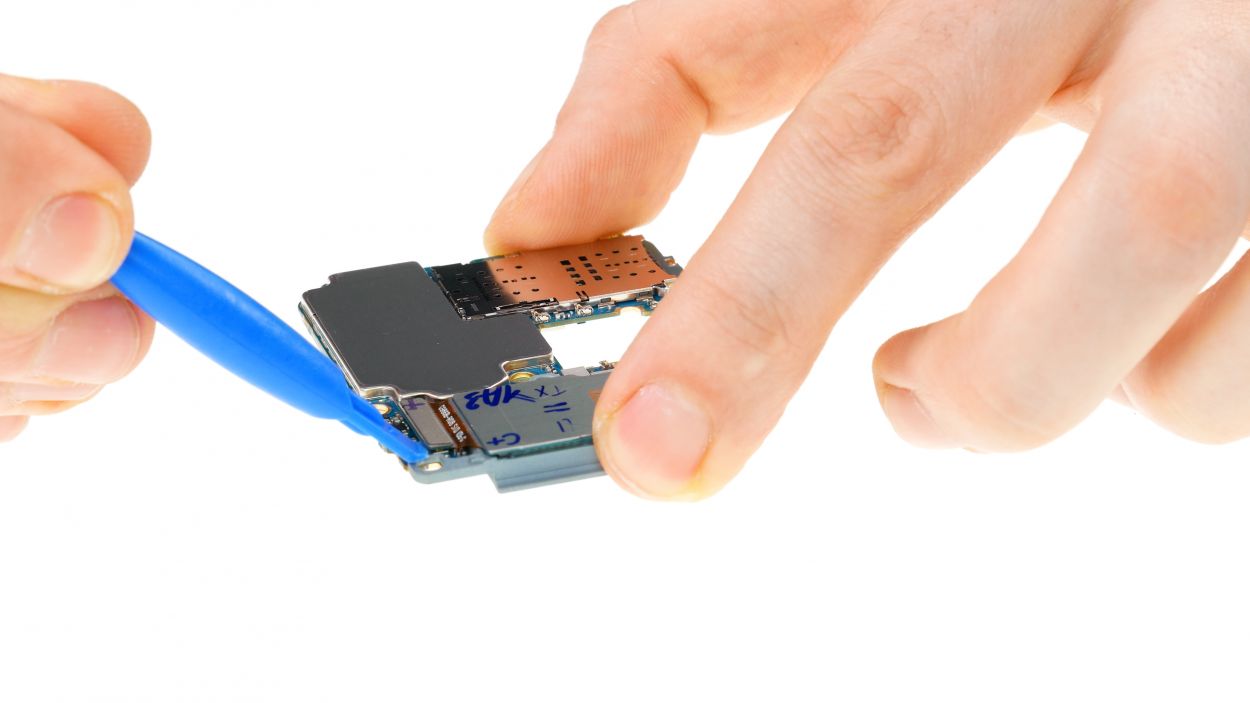
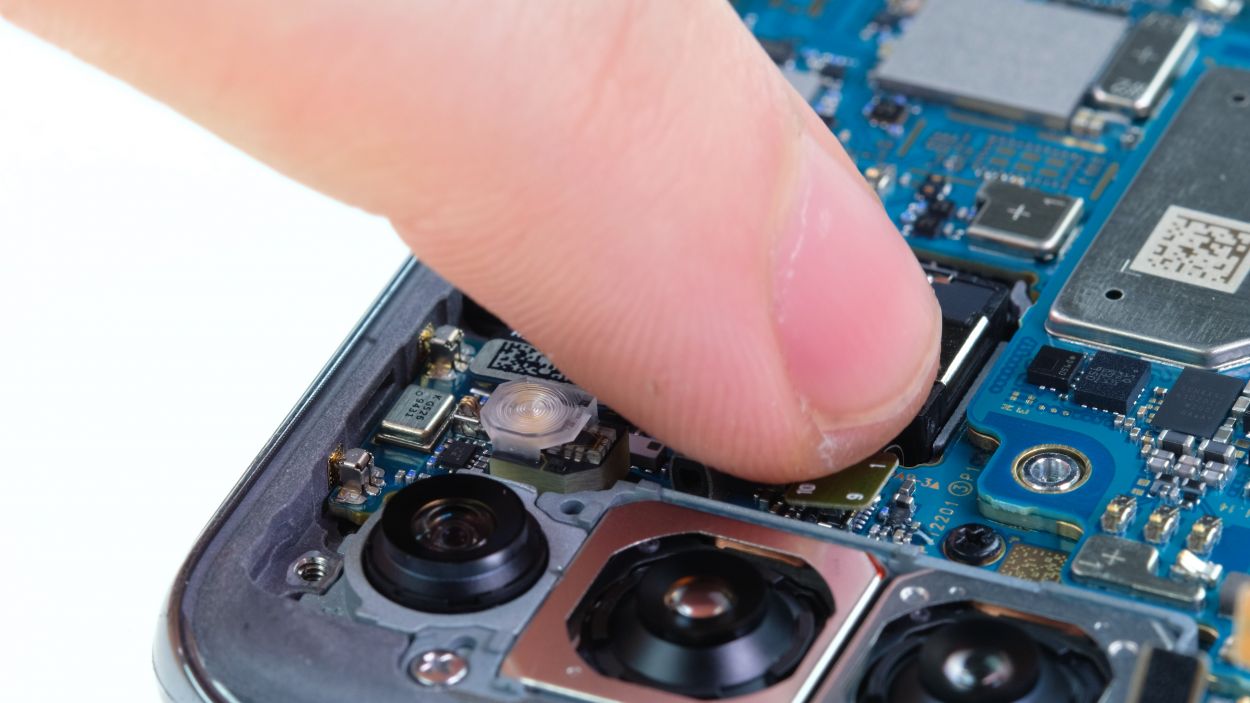
Camera Connector
Keep those camera lenses sparkling clean! Wipe away any fingerprints or dust to ensure your photos shine bright. Remember, a clean lens is a happy lens!
– Grab your shiny new camera and pop it into the board alongside the other camera module. You’re doing great!
Step 9

1 × 4,0 mm Phillips
1 × 2,8 mm Phillips
Gently align those connectors with their sockets and give them a little press down. They should click right into place like they were meant to be! If they’re being a bit stubborn, just loosen them up and try repositioning. You’ve got this!
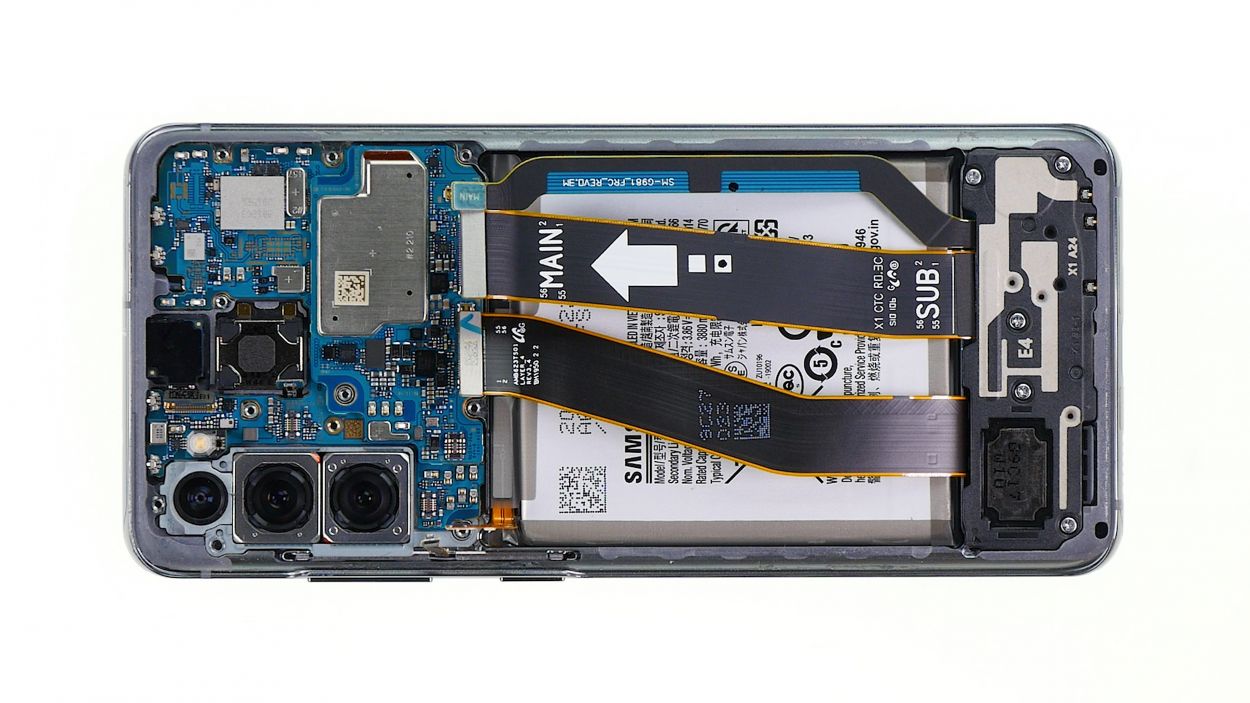
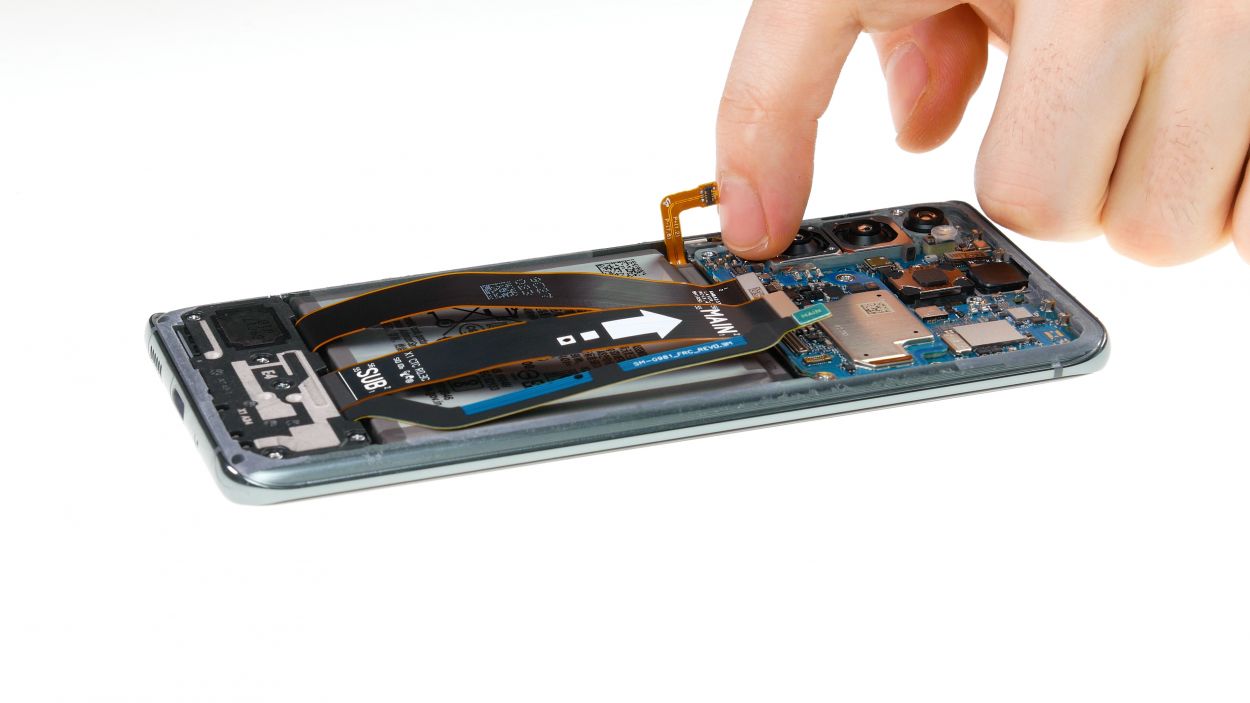
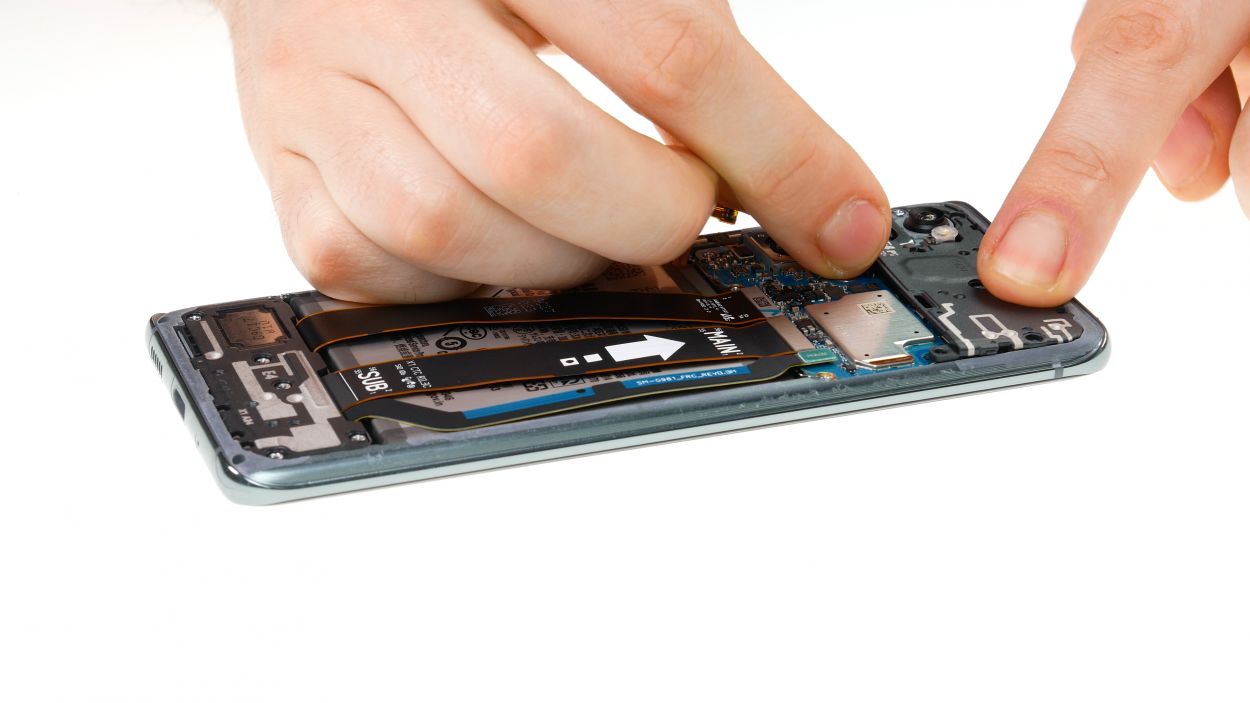
– Gently bend all the flex cables to the side, then slide the main board into the device like a pro.
– Start from the top and guide that board down until it fits snugly in place.
– Watch out for those cables—no pinching allowed under the board!
– If the motherboard is sitting pretty and flat, it’s time to secure it with some screws.
– Pop the SIM holder back into position. If it’s being stubborn, don’t force it—just double-check that the main board is aligned just right.
– Now, connect all those connectors like a champ!
Step 10

4 × 4,0 mm Phillips
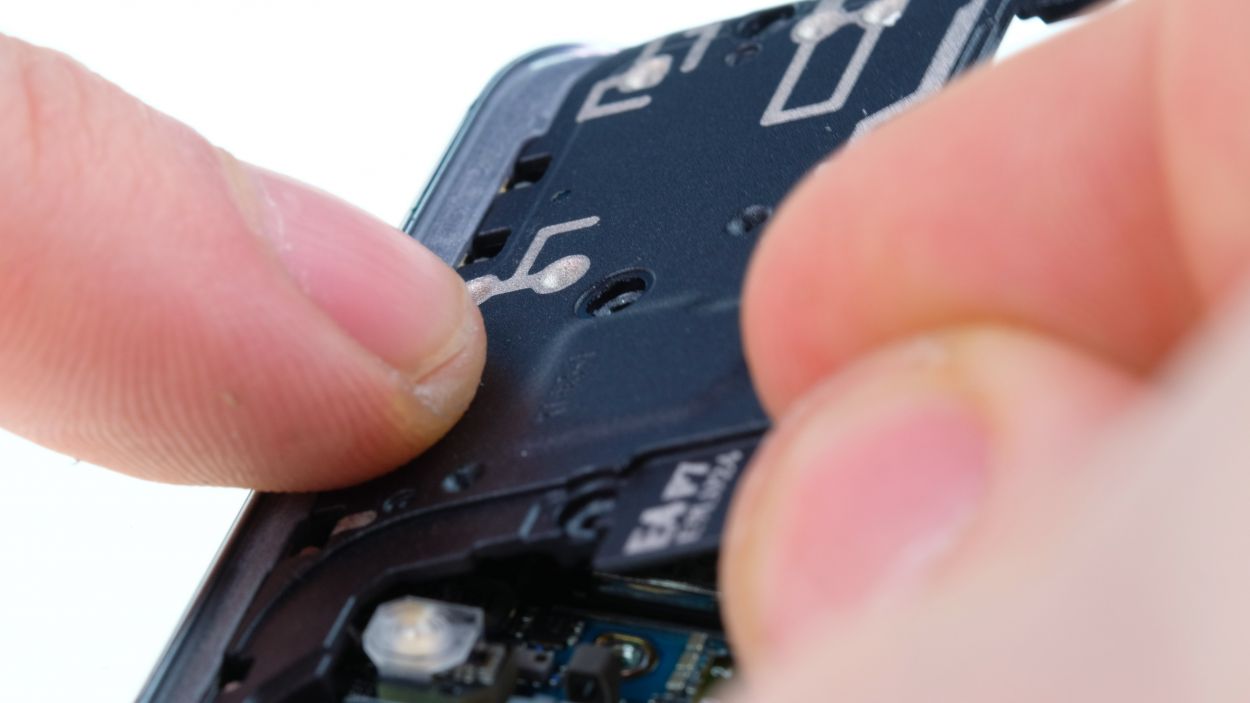
– Tilt the top cover at a cool angle and then gently press it down until it clicks into place.
– Once you hear that satisfying click all around, go ahead and secure it in place!


Step 12
5 × 4,0 mm Phillips
– Put on the metal cover with the charging coil.
– Hook it in at the top and fasten all screws.
Step 13

– Before you button up your Galaxy S20, let’s do a quick check!
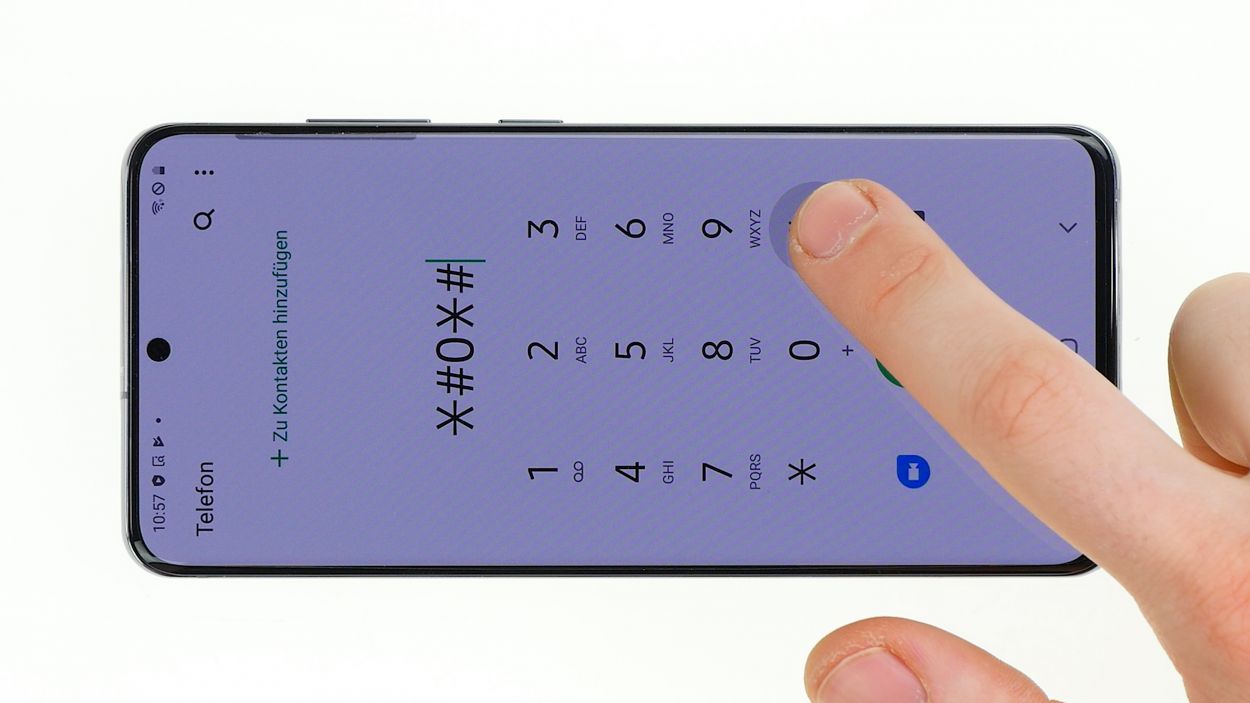
– Power up your phone and launch the phone app – get ready for some awesome testing!
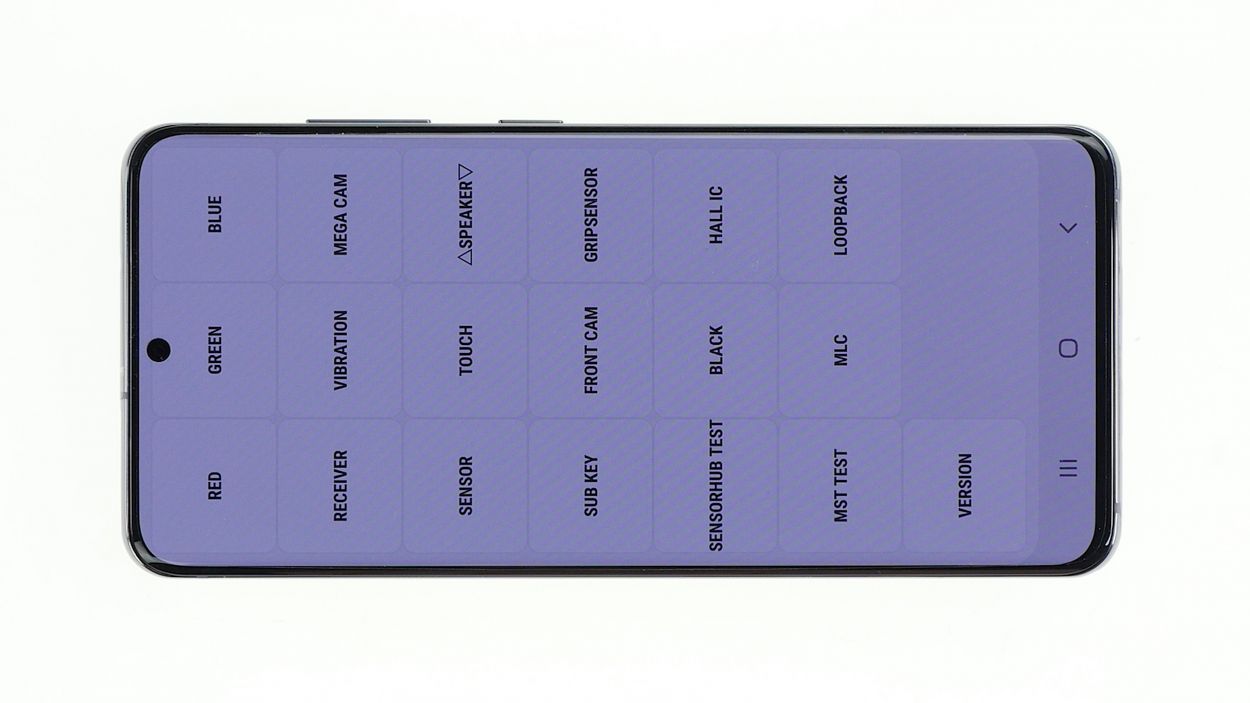
– Time for a secret code! Punch in *#0*#, and watch a test menu magically appear.
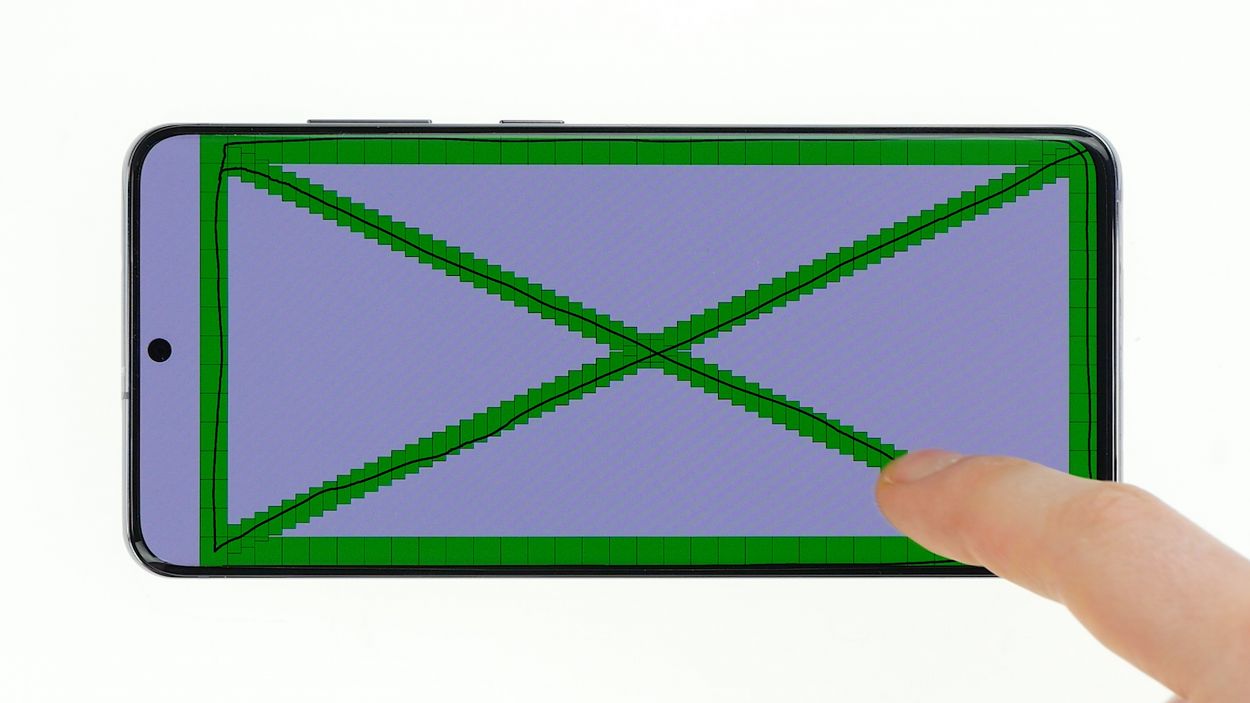
– This test menu is where the fun begins! Check your screen for any mischievous pixels, test that touchscreen responsiveness, and give your camera, speaker, and LED a high-five.
– If all systems are go, you’re ready to give your phone a well-deserved rest. If you need help, you can always schedule a repair
Step 14


Heads up! Even with a shiny new adhesive frame, we can’t promise a complete fortress against dust and liquids. But hey, you’re doing great by taking this step! If you need help, you can always schedule a repair.
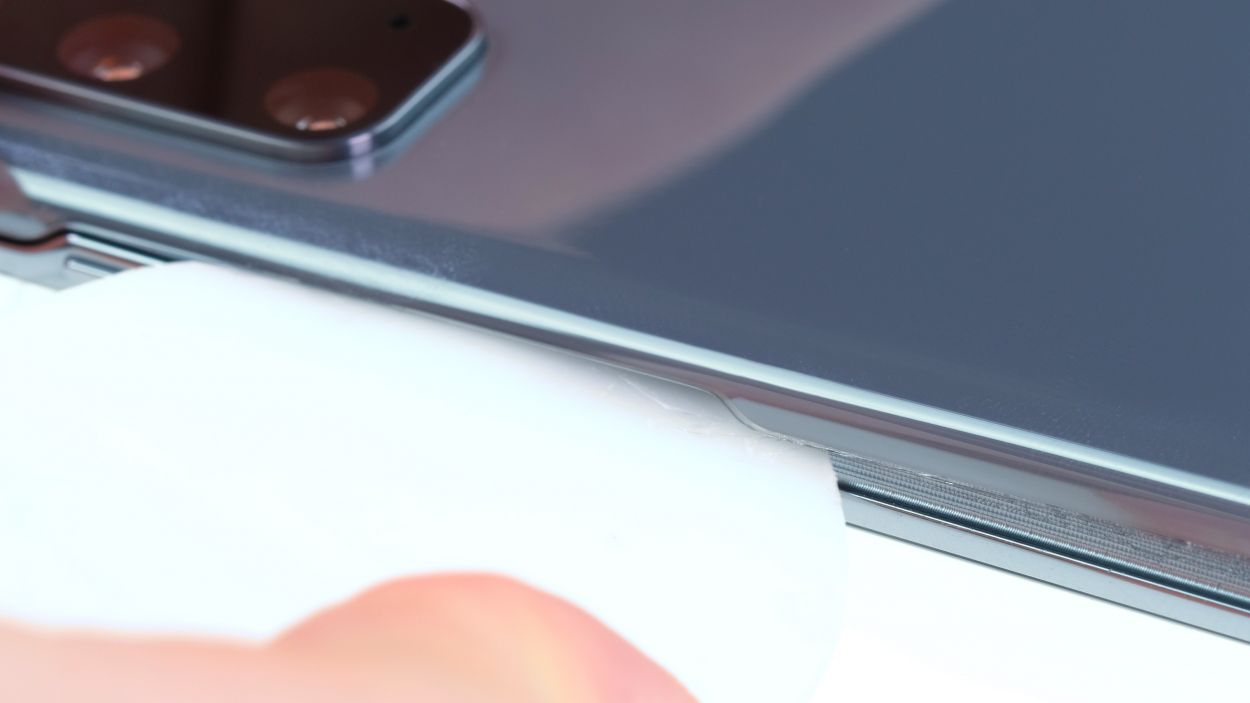
– Before you snap that back cover into place, take a moment to check the glue situation. It should be spread out evenly around the edge of the back cover. If you see any extra glue hanging around, go ahead and wipe it away.
– Feeling adventurous? You can ditch the old glue and bring in some fresh stuff instead!