DIY Guide to Replace Samsung Galaxy S21+ Screen and Battery Assembly
Duration: 45 minutes
Steps: 45 Steps
Hey there!
totally
zap that battery’s energy till it’s spent
Get ready to dive into replacing the screen and battery assembly of your Samsung Galaxy S21+! This guide is tailored specifically for the screen and battery assembly, which combines the screen, battery, and frame all in one neat package. Before you jump in, make sure you’ve got the right part on hand. If your battery looks a bit puffy, take the necessary precautions! And don’t forget to fully discharge your battery before disassembling your device—this helps keep things safe in case the battery gets a little too adventurous during the repair. Just a heads up: getting back that water resistance after the repair will depend on how well you reapply the adhesive, so keep that in mind. Your device will lose its IP (Ingress Protection) rating, but you’ll be back up and running in no time!
Step 1


No biggie, if you accidentally jammed the SIM eject tool into a mic hole, it’s probably still chillin down there. Don’t sweat it!
– Grab your trusty SIM eject tool, a bit, or even a straightened paper clip and gently insert it into the SIM card tray hole located on the top edge of your phone.
– Give that SIM eject tool a little push into the SIM card tray hole to pop out the SIM card tray with style.
– Now, carefully take out the SIM card tray and you’re all set!
Step 2

Don’t forget to switch off your device before diving into the repair adventure!
– Warm up your iOpener and then give a little love to the bottom edge of the back cover for around two minutes. You’re almost there!
Tools Used

Step 3
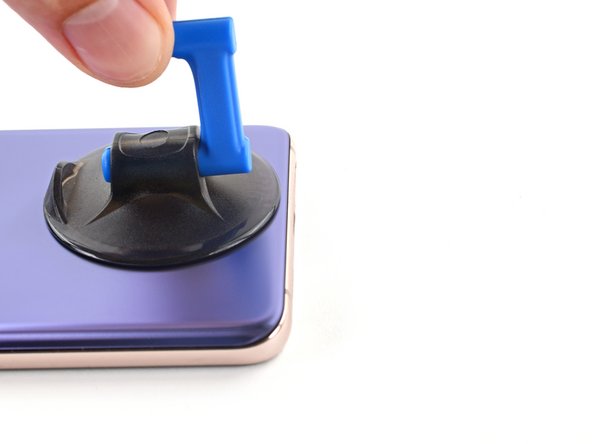
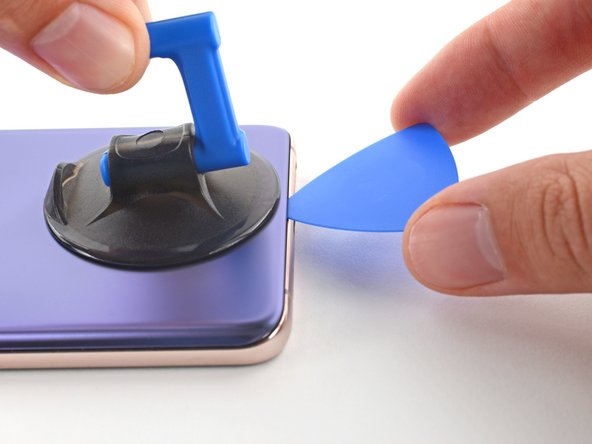
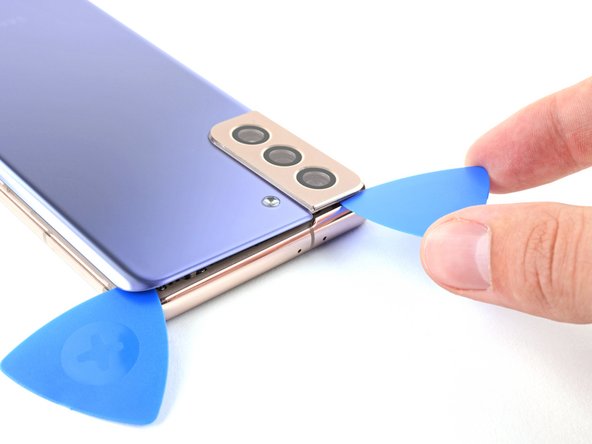
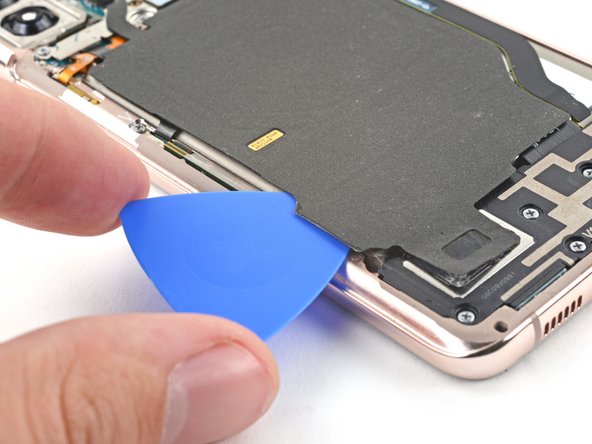
– Alrighty, get ready to be a phone-rescuing hero! First, find a sleek suction cup buddy and snap it onto that bottom edge of the back cover, keep it close to the edge. Now, give that back cover a little lift with your trusty suction helper, so we can create some room. Finally, grab an opening pick and slide it into the gap we just made. If you need help, you can always schedule a repair!
Tools Used

Step 4


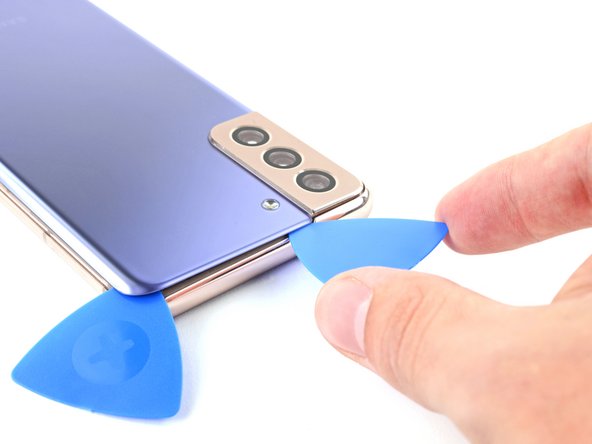
– Gently slide that opening pick down to the bottom left corner to cut through the adhesive like a pro.
– Keep the opening pick in position to stop the adhesive from sealing back up. You’re doing great!
Step 5

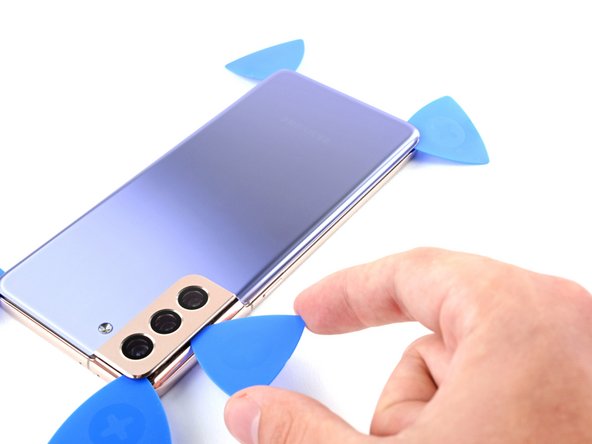
– Grab a second opening pick and slide it into the bottom edge of your phone.
– Gently glide that opening pick to the bottom right corner to cut through the adhesive.
– Keep those opening picks in place to make sure the adhesive doesn’t seal back up on you.
Step 6

– Get your iOpener ready and gently place it on the right side of the back cover for a cozy two minutes.
Tools Used
Step 7


Having trouble cutting through the adhesive? It might have cooled off. Just give it a quick warm-up with a heated iOpener at the edge to get it back in action.
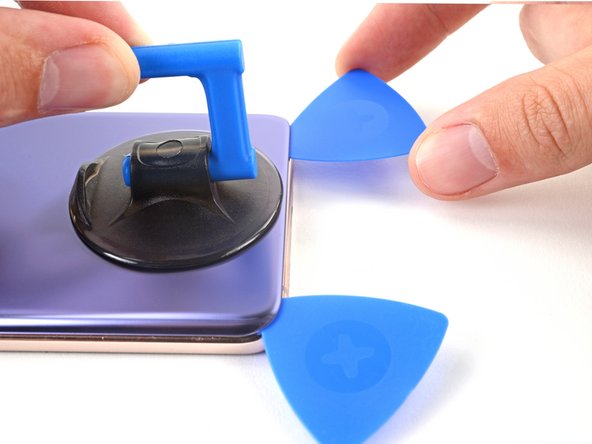
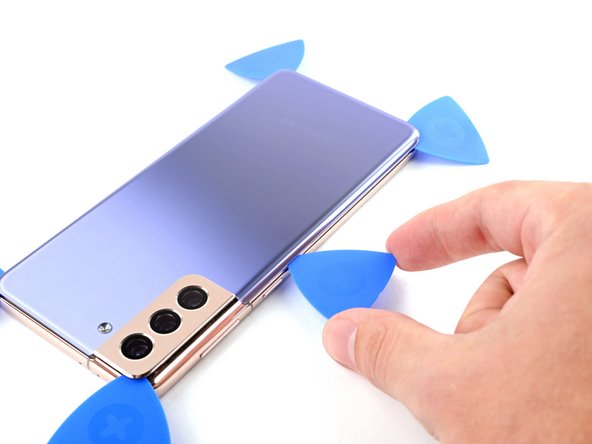
– Alrighty folks, let’s kickstart this adventure with a trusty third pick at the bottom right corner. Just yoga stretch those fingers, grab your pick, and get crackin’! We’ll slide this sucker right along the right edge to break that sticky spell. And once we’re done, let’s pop ’em in the top right corner like a toothpick in a jar. We wouldn’t want that glue-snake giving chase! If you somehow find yourself in need of a helping hand, fret not! Just click here to schedule a repair and let the pros handle this with a sprinkle of magic!
Tools Used
Step 8

– Warm up your trusty iOpener and gently place it on the upper edge of the back cover for a couple of minutes.
Tools Used
Step 9

When you’re working around the camera assembly, just slide in the tip of that opening pick (about 4-5 mm) to keep everything safe and sound—no need to risk damaging or smudging the camera!
– Slide a fourth opening pick right under the top right corner of your phone—let’s get that open!
– Gently glide the opening pick along the top edge to cut through that pesky adhesive.
– Keep your opening pick snug in the top left corner to stop the adhesive from sticking back together. You’ve got this!
Step 10

– Get your iOpener ready and gently place it on the cool left side of the back cover for a couple of minutes.
Tools Used
Step 11

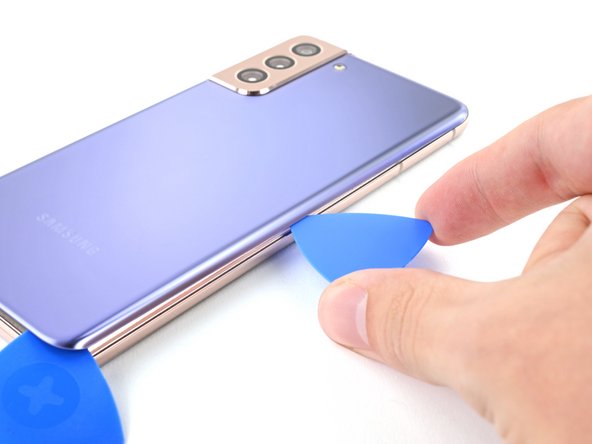
– Slide in that fifth opening pick right under the bottom left corner, just like slipping a letter into an envelope!
– Now, gently glide the opening pick along the left edge of the back cover to cut through that pesky adhesive like a pro!
Step 12


– Let’s kick things off by gently taking off the back cover. It’s like peeling a banana, but way more satisfying!
– As you put everything back together, remember: a little bit of patience goes a long way!
Step 13

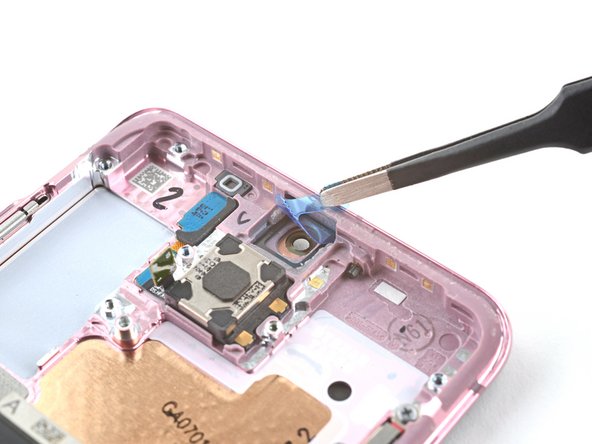
– Gently slide an opening pick under the bottom left corner of the NFC antenna and charging coil assembly. You’re doing great!
– With care, glide that opening pick along the bottom left edge of the assembly to free it from the battery. Keep it up!
Step 14
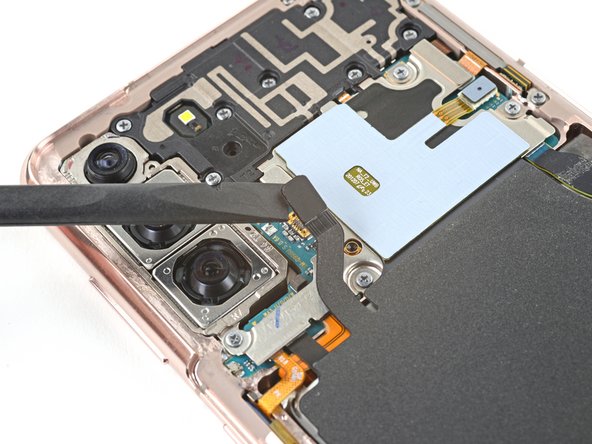

– Grab your trusty spudger and gently lift the charging coil connector straight up from its socket. You’ve got this!
Tools Used


Step 16

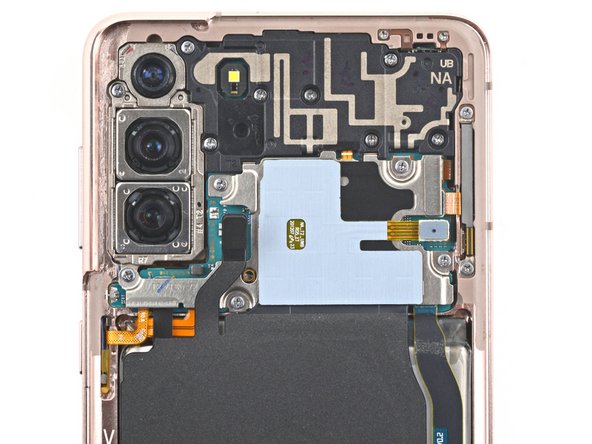
– Grab a Phillips screwdriver and let’s get to work! Carefully unscrew the five screws that are holding the NFC antenna and charging coil assembly in place. They are 3.9 mm long, so keep an eye out for them!
Step 17

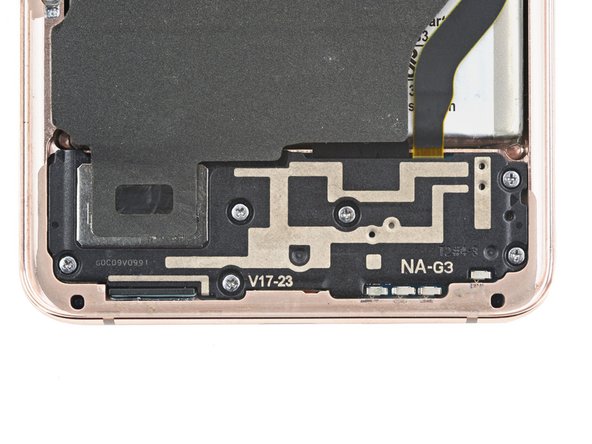
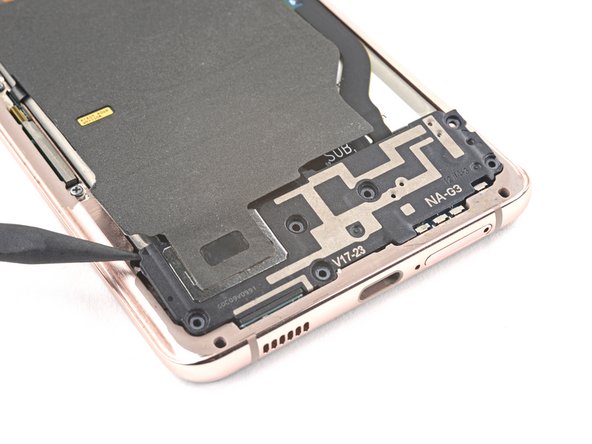
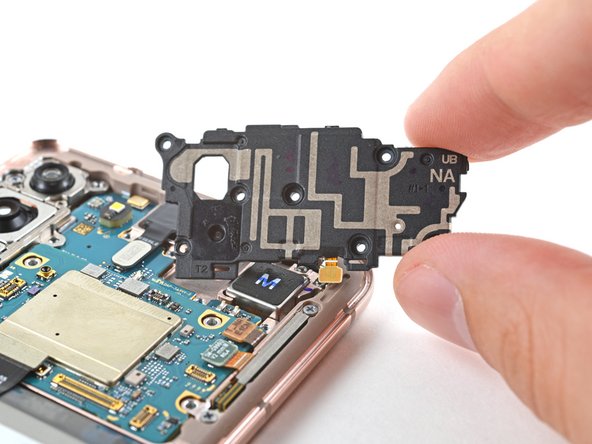
– Grab your trusty Phillips screwdriver and get ready to tackle those six 3.9 mm-long screws holding the loudspeaker assembly in place. You got this!

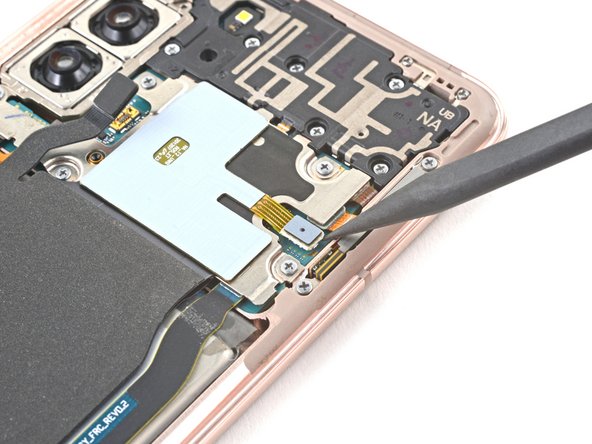
Step 19

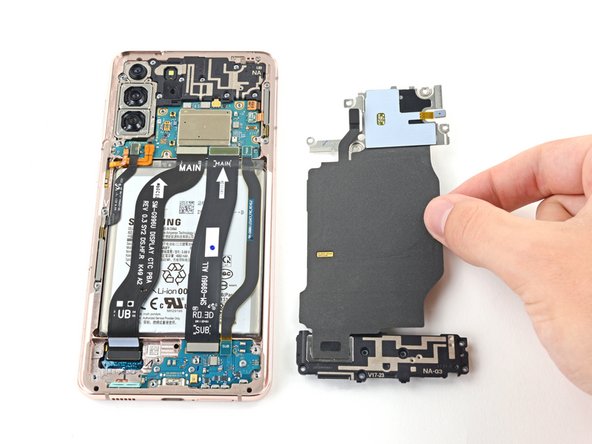
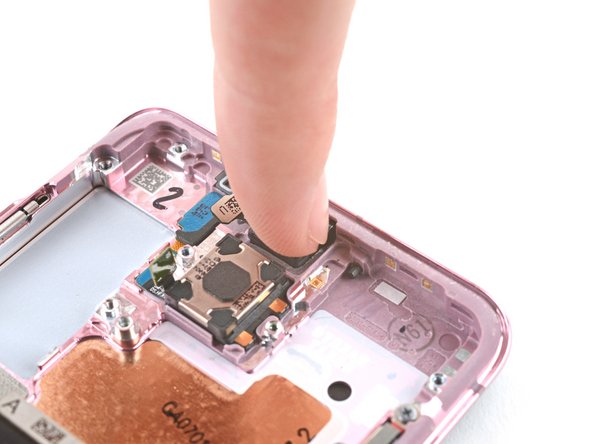
– Grab a trusty pair of tweezers or just your fingers and gently pop off the NFC antenna and charging coil assembly. You’ve got this!

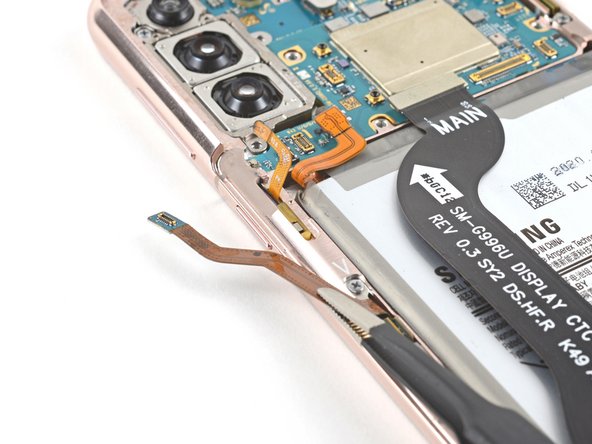
Step 21
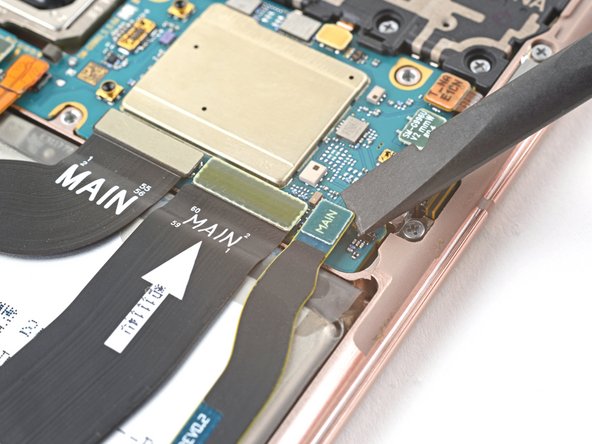

– Get ready to rock and roll by using a spudger to gently pry up and disconnect those primary and secondary interconnect cables’ press connectors on the motherboard.
Tools Used
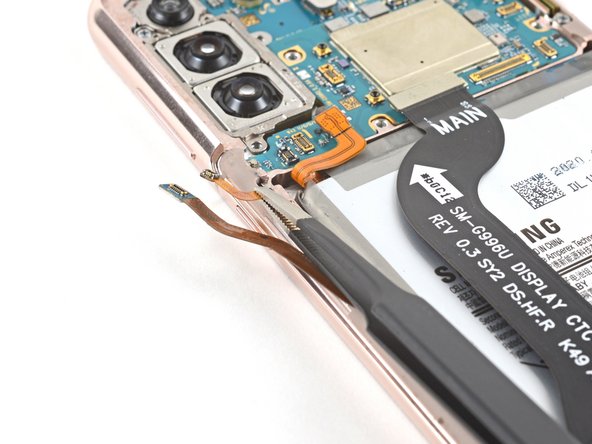
Step 22

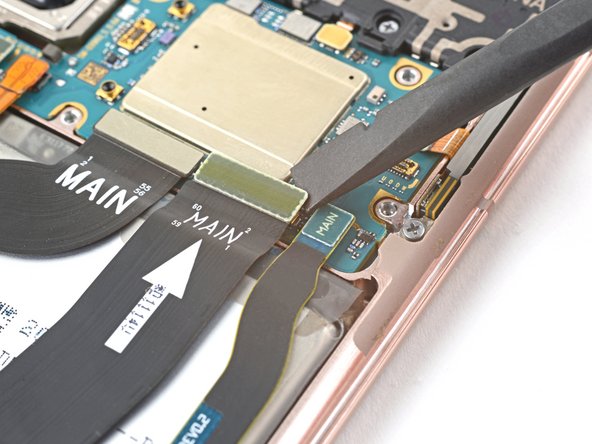
– Grab a spudger and gently coax apart the main and alternate interconnect cables’ press connectors on the daughterboard.
Tools Used
Step 23

– Grab some tweezers or just use your fingers to gently lift off those interconnect cables. You’re doing great!
– Once they’re free, set them aside safely – you’ll be bringing them back into action when it’s time to reassemble.
Step 24

– Grab your trusty Phillips screwdriver and let’s tackle those three 3.4 mm-long screws holding the charging board in place! You’ve got this!
Step 25

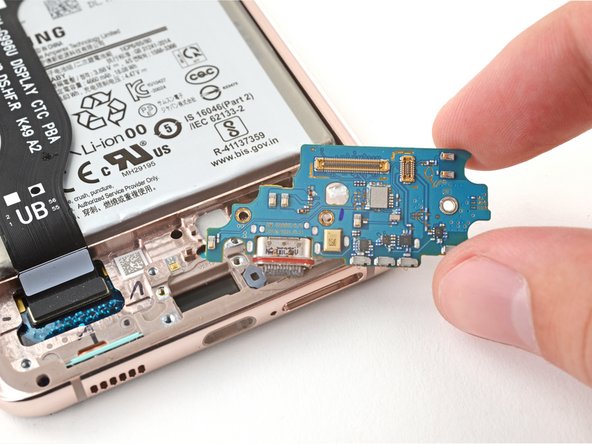
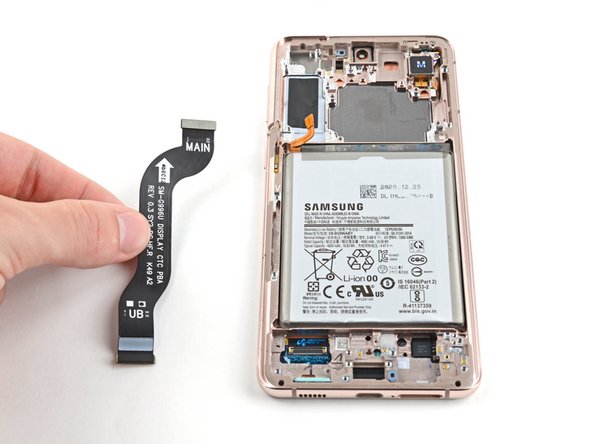
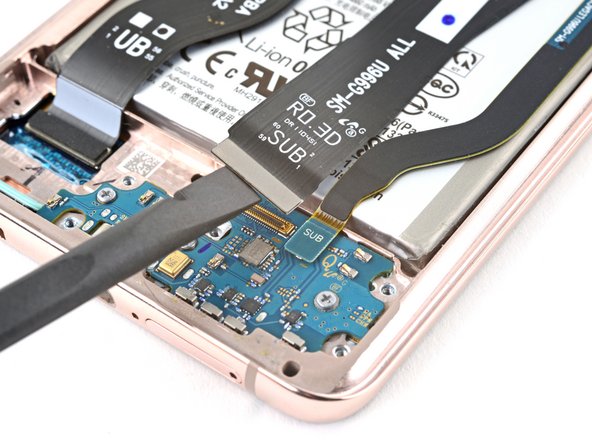
– Gently slide the pointed end of your trusty spudger under the upper left edge of the daughterboard and give it a little nudge to pop it out of its cozy spot.
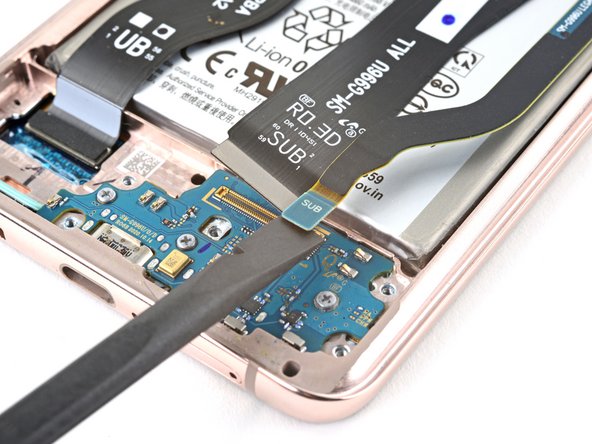
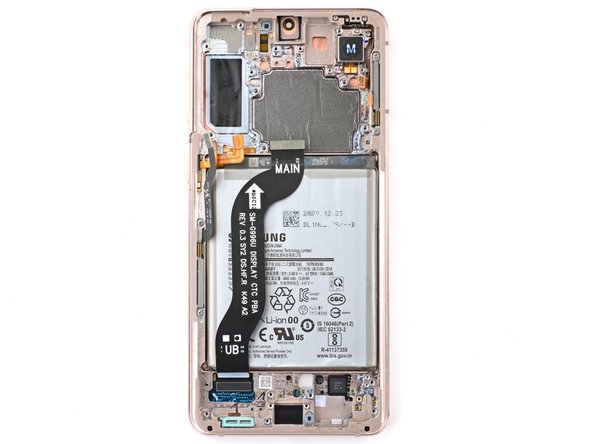
– With a bit of finesse, use tweezers or your fingers to lift the daughterboard up and away from the bottom of the device, then say goodbye as you remove it.
Tools Used
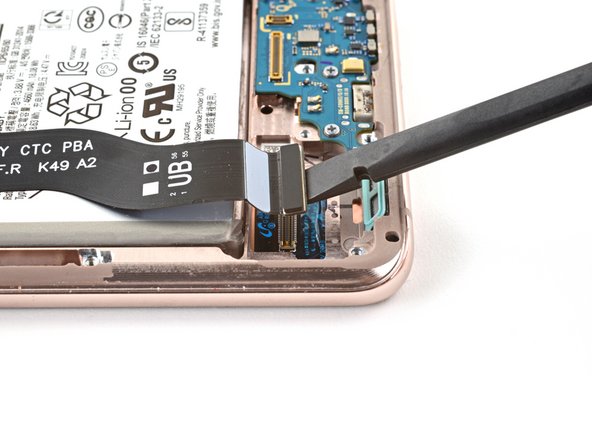
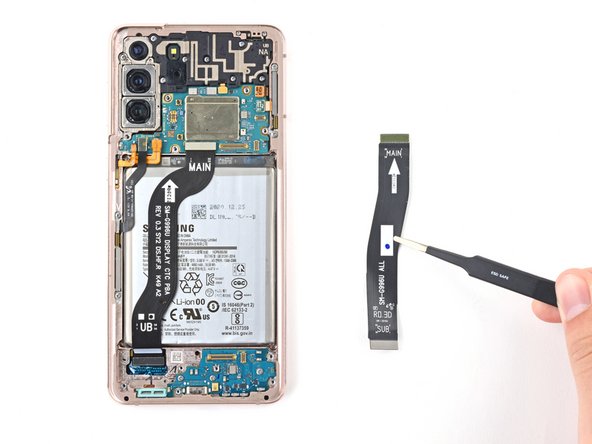
Step 26

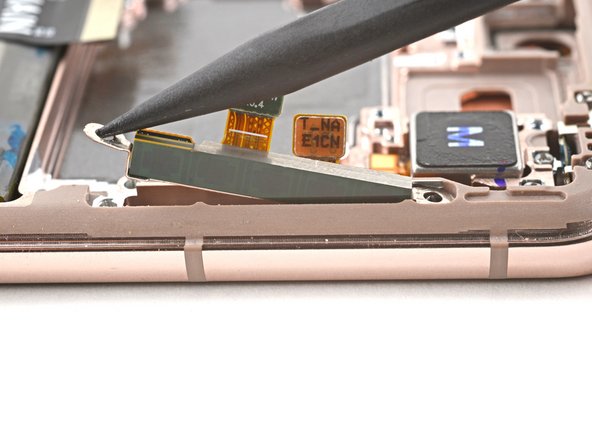
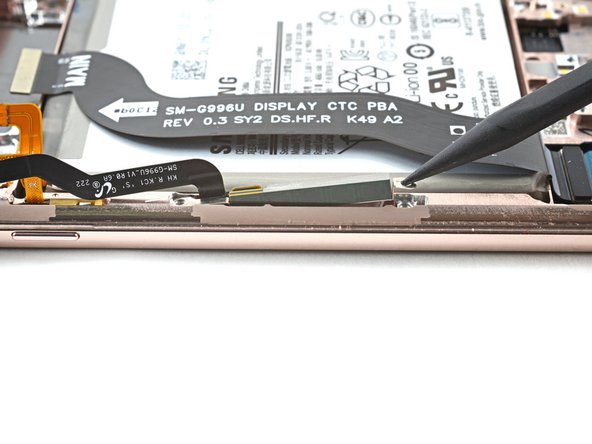
– Buddy up those cables, just like you would with an old friend! Carefully use your trusty spudger to gently lift and disconnect the display cable’s press connector. If you need help, you can always schedule a repair.
Tools Used
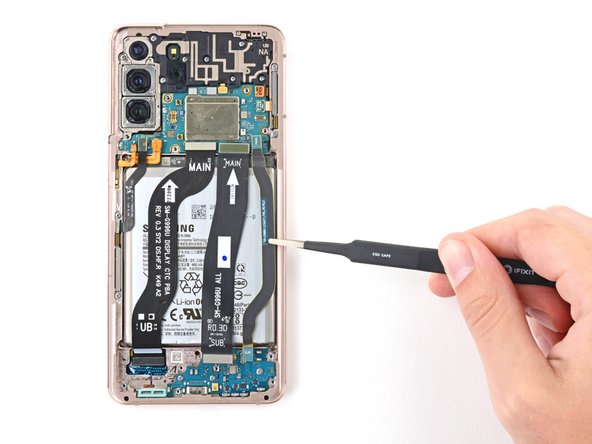
Step 27

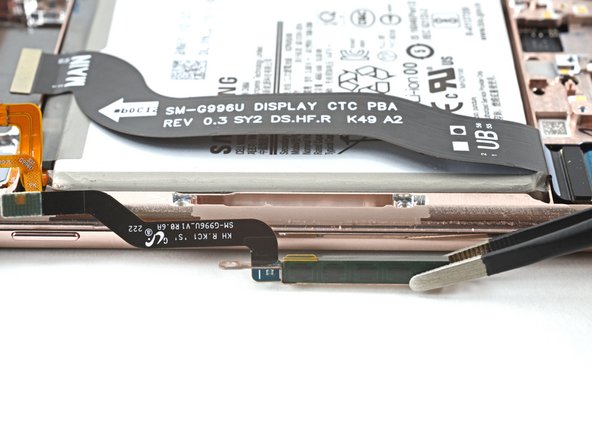
– Grab your trusty spudger and gently nudge up the earpiece speaker’s press connector to disconnect it. You’ve got this!
Tools Used
Step 28

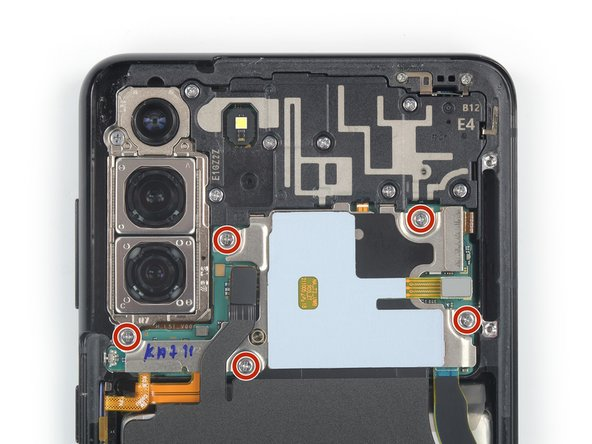
– Grab your trusty Phillips screwdriver and get ready to tackle this! Start by unscrewing the seven screws that hold the earpiece speaker assembly in place. Each screw is 3.9 mm long, so keep an eye on them! You’ve got this!
Step 29

– Gently slide a spudger between the earpiece speaker and the frame.
– With finesse, lift up using the spudger to free the earpiece speaker from its plastic clips.
– Take out the earpiece speaker with care.
– Put the speaker aside for safekeeping; it’ll be back in action during reassembly.
Tools Used
Step 30

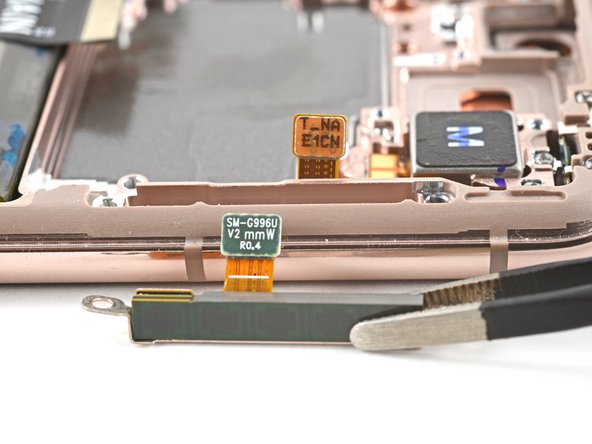
– Gently use a spudger to lift up and disconnect the 5G mmWave antenna’s press connector.
– Don’t forget to do the same for the power button cable’s press connector right next to it.
Tools Used
Step 31

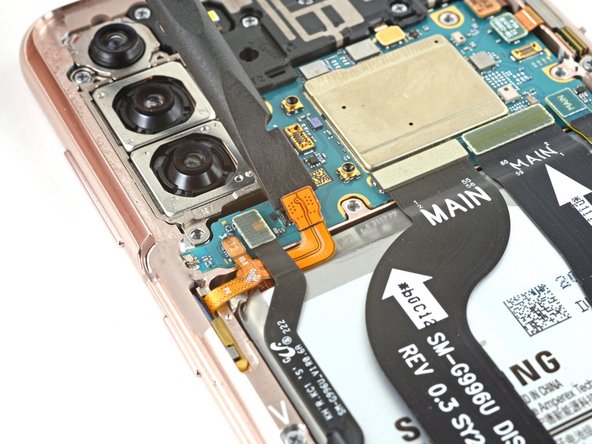
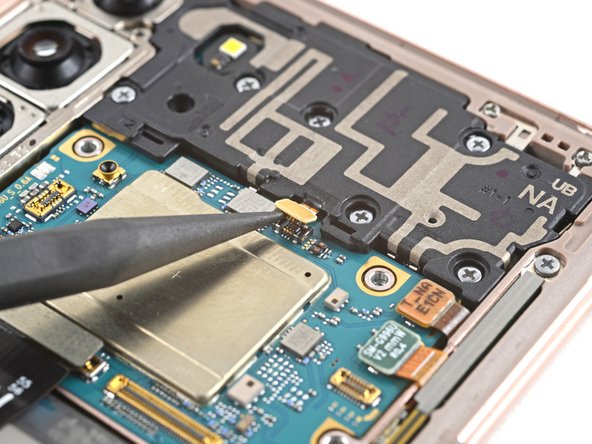
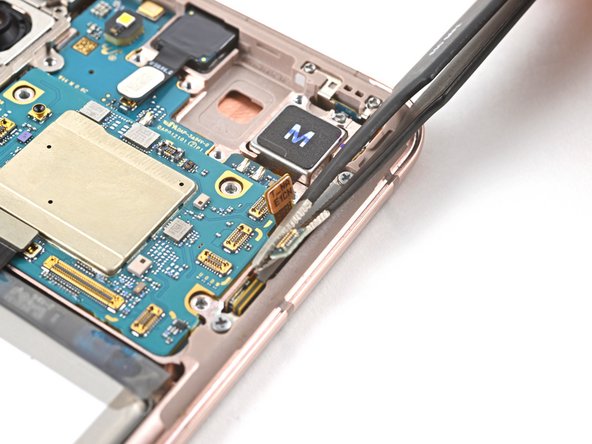
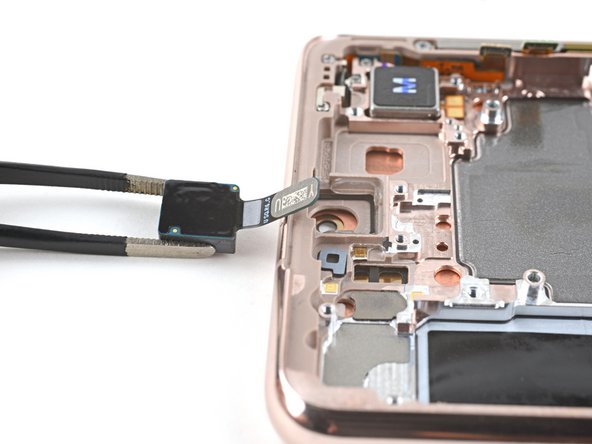
– Grab your trusty spudger and gently wiggle it to lift up and unplug the front camera’s press connector. You’ve got this!
Tools Used
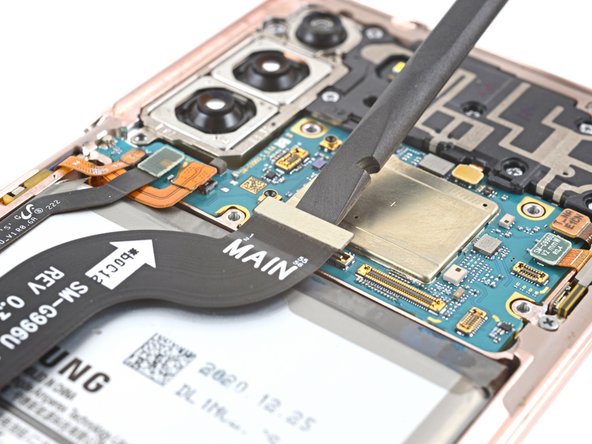
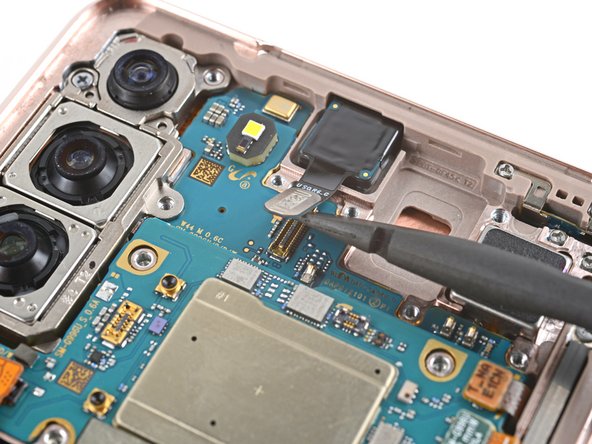
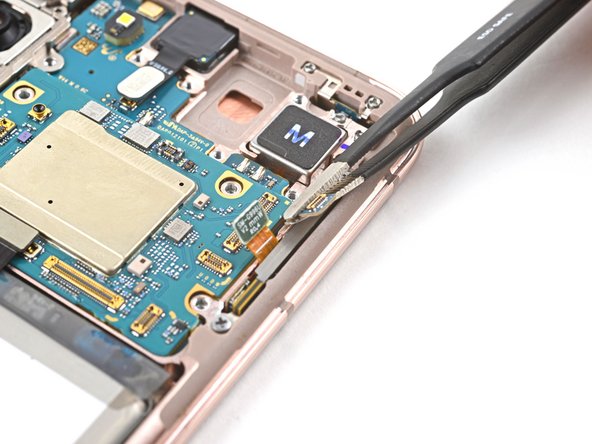
Step 32

– Get your spudger ready to gently pry up and disconnect the zesty orange press connector.
– Now, give those press connectors next to it a little love tap, just like you’re saying hello to old friends.
Tools Used
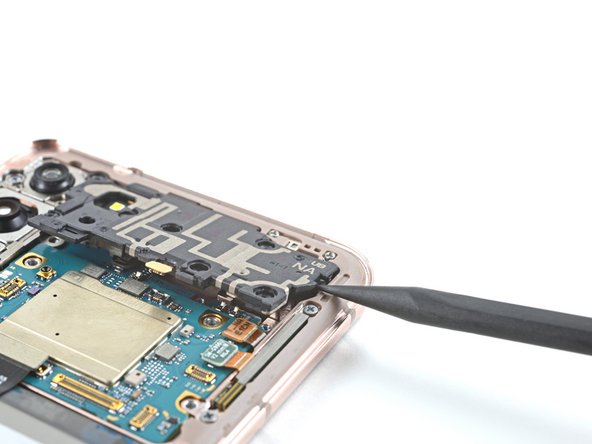
Step 33

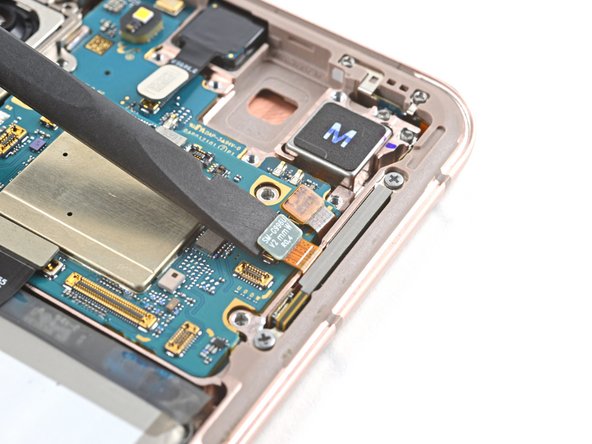
– Grab your trusty Phillips screwdriver and get ready to tackle that 3.9 mm-long screw holding the motherboard in place. You’ve got this!
Step 34

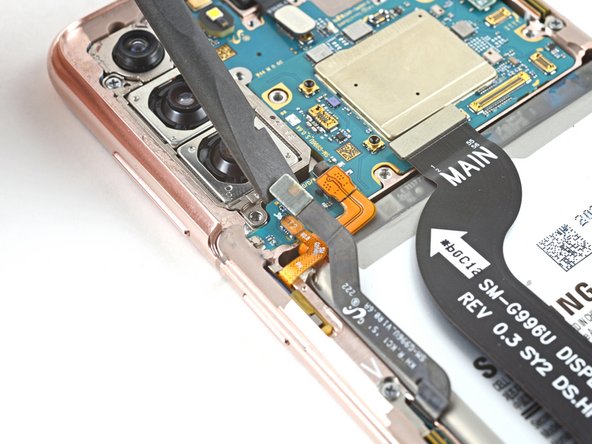
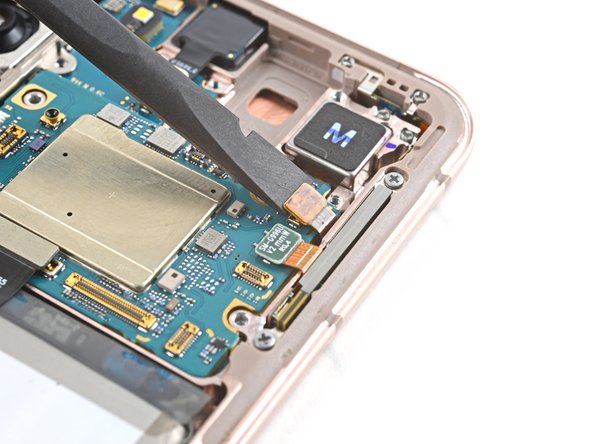
– Grab some tweezers or just your trusty fingers, and gently nudge that left 5G mmWave antenna cable away from the frame. It’s like giving it a little stretch!
– Now, do the same thing for the power button cable. A little love goes a long way!
Step 35

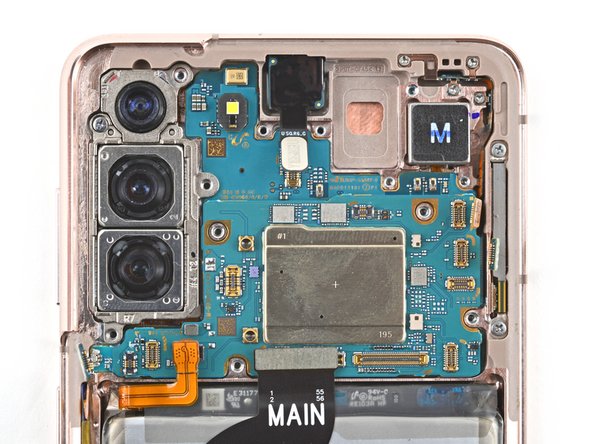
– To get things moving, use tweezers or your trusty fingers to gently nudge the two connectors away from the right edge of the motherboard.
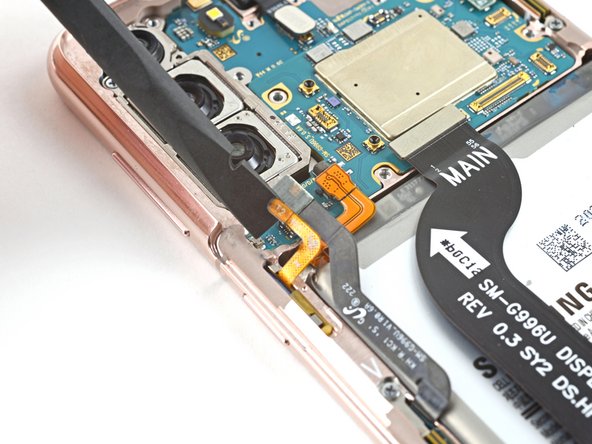
Step 36
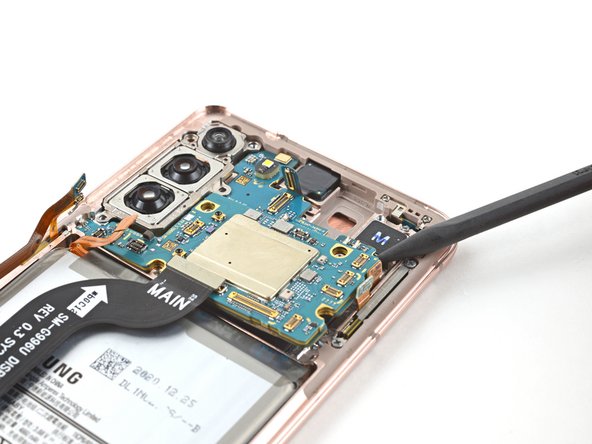

– Gently slide a spudger between the motherboard and the frame with a smile.
– Give a little lift with the spudger to free the motherboard from its snug spot in the frame.
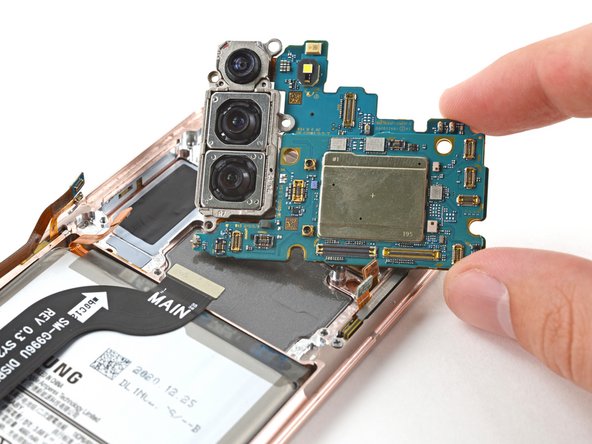
– Lift out the motherboard like a pro.
– Put the motherboard in a safe spot for now. You’ll be pals again during reassembly.
Tools Used
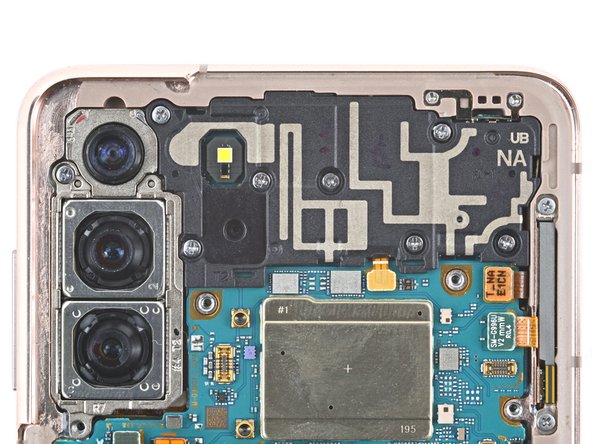
Step 37

– Warm up your iOpener and give some love to that front camera for a cozy 90 seconds.
Tools Used
Step 38

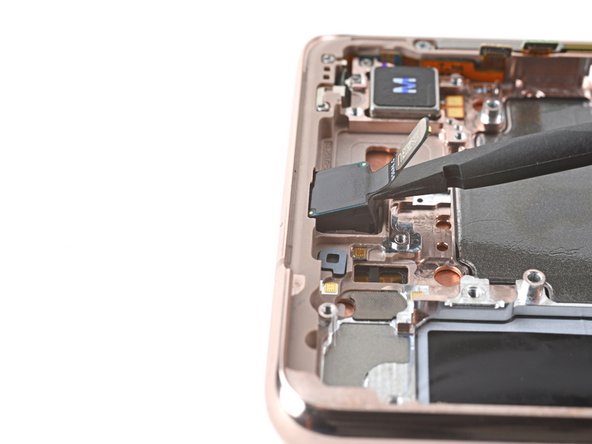
– Slide a spudger into the little space between the frame and the front camera. It’s like giving it a gentle nudge!
– Use that spudger to gently pry up and free the front camera from its frame home. You’re doing great!
– With some tweezers or your fingers, carefully lift out the front camera. You’ve got this!
– Now, set the camera aside for a bit. You’ll be bringing it back to the party during reassembly.
Tools Used
Step 39

– As you dive into the reassembly journey, here’s how to get your front camera back in place with style:
Step 40

– Grab your trusty Phillips screwdriver and get ready to tackle those four screws holding down the 5G mmWave antennas, each a cool 3.4 mm long. Let’s make this happen!
Step 41

– Grab your trusty spudger and gently lift up the bottom screw tab of the right 5G mmWave antenna bracket. You’ve got this!
– With a little finesse, use tweezers or your fingers to carefully take out the right 5G mmWave antenna.
– Now, just set the antenna aside for now. It’ll be back in action during reassembly!
Tools Used
Step 42

– Grab your trusty spudger and gently nudge up on the bottom screw tab of the left 5G mmWave antenna bracket. It’s like giving it a little high-five!
– With your tweezers or fingers, carefully lift off the left 5G mmWave antenna. Treat it like a delicate butterfly!
– Now, set that antenna aside for a moment. You’ll be bringing it back to the party during reassembly!
Tools Used