DIY Guide to Replace Sisterboard in Mac Powerbook 140
Duration: 45 minutes
Steps: 6 Steps
Hey there! Before you dive in, remember to power down your device and disconnect it from any power source. Safety first, folks! If you run into any bumps along the way, don’t hesitate to schedule a repair. You’ve got this!
Ready to dive into the exciting world of tech repair? This guide is here to help you swap out the Sisterboard in your Macintosh Powerbook 140. Remember to double-check that all your parts are compatible to keep your device safe and sound. Keep tabs on every little part, and don’t forget to give your hands a good wash after handling those components. Most importantly, just use your noggin! And hey, I’m not a computer whiz, so if you spot any mistakes or have suggestions, feel free to let me know. Happy repairing!
Step 1


– Flip the 140 over and unscrew the 4 screws on the bottom using a T10 star-headed screwdriver. You’ve got this!
Step 2


– With a steady hand, keep the top and bottom parts of your computer snugly together. Now, flip it over to the back side and grab your trusty T17 Star-headed screwdriver to take out that last pesky screw!


Step 4

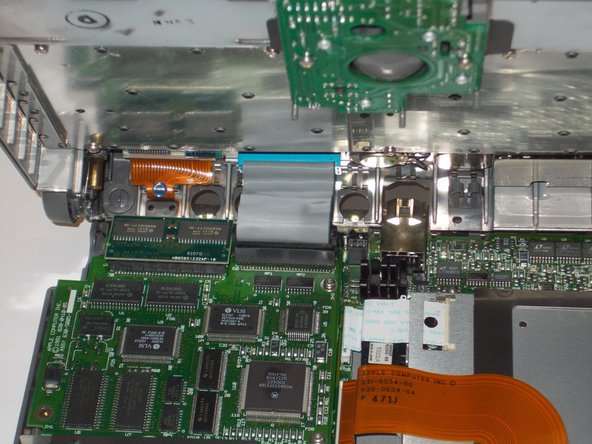
– With a touch of finesse, delicately elevate the back of the screen and keyboard unit (the top of the computer) while giving a gentle nudge to the front left and right corners towards the bottom unit until a satisfying click resonates. Next, lift the upper unit with a slow and steady hand, carefully disconnecting the interconnect cable (the rather sizeable, somewhat fragile cable that links the two halves) from its snug socket in the sisterboard.
Step 5
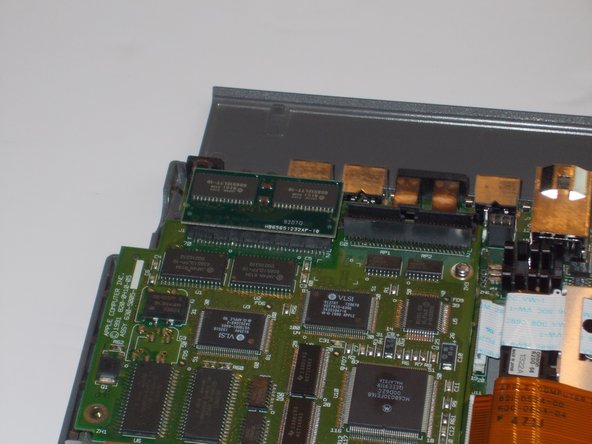

– Grab your trusty T17 Star-headed screwdriver and let’s tackle those 4 screws securing the sisterboard! Quick heads up: if your computer’s sporting a RAM or PRAM extension card, make sure to pop that out first. And hey, some of these screws might be a bit stubborn. No worries! Just gently grasp the screw with some needle-nosed pliers and give it a twist. With a little patience, you’ll have those screws out in no time!
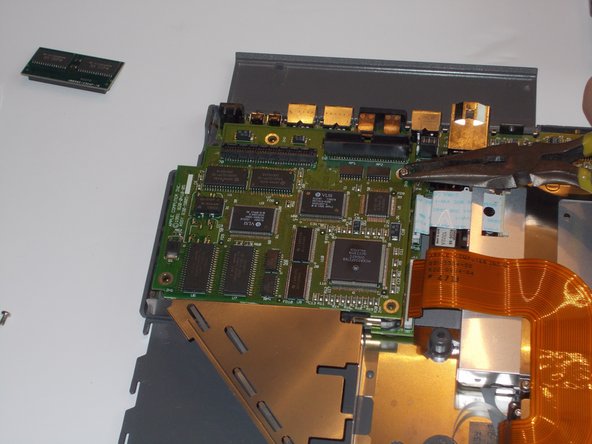
Step 6
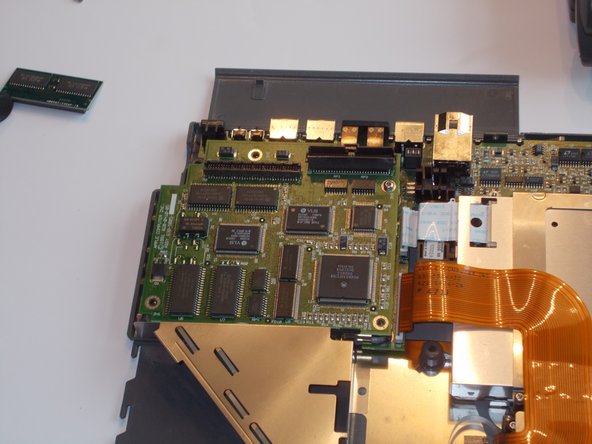


– On the left side of the sisterboard, gently lift it up to part ways with the motherboard. Just a friendly reminder—keep the old and new sisterboard straight so there’s no mix-up! Place the new sisterboard snugly where the old one used to chill. Make sure all the pins connecting the mother and sisterboards are aligned and seated properly in the sisterboard socket. If you need help, you can always schedule a repair.
